Bedtime Stitches in Pacific Northwest

Pacific Northwest Quilt and Fiber Arts Museum in La Conner, WA

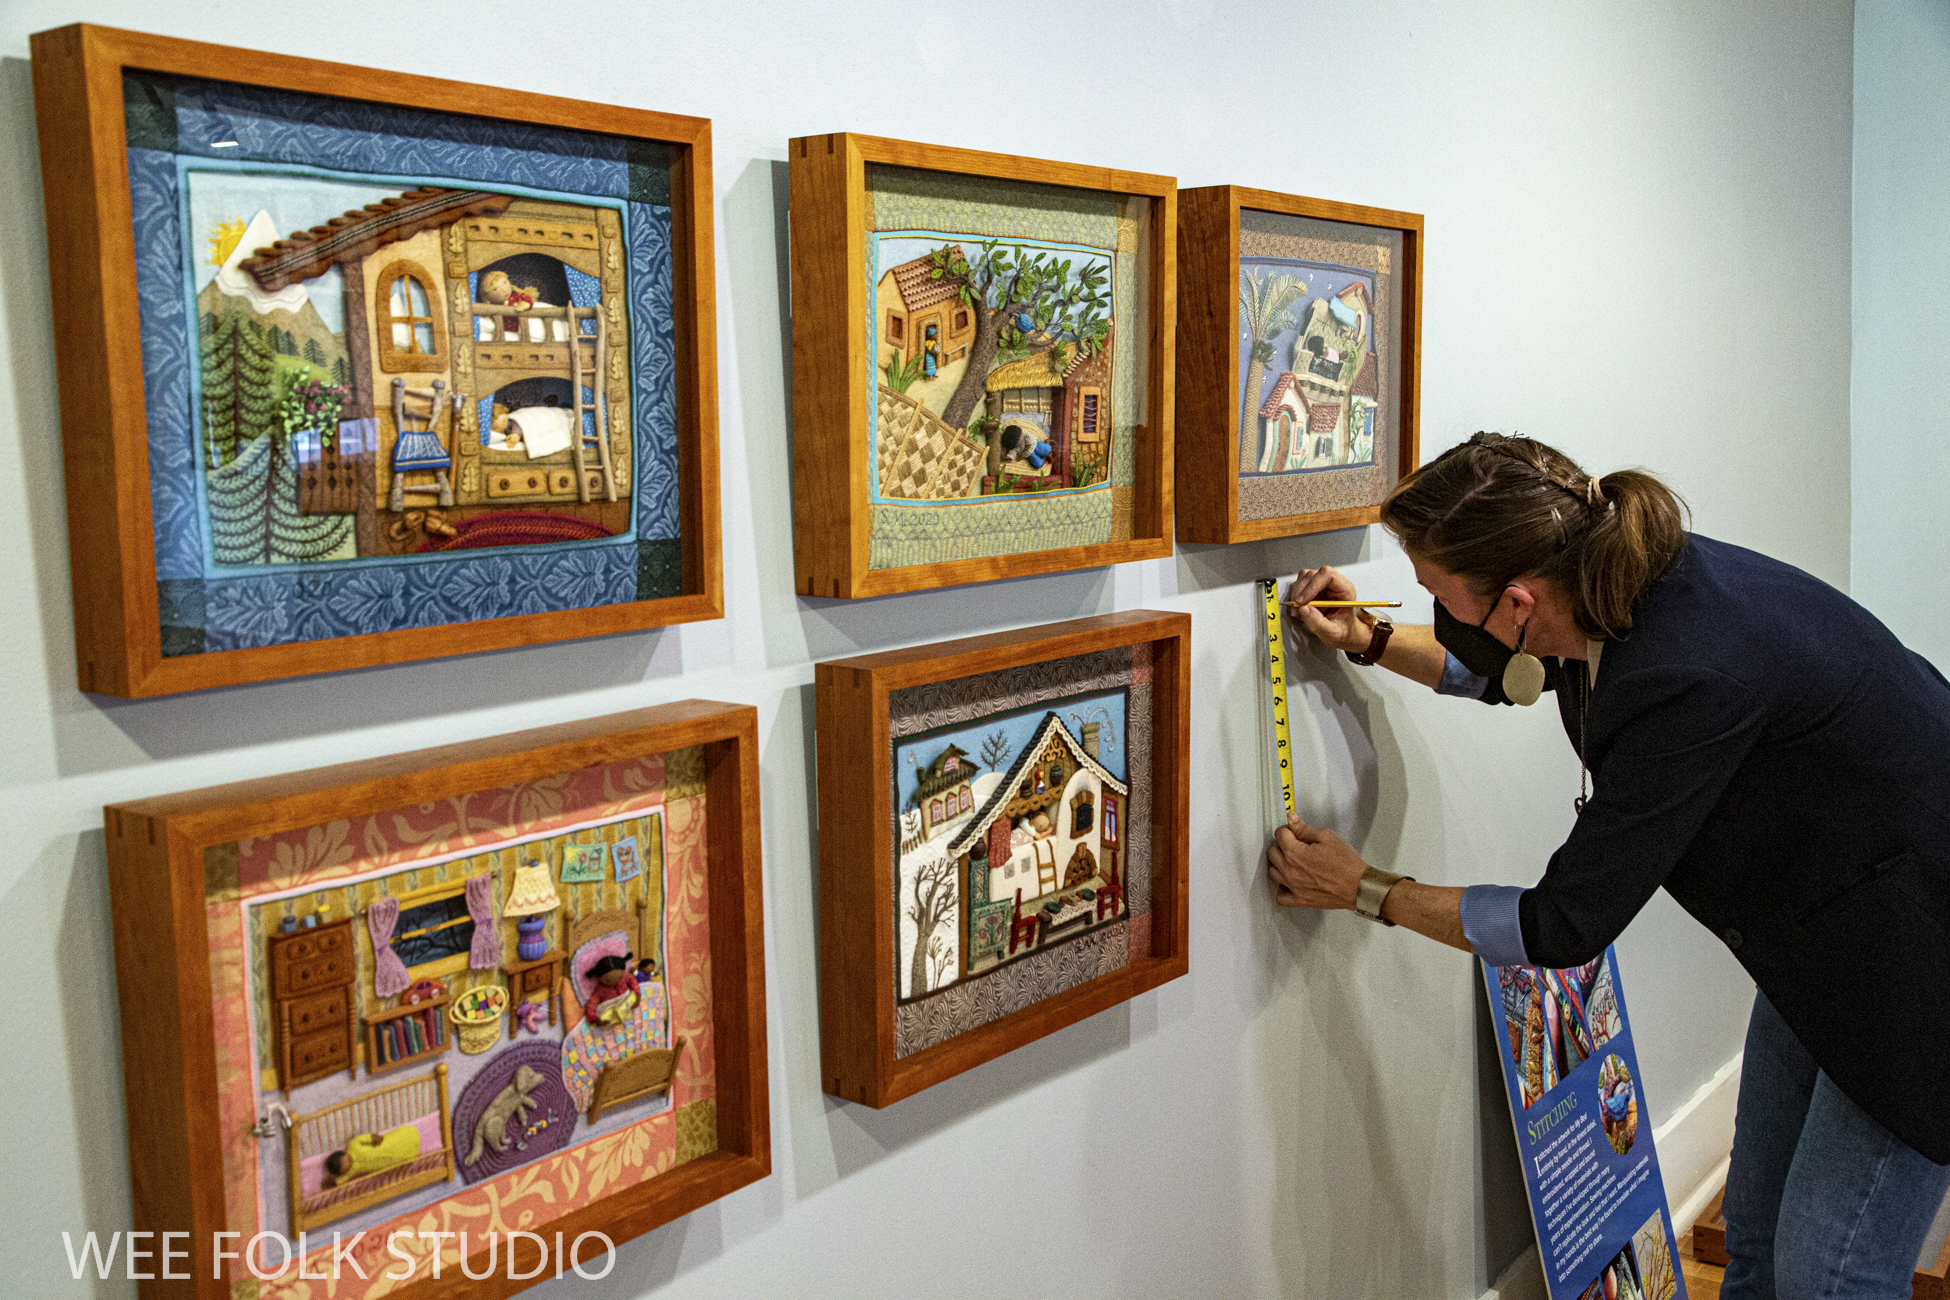
I am happy to announce that Bedtime Stitches, the traveling exhibition of original artwork for my picture book, MY BED, is on view at the Pacific Northwest Quilt & Fiber Arts Museum in La Conner, WA through April 30th. This is the westernmost location on the tour and I hope that many of you in the area (including BC, Canada) will make the trip to see the show. To find out where it’s going in the next couple of years, please visit the exhibitions page.

MY BED: Enchanting Ways to Fall Asleep around the World is available worldwide where books are sold, including from online vendors. Autographed copies can be purchased in my Etsy Shop here.
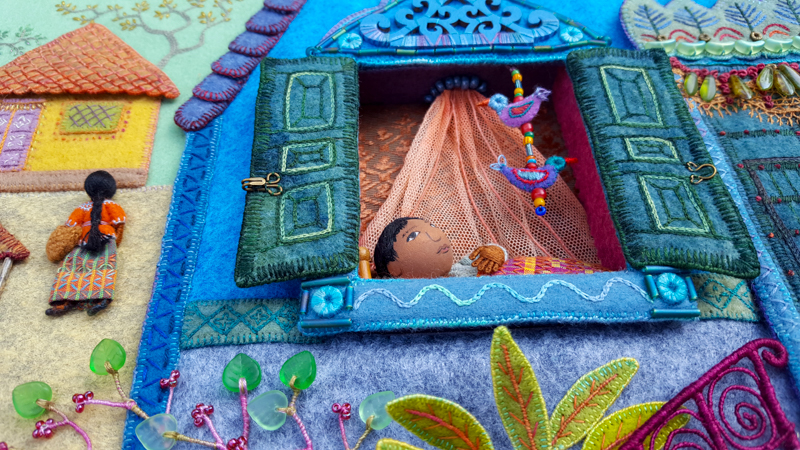
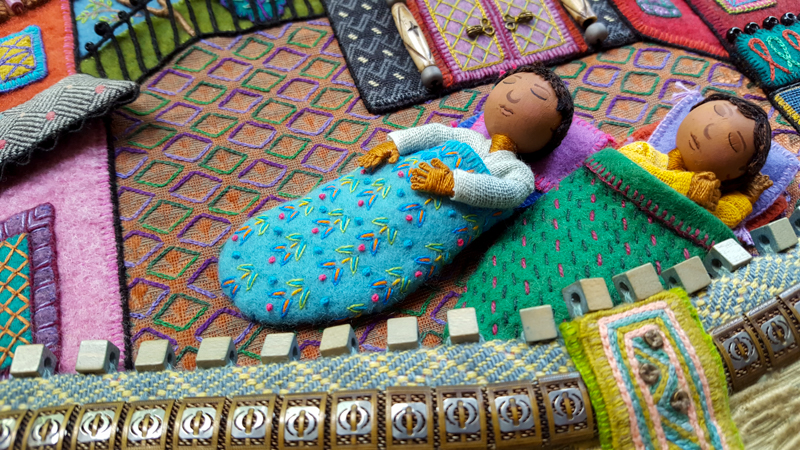
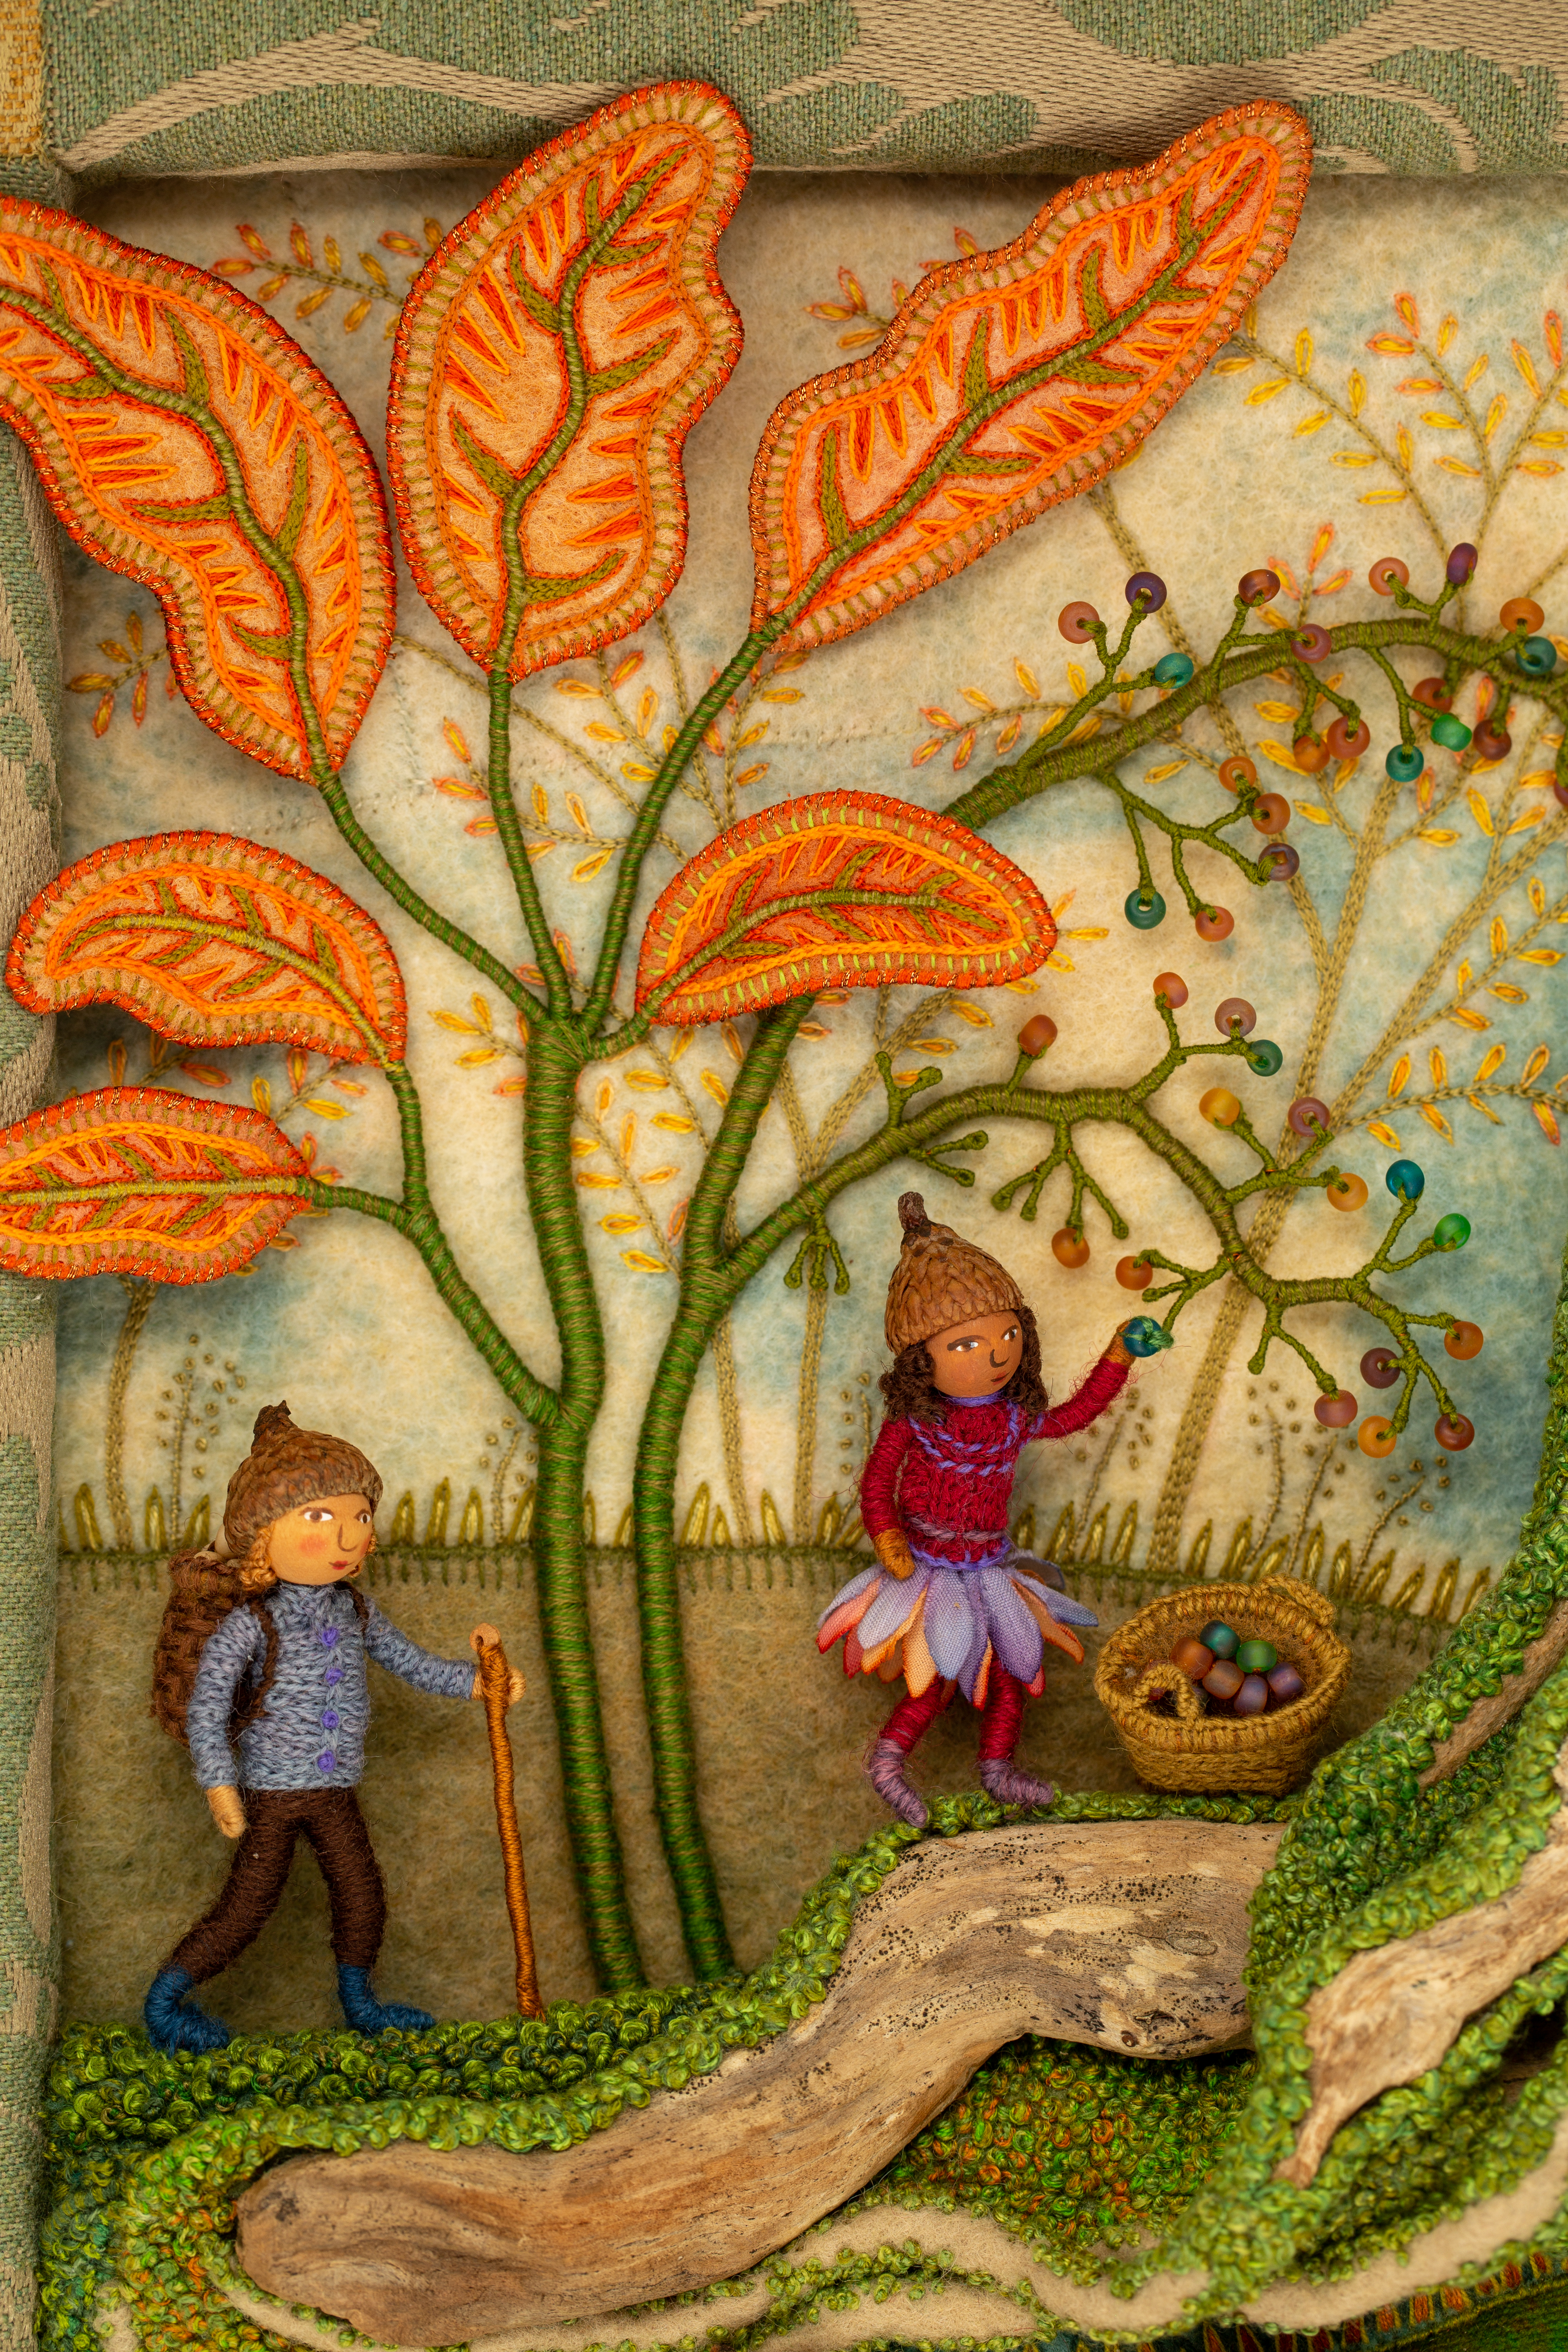
The exhibition of embroidered bas-relief sculptures brings the viewer on an international journey, showing children in varying cultures and home environments around the world. Each intricately rendered scene captures the spirit of a different place and way of life, all the while illuminating the universal theme of children sleeping safe in their beds.
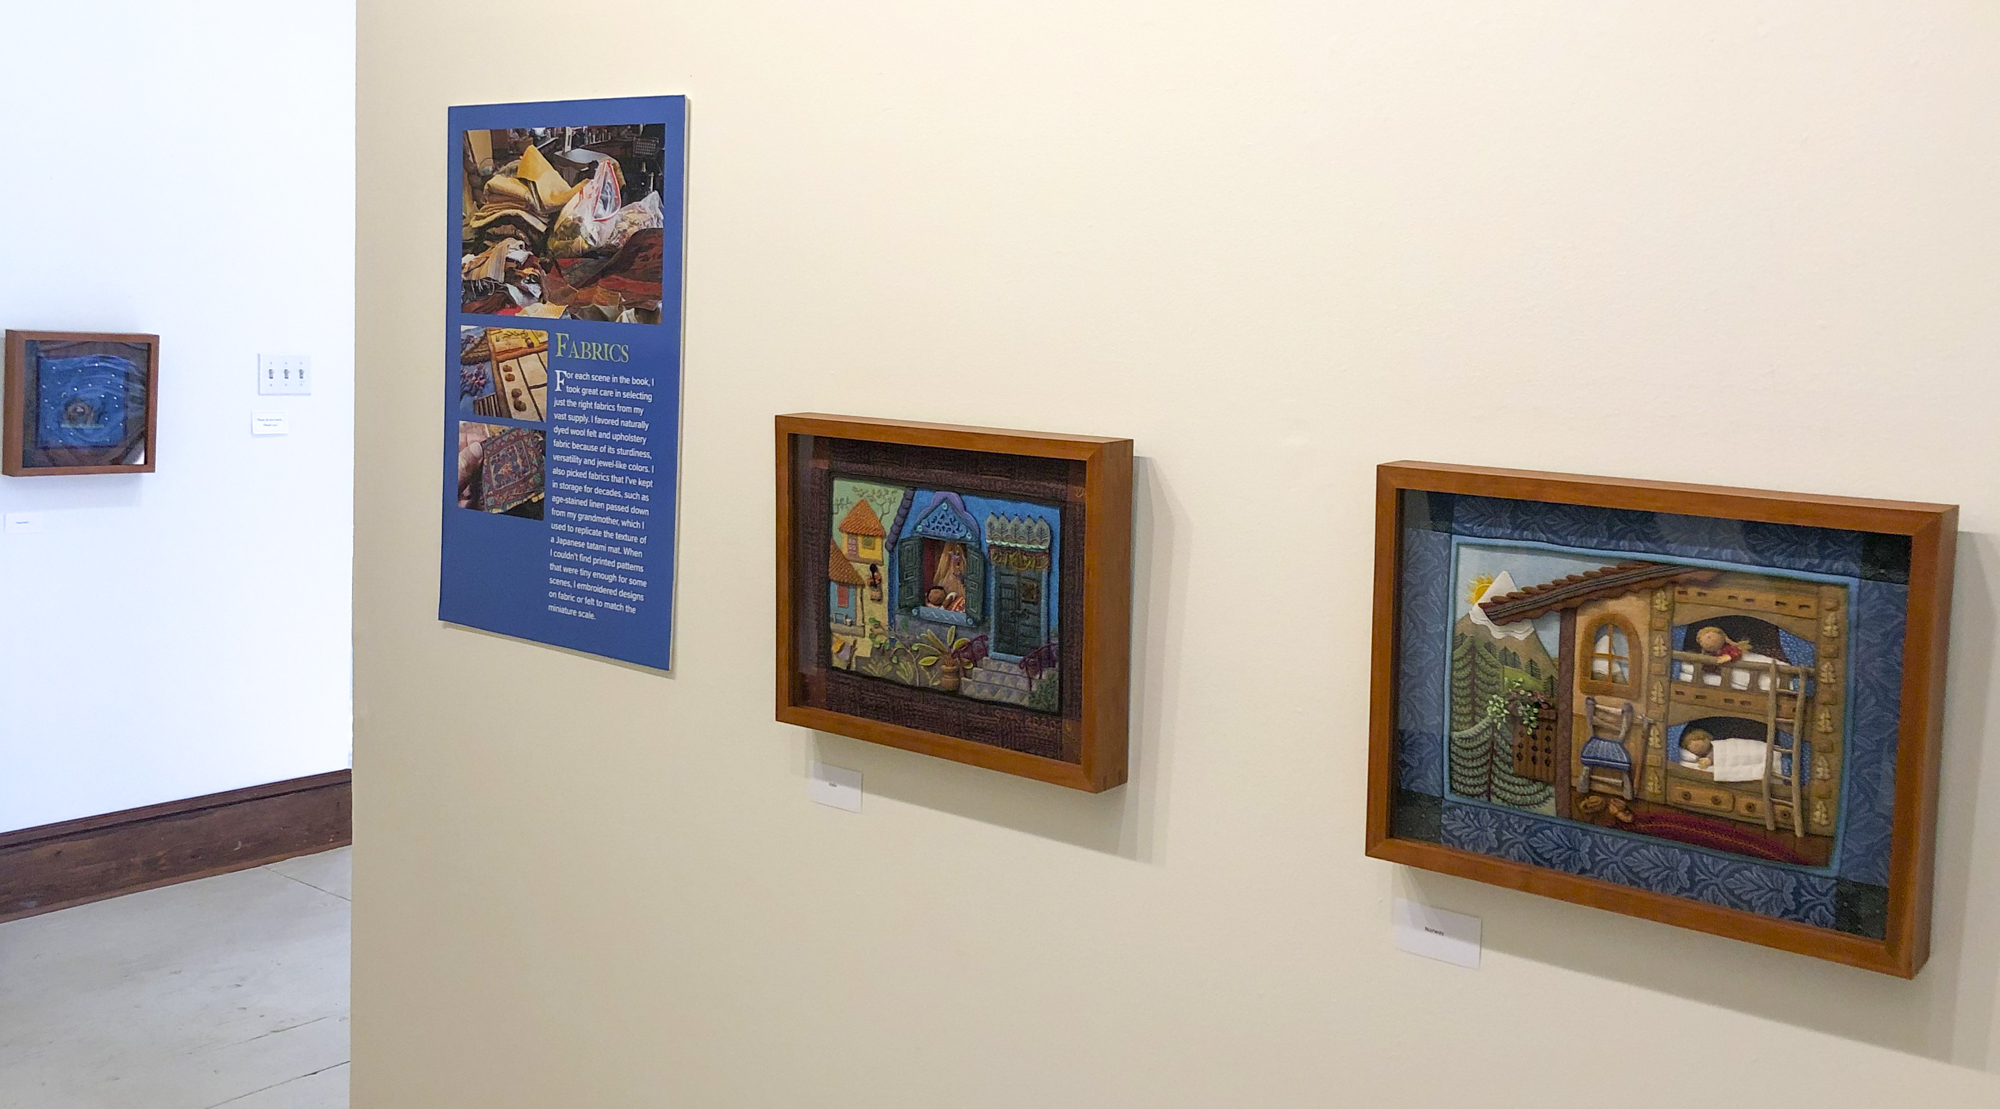
Pacific Northwest Quilt and Fiber Arts Museum in La Conner, WA

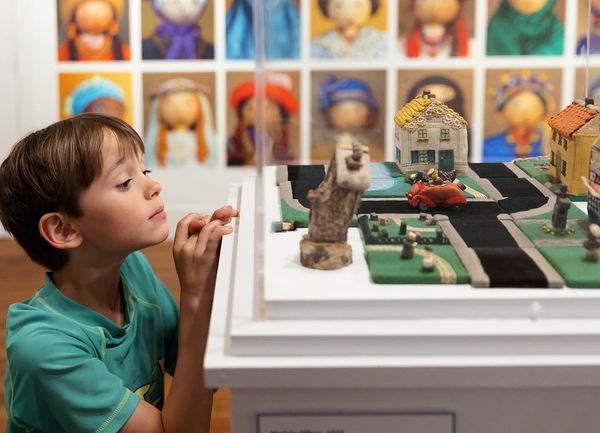
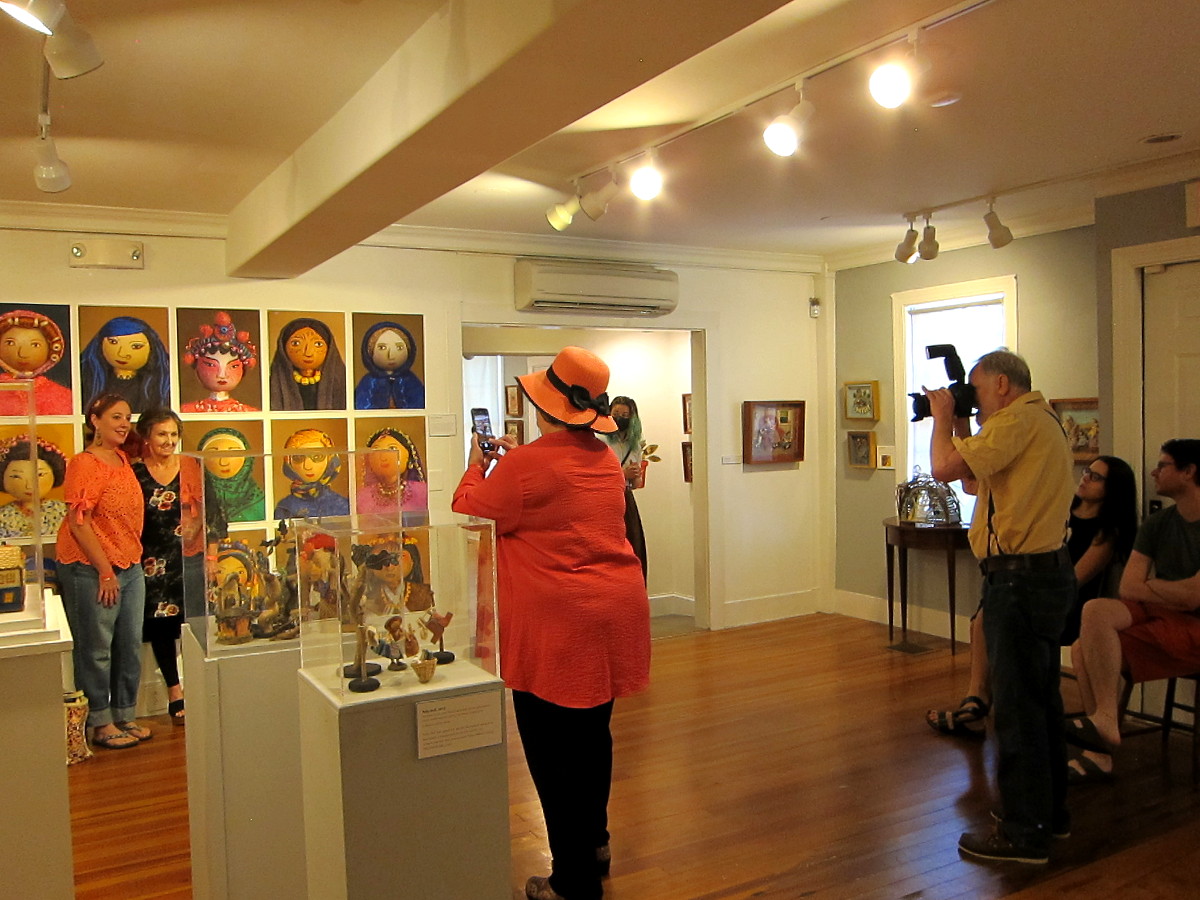
I’m especially excited to have my work at the museum because the Pacific Northwest has such an active quilt and fiber arts community. People are already flocking to see the show and telling their friends about it. Recent visitors wrote, “The pieces are even more amazing in person!” and “I found myself standing in front of each frame and ‘dreaming’. I will go back.”

Pacific Northwest Quilt and Fiber Arts Museum in La Conner, WA

In addition to the framed original artwork, visitors will see several interpretive boards that touch on different aspects of my working process, including this one about the animal icons featured throughout the book. While I worked on the animals, I took photos along the way and shared how I made each one. Click the animals to link to posts:

RoosterCamelParrotElephantGoldfishCatDuckSheep,
RabbitCowCrocodileGiraffeDogPony.

I am grateful to the Pacific Northwest Quilt & Fiber Arts Museum for their enthusiastic invitation to show my work and willingness to book it years in advance! The exhibition is spread out on the 3rd floor of their beautiful Tudor-style Victorian mansion.
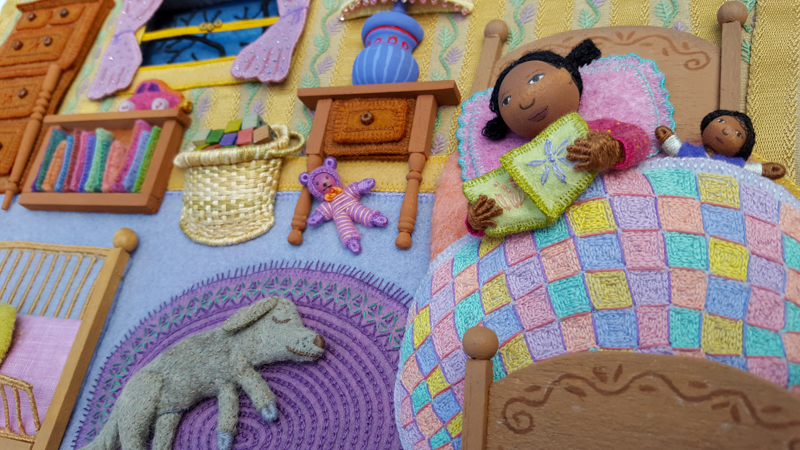
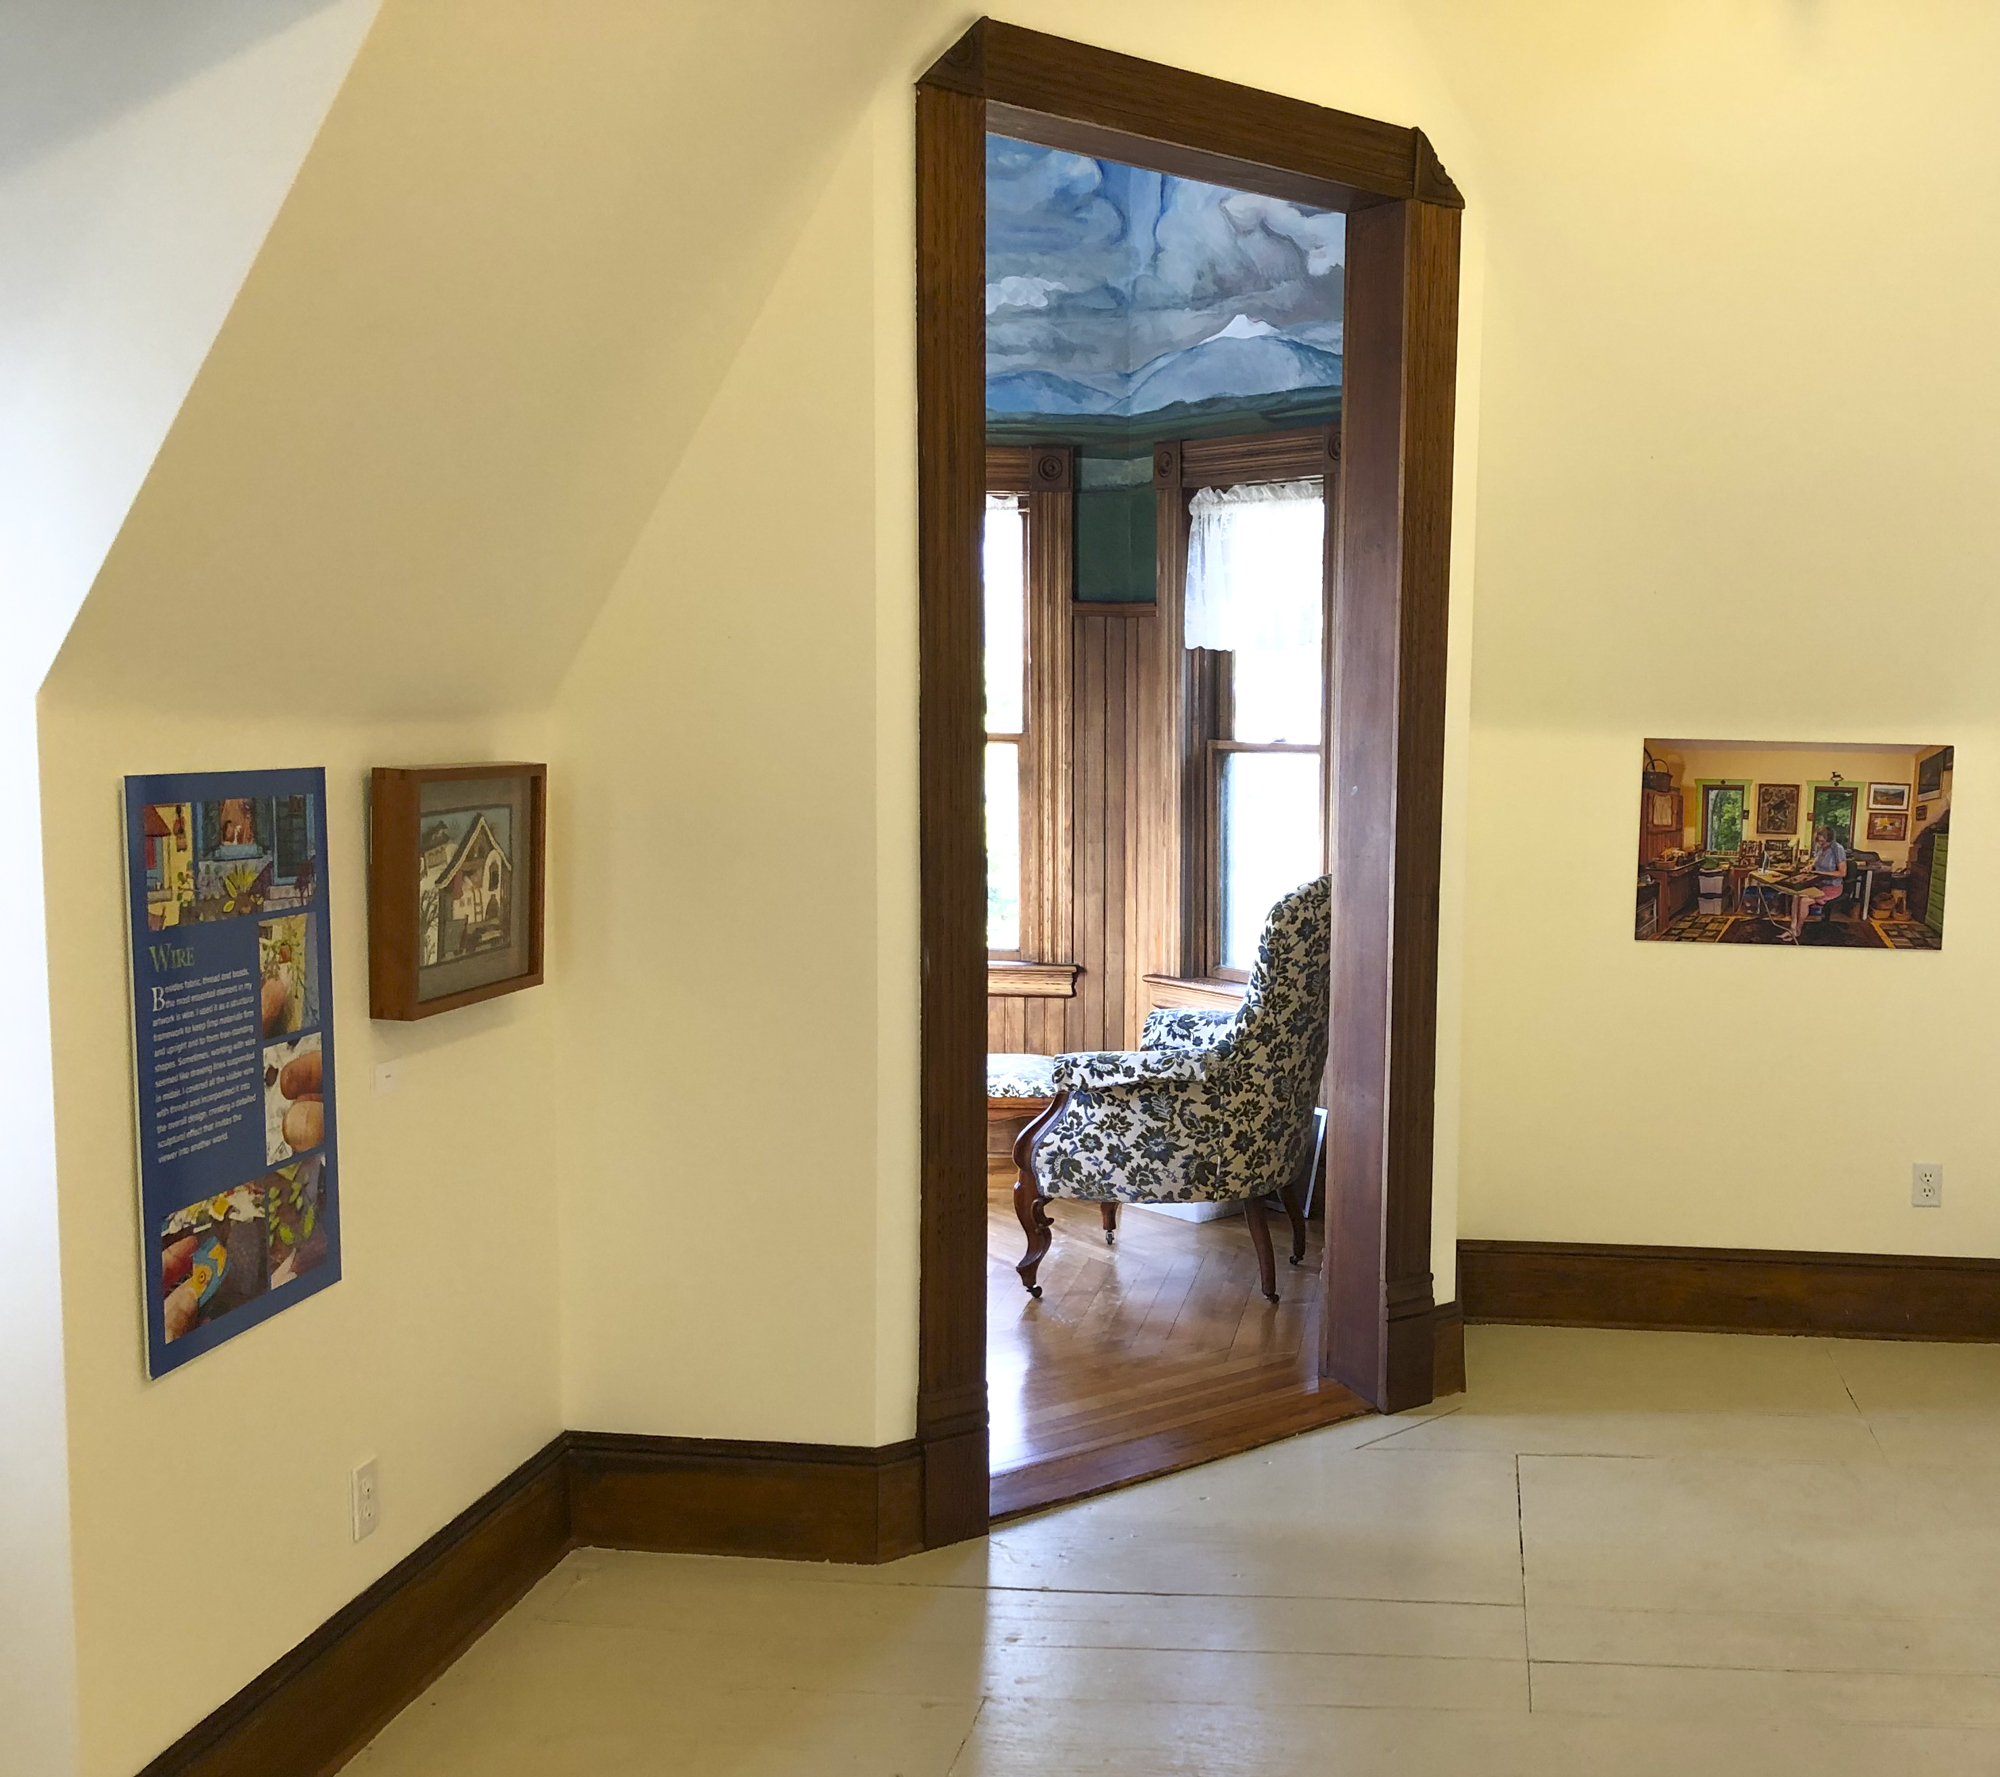
Pacific Northwest Quilt and Fiber Arts Museum in La Conner, WA

Bedtime Stitches is currently booked into 2025 with the possibility of being extended into 2026. Interested museums and curators are welcome to write me information about hosting the exhibit via the contact form below.

← Back

Thank you for your response. ✨

To keep up with new posts, please subscribe to this blog. Your contact info will not be sold or shared. If you’d like to see more frequent photos tracking the projects in my studio, please follow me on Facebook and/or Instagram.

Hey! You were already subscribed.

Adaptive Sled for the snow scene

This father and child pair is included in my winter themed display that is currently on view at Boston Children’s Hospital. The exhibit, which I wrote about in a previous post, is in the Mini-Museum in the Hale lobby, not far from the main entrance to the hospital at 300 Longwood Ave., Boston, Massachusetts through March 15th.

The hospital’s art program manager requested that I make a little adaptive sled for riders with disabilities to include in the snow scene. For reference, she sent a link to this futuristic looking contraption. At first I balked at the idea because of such short notice during the holidays. But, I decided to give it a try, as long as she understood that it would be a naturalistic wee folk version.

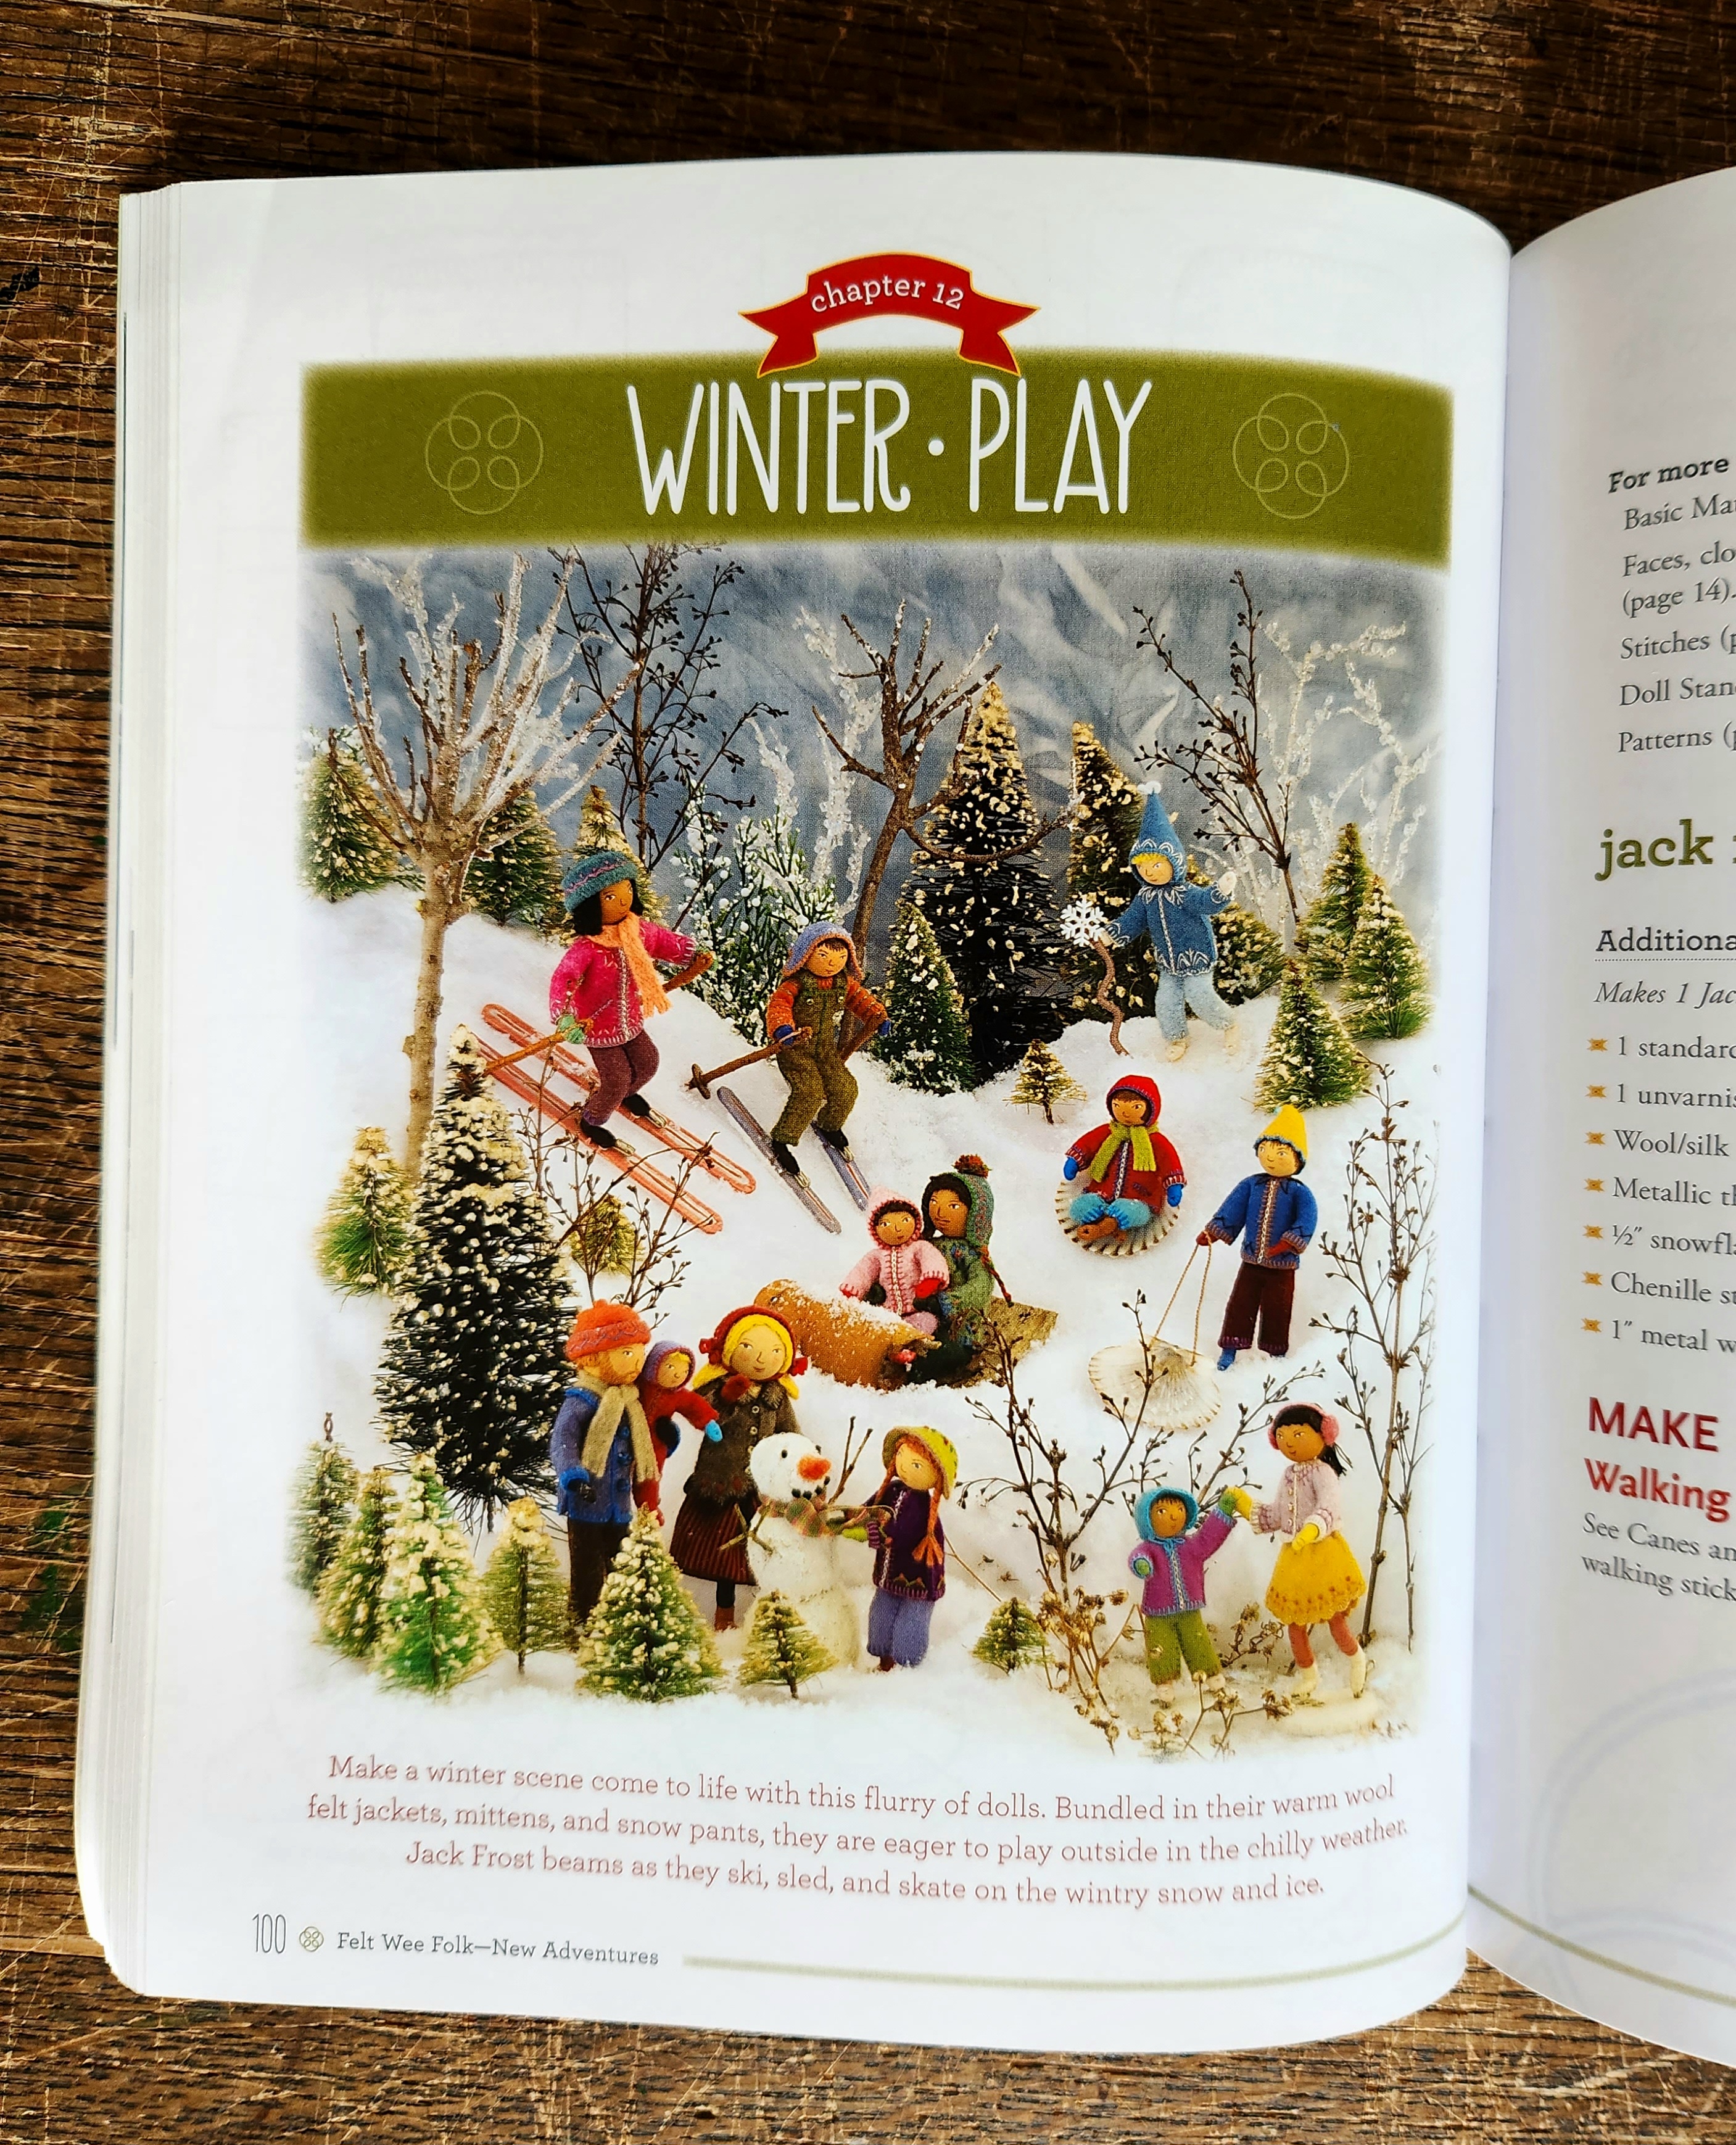
I knew it would take at least a couple of days to make, so I pushed aside other impending deadlines and focused entirely on the sled. I picked out a father and child from the collection of sample dolls I’d made for the Winter Play chapter of my how-to book, Felt Wee Folk.

I studied the photo of the adaptive sled and and made sketches of its basic structure. I measured the figures and bent wire to form the seat, back frame and handle bars.

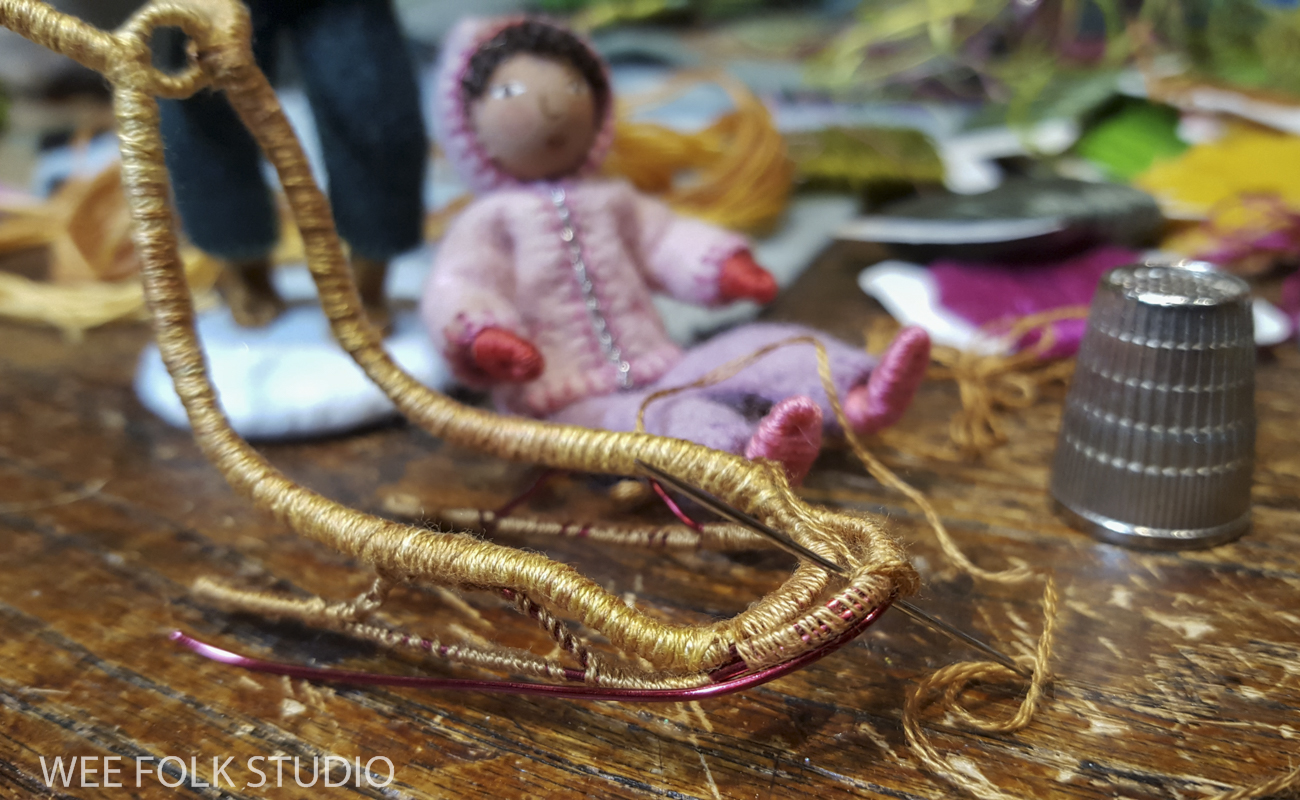
I wrapped embroidery floss around the wire frame, making several passes until the shiny metal was thoroughly covered and the thread looked smooth and even. Wrapping is the most time-consuming part! You can’t really rush the process, otherwise it comes out lumpy and crude looking.

I formed the lower frame and runners out of wire and bound it to the seat frame with thread. At this stage the wrapping was quite fussy, with lots of maneuvering in and around joints.

I added arms to the seat with a finer gauge wire.

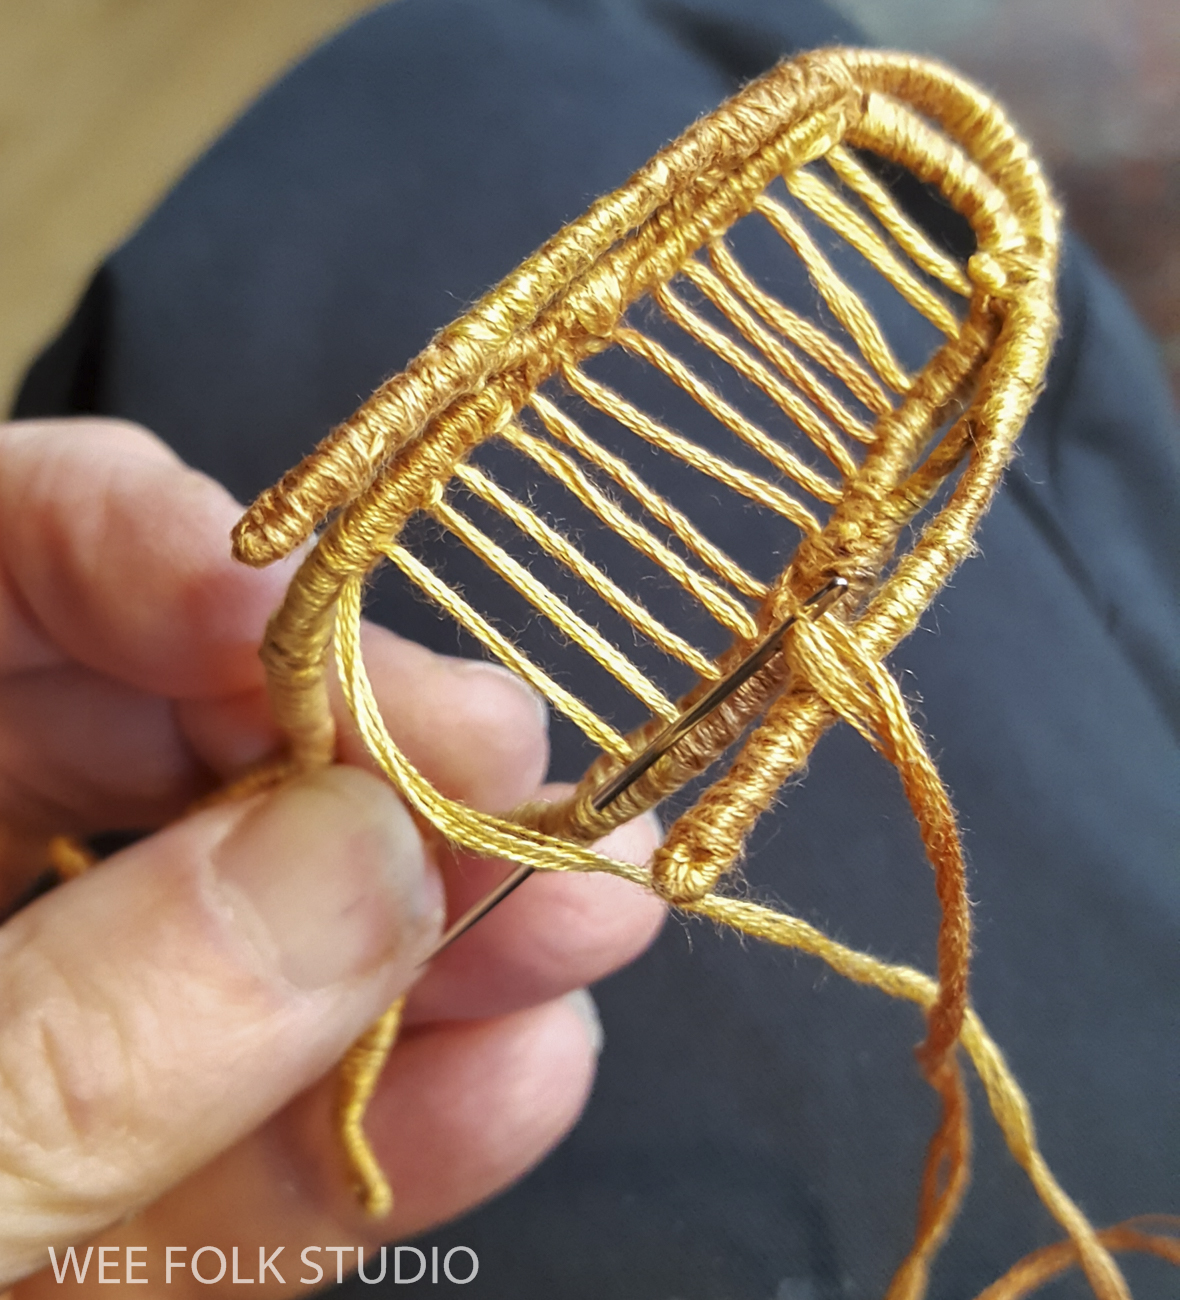
Up until this point, I hadn’t chosen exactly how to finish the seat – felt or floss or a combination. Since the sled was looking more and more like an old fashioned caned chair, I decided to go all out and weave the seat. I’m not sure how warp and weft apply here, but I basically set up a loom.

In this video, you can see the weaving process from the top and the bottom.

Here’s a video of the installation in Boston Children’s Hospital.

I’ve already been contacted by several people who saw the display while going to a doctor’s appointment with their child or grandchild. Hearing their reactions warms my heart and makes it feel like the effort was worth it! If you’re in the area, please stop by the Boston Children’s Hospital’s Mini Museum.

Boston Children’s Hospital Installation

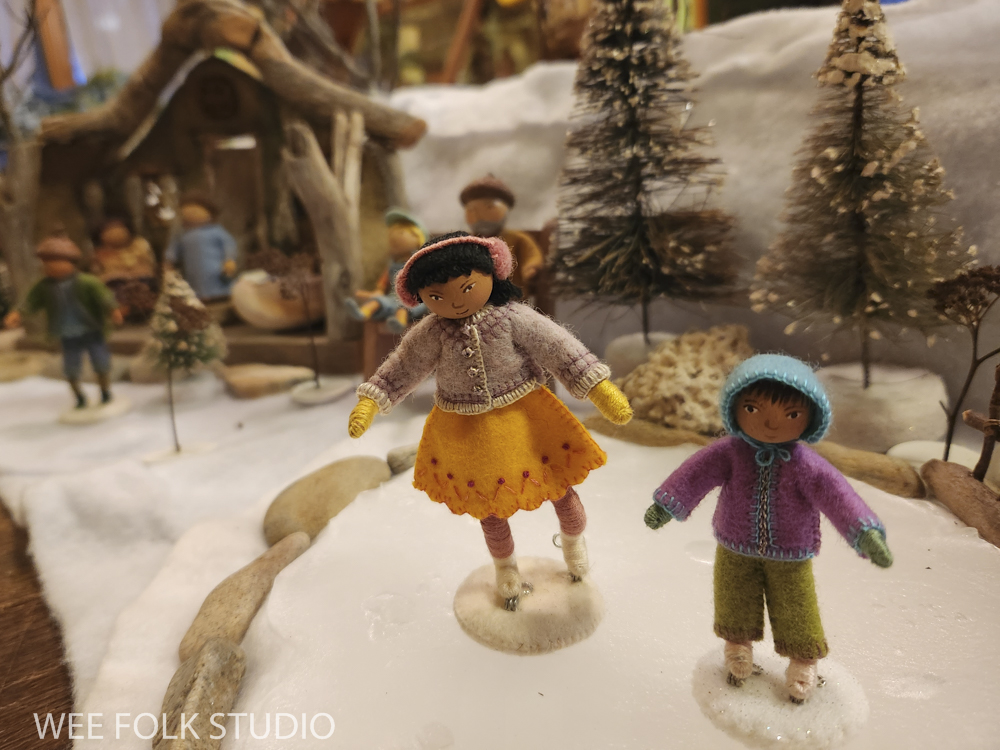
I’m excited to announce that a winter themed display full of my wee folk characters is on view until March 15th at Boston Children’s Hospital, which has been named the country’s #1 pediatric hospital for 9 years in a row.
UPDATE: Good news! The show has been extended until March 27th.

The 8 ft. long case is located in the Mini-Museum in the Hale lobby, not far from the main entrance to the hospital at 300 Longwood Ave., Boston, Massachusetts. The exhibit, which is sponsored by the Art Program at Boston Children’s Hospital is for patients and their families, staff, and visitors to enjoy.

I’m thrilled to be given the opportunity to show my work in the hospital and hope that it provides a bit of comfort and joy to the children and their families who pass by on their way to appointments and treatments.

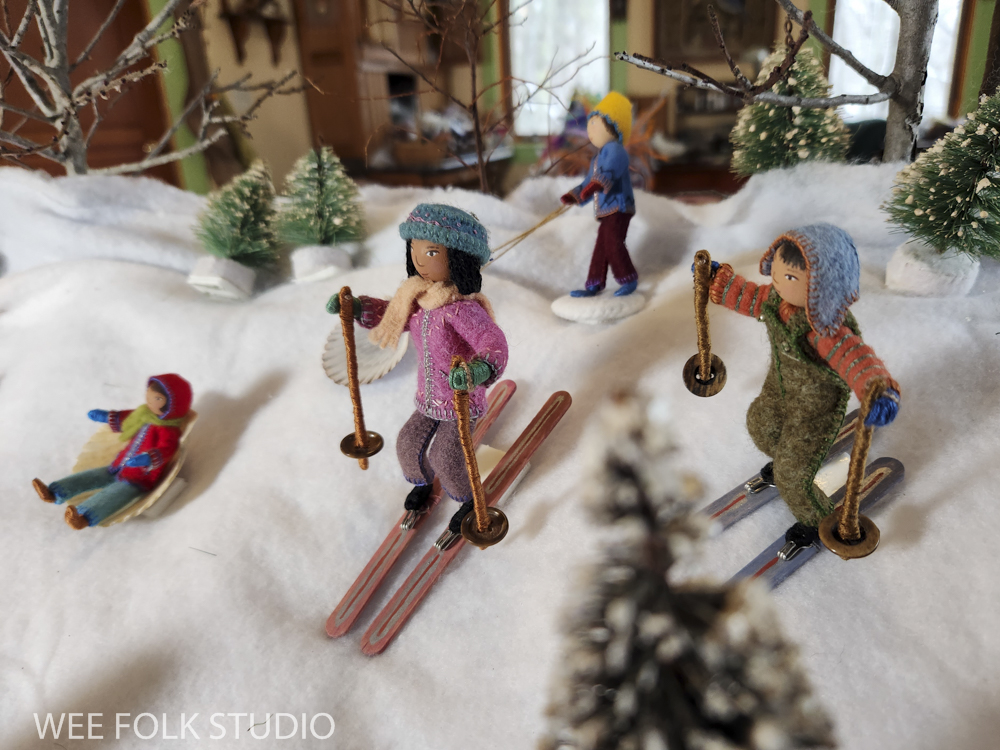
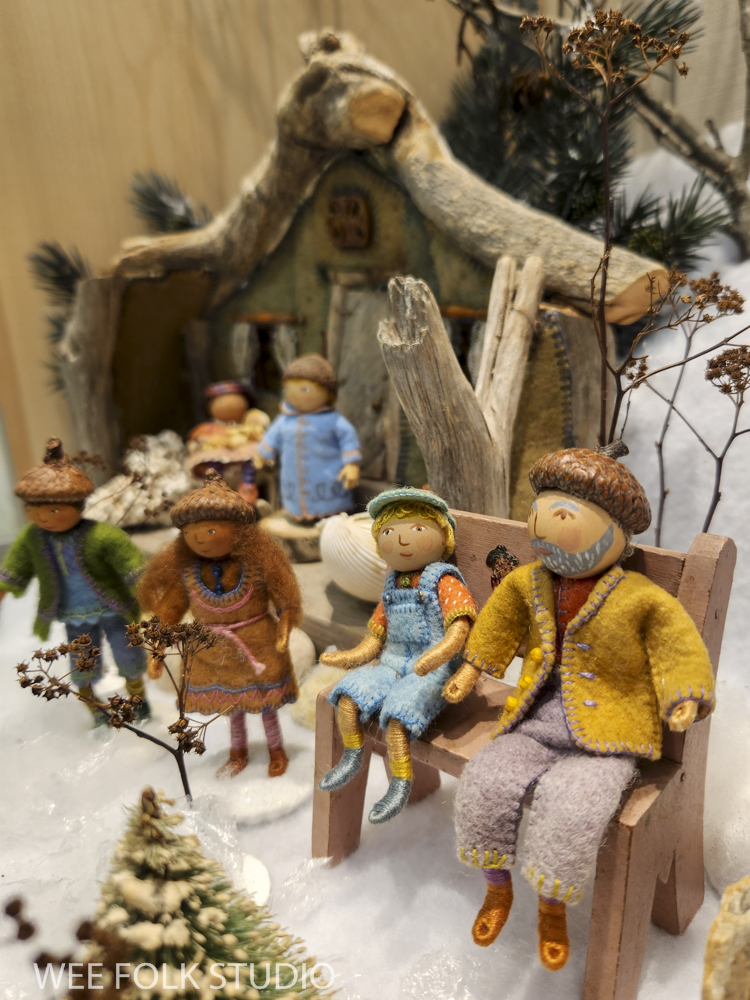
The snow scene is populated with sample dolls from the Winter Play chapter of my how-to book, Felt Wee Folk: New Adventures. The book includes instructions for making the dolls and stands like the ones I used in this scene.

After being invited to show my work and consulting with the hospital’s art program manager, I drew up this sketch that showed how I envisioned the display case. We agreed that placing the 3-dimensional snow scene at child height on the bottom shelf was important.

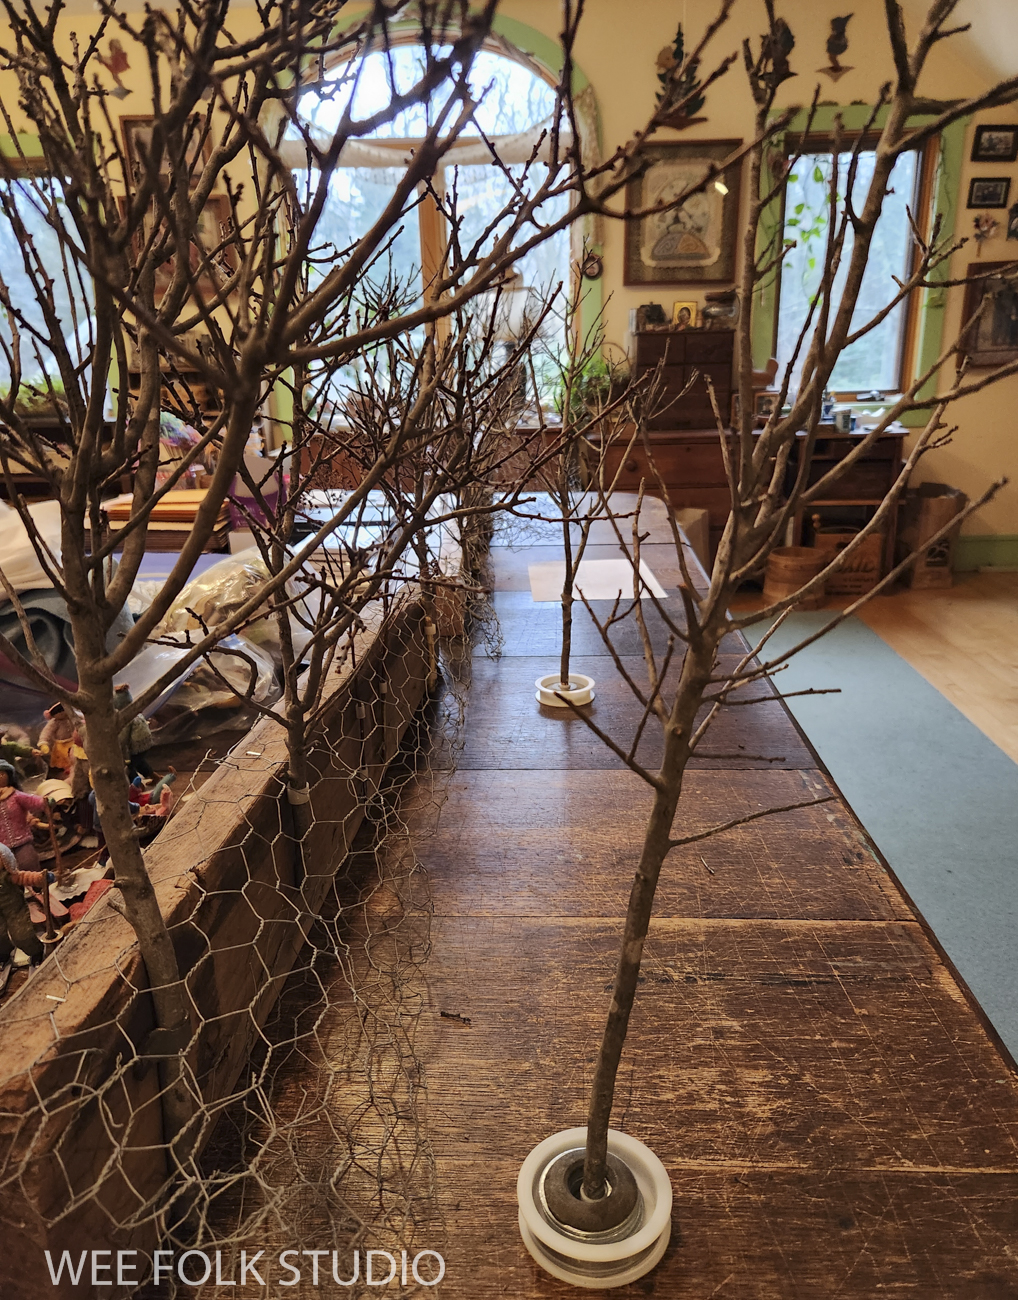
I constructed wood and chicken wire supports for the snow bank and trees, which I tested out on the big oak table in my studio. Bayberry branches, with their densely packed branches are the perfect scale for a scene like this.

For the free-standing trees, I made weighted stands from plastic wire spools and a stack of metal washers, which I padded with stuffing and covered with white felt.

This video shows the practice set-up of the winter scene in my studio.

Snow scene practice set-up in studio

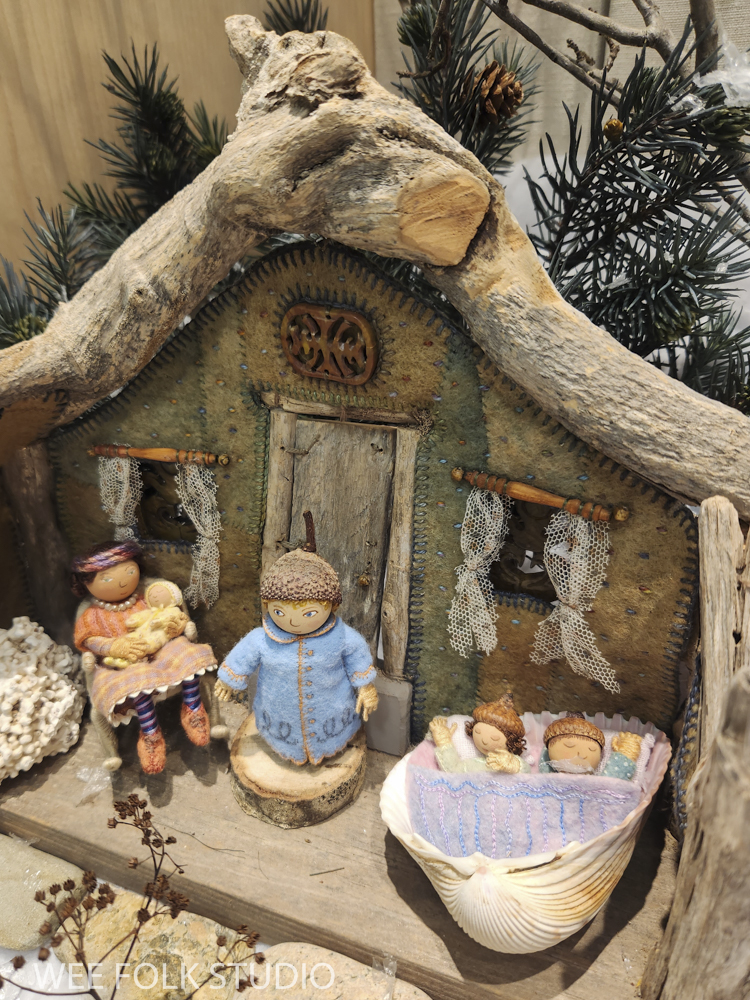
I packed everything up and drove to Boston to set up the scene. Some of the figures aren’t really dressed for cold weather, but they wanted to come along anyway!

Also in the case, above the snow scene set up, are printed enlargements of Frosty Morning, Winter Play (from Felt Wee Folk) and Snow. All 3 are available as cards in my shop.

Here’s a video of the installation in Boston Children’s Hospital.

Snow Scene Display at Boston Children’s Hospital

Most of the figures and houses are from other projects, so I was able to reuse them for this display. I did make something new, though – an adaptive sled for riders with disabilities. I took lots of photos of the process of creating the sled, which I’ll share in a future post.

I’ve already been contacted by several people who encountered the exhibit while going to a doctor’s appointment with their child or grandchild. Hearing their reactions warms my heart and makes it feel like the effort was worth it! If you’re in the area, please stop by the Boston Children’s Hospital’s Mini Museum.

To keep up with new posts, please subscribe to this blog. Your contact info will not be sold or shared. If you’d like to see more frequent photos tracking the projects in my studio, please follow me on Facebook and/or Instagram.

Hey! You were already subscribed.

Vintage Valentine

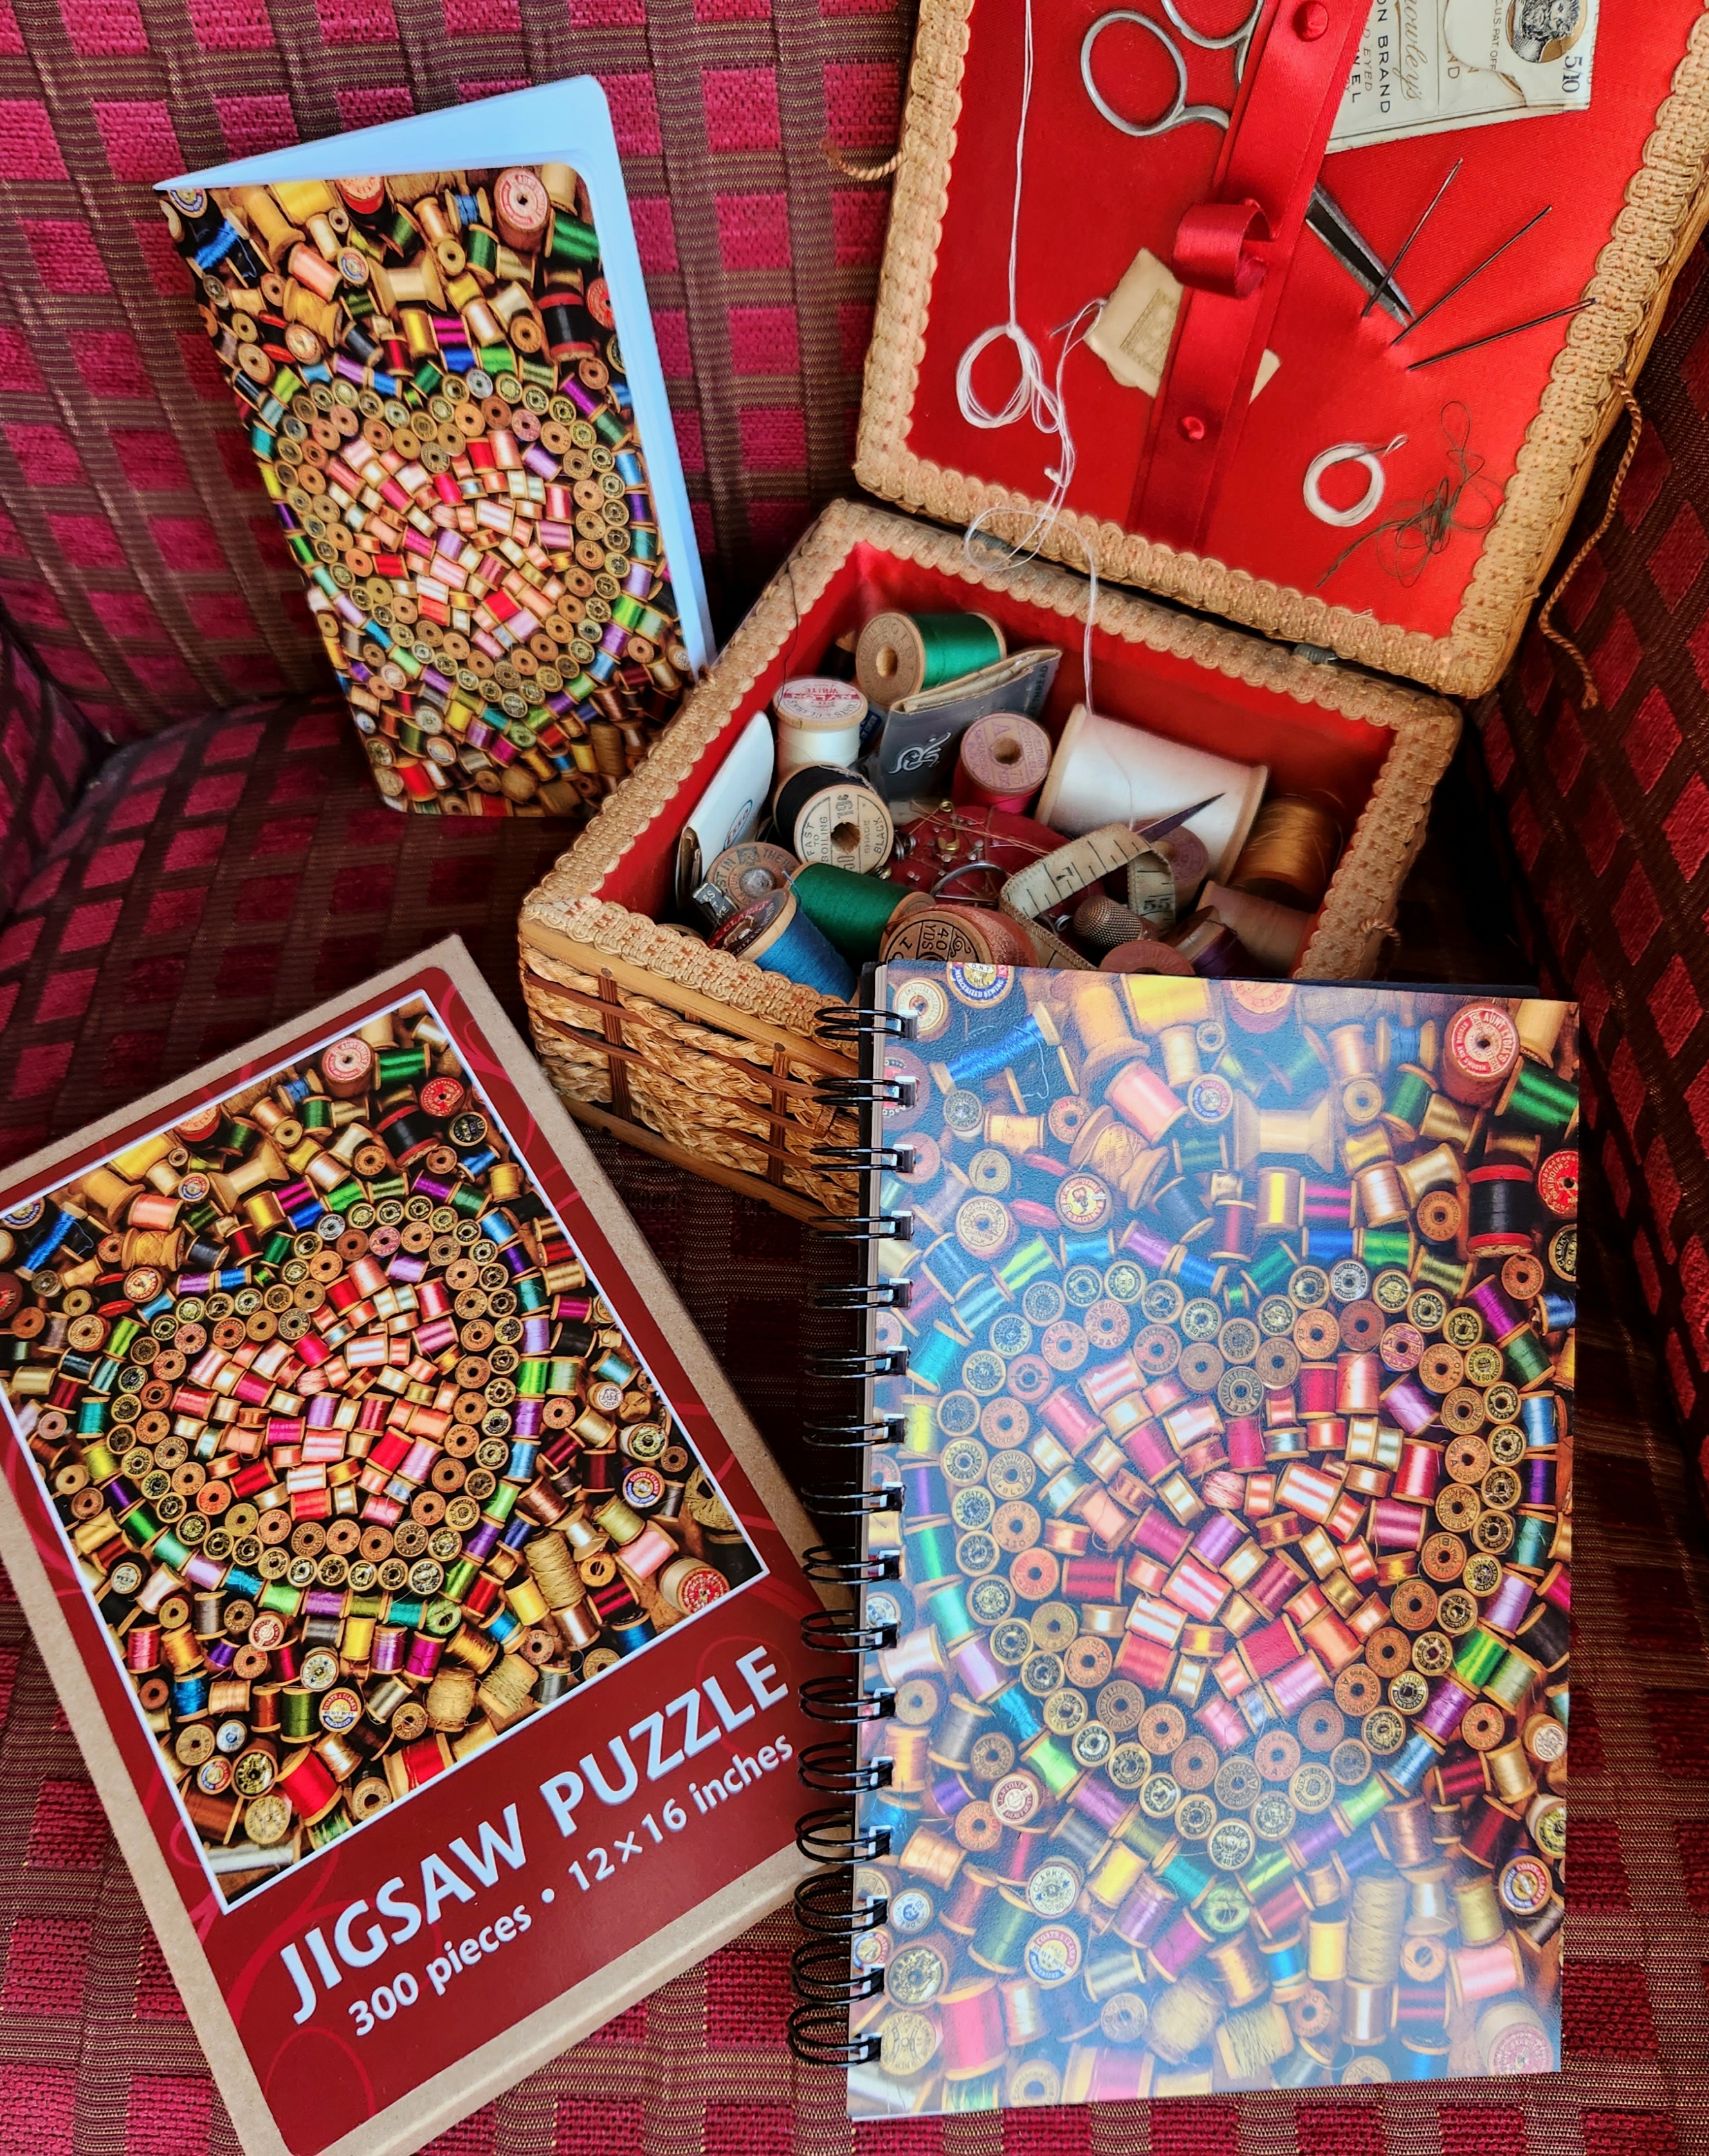
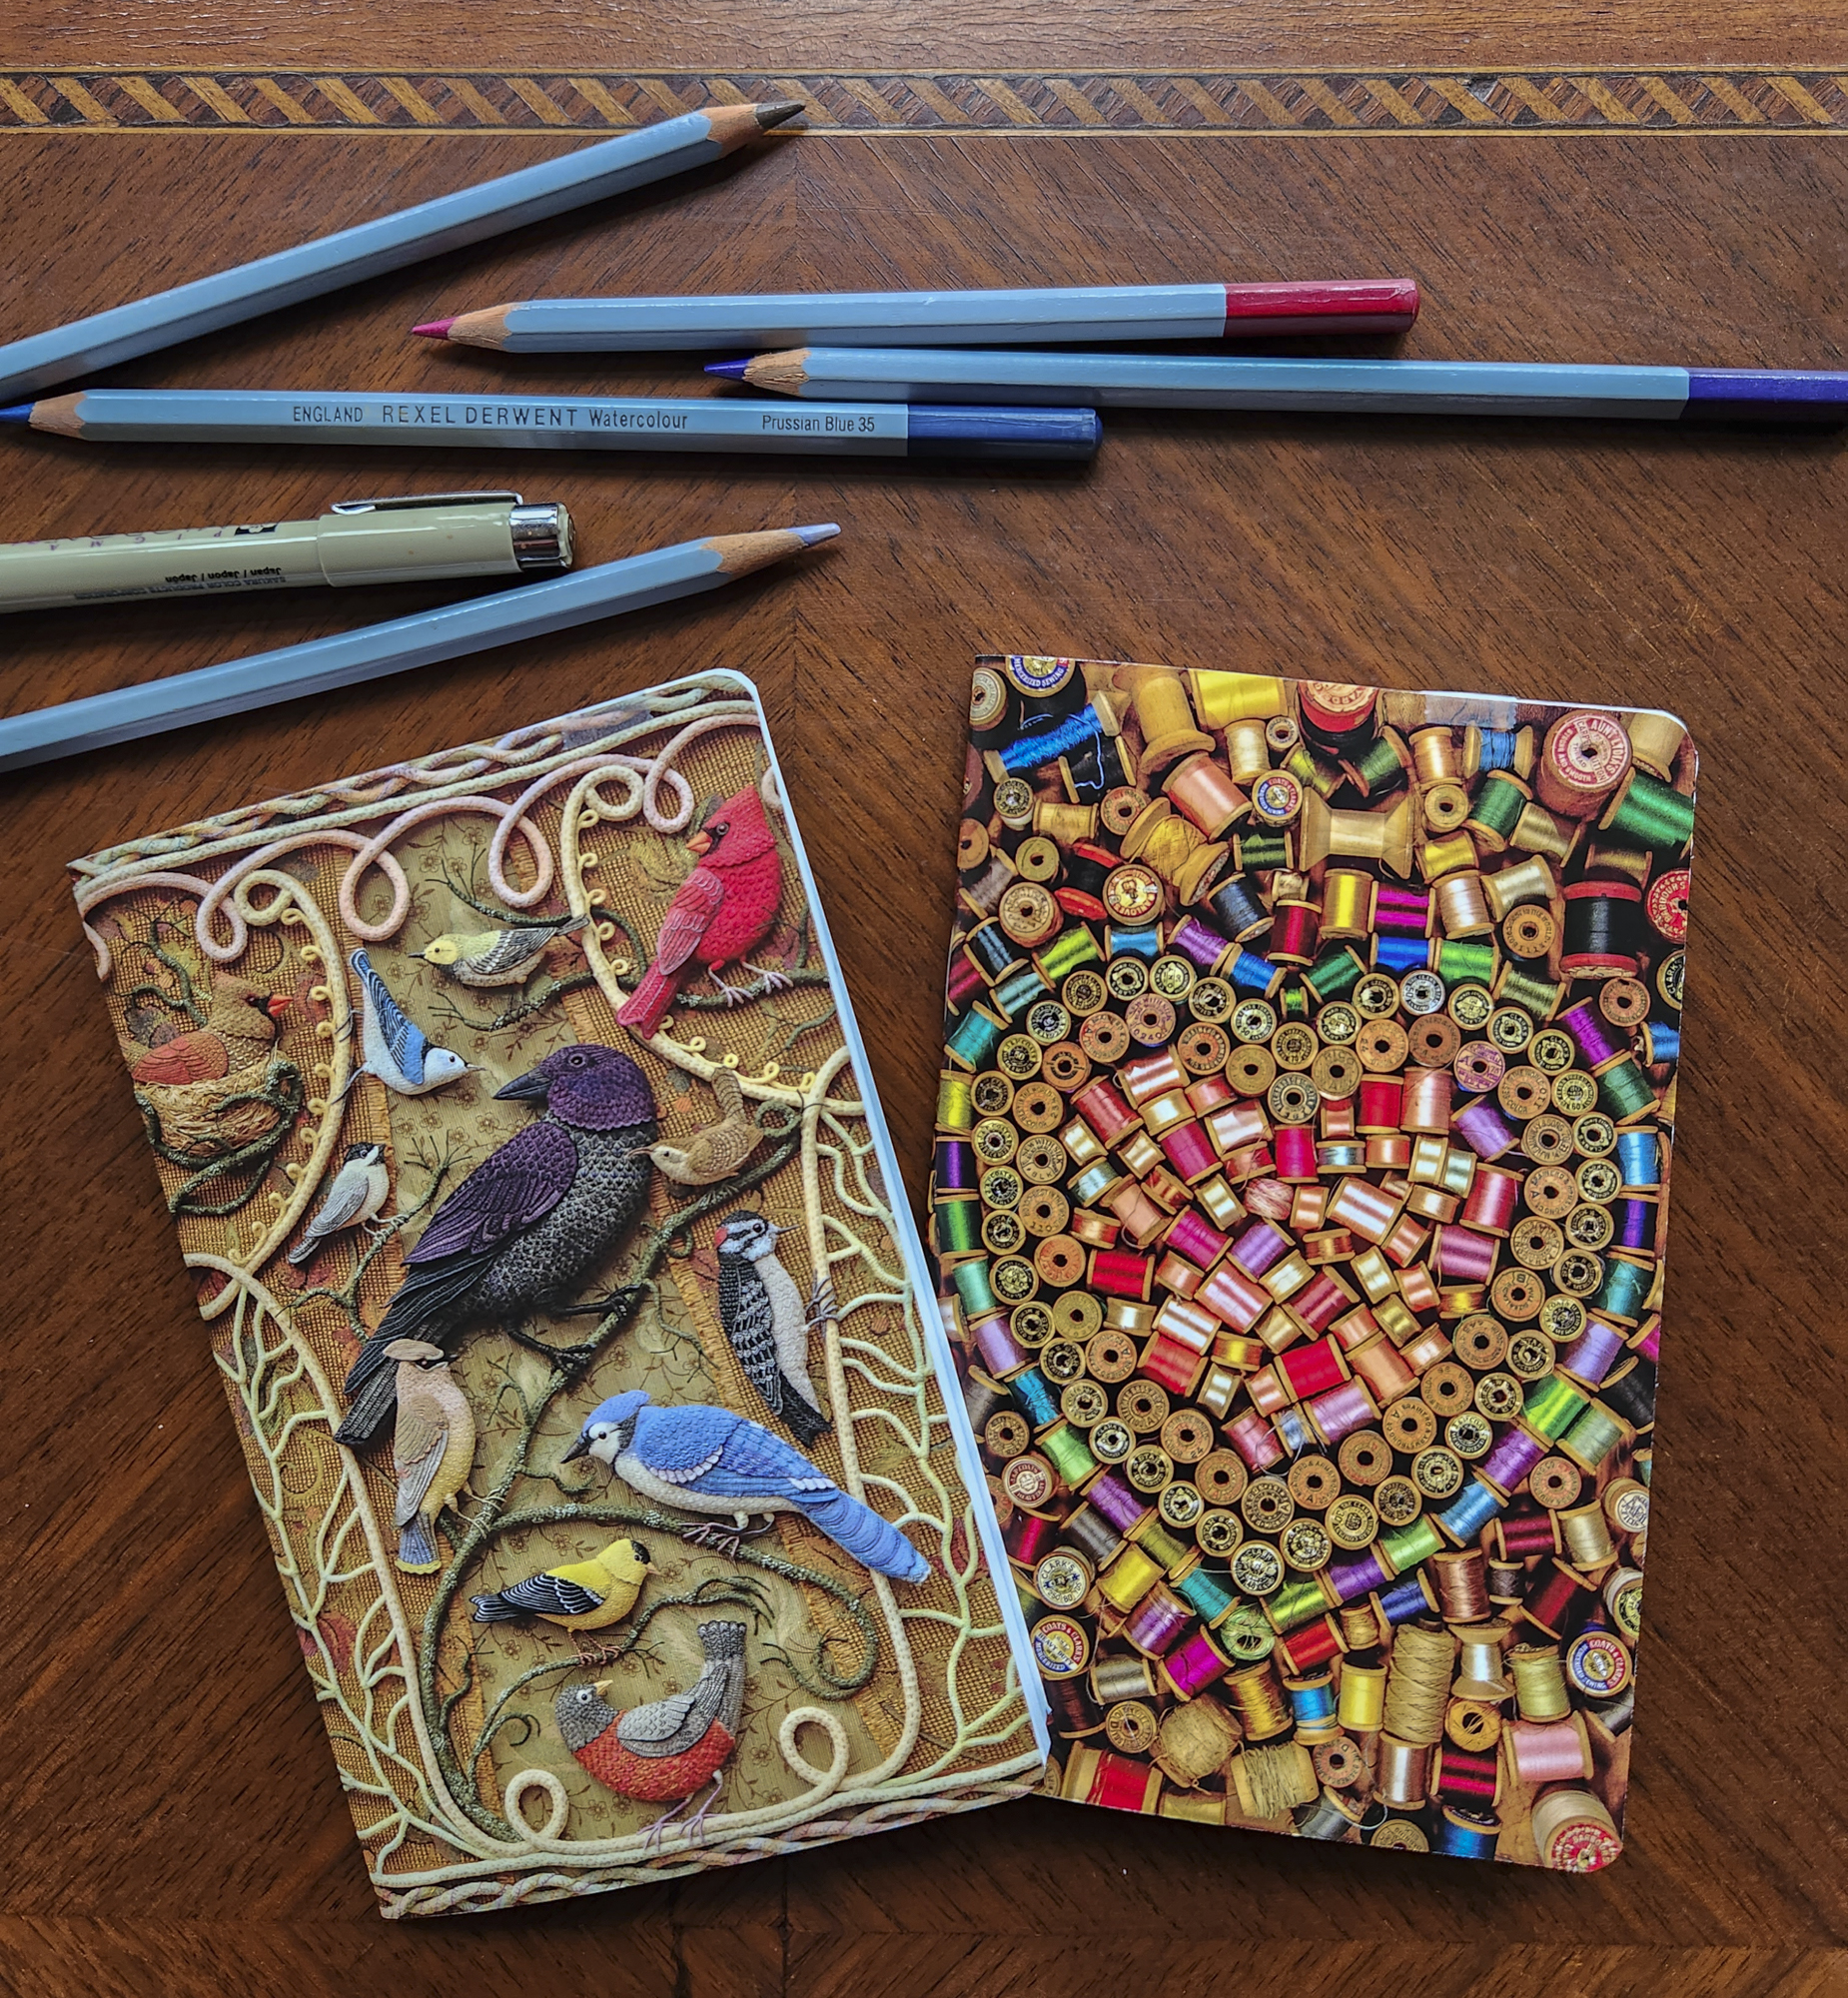
NEW ARRIVALS – just in time for Valentine’s Day! I’m happy to offer more items that make the perfect gift for people who quilt, stitch and sew. In addition to a note card and a poster, my nostalgic assemblage of vintage spools of thread is now available as a jigsaw puzzle and a spiral bound notebook. Please visit my Etsy Shop.

Remember when every household had a wicker sewing box filled with an assortment of threads just like these? My heart-shaped assemblage of vintage spools pays homage to all of the mothers and grandmothers who sewed and mended with skill and patience and passed down their knowledge to the next generation.

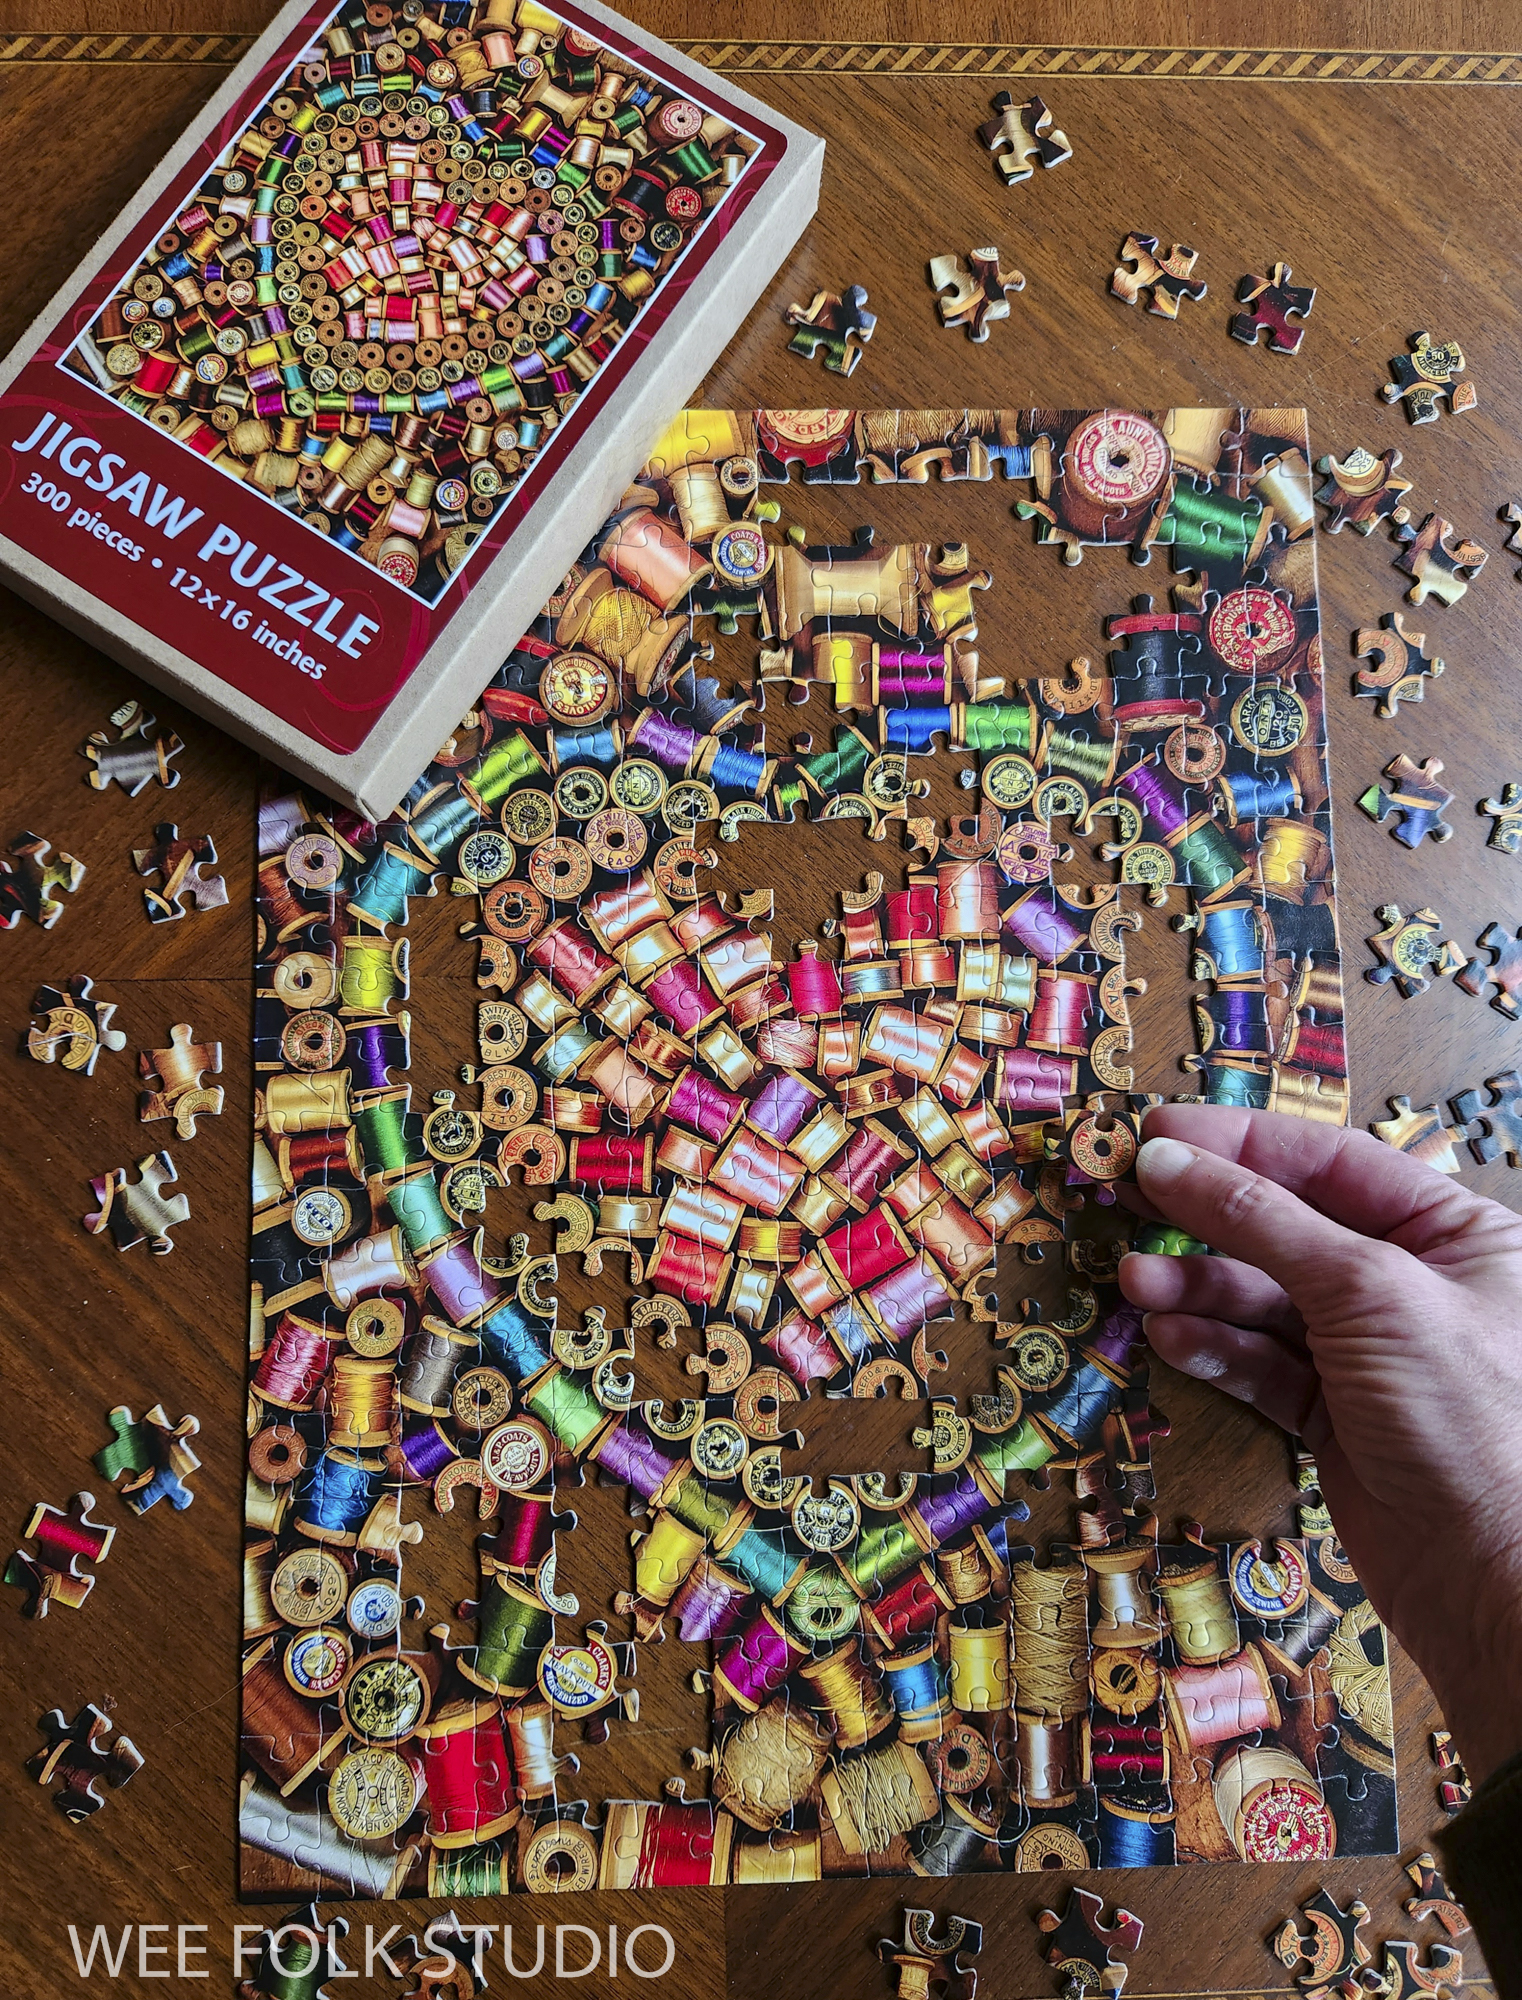
Thread Spool Heart Jigsaw Puzzle

JIGSAW PUZZLE: Don’t let its size fool you. I can honestly say that this puzzle is challenging to put together! 300 pieces was plenty big, even for an obsessive puzzle maker like myself. 500 and 1000 piece puzzles would be great, but for a small operation like mine, manufacturing and storing large puzzles isn’t practical and economically feasible. So I compromised on the smaller version.

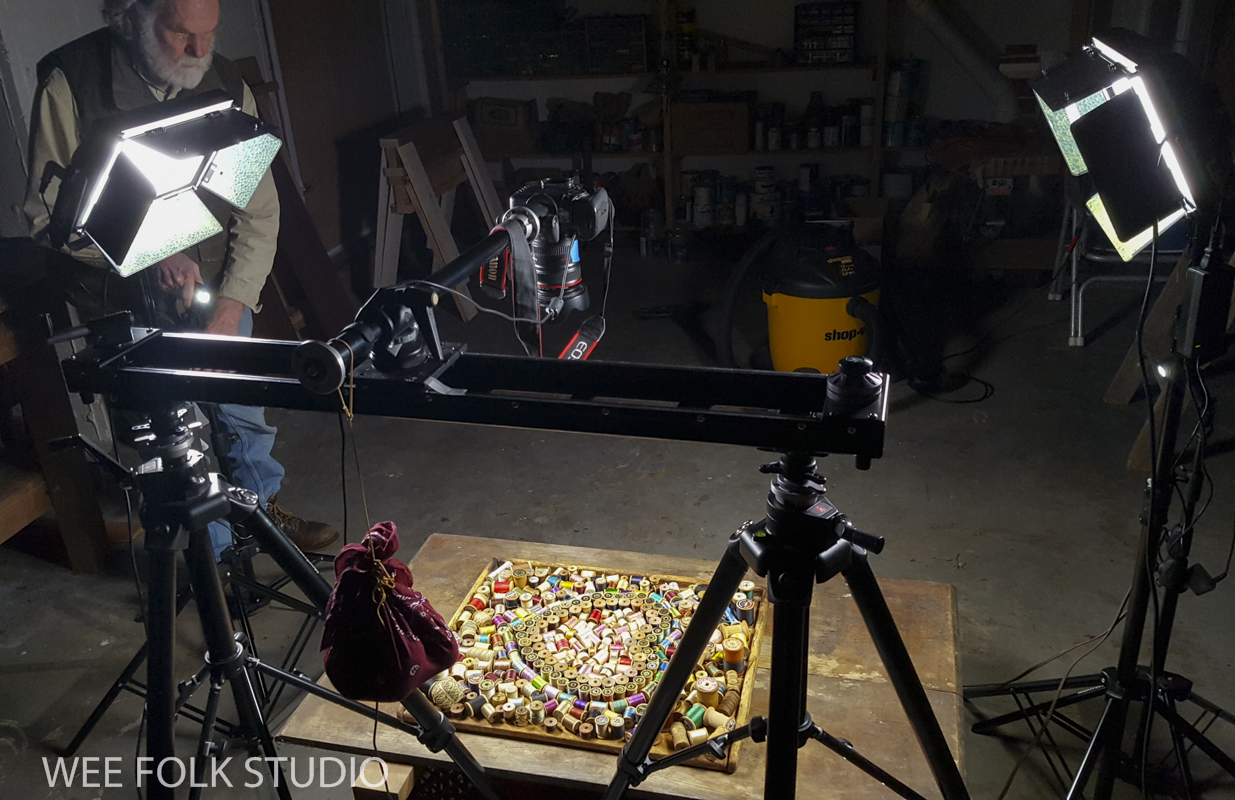
A couple of years ago, I decided to make an assemblage with my collection of cotton and silk thread. I put some spools on end and some sideways, separating the ones with paper labels from the stamped ones. It was so much fun that I surrounded the heart shape with just about every spool I could find hidden away in my studio.

 Rob took a photo of the arrangement and viola, a piece of art!

I’ve collected vintage wooden spools of thread for decades, knowing that someday I’d make something with them. They are beautiful relics of a bygone era that I could never bring myself to throw out because they are a connection to people and places in my past.

Thread Heart Note Card

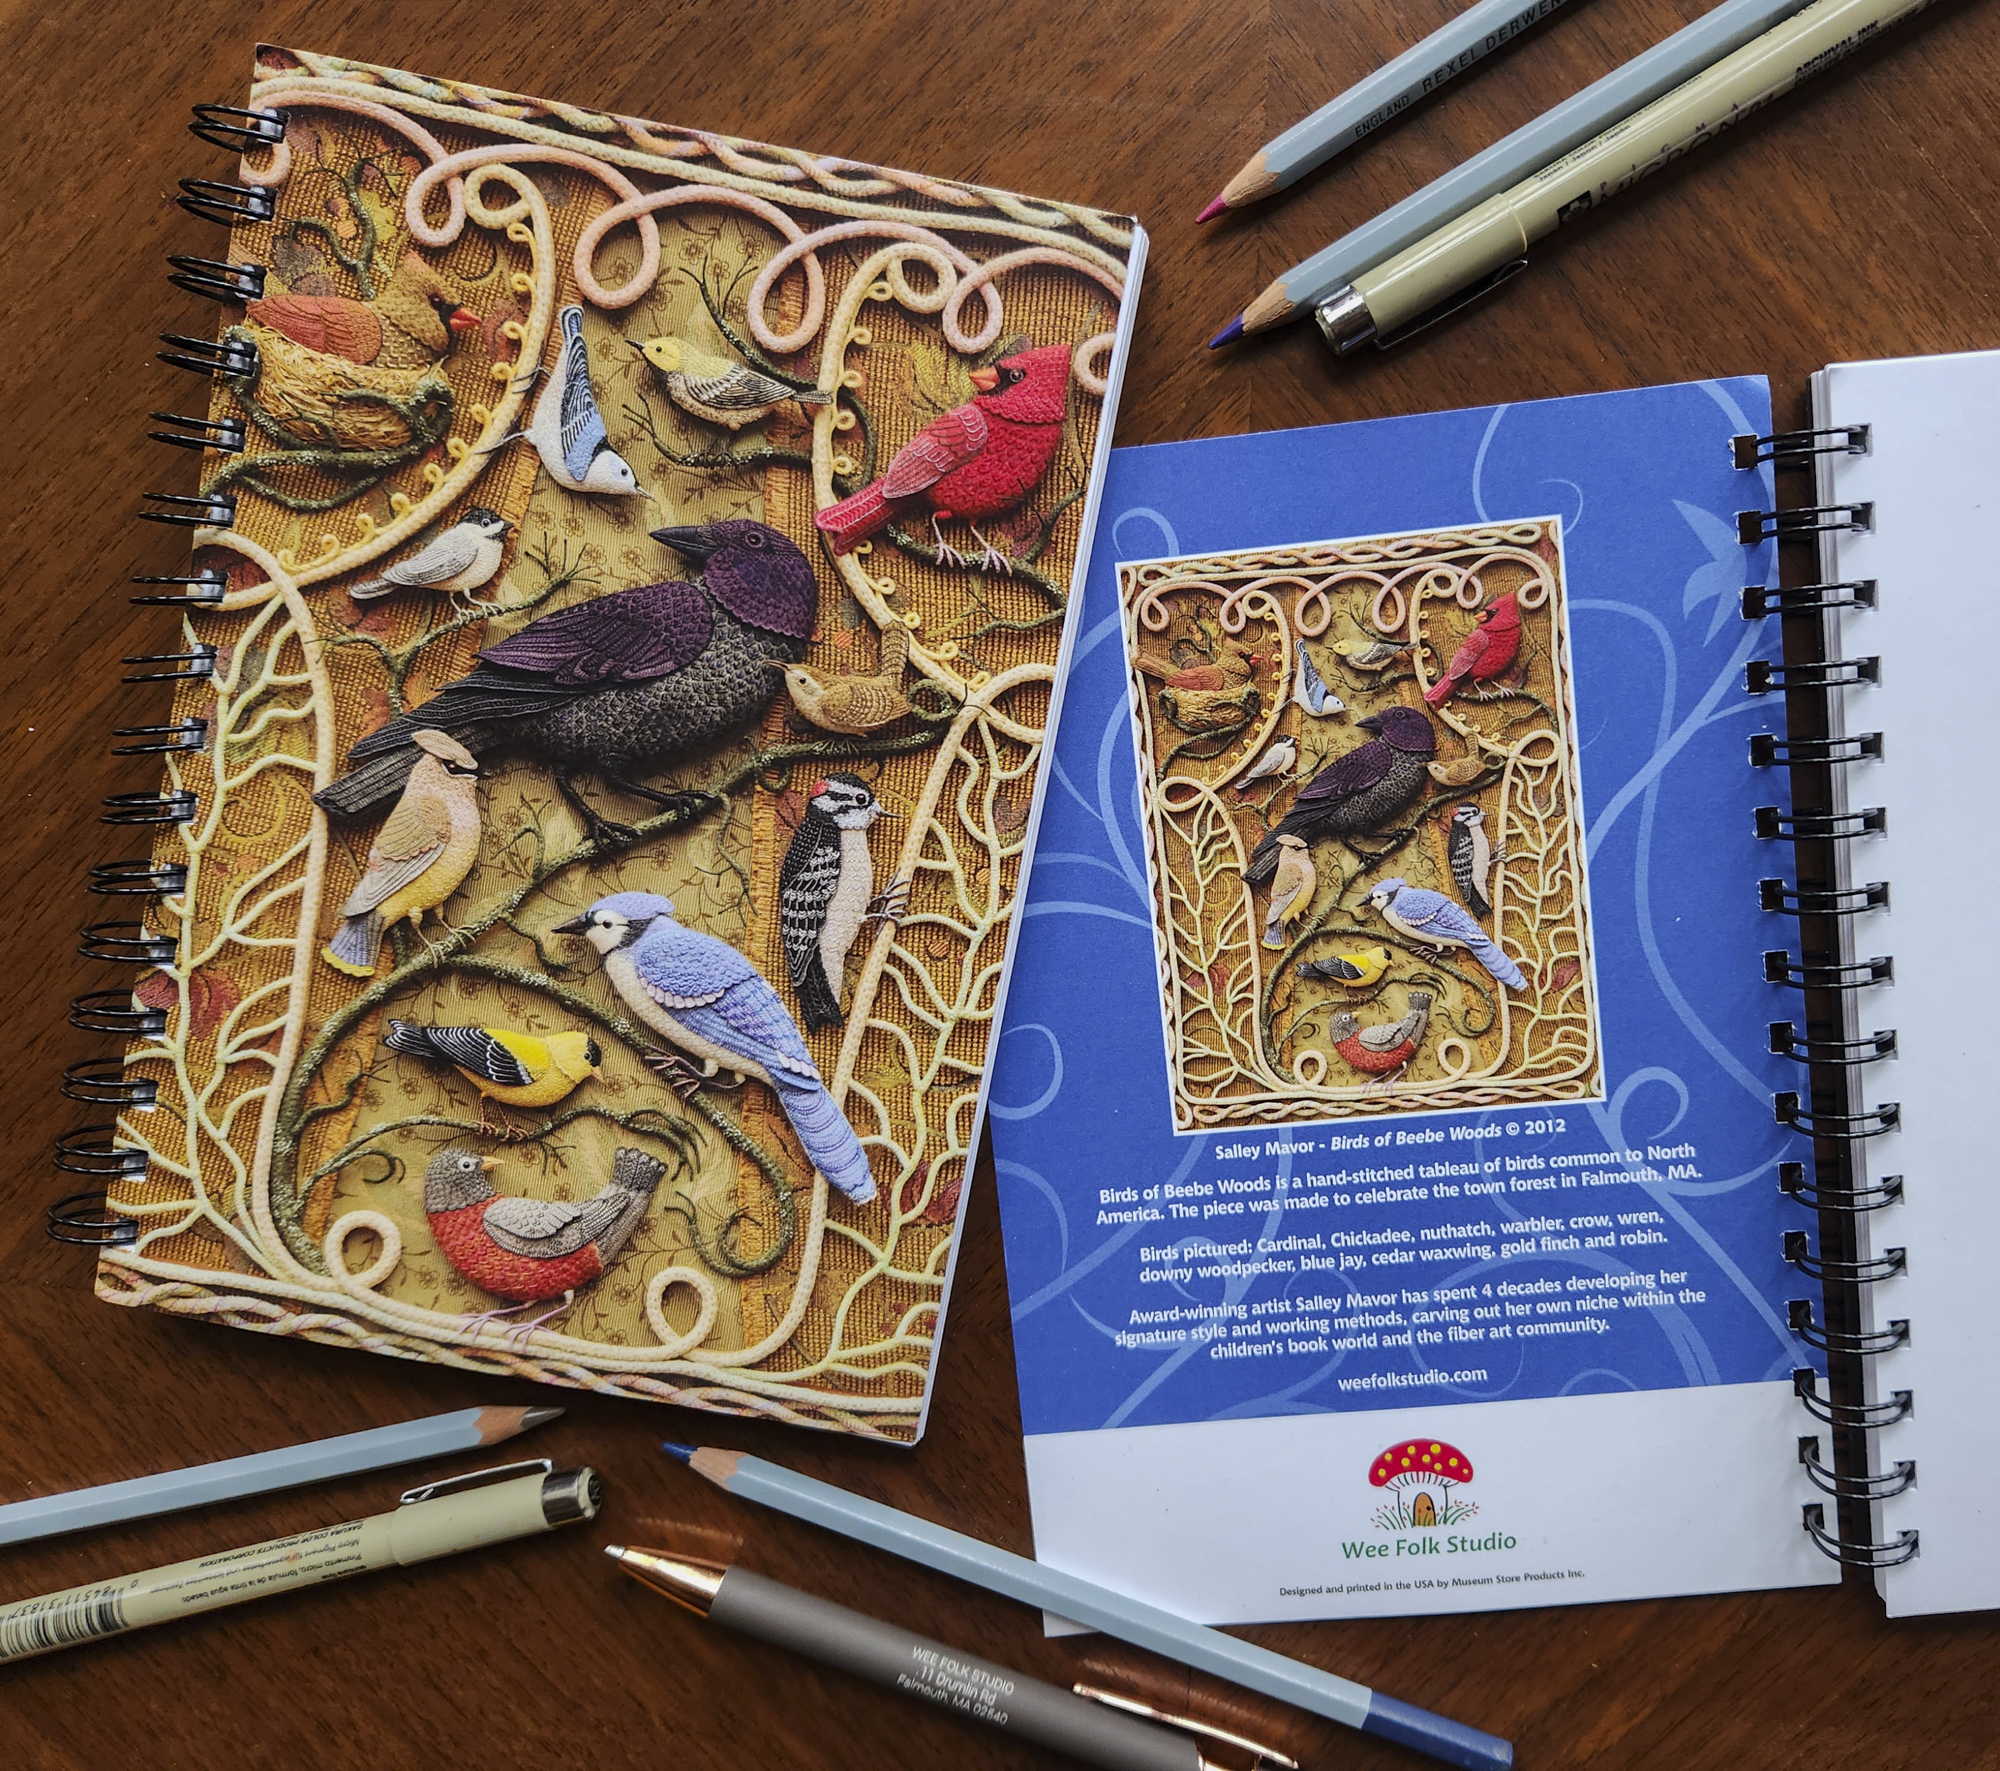
I’ve also added more items to my shop that feature my piece Birds of Beebe Woods, including a jigsaw puzzle and notebooks.

Birds of Beebe Woods Spiral Bound Notebook

Please come on over to my shop and have look.

Soft Cover Small Notebooks – Birds and Thread Heart
Posted in Uncategorized | 1 Reply

Harvest Time – part 3 (felt leaves)

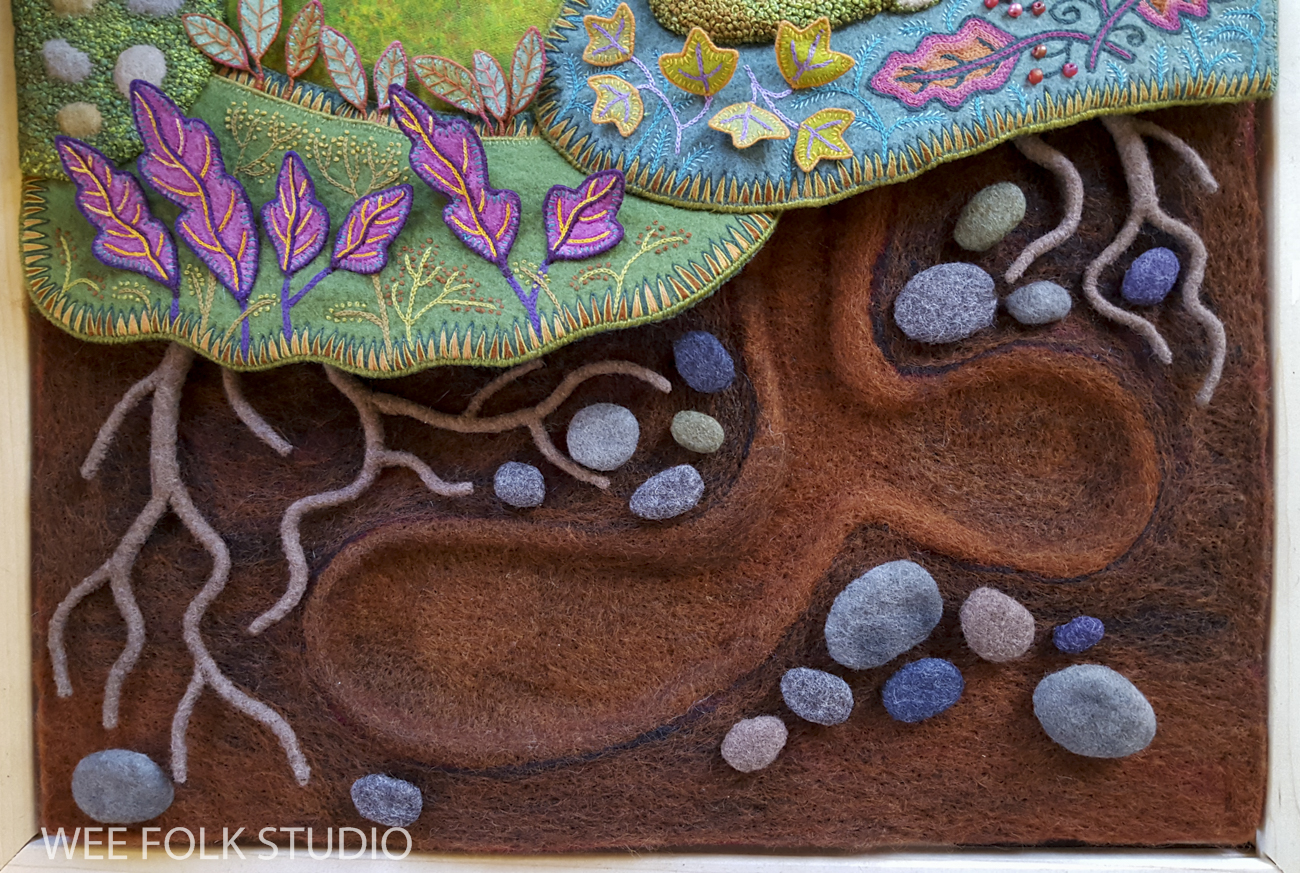
In Part 3 in the series about making Harvest Time, I share photos, commentary and a stitch-minute video about embellishing the felt leaves that appear on the ground-cover and bushes. Please note that when I use the word ‘felt”, I’m referring to the noun, not the verb. Felting is agitating and manipulating wool fleece fibers with a barbed needle or soapy water to create a felted surface. That’s how I made the brown soil in the underground part, which I’ll describe in a future post.

In the coming weeks and months, I will post more stories that focus on different aspects of making the fall scene, including the toad stool mushroom, wee folk figures, needle felted tunnels, roots, stones and foliage of all kinds. Part 1 featured moss making. Part 2 is about making the turkey tail mushroom.

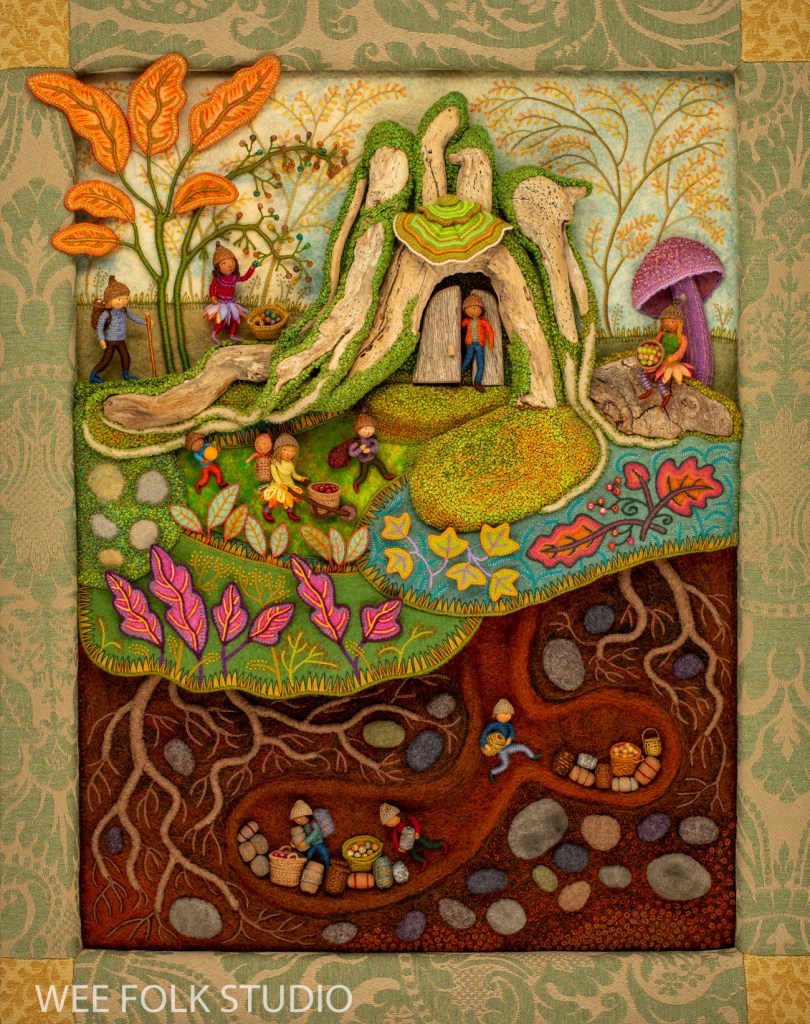
Harvest Time is the fall scene in a series of seasonal landscapes that capture the wonder and magic of the natural world, both real and imagined.
Harvest Time note cards and a jigsaw puzzle are available in my Etsy Shop.

When envisioning this piece, I wasn’t sure how it would come together, but that’s normal for me. I knew that I needed to figure out a way to clearly define the edge between above ground and below ground. This is the kind of thing I think about when doing busy work, like stitching hundreds of French knots. I’m always one step ahead, planning the next move. I ended up creating a kind of flap with two sections of felt “sod” that overlapped the underground tunnel to the root cellar.

Felt Leaves
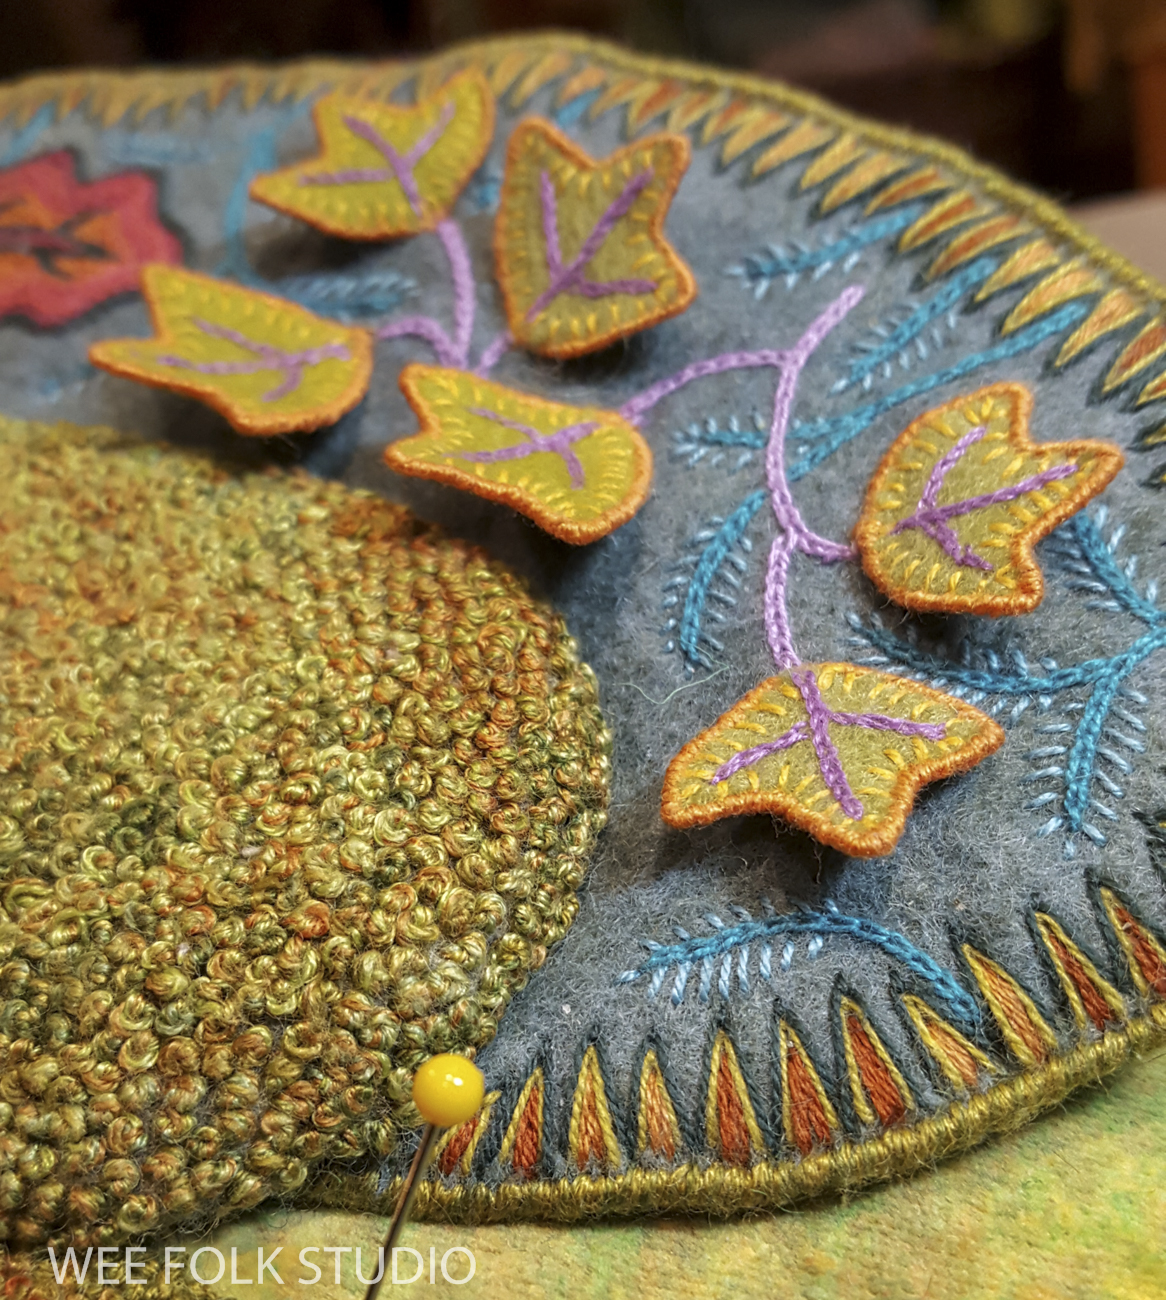
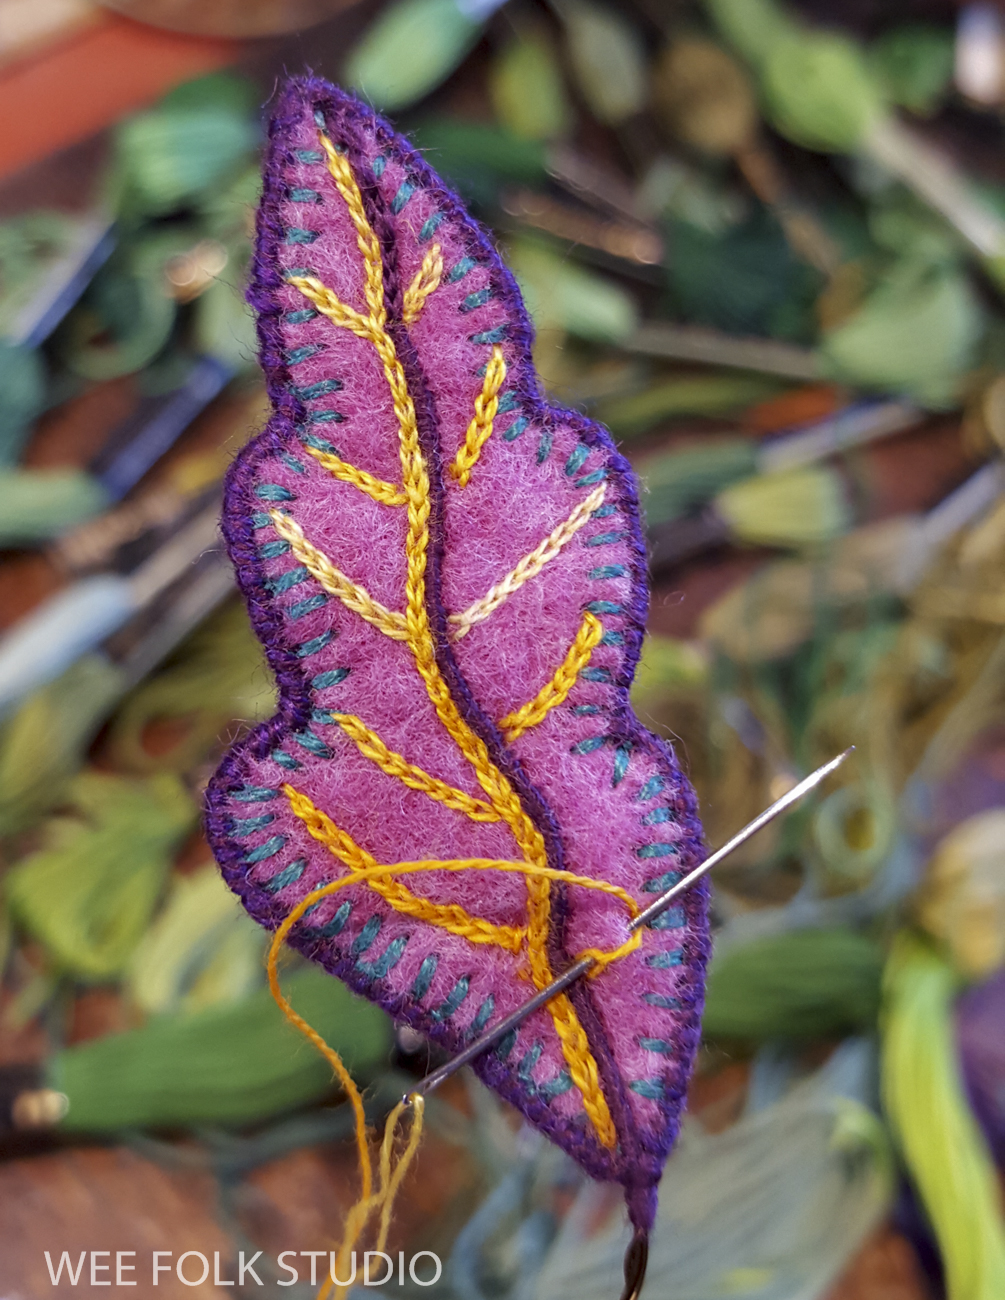
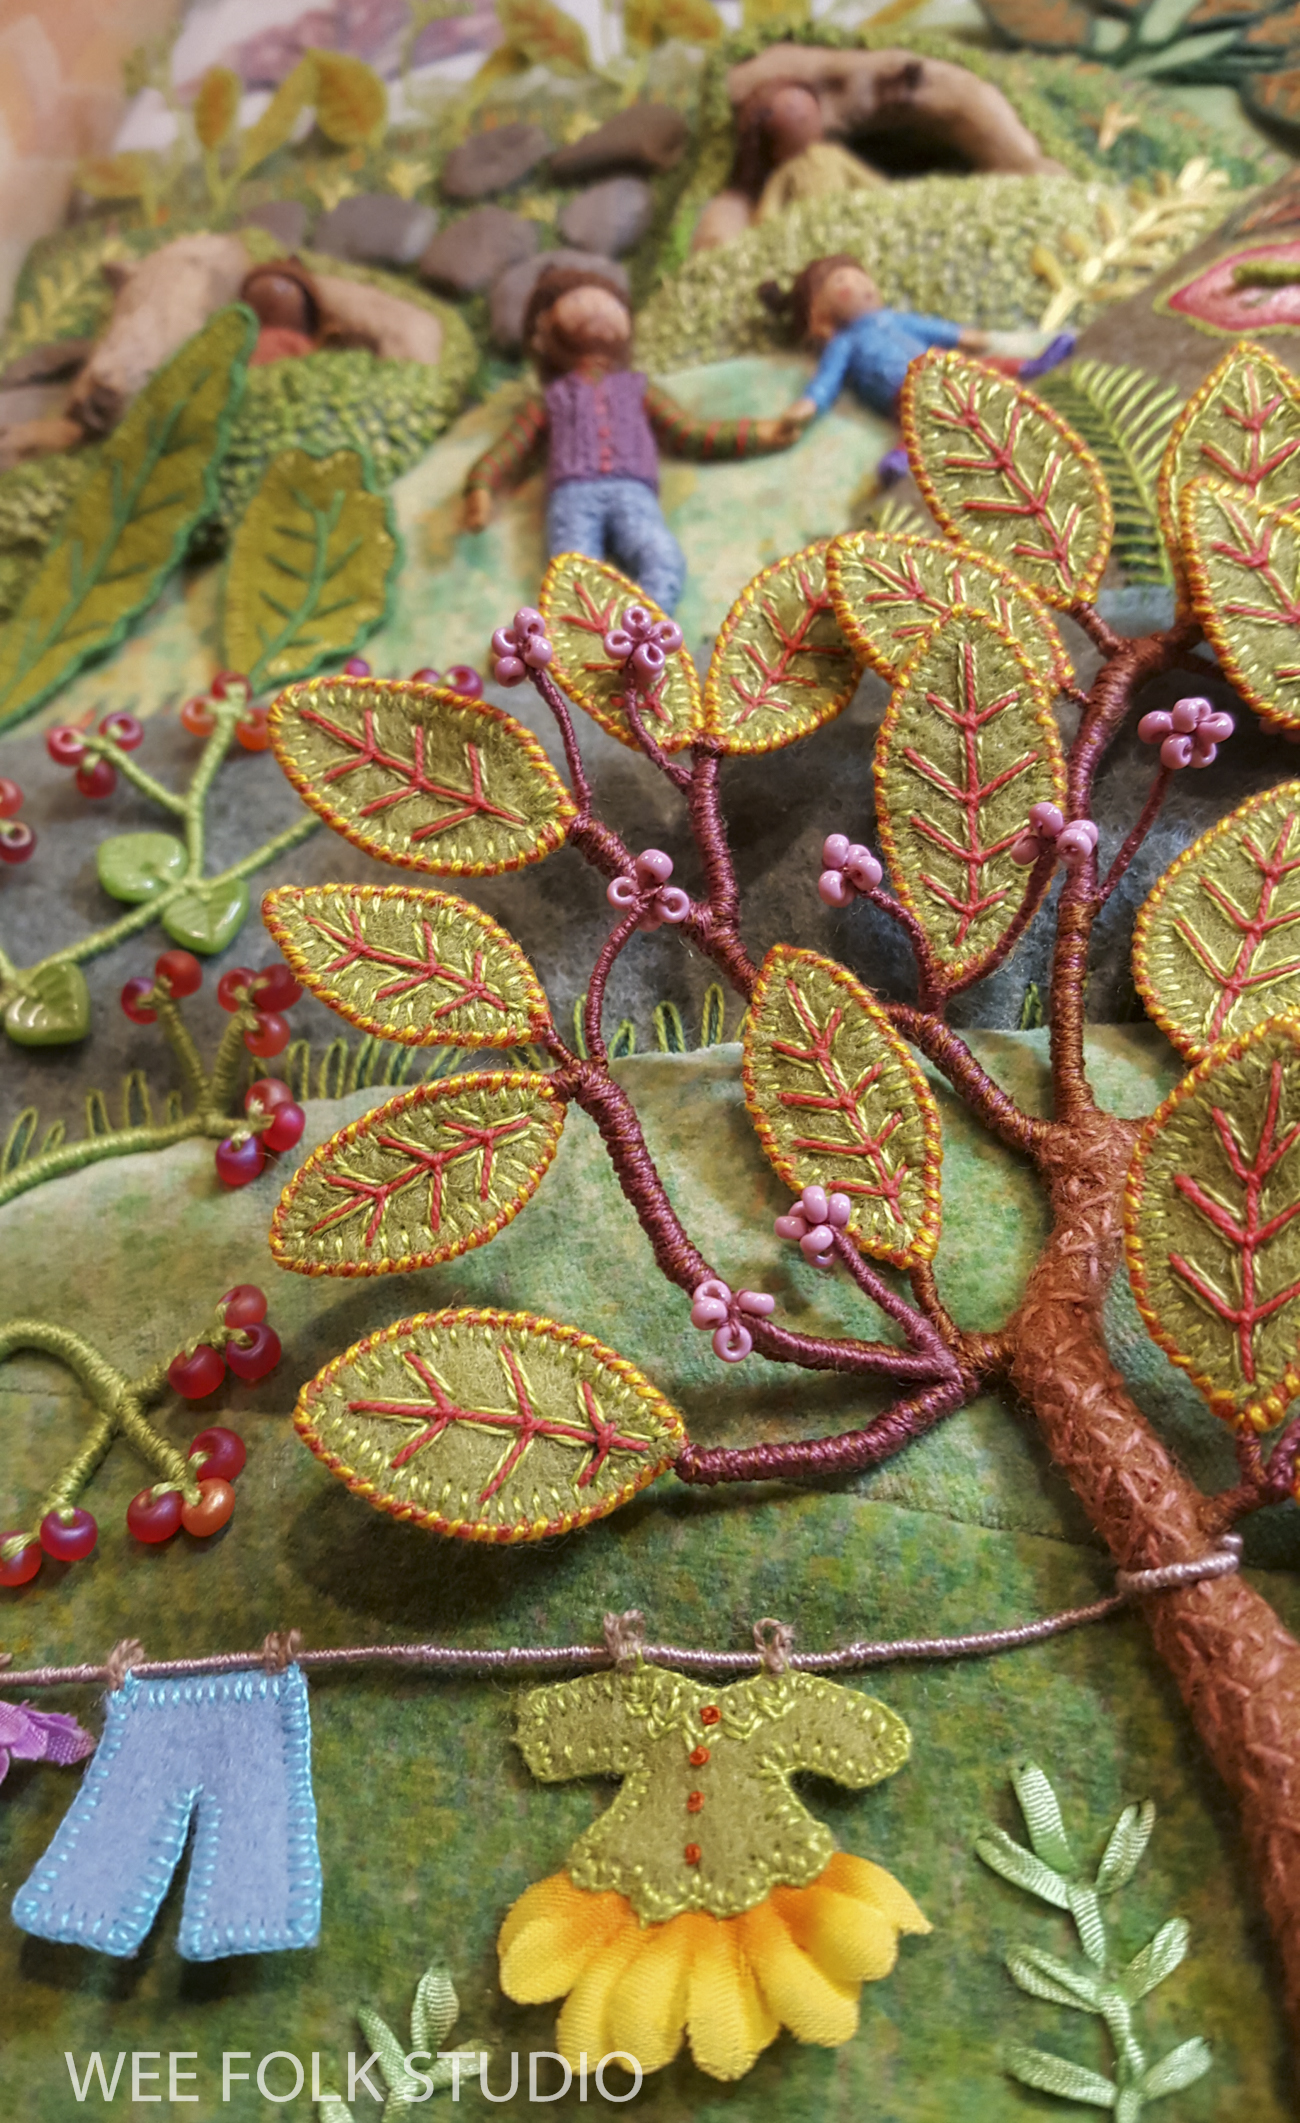
After edging the felt leaves with blanket stitches, I bent wire to match the shape and stitched it to the outside edge. Then I kept going around until the wire was completely covered with thread. I used single strands of floss to give it a fine finished look.

I wanted to fill the ground cover with an eye-catching array of textures, colors and shapes that would balance the composition of the whole piece. To help the leaves perk up and create shadows, I pushed the wire stems through a small hole to the back of the felt background, where it became a leverage point.

Because this scene has an element of fantasy, I felt free to incorporate bright unnatural looking shades.

I searched through my stash and found some variegated yellow embroidery floss to use for the chain stitched veins on these hot pink leaves.

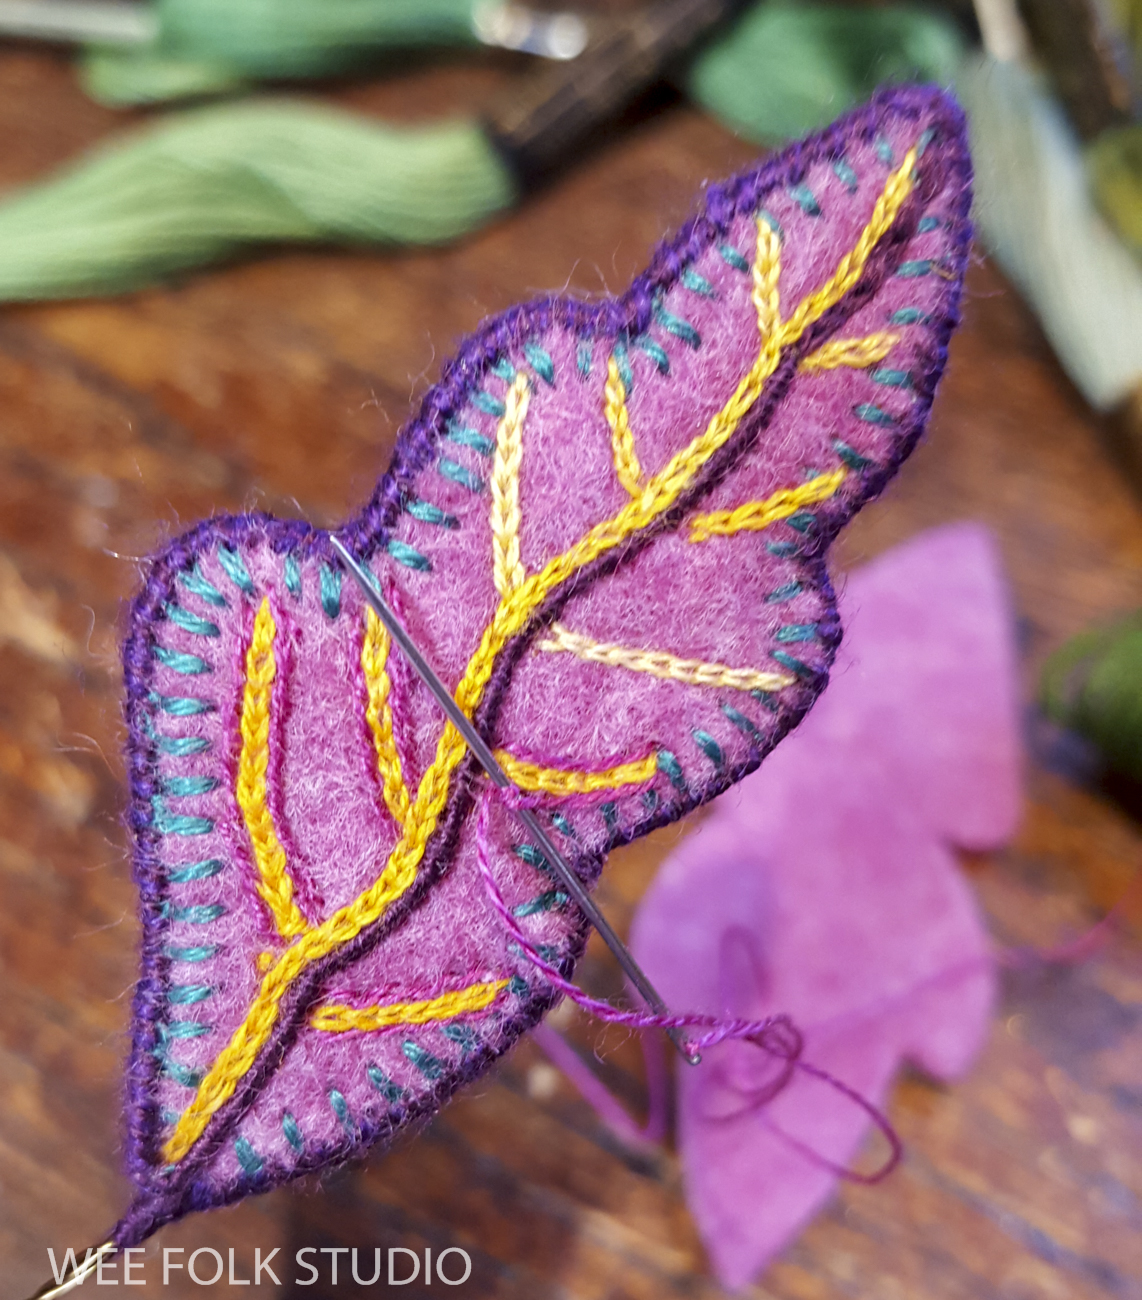
When I embellish with thread, I constantly think about how to enhance and articulate the form, without becoming too cluttered. For instance, adding a dark pink outline around the veins on this leaf help emphasize the lines.

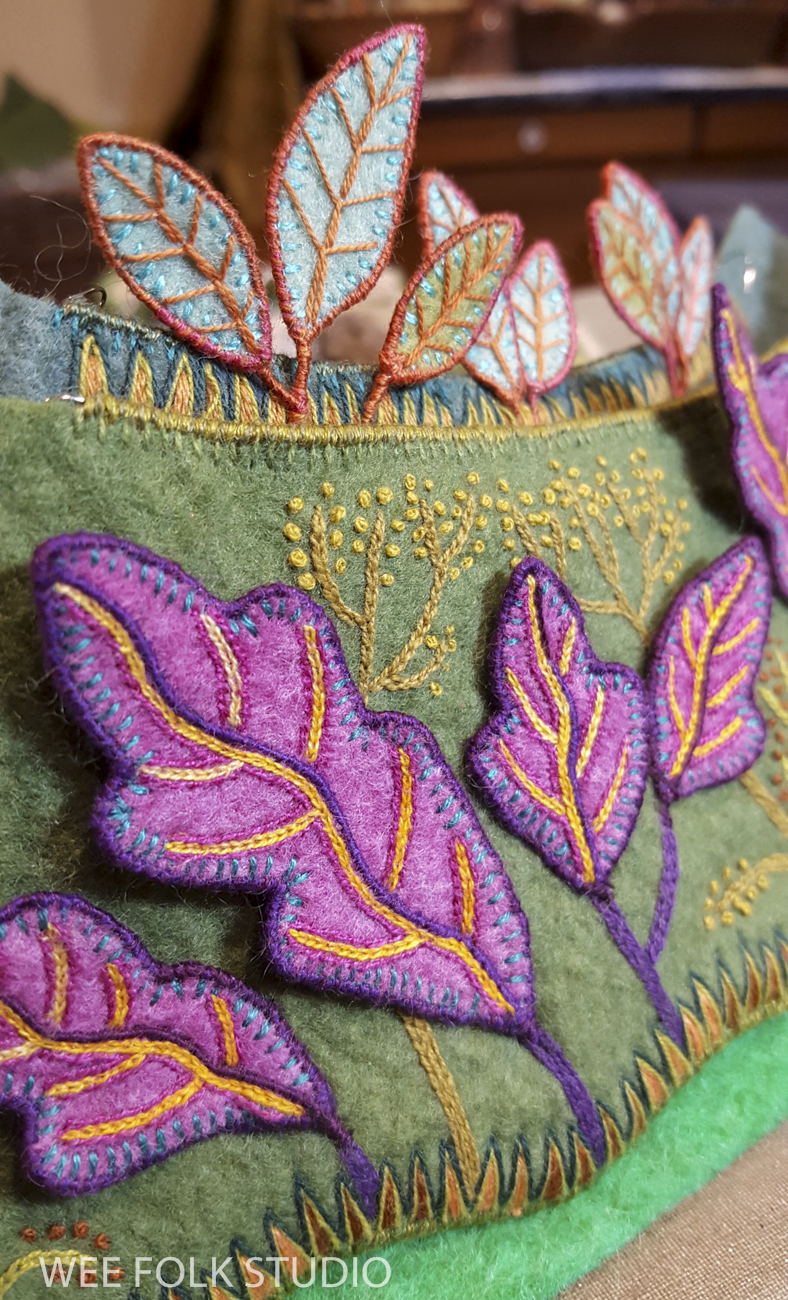
I hadn’t noticed it before, but now I see that the leaves are all made with complimentary colors. That way they pop out at you, both visually and physically!

This Stitch Minute video shows how I made a wire edged felt leaf.

As you can see, I constructed this background piece separately from the other parts of the scene. At the very end, after months of work, I assembled all of the pieces and stitched the sections onto one stretched fabric layer.

I also made larger orange leaves for the berry bush that’s growing next to the moss covered stump.

In future posts, I will focus on different aspects of making Harvest Time, including the toad stool mushroom, wee folk figures, needle felted tunnels, roots, stones and foliage of all kinds.
The overview introduces the Harvest Time piece.
Part 1 features moss making.
Part 2 is about making the turkey tail mushroom.
Part 3 shows the construction of felt leaves.
Part 4 gives a peek at embroidering the plants.
Part 5 is about making the toadstool mushroom
Part 6 shows the process of making the underground

looking back at 2022

I started 2022 in hibernation mode, sitting in front of the wood stove, with work in hand. Twelve months later, I’m back in the same spot. The only difference is what I’m working on. The year brought many joys, both personally and professionally, with a family wedding, a major retrospective exhibition and the continuation of the touring exhibit, Bedtime Stitches. Rob and I filmed a bunch of Stitch Minute videos and I introduced 2 jigsaw puzzles of my artwork.

Here on Cape Cod, which has a median age of 54, I’m surrounded by retirees who always seem to be on the move – driving cross-country in their camper van or disappearing south for the winter. To my husband Rob’s dismay, escaping to a warmer climate or living on the road does not appeal to a serious homebody like me, so we stay put. I’m grateful that he understands how uprooting me from my studio, with all of my supplies and other stuff close at hand, would make me miserable to live with.

Rob in the garden

I’ll never retire, but I am slowing down a bit and making fewer work-related commitments. Instead of spending every spare moment stitching new pieces and organizing exhibits, I’m giving equal time to the people in my life and my garden.

Garden Bounty, including hundreds of zinnias for son Ian’s wedding.

Professionally speaking, the highlight of the year was last summer’s retrospective exhibition, What a Relief at the Brick Store Museum in Kennebunk, Maine.

What a Relief, Brick Store Museum, Kennebunk, Maine

Four galleries on the Museum’s first floor displayed over 150 works that spanned 45 years of my career. I’m touched that so many of you went out of your way to see my work in person. It makes me feel that all of the effort that went into this exhibit was worth it! You can see photos and videos of the exhibition in these 2 posts:
What a Relief installation
What a Relief – first 6 weeks

Last summer I gave this Zoom talk about my artwork. The video includes an interview, slide show and Q&A section.

Personally, the best part of 2022 was our son Ian and his wife Liz’s wedding. I wrote about making their cake topper here.

I also made a wedding cake topper for our good family friend Sam and his wife Louisa, which you can see here.

Bedtime Stitches, the touring exhibit of original artwork for my picture book MY BED continued to travel to different parts of the country.
Bedtime Stitches in Lincoln, Nebraska
Bedtime Stitches in Kennebunk, ME
Bedtime Stitches opens in Minnesota

In 2023, Bedtime Stitches will be going to the Pacific Northwest Quilt & Fiber Art Museum (Feb. 1 – April 30), the Southeastern Quilt and Textile Museum (June – mid-Sept.) and the Southern Vermont Arts Center (Sept. 30, 2023 – Jan. 7, 2024).

Two years ago, I began a series of seasonal landscapes that capture the wonder and magic of the natural world, both real and imagined. The first was a winter scene, Frosty Morning, which I shared in 2021. This past year, I wrote a multi-part series about making the spring scene, Mossy Glen. Overview, Part 1 (moss), Part 2 (cherry trees), Part 3 (stone walls), Part 4 (forsythia), Part 5 (leaves), Part 6 (stitches leaves), Part 7 (violets and berries), Part 8 (wee folk).

Mossy Glen

I also began sharing a series of posts about making the fall scene, Harvest Time, which will continue into 2023.
Harvest Time – overview
Harvest Time – Part 1 (mossy tree trunk)
Harvest Time – Part 2 (turkey tail mushroom)

Harvest Time

I’m working on a summer scene now, which I’ll share after it’s finished next year. As always, you can follow along and see its progress in real time on Facebook and/or Instagram. 

Despite Rob’s skepticism, the Stitch Minute videos have been a big hit. He couldn’t understand why anyone would want to watch me stitching for a whole boring minute. You can see them all on the Videos page.

Stitch Minute – moss

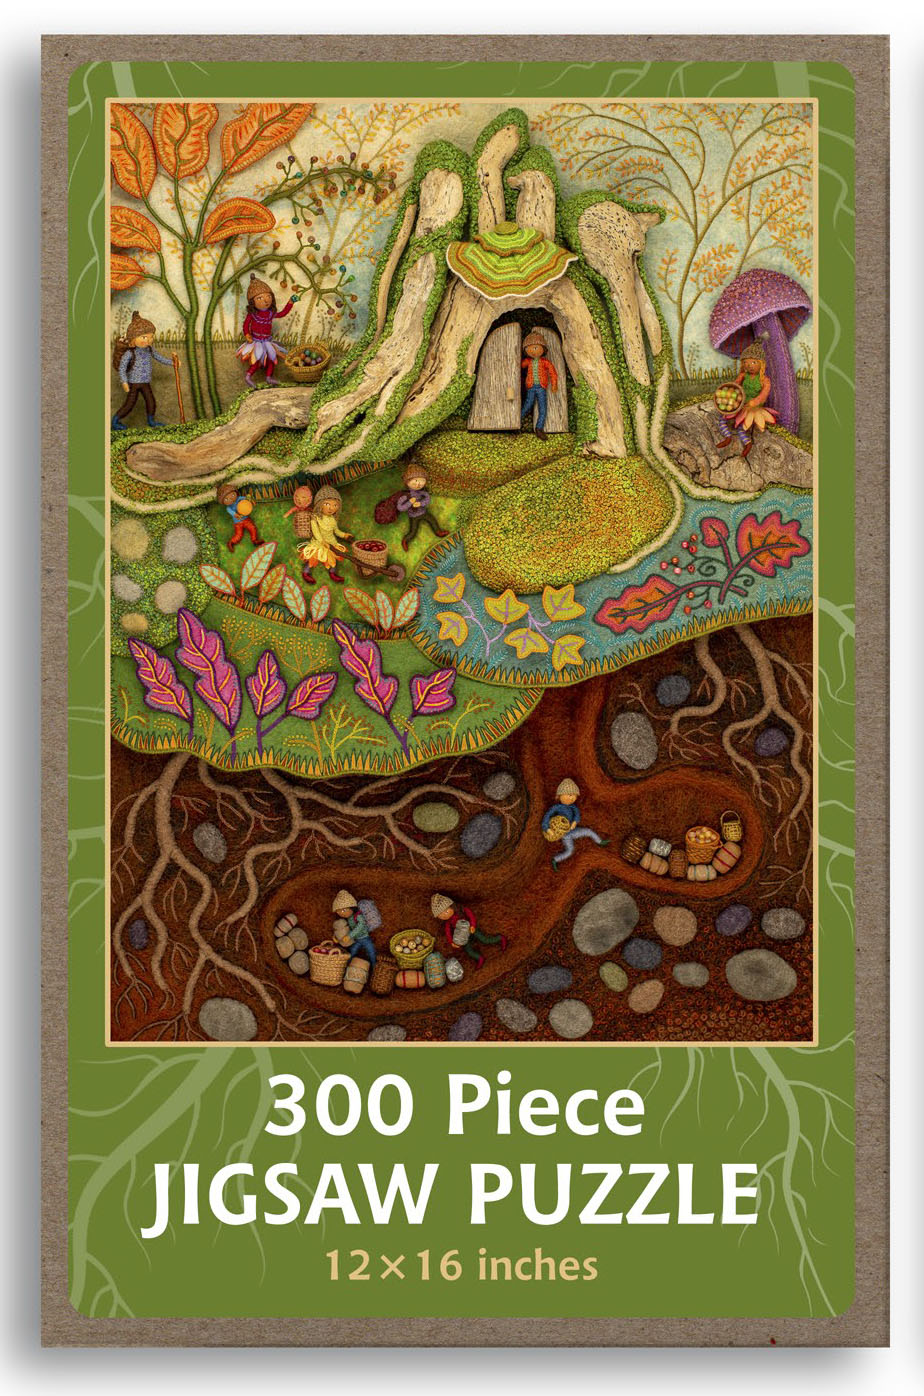
After years of searching for a high quality product and an economically feasible manufacturing arrangement, I finally decided to test the market just before Christmas with two puzzle designs; Birds of Beebe Woods and Harvest Time. The puzzles are available in my shop here.

Is there a particular piece of mine that you would like to see in puzzle form? I’m planning to have more puzzles made and would love to hear your suggestions. Illustrations from my books MY BED and Pocketful of Posies can’t be reproduced, but other stand alone pieces are a possibility, if I have hires photos. Please leave a comment with your suggestions.

Many of you have requested 500 or 1000 piece puzzles, but for a small operation like mine, manufacturing large puzzles isn’t economical, nor do I have the storage space. So I compromised on the 300 piece version.

To keep up with new posts, please subscribe to this blog. Your contact info will not be sold or shared. If you’d like to see more frequent photos tracking the projects in my studio, please follow me on Facebook and/or Instagram.

Hey! You were already subscribed.

Holiday cards and more

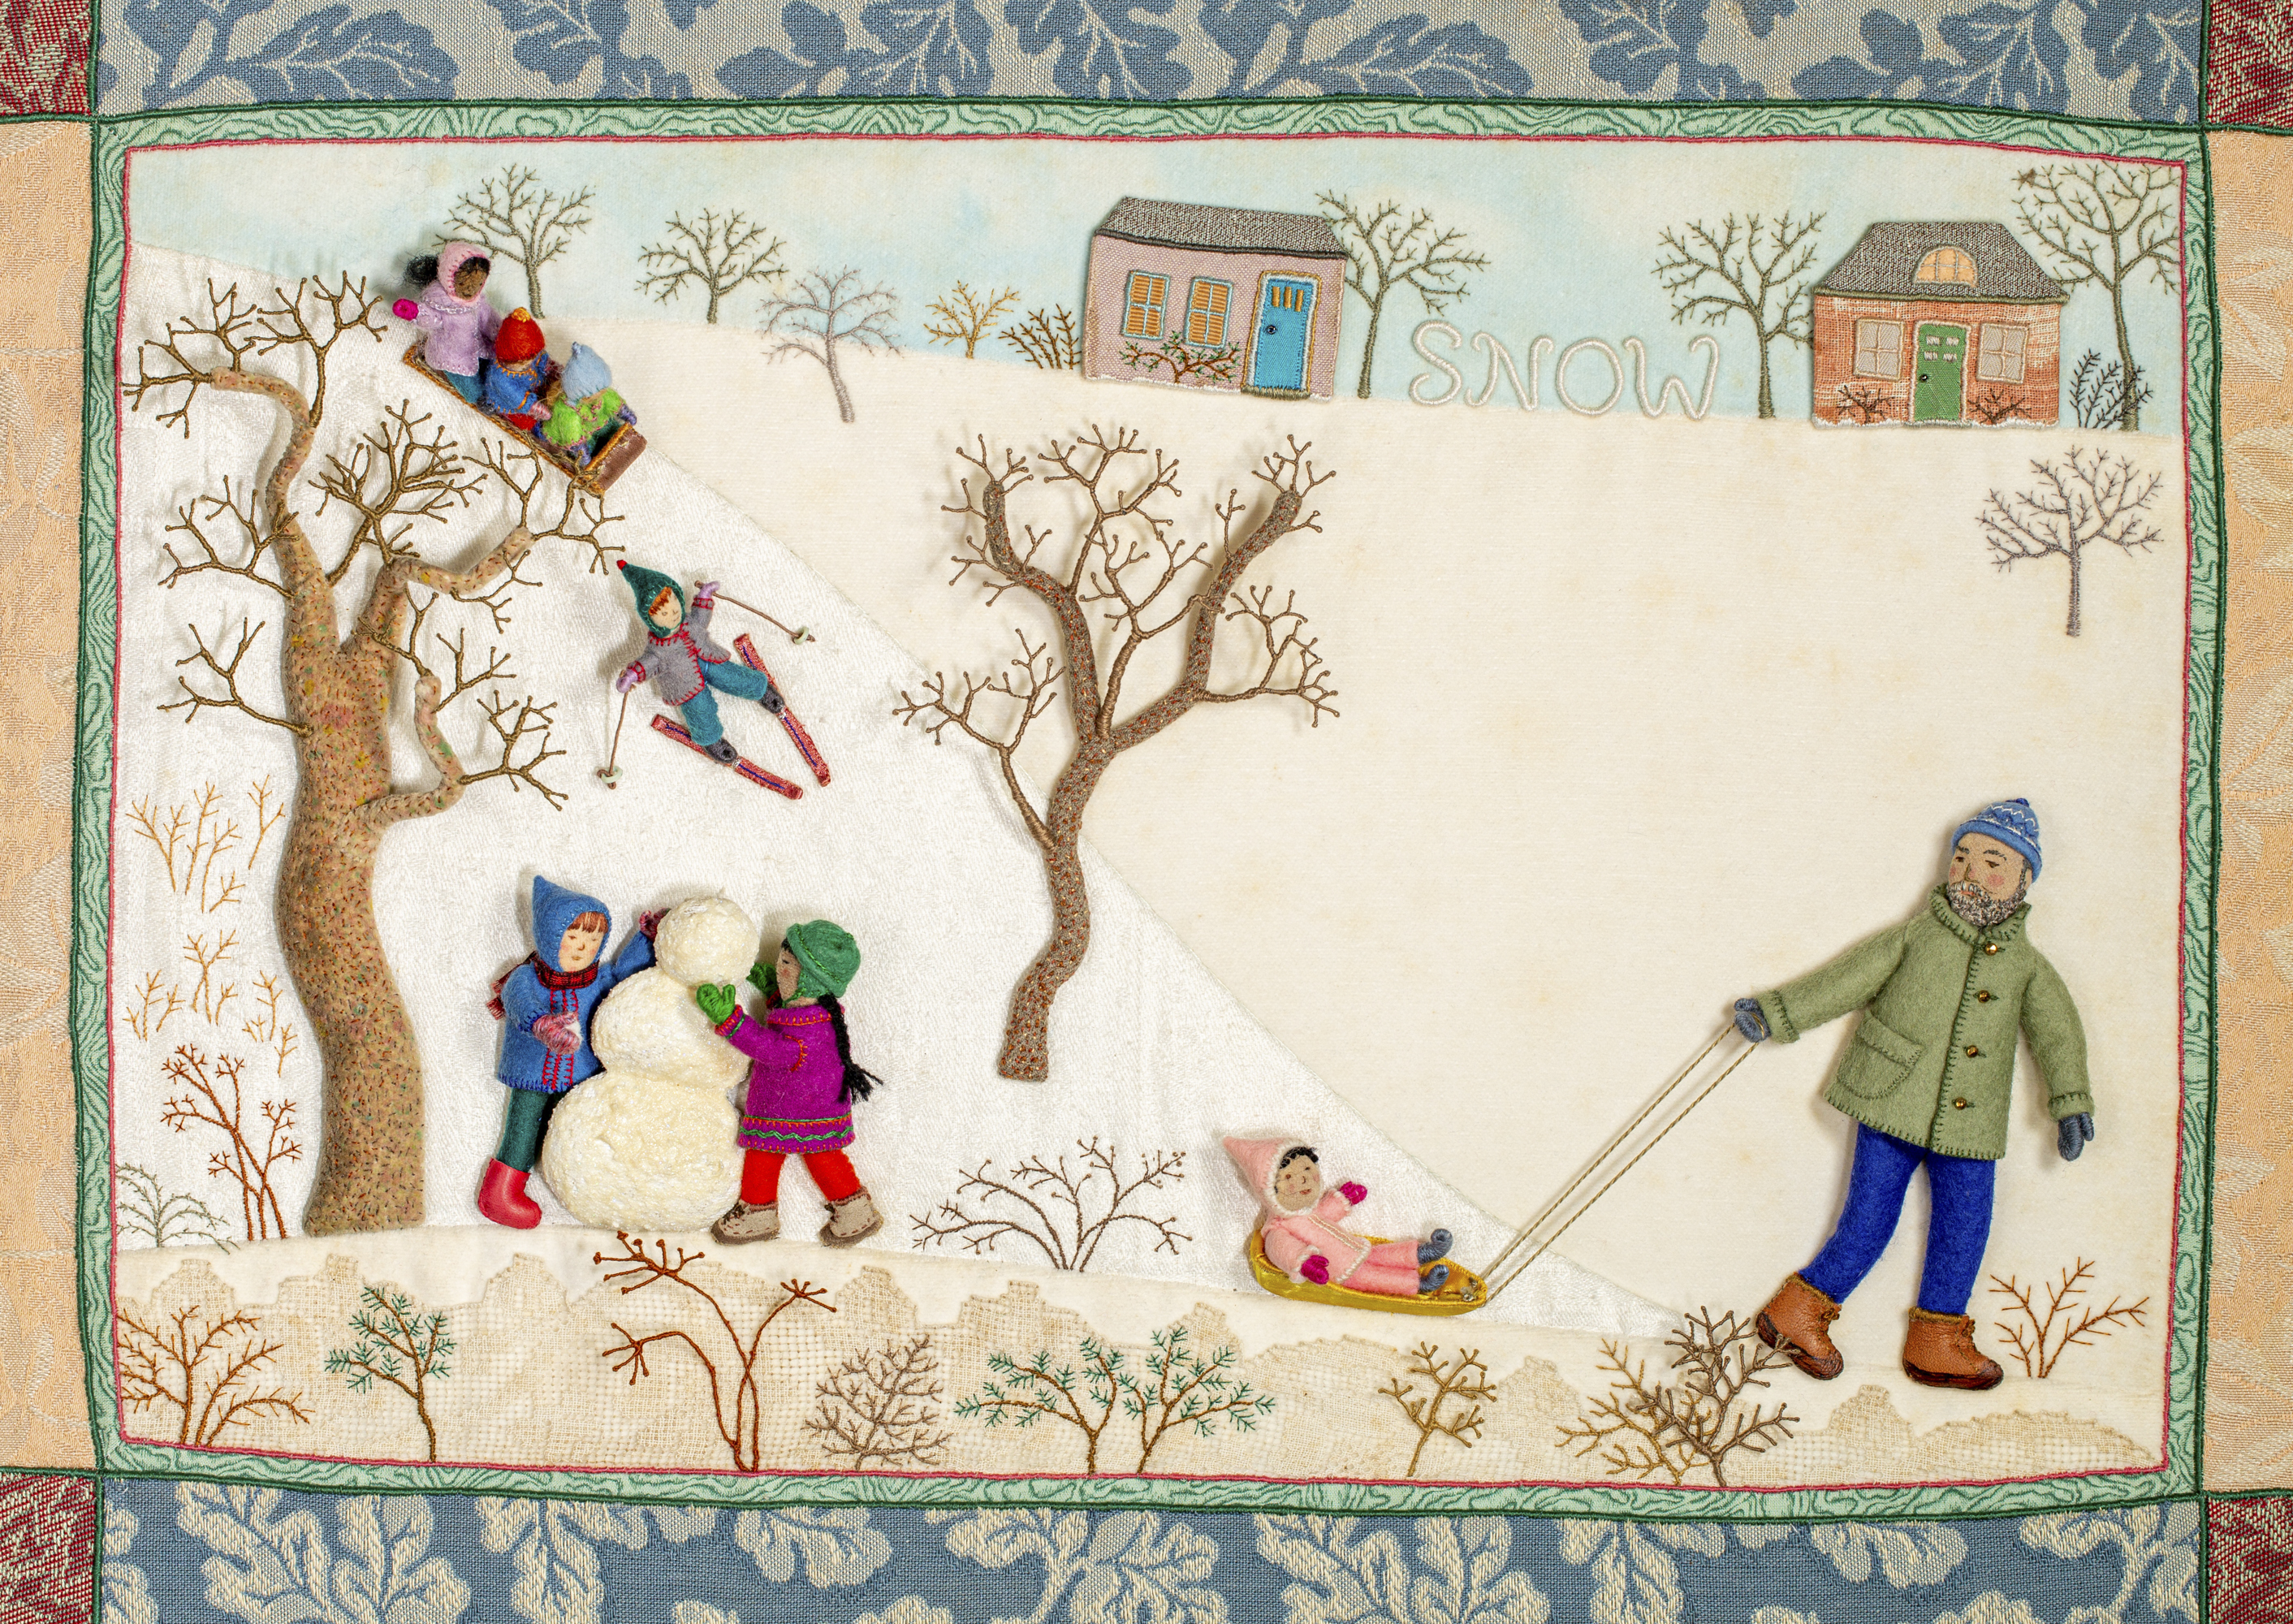
SNOW note card

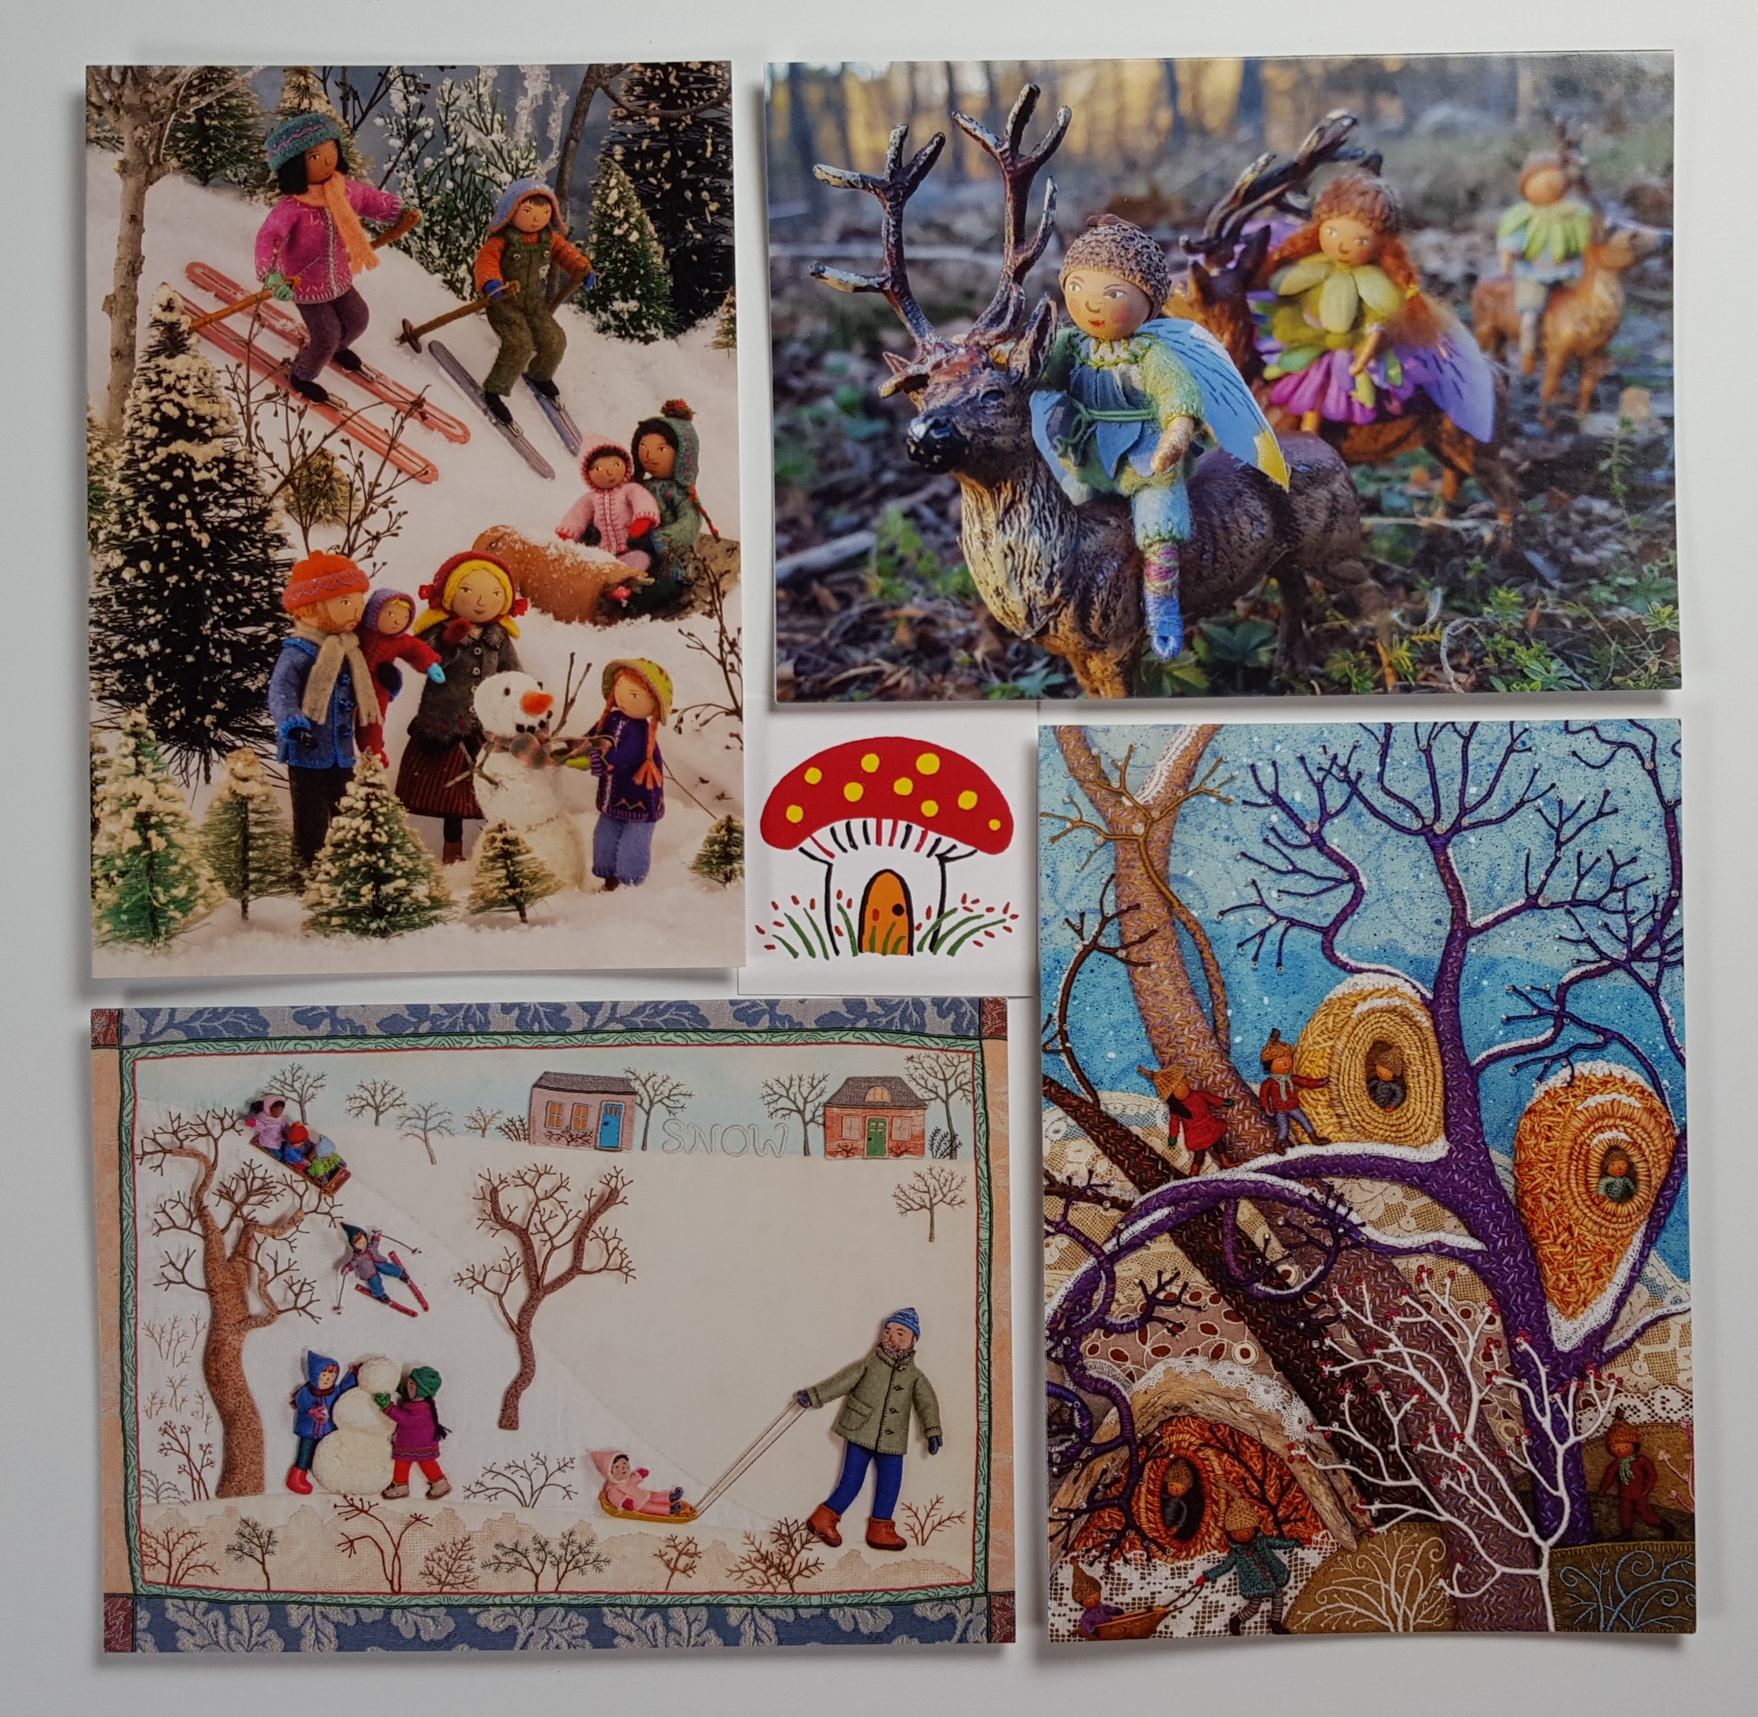
Are you looking for a cheerful, wintry Holiday card to send to family and friends this year? I just added this snow scene to the line of note cards in my Etsy Shop. Snow was an illustration in my 1997 picture book, You and Me: Poems of Friendship. We recently rephotographed the original fabric relief piece after borrowing it from the person who bought it years ago. The image just called out to be made into a card! It and other cards in my shop are sold in packs of 4 and 8. Snow is also part of the Winter Sampler, which includes 4 different winter scenes populated with warmly dressed wee folk characters happily playing in the snow and fairies riding reindeer.

Winter Sampler note cards

Winter Play features sample figures from my how-to book Felt Wee Folk: New Adventures. To see how the scene was photographed, visit this post.

Winter Play note card
Sample dolls in the how-to book Felt Wee Folk: New Adventures

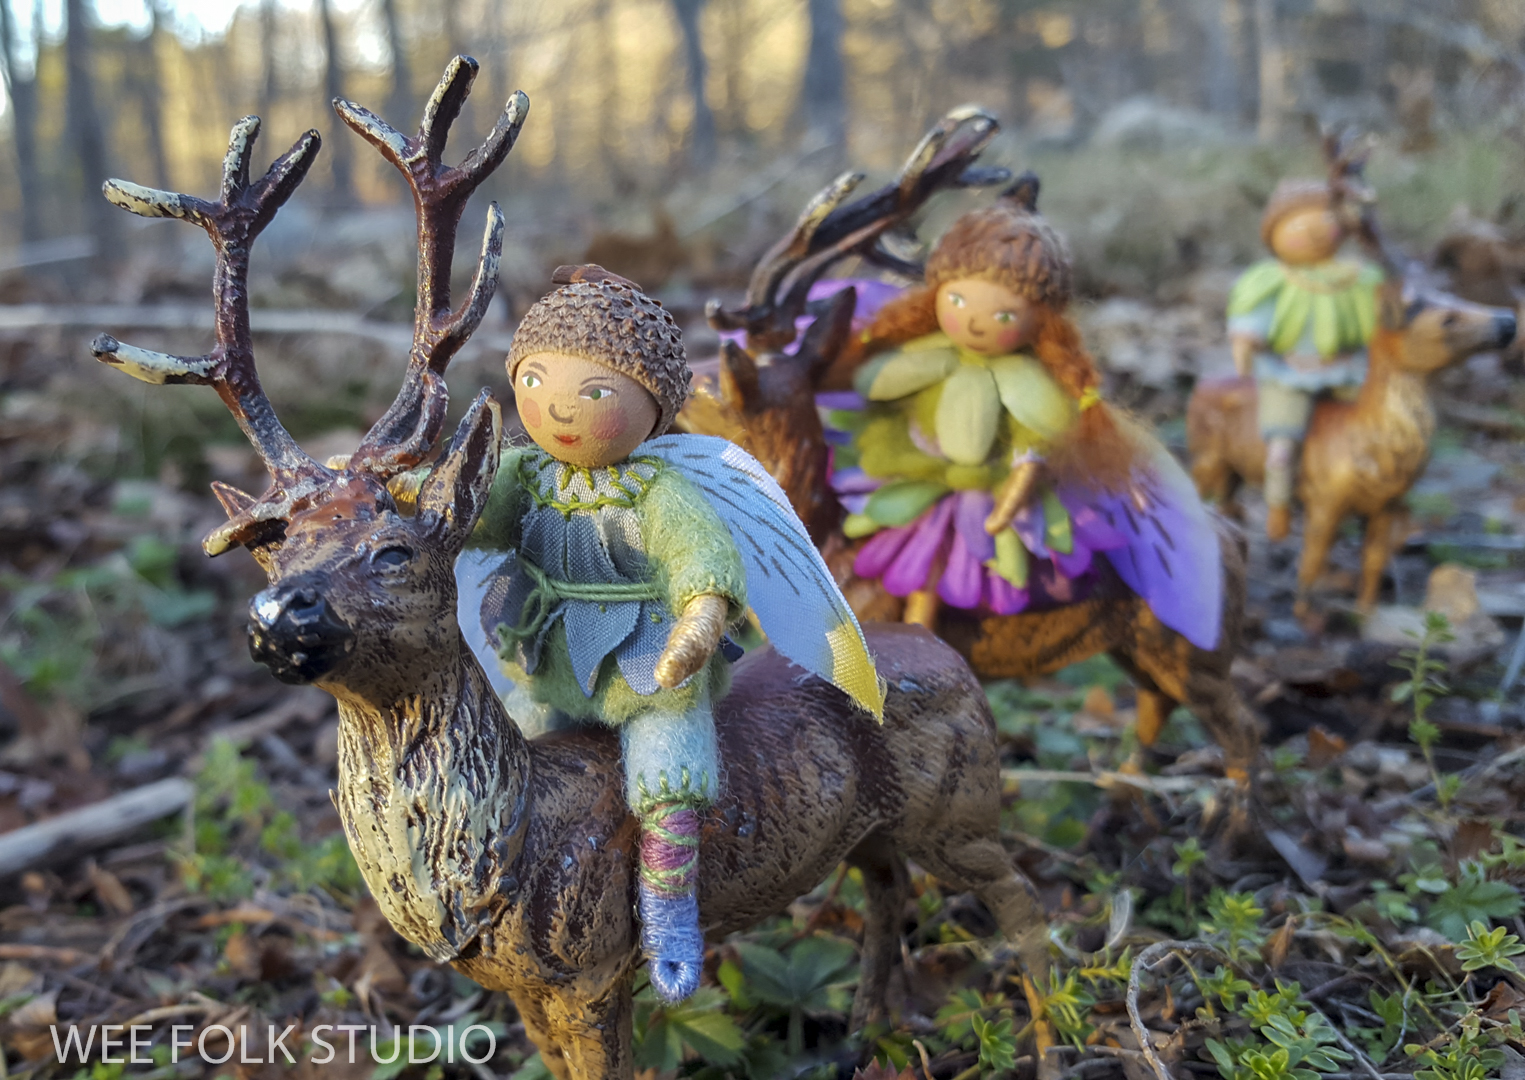
One winter afternoon, when the light was low, I got down on the ground and took this photograph of a group of fairies going for a Reindeer Ride.

Reindeer Ride note card

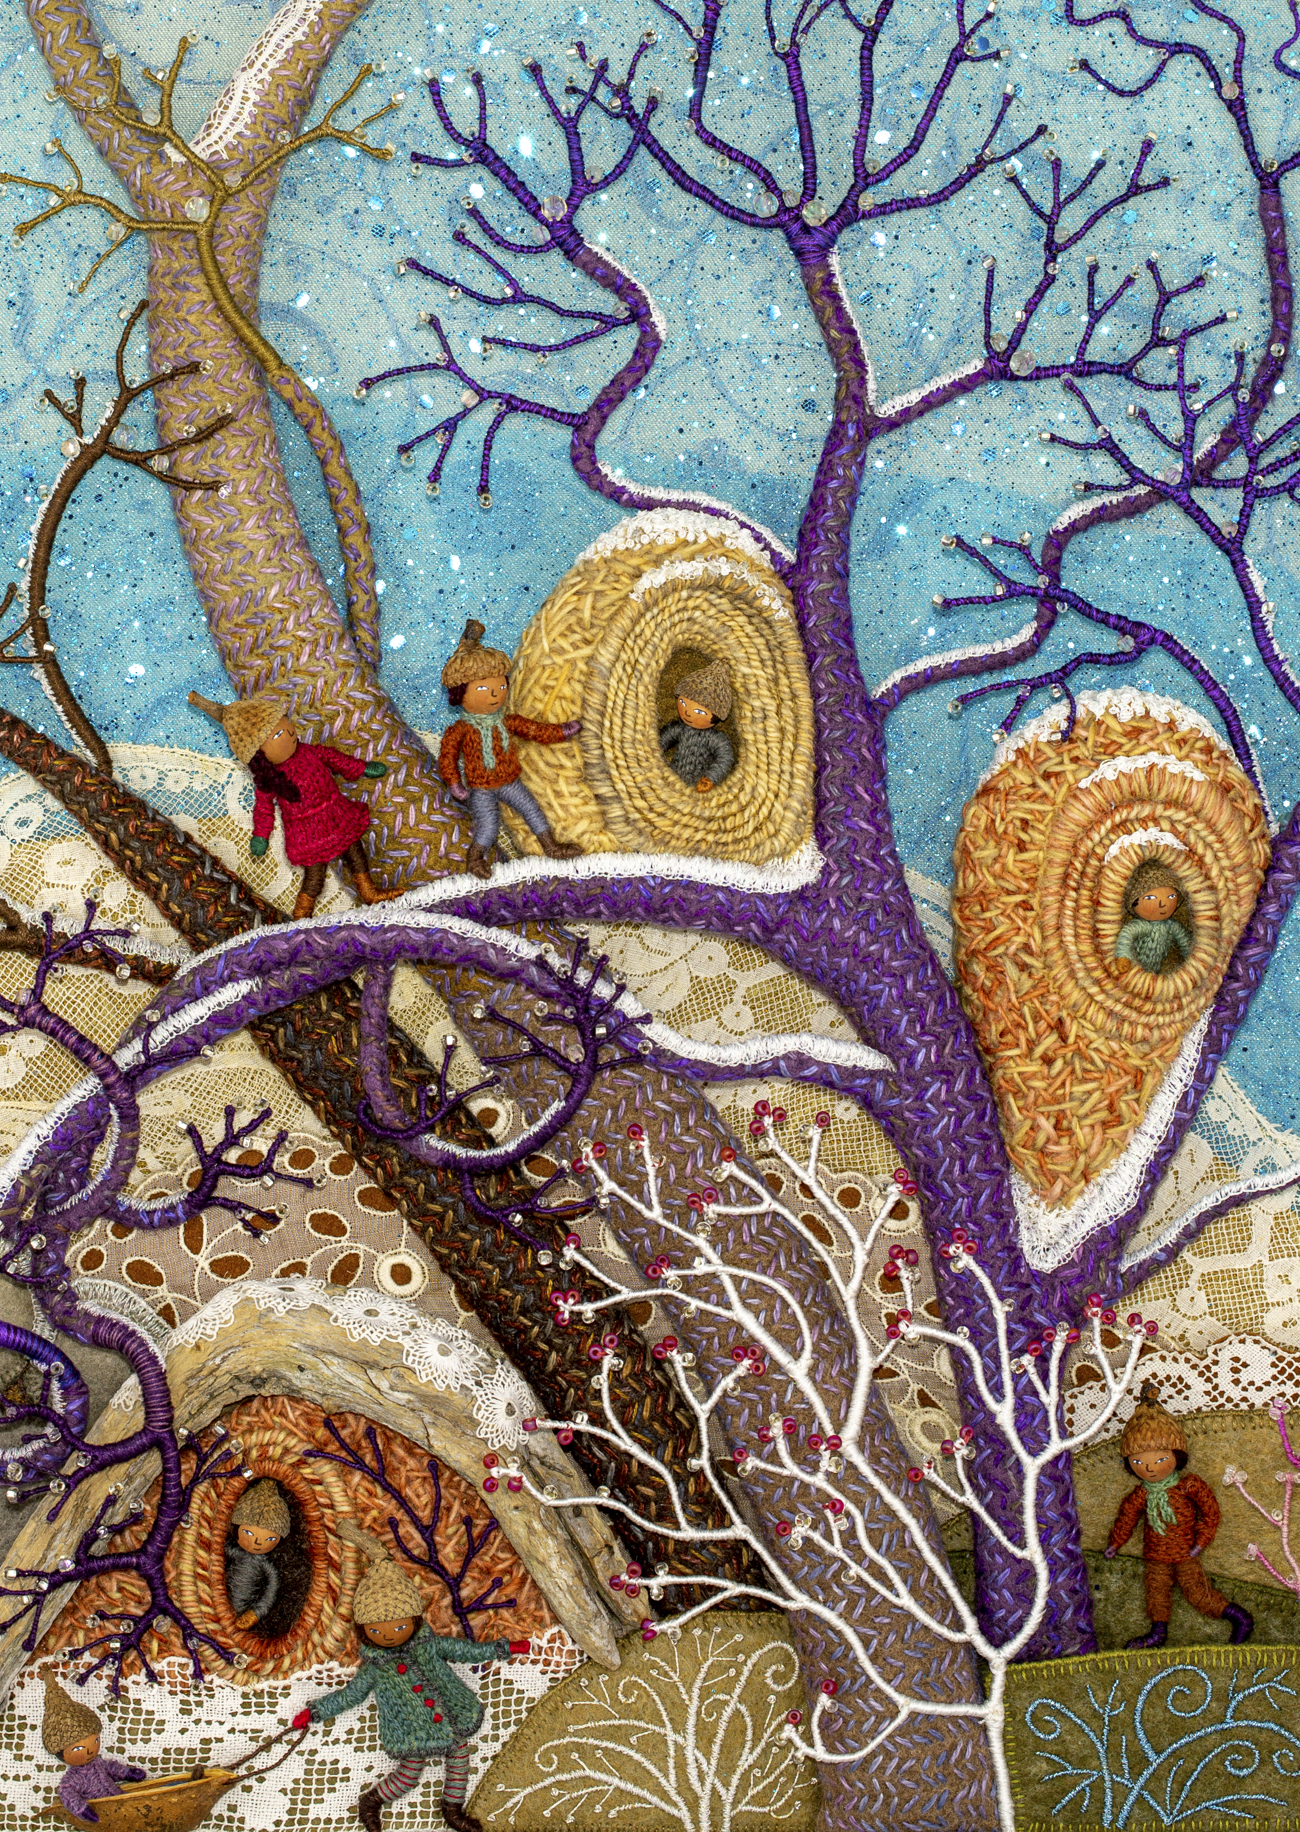
Frosty Morning was inspired by what I saw early one January morning, when every bare branch sparkled with ice crystals. Learn more about this piece and the series of seasonal landscapes I’ve been working on for the past couple of years here.

Frosty Morning note card

I also offer a mixed pack of 3 different scenes in the series of seasonal landscapes that capture the wonder and magic of the natural world, both real and imagined.

Since so many of you’ve enjoyed my recipe for Cheese Straws over the years, I decided to make a card with the cozy kitchen scene on the front and the recipe for making cheese straws printed on the back. That way, it’s a greeting card (or Holiday card) and recipe card all in one. Get an inside peek at making the family in the doll house kitchen here.

Cheese Straws note cards (recipe on back)

Enter my Etsy Shop here. Cards are sold in packs of 4 and 8 with free shipping. In addition to a large selection of note cards, my shop sells other printed reproductions of my embroidered artwork in autographed books, posters, playing cards and jigsaw puzzles.

A note to my international fans: I’m really sorry, but due to the high cost of shipping overseas and unreasonable delays, I now only ship within the US and to Canada.

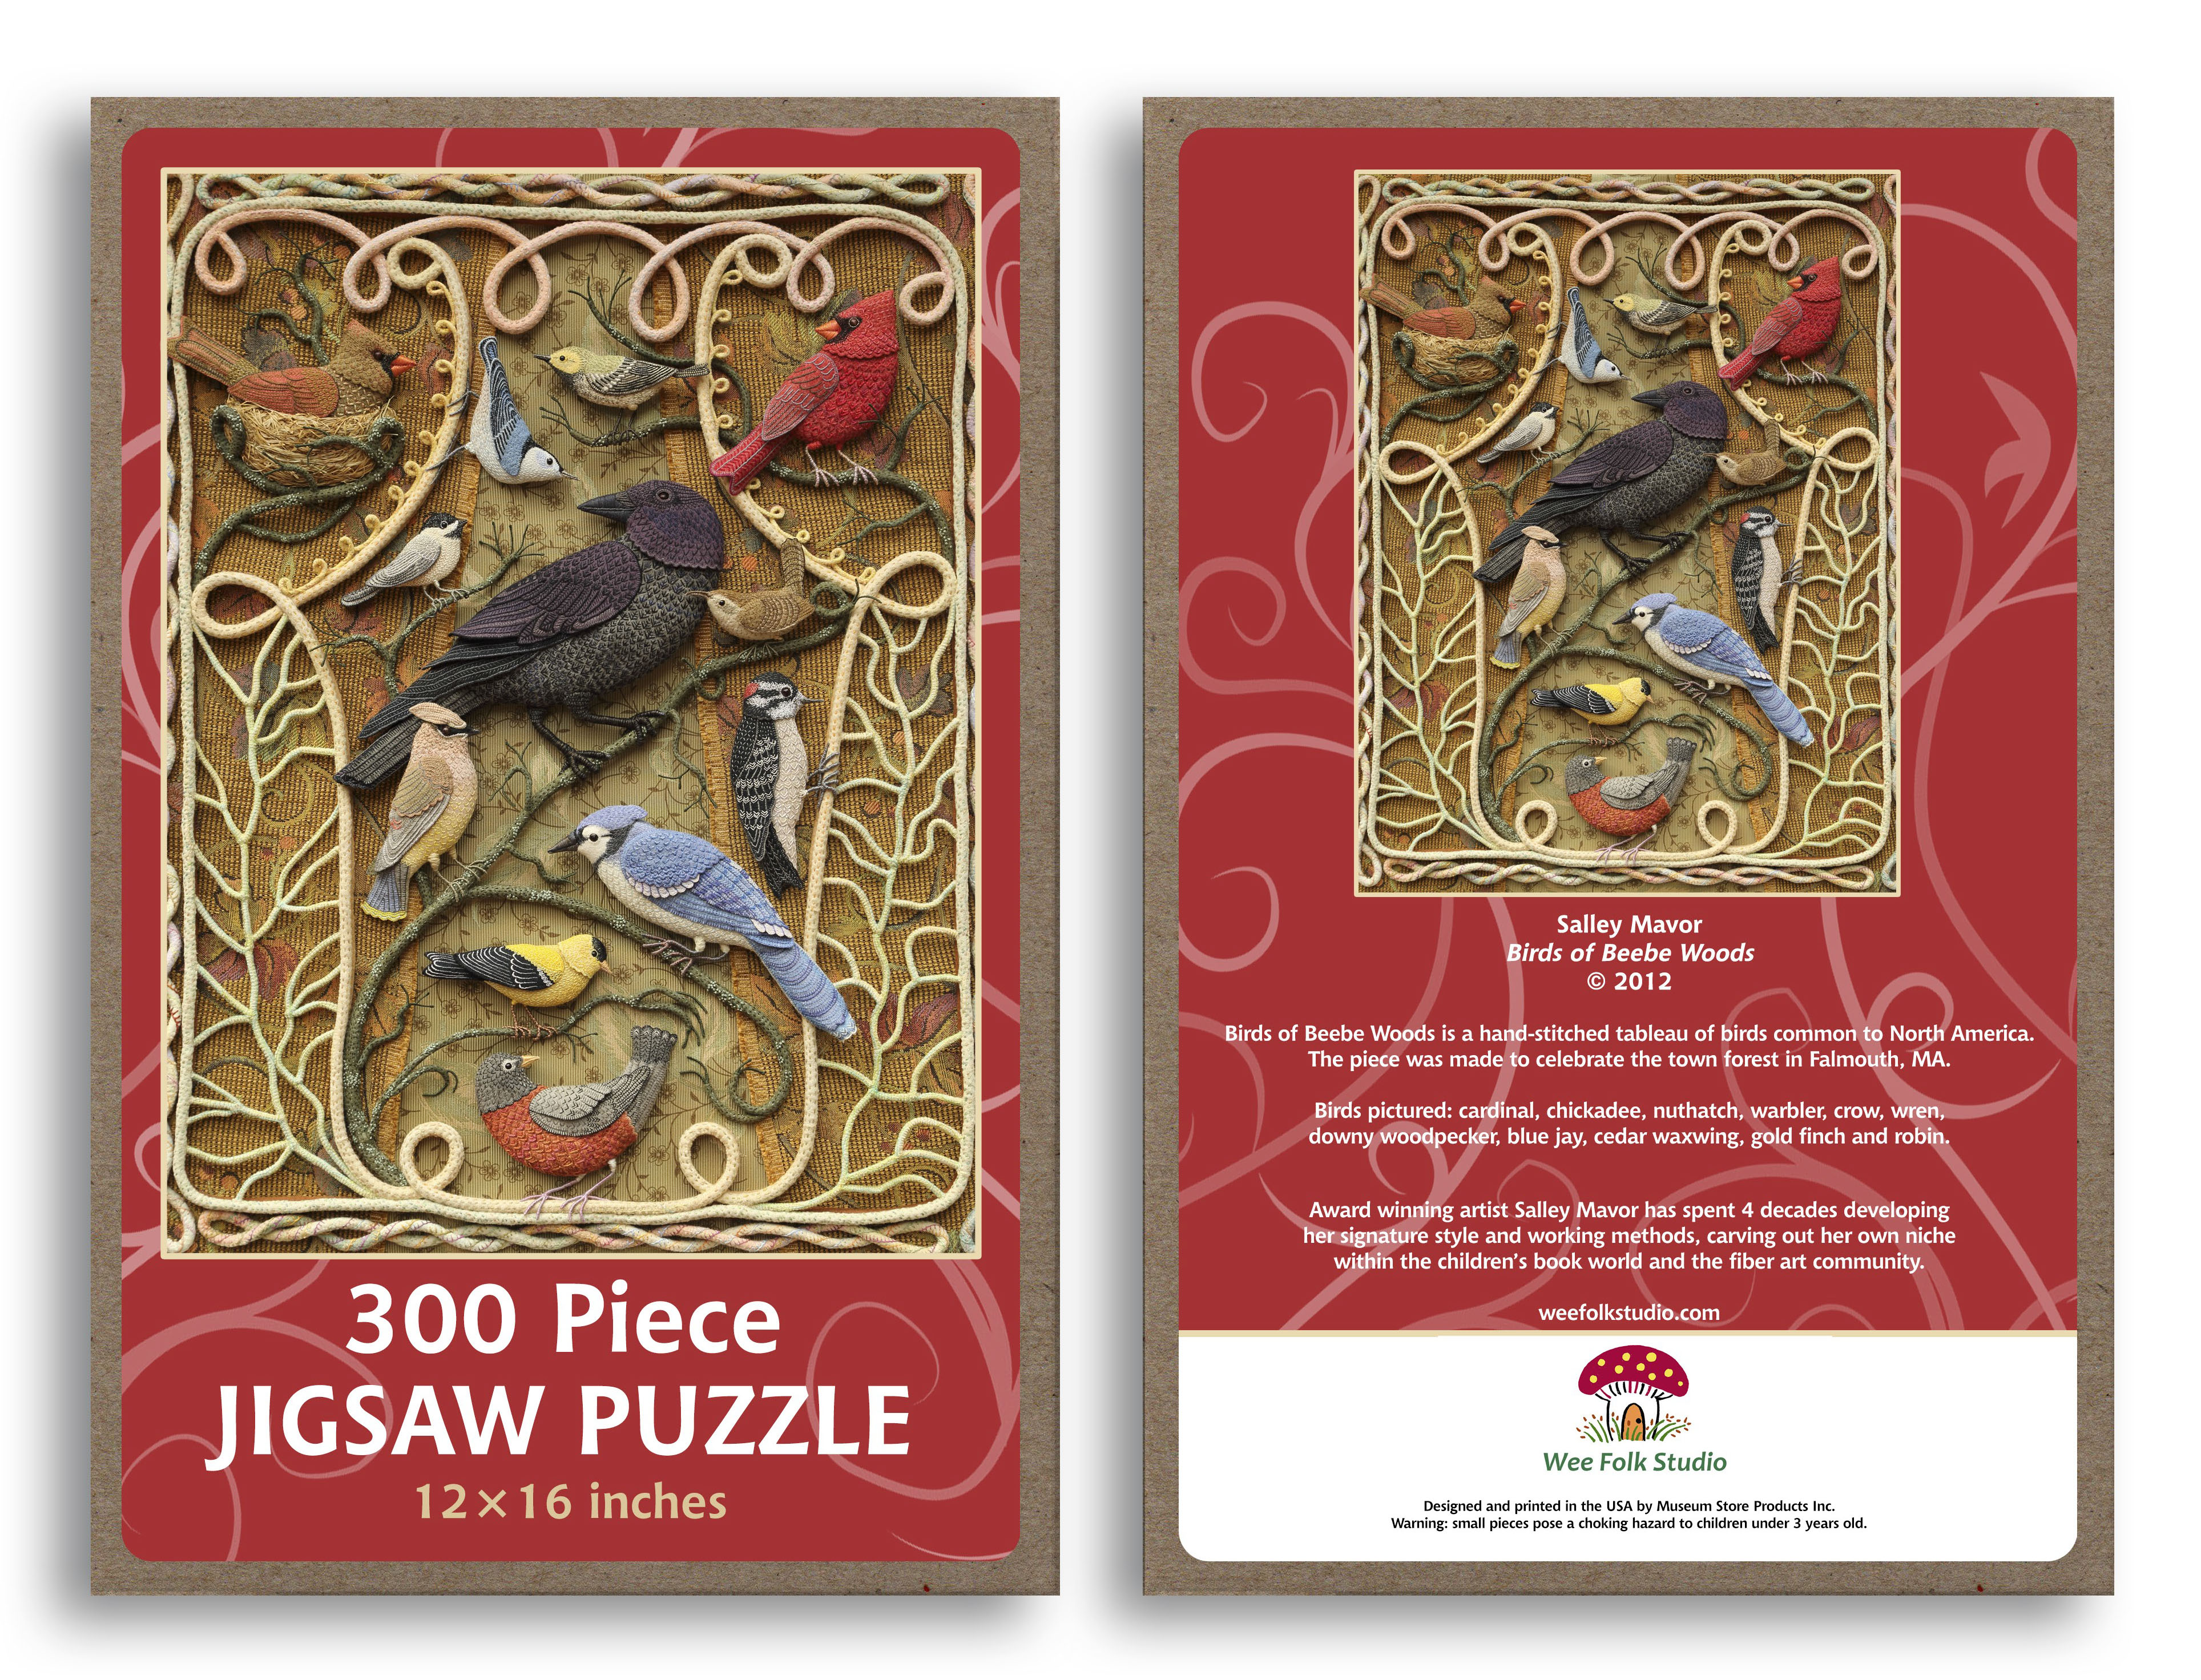
Birds of Beebe Woods jigsaw puzzle

JIGSAW PUZZLES!
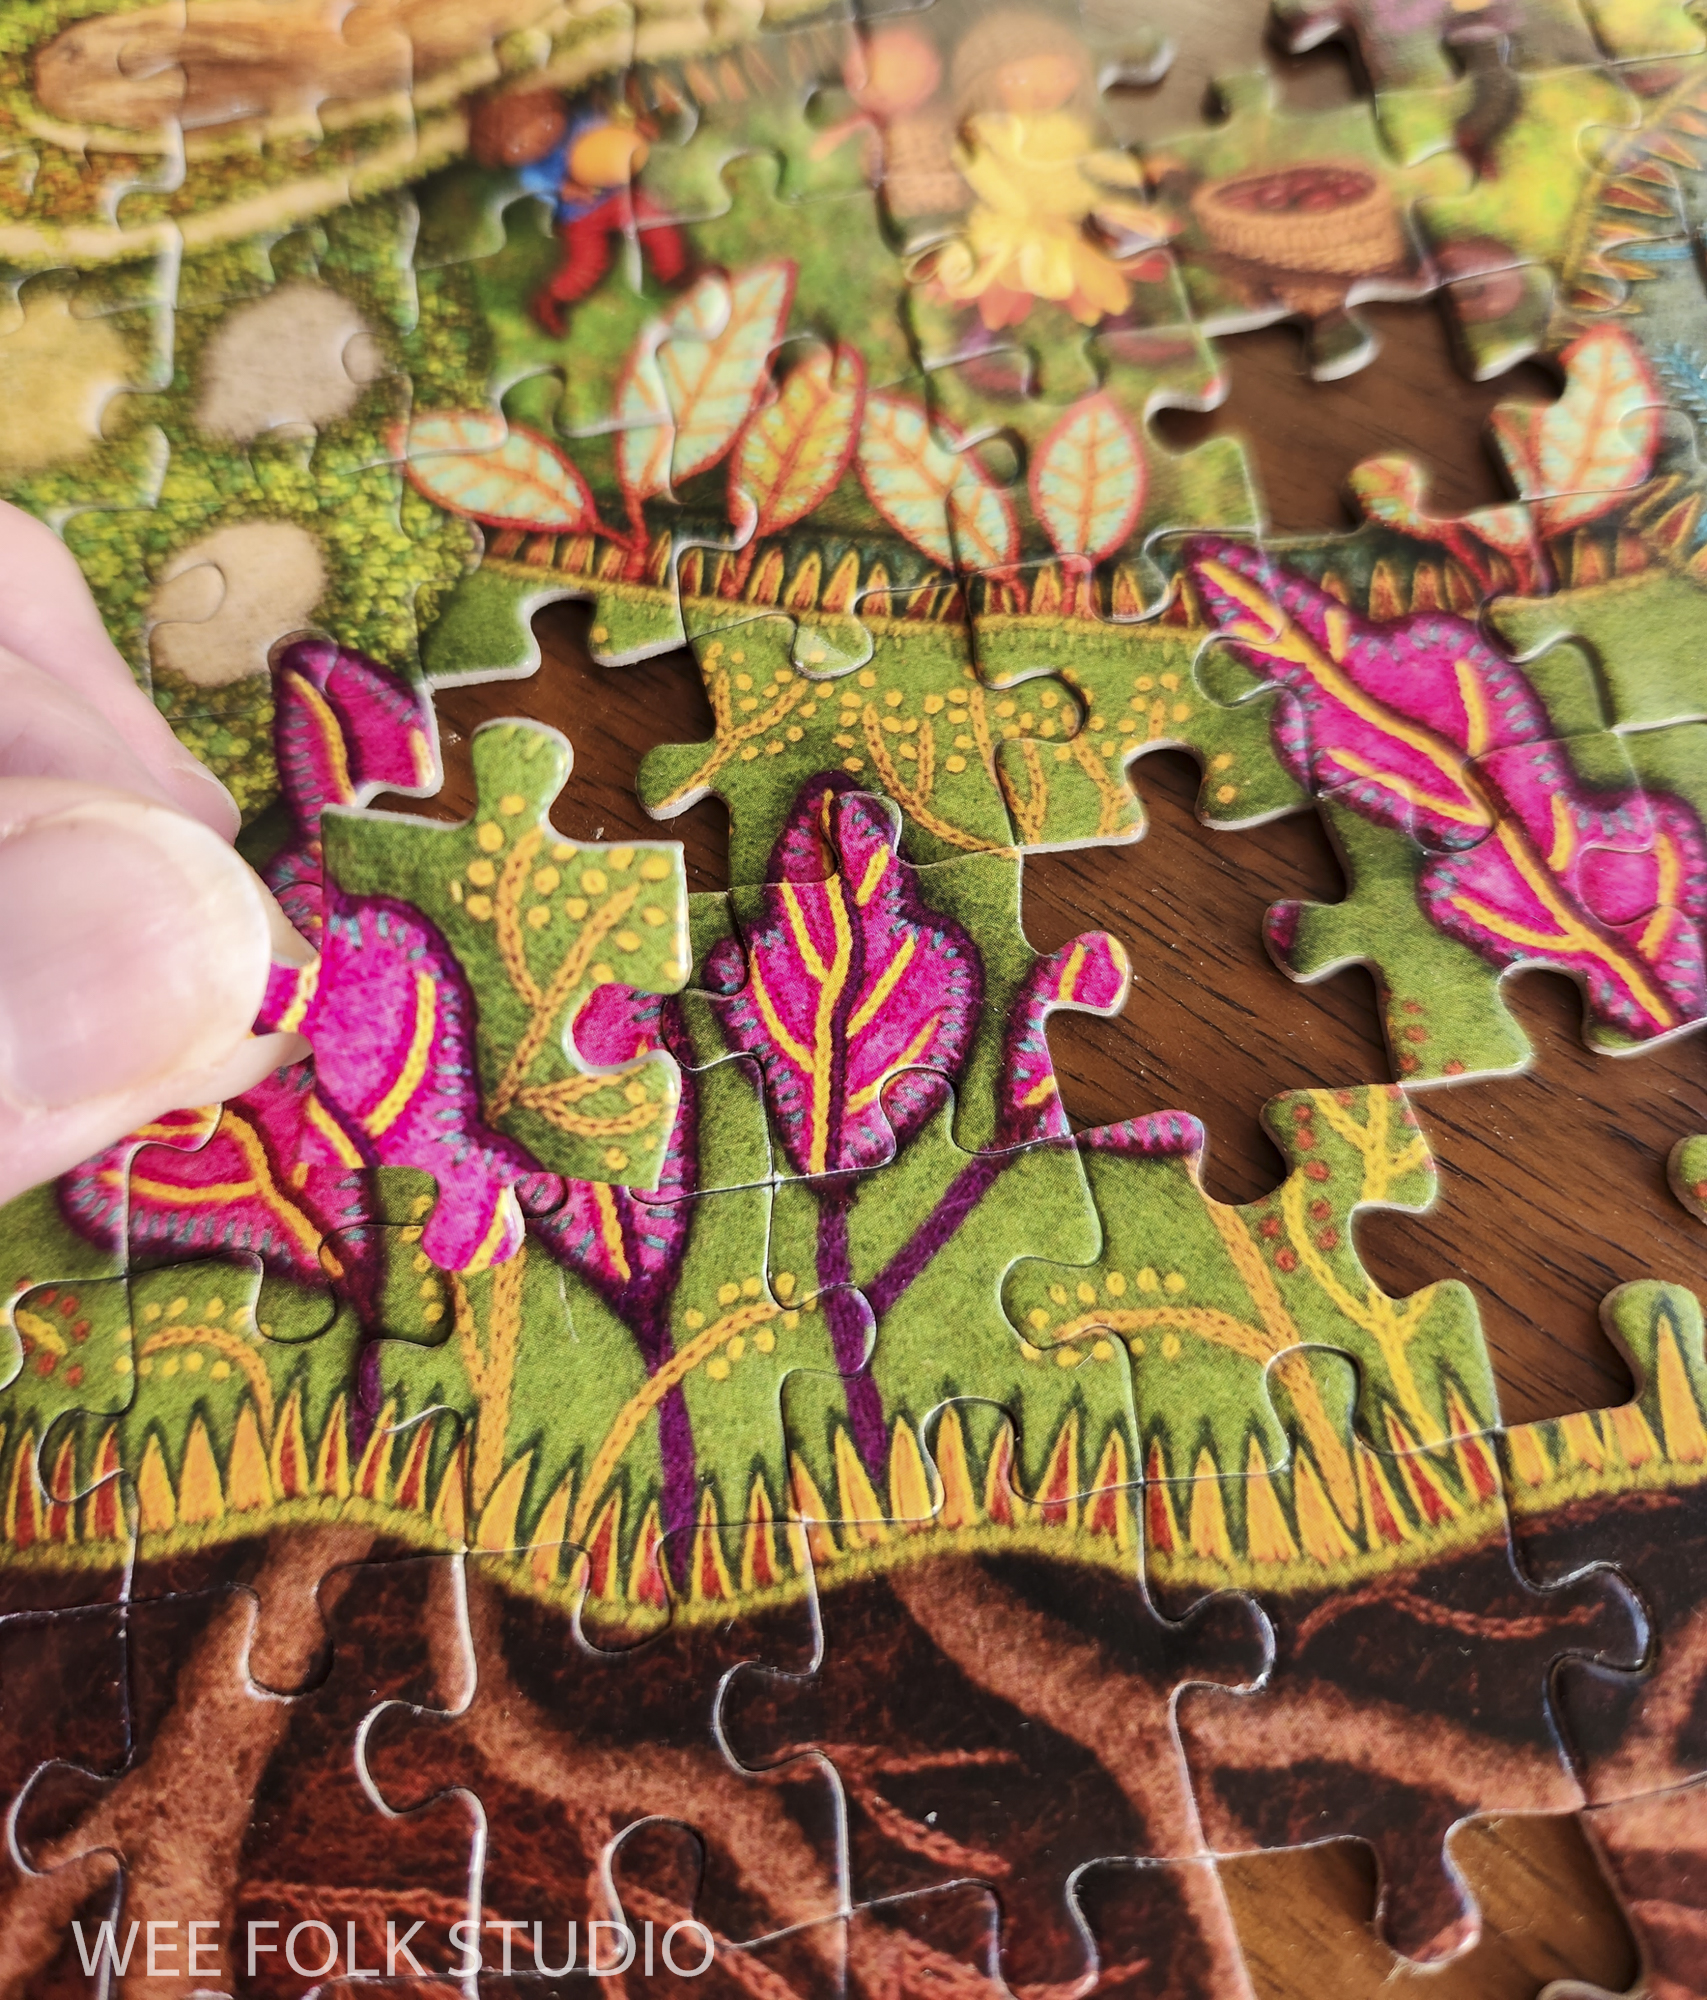
Two jigsaw puzzle designs, Birds of Beebe Woods and Harvest Time were just added to my shop. I’m glad to report that they are back in stock after quickly selling out. The puzzles are exclusively available through my Etsy Shop.

Is there a particular piece of mine that you would like to see in puzzle form? I’m planning to have more puzzles made and would love to hear your suggestions. Illustrations from my books MY BED and Pocketful of Posies can’t be reproduced, but other stand alone pieces are a possibility, if I have hires photos. Please leave a comment with your suggestions.

Birds of Beebe Woods jigsaw puzzle
Harvest Time jigsaw puzzle

Jigsaw Puzzles!

Birds of Beebe Woods jigsaw puzzle

I’m excited to share the news that jigsaw puzzles are now available in my Etsy Shop! For a long time, fans have suggested that my work would translate well into puzzle form. I thought so, too, but was too busy stitching to do anything about it. After years of searching for a high quality product and an economically feasible manufacturing arrangement, I’ve finally decided to test the market with two puzzle designs; Birds of Beebe Woods and Harvest Time.

Birds of Beebe Woods jigsaw puzzle

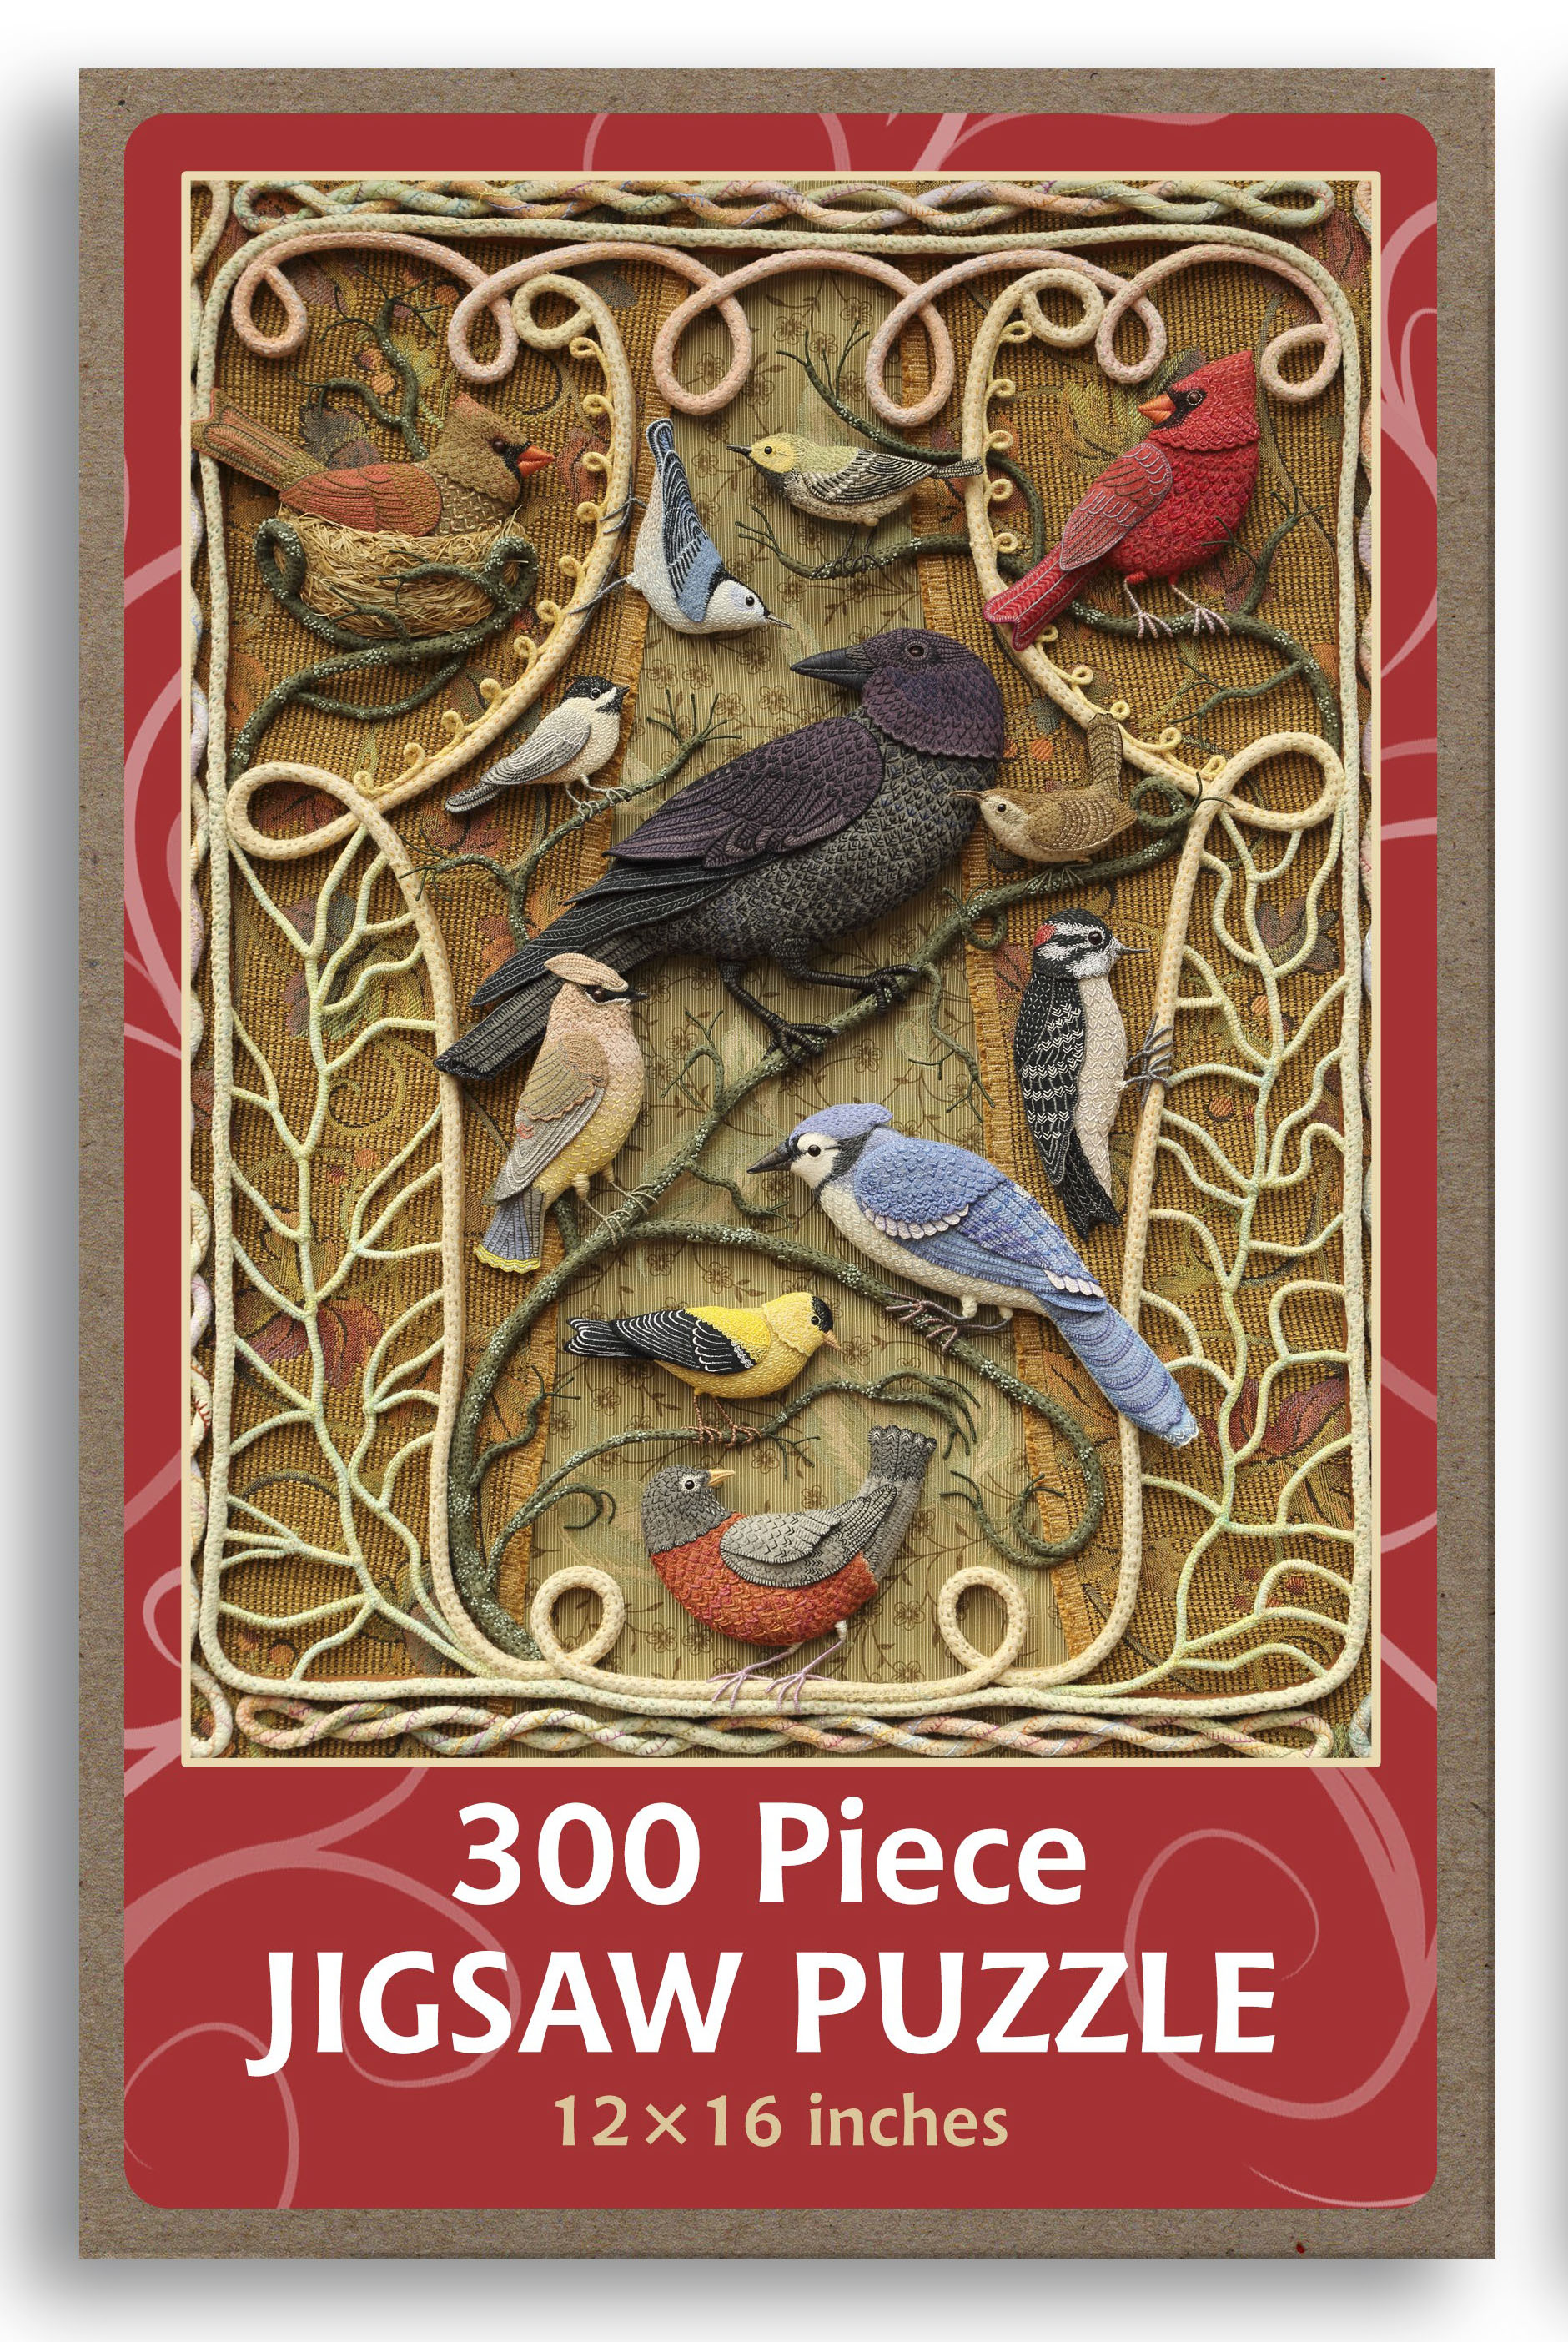
The 300 piece 12″ x 16″ puzzles are suitable for older children as well as adults. At this size, the puzzle pieces can easily spread out on a card table instead of taking over the dining room table. And it won’t take an interminable amount of time to piece together the image. Of course, some people love nothing more than to get sucked into a seemingly never-ending puzzle. I’m kind of like that and have to regulate my puzzle time, lest my obsessive nature takes over.

Birds of Beebe Woods jigsaw puzzle, box front and back

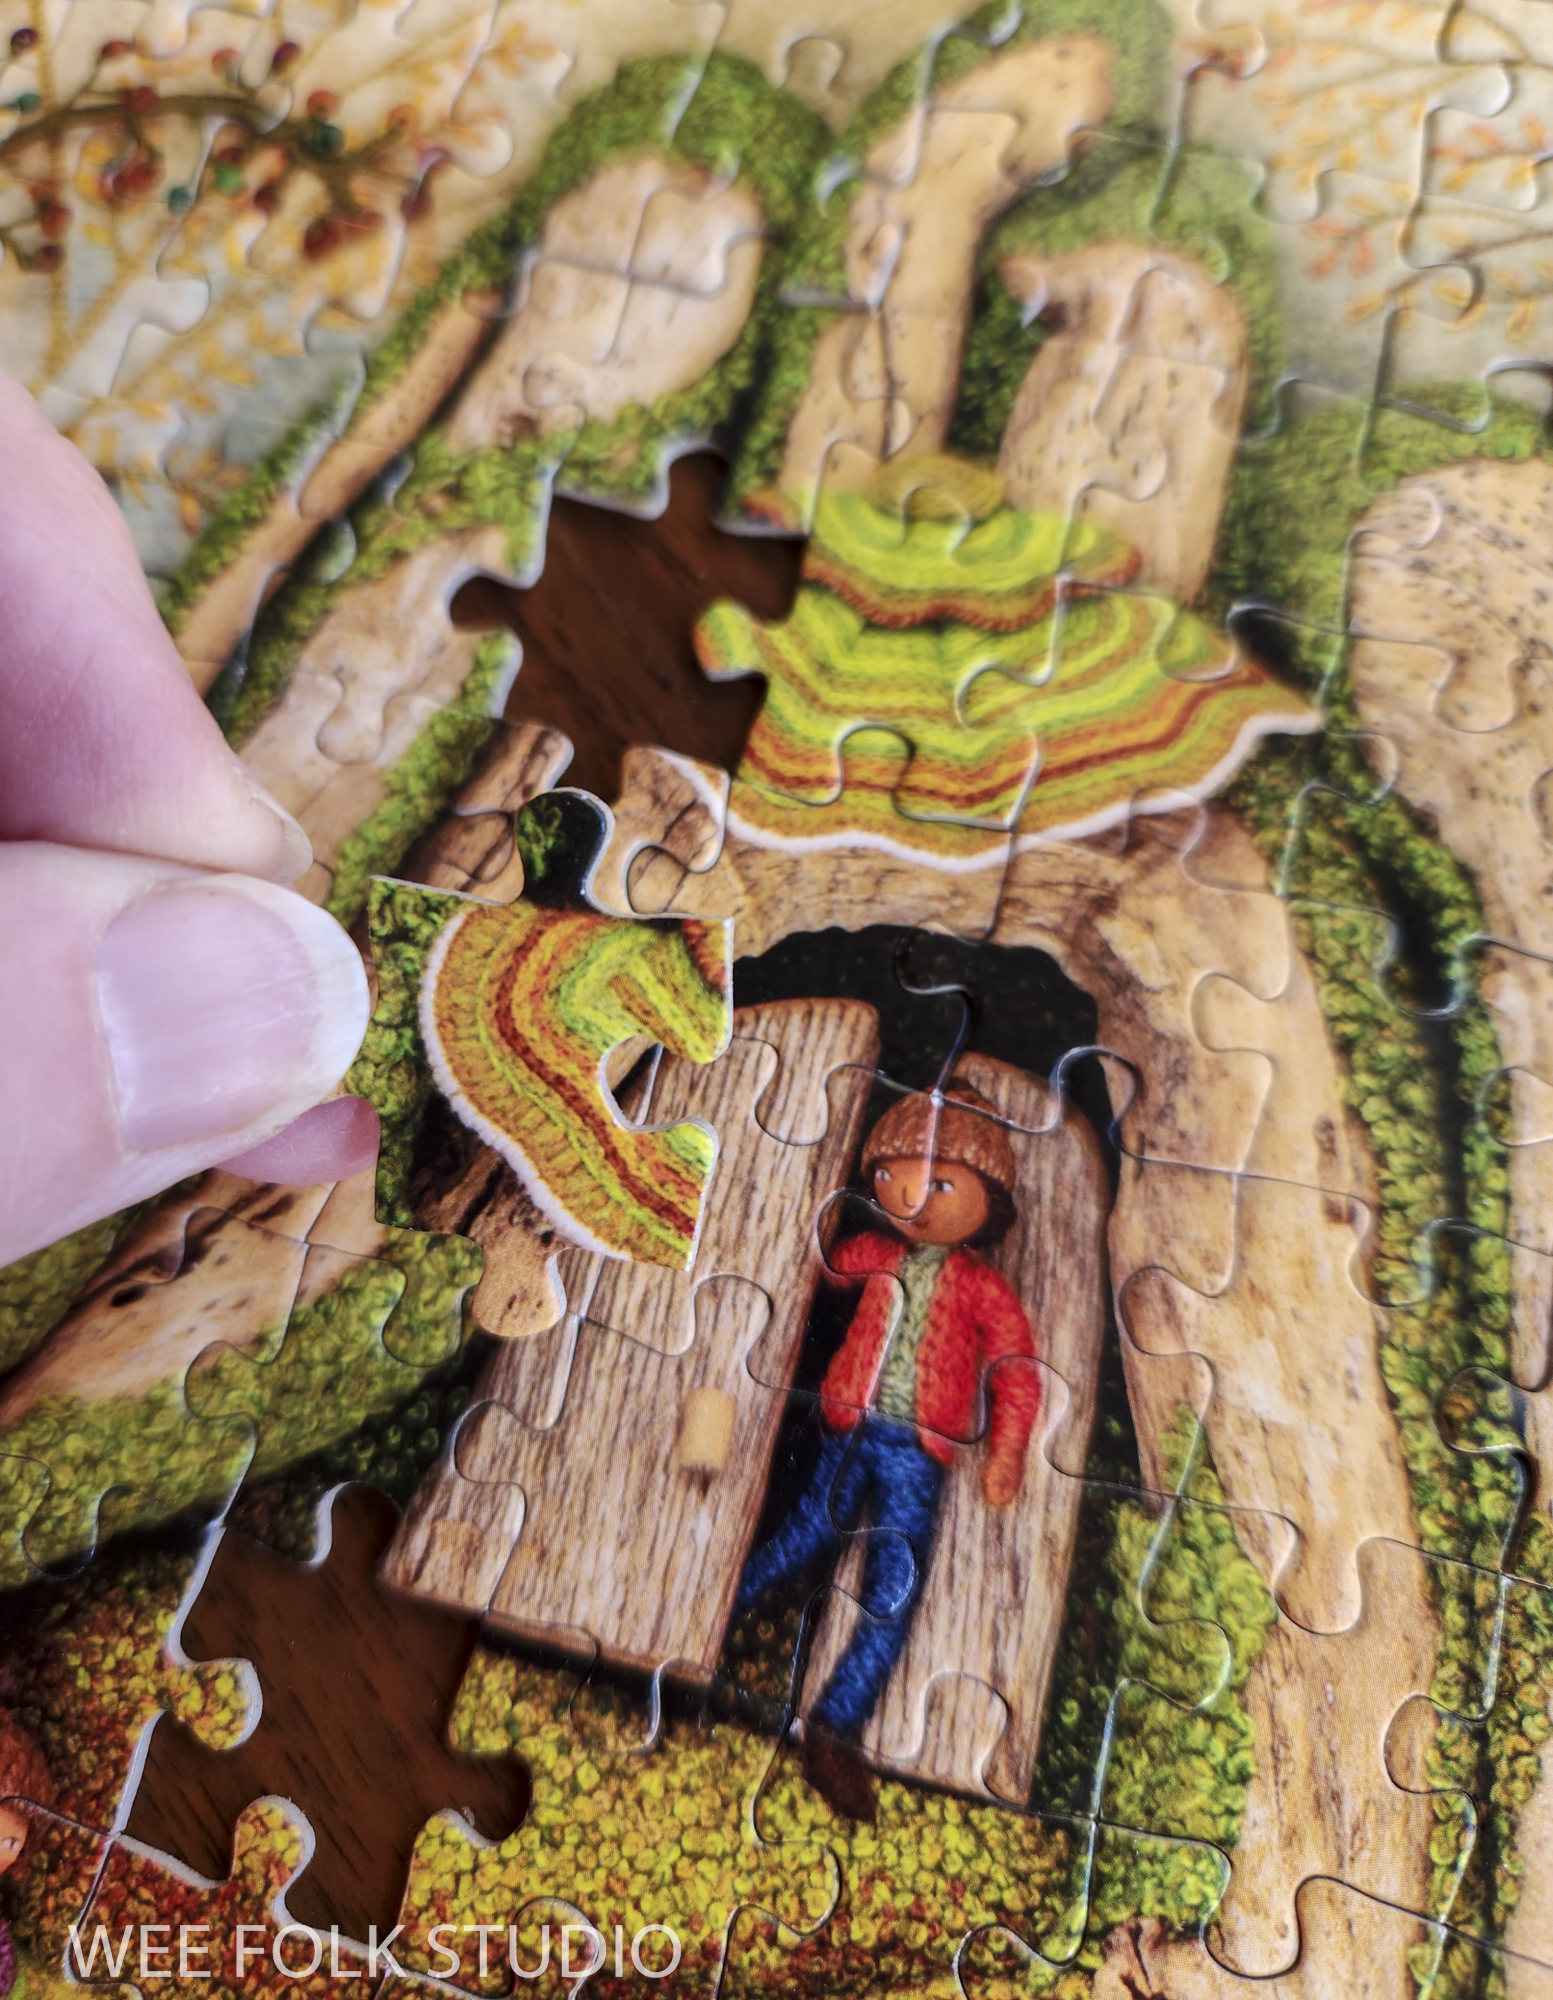
After our Thanksgiving meal, my family put together the Birds of Beebe Woods puzzle. It was more challenging than expected!

The puzzles are exclusively available through my Etsy Shop. They were just listed a few days ago and are selling so well that I’m having more made.
A note to my international fans: I’m really sorry, but due to the high cost of shipping overseas and unreasonable delays, I now only ship within the US and to Canada.

Is there a particular piece of mine that you would like to see in puzzle form? I’m planning to have more puzzles made and would love to hear your suggestions. Illustrations from my books MY BED and Pocketful of Posies can’t be reproduced, but other stand alone pieces are a possibility, if I have hires photos. Please leave a comment with your suggestions.

Harvest Time Jigsaw Puzzle
Harvest Time jigsaw puzzle, box front and back

BIRDS OF BEEBE WOODS is a hand-stitch tableau of birds common to North America. I made the piece to celebrate the town forest in Falmouth, MA. Birds pictured: cardinal, nuthatch, warbler, crow, wren, downy woodpecker, blue jay, cedar waxwing, gold finch and robin.

Birds of Beebe Woods jigsaw puzzle

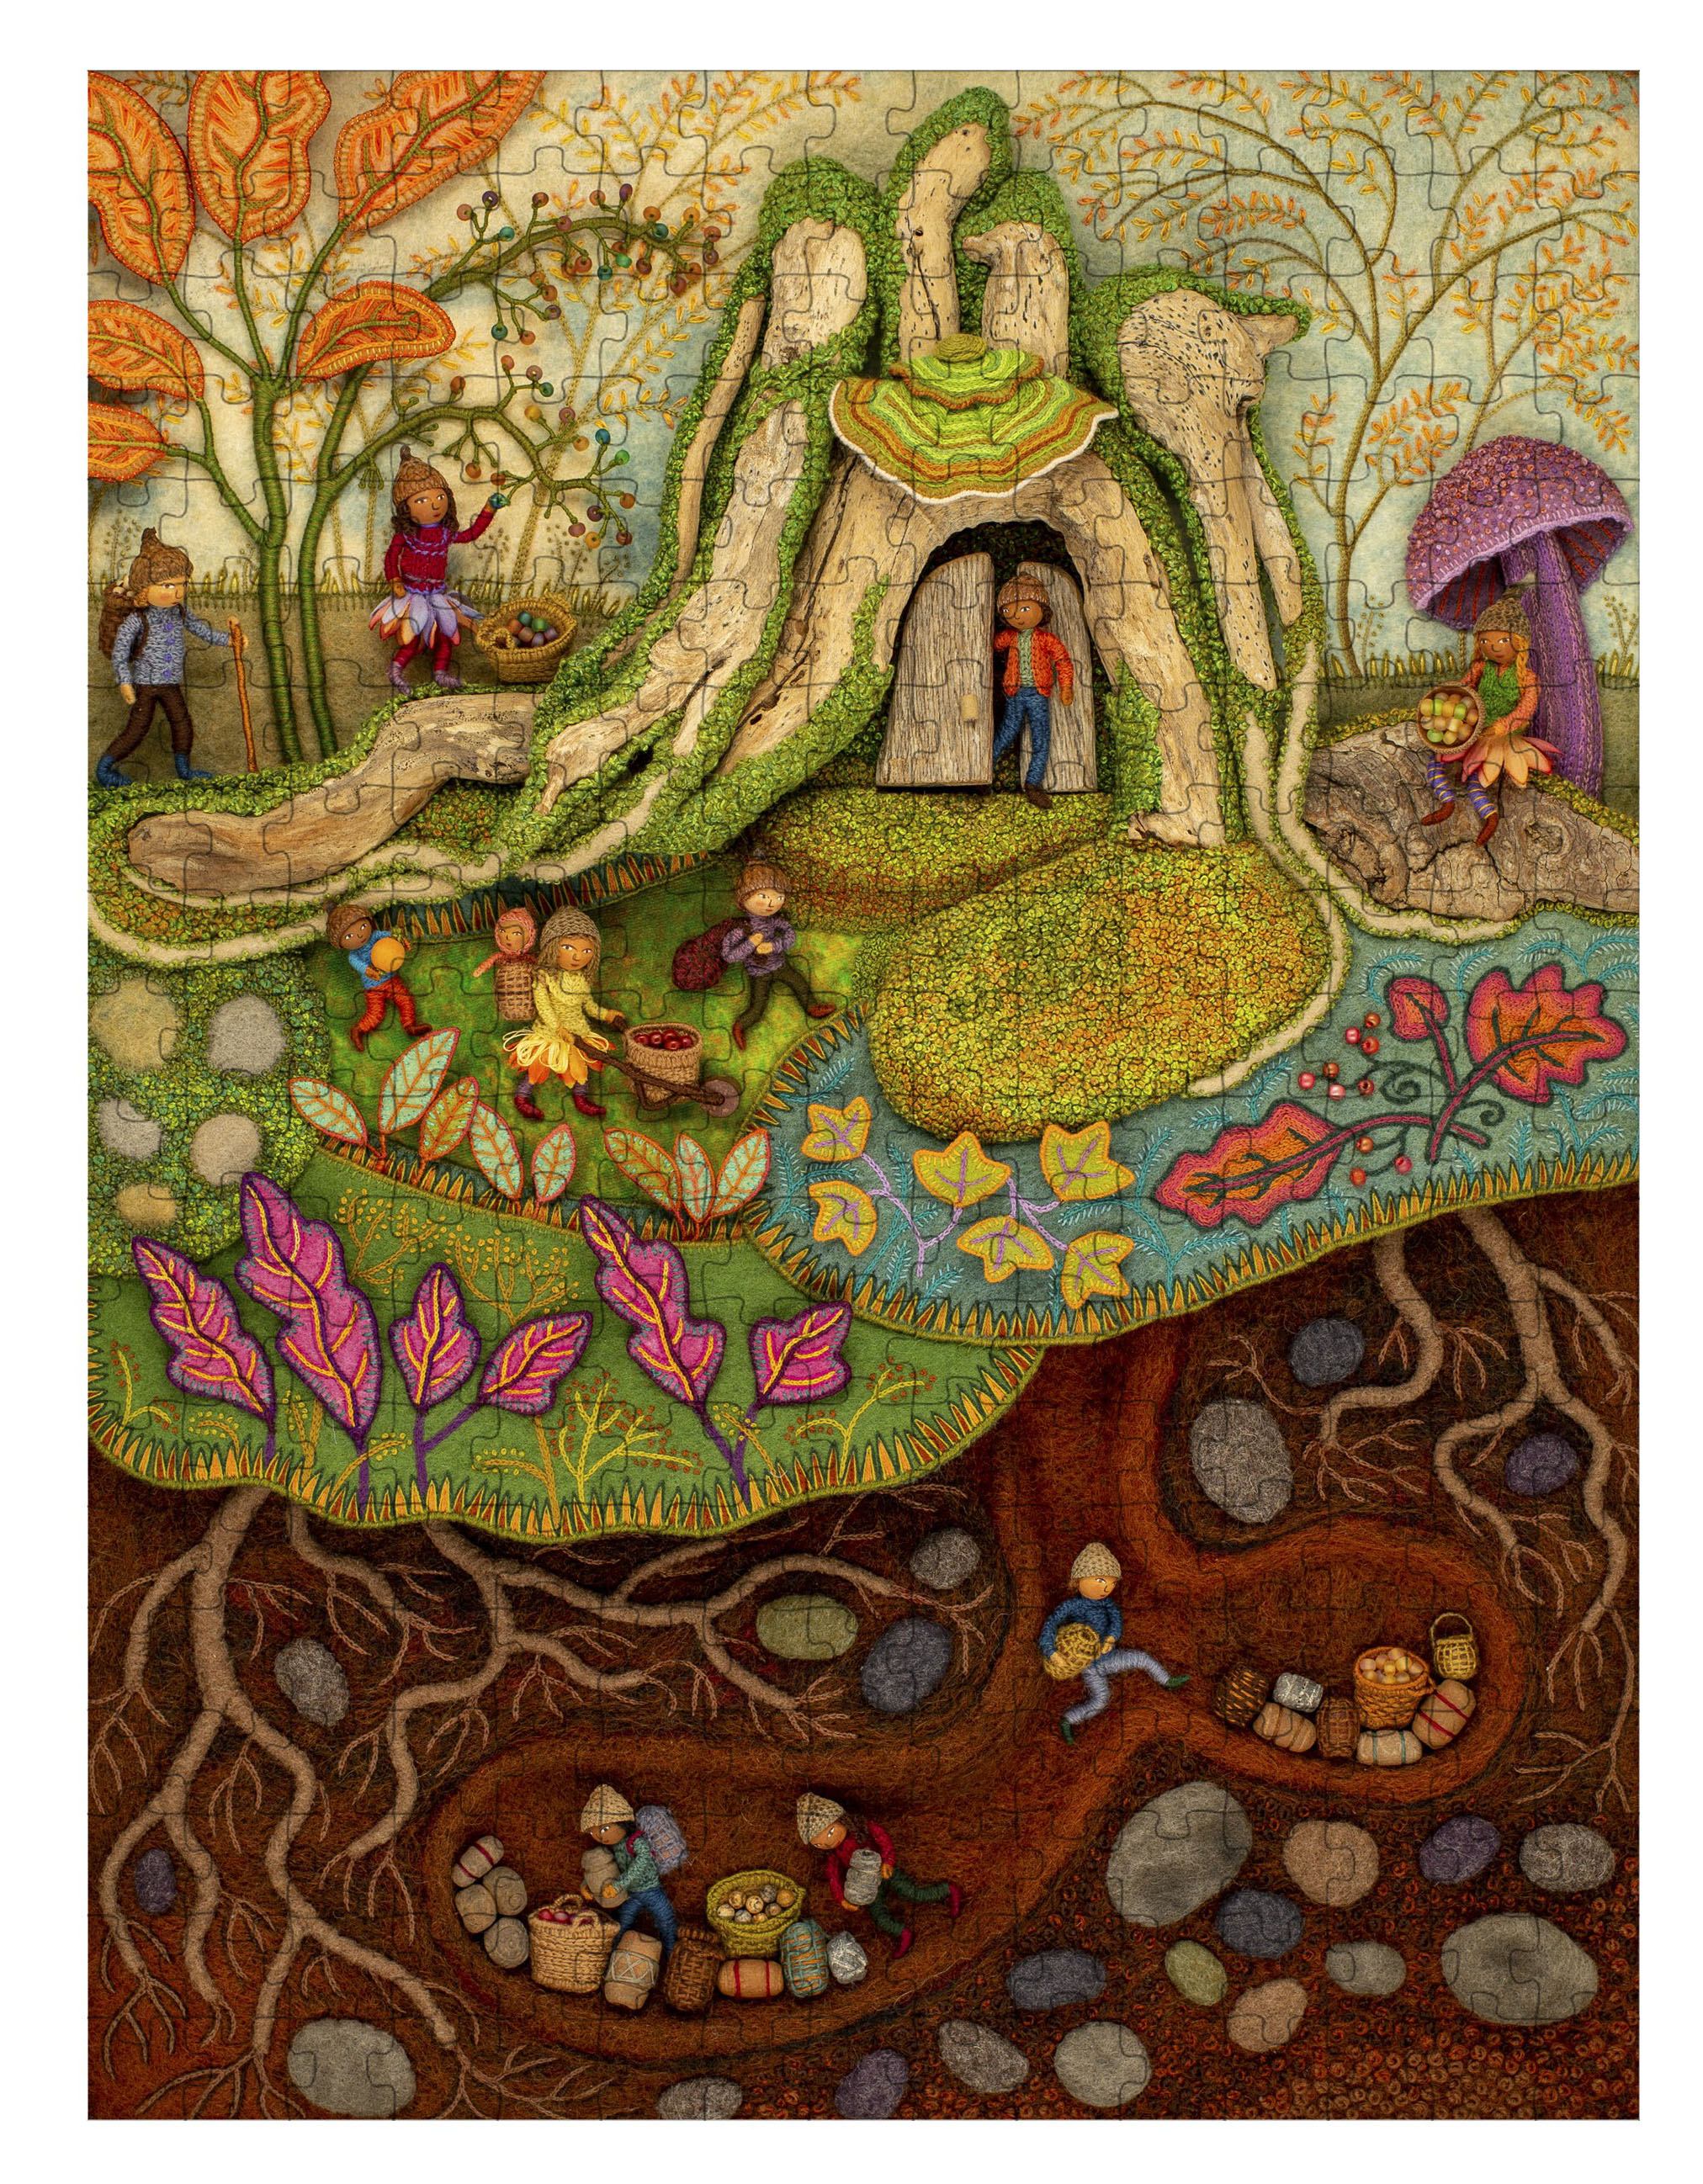
HARVEST TIME is the fall scene in a series of seasonal landscapes that capture the wonder and magic of the natural world, both real and imagined. The piece is entirely stitched by hand and incorporates a variety of materials, including driftwood, wool felt, beads and wire.

Harvest Time jigsaw puzzle

Harvest Time – Part 2 (turkey tail mushroom)

In Part 2 in the series about making Harvest Time, I share photos, commentary and a stitch-minute video about creating the turkey tail mushroom overhanging the doorway in the stump. In the coming weeks and months, I will post more stories that focus on different aspects of the process of making the fall scene, including the toad stool mushroom, wee folk figures, tunnels, roots, stones and foliage of all kinds.
The overview introduces the Harvest Time piece.
Part 1 features moss making.
Part 2 is about making the turkey tail mushroom.
Part 3 shows the construction of felt leaves.
Part 4 gives a peek at embroidering the plants.
Part 5 is about making the toadstool mushroom
Part 6 shows the process of making the underground

Harvest Time is the fall scene in a series of seasonal landscapes that capture the wonder and magic of the natural world, both real and imagined. Harvest Time and 2 other scenes I’ve completed and written about, Frosty Morning and Mossy Glen, are available as note cards and jigsaw puzzles in my shop here.

Harvest Time Puzzles are available in my Etsy shop.

Turkey tail mushrooms or shelf fungi are found all over the world. They usually grow on dead hardwood stumps and downed hardwood trunks or branches.

Turkey Tail Mushrooms

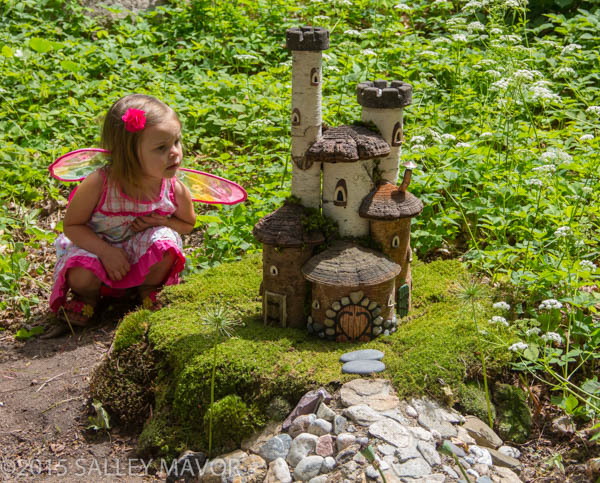
I love how Glen Carliss used shelf fungi for the roofs in “Glendell Towers”, which he made for The Fairy Houses of Highfield Hall, an outdoor exhibition that I curated in 2015. Glen told me that he’d been eyeing the mushrooms growing on trees along his road for years, imaging what to do with them.

Glendell Towers by Glen Carliss

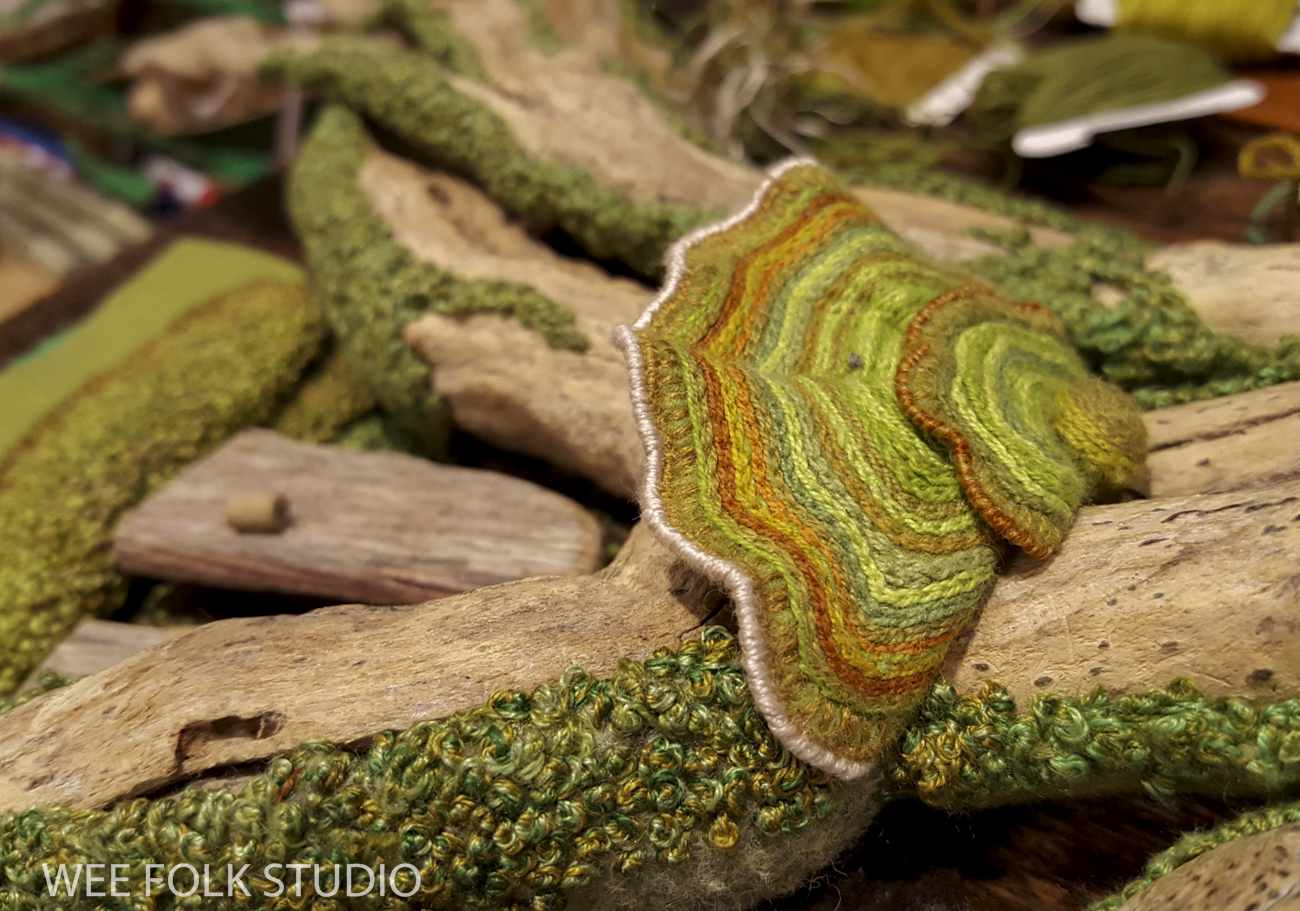
I didn’t use actual mushrooms in Harvest Time, but I was inspired by their fanciful appearance. My photo search came up with multiple color combinations, from earthy hues to shades as garish as 1960’s fashion. I chose a more subdued mixture of fall colors for the mushroom roof.

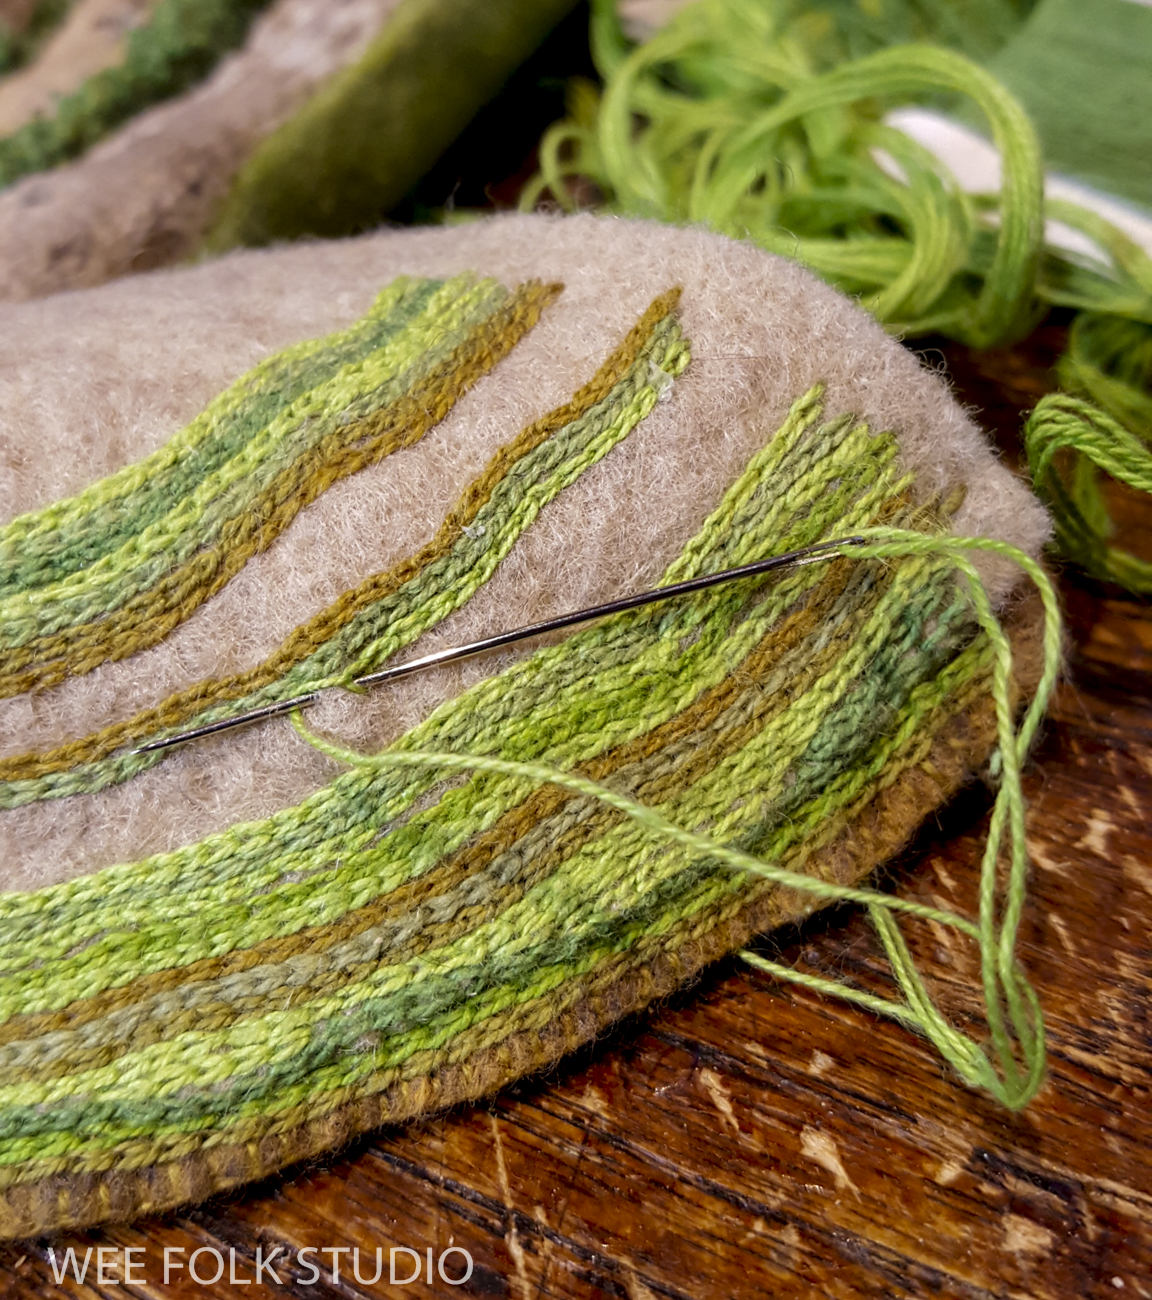
To make the striped concentric pattern, I chain stitched rows and rows of different shades of green and orange DMC cotton flower thread to a piece of felt. It took two tries to get the shape and colors the way I wanted it.

In this Stitch Minute video, I demonstrate chain stitching the stripes and adding wire.

After we filmed it, I wasn’t happy with the overall shape and color combo, so I started over and made a new one that was more curvy and included orange and yellow.

I stitched wire around the outside edge and covered it with white embroidery floss.

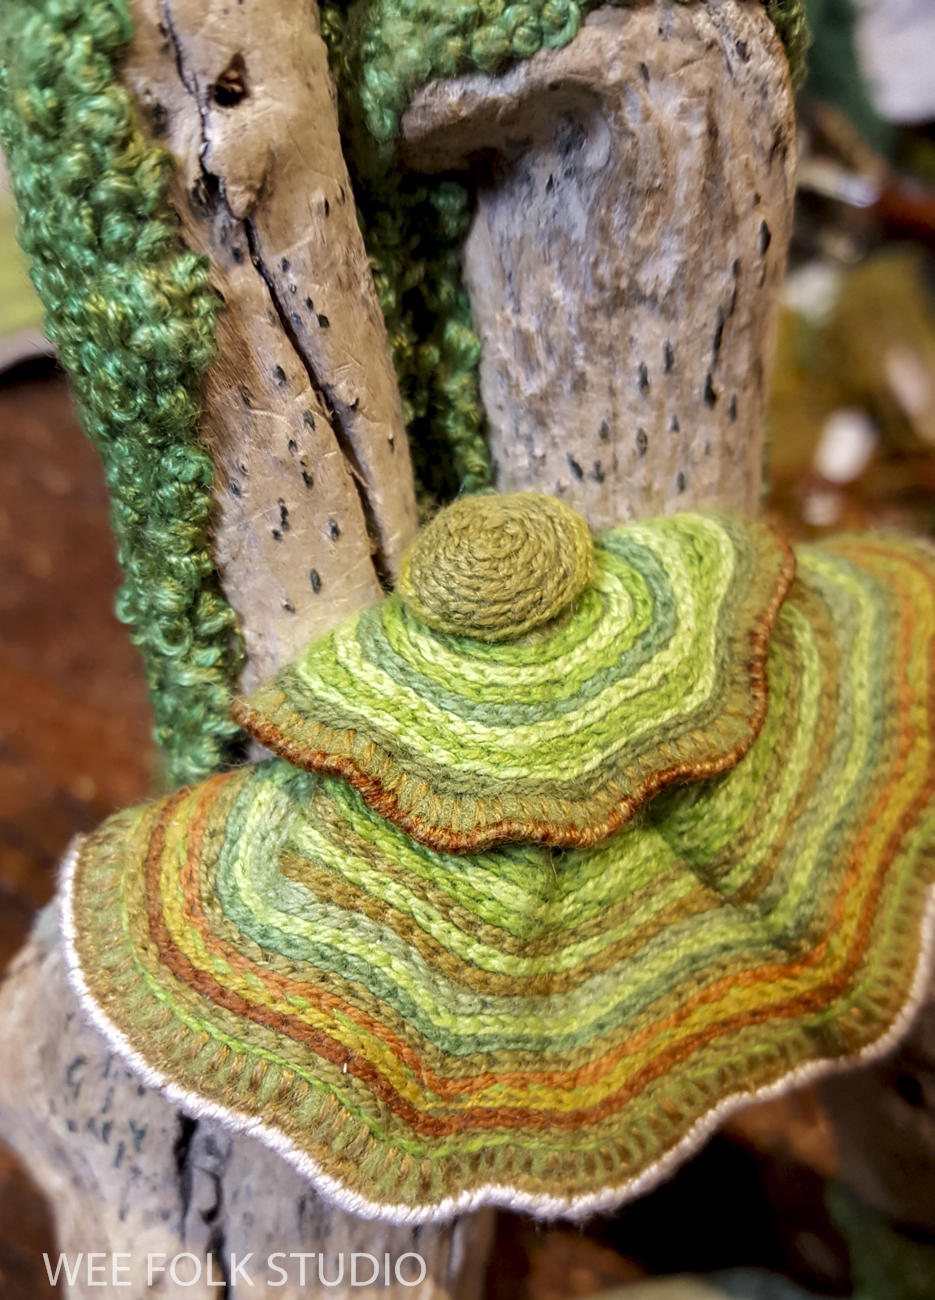
Then I made a smaller mushroom and a really little one that looked like a pompom on top of a hat. It’s been a year since I started working on this piece, so my memory is a bit foggy. I can only guess at how I formed the layers into a roof shape and attached it to the driftwood. I do remember that the mushroom wasn’t very cooperative and I had to torture it into shape. Most likely, I glued felt to the wood and then sewed the mushroom to the felt.

During the process, I constantly measured the depth of the trunk to make sure that it would fit behind the glass when the finished piece was framed. After the mushroom roof was added, there was just enough clearance!

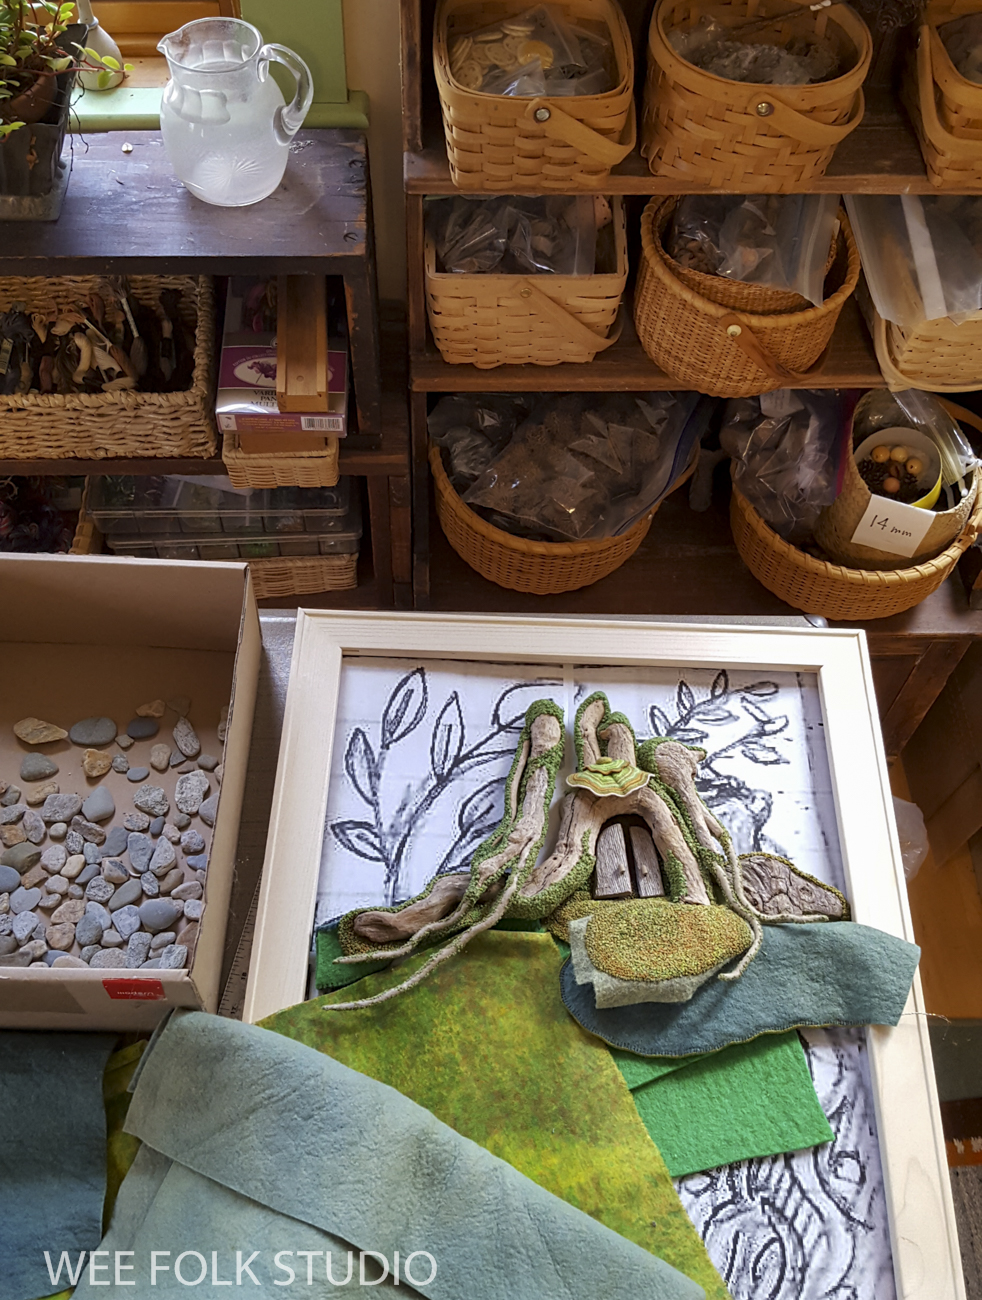
My use of found objects is mostly limited to individual items that are sewn in place and incorporated into embroidered scenes. This trunk was different because it was made up of several driftwood parts that created a fairly large mass that stuck out from the background. Its depth and breadth would determine how I created everything else in the landscape.

Now that the trunk was finished, I could start building the other parts of the scene, including the ground at its base.

Next time, I will show the process of making the felt and stitched foliage growing on the ground at the foot of the tree trunk.

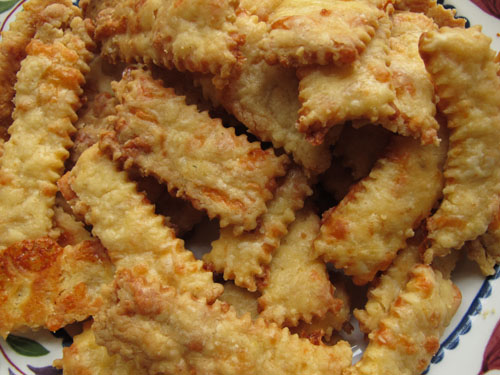
The best cheese straws in the world!

This family recipe was first published on my blog 10 years ago and the post has been a constant favorite ever since. If you want to bring something special that’s not hard to make to a holiday party this season, try it out!

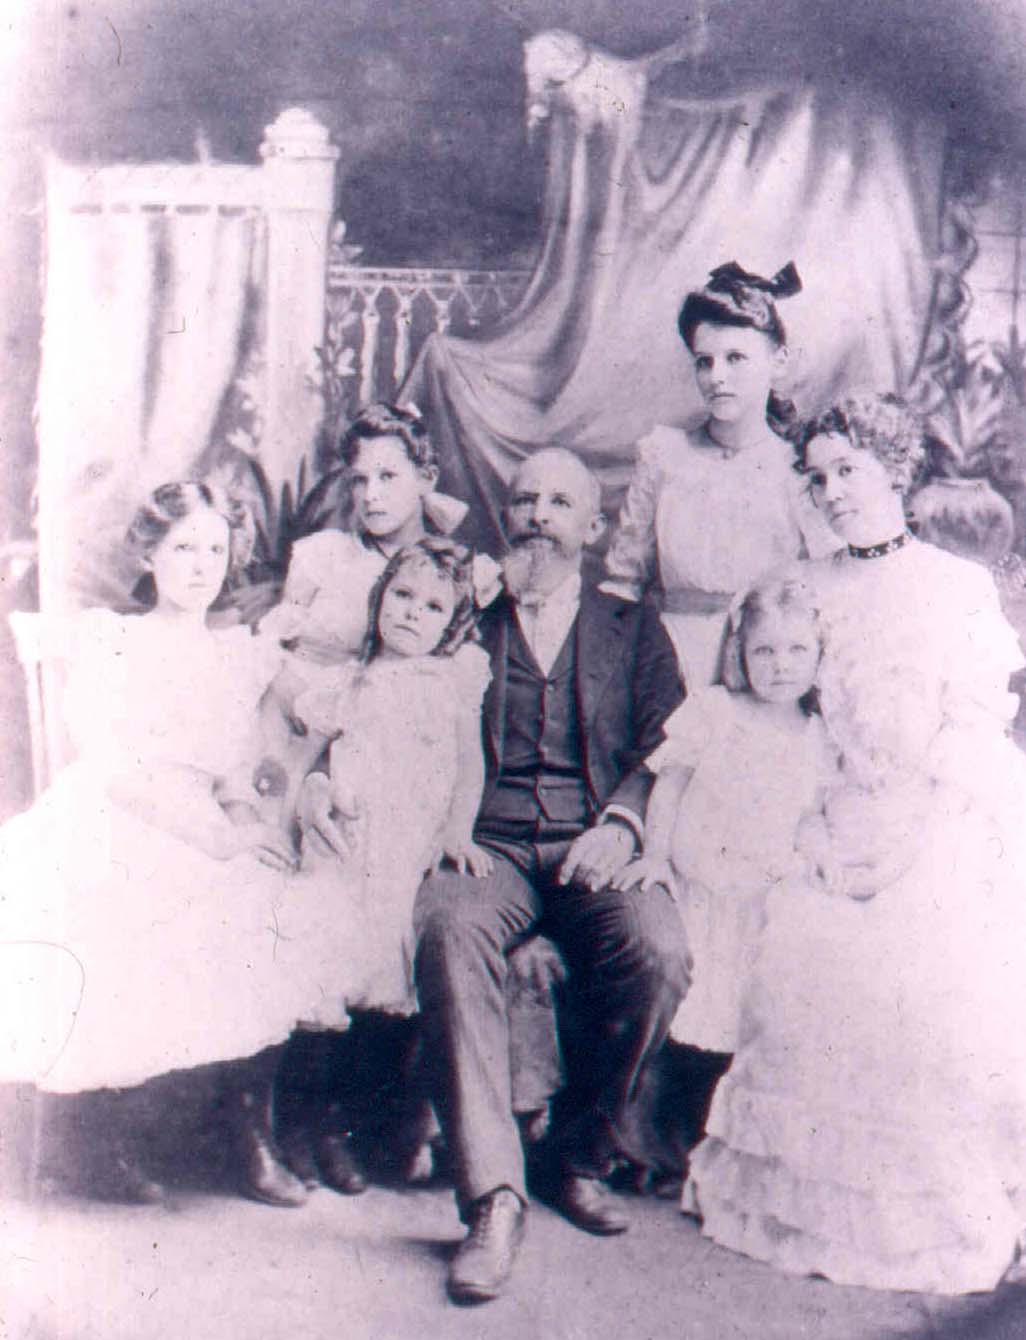
Cheese straws are my favorite offering to bring to holiday gatherings. The recipe comes from my maternal grandmother’s family, the Salley’s from Orangeburg, South Carolina. The tradition has been passed down from mother to child for generations. There are cheese straws and then there are these cheese straws, which always get a lot of attention. I’m working on teaching my sons how to make them – they sure like to eat them! The trick is to use the sharpest cheddar cheese you can get and to roll them as thinly as possible.

My grandmother (2nd from left) with the Salley family, in about 1900.

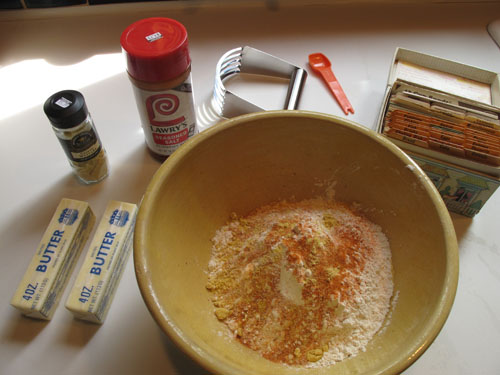
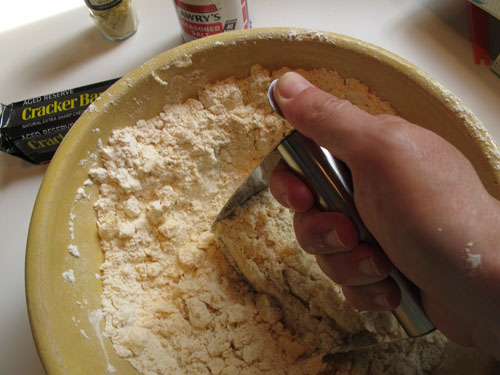
Ingredients: 3 Cups flour, 2 tsp. seasoned salt (I use Lawry’s), 1 tsp. dried mustard, 1 cup butter, 8 oz. very sharp cheddar cheese. Start by mixing the flour, salt and dried mustard in a bowl.

Cut in the butter with a pastry cutter, like you are making pie crust.

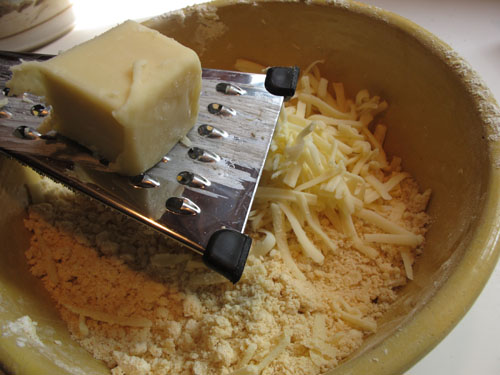
Grate the cheddar cheese and stir it in with the flour mixture.

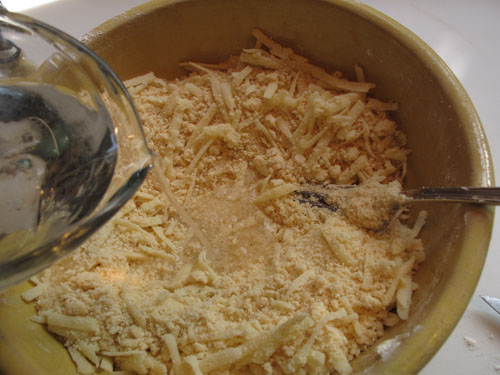
Dribble ice water into the mixture and combine until it sticks together in a doughy consistency. Don’t let it get too soggy!

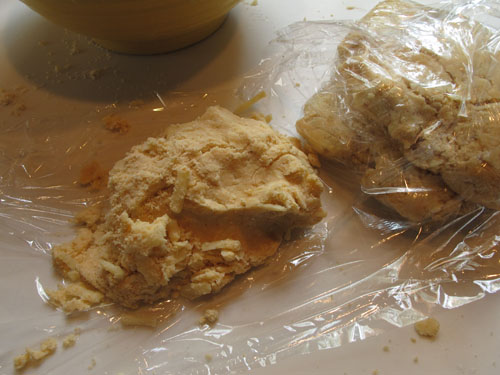
Divide into balls, handling the dough as little as possible. Then wrap the balls and refrigerate for a few hours.

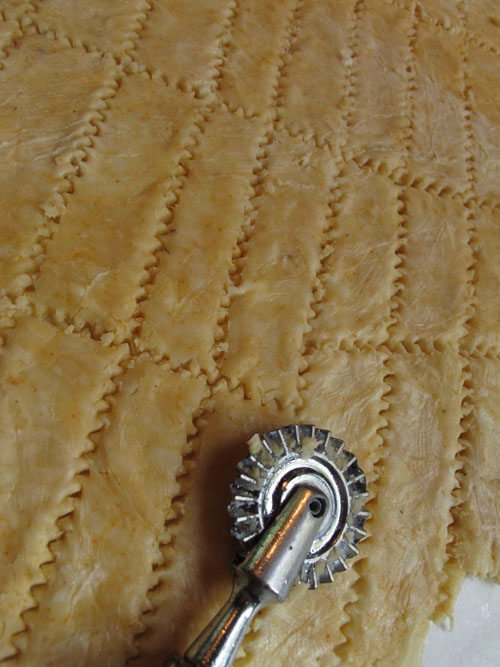
Roll out the dough balls as thinly as possible and cut in strips with a pastry crimper.

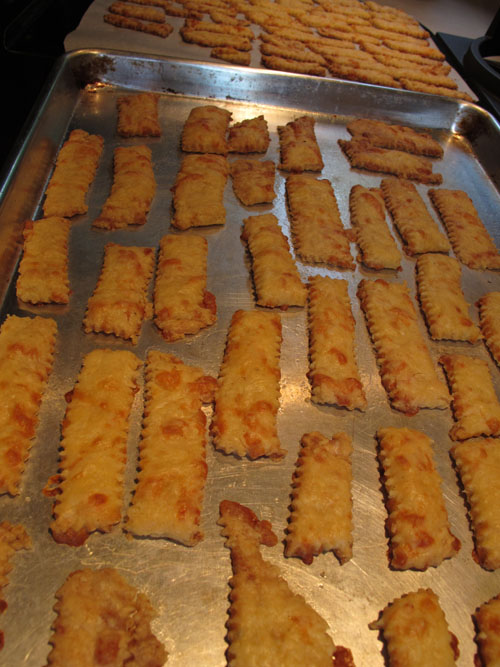
Spread the straws out on a cookie sheet and bake in a 350 degree oven for 15 to 20 minutes, until golden brown. They may take longer to cook, so check them often and switch pans to different racks during baking time.

They don’t take long to cool, so immediately sample a few. Now, put them out and watch them disappear! They can be saved in a tin and make a great gift, too.

Since so many of you’ve enjoyed the recipe over the years, I decided to make a card with the cozy kitchen scene on the front and the recipe for making cheese straws printed on the back. That way, it’s a greeting card (or Holiday card) and recipe card all in one. The Cheese Straws card is available in my shop in packs of 4 or 8.

To keep up with new posts, please subscribe to this blog. Your contact info will not be sold or shared. If you’d like to see more frequent photos tracking the projects in my studio, please follow me on Facebook and/or Instagram.
Hey! You were already subscribed.