

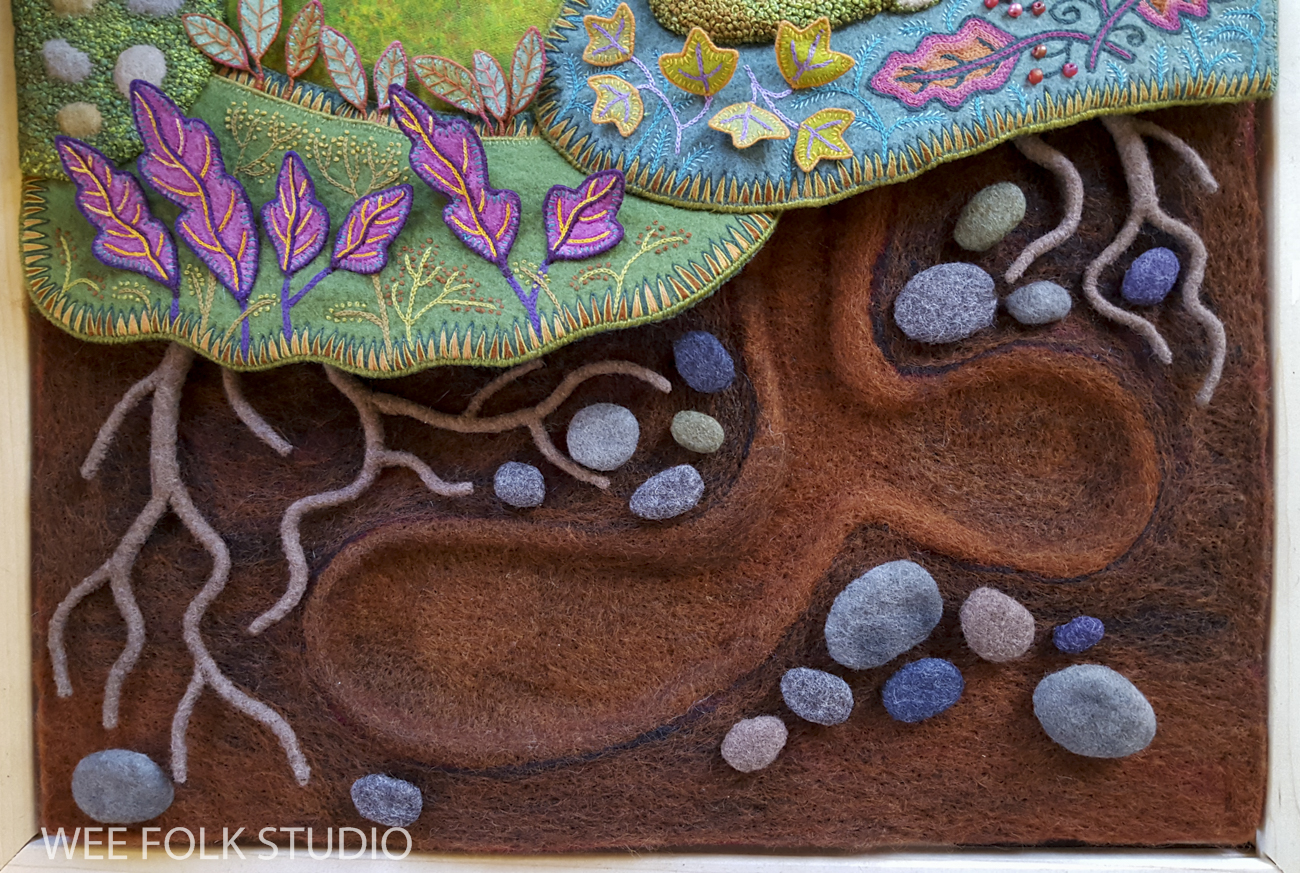
In Part 3 in the series about making Harvest Time, I share photos, commentary and a stitch-minute video about embellishing the felt leaves that appear on the ground-cover and bushes. Please note that when I use the word ‘felt”, I’m referring to the noun, not the verb. Felting is agitating and manipulating wool fleece fibers with a barbed needle or soapy water to create a felted surface. That’s how I made the brown soil in the underground part, which I’ll describe in a future post.
In the coming weeks and months, I will post more stories that focus on different aspects of making the fall scene, including the toad stool mushroom, wee folk figures, needle felted tunnels, roots, stones and foliage of all kinds. Part 1 featured moss making. Part 2 is about making the turkey tail mushroom.
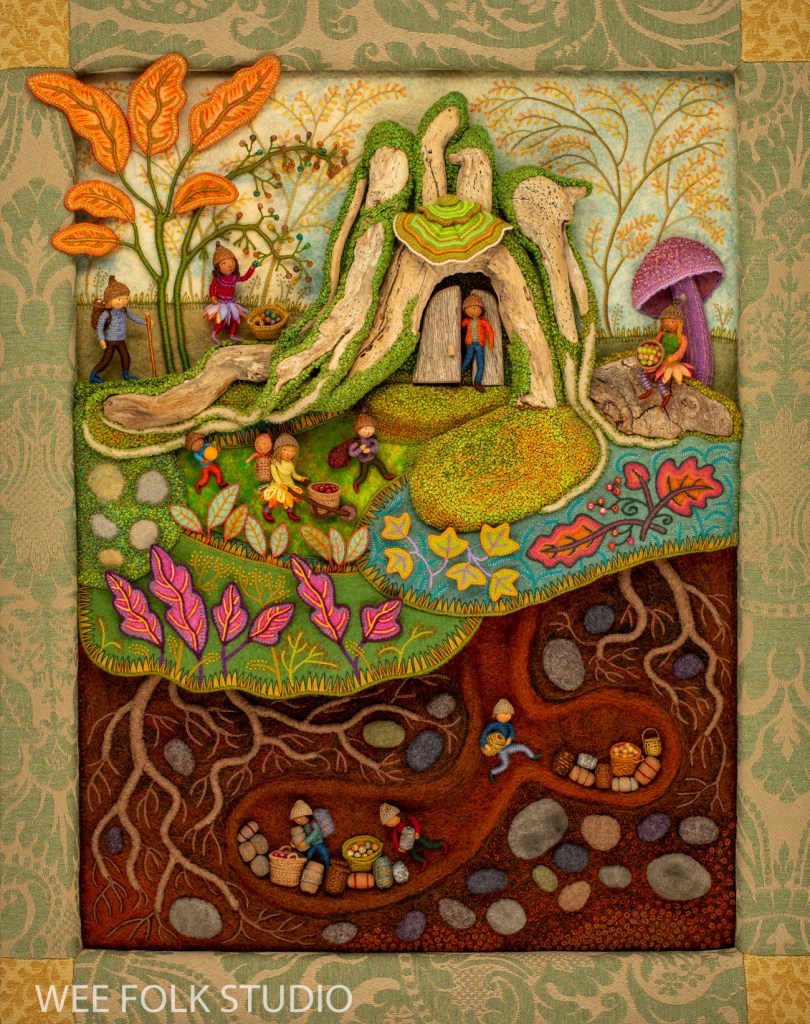
Harvest Time is the fall scene in a series of seasonal landscapes that capture the wonder and magic of the natural world, both real and imagined.
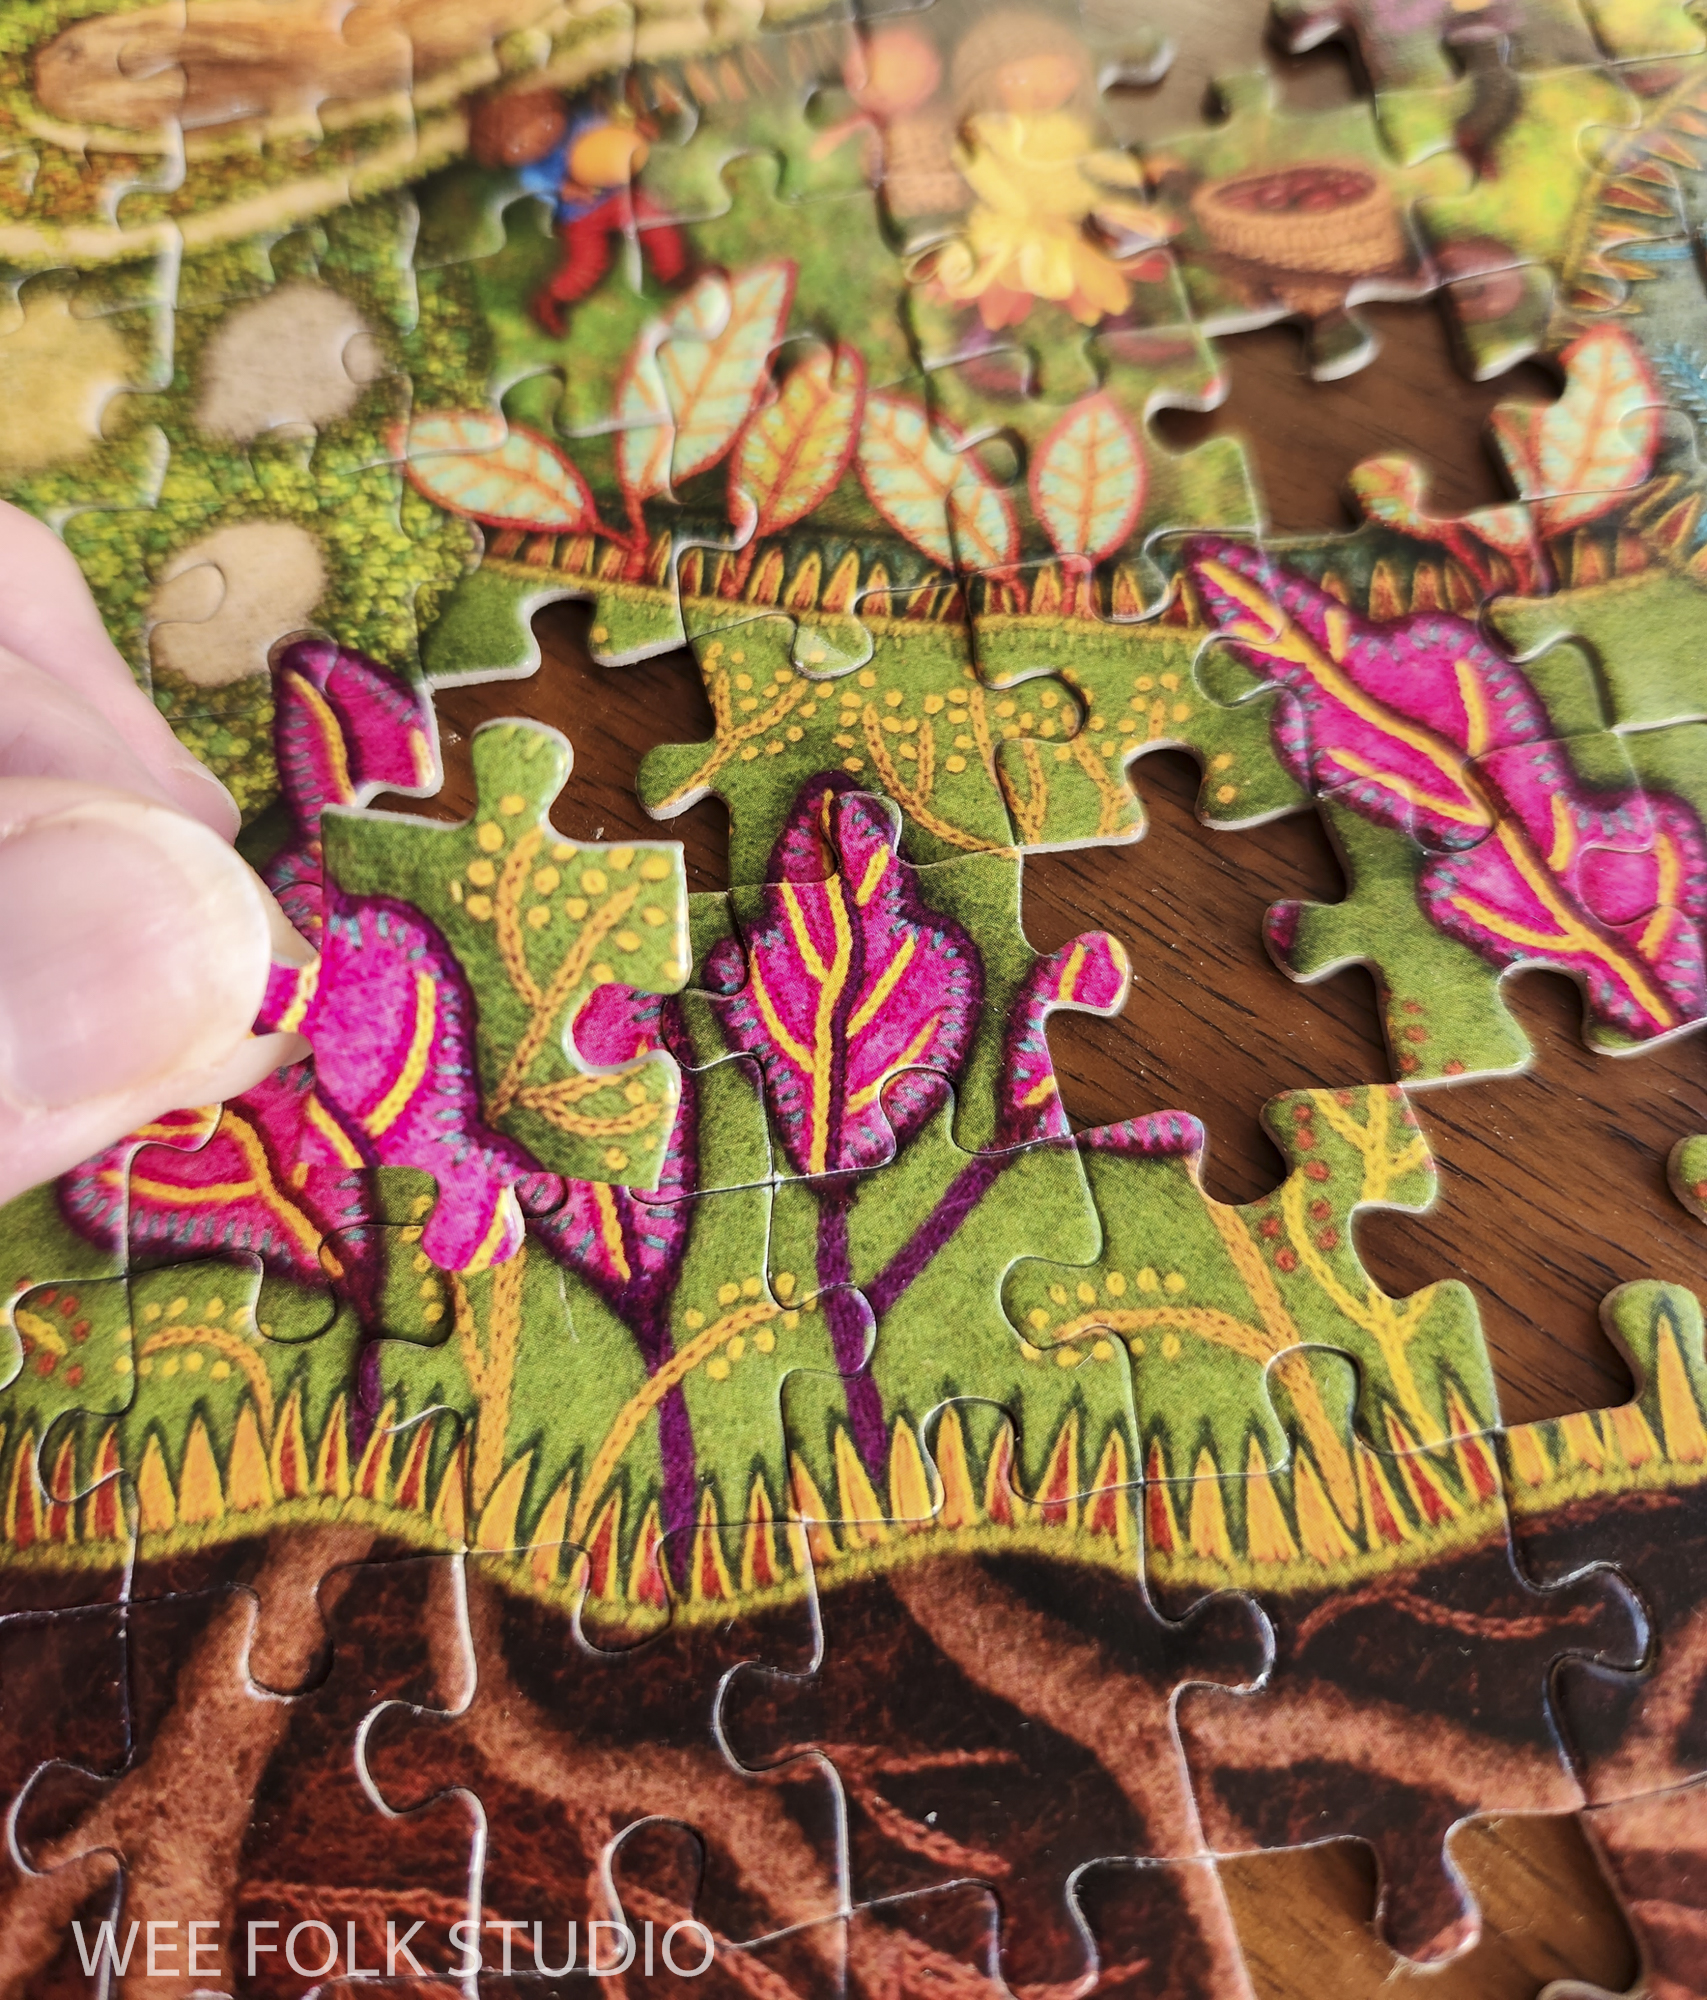
Harvest Time note cards and a jigsaw puzzle are available in my Etsy Shop.
When envisioning this piece, I wasn’t sure how it would come together, but that’s normal for me. I knew that I needed to figure out a way to clearly define the edge between above ground and below ground. This is the kind of thing I think about when doing busy work, like stitching hundreds of French knots. I’m always one step ahead, planning the next move. I ended up creating a kind of flap with two sections of felt “sod” that overlapped the underground tunnel to the root cellar.

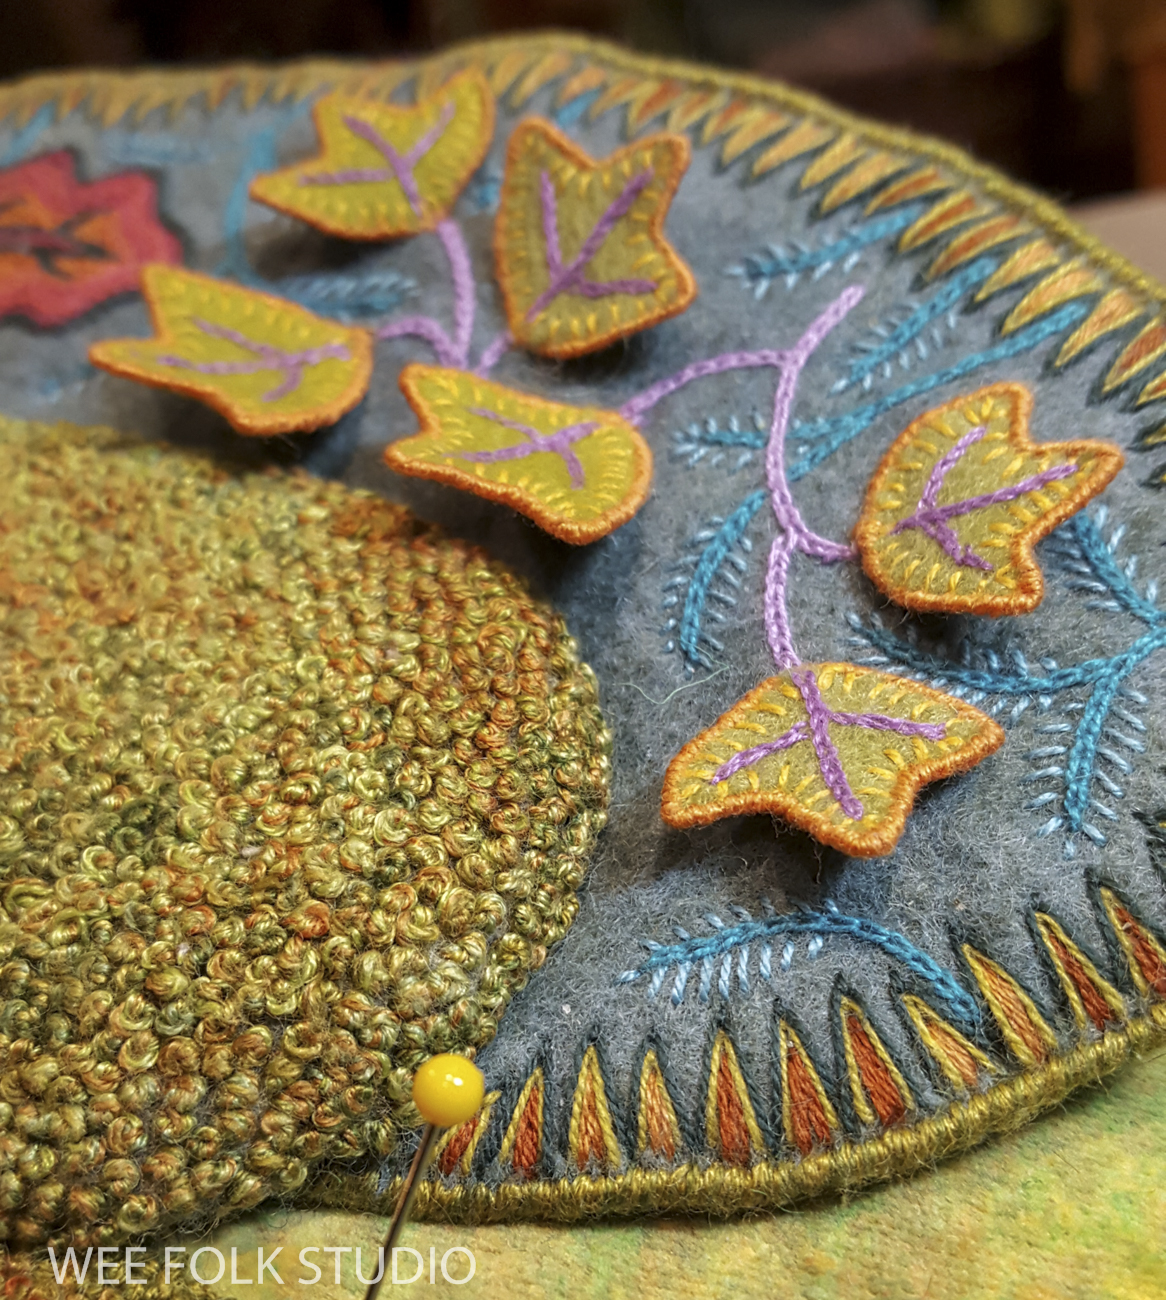
Felt Leaves
After edging the felt leaves with blanket stitches, I bent wire to match the shape and stitched it to the outside edge. Then I kept going around until the wire was completely covered with thread. I used single strands of floss to give it a fine finished look.

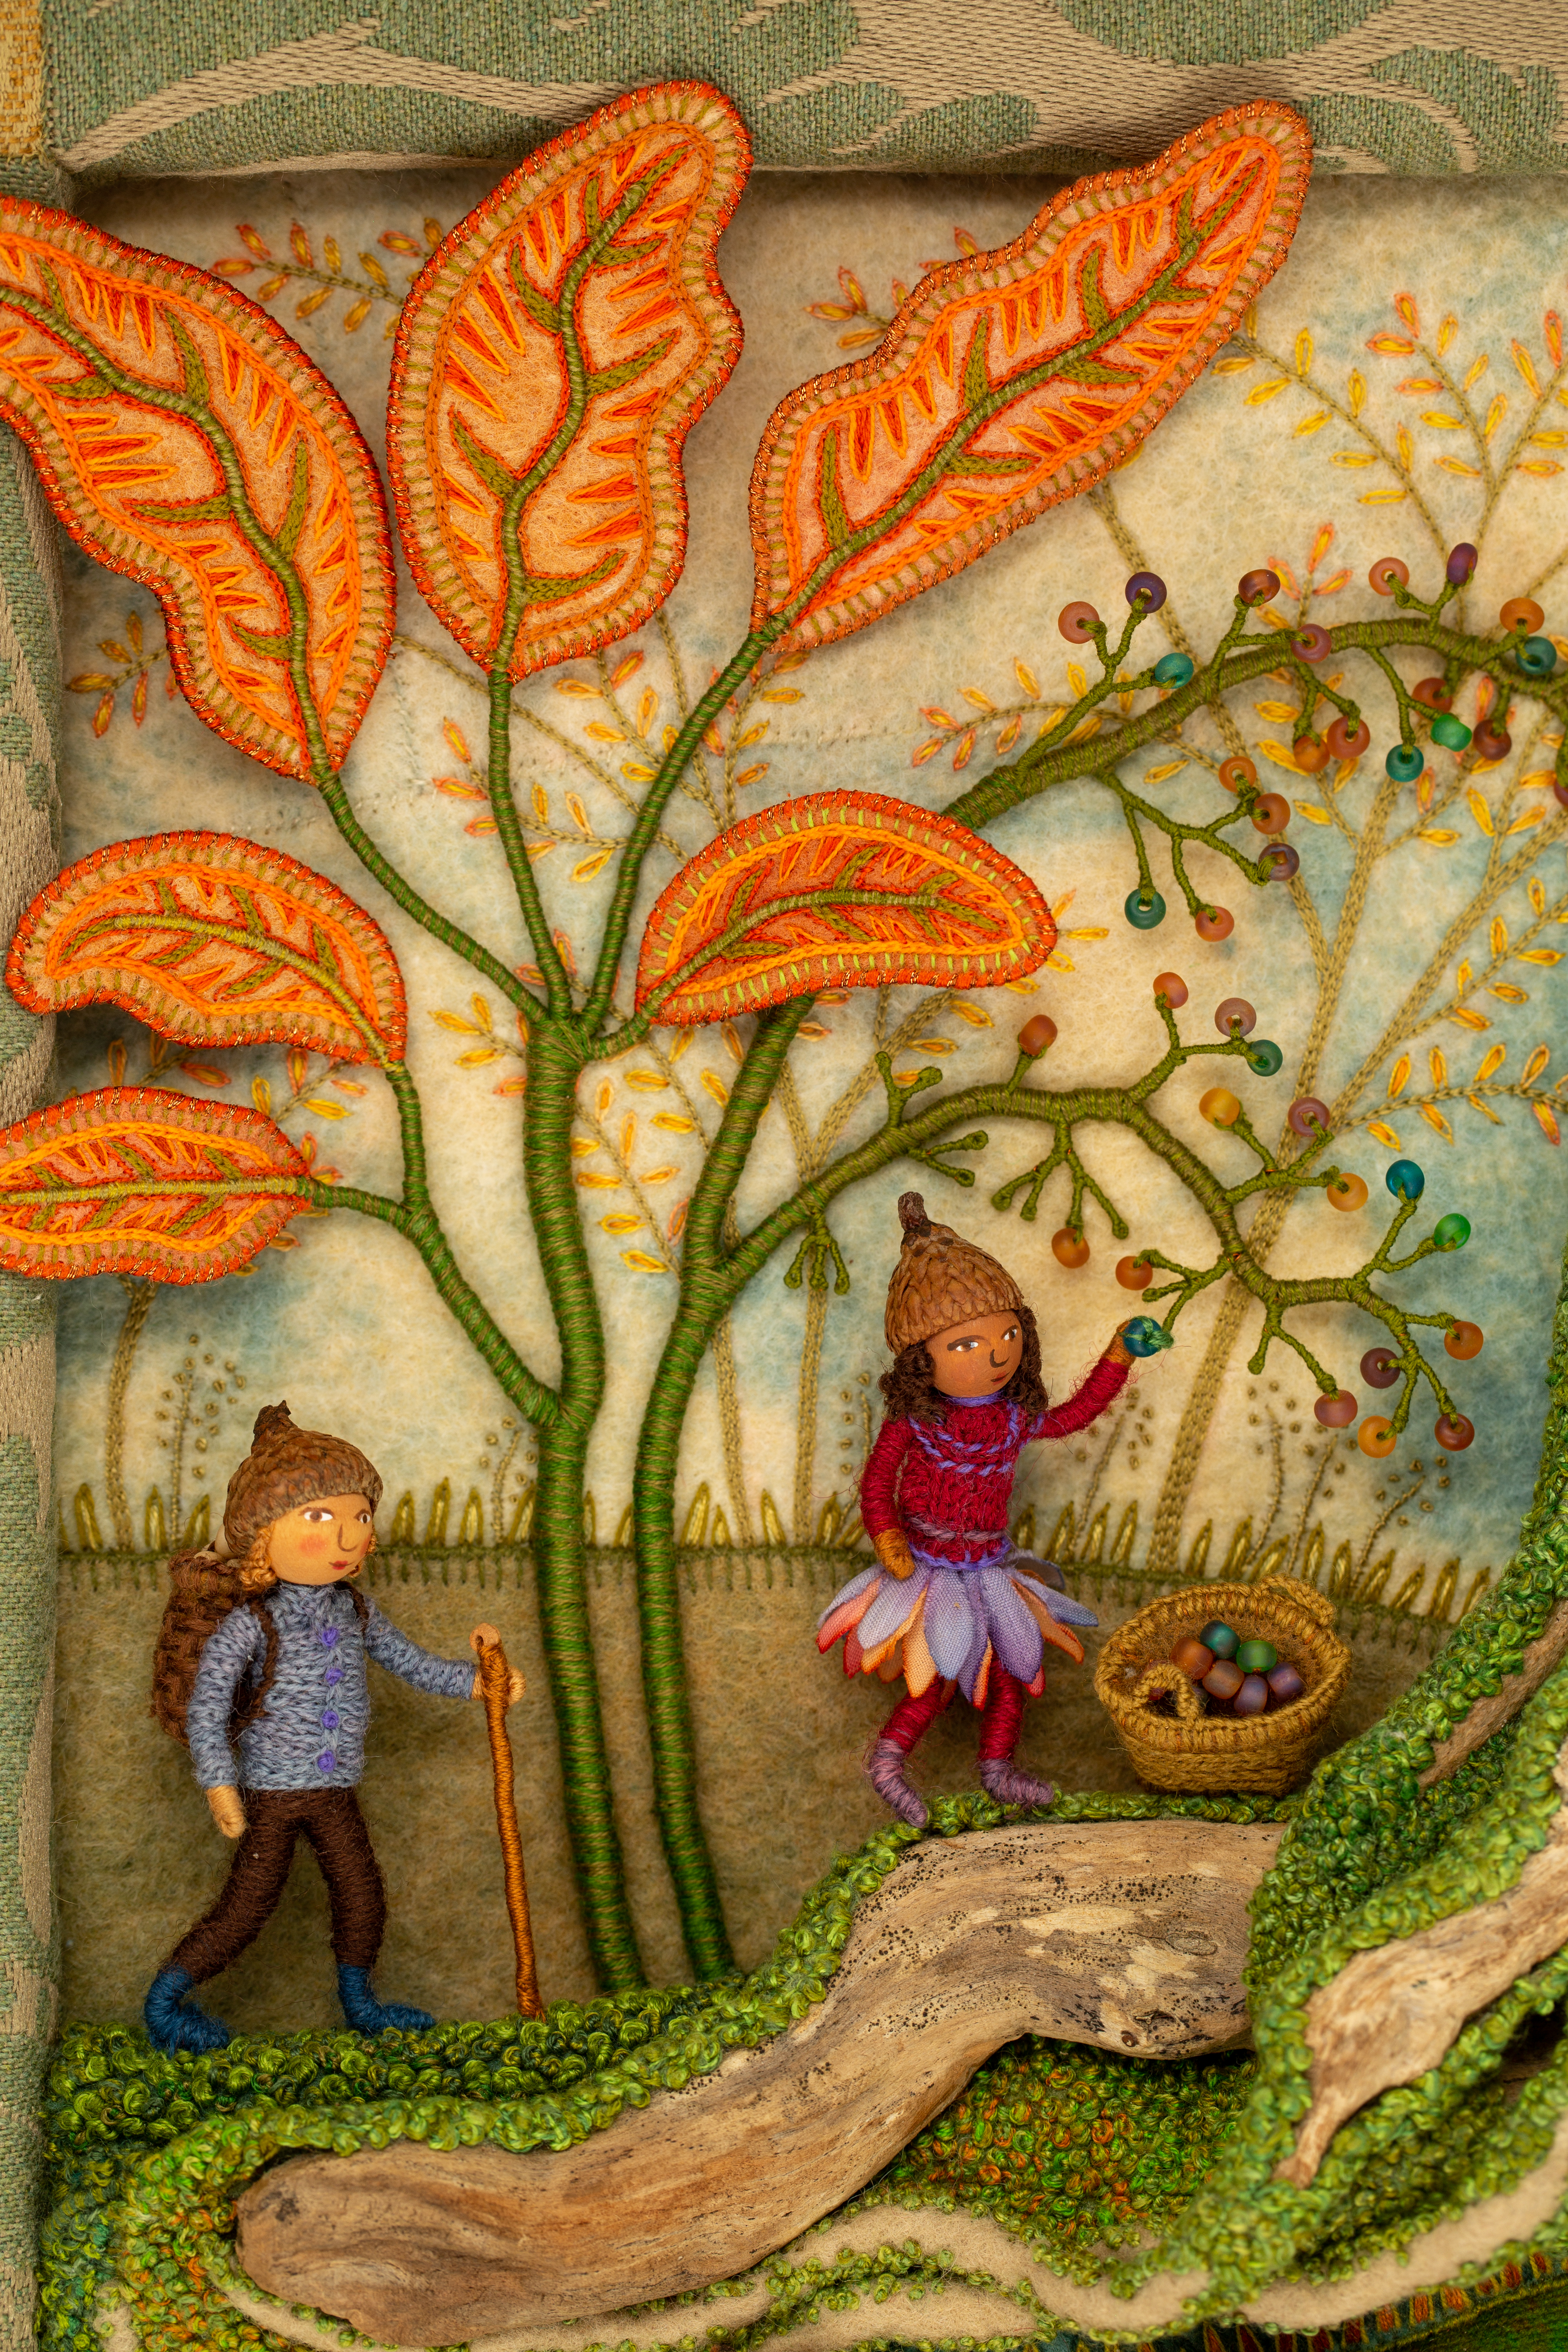
I wanted to fill the ground cover with an eye-catching array of textures, colors and shapes that would balance the composition of the whole piece. To help the leaves perk up and create shadows, I pushed the wire stems through a small hole to the back of the felt background, where it became a leverage point.
Because this scene has an element of fantasy, I felt free to incorporate bright unnatural looking shades.

I searched through my stash and found some variegated yellow embroidery floss to use for the chain stitched veins on these hot pink leaves.
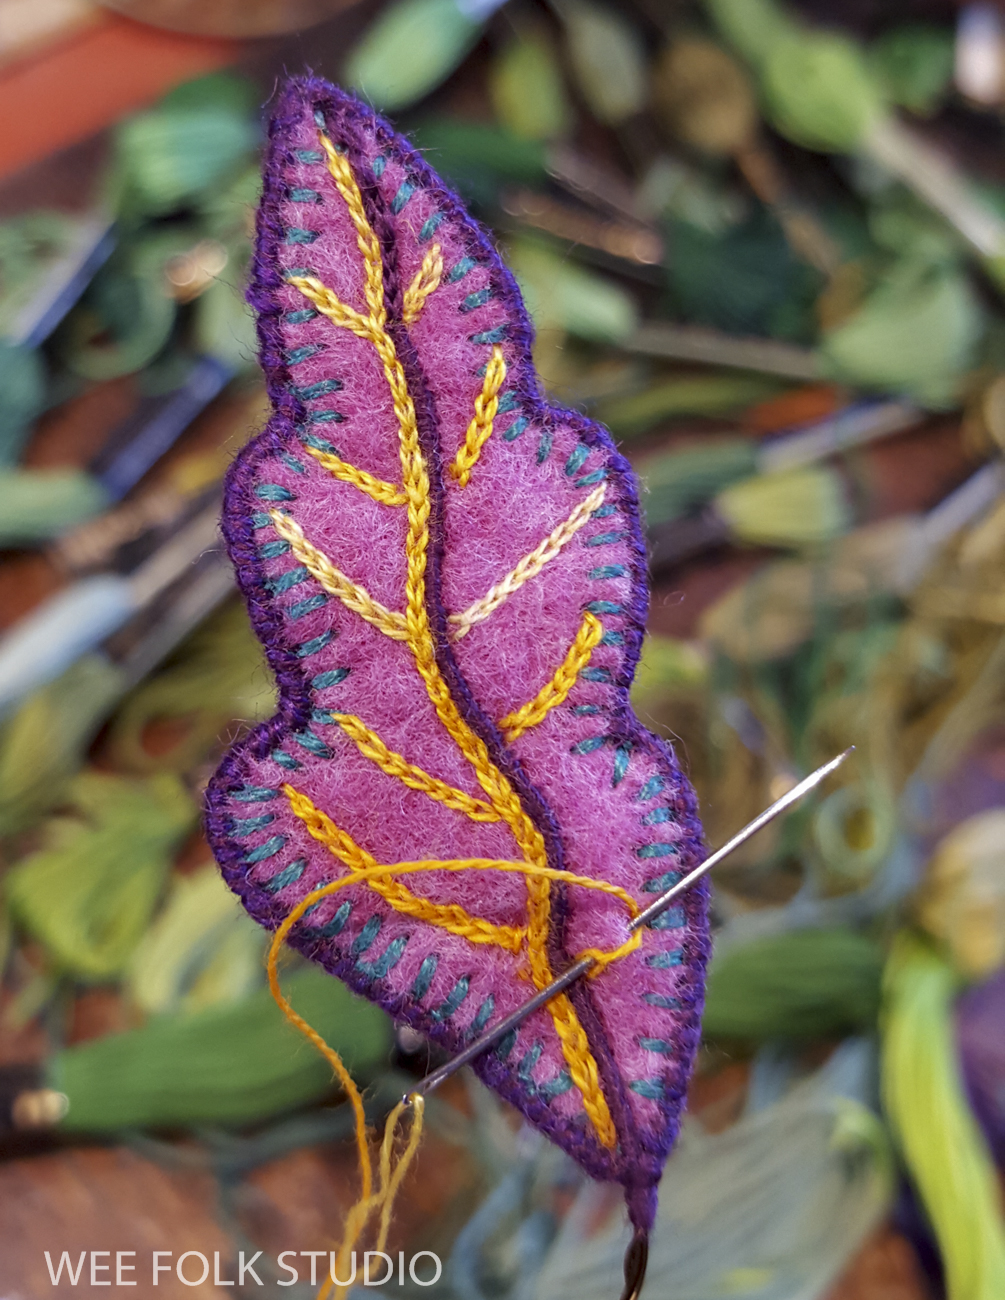
When I embellish with thread, I constantly think about how to enhance and articulate the form, without becoming too cluttered. For instance, adding a dark pink outline around the veins on this leaf help emphasize the lines.
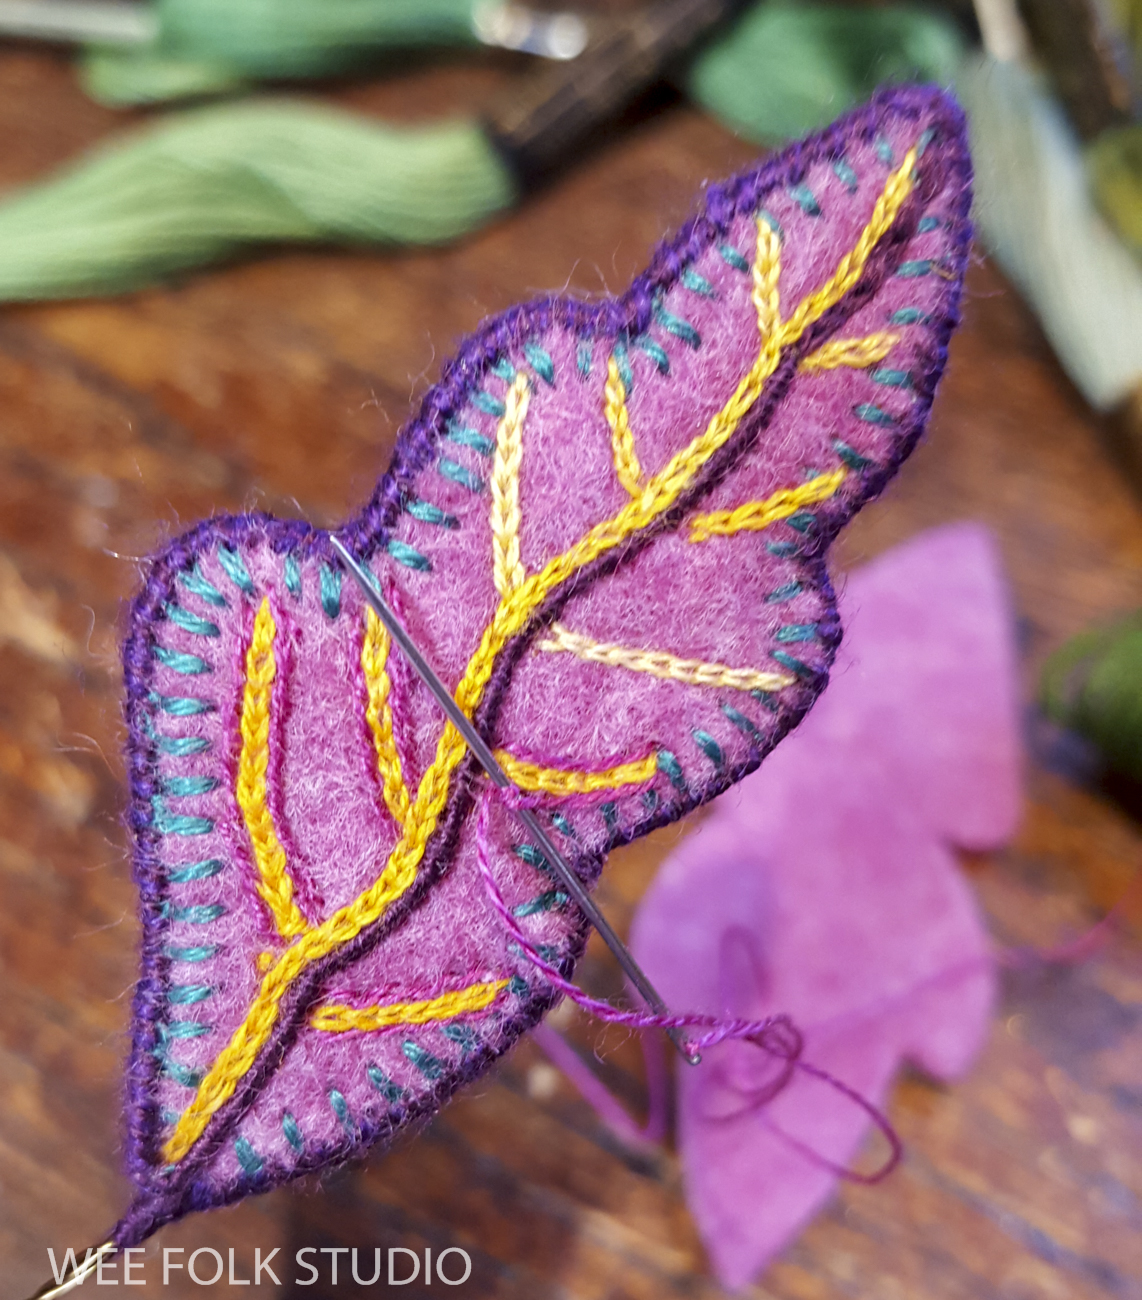
I hadn’t noticed it before, but now I see that the leaves are all made with complimentary colors. That way they pop out at you, both visually and physically!

This Stitch Minute video shows how I made a wire edged felt leaf.
As you can see, I constructed this background piece separately from the other parts of the scene. At the very end, after months of work, I assembled all of the pieces and stitched the sections onto one stretched fabric layer.

I also made larger orange leaves for the berry bush that’s growing next to the moss covered stump.


In future posts, I will focus on different aspects of making Harvest Time, including the toad stool mushroom, wee folk figures, needle felted tunnels, roots, stones and foliage of all kinds.
The overview introduces the Harvest Time piece.
Part 1 features moss making.
Part 2 is about making the turkey tail mushroom.
Part 3 shows the construction of felt leaves.
Part 4 gives a peek at embroidering the plants.
Part 5 is about making the toadstool mushroom
Part 6 shows the process of making the underground


Thank you for sharing your photos and descriptions. I’m fascinated by your process and creativity. I’m also learning a few tips for my own very amateurish attempts.
I am truly thankful to receive your updates on your artful process creating these wonderful scenes. They are pure magic and you are the magician!
Fabulous work, you have such an eye for detail and how everything will go together.
I’m going to keep these newesletters to inspire me to do an art piece of my own along with blogs to show folk how I might do stuff – once I’ve worked it out myself!
Helen Llewellyn
Hi Salley,
I just love your use of color.. so beautifully balanced, warm and complimentary.
Carole
Thank you for sharing your progress. You are indeed a master of your craft. Have you ever thought of a virtual class project for those of us who would like to learn from you?
Thank you for your interest in learning more about how I work. The question of classes comes up quite often, so I put it on my FAQ page. The answer is that I do not teach classes or give workshops. I’ve tried teaching and discovered that I don’t have the patience for it. That may sound ironic, considering the kind of work I do, but being an artist doesn’t necessarily make one a good or willing teacher. Writing Felt Wee Folk, my how-to book and sharing my process on this blog from time to time is as much as I want to do. I will continue to offer glimpses into my world through the wonders of social media and I hope you come along on the adventure!