Harvest Time – Part 9 (embroidered trees)

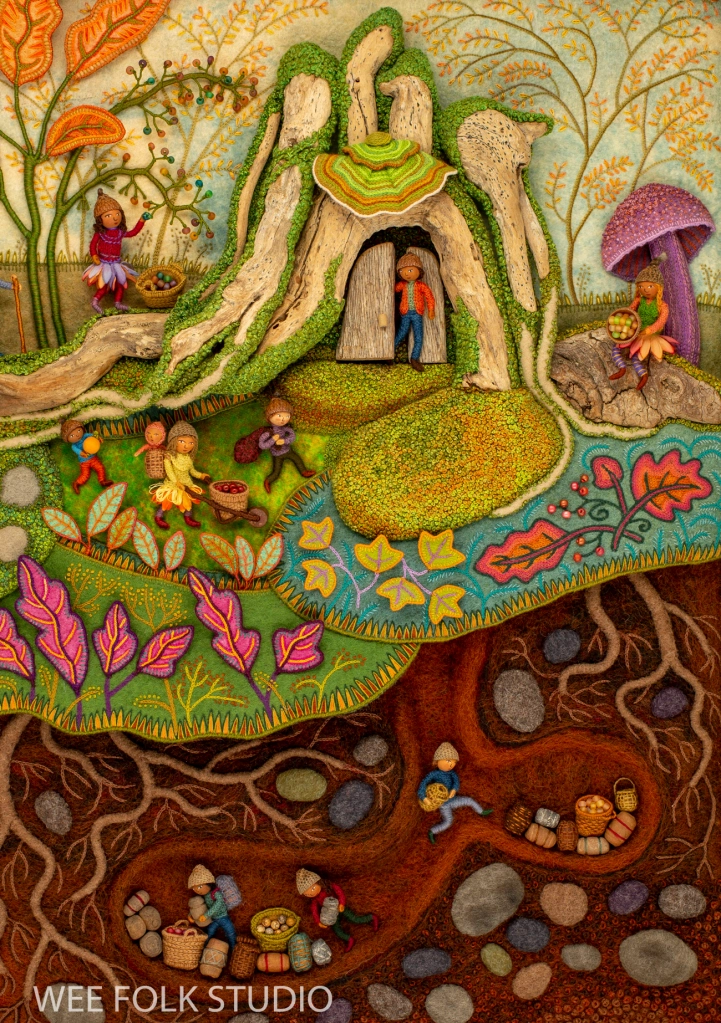
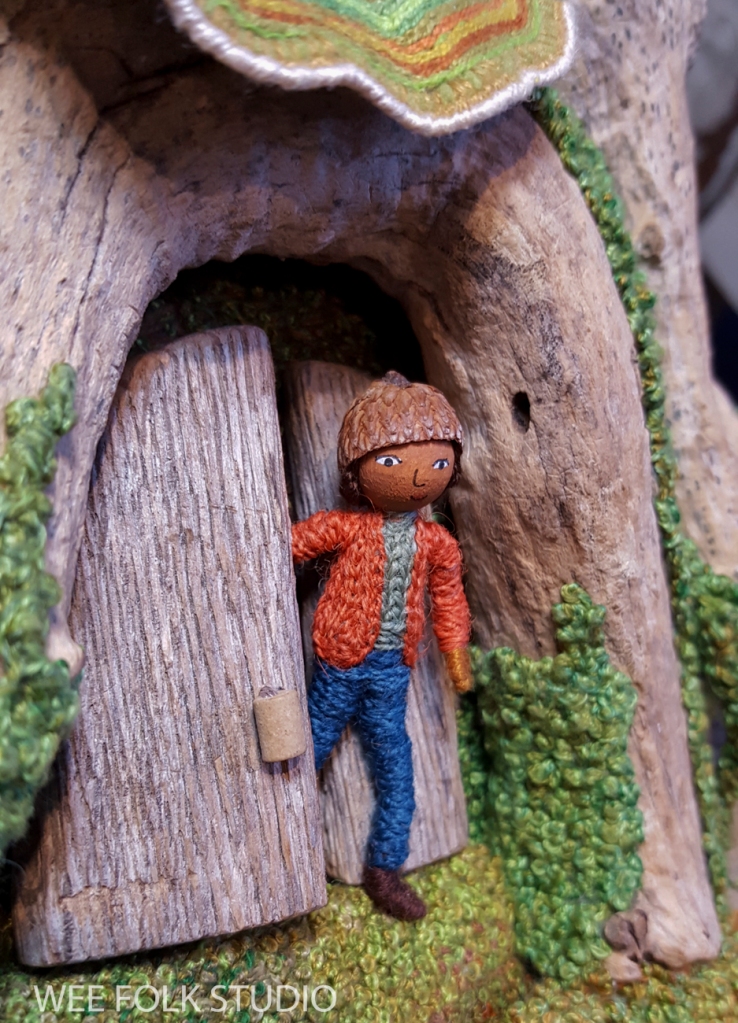
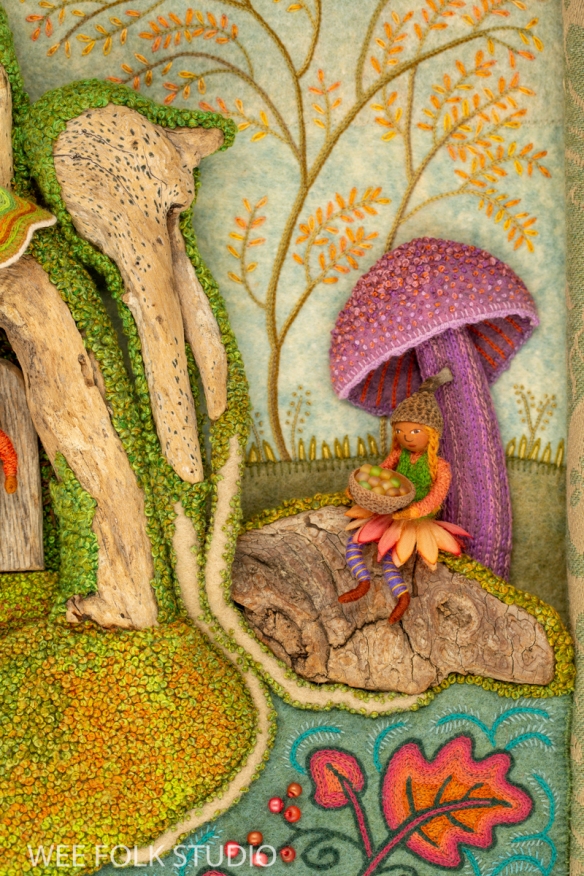
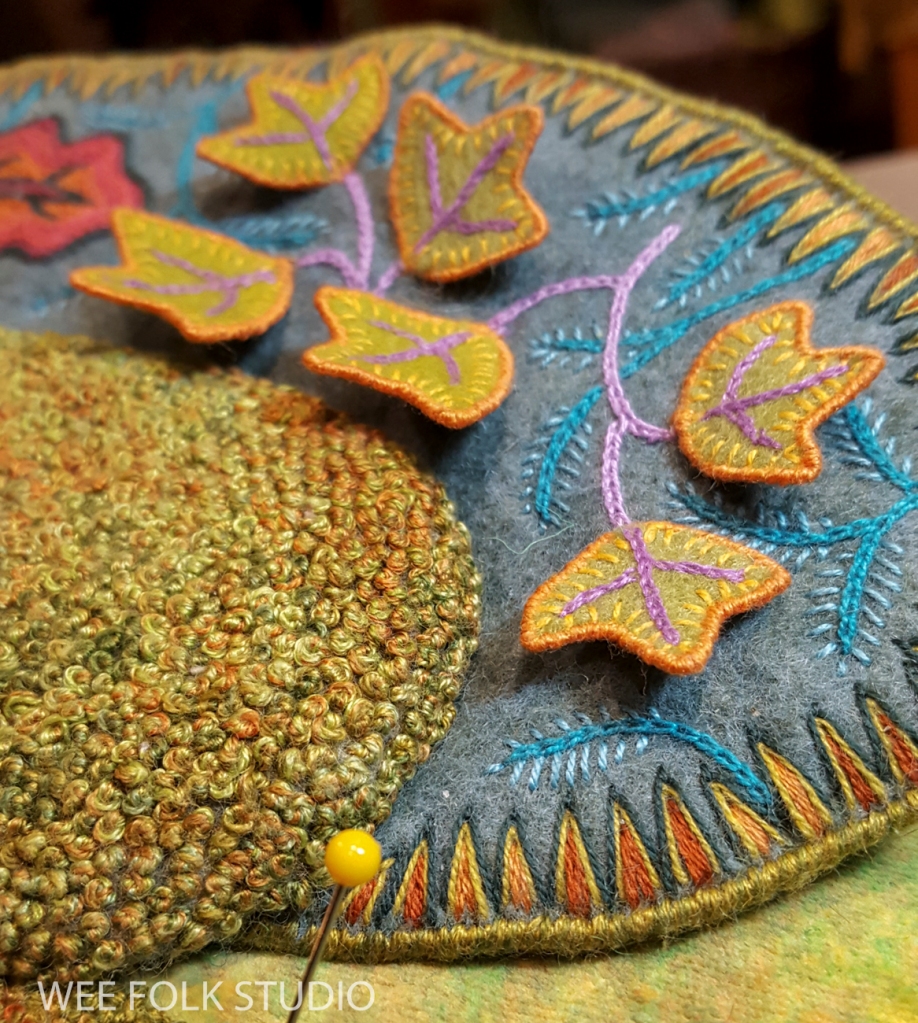
As promised, I’m winding down the string of posts about Harvest Time, the fall scene in my series of seasonal landscape. Part 9 features the embroidered trees in the background sky portion of the piece. For over a year now, I’ve shared photos, videos and commentary about different aspects of the project, from moss to underground tunnels to miniature storage containers (see list with links below). This year, I’ll be writing about Summertime, so stay tuned!
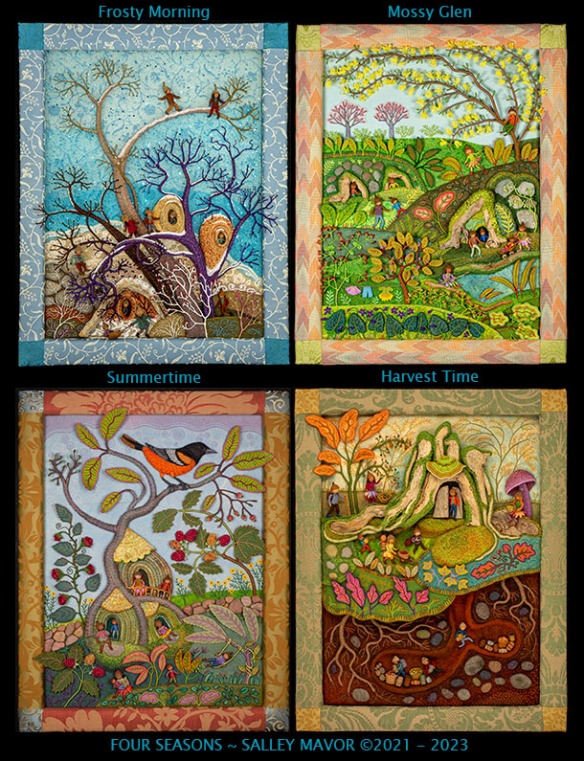
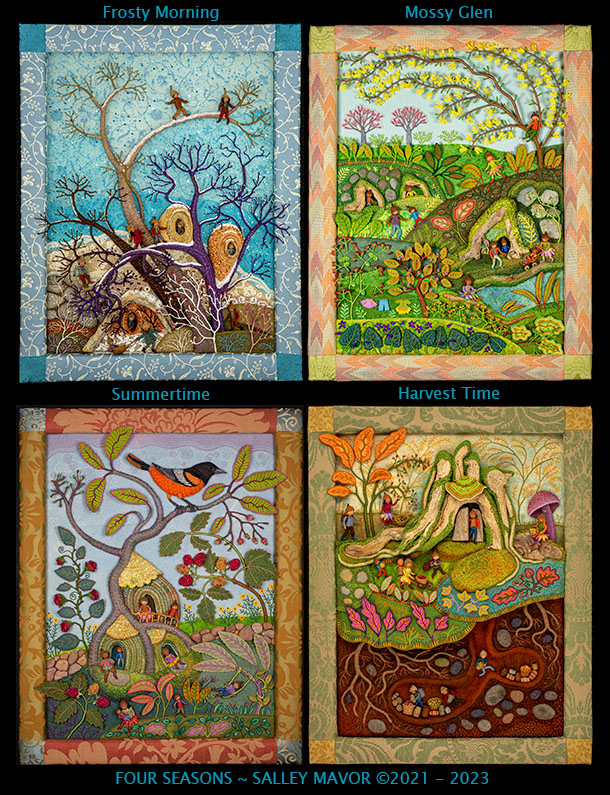
Harvest Time is the fall scene in a series of seasonal landscapes that capture the wonder and magic of the natural world. Note cards, prints and jigsaw puzzles of Harvest Time and the other scenes in the series (Frosty Morning, Mossy Glen and Summertime) are available in my Etsy Shop.

Here’s a list of the other posts about Harvest Time:
The overview introduces the piece.
Part 1 features moss making.
Part 2 is about making the turkey tail mushroom.
Part 3 shows the construction of felt leaves.
Part 4 gives a peek at embroidering the plants.
Part 5 is about making the toadstool mushroom.
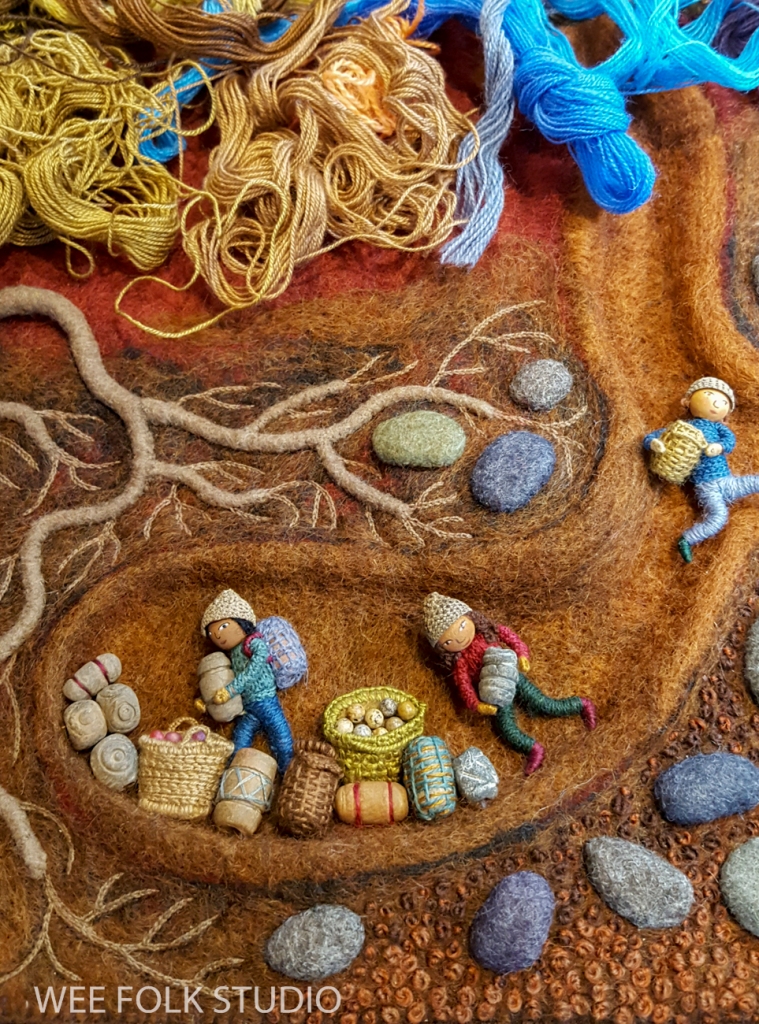
Part 6 covers the underground tunnels, roots and stones.
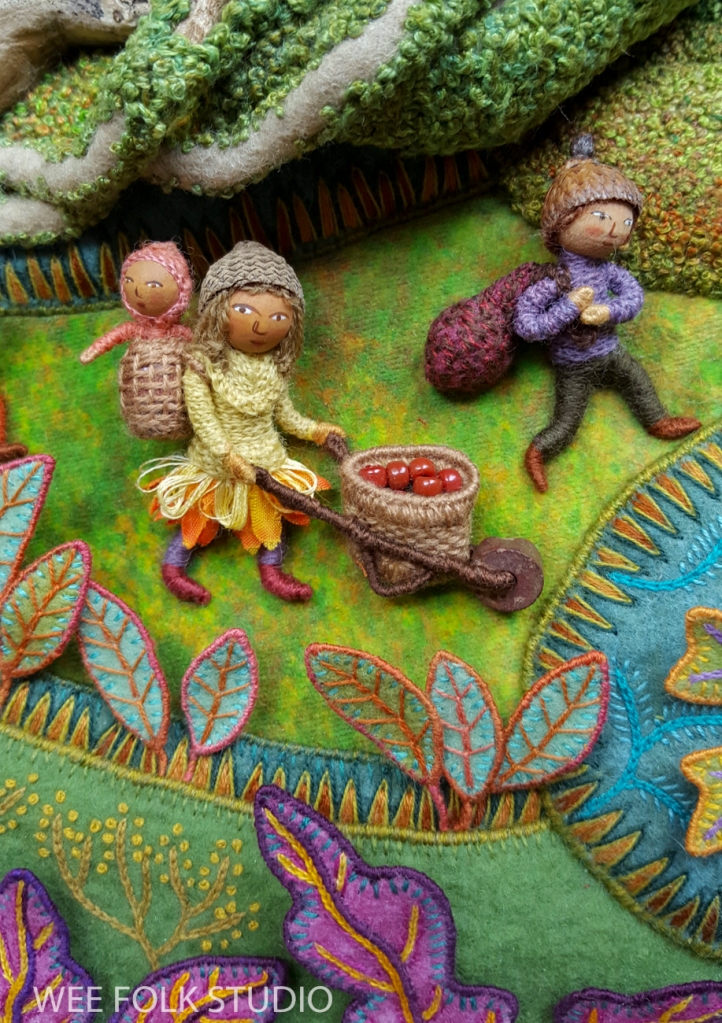
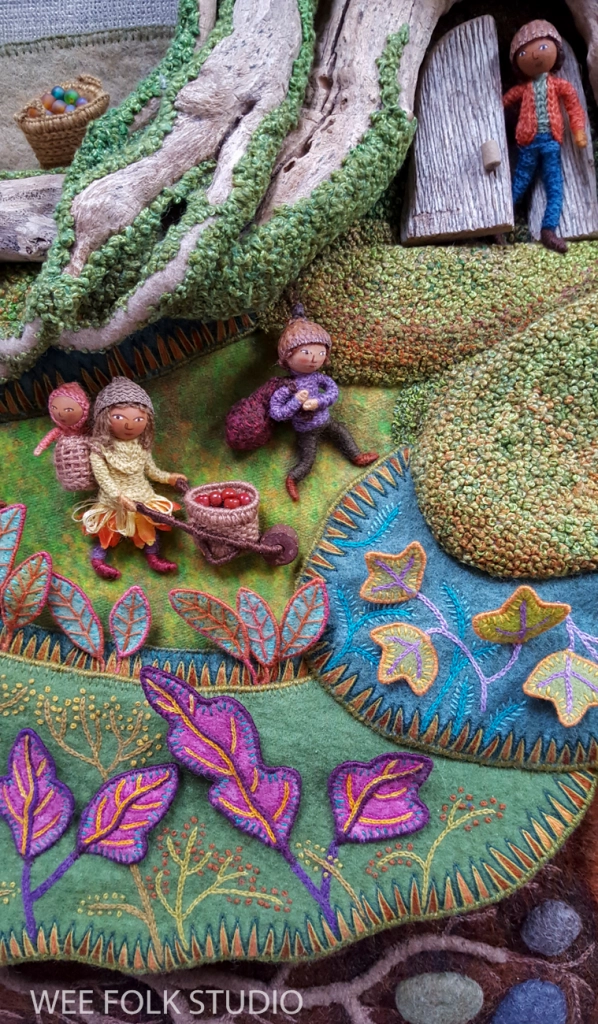
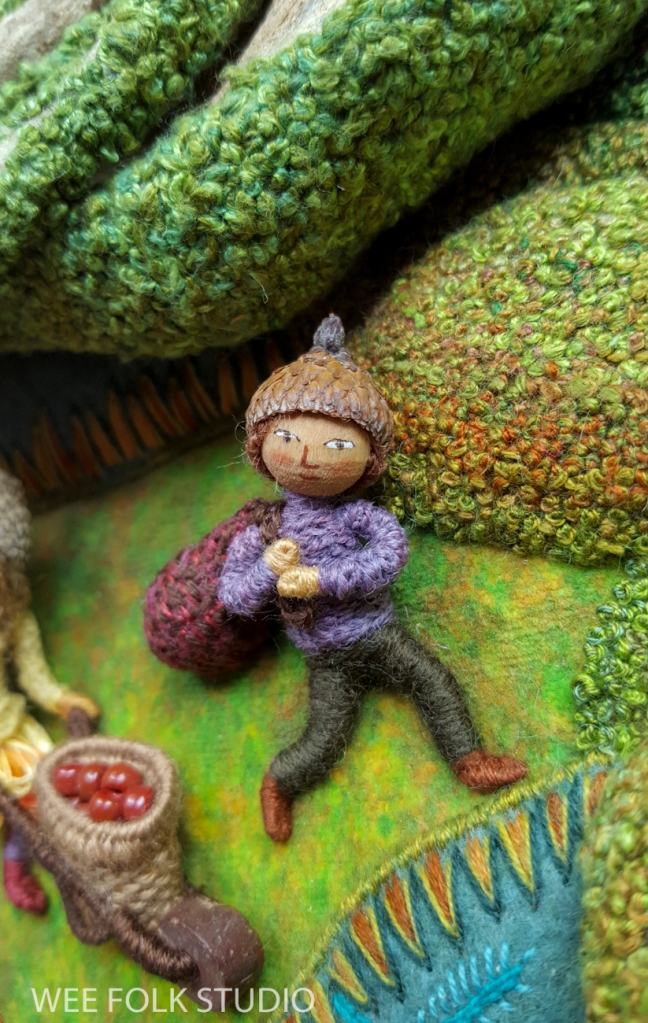
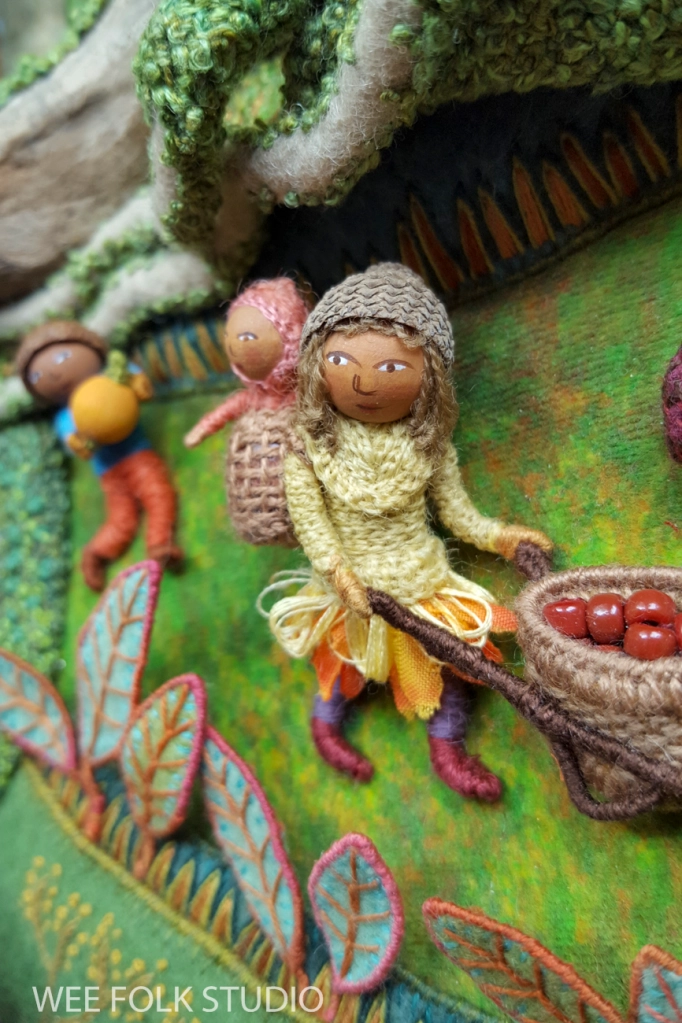
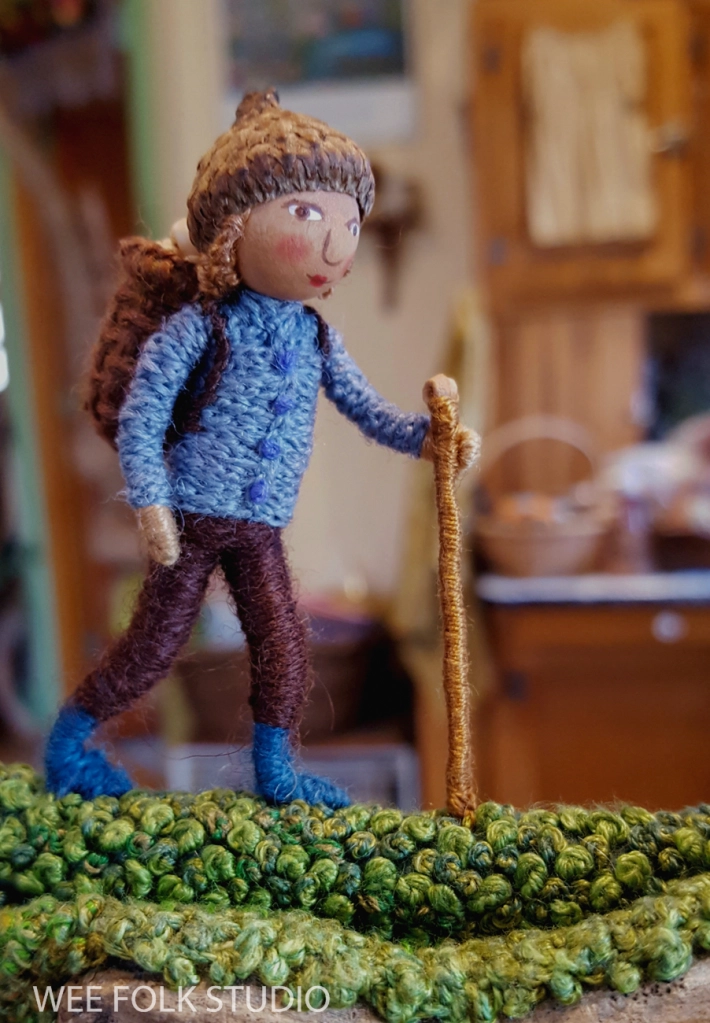
Part 7 shows how I made the wee folk harvesters.
Part 8 is about miniature storage containers
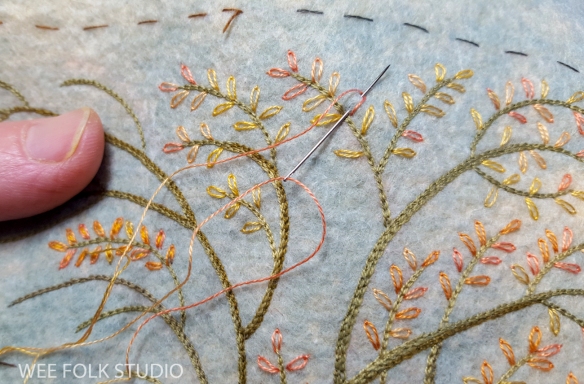
Embroidered Trees
I saved this part until the very end, when it was clear how much of the sky area would be visible. During the months-long process of making this piece, all of the separate parts and figures piled up, waiting in the wings until it was time to go on stage, like scenery and characters in a play.
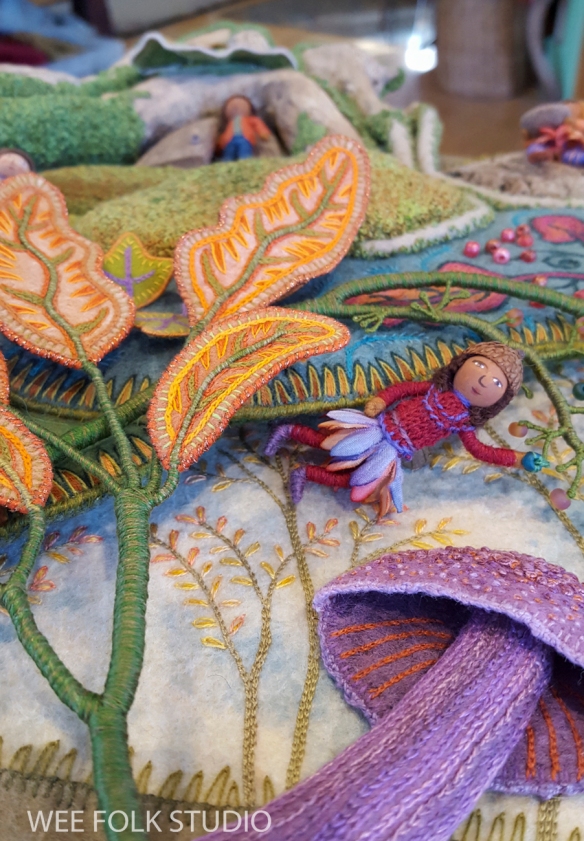
I used a mottled blue naturally dyed wool felt to make the sky portion. Years ago, I bought some unevenly dyed felt, which was sold as “seconds”. Unfortunately, I can’t get it anymore, so I make do with what I have. Since I didn’t have a large enough piece of this color combo, I sewed together smaller scraps from my stash. If you’re looking for naturally dyed wool felt in solid colors, check out A Child’s Dream.

This felt is so precious that I’ve kept every little scrap. I used some of the smallest pieces of blue and lavender to patch together a background for mounting the animals from my book, MY BED.

Animals from MY BED

It’s one of the 18 framed originals from My Bed included in my touring exhibition, Bedtime Stitches. For information about the book and where the show is going through 2025, please visit this page.

Bedtime Stitches at the Southern Vermont Arts Center in 2023

Now, back to Harvest Time. After sewing together the pieces of felt, I marked the edges of the open areas with large stitches.

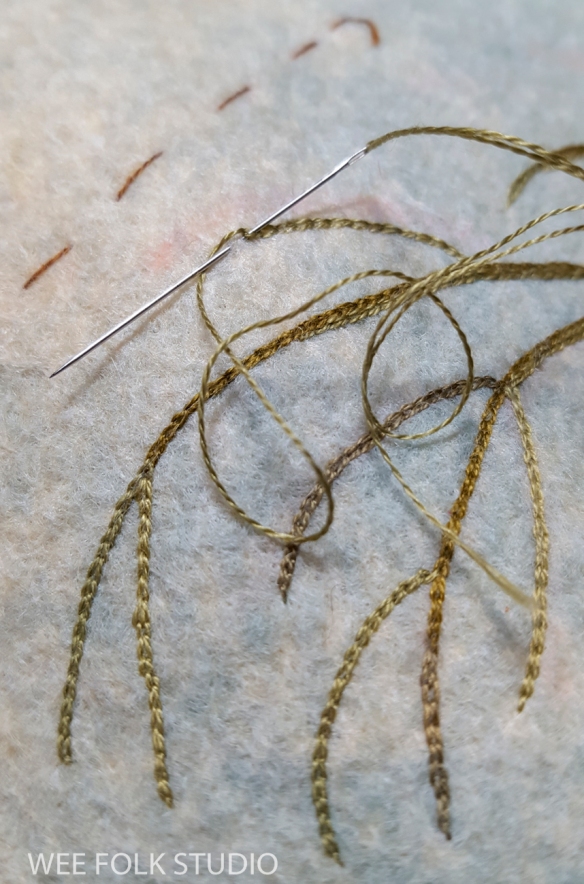
Drawing on felt isn’t very effective, but I managed to mark a few faint lines with a pink chalk pencil. While I chain-stitched the branches and handled the felt, most of the chalk brushed away.
The next step was to add leaves along the branches with daisy chain stitches. For a naturalistic look, I used single strands of variegated embroidery floss.
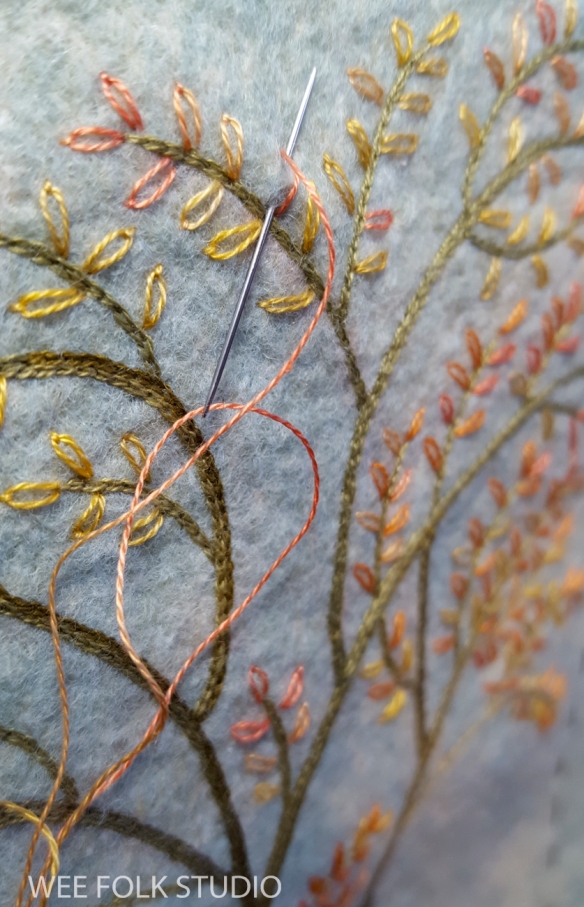
I created a horizon line by sewing pieces of grayish brown felt along the bottom of the sky section. Every once in a while, I tested how it looked by temporarily positioning parts on top.

To make the leaves stand out visually, I filled them in with bright yellow floss. I then stitched blades of grass and other vegetation that was growing up along the ground.

Before assembling the scene, I covered the wooden stretcher bars with upholstery fabric. Then, I stapled the background fabric to the back of the stretcher and sewed all of the individual trees and figures in place on top. Everything is secured with a needle and thread. This video shows the whole piece put together.

I hope that you enjoyed this behind the scenes peek at my process. To start from the beginning, please go to Harvest Time’s introductory post here.

To keep up with new posts, please subscribe to this blog Your contact info will not be sold or shared. If you’d like to see more frequent photos tracking the projects in my studio, please follow me on Facebook and/or Instagram.

2023 in review

Here we are again, at the dawn of a new year! As usual, 2023 flew by so fast that it’s hard to comprehend how we could have passed through all four seasons already! For me, it was a year full of blessings and opportunities, both personally and professionally, highlighted by the arrival of a new family member, new artwork, new exhibitions and new products in my shop.

Artwork packed and ready to go to the Southern Vermont Arts Center.

Thank you to all of you who follow this blog and take an interest in my work and life as an artist. As we enter its 15th year, I marvel at the constant influx of new subscribers every day! According to some, the blog format has faded in popularity compared to other fast and flashy social media platforms, but not here. The slow, in-depth, and thoughtful way of writing posts with pictures is more in keeping with my style of working. My Facebook and Instagram pages attract more visitors, but I’m constantly directing people to my blog because this is where you’re more likely to find out about what I do and why I do it, not just a little snippet of the story. So, now that you’re here, please come along as I review the past 12 months and share posts (linked in bold blue letters) published in 2023.

The most significant event in my life this year was the birth of our grandson, Elias in January. During the winter and spring, he and I covered many miles strolling on the bike path behind his house, while I sang every song I could remember. Though, I did manage to get some work done in the studio, including a baby banner with his name, birth date and weight.
Baby Banner for Elias shows how I created the felt banner, including correcting a misspelling.

Baby banner for Elias

WINTER DISPLAY at BOSTON CHILDREN’S HOSPITAL
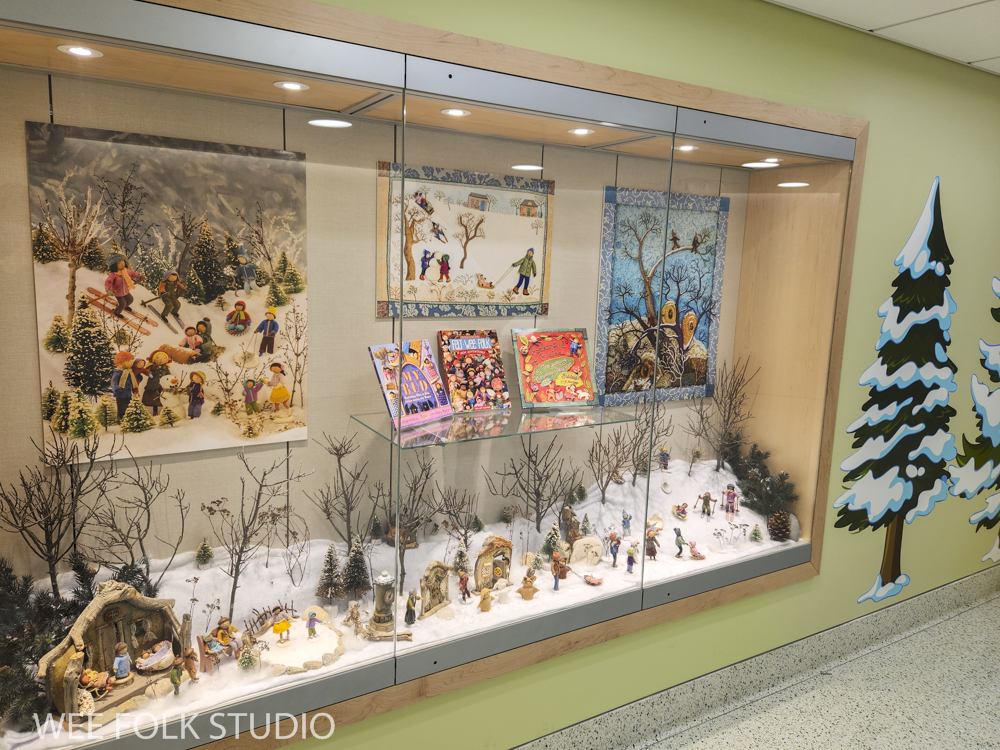
I was thrilled to be invited to set up a display at the Boston Children’s Museum last winter. The snow scene was populated with sample dolls from the Winter Play chapter of my how-to book, Felt Wee Folk: New Adventures.
Boston Children’s Hospital Installation shows a practice set-up of the scene in my studio.

Boston Children’s Hospital Installation

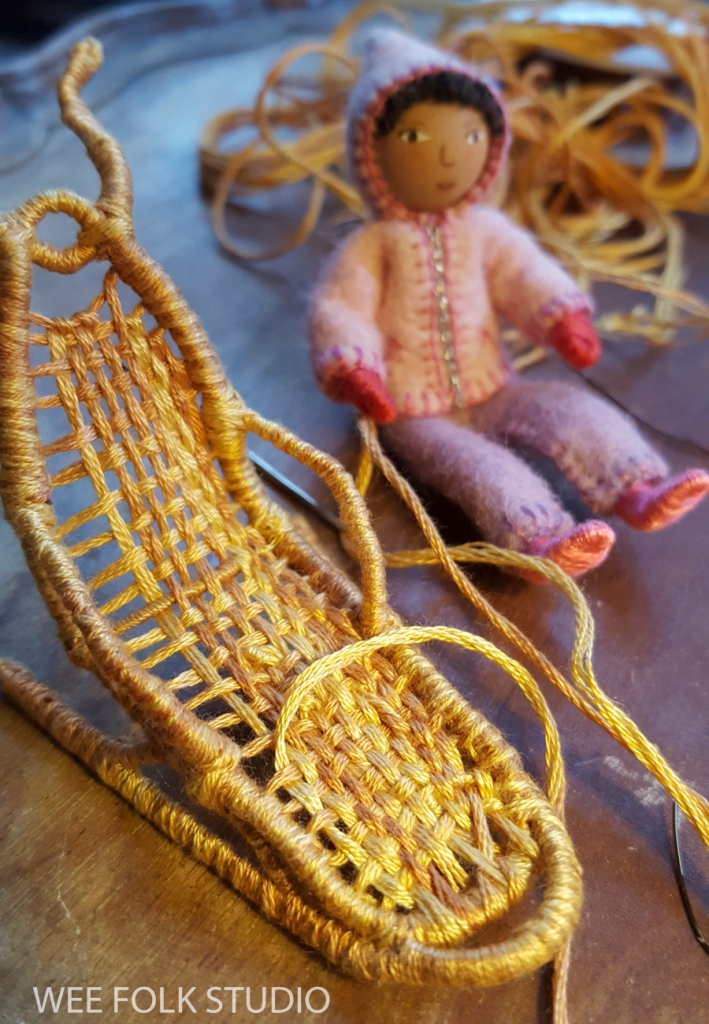
Adaptive Sled for the snow scene gives an inside view in photos and video of how I constructed an adaptive sled for the snow scene.

HARVEST TIME
During 2023, I posted 6 more segments about the fall scene in my series of seasonal landscapes. There’s one more part to go, which will be published in 2024.
Harvest Time – Part 3 (felt leaves)
Harvest Time – Part 4 (embroidered plants)
Harvest Time – Part 5 (toadstool mushroom)
Harvest Time – Part 6 (underground)
Harvest Time – Part 7 (wee folk)
Harvest Time – Part 8 (storage containers)

Harvest Time – Part 5 (toadstool mushroom)
Harvest Time – Part 6 (underground)
Harvest Time – Part 8 (storage containers)

SUMMERTIME
This past year I finally completed Summertime, the fourth piece in my series of seasonal landscapes. In the coming year, I will post photos, videos and commentary about various aspects of the project.

Normally, I wait until a piece is finished before writing blog posts about it, but I couldn’t wait to give you a preview of Summertime and whet your appetite for what’s to come! The following 2 posts show photos and stitch minute videos documenting my process, including this raspberry video.
Studio News
Summertime makes the finish line!

Studio News

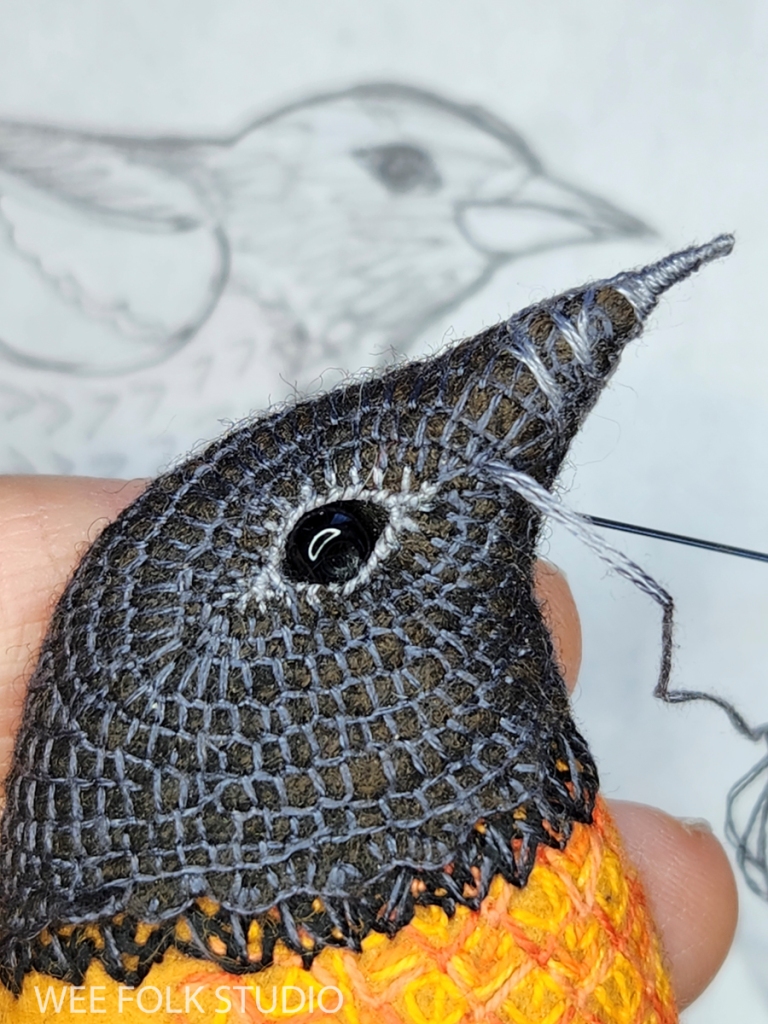
Baltimore Oriole Sneak Peek includes photos and videos of creating the bird for Summertime.

BEDTIME STITCHES TOURING EXHIBITION
Bedtime Stitches in Pacific Northwest shared the news that Bedtime Stitches was on view last winter at the Pacific Northwest Quilt & Fiber Arts Museum.
Summer Tidbits announced several opportunities to see my work in person, including Bedtime Stitches last summer at the Southeastern Quilt and Textile Museum and this past fall at the Southern Vermont Arts Center.
Bedtime Stitches 2024 Schedule:
March 2 – May 5, 2024, Upcountry History Museum, Greenville, SC
July 27, 2024 – mid-Feb. 2025, Albany Institute of History and Art, Albany, NY.

THE WEE WORLDS OF SALLEY MAVOR
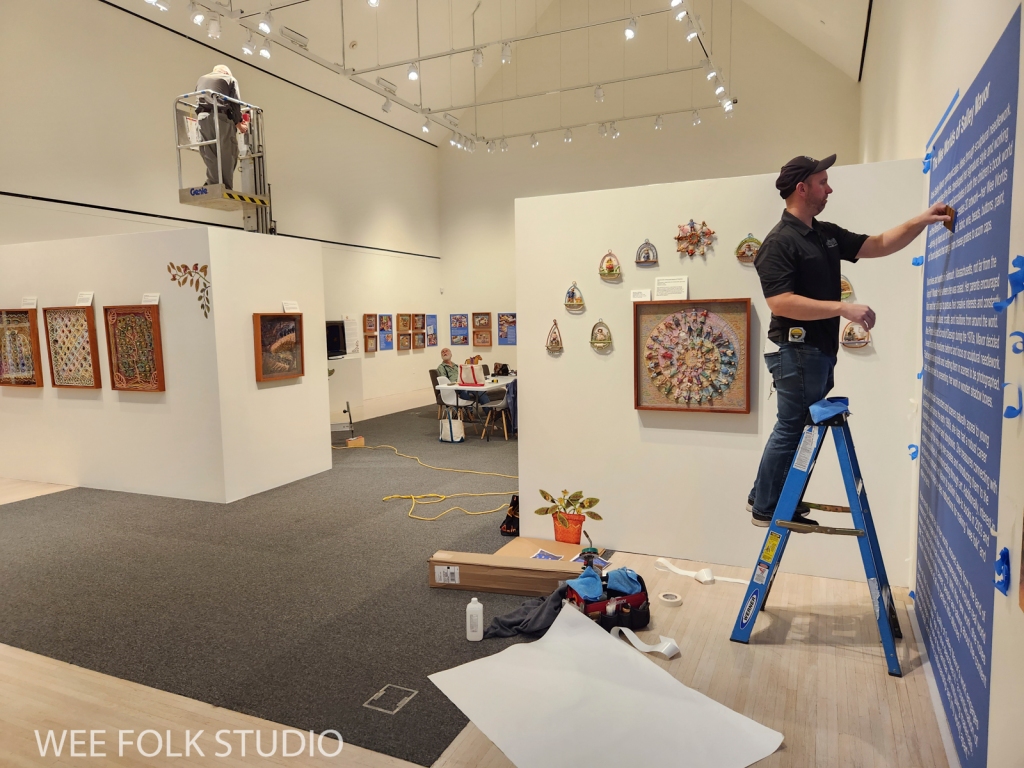
Wee Worlds on view in Vermont is an overview of my exhibition, The Wee Worlds of Salley Mavor at the Southern Vermont Arts Center (on view until Jan. 7, 2024)

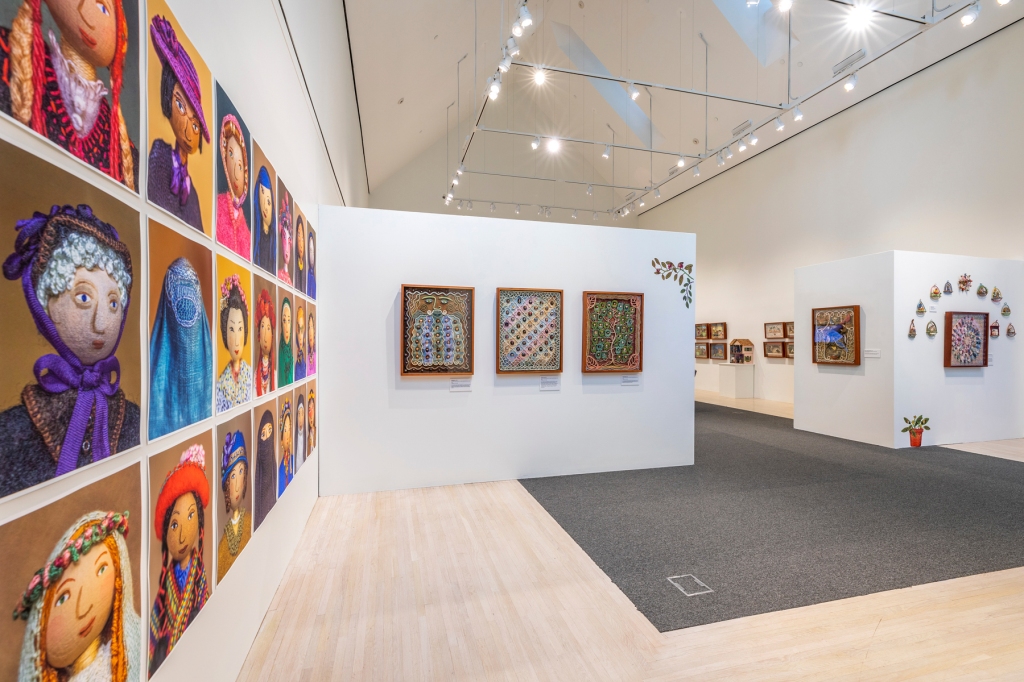
The Wee Worlds of Salley Mavor at the Southern Vermont Arts Center

This was the first time that all four pieces in my recently completed seasonal landscape series were shown together. Over the past few years, I’ve shared photos, commentary and videos that give a behind the scenes peek at how I created these bas-relief embroideries. You can catch up in the archives here: Frosty Morning, Mossy Glen, Summertime, Harvest Time. Summertime will be added in 2024.

Wee Worlds exhibition video Watch a video of the Vermont show and find out the reasons behind my decision to stop selling my original pieces.

The Wee Worlds of Salley Mavor at the Southern Vermont Arts Center

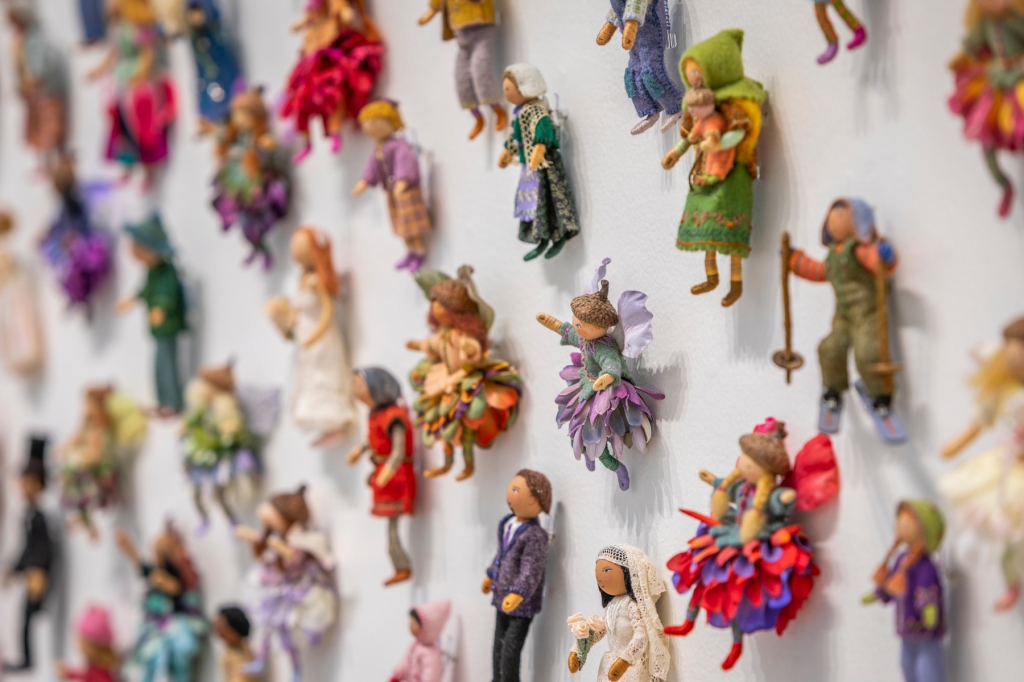
Wall of Wee Folk describes how I gathered and affixed the display of about 150 little dolls to the gallery wall.

The Wee Worlds of Salley Mavor at the Southern Vermont Arts Center

NEW PUZZLES
NEW Wee Folk Group Portrait gives an inside view of setting up and taking a photo of 20 years worth of little dolls for a puzzle image.

What’s new in my shop announces the addition of more jigsaw puzzles and a CD that feature my artwork.

Vintage Valentine gives a background look at collecting and arranging vintage spools for my nostalgic assemblage and introduces a new jigsaw puzzle and a spiral bound notebook featuring its image.

To keep up with new posts, please subscribe to this blog. Your contact info will not be sold or shared. If you’d like to see more frequent photos tracking the projects in my studio, please follow me on Facebook and/or Instagram.

Harvest Time: Part 8 (storage containers)

After a months-long hiatus, it’s time to get back to writing about how I made Harvest Time. Yes, even after 7 parts, there’s more to show! In Part 8, I share photos and commentary about the miniature storage containers that the wee folk used to hold and haul their produce both above and below ground.

So far, I’ve written the following posts about Harvest Time:
The overview introduces the piece.
Part 1 features moss making.
Part 2 is about making the turkey tail mushroom.
Part 3 shows the construction of felt leaves.
Part 4 gives a peek at embroidering the plants.
Part 5 is about making the toadstool mushroom.
Part 6 covers the underground tunnels, roots and stones.
Part 7 shows how I made the wee folk harvesters

Harvest Time is the fall scene in a series of seasonal landscapes that capture the wonder and magic of the natural world. Note cards, prints and jigsaw puzzles of the this and other scenes in the series (Frosty Morning, Mossy Glen and Summertime) are available in my Etsy Shop.

This past year, I’ve focused on completing the Four Seasons series, so that all 4 scenes could be included in my exhibition in Vermont, which will be on view for 3 more weeks. The Wee Worlds of Salley Mavor is at the Southern Vermont Arts Center until Jan. 7, 2024. Thank you to all of you who’ve traveled from near and far to see my work in person. Your enthusiastic response makes me feel that all the stitching is worth the effort!

During the months that I worked on the landscape and figures for this piece, I looked forward to creating the storage containers, like the promise of something sweet at the end of a meal. Throughout the process, there were many moments of busy work when I let my mind think ahead and plan out future stages of the project.

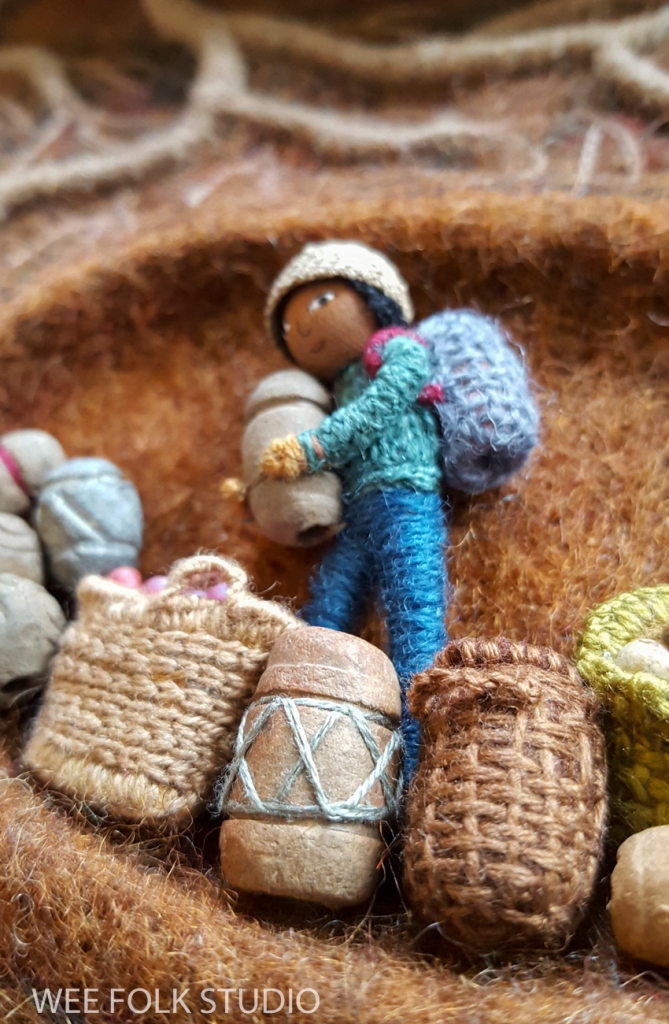
I envisioned baskets, sacks and barrels made to scale with felt, beads, wire and thread. The containers didn’t have to actually be woven or hold anything, they just had to look convincing.

I searched through my collection of beads and put aside several candidates that were the right size and shape. As you might imagine, I have a lifetime supply of beads to choose from!

Using an oval wooden bead as a form, I wove a basket by creating the warp and weft with wool/silk yarn.

Nestled in with the baskets are some rustic clay beads that worked just fine without embellishment.

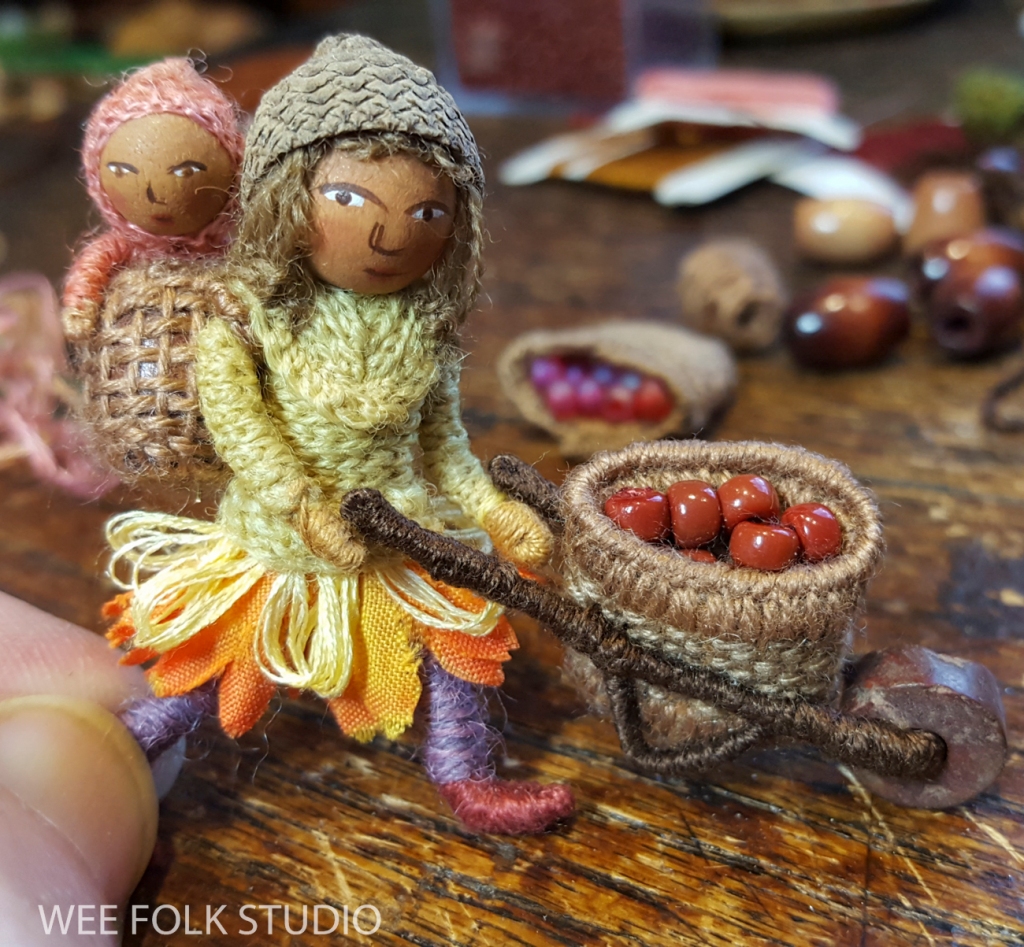
This wheelbarrow is modeled after one that my grandmother used in her garden. Her’s was designed to carry a bushel basket that could be removed.

I made the basic basket shape out of felt and then stitched it with wool/silk yarn. The tricky part was making it appear 3-dimensional when it’s actually quite flat.

I constructed the wheelbarrow’s handles and stand out of wire, which I wrapped with brown embroidery floss. The whole thing is less than half an inch deep.

For some containers, I covered beads with felt first and then stitched a woven pattern onto the felt.

Wire also came in handy for adding structure to the top rim of some baskets.

I sewed glass beads inside the baskets, taking care to hide the thread as much as possible. The wee folk have stored a goodly stash that should help sustain them through the cold winter ahead.

Stay tuned for Part 9, which will be the last post in the Harvest Time series. It’ll be about making the embroidered trees in the background sky. I promise not to make you wait for months to see it!

In the coming year, I will share photos, videos and commentary about making Summertime, which you get a glimpse of in this post.

To keep up with new posts, please subscribe to this blog. Your contact info will not be sold or shared. If you’d like to see more frequent photos tracking the projects in my studio, please follow me on Facebook and/or Instagram.

Harvest Time – Part 7 (wee folk)

In Part 7 in the continuing series about making Harvest Time, I share photos and commentary about the wee folk characters who populate the landscape. In the coming weeks, I will post more stories that focus on different aspects of making the fall scene, including the miniature storage containers and the embroidered trees. So far, I’ve written the following posts:
The overview introduces the Harvest Time piece.
Part 1 features moss making.
Part 2 is about making the turkey tail mushroom.
Part 3 shows the construction of felt leaves.
Part 4 gives a peek at embroidering the plants.
Part 5 is about making the toadstool mushroom.
Part 6 covers the underground tunnels, roots and stones.

Harvest Time is the fall scene in a series of seasonal landscapes that capture the wonder and magic of the natural world, both real and imagined. Note cards and jigsaw puzzles of the this and other scenes in the series (Frosty Morning and Mossy Glen) are available in my Etsy Shop.

Everything I make includes some sort of living being with eyes, be they animal or human. I can’t imagine spending months working on a piece that is purely decorative, abstract or simply a landscape, without a storytelling element. The interplay between characters and their surroundings is what drives me to create. As I paint their faces, form their little bodies and stitch their clothes, I grow to care about them. This emotional connection is what motivates me to spend copious amounts of time creating an imaginary world that is worthy of their existence.

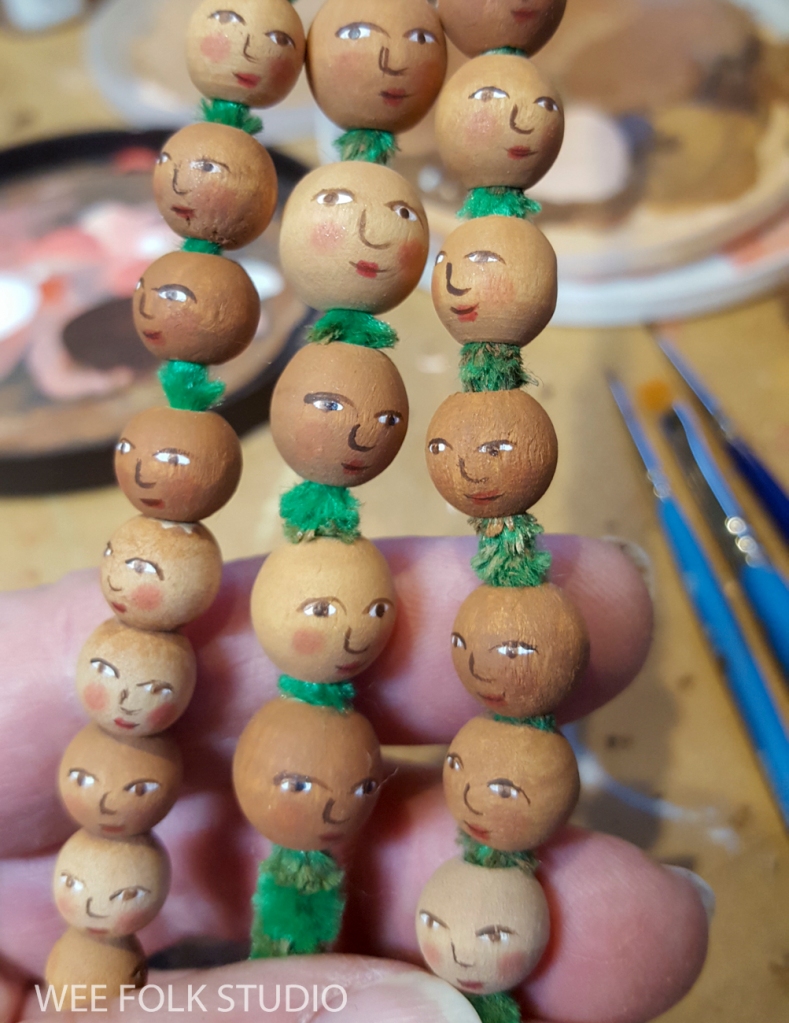
For this scene, I painted more faces than I needed, in different sizes and shades. That way, I could select a cast of characters later. I’m never sure how many figures I’ll need or exactly where they’ll end up. They are like actors in an improvisational skit or a group posed in a tableau.

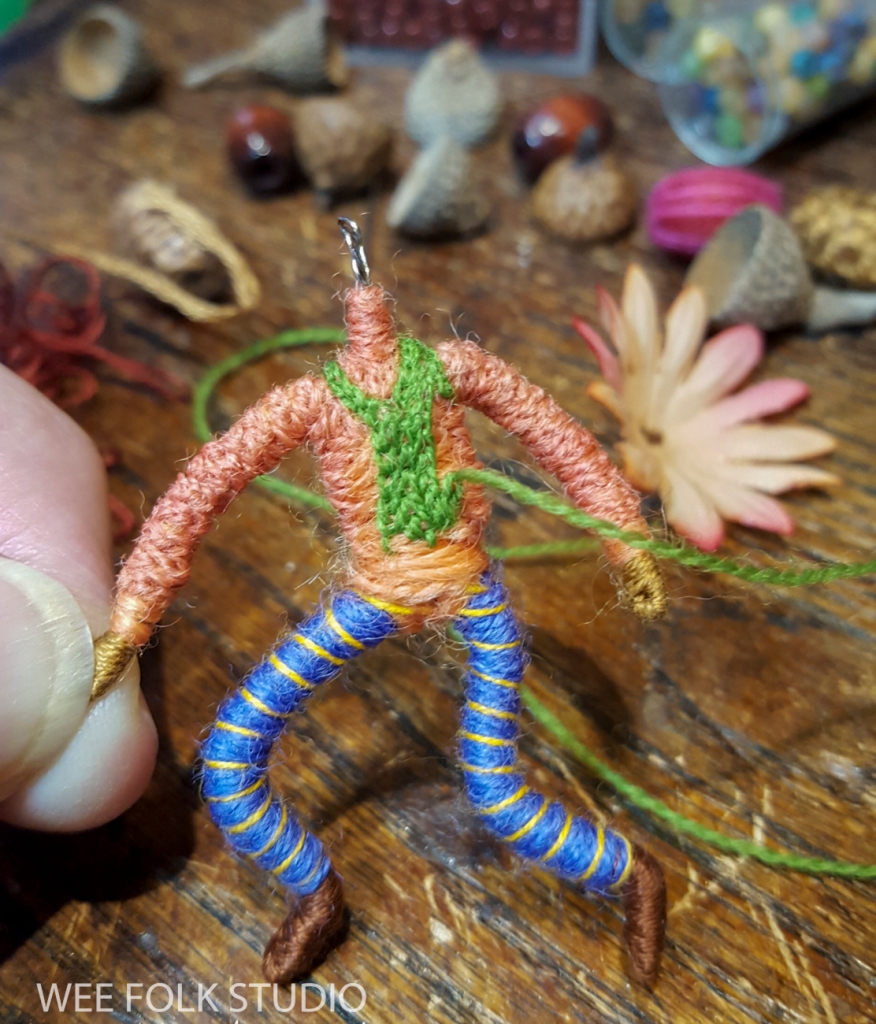
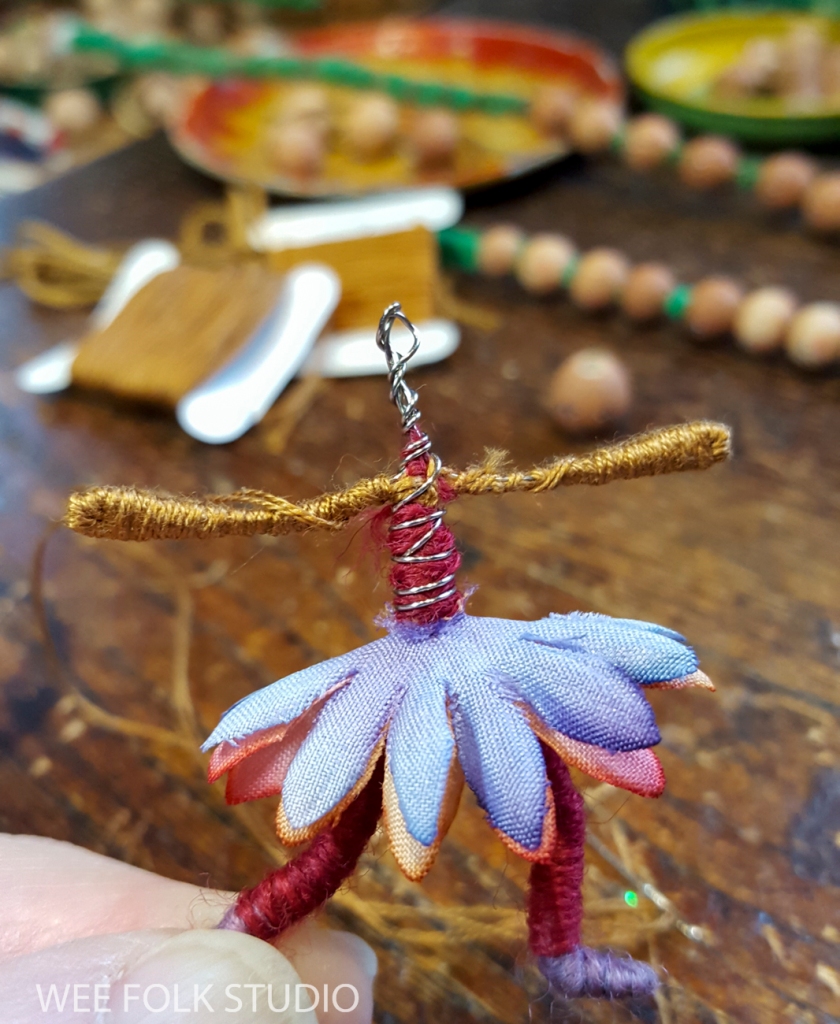
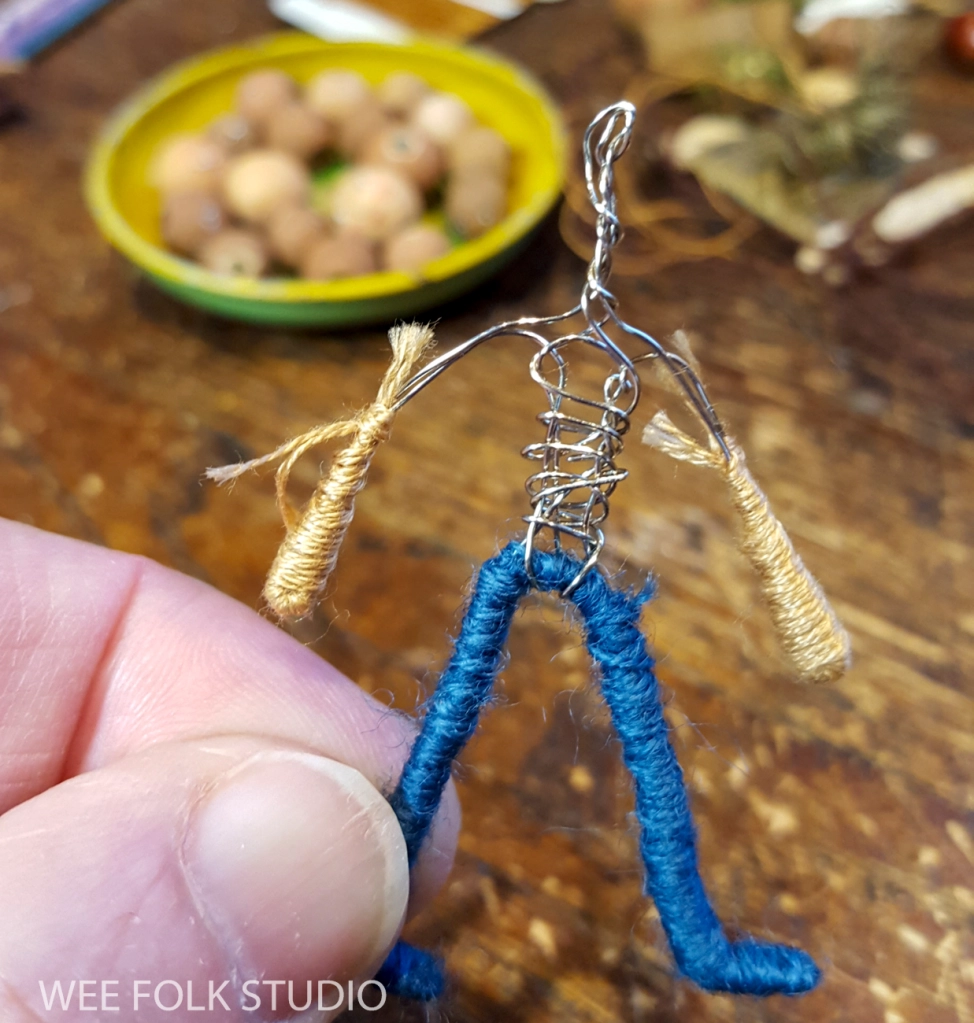
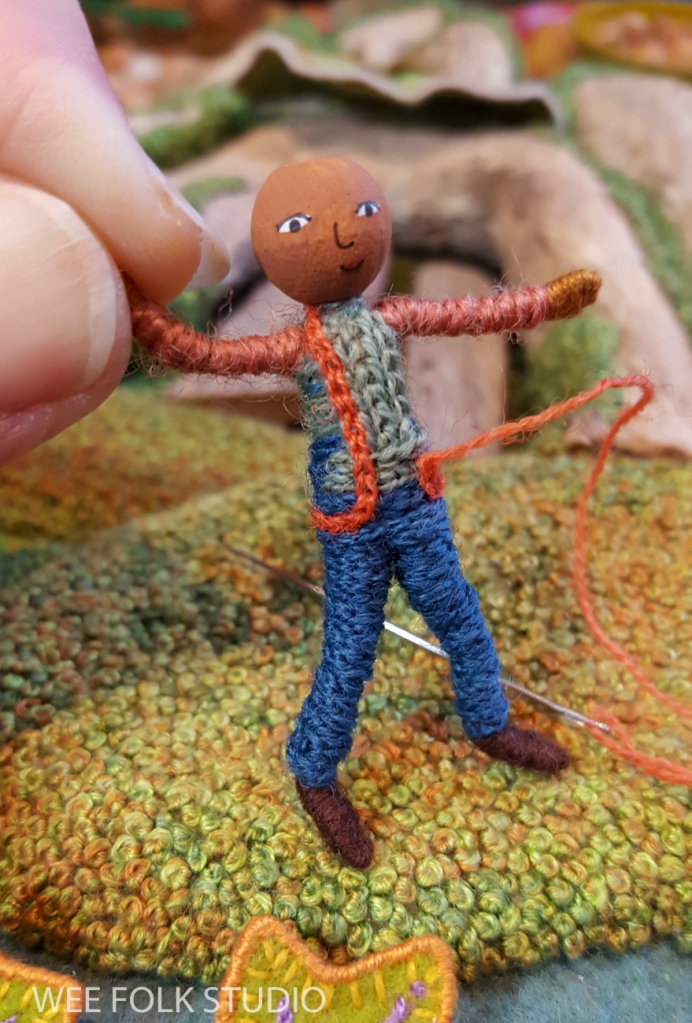
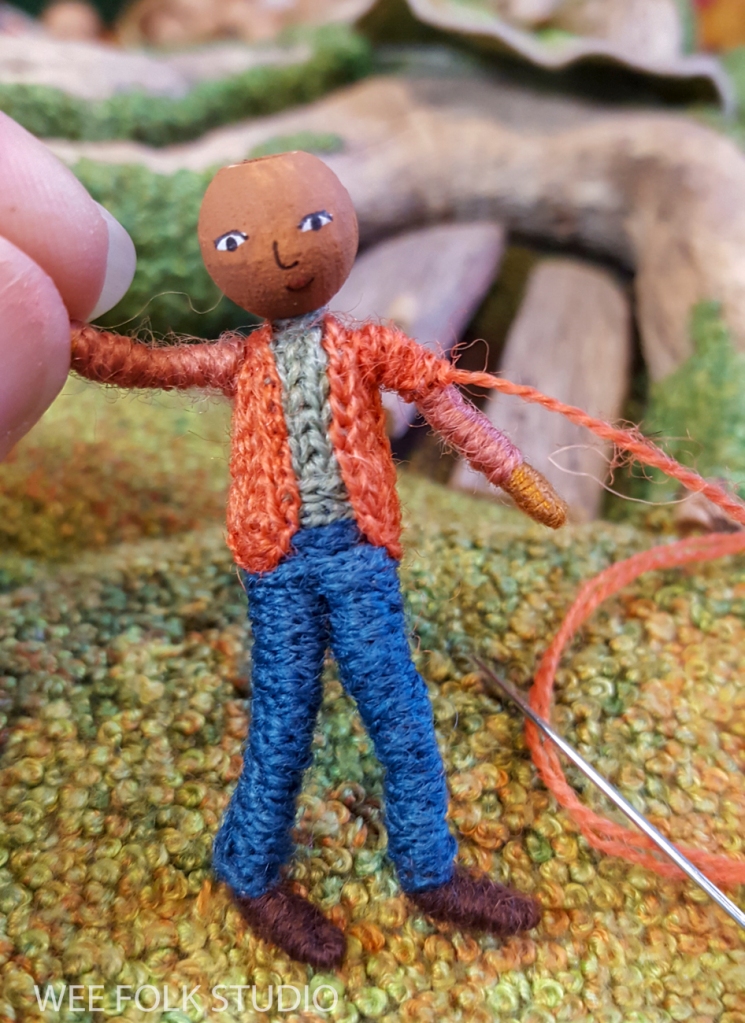
The little people range in size between 1″ to 2″ tall. They were made the same way as the wee folk dolls in my how-to book, Felt Wee Folk, with slight variations. For instance, I used wire instead of pipe cleaners for their tiny armatures.

In keeping with the harvesting theme, all of the people are bringing produce to the mossy stump, where it will be stored in the cellar.

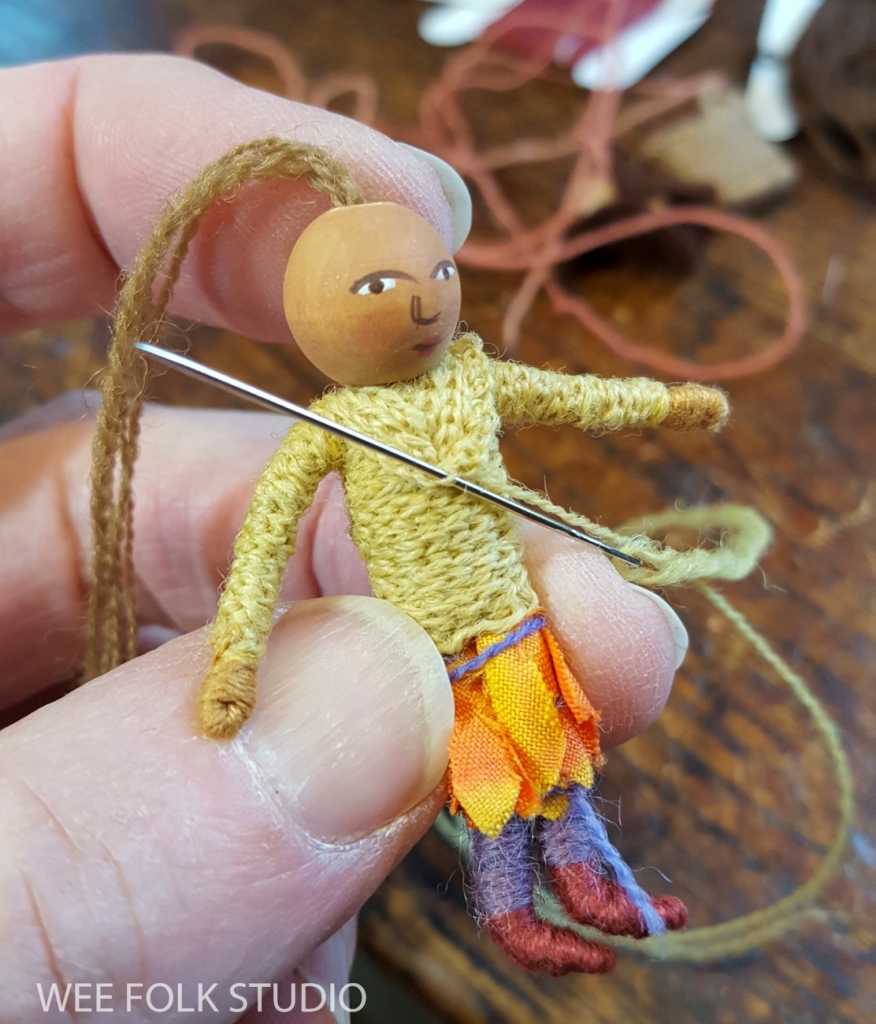
I’m often asked, “How do you knit their tiny outfits?” There might be someone out there who can knit or crochet a tiny sweater for a 2″ doll, but I challenge them to stuff their arms through the sleeves! Remember, this is make believe. The wee folk never have to bathe or change their clothes. Why knit, when you can embroider a piece of clothing directly onto a body? Rows of chain stitching are pretty convincing, don’t you think? I call it faux knitting.

Please stay tuned for more stories about making Harvest Time, including the storage containers and embroidered trees.
The overview introduces the Harvest Time piece.
Part 1 features moss making.
Part 2 is about making the turkey tail mushroom.
Part 3 shows the construction of felt leaves.
Part 4 gives a peek at embroidering the plants.
Part 5 is about making the toadstool mushroom
Part 6 covers the underground tunnels, roots and stones.

To keep up with new posts, please subscribe to this blog. Your contact info will not be sold or shared. If you’d like to see more frequent photos tracking the projects in my studio, please follow me on Facebook and/or Instagram.

Harvest Time – part 6 (underground)

In Part 6 in the continuing series about making Harvest Time, I share photos and commentary about making the tunnels, roots, and stones in the underground portion of the landscape. In the coming weeks, I will post more stories that focus on different aspects of making the fall scene, including the wee folk figures, their storage containers, and the embroidered trees. So far, I’ve written the following posts:
The overview introduces the Harvest Time piece.
Part 1 features moss making.
Part 2 is about making the turkey tail mushroom.
Part 3 shows the construction of felt leaves.
Part 4 gives a peek at embroidering the plants.
Part 5 is about making the toadstool mushroom

Harvest Time is the fall scene in a series of seasonal landscapes that capture the wonder and magic of the natural world, both real and imagined. Note cards and jigsaw puzzles of the this and other scenes in the series (Frosty Morning, Mossy Glen and Summertime) are available in my Etsy Shop.

I’m never sure where my ideas come from. The usually appear in my head as pictorial concepts that ferment for a long time before transferring into my sketchbook and then as finished pieces. The fall scene lived in my imagination for many months before I began visualizing 3 separate areas – sky, a forest floor and below ground. I’ve always been fascinated by dioramas of underground tunnels and burrows dug by animals. I wanted to create similar storage areas for the wee folk to keep their fall harvest.

Once I became fixated with the idea of a cut-away underground view, I couldn’t wait to bring it to life! From the start, I knew that translating the picture in my mind’s eye into something real was going to require exploring different ways of working. While mulling over the possibilities, I decided to try both wet and dry felting, which I’ve dabbled in over the years.

Felting does have an appeal, but in the end, all that poking and meshing of wool fibers creates a uniform fuzzy texture that blends everything together. I wouldn’t ordinarily want that in my work because I’m more interested in creating lines and clear, defined edges. But for this project, a soft texture might be exactly what I needed for the dark soil below ground.

I also thought that felting would be a good way to form the concave shaped tunnel and storage areas. After reviewing the wet felting process on this YouTube tutorial, I wrapped a couple of stones and a curved stick with brown wool fleece and felted them in soapy water. When they dried, I cut through the thick felt and removed the stones and stick.

At this stage of the process, I needle felted the different parts together. An advantage to working with a barbed needle is that with enough jabbing, you can make seamless joints. Then, I cut out openings in a sheet of red felt (it happened to be what I had), inserted the tunnel, and needle felted them together.

To create the soil color, I needle felted layers of brown fleece on top of the red felt background.

I made the underground roots by covering wire with felt, the same way that I make trees.

The stones are made with 2 layers of heather shades of felt, folded over and sewn on the back.

Once the roots and stones were sewn in place, I could go in and add embroidered details like the chain stitched finer roots…

and French knot “dirt”.

After all of the manic stabbing with a barbed needle, it was a relief to get back into stitching mode. It felt great to get out a large embroidery needle, thread it with tapestry yarn, and create a distinctive texture that contrasted with the fleecy wool.

With the underground section in place and most of the landscape complete, I could now begin to focus on populating the scene with the wee folk who lived and worked there.

Please stay tuned for more stories about making Harvest Time, including the wee folk figures, storage containers, and embroidered trees.
The overview introduces the Harvest Time piece.
Part 1 features moss making.
Part 2 is about making the turkey tail mushroom.
Part 3 shows the construction of felt leaves.
Part 4 gives a peek at embroidering the plants.
Part 5 is about making the toadstool mushroom

To keep up with new posts, please subscribe to this blog. Your contact info will not be sold or shared. If you’d like to see more frequent photos tracking the projects in my studio, please follow me on Facebook and/or Instagram.
Harvest Time – part 5 (toadstool mushroom)

In Part 5 in the continuing series about making Harvest Time, I share photos and commentary about making the purple toadstool mushroom and the wee folk forager sitting under it. In the coming weeks, I will continue to post stories that focus on different aspects of making the fall scene, including the other wee folk figures, storage containers, tunnels, roots, and stones. So far, I’ve written the following posts:
The overview introduces the Harvest Time piece.
Part 1 features moss making.
Part 2 is about making the turkey tail mushroom.
Part 3 shows the construction of felt leaves.
Part 4 gives a peek at embroidering the plants.
Part 6 shows the process of making the underground

Harvest Time is the fall scene in a series of seasonal landscapes that capture the wonder and magic of the natural world, both real and imagined. Note cards and jigsaw puzzles of the this and other scenes in the series (Frosty Morning and Mossy Glen) are available in my Etsy Shop.

Harvest Time Jigsaw Puzzle

I don’t know why I didn’t include mushrooms in the original sketch. It seems so obvious now, especially for a fall landscape. The idea of putting one in the scene came later, when I shifted over the stump and created a place to fill on the right horizon.

Toadstool mushrooms have popped out in my artwork for over 40 years. These are some mushroom houses I made in 1979, back when I used a sewing machine.

When I went into business selling fairy kits in 1998, I designed a logo with a red-capped mushroom house. My 10 year stint making kits is long gone, but I still use the same logo.

In this scene from 2009, I used both real mushrooms from the supermarket and more fanciful ones that I made with polymer clay and painted kid leather.

This mushroom with a fairy taking shelter underneath is in my 2010 picture book, Pocketful of Posies, illustrating the rhyme, “Rain on the green grass, and rain on the tree; Rain on the housetop, but not on me.”

For Harvest Time, I chose a different type of mushroom. The idea of a purple toadstool struck my fancy, so I researched the Inky Cap variety. Besides being attracted to the purple/orange color combo, I looked forward to replicating the texture on the cap.

To begin, I drew the mushroom to size and used a paper cutout as a guide. It took some fudging to figure out the size and shape to cut the felt, because the front piece of the cap would be curved and sticking out about 1/2″,

I sewed wire along the rim of the cap to help hold its curve. After covering the wire with stitches, I created an uneven edge with messy loops, so it would look more realistic. To make the bumpy texture on top, I stitched French knots with different shades of purple and orange embroidery floss.

To make the stem, I cut out a thin strip of felt and covered it with lines of chain stitching.

I forgot exactly how I did this part, but it looks like I added a felt stem back piece that was reinforced with iron-on interfacing material. I must have thought it needed stiffening, since felt by itself is usually too floppy. Also, I probably stuffed the hollow cavity with wool fleece to keep it from collapsing.

I chain stitched scales with a contrasting shade of orange thread to the inside of the cap and sewed on the stem.

The mushroom and surrounding area looked lonely and plain, so I made a wee person to sit underneath.

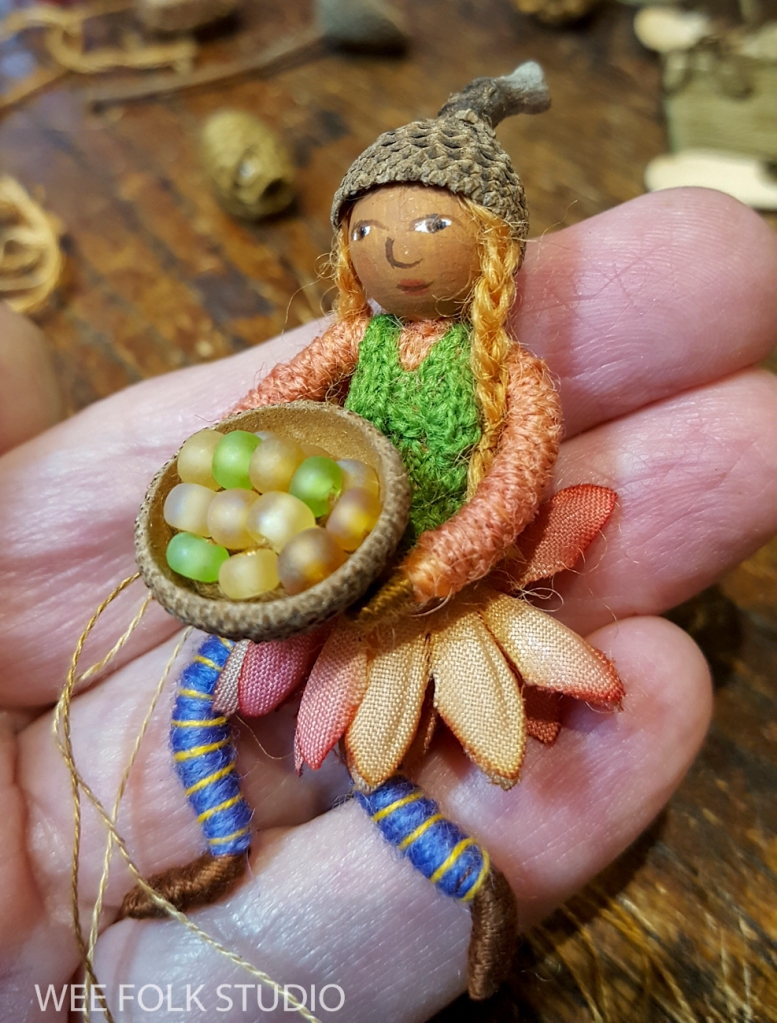
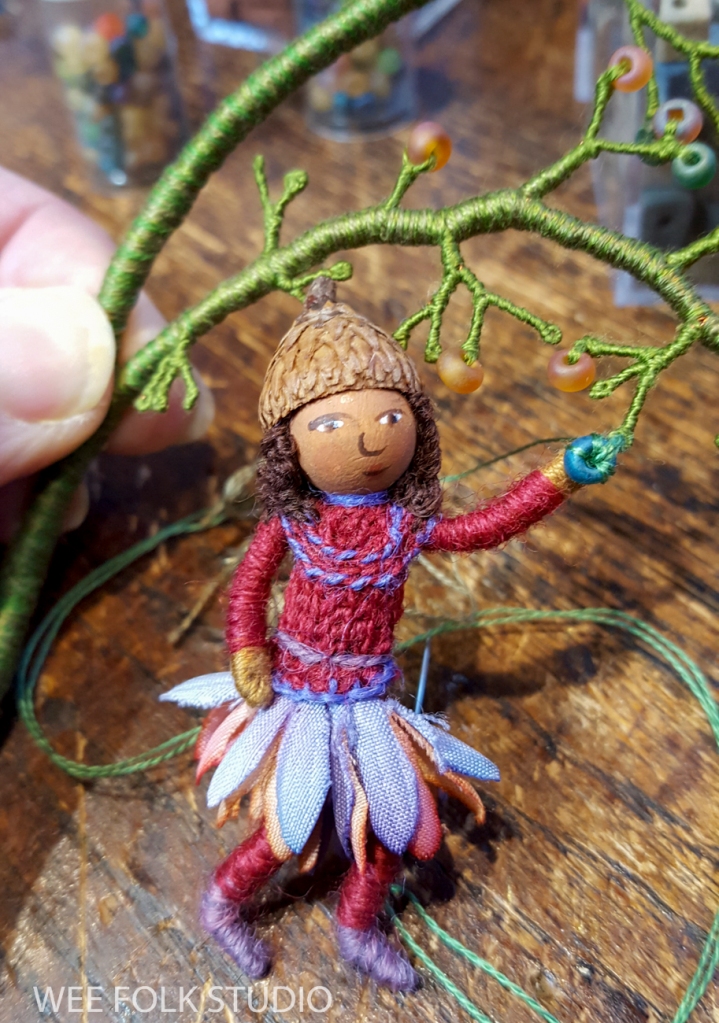
To make a figure, I formed an armature with 24 gauge jewelry wire and wrapped it with thread. This is the same basic technique that I teach in my how-to book, Felt Wee Folk, but on a smaller scale. I didn’t make separate clothing, but faux knitted a shirt and vest directly onto the body with chain stitching. The skirt is an artificial flower.

This Stitch Minute video shows faux knitting for a character in the spring landscape, Mossy Glen.

I painted a face on a wooden bead and glued braids and an acorn cap on top. Another acorn cap served as a container for glass bead “food”, which I sewed together in a bunch. The beads were sewn in place through drill holes in the acorn cap.

At this stage of the process, miscellaneous parts piled up, waiting to be assembled at the end, when everything is sewn to the background fabric. Please stay tuned for more stories about making Harvest Time, including the other wee folk figures, storage containers, tunnels, roots, and stones.

To keep up with new posts, please subscribe to this blog. Your contact info will not be sold or shared. If you’d like to see more frequent photos tracking the projects in my studio, please follow me on Facebook and/or Instagram.
Harvest Time – part 4 (embroidered plants)

In Part 4 in the series about making Harvest Time, I share photos and commentary about embroidering plants to fill in around the 3-D felt leaves shown in Part 3. When planning out this piece, I wanted to come up with a way to separate the above ground front yard from the underground cutaway portion. I ended up embellishing gardens on pieces of felt that overlap the soil, roots, and stones below.

Harvest Time is the fall scene in a series of seasonal landscapes that capture the wonder and magic of the natural world, both real and imagined. Note cards and jigsaw puzzles of the this and other scenes in the series (Frosty Morning and Mossy Glen) are available in my Etsy Shop.

Harvest Time Jigsaw Puzzle

I use a combination of flat embroidery and 3-D forms in my artwork because I think it’s more dynamic and eye catching that way. I also like the process of doing both, so I mix it up to keep myself interested.

This part of the process was more free form and reminded me of the simple embroidered foliage I made in the illustrations for Hey, Diddle, Diddle.

Hey, Diddle, Diddle! board book, 2005

To stabilize the floppy pieces of felt, I stitched and wrapped wire along the outside edges and then embroidered blades of grass.

Then I doodled stems with chain stitches and added French knot seeds.

This kind of work is portable, so I carried around all of the parts and supplies wherever I went…

…and did most of the stitching in front of the wood stove.

The orange and red leaves are chain stitched with DMC flower thread, which unfortunately has been discontinued. It’s thicker and not as shiny as regular embroidery floss and has a sturdy feel that I find satisfying. I treasure my supply of flower thread and have enough to last my lifetime.

Glass beads make great berries.

I glued a piece of driftwood to the top of one section to make a perch for a wee folk forager to sit on. Doesn’t the whole thing look like a shoe!

I also created a mossy patch of front lawn to go just below the doorway with hundreds, if not thousands of French knots.

I padded the back of the embellished pieces with layers of thick felt so that they would stick out and float above the cutaway underground portion, which I’ll get to later in the series.

In future posts, I will focus on different aspects of making Harvest Time, including the toad stool mushroom, wee folk figures, storage containers, needle felted tunnels and cold cellars, roots, and stones.

The overview introduces the series.
Part 1 features moss making.
Part 2 is about making the turkey tail mushroom.
Part 3 shows the construction of felt leaves.
Part 4 gives a peek at embroidering the plants.
Part 5 is about making the toadstool mushroom
Part 6 shows the process of making the underground

To keep up with new posts, please subscribe to this blog. Your contact info will not be sold or shared. If you’d like to see more frequent photos tracking the projects in my studio, please follow me on Facebook and/or Instagram.

Harvest Time – part 3 (felt leaves)

In Part 3 in the series about making Harvest Time, I share photos, commentary and a stitch-minute video about embellishing the felt leaves that appear on the ground-cover and bushes. Please note that when I use the word ‘felt”, I’m referring to the noun, not the verb. Felting is agitating and manipulating wool fleece fibers with a barbed needle or soapy water to create a felted surface. That’s how I made the brown soil in the underground part, which I’ll describe in a future post.

In the coming weeks and months, I will post more stories that focus on different aspects of making the fall scene, including the toad stool mushroom, wee folk figures, needle felted tunnels, roots, stones and foliage of all kinds. Part 1 featured moss making. Part 2 is about making the turkey tail mushroom.
Harvest Time is the fall scene in a series of seasonal landscapes that capture the wonder and magic of the natural world, both real and imagined.
Harvest Time note cards and a jigsaw puzzle are available in my Etsy Shop.

When envisioning this piece, I wasn’t sure how it would come together, but that’s normal for me. I knew that I needed to figure out a way to clearly define the edge between above ground and below ground. This is the kind of thing I think about when doing busy work, like stitching hundreds of French knots. I’m always one step ahead, planning the next move. I ended up creating a kind of flap with two sections of felt “sod” that overlapped the underground tunnel to the root cellar.

Felt Leaves
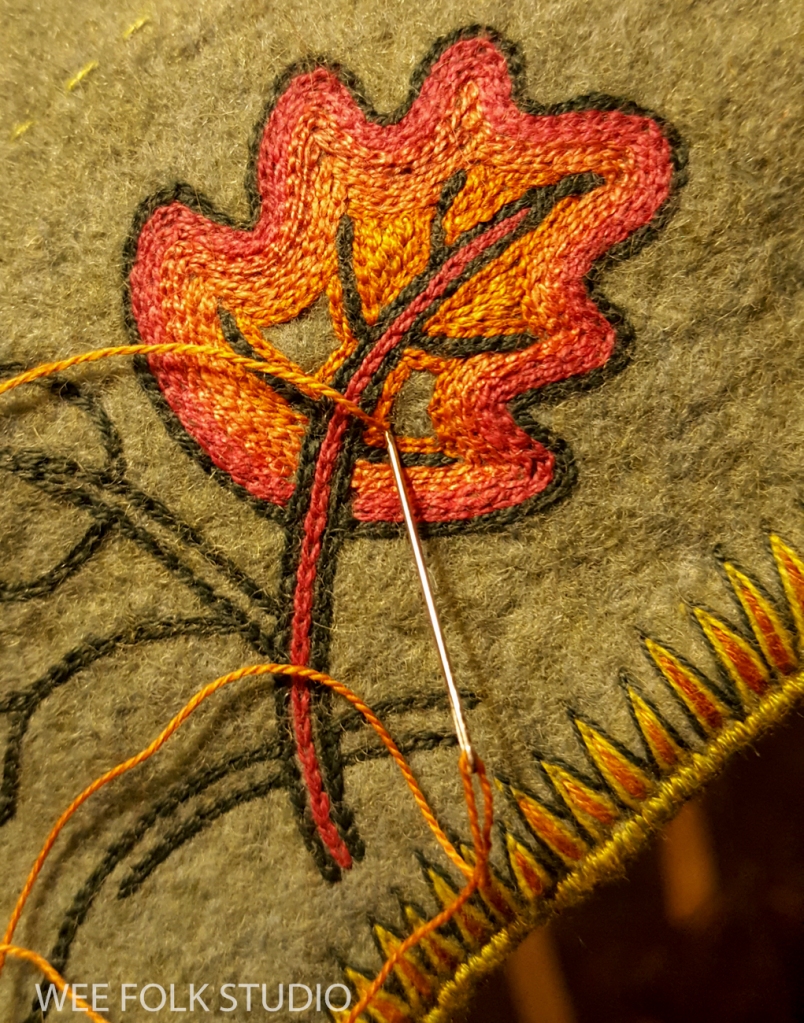
After edging the felt leaves with blanket stitches, I bent wire to match the shape and stitched it to the outside edge. Then I kept going around until the wire was completely covered with thread. I used single strands of floss to give it a fine finished look.

I wanted to fill the ground cover with an eye-catching array of textures, colors and shapes that would balance the composition of the whole piece. To help the leaves perk up and create shadows, I pushed the wire stems through a small hole to the back of the felt background, where it became a leverage point.

Because this scene has an element of fantasy, I felt free to incorporate bright unnatural looking shades.

I searched through my stash and found some variegated yellow embroidery floss to use for the chain stitched veins on these hot pink leaves.

When I embellish with thread, I constantly think about how to enhance and articulate the form, without becoming too cluttered. For instance, adding a dark pink outline around the veins on this leaf help emphasize the lines.

I hadn’t noticed it before, but now I see that the leaves are all made with complimentary colors. That way they pop out at you, both visually and physically!

This Stitch Minute video shows how I made a wire edged felt leaf.

As you can see, I constructed this background piece separately from the other parts of the scene. At the very end, after months of work, I assembled all of the pieces and stitched the sections onto one stretched fabric layer.

I also made larger orange leaves for the berry bush that’s growing next to the moss covered stump.

In future posts, I will focus on different aspects of making Harvest Time, including the toad stool mushroom, wee folk figures, needle felted tunnels, roots, stones and foliage of all kinds.
The overview introduces the Harvest Time piece.
Part 1 features moss making.
Part 2 is about making the turkey tail mushroom.
Part 3 shows the construction of felt leaves.
Part 4 gives a peek at embroidering the plants.
Part 5 is about making the toadstool mushroom
Part 6 shows the process of making the underground

Jigsaw Puzzles!

Birds of Beebe Woods jigsaw puzzle

I’m excited to share the news that jigsaw puzzles are now available in my Etsy Shop! For a long time, fans have suggested that my work would translate well into puzzle form. I thought so, too, but was too busy stitching to do anything about it. After years of searching for a high quality product and an economically feasible manufacturing arrangement, I’ve finally decided to test the market with two puzzle designs; Birds of Beebe Woods and Harvest Time.

Birds of Beebe Woods jigsaw puzzle

The 300 piece 12″ x 16″ puzzles are suitable for older children as well as adults. At this size, the puzzle pieces can easily spread out on a card table instead of taking over the dining room table. And it won’t take an interminable amount of time to piece together the image. Of course, some people love nothing more than to get sucked into a seemingly never-ending puzzle. I’m kind of like that and have to regulate my puzzle time, lest my obsessive nature takes over.

Birds of Beebe Woods jigsaw puzzle, box front and back

After our Thanksgiving meal, my family put together the Birds of Beebe Woods puzzle. It was more challenging than expected!

The puzzles are exclusively available through my Etsy Shop. They were just listed a few days ago and are selling so well that I’m having more made.
A note to my international fans: I’m really sorry, but due to the high cost of shipping overseas and unreasonable delays, I now only ship within the US and to Canada.

Is there a particular piece of mine that you would like to see in puzzle form? I’m planning to have more puzzles made and would love to hear your suggestions. Illustrations from my books MY BED and Pocketful of Posies can’t be reproduced, but other stand alone pieces are a possibility, if I have hires photos. Please leave a comment with your suggestions.

Harvest Time Jigsaw Puzzle
Harvest Time jigsaw puzzle, box front and back

BIRDS OF BEEBE WOODS is a hand-stitch tableau of birds common to North America. I made the piece to celebrate the town forest in Falmouth, MA. Birds pictured: cardinal, nuthatch, warbler, crow, wren, downy woodpecker, blue jay, cedar waxwing, gold finch and robin.

Birds of Beebe Woods jigsaw puzzle

HARVEST TIME is the fall scene in a series of seasonal landscapes that capture the wonder and magic of the natural world, both real and imagined. The piece is entirely stitched by hand and incorporates a variety of materials, including driftwood, wool felt, beads and wire.

Harvest Time jigsaw puzzle

Harvest Time – Part 2 (turkey tail mushroom)

In Part 2 in the series about making Harvest Time, I share photos, commentary and a stitch-minute video about creating the turkey tail mushroom overhanging the doorway in the stump. In the coming weeks and months, I will post more stories that focus on different aspects of the process of making the fall scene, including the toad stool mushroom, wee folk figures, tunnels, roots, stones and foliage of all kinds.
The overview introduces the Harvest Time piece.
Part 1 features moss making.
Part 2 is about making the turkey tail mushroom.
Part 3 shows the construction of felt leaves.
Part 4 gives a peek at embroidering the plants.
Part 5 is about making the toadstool mushroom
Part 6 shows the process of making the underground

Harvest Time is the fall scene in a series of seasonal landscapes that capture the wonder and magic of the natural world, both real and imagined. Harvest Time and 2 other scenes I’ve completed and written about, Frosty Morning and Mossy Glen, are available as note cards and jigsaw puzzles in my shop here.

Harvest Time Puzzles are available in my Etsy shop.

Turkey tail mushrooms or shelf fungi are found all over the world. They usually grow on dead hardwood stumps and downed hardwood trunks or branches.

Turkey Tail Mushrooms

I love how Glen Carliss used shelf fungi for the roofs in “Glendell Towers”, which he made for The Fairy Houses of Highfield Hall, an outdoor exhibition that I curated in 2015. Glen told me that he’d been eyeing the mushrooms growing on trees along his road for years, imaging what to do with them.

Glendell Towers by Glen Carliss

I didn’t use actual mushrooms in Harvest Time, but I was inspired by their fanciful appearance. My photo search came up with multiple color combinations, from earthy hues to shades as garish as 1960’s fashion. I chose a more subdued mixture of fall colors for the mushroom roof.

To make the striped concentric pattern, I chain stitched rows and rows of different shades of green and orange DMC cotton flower thread to a piece of felt. It took two tries to get the shape and colors the way I wanted it.

In this Stitch Minute video, I demonstrate chain stitching the stripes and adding wire.

After we filmed it, I wasn’t happy with the overall shape and color combo, so I started over and made a new one that was more curvy and included orange and yellow.

I stitched wire around the outside edge and covered it with white embroidery floss.

Then I made a smaller mushroom and a really little one that looked like a pompom on top of a hat. It’s been a year since I started working on this piece, so my memory is a bit foggy. I can only guess at how I formed the layers into a roof shape and attached it to the driftwood. I do remember that the mushroom wasn’t very cooperative and I had to torture it into shape. Most likely, I glued felt to the wood and then sewed the mushroom to the felt.

During the process, I constantly measured the depth of the trunk to make sure that it would fit behind the glass when the finished piece was framed. After the mushroom roof was added, there was just enough clearance!

My use of found objects is mostly limited to individual items that are sewn in place and incorporated into embroidered scenes. This trunk was different because it was made up of several driftwood parts that created a fairly large mass that stuck out from the background. Its depth and breadth would determine how I created everything else in the landscape.

Now that the trunk was finished, I could start building the other parts of the scene, including the ground at its base.

Next time, I will show the process of making the felt and stitched foliage growing on the ground at the foot of the tree trunk.