

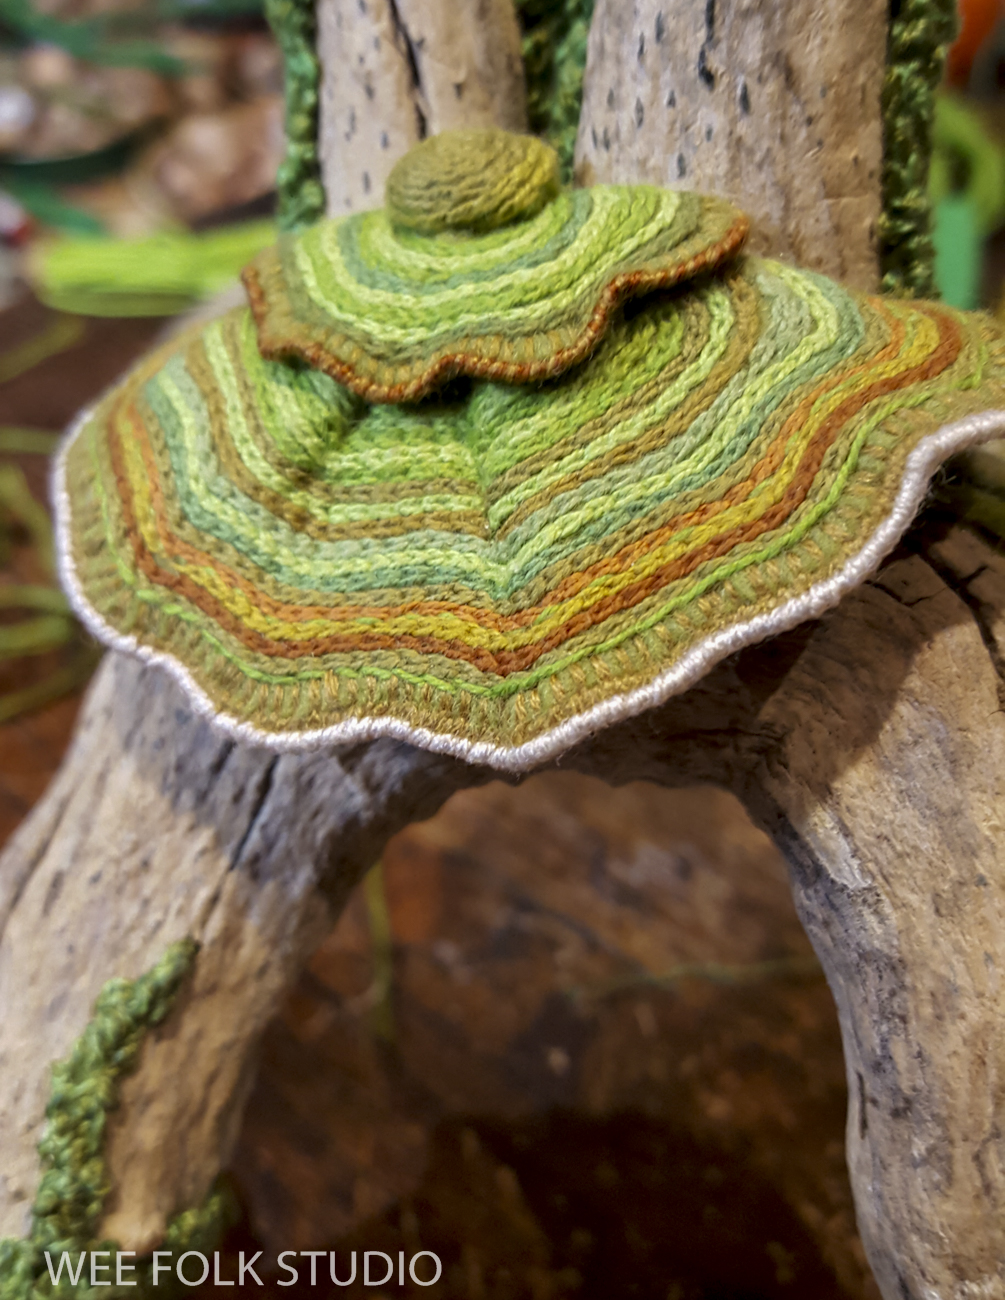
Do you ever see little hollow openings at the foot of trees and wonder who could live there? In Part 1 of the series about making Harvest Time, I share photos, commentary and a stitch-minute video about how I created such a place. In the coming weeks and months, I will post more stories that focus on different aspects of the process of making the fall scene, including the turkey tail mushroom roof, the toad stool mushroom, wee folk figures, tunnels, roots, stones and foliage of all kinds.

Harvest Time is the fall scene in a series of seasonal landscapes that capture the wonder and magic of the natural world, both real and imagined. Harvest Time and 2 other scenes I’ve completed and written about, Frosty Morning, Mossy Glen, and Summertime are available as note cards and jigsaw puzzles in my shop here.

A project like this generally begins with a concept in my head, where it germinates for a certain amount of time until the image is compelling enough to translate into something real. Sometimes I can visualize an idea right away, but other times it takes months to develop a thought into a clear picture in my imagination. I mulled over this fall piece for a while before hitting on the idea of creating a cross section of an underground root cellar. Then, I was ready to put something down on paper. I made a bunch of thumbnail sketches, which helped solidify the composition. At this stage I didn’t bother with the details. They would come later, when I formed the individual parts.
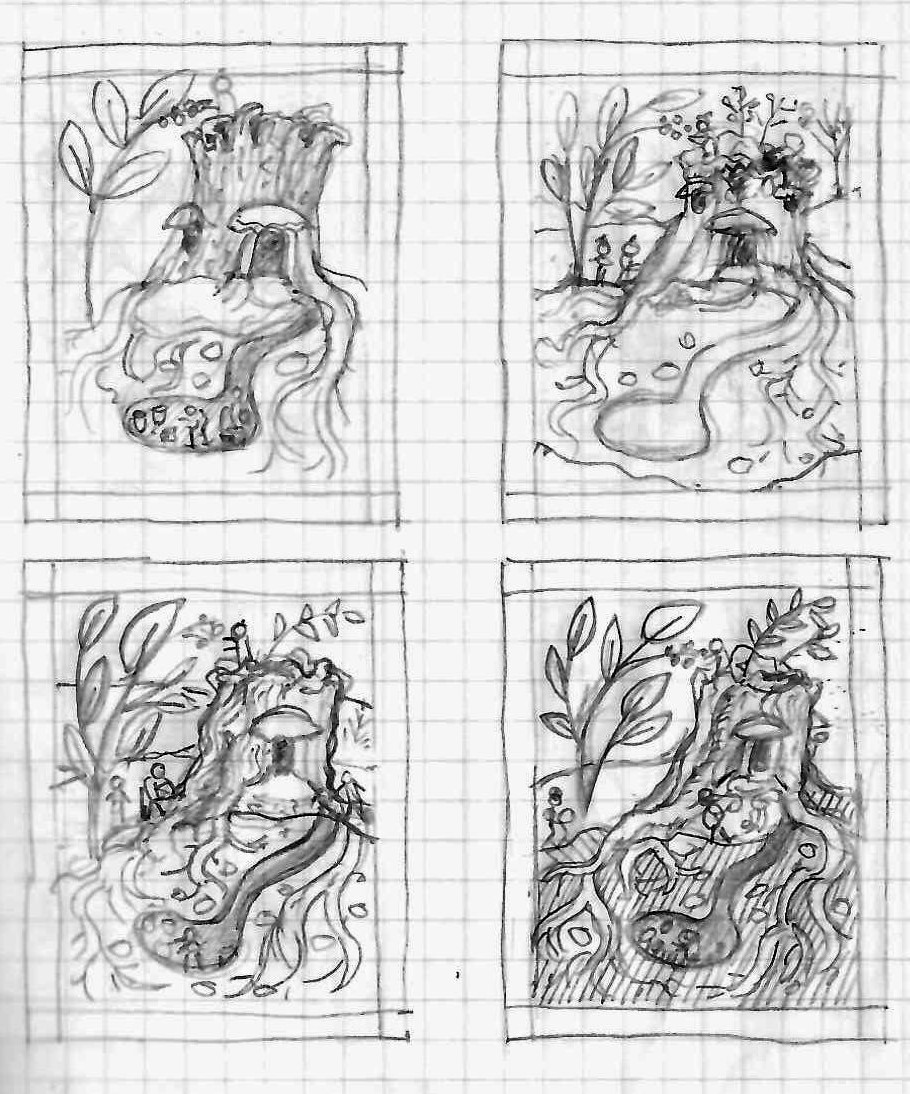
I enlarged the drawing on the lower right to full size (19″ x 24″), which gave me something to go by throughout the months-long process of making the scene. I thought of it as a guide more than a pattern or template because the design changed, depending on the objects I used and construction techniques I figured out along the way.

To make the tree trunk, I searched through my supply of driftwood and played around with the pieces until I came up with a plausible arrangement. Once I found a curved arch of the right size for the doorway, I could relax and build around it.
Moss covered trees
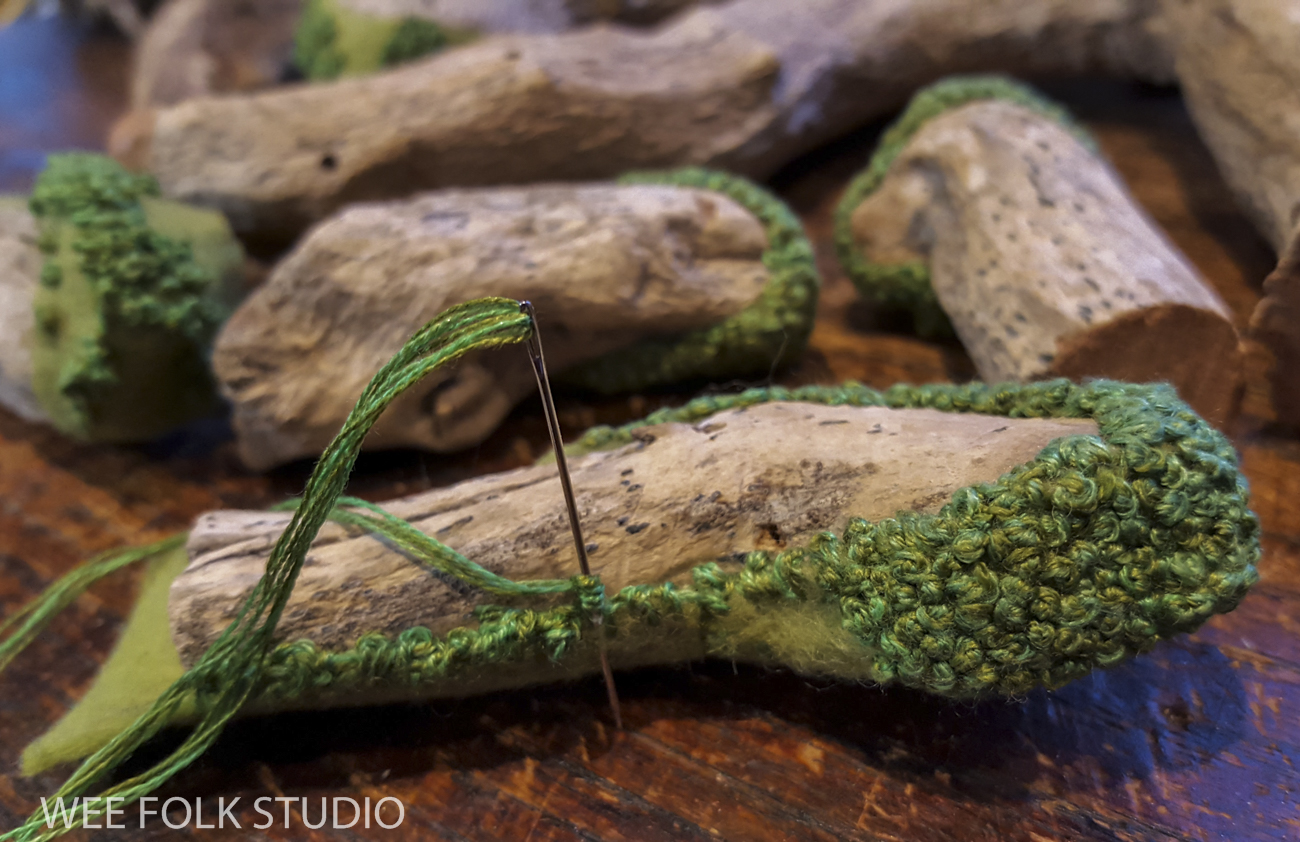
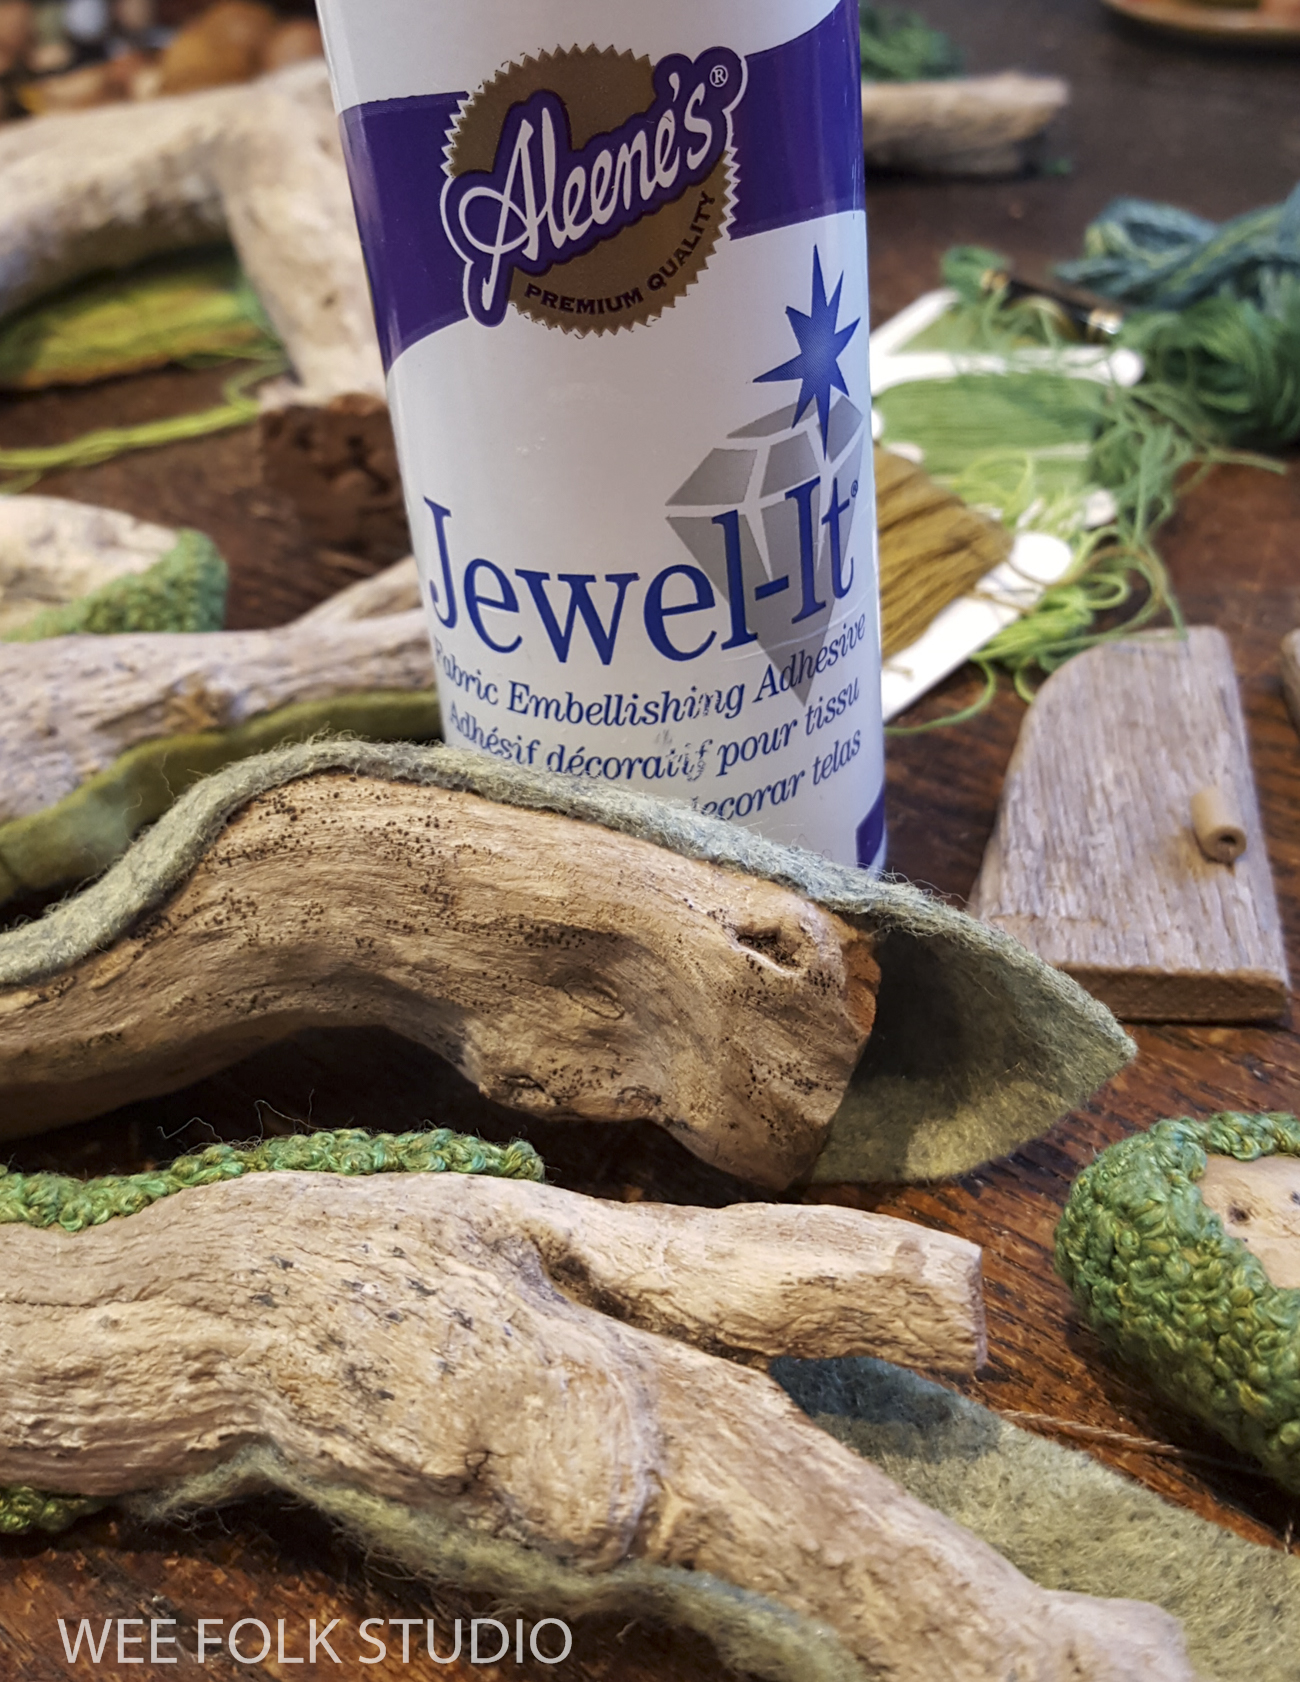
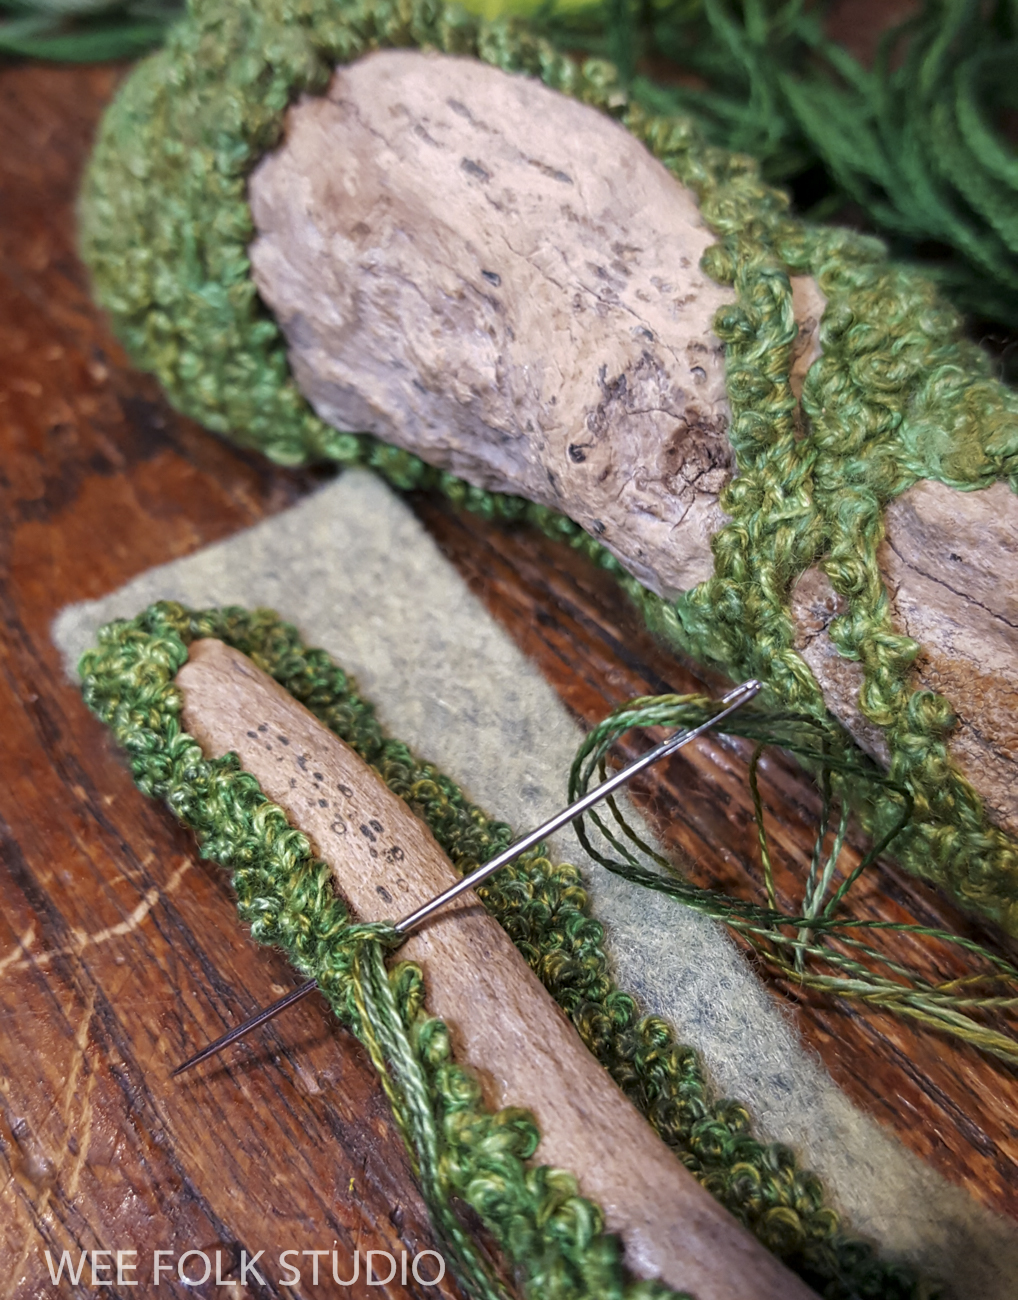
Last year, when I made Mossy Glen, the spring scene in this series, I devised a method of showing moss growing on wood. It involved using glue, which I don’t normally use because it’s messy and undependable. I also don’t use a glue gun because it’s stringy and shoddy looking and I don’t trust its holding capabilities. But, how else was I going to provide a surface that a needle could catch onto? So, out of necessity and with a fair bit of trepidation, I tried gluing pieces of felt onto the driftwood. And it did the job, without being visible! Aleene’s glue makes a variety of fabric embellishing adhesives that all work well.

Now came the gloriously obsessive part, when I spent at least a month stitching moss “knots” onto the felt. It might appear tedious, but to me the act of repetitive stitching is heavenly! I’d also like to mention that no fingers or joints were harmed in the process. Here’s a Stitch Minute video that shows how I stitched the knots.
French knots/Colonial knots
It’s been pointed out by people who know such things, that I’m actually making a Colonial knot, not a French knot. It has something to do with the twist at the end. Being self-taught, I’ve never paid attention to the names of different stitches or doing them the “right” way. I just use the basics in combinations that work for me.
Thread
To make the moss, I used DMC cotton floss. The naturalistic appearance comes from combining different shades of green in groups of 3 or 4 strands.

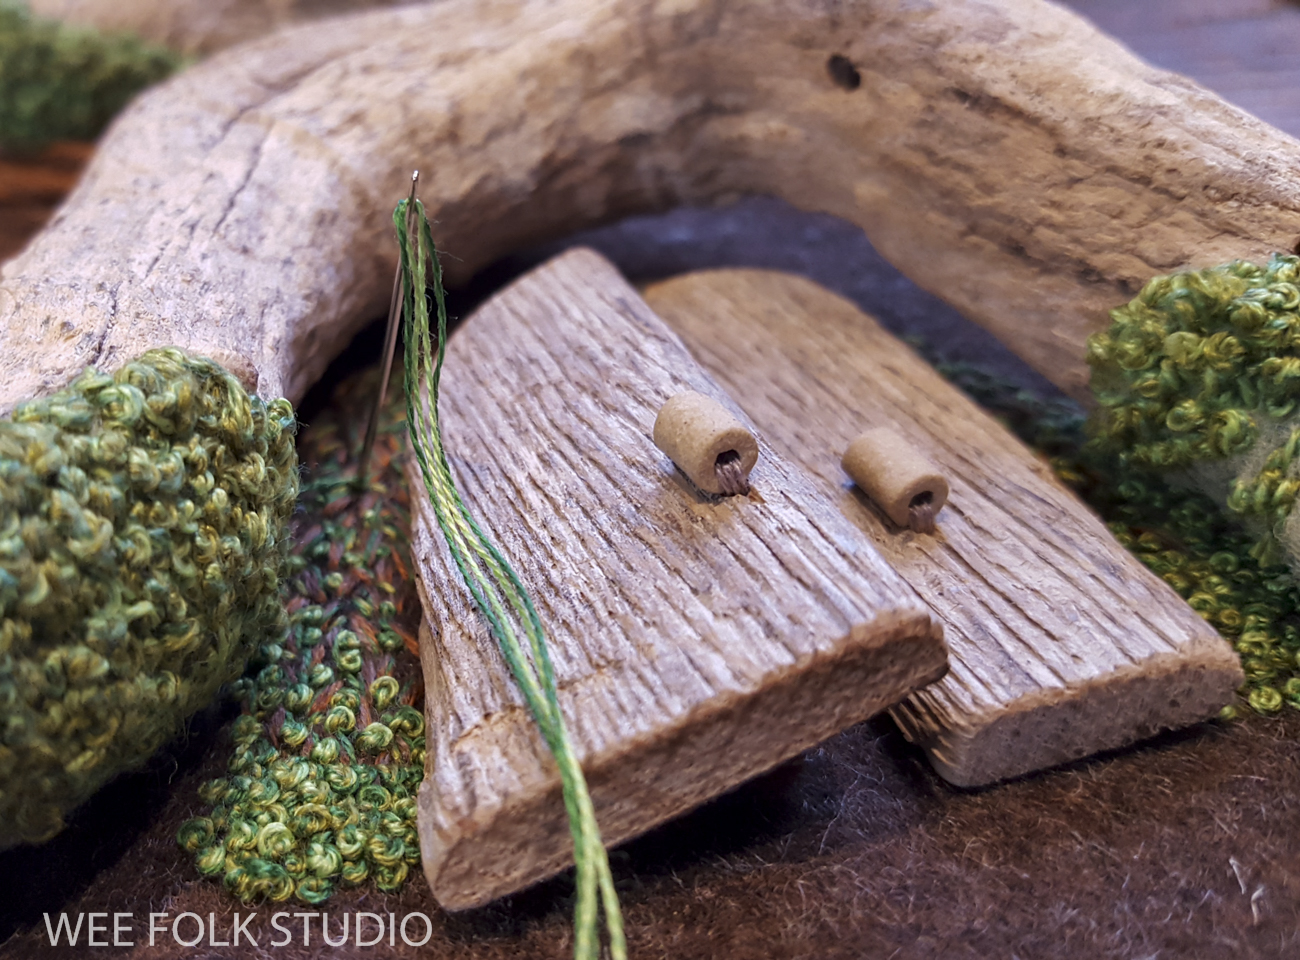
I made doors out of an old wooden sail batten that had washed up onto the beach, sawing and sanding it to fit the opening. The doorknobs are beads sewn through drill holes. I glued felt to the back of the wooden doors and sewed them to a piece of felt. Then, I filled in the area around it with seed stitches.

To open the door a crack, so a little guy could peek out, I layered (glued or stitched, perhaps?) extra felt pieces behind the door. Then, I stitched moss to the felt on both sides of the door.
My work is made up of several parts that eventually come together, so the whole time I worked on the tree trunk, I planned ahead and thought about how it would merge with the other elements yet to be made.

I also wanted to create an inviting entrance for the wee folk to step onto when coming and going.

Stay tuned for more posts about making Harvest Time. Next time, I’ll share photos, commentary and a video about creating the turkey tail mushroom roof over the doorway.
To keep up with new posts, please subscribe to this blog. Your contact info will not be sold or shared. If you’d like to see more frequent photos tracking the projects in my studio, please follow me on Facebook and/or Instagram.

Fabulous work, Salley. Love the mossy logs!
Mary, (Maisie) Crowther
You are amazing
I am just tickled about your good work.
Love the colors and texture of the moss and the underground casche of food – and the pink leaves.
This is utterly FASCINATING!!! What a labor of love.
Thank you for sharing your creative process that is truly amazing!
So wonderful and thank you for sharing
As I look at the scene, I wish I could just open the wee door and walk right inside. Thank you for generously sharing your process! I love your work!
I haven’t commented it quite a while, but just want you to know how much I enjoy your work, artistry, and the kindness not only to share the final Art Pieces, but also of the mechanics of how you do it.
You keep on amazing me!!! I could also really use some of your patience….❣️
Sigo maravillada al leer como logras tu trabajo, desde los bocetos iniciales pasando por la realización de delicado musgo, el tratamiento de la madera, hasta la escena final.
No conocía tus creaciones hasta que me tope con el hongo pavo real”. Hace 2 horas estoy leyendo y mirando tus increíbles creaciones
Gracias Sally por compartir tanta belleza!
I love your work! The way you use stitches to make moss is genius! Figuring out how to attach felt to the driftwood must have been difficult, but you did it! I wish I had some of your talent!
Magnifique c’ une promenade dans un monde magique qui fait du bien. Merci pour ce moment de bonheur.. Jocelyne
Thank you so much for sharing! I have loved your work for years and have 2 books.
Brilliant idea for making the moss on real wood!
Marcia Romashko
I could watch this over and over and the music brings me such joy. Thank you so much for sharing your beautiful work of heart❤️