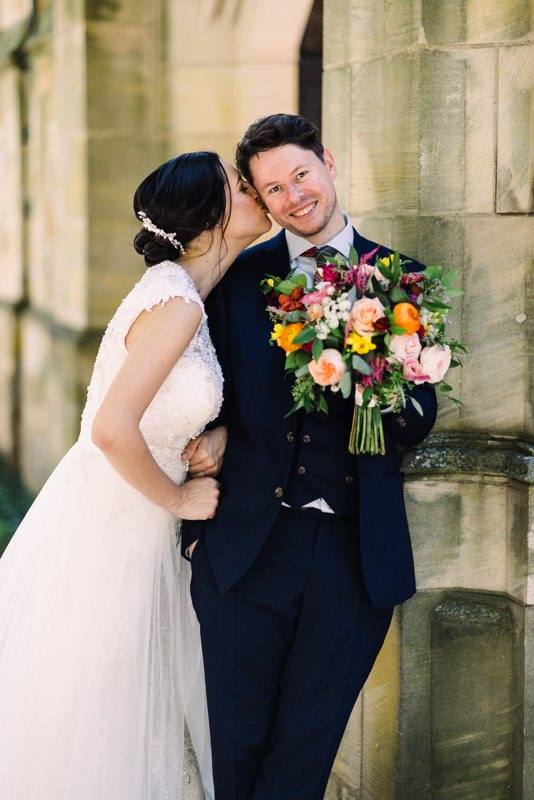
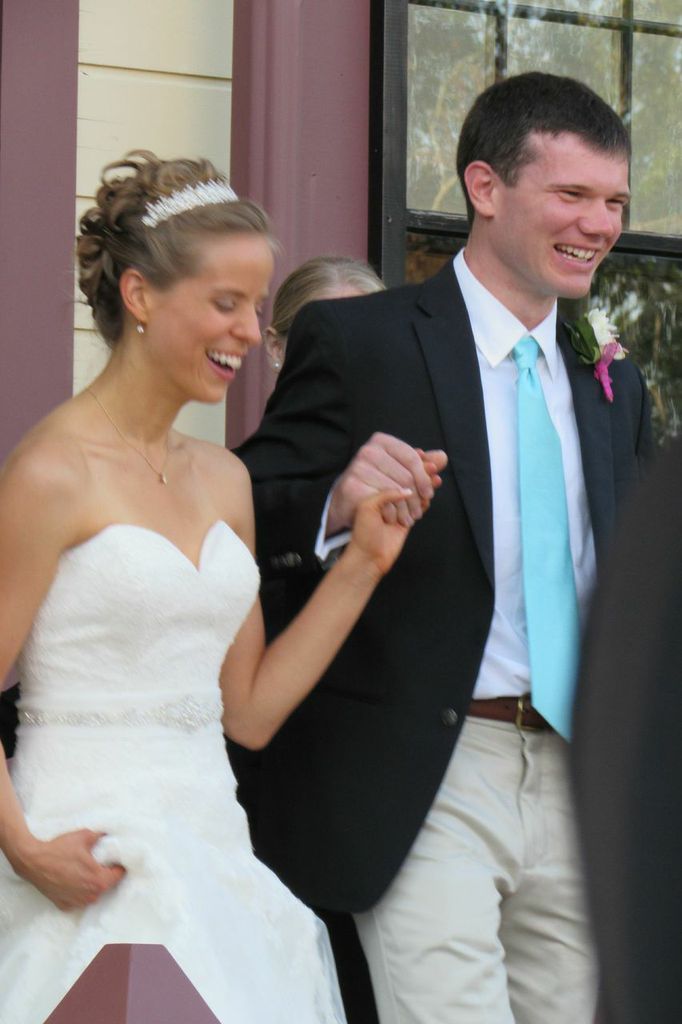
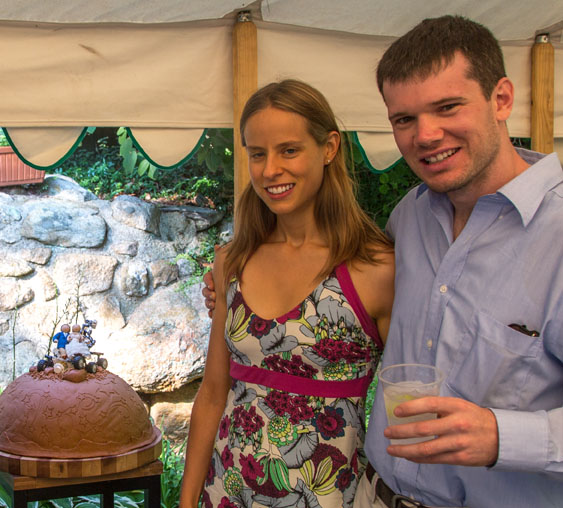
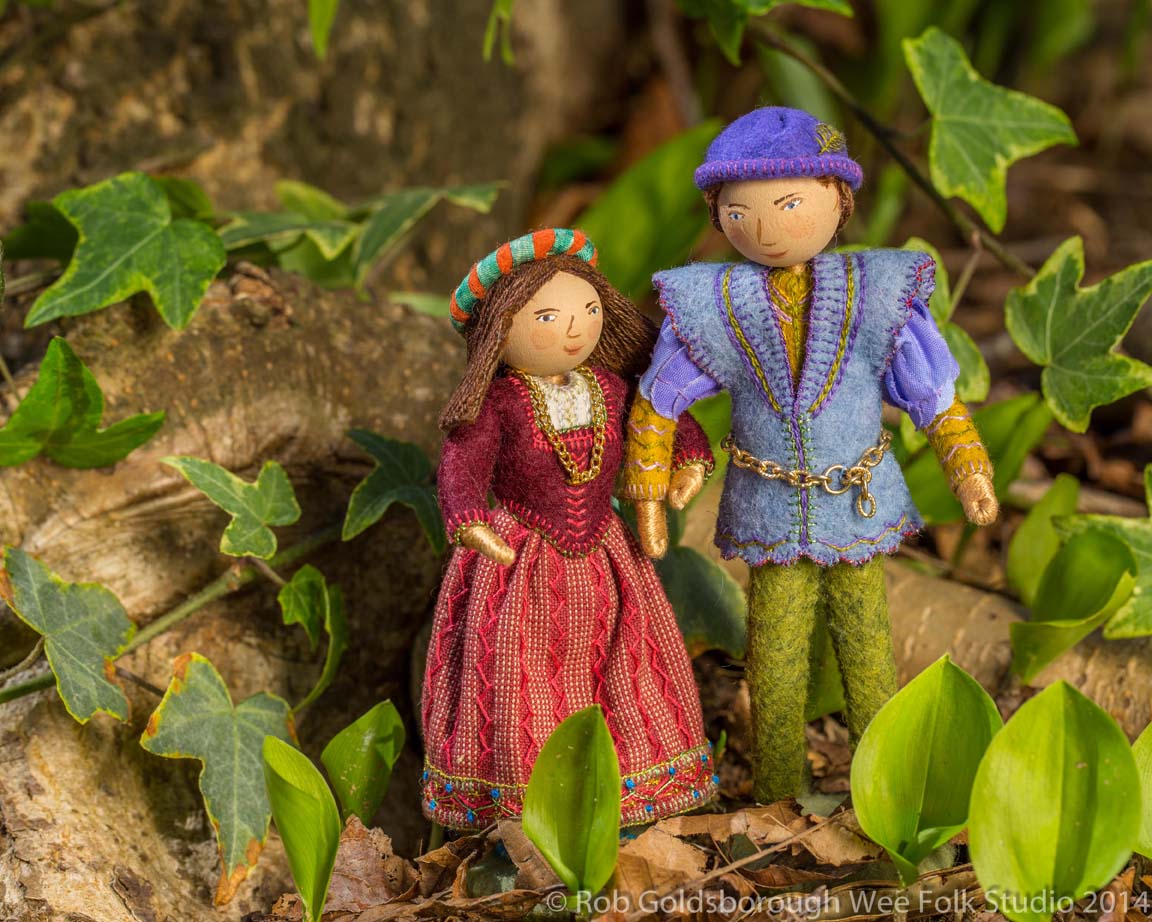
This summer, both my son Ian and Sam, his best friend from childhood, got married. Here they are at age 3 and at Sam’s wedding last weekend. So, I had the pleasure of making personalized cake toppers for 2 wedding couples! You can see the post I wrote about Ian and Liz’s dolls here.


Sam and Louisa hosted a heart-felt and whimsical ceremony and reception, full of do-it-yourself touches, at their home in Falmouth, MA. Sam is a radio announcer and reporter for WCAI, our local NPR station and Louisa teaches ballet and is also the handwork teacher at the Waldorf School of Cape Cod.

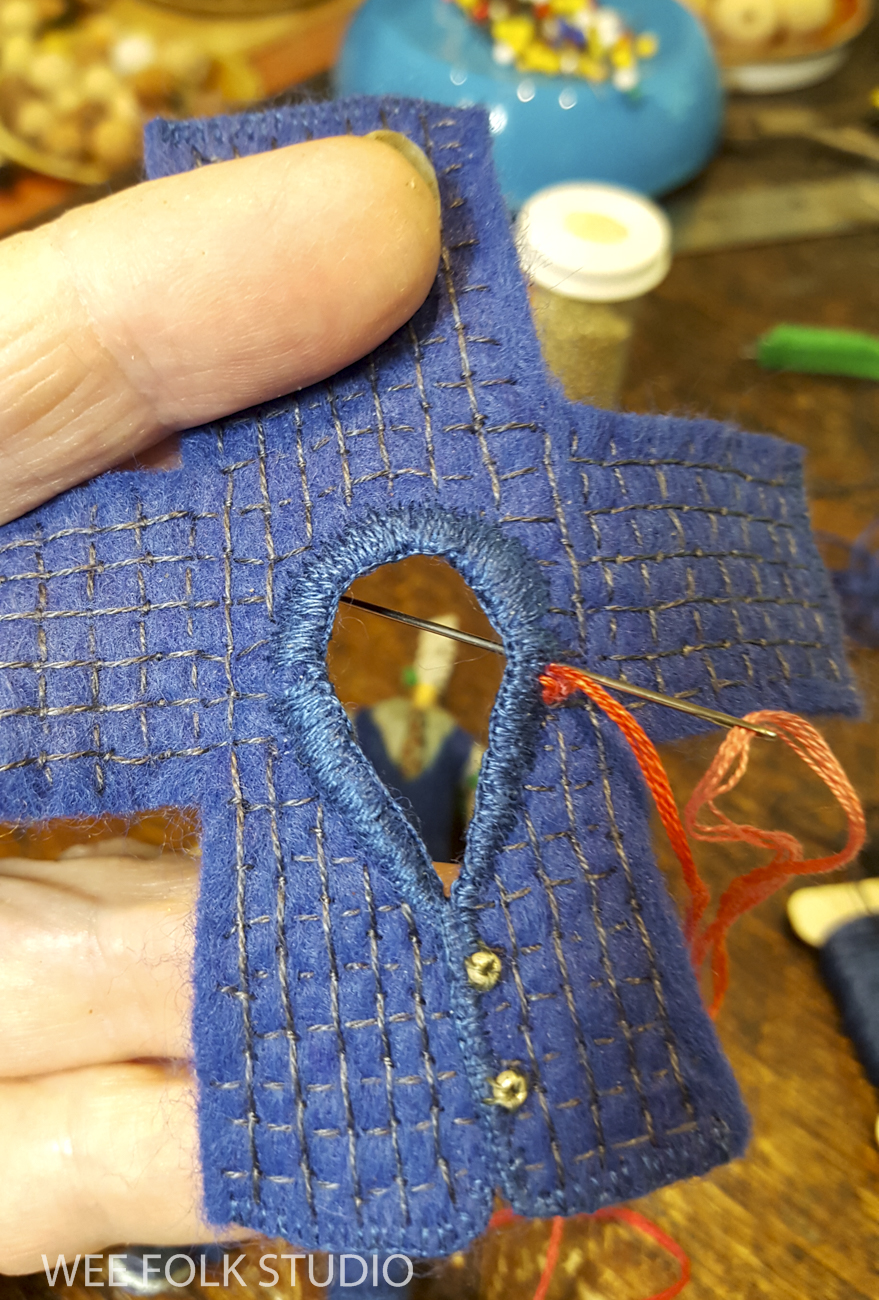
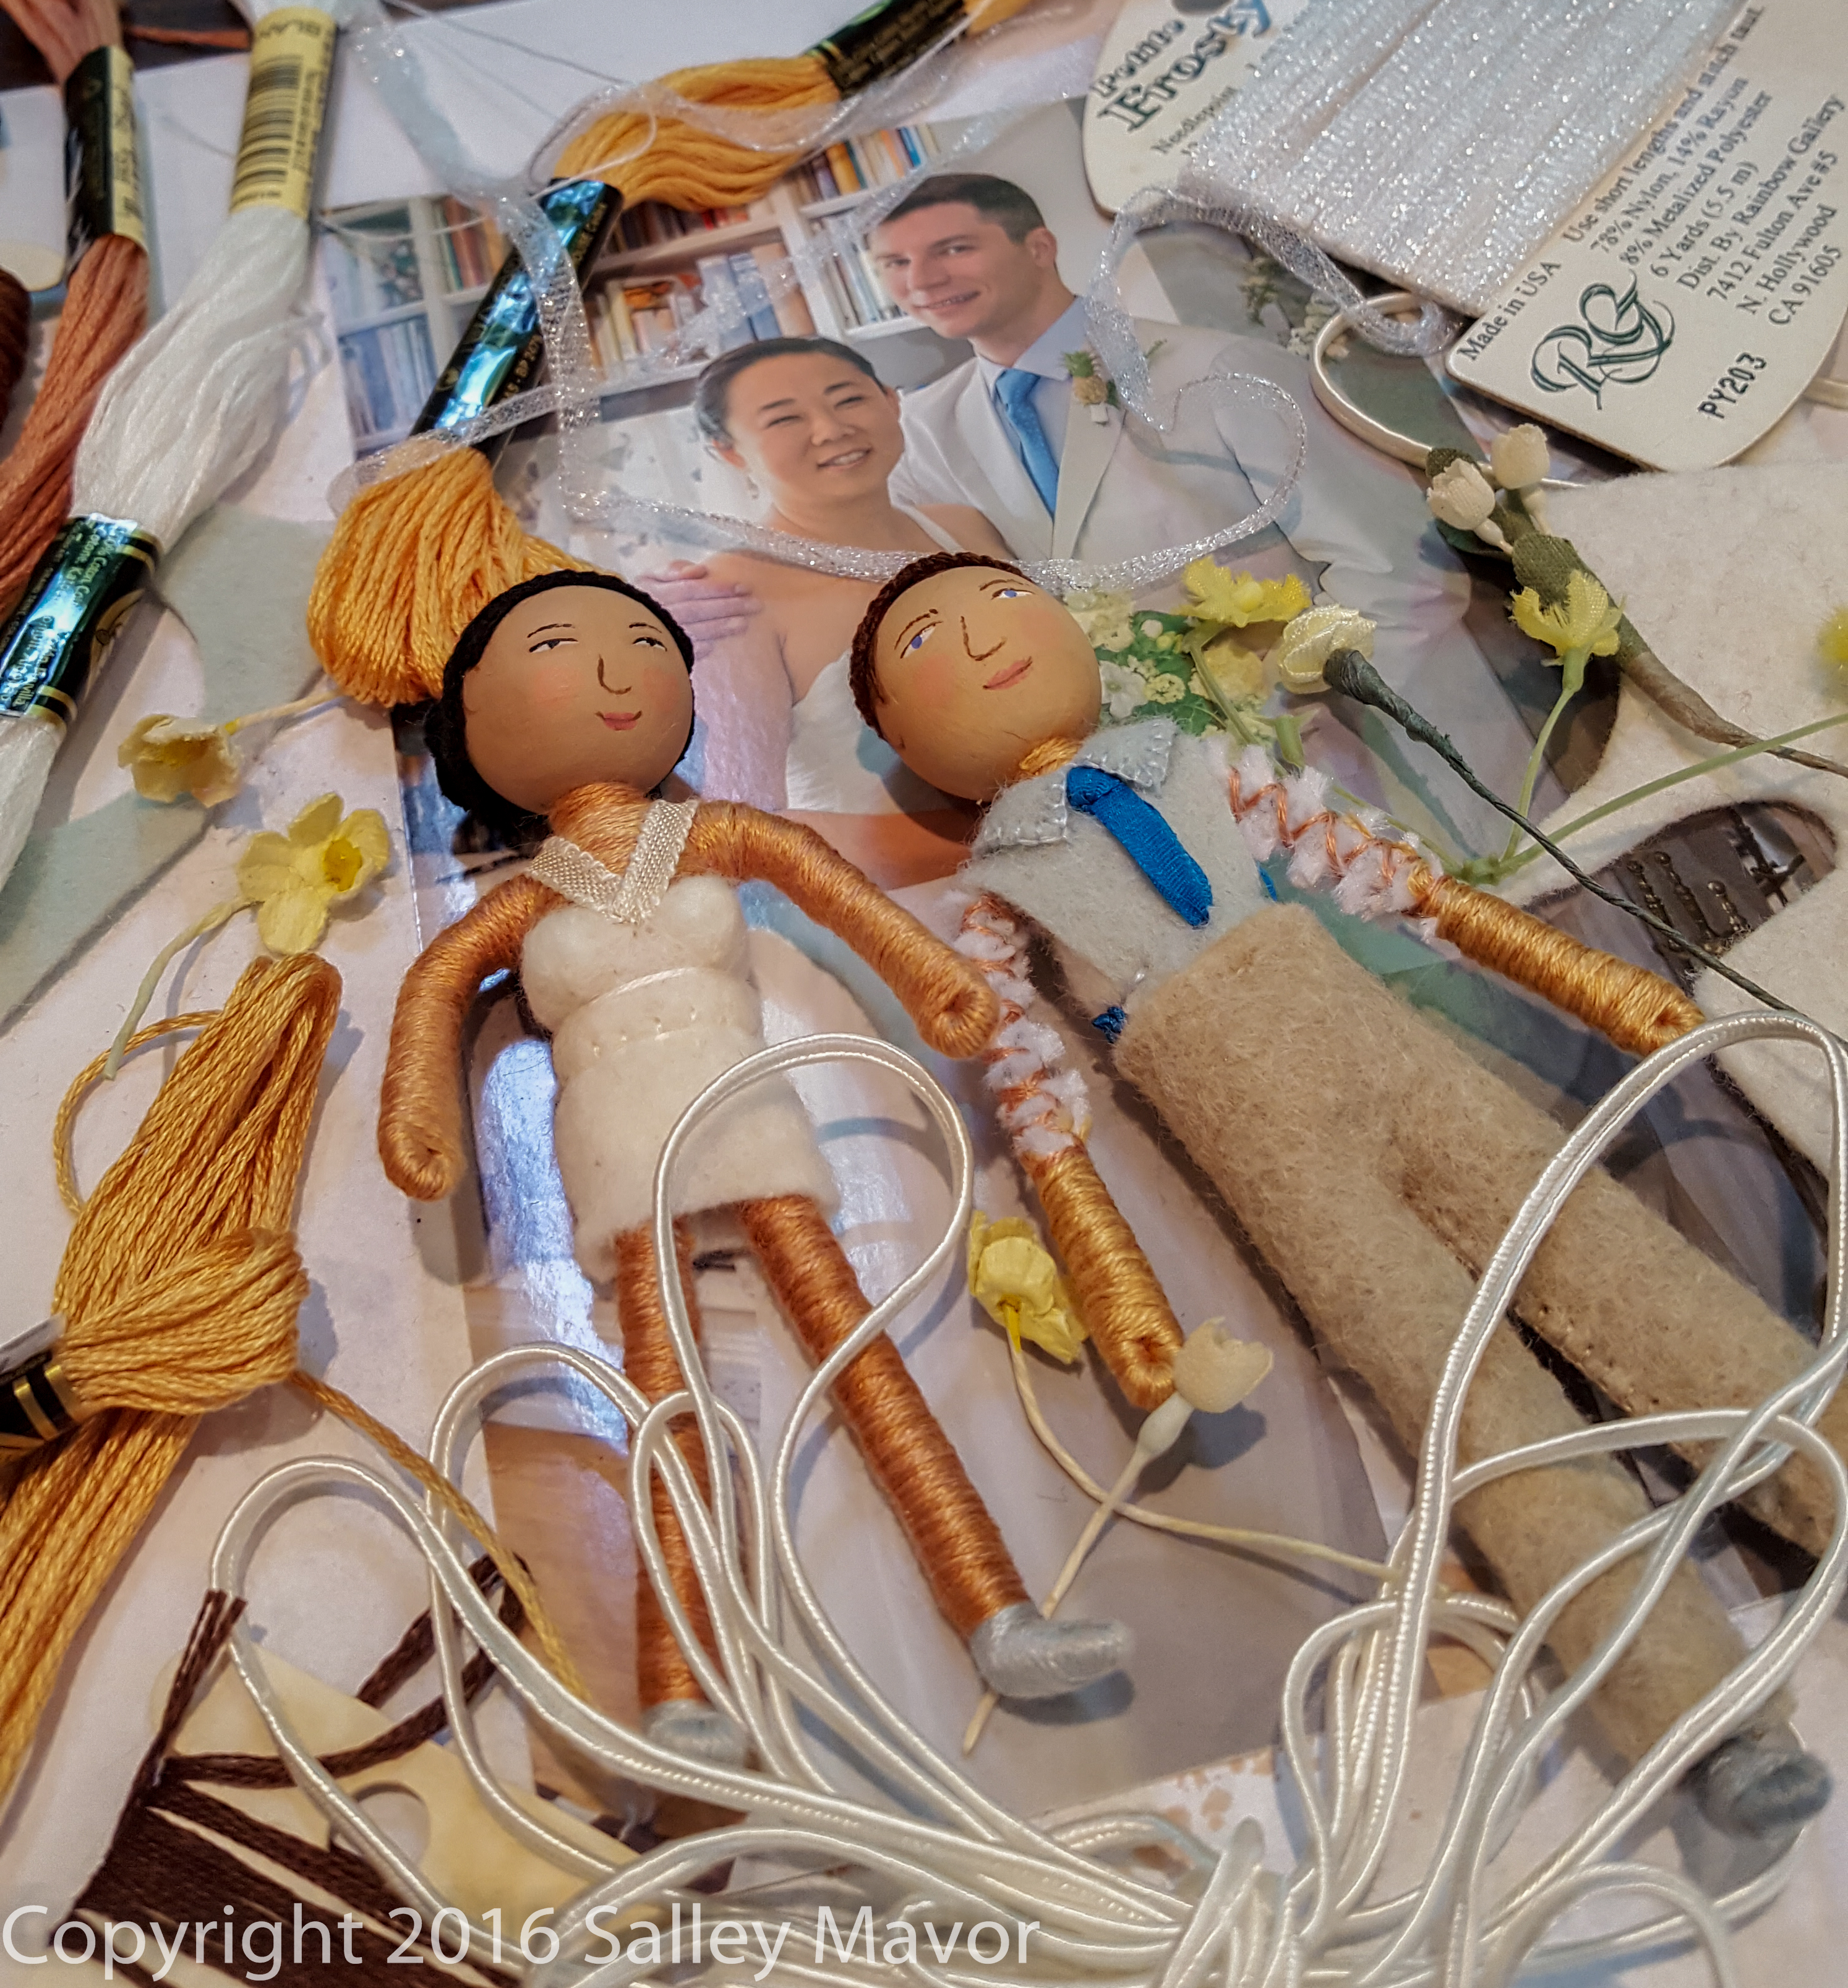
A few weeks before the wedding, Sam and Louisa sent photos of their wedding attire and accessories, including their shoes. As I teach in my how-to book, Felt Wee Folk, the figures are constructed from the feet upward.

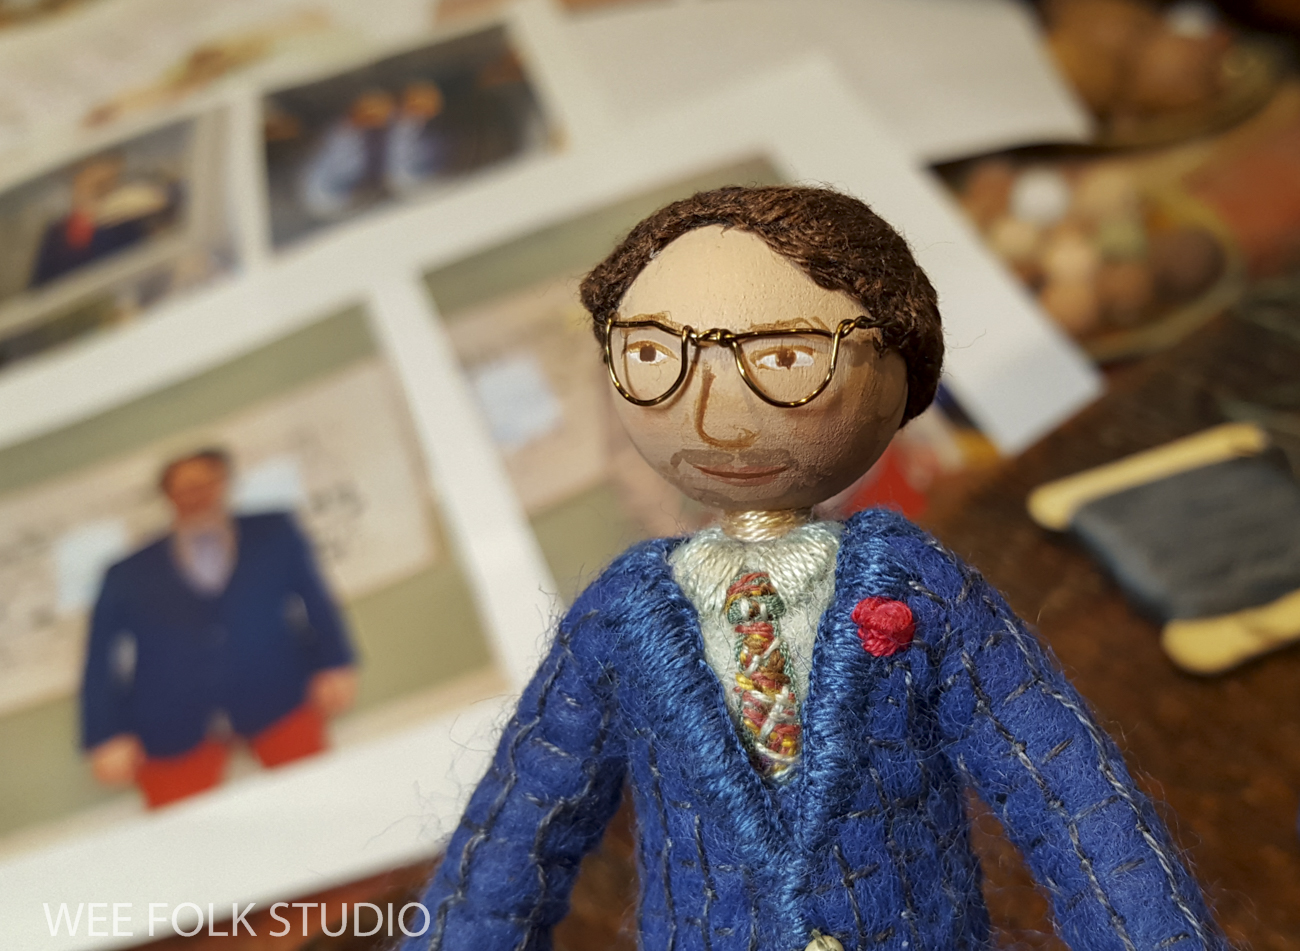
I also asked them to send head shots, specifically with closed mouths – no toothy grins, which are difficult to paint. When depicting real people, I like to paint their likenesses way in the beginning of the process. That way, I feel attached to them. They aren’t just dolls, but individuals with unique characteristics who are dressing up for a special occasion.

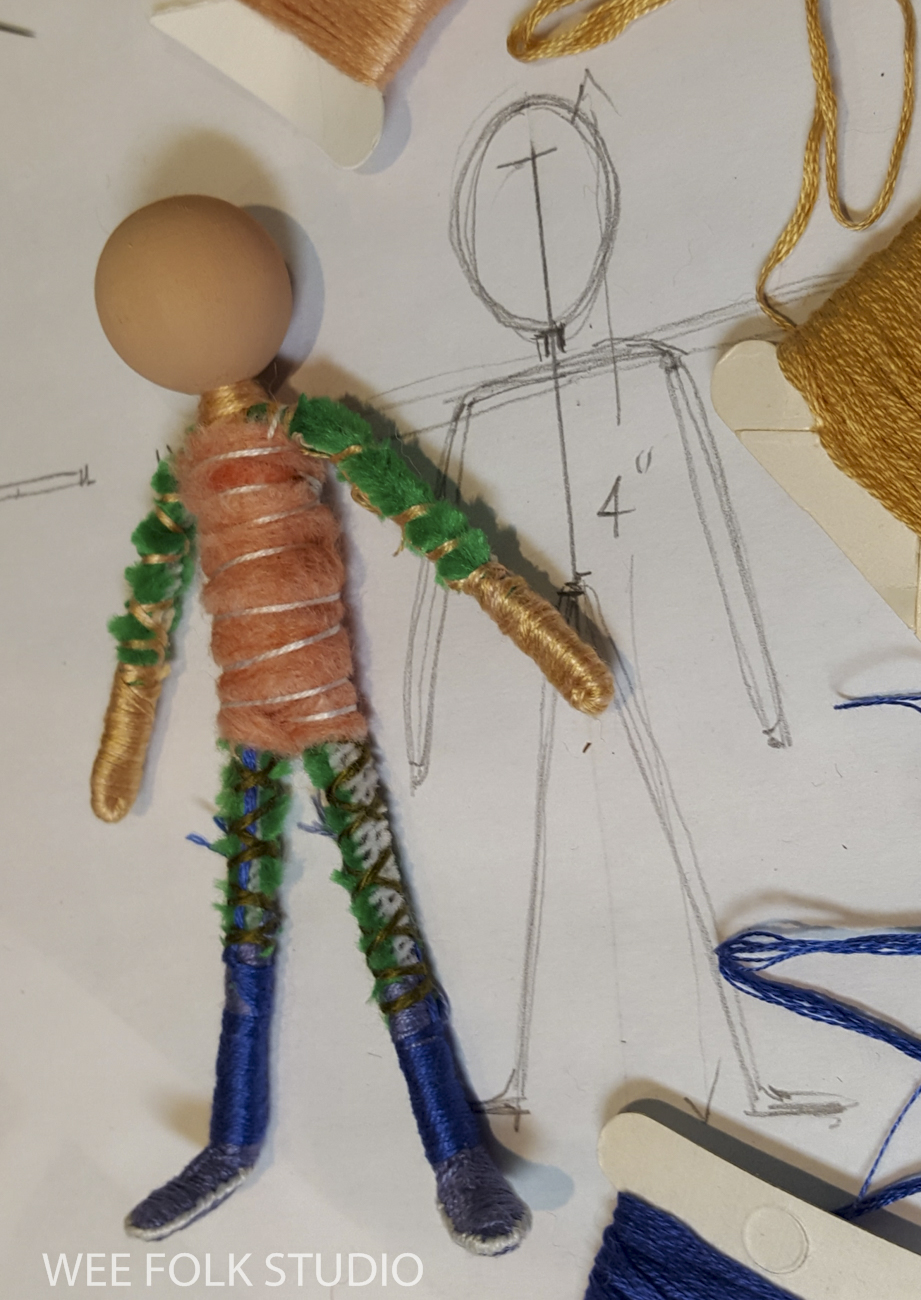
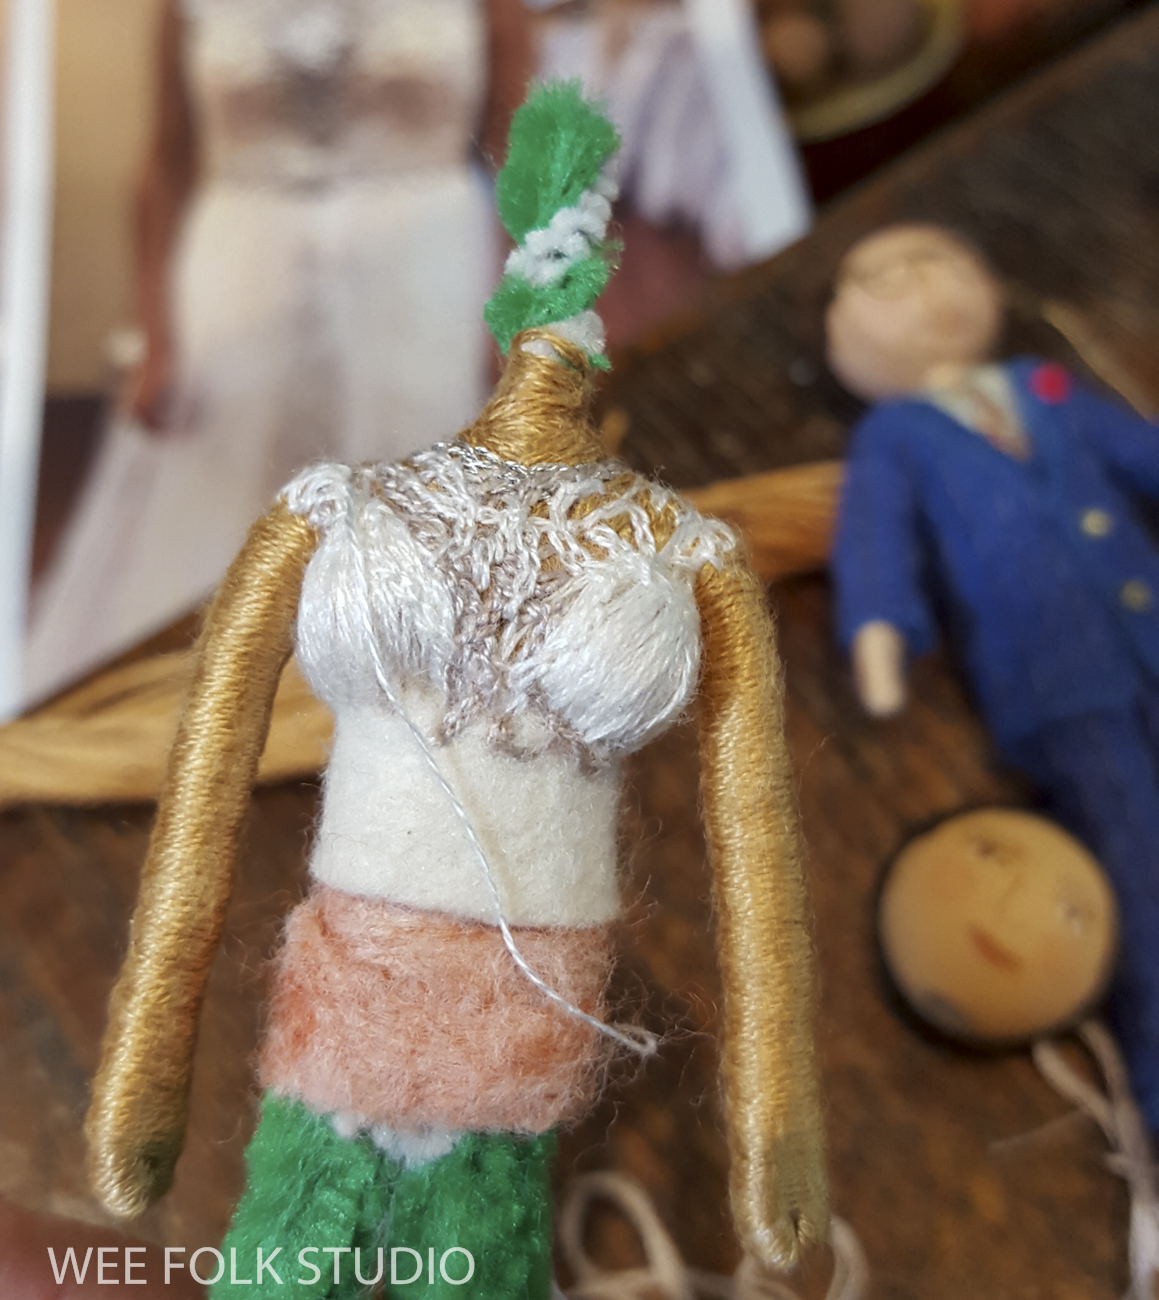
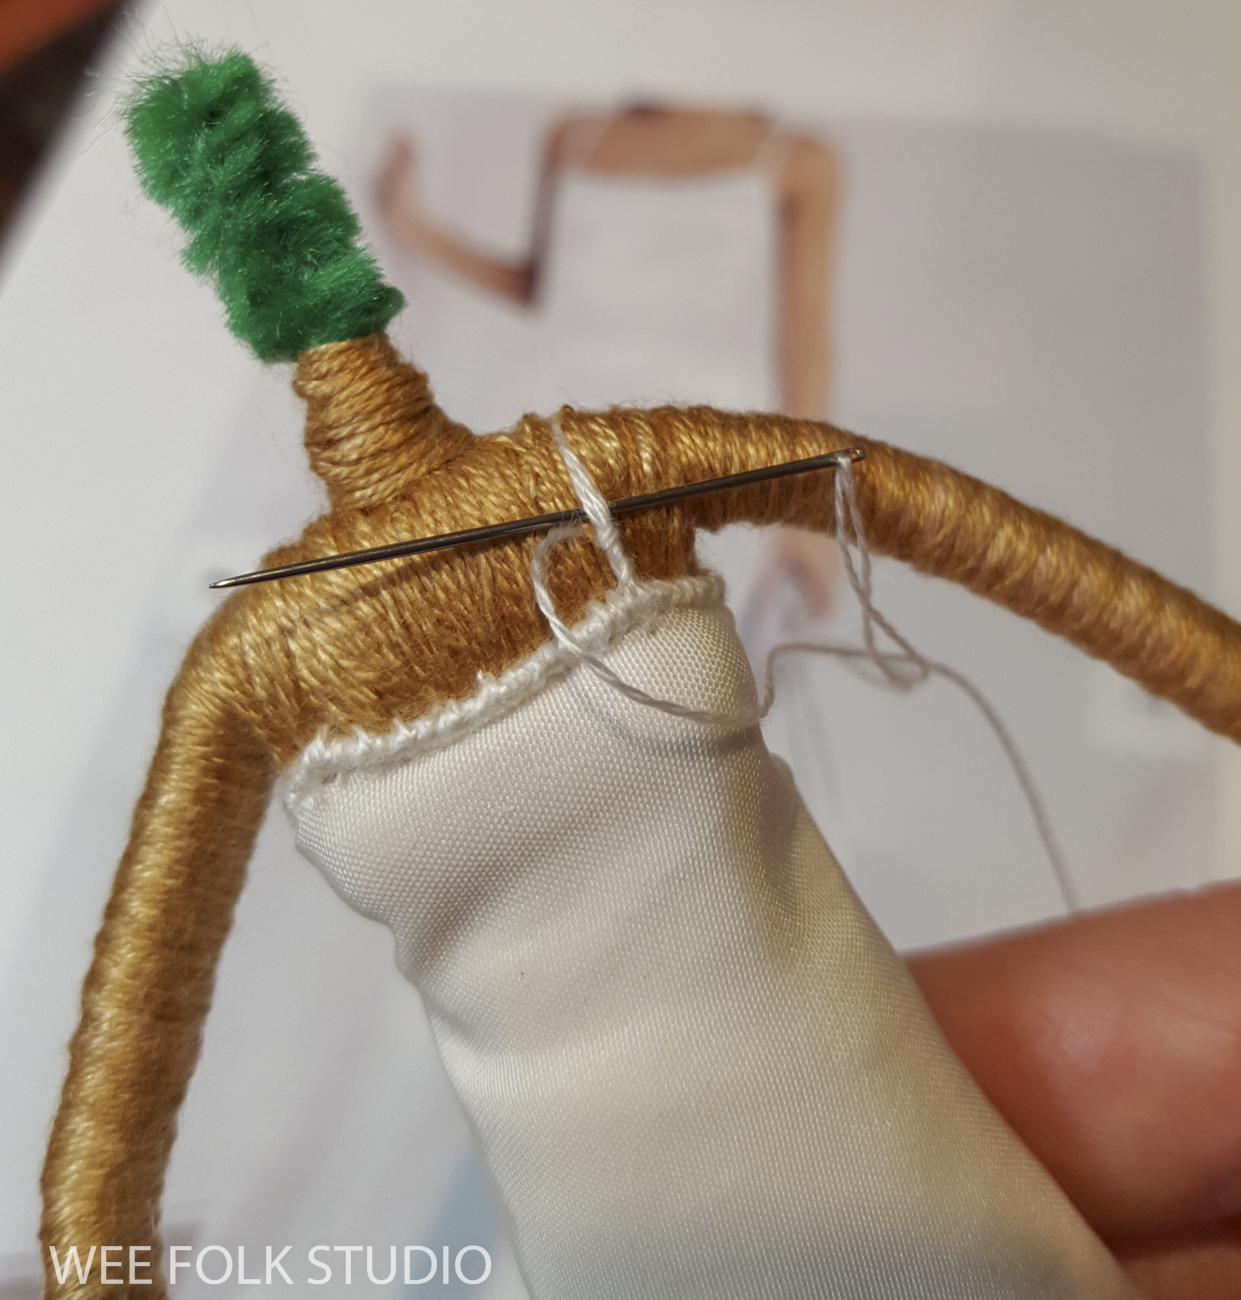
After forming the bride’s limbs with pipe cleaners and wrapping the arms and legs with embroidery floss, I sewed felt around the torso and stitched on boob beads.
Then, I covered the torso and boob beads with a layer of cotton batting and stitched more embroidery floss onto the upper chest area. Dressing bride dolls is a challenge because so often they wear skimpy gowns that show a lot of exposed skin. It’s so much easier to make the groom’s suit out of wool felt!

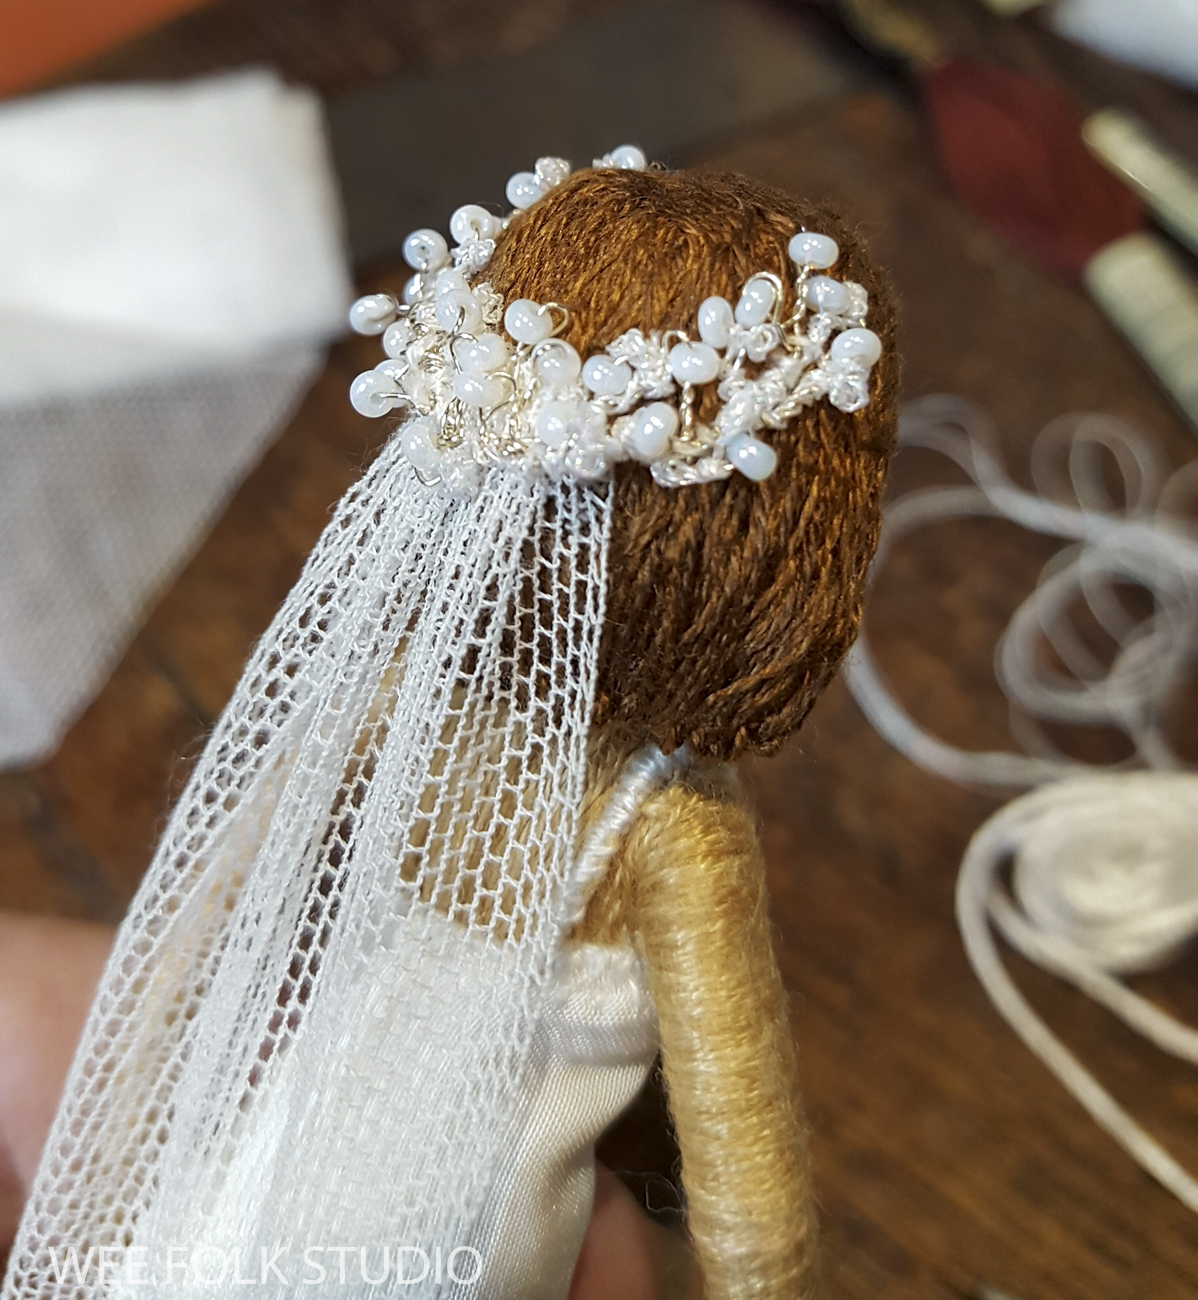
To make Louisa’s hair, I stitched embroidery floss onto the felt “wig”, which I’d previously glued onto her wooden bead head (see photo above). I should mention that at this point, her head is not yet glued onto the neck. That came at the end, after her clothing was finished. I popped her head on and off throughout the process to check how it looked.

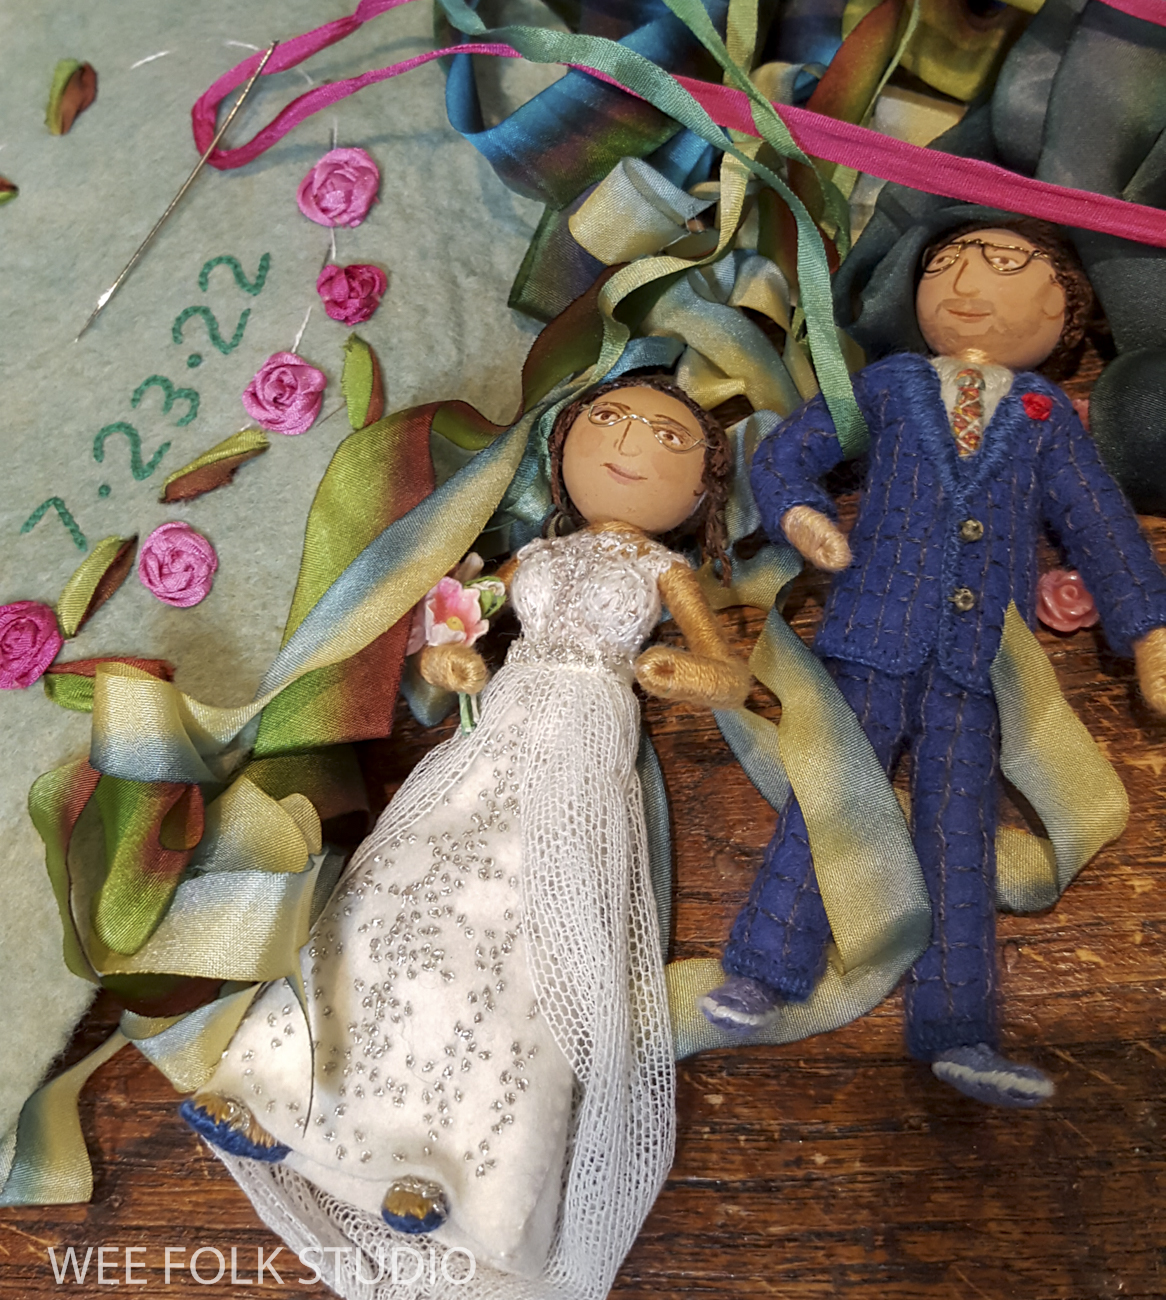
I found some white silk (or silk-like) fabric in my stash to make Louisa’s gown.
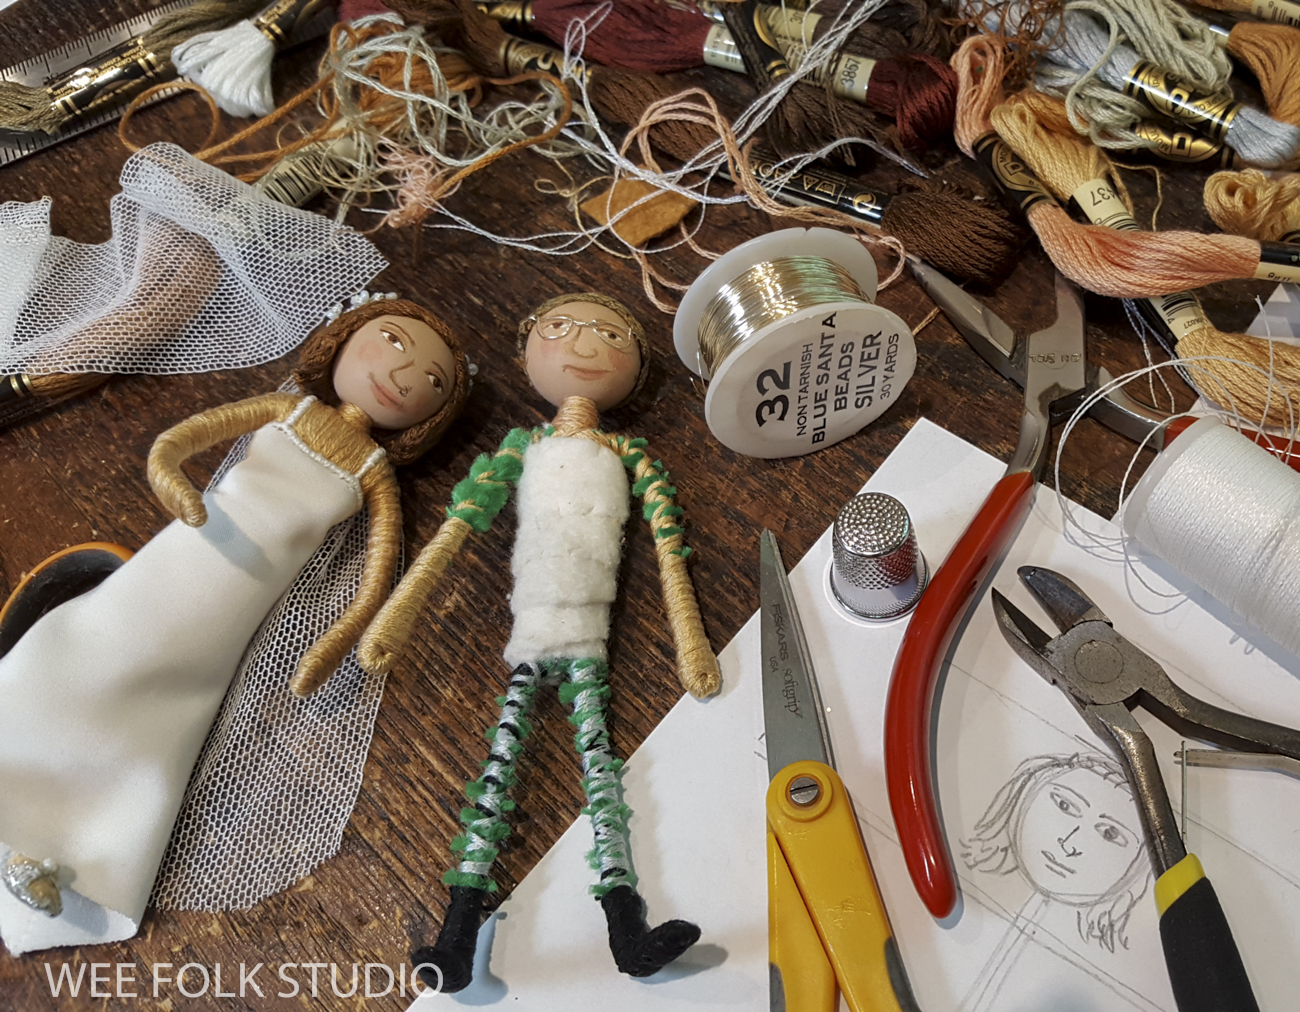
I formed Sam’s pipe cleaner body and he lay on my work table in his underwear, while I waited for photos of his suit.
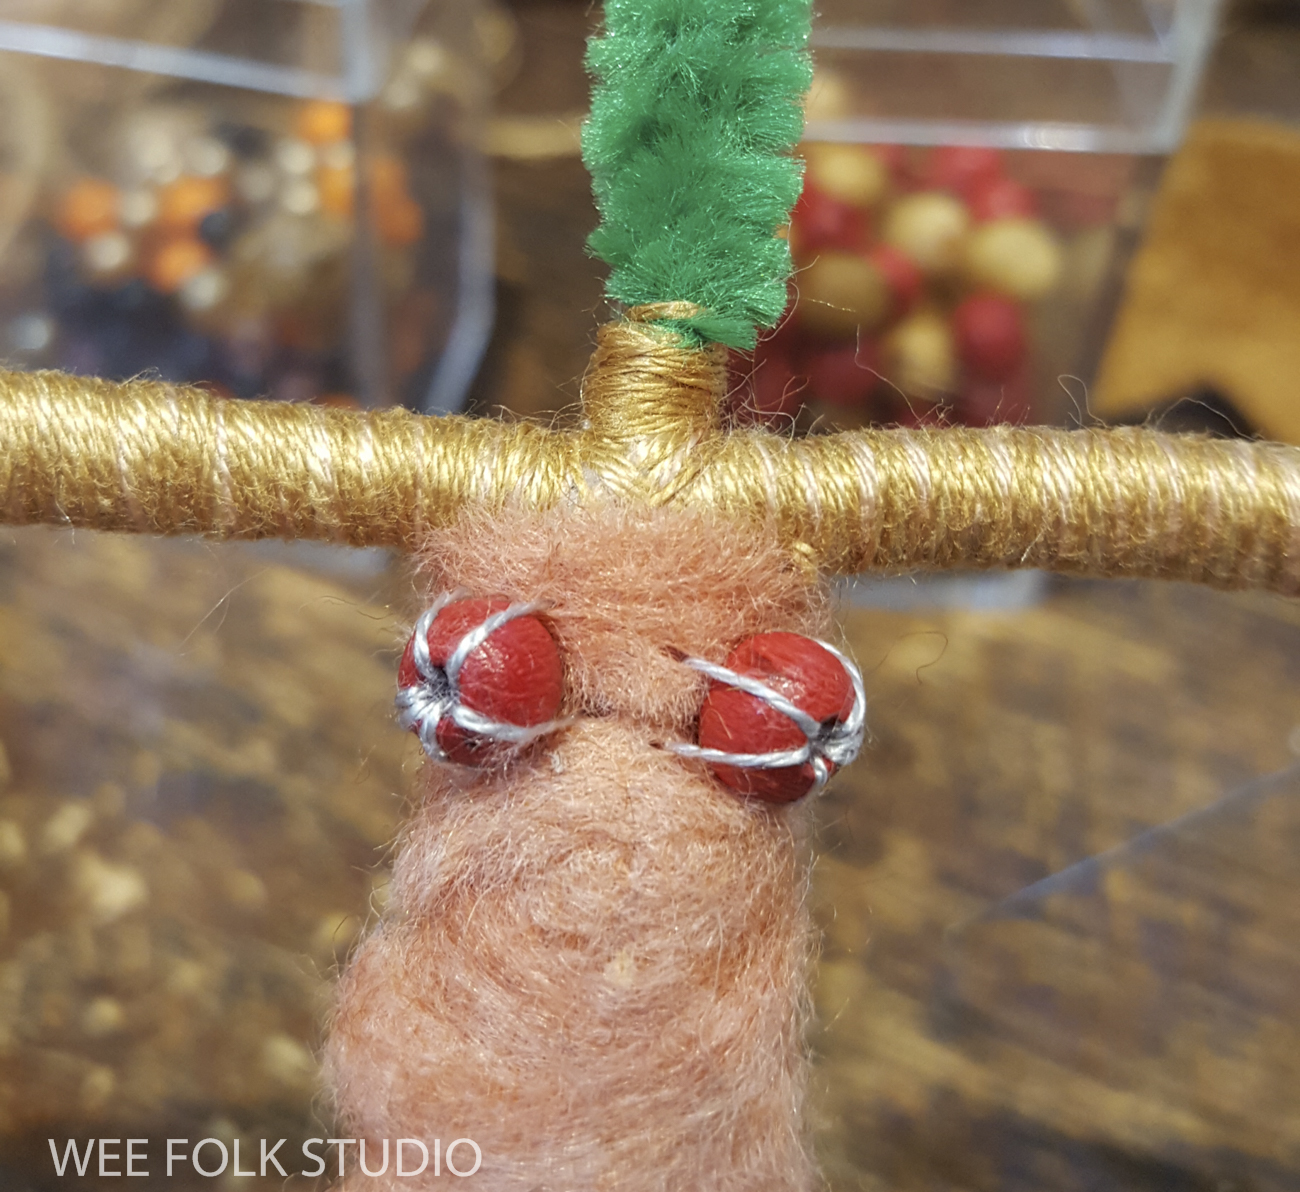
Using photos of Louisa’s family heirlooms, I fashioned her veil and pearl necklace.

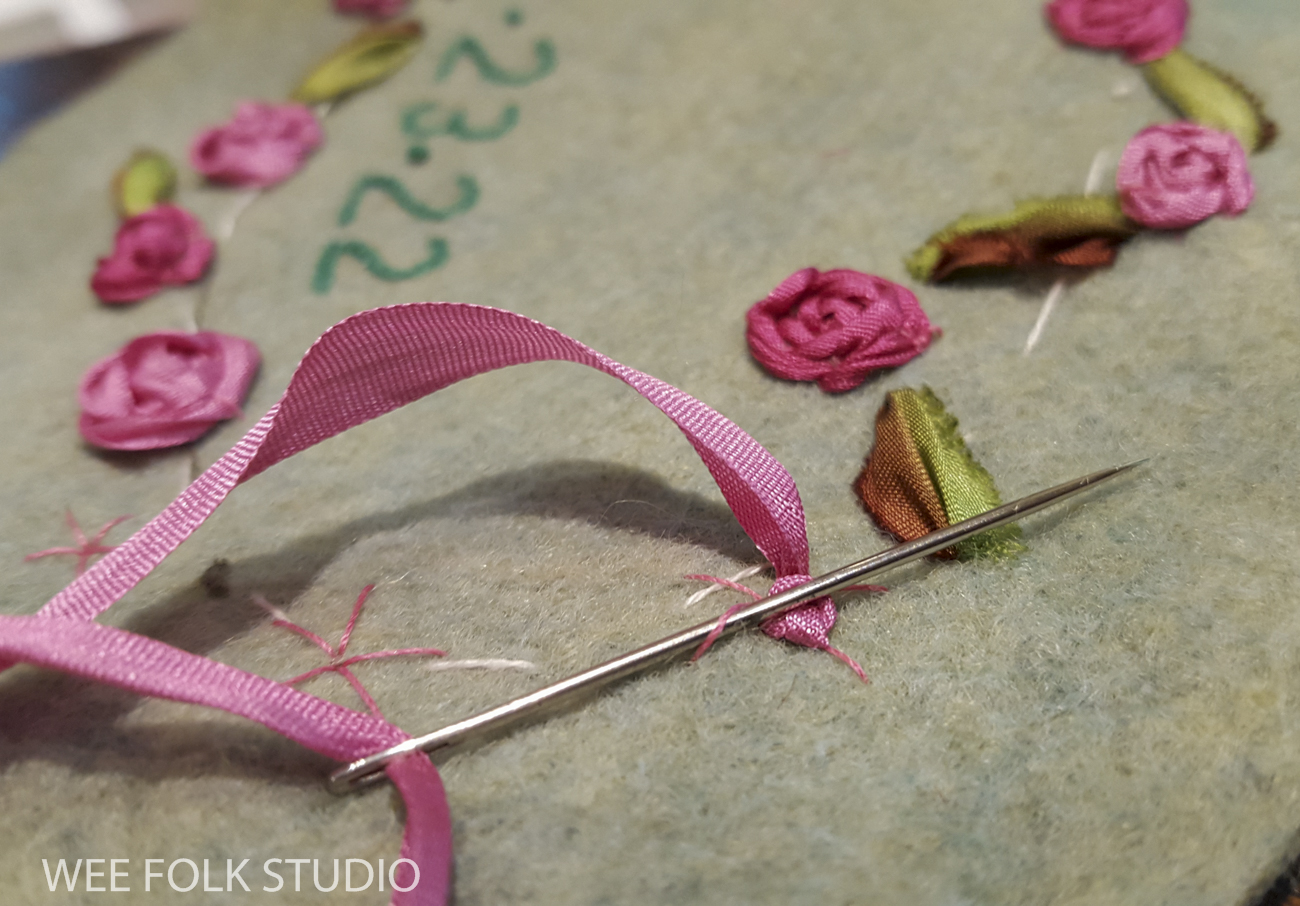
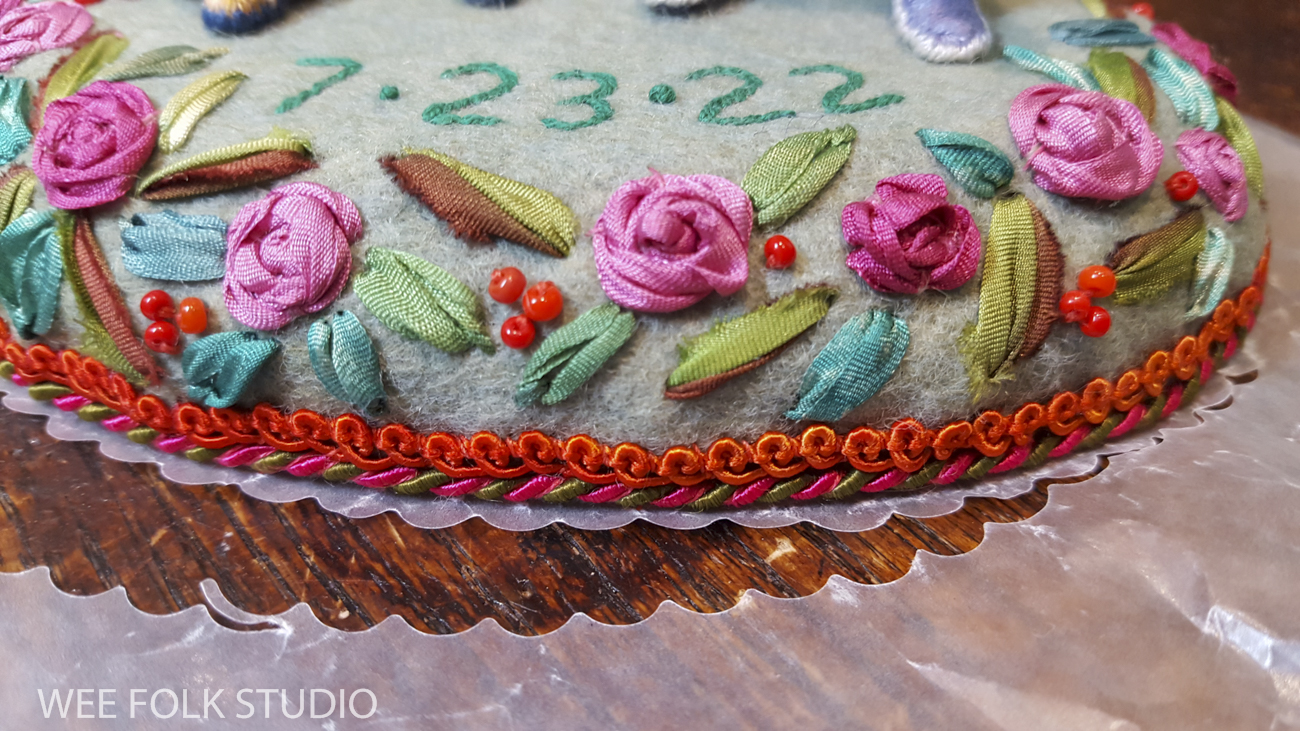
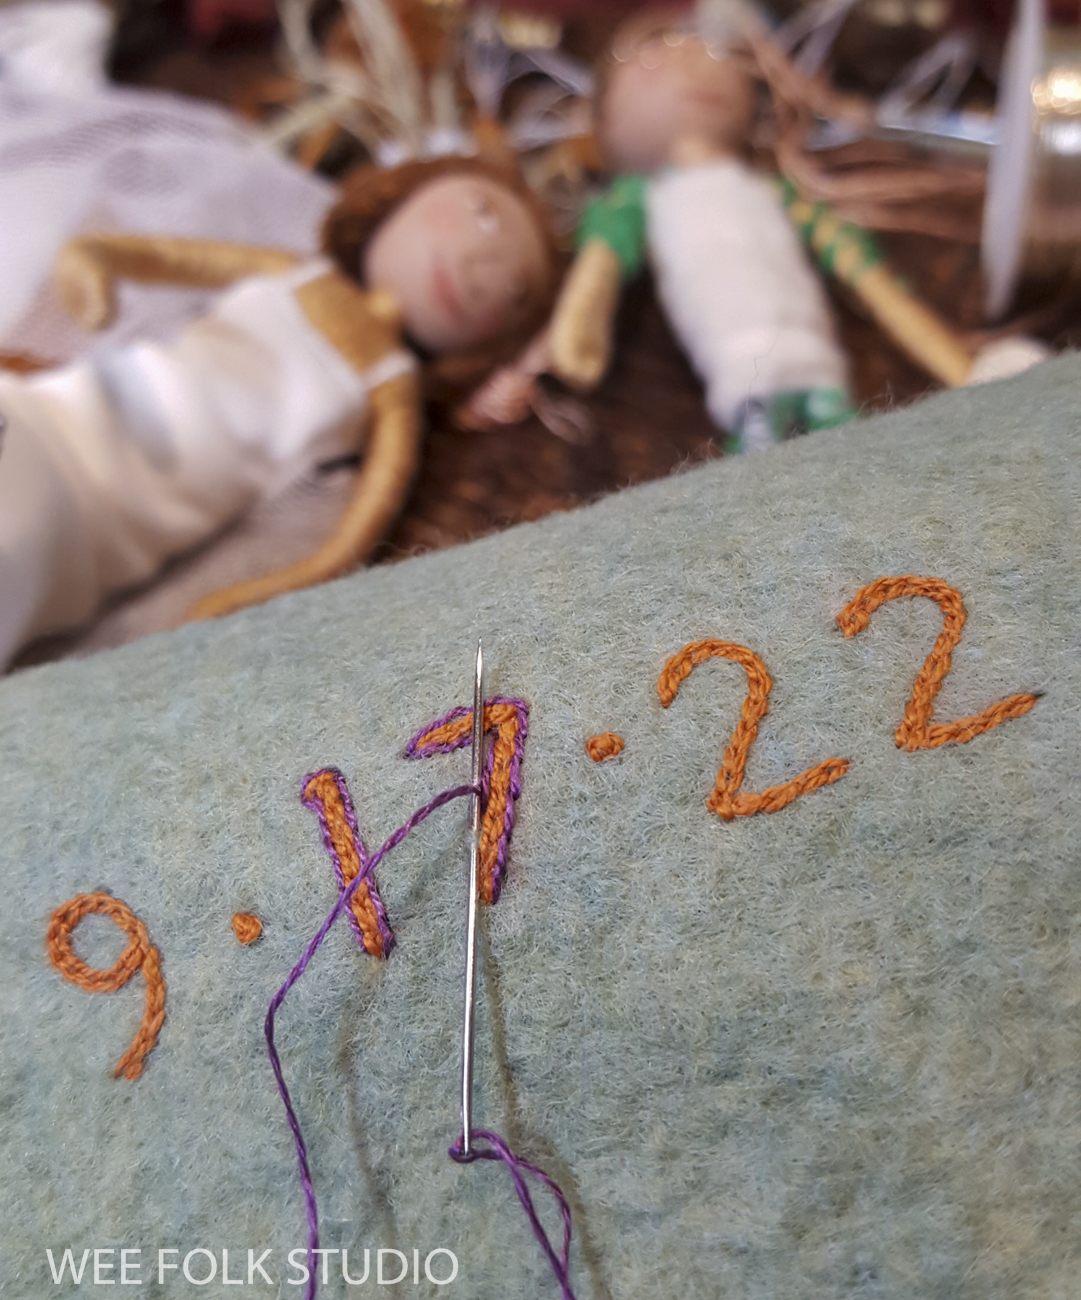
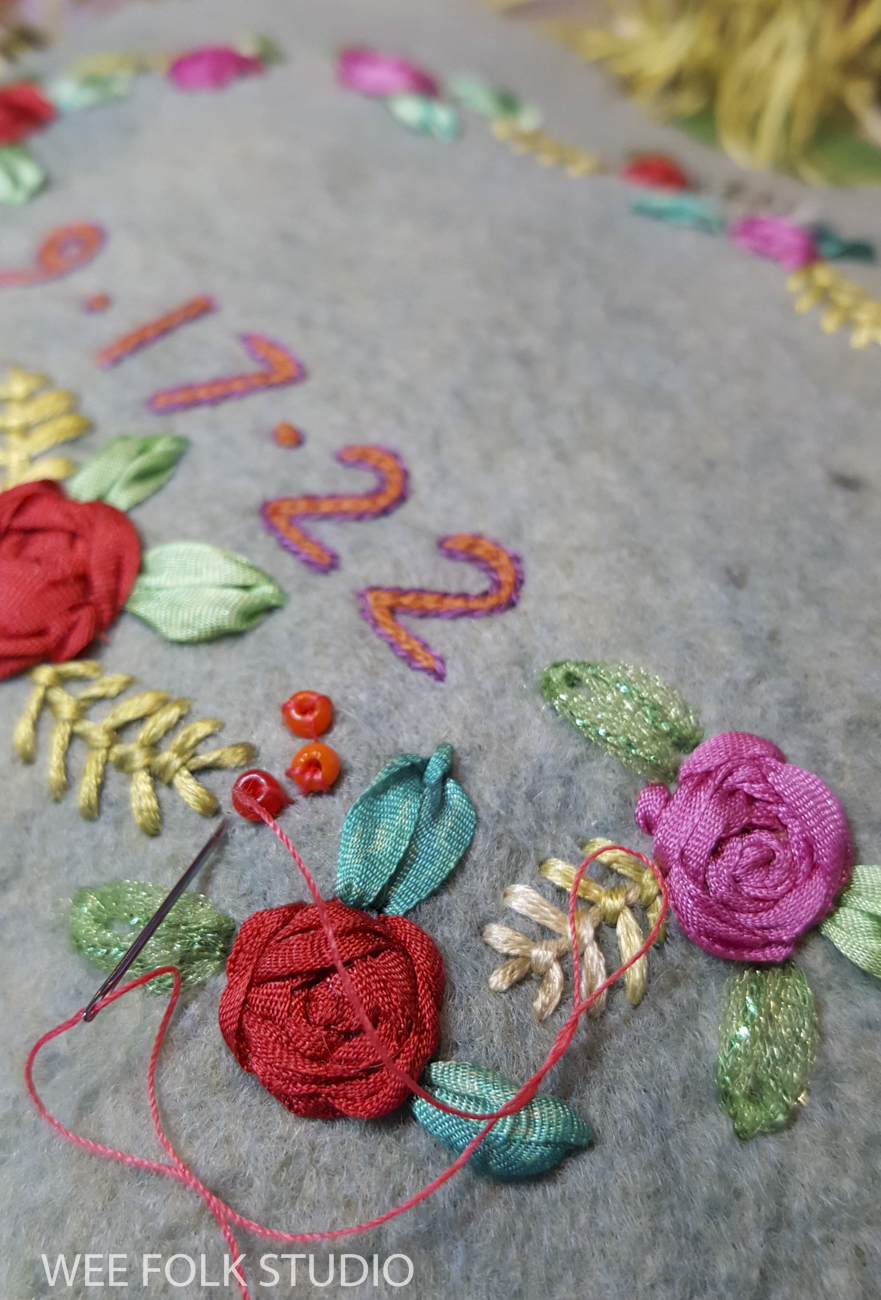
With Sam still in his underwear, I pressed forward and made the platform that they would stand on, which is basically a piece of wood covered with felt. I chain stitched their wedding date in orange and outlined the numbers in purple to make them more prominent.
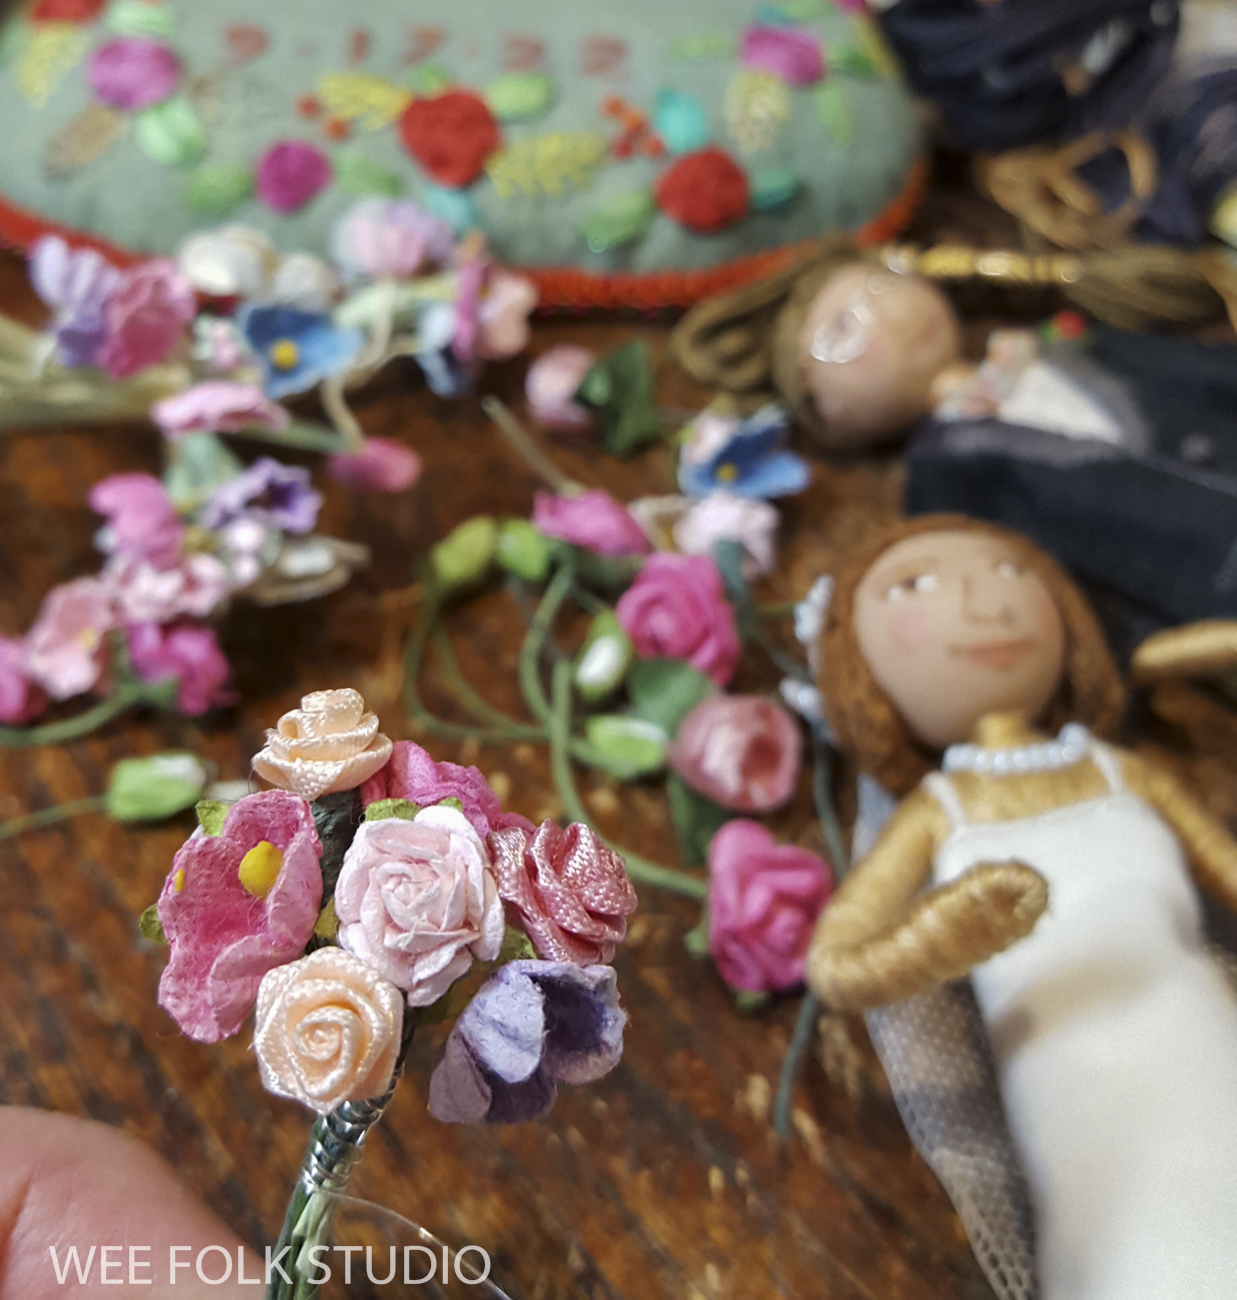
I used a spider web technique to embroider ribbon roses, which I learned on YouTube.

I added more ribbon embroidery and bead embellishments.

I glued a piece of felt to the bottom of the wooden platform and stitched the embellished felt top piece to it around the outside edge. Then I edged the base with twisted memory wire and braid.

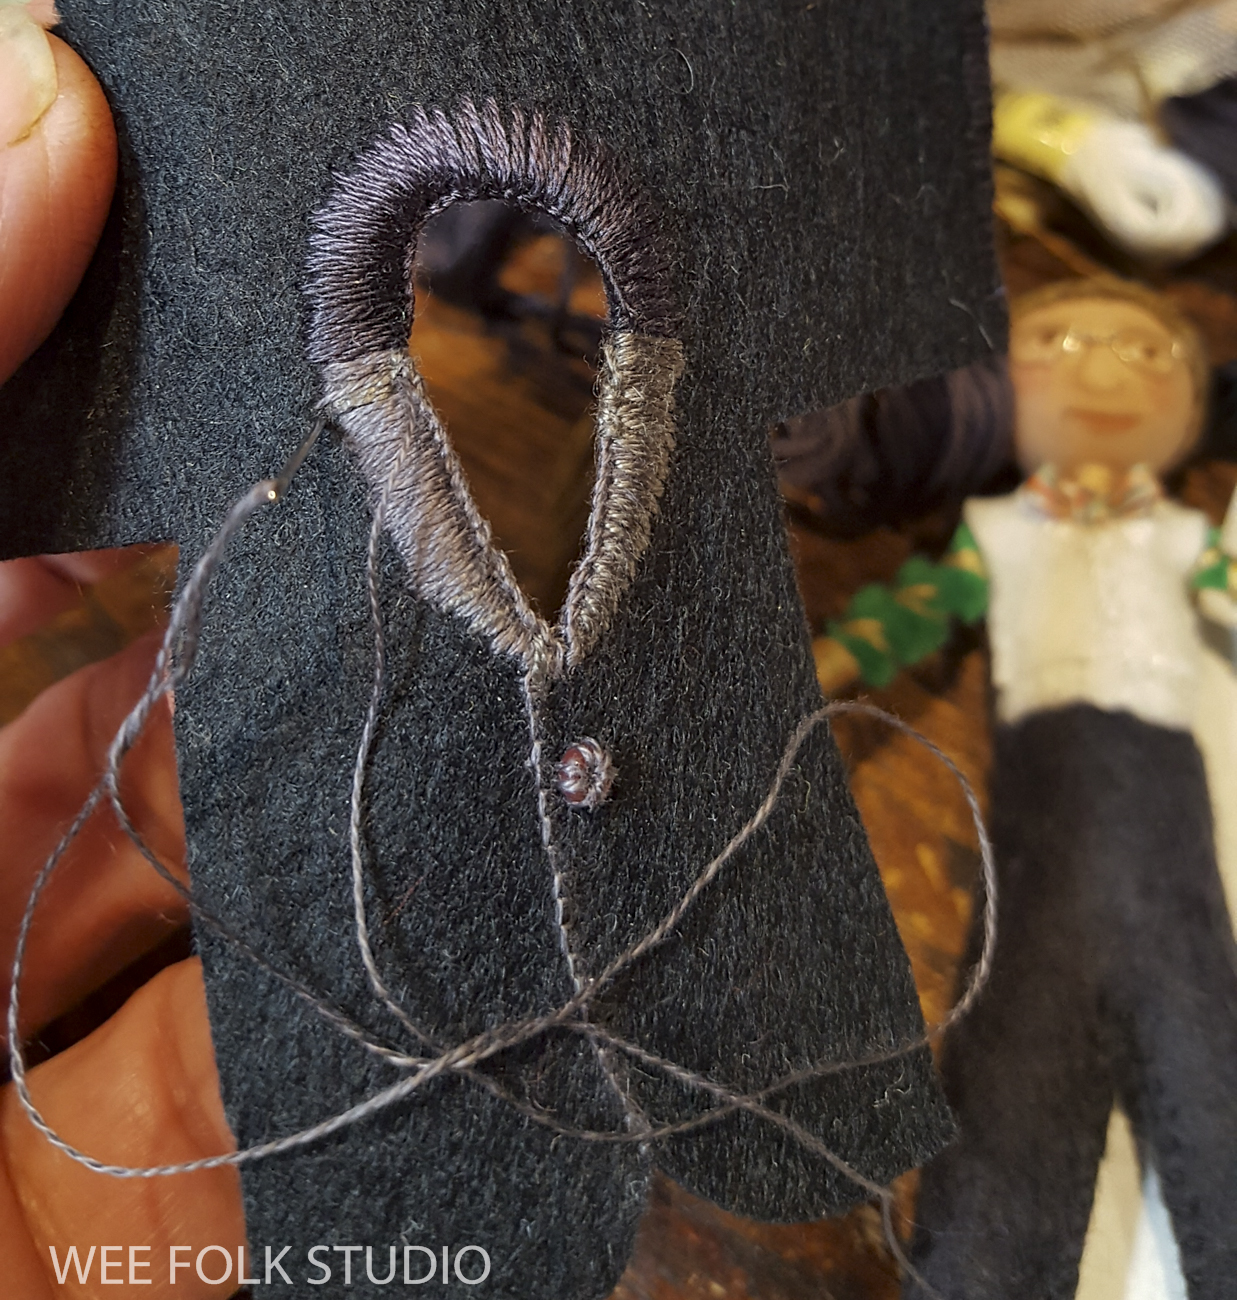
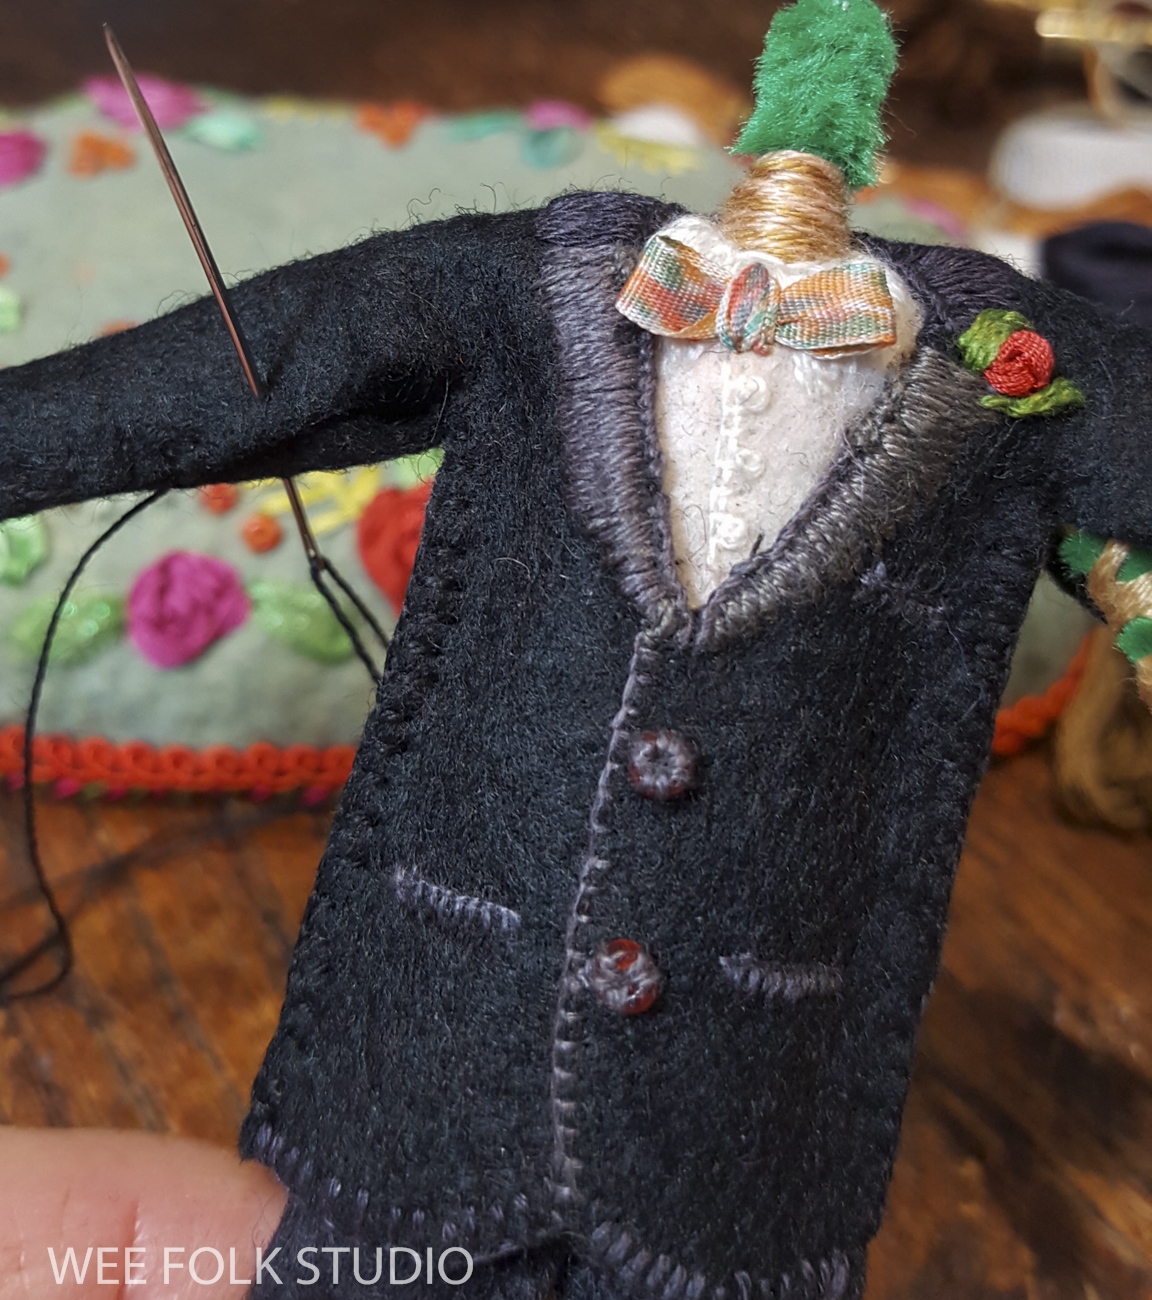
As soon as the photo of Sam in his black velvet jacket appeared on my phone, I got to work creating its wee version.
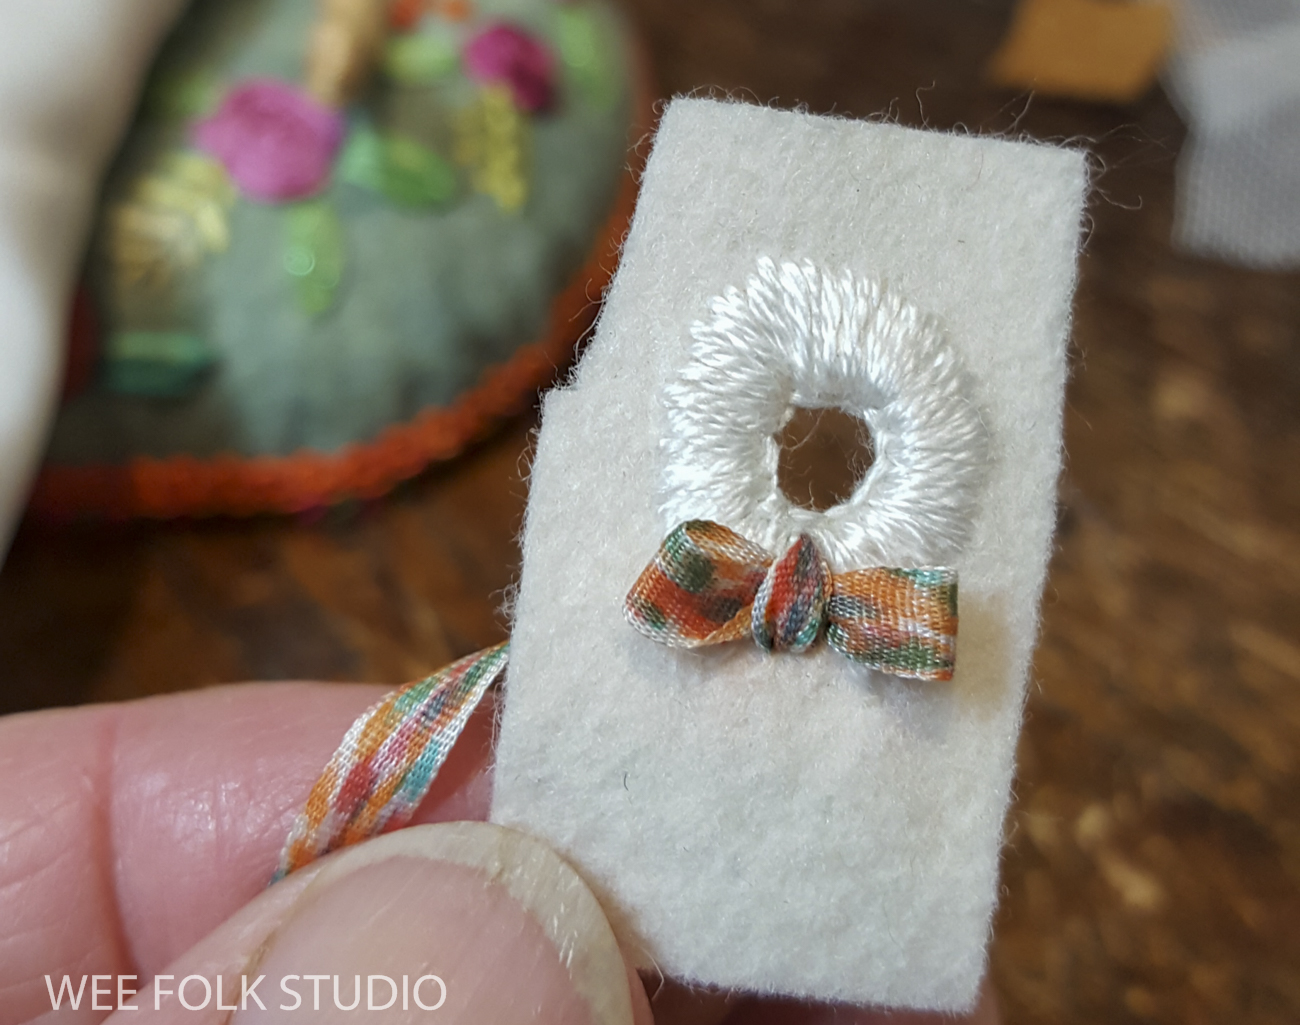
To make Sam’s floral bow-tie, I decorated silk ribbon with markers and stitched it to his shirt.
It didn’t take long to sew his jacket onto the pipe cleaner body, and glue his head on top. Now, he was all ready to get married!
For her bouquet, i weeded through my collection of miniature flowers, guessing what it might look like. In reality, it turned out that she held a bouquet of dahlias in a very similar color scheme.

Before covering the wooden base with felt, I had drilled holes for sewing their feet in place. I had marked the location of the drill holes on the felt, so it was easy to anchor their feet with a few stitches using a long sewing needle.

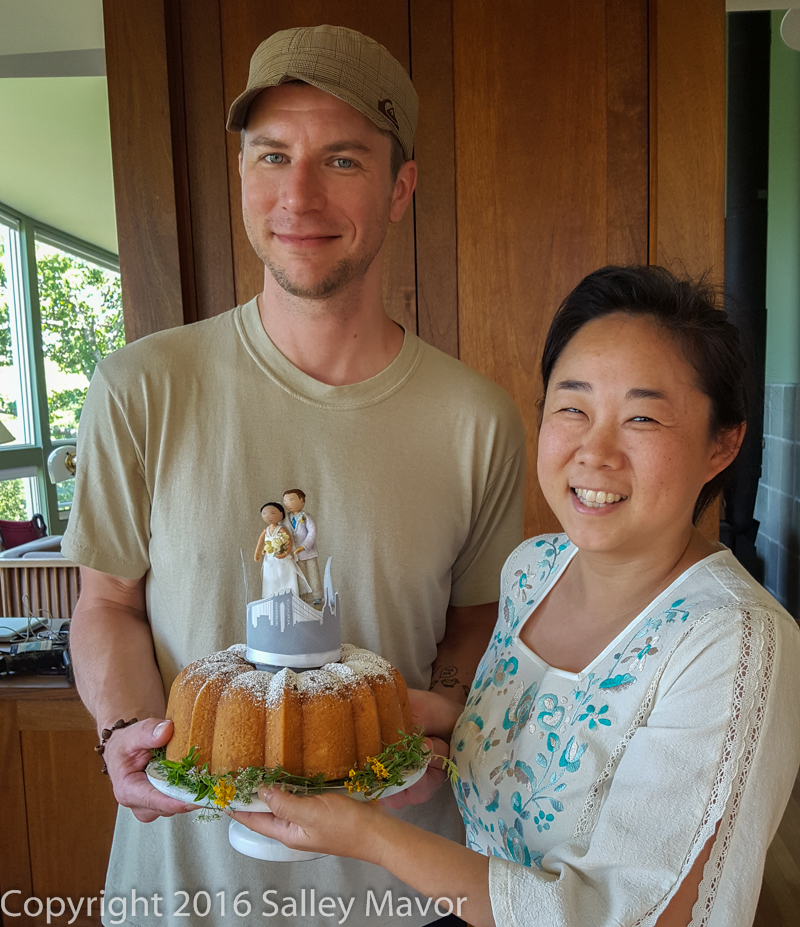
Here they are, atop their lemon poppy seed wedding cake, which was homemade by the bride’s sister. Congratulations and best wishes to Sam and Louisa!

To keep up with new posts, please subscribe to this blog. Your contact info will not be sold or shared. If you’d like to see more frequent photos tracking the projects in my studio, please follow me on Facebook and/or Instagram.