I made this modular play village when I was a student at RISD around 1977. It was a project for one of my favorite classes, where we were encouraged to explore the concept of toys. It wasn’t necessarily about making toys for children, but rather playful art objects. Looking back, I can see that the teacher’s goal was to stretch our imaginations beyond tradition forms of illustration. At this point, I had already started working in 3-d, so this class was an opportunity to play, play, play! In this class, I made paper vegetables and a layer cake out of a stack of Reader’s Digest condensed novels, which I cut into a circle with a band saw and decorated with piped sugar frosting. They’ve since gone by the wayside, but I still have the play village!

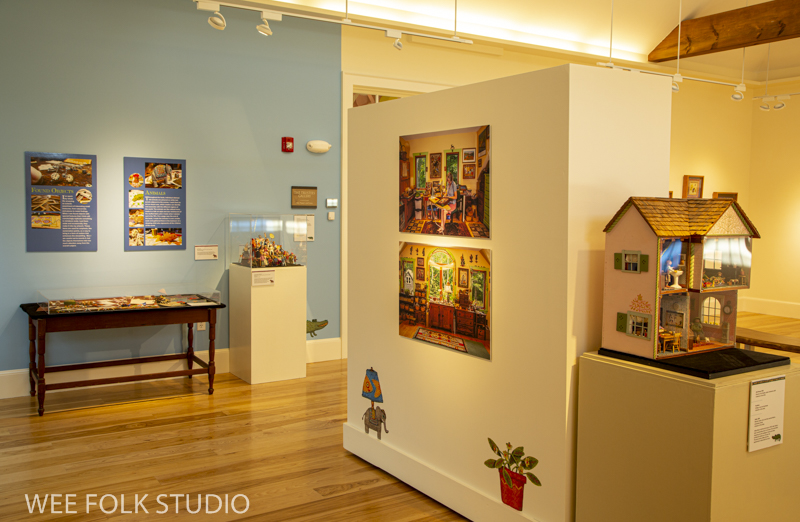
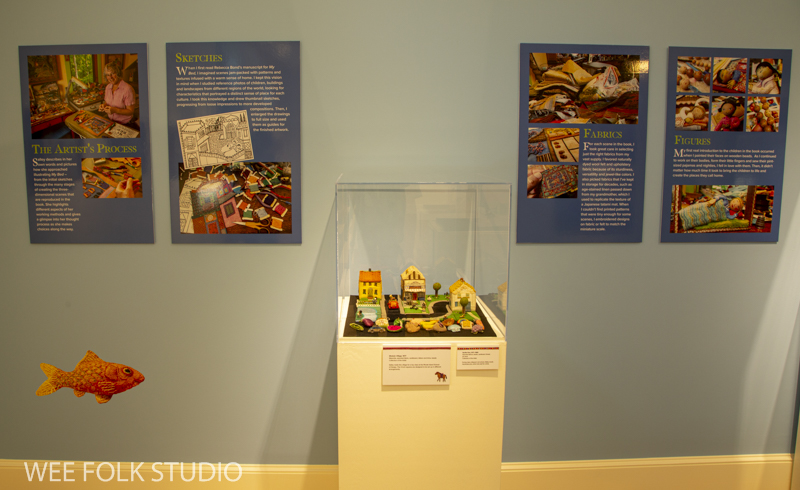
I’m writing about the village now because it’s included in my exhibition “Bedtime Stitches” at the Cahoon Museum through Dec. 19, 2020. That’s just 1 more week! Click here for hours, registration and Covid safely information. The village is one of several extra items that will only be shown at the Cahoon and will not travel with the touring exhibition of 18 original framed sculptural embroideries for my picture book, MY BED. To see the schedule of participating museums, click here.
My friends Glen and Susan sent this photo after they went to see the exhibition yesterday. Don’t they look handsome and color coordinated, masks and all? I made them this pair of dolls when they got married a few years ago.


Now back to the Play Village:
I can’t remember the class assignment that triggered the notion of a modular village, but I do remember making it. The whole idea was to create a town, with buildings, grass, river and road sections on squares that could be moved around. To begin, I talked my way into the school’s wood-shop where I got help using a table saw to cut 1/4″ thick Masonite into 3″ squares.

I covered the squares with fabric, using green flannel for grass and black velveteen for the road. Even back then, I didn’t trust glue and relied on stitches to make a tight fit.
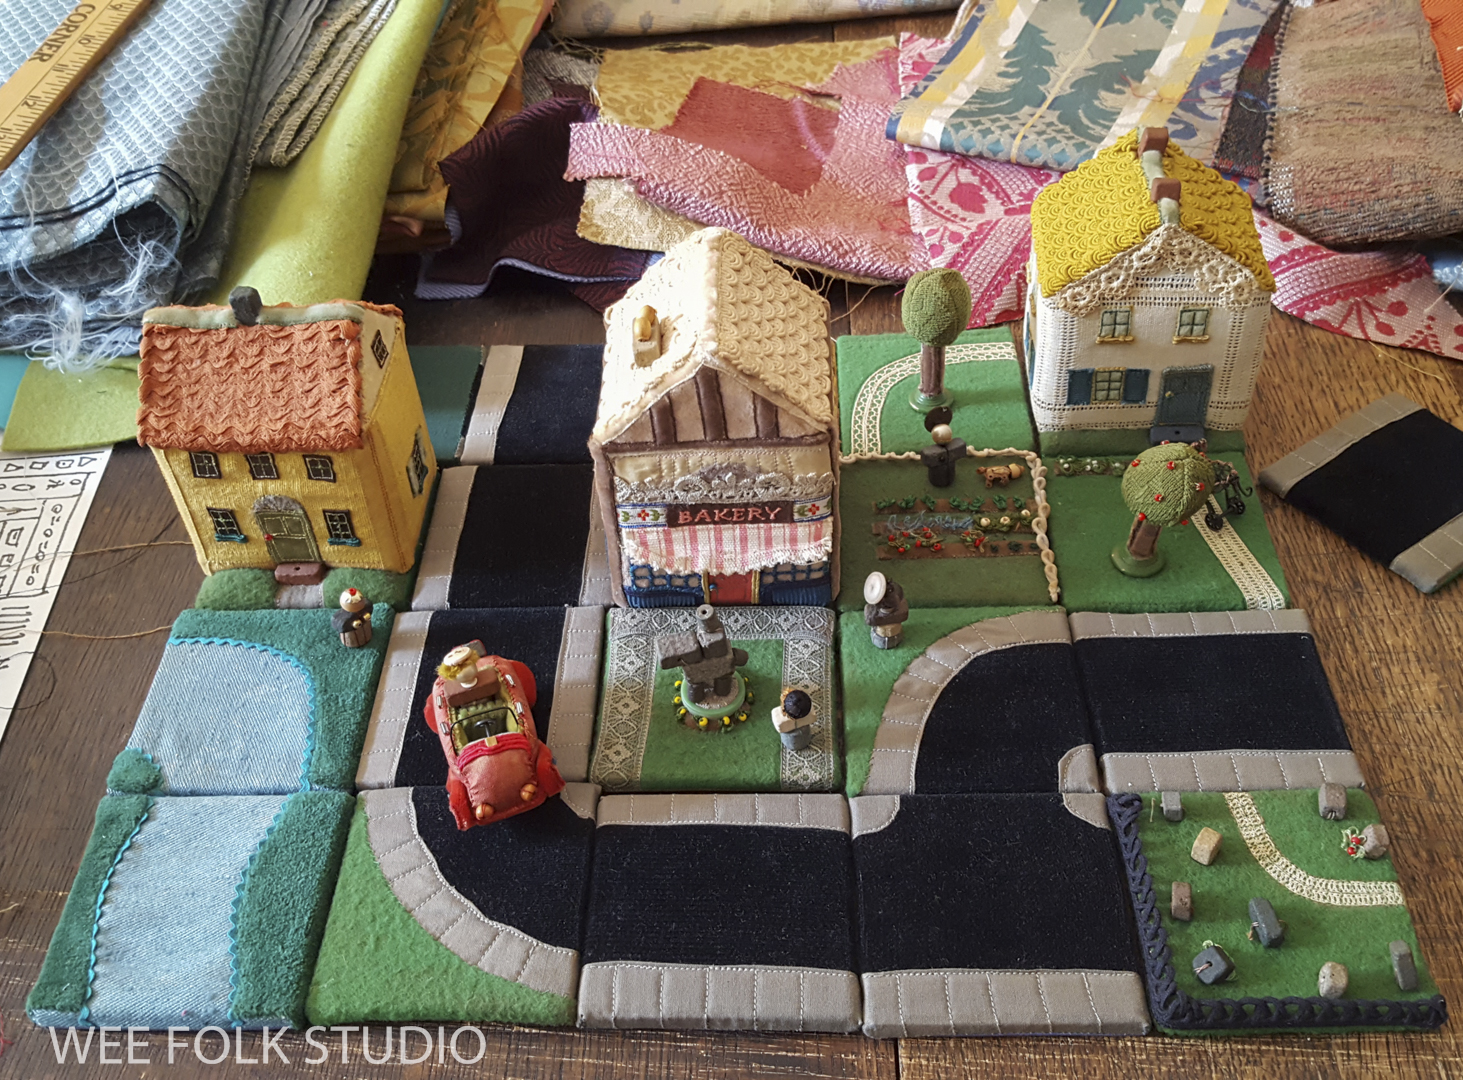
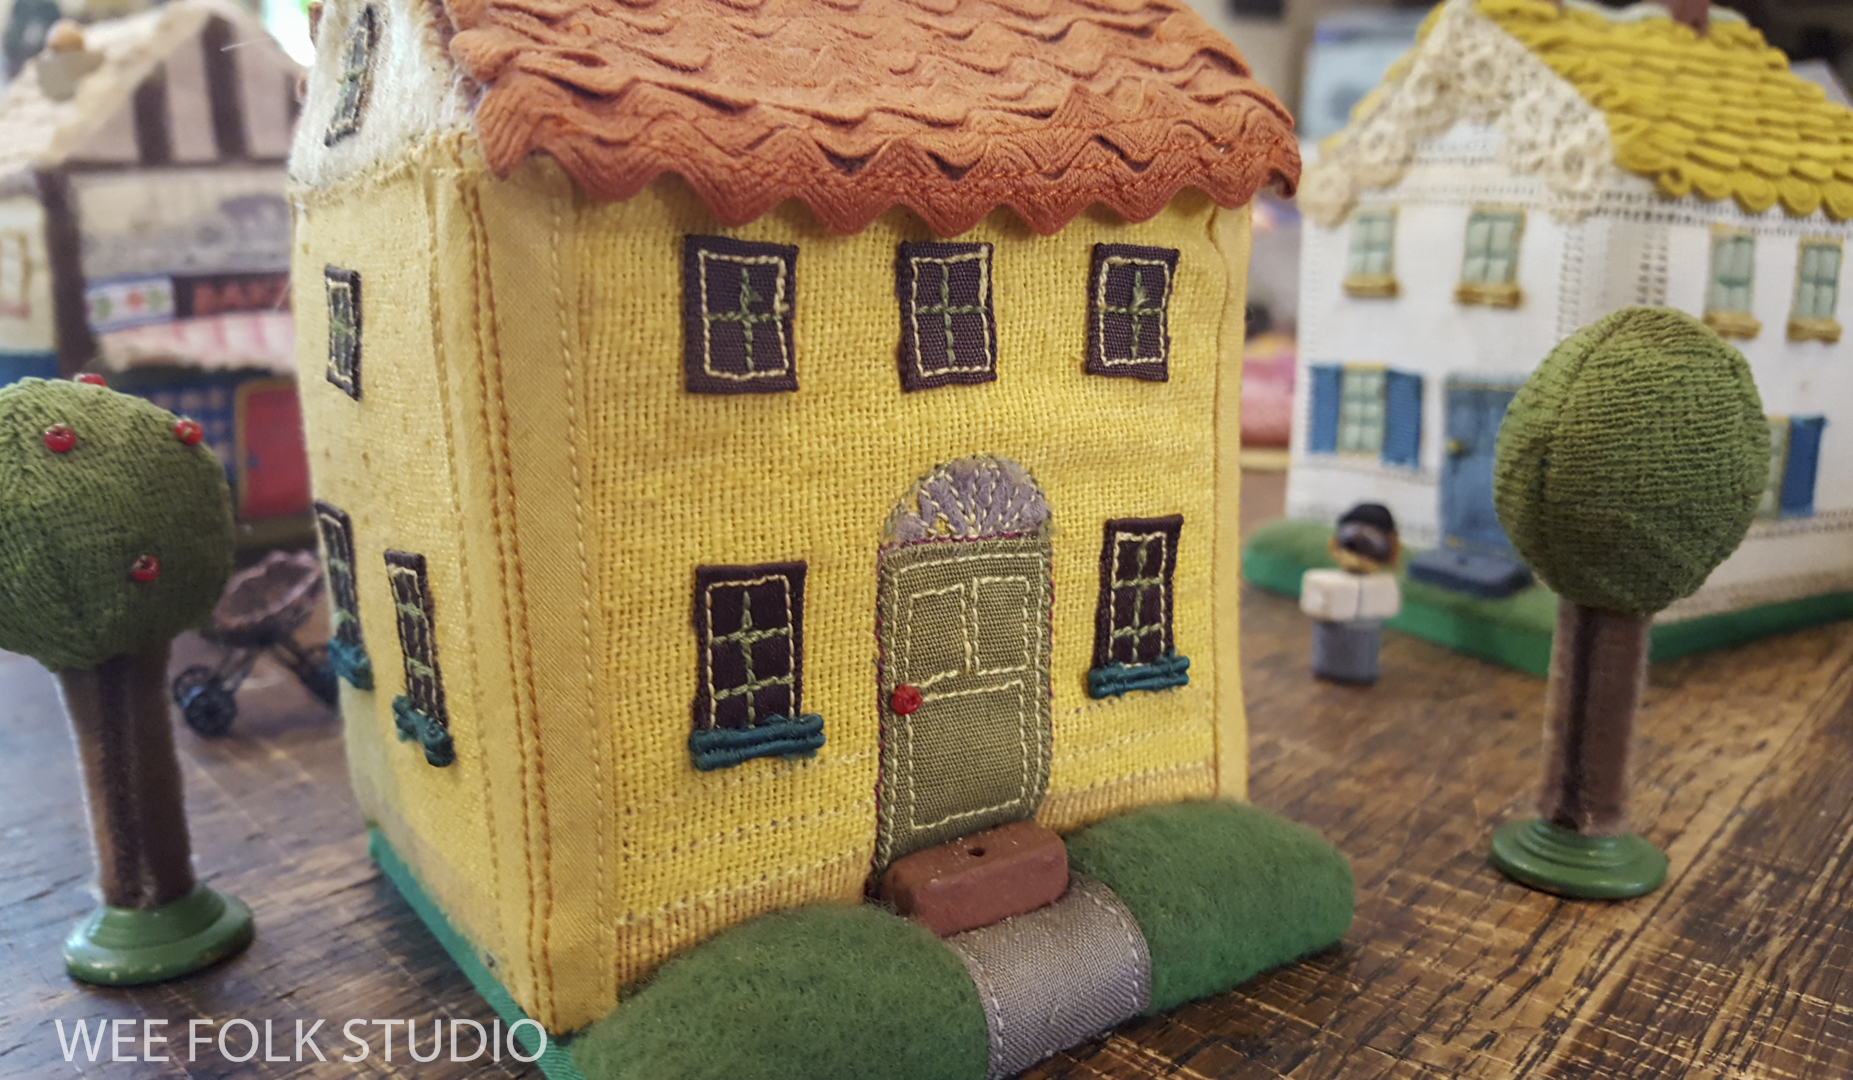
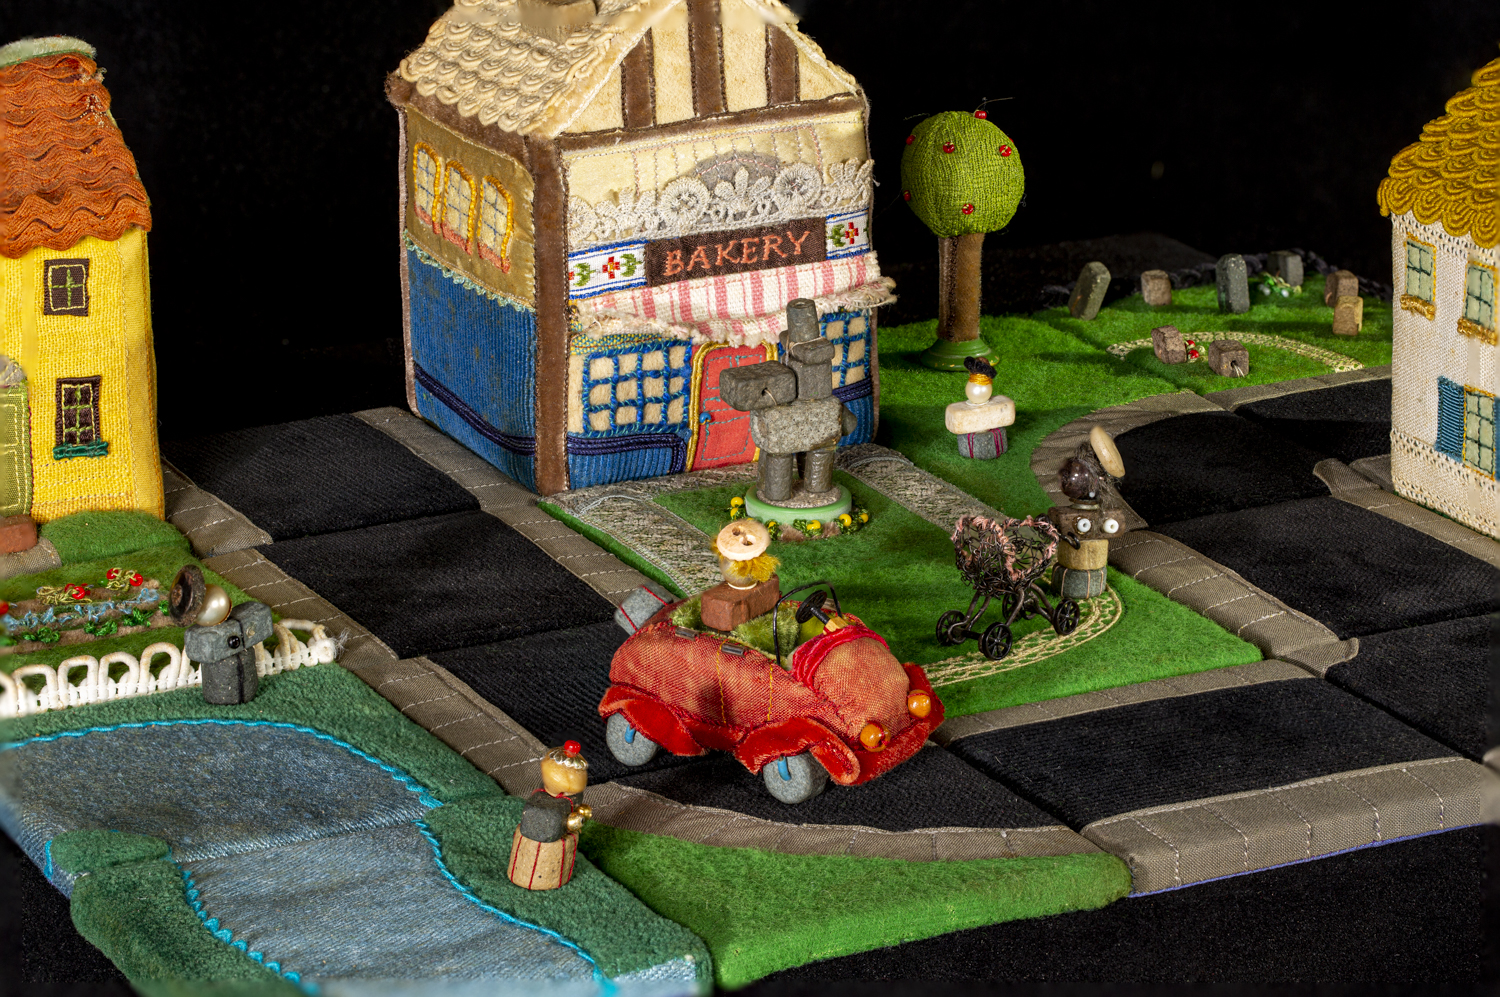
I constructed the houses out of mat board and then made sides and roof pieces out of fabric. I used my Singer Featherweight to top-stitch ribbon windows and rows of rickrack roof tiles.
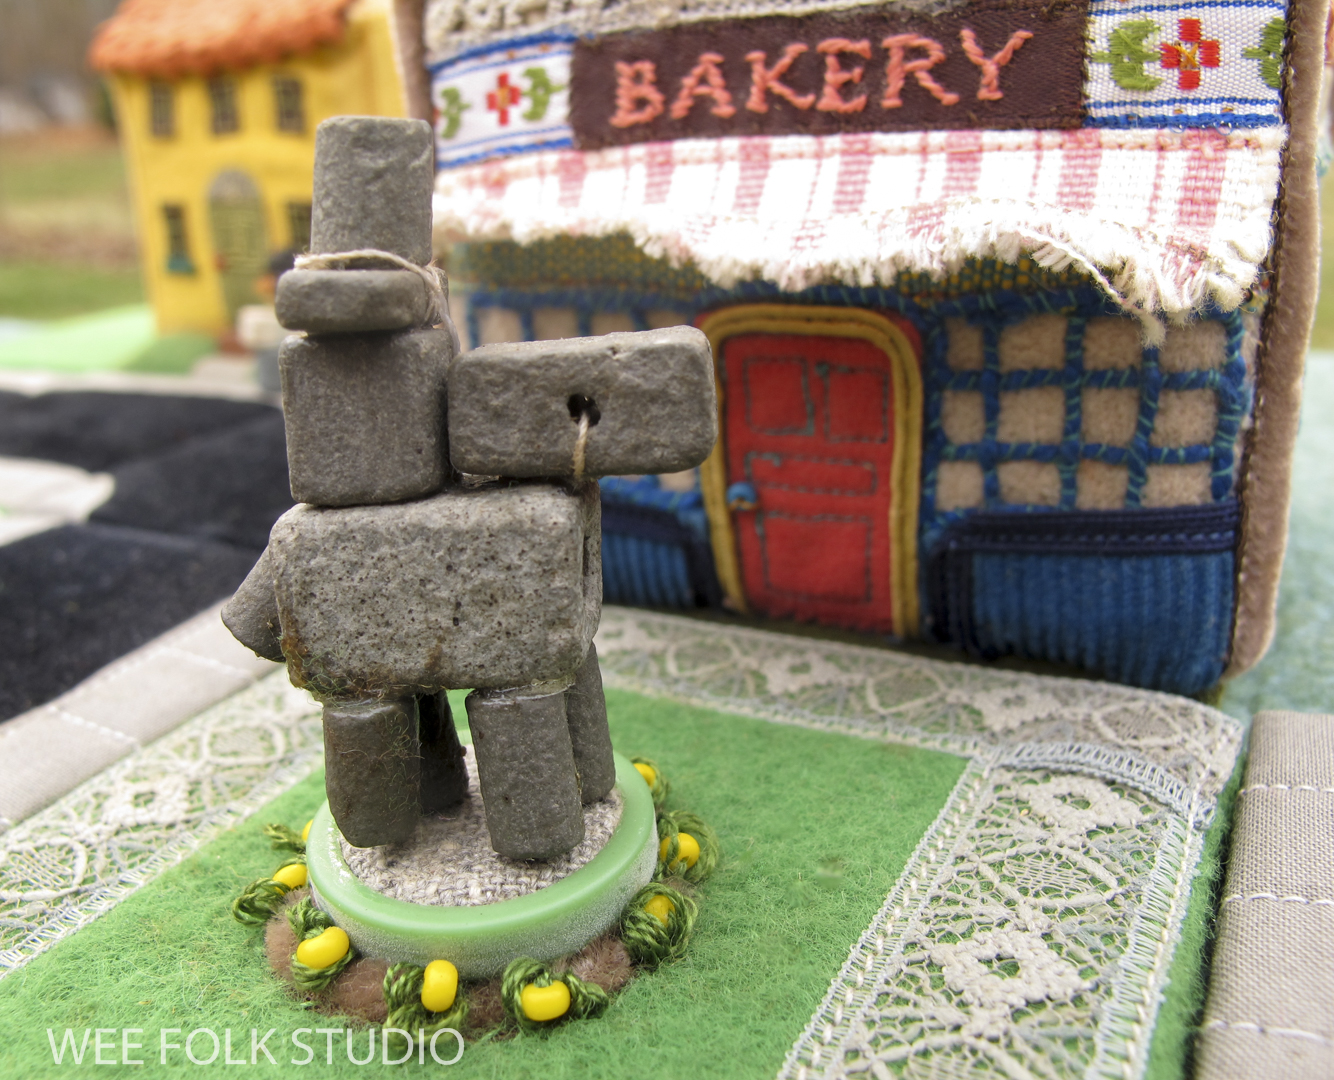
I hand embroidered the bakery sign and hand stitched the buildings to the fabric covered squares.

The trees are made with ribbon covered wooden dowels, with stuffed fabric balls on top. The base is a wooden button that had a hollow big enough to fit the dowel into. Since they’ve stayed together all these years, I must have used glue.
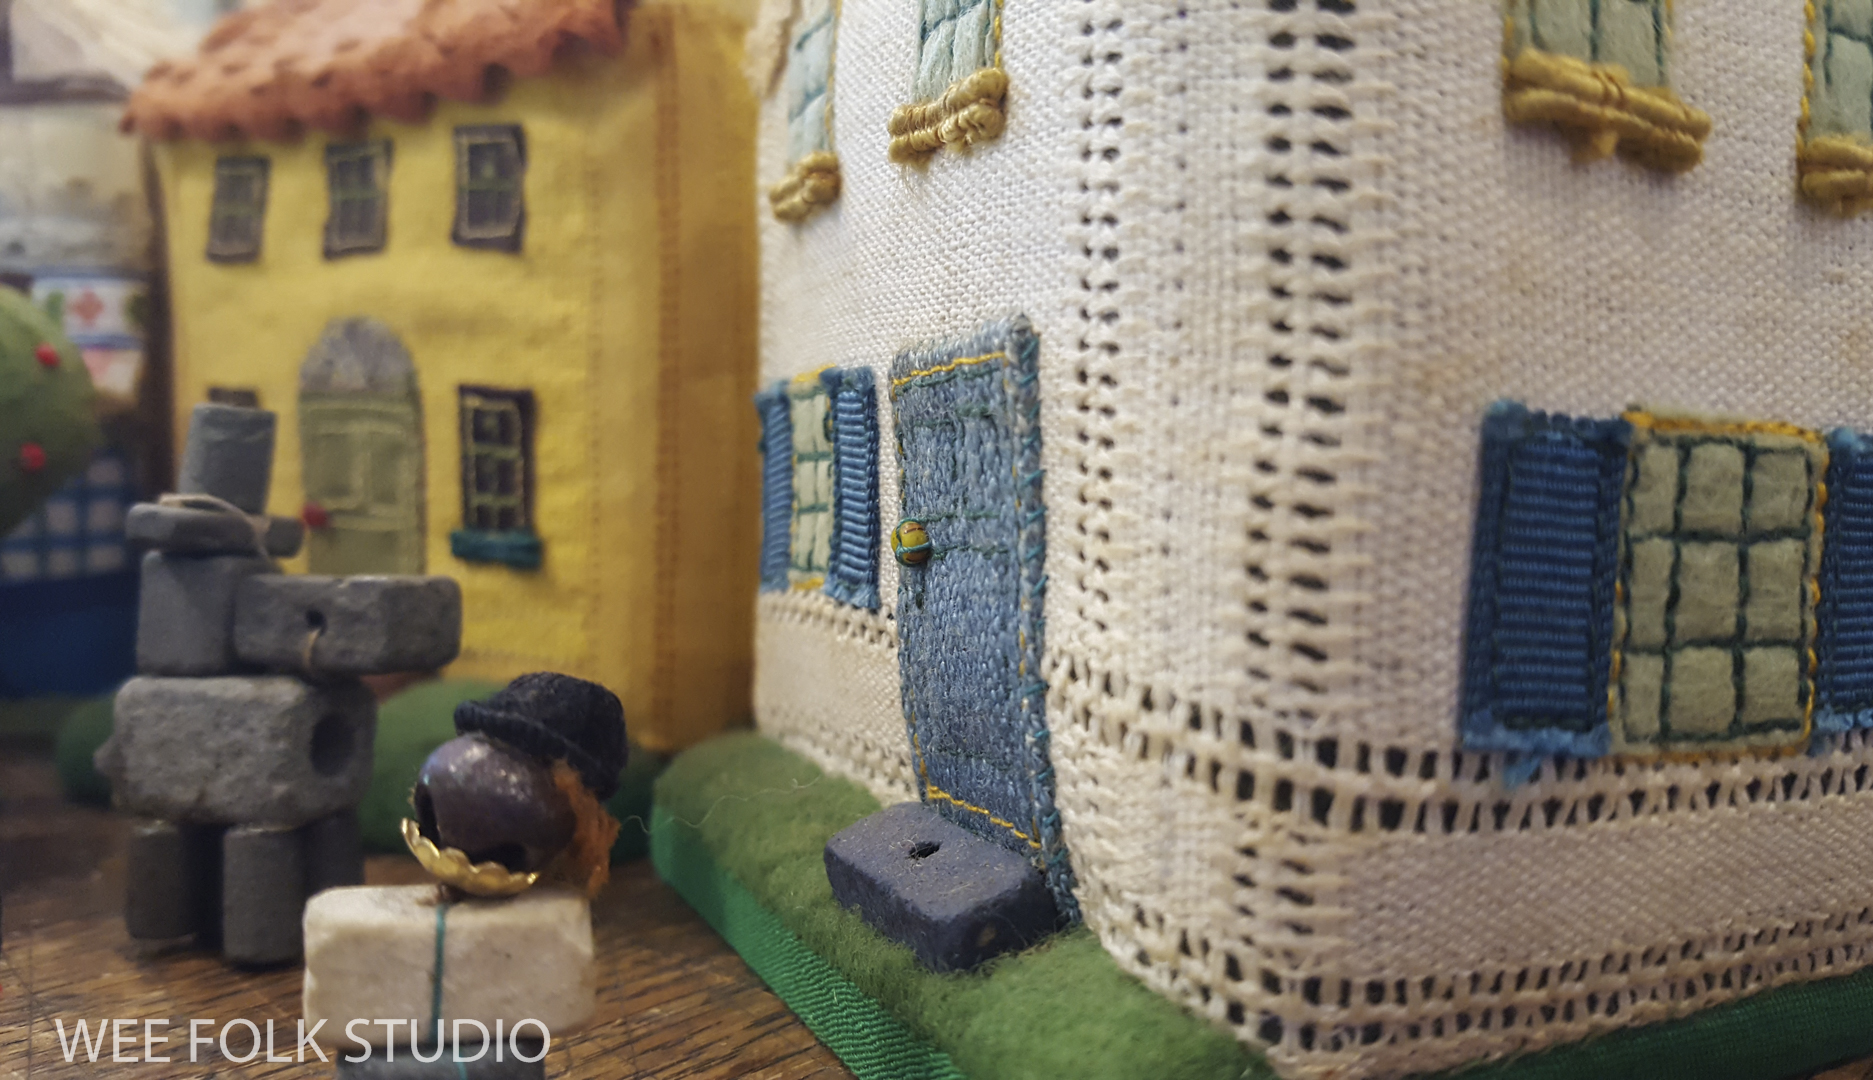
I also used glue to hold together clay beads for this equestrian statue. That’s only because I couldn’t figure out how to sew the beads together without a maze of threads showing.
I most likely used cardboard to form the car’s basic shape and stuffed the hood to make it puff out in front. The wheels are clay beads – you can see the insulated wire axle sticking out. The seat lining and fenders are made with velvet ribbon and the steering wheel is a plastic miniature car wheel.
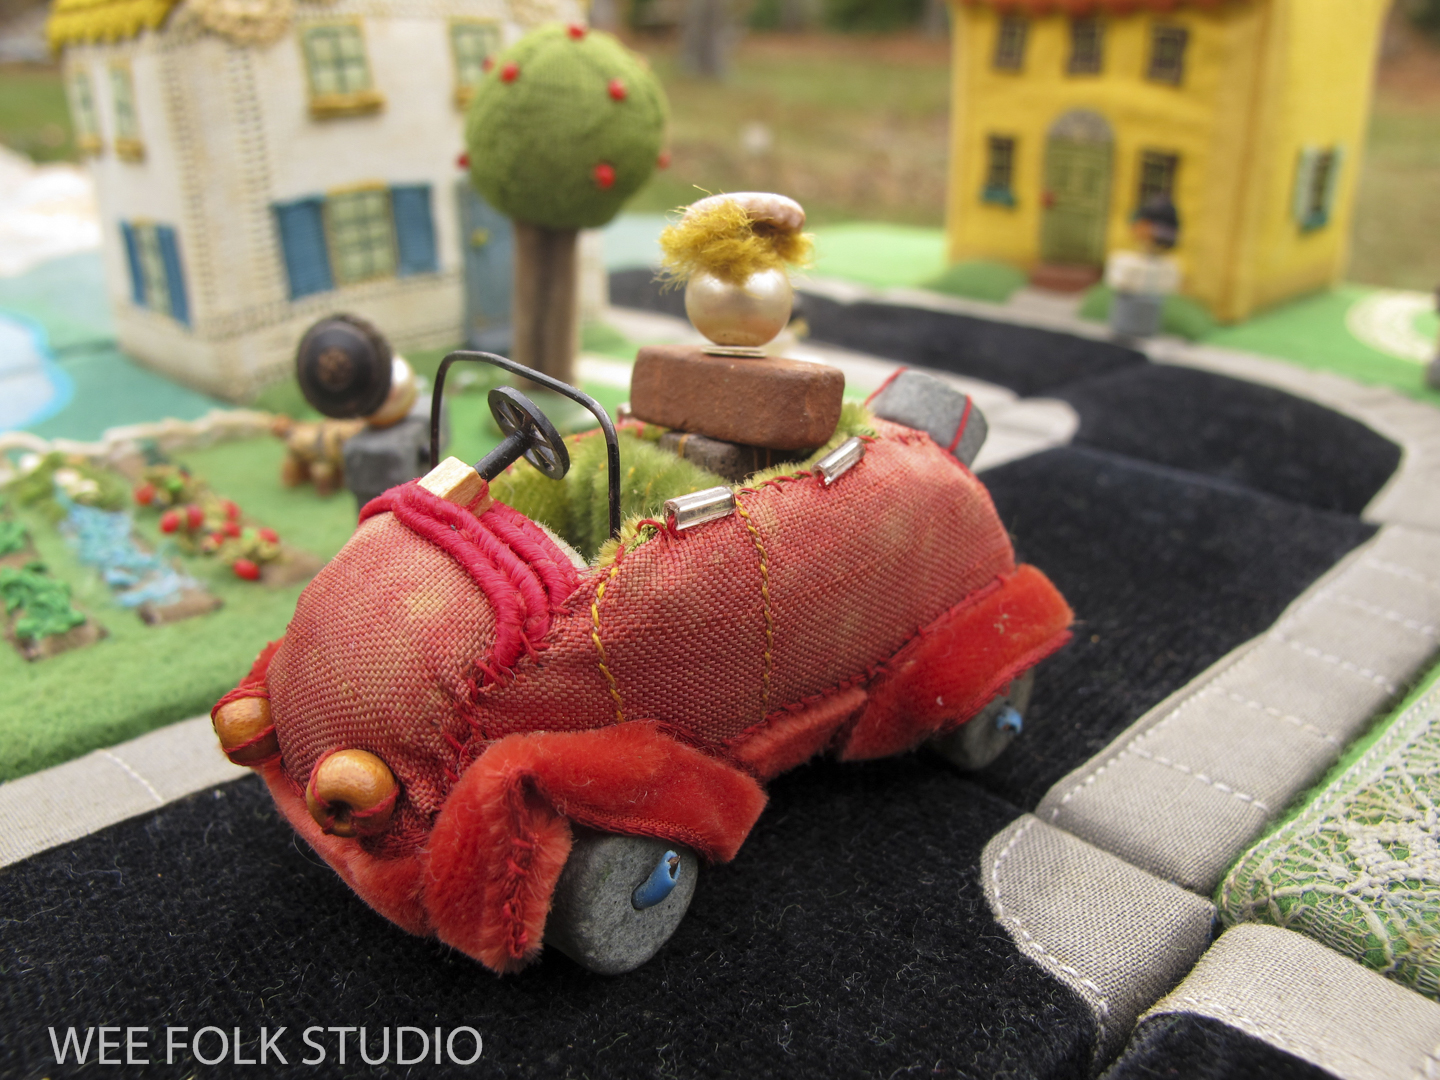
The people are simple beads sewn and glued together.

The baby carriage is made with plastic toy car wheels, hooks and eyes and black wire. There used to be a baby inside, but he got lost.

I hope that you enjoyed this closer look at the village. It’s brought back a lot of memories that make me grateful for the remarkable teachers at RISD who help ignite the unique spark inside their students.
To keep up with new posts, please subscribe to this blog. Your contact info will not be sold or shared. If you’d like to see more frequent photos tracking the projects in my studio, please follow me on Facebook and/or Instagram.