

Part 4 in the Doll House Stories series shows how I re-upholstered the sofa in the living room of my newly renovated doll house. I built the house in 1975 while in art school and thought it was due for a fix-up. Other posts in this series: part 1 (history), part 2 (wall-papering), part 3 (kitchen).

UPDATE:The doll house is currently on display in my exhibition, “The Wee Worlds of Salley Mavor” at the Southern Vermont Arts Center thru Jan, 7, 2024.

The “made in Japan” 1930’s era sofa came from my mother’s childhood collection of doll house furniture. Over the years since she gave me the furniture, I’d become quite fond of the sofa, with its sinking seat and rusted tacks. But, as I fixed up the house, I knew that it was time to re-cover the sofa.

When I started sharing the re-upholstery process on Facebook, an immediate alarm went off, as I committed the grave sin of altering a vintage item! And on a cherished toy of my mother’s no less! I imagined that many of the people who commented were just preaching the gospel according to Antiques Road Show. As I posted new photos, the chastising subsided and when they saw what it looked like in the end, I even got some requests for forgiveness.

It actually took years for me to overcome my sentimental attachment to this sofa and decide that my late mother would be excited about upgrading it. The first challenge was to find a fabric that was the right color, weave and weight. I looked through my large stash of upholstery fabric and chose this one, with its appropriately scaled pattern and subdued color palette. The only problem was its distracting reddish purple dots, which I pulled out, thread by thread.

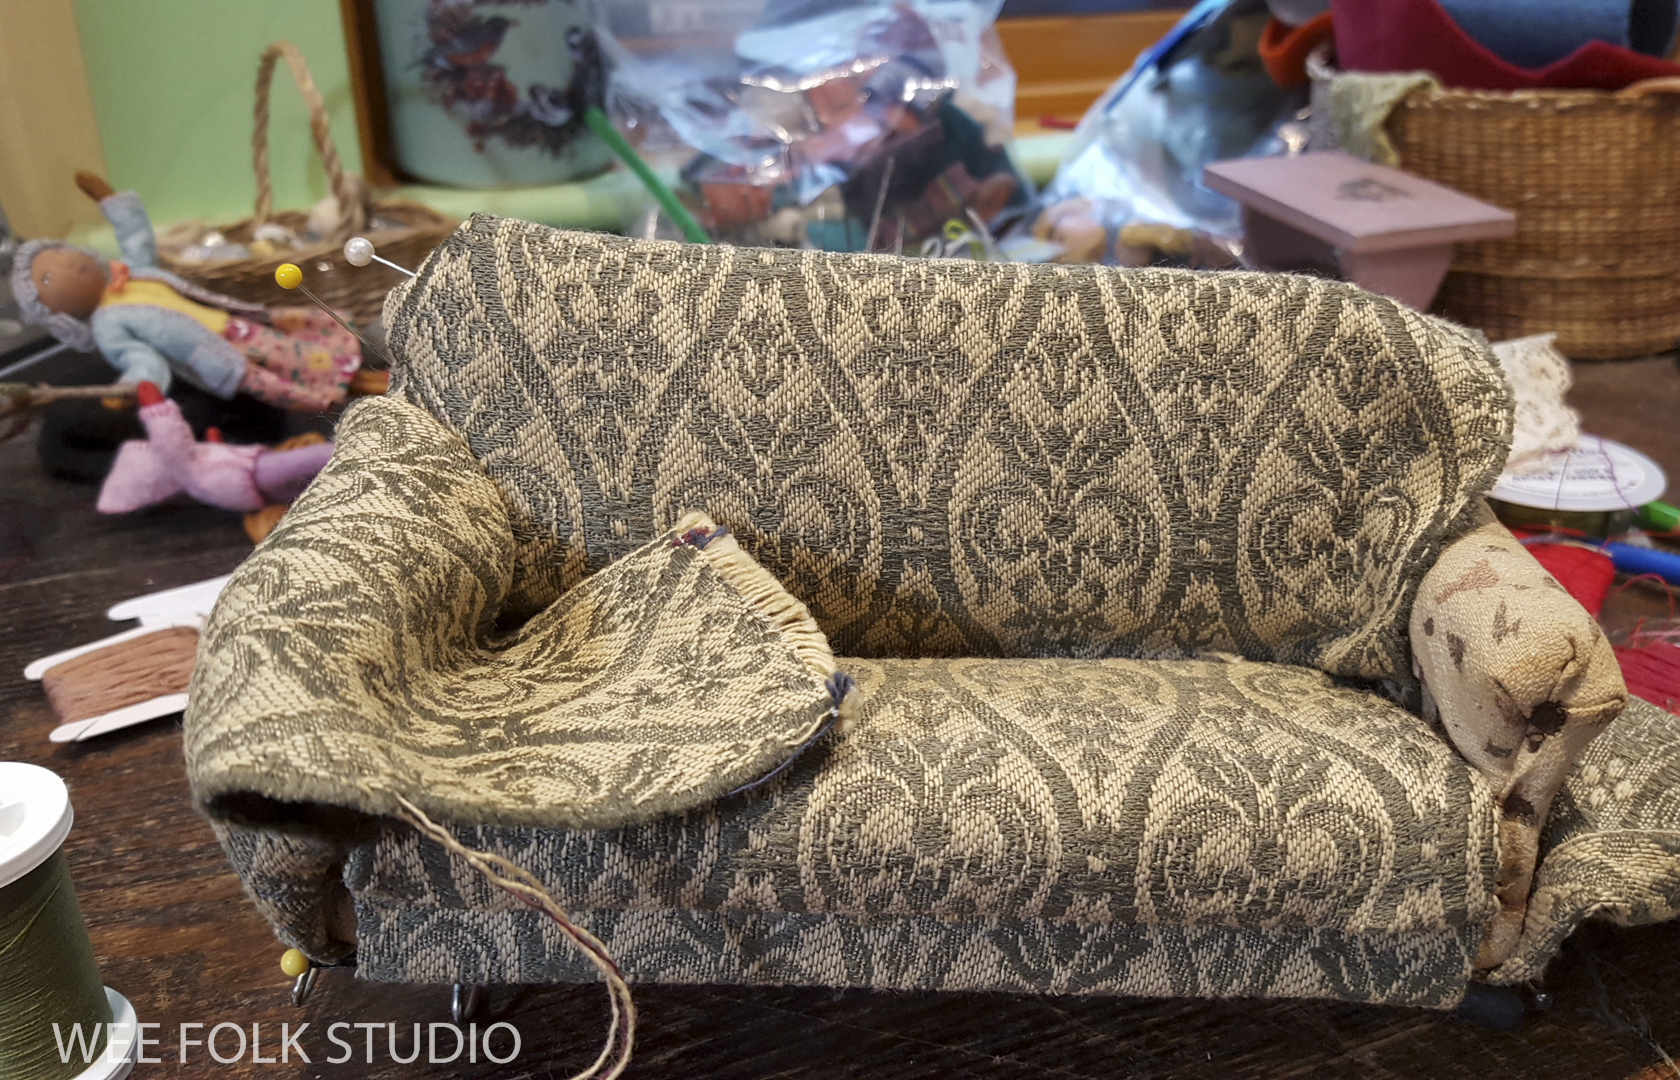
I didn’t want to take the sofa apart, since I wasn’t sure what I’d find underneath, so I left the existing fabric in place. Using a combination of white glue and stitching, I covered the seat first.
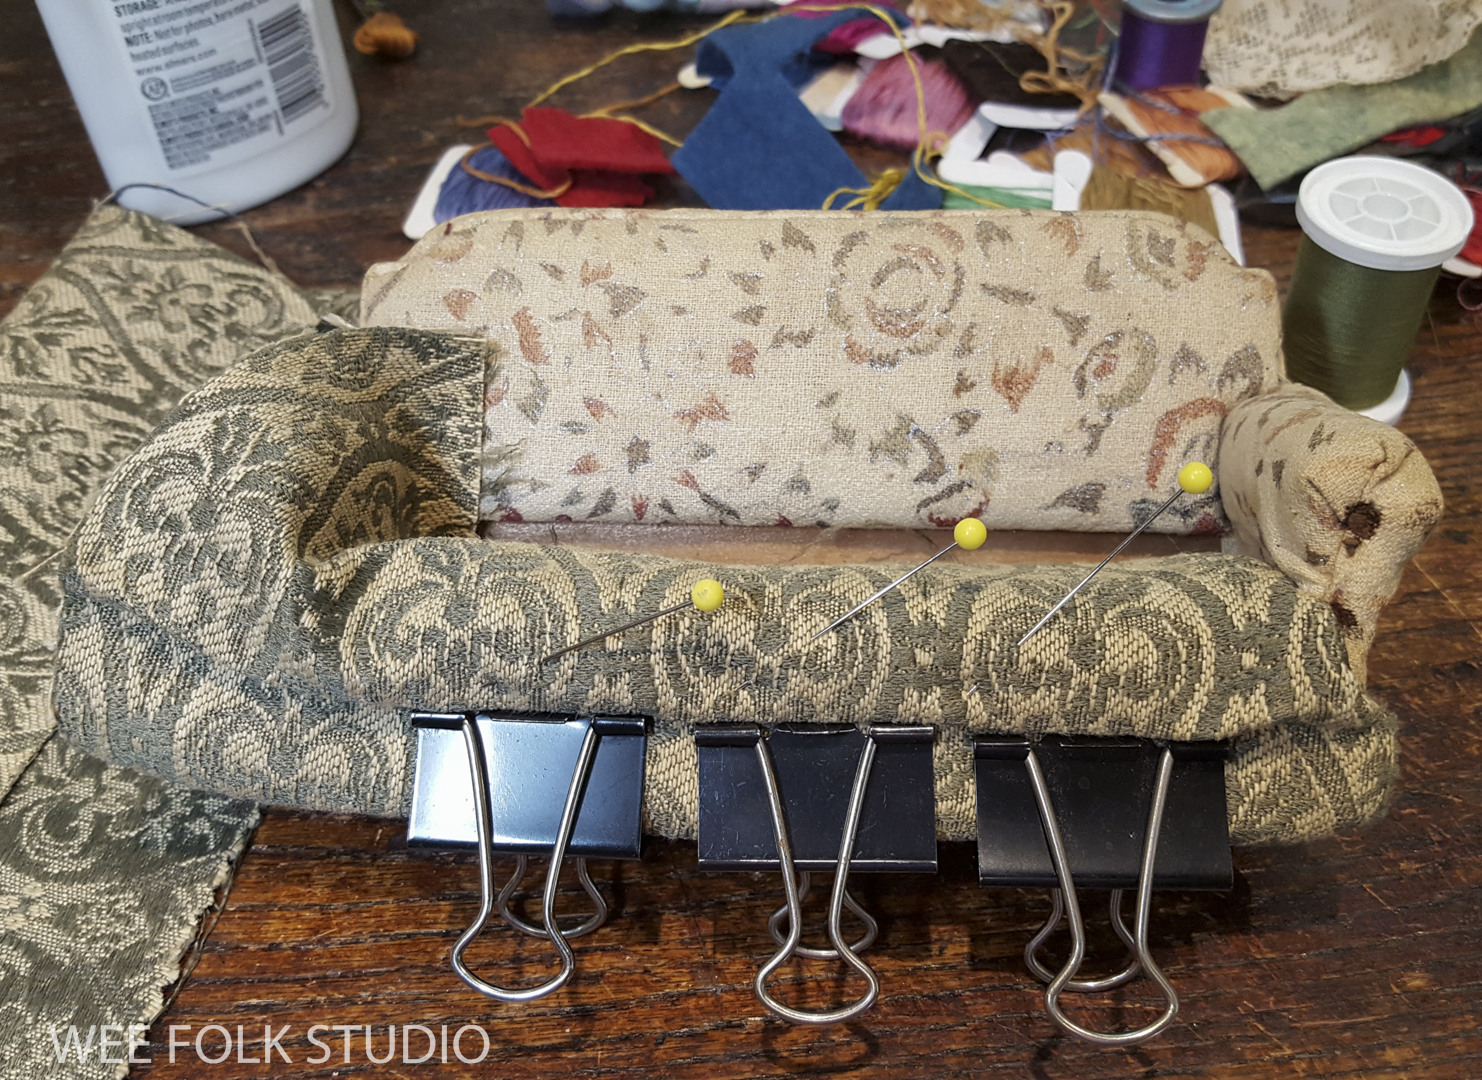
Then, I covered the back…

and stitched along the curve of the top.

The arms were tricky. Looking at this photo months later, I can’t even tell how I did it.
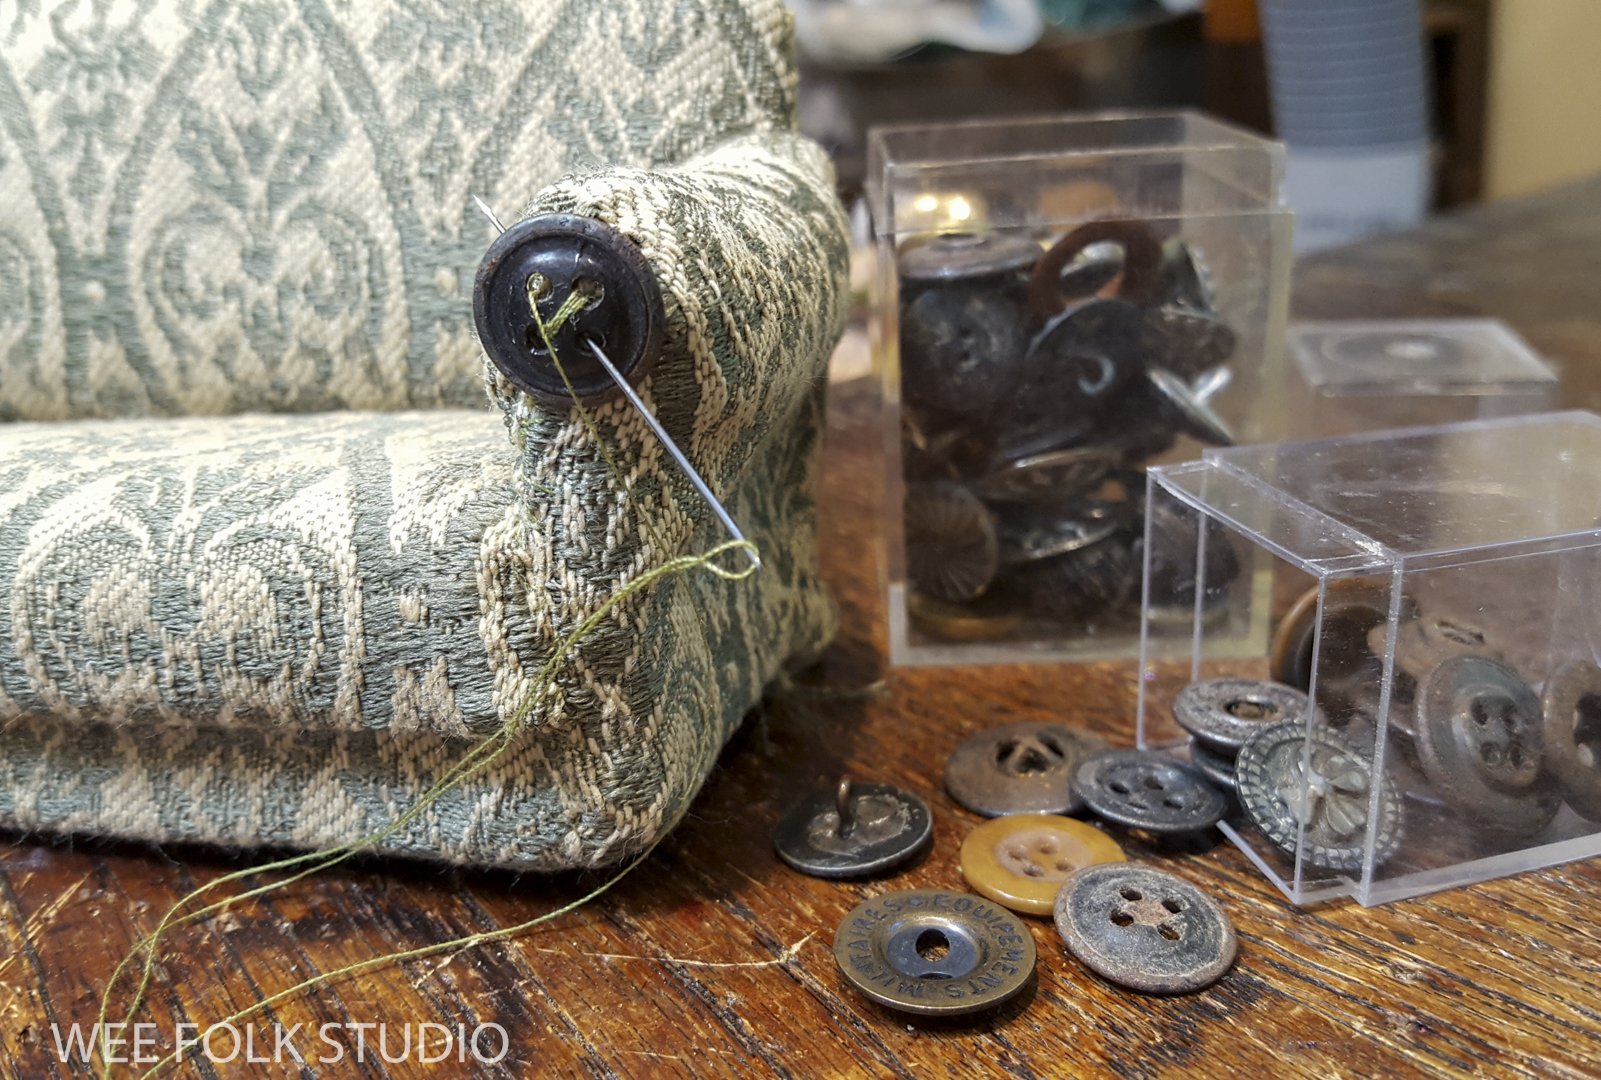
The front of the arms where all of the sides came together looked kind of messy, so I sewed a metal button on top.

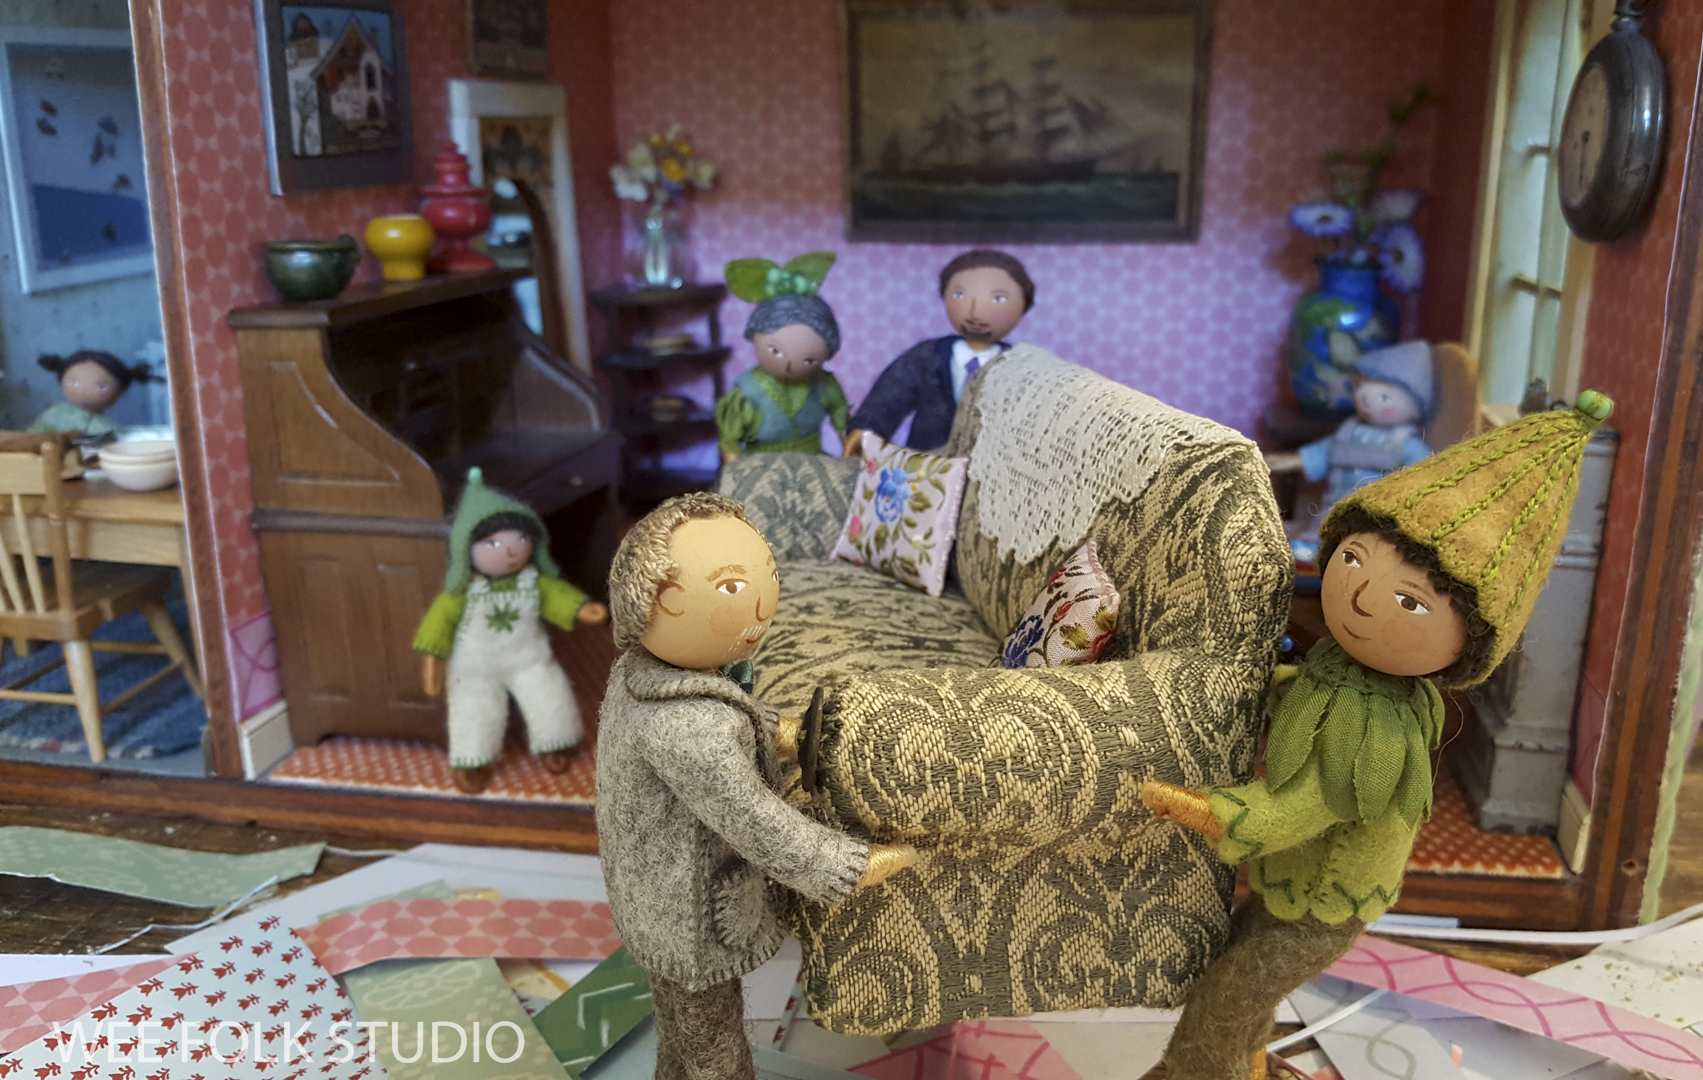
It took several wee hands to help move the sofa into the living room. All it needed were some pillows and a doily antimacassar draped over the back.

Stay tuned for part 5 in the Doll House Stories series. I will show photos and a video of the finished doll house. Other posts in this series: part 1, part 2 (wallpapering), part 3 (kitchen).

To keep up with new posts, subscribe to this blog. Your contact info will not be shared. If you’d like to see more frequent photos tracking the projects in my studio, please follow me on Facebook and/or Instagram.

So neat again and again! Still looking forward to seeing your show with Mel one of these days!!! Love, Maria
Your mother would be proud. Congratulations on a good looking new custom sofa.
Oh my gosh those red dots! Why remove them? Curious your aesthetic judgement!
End result lovely!
Sometimes furniture needs to be given a little TLC.
When my mother bought our family sofa she also bought enough fabric to have it reupholstered 2 times, in anticipation of children and general wear and tear. None of her friends could figure how it stayed in such good shape for 50+ years!
Good for you giving your dollhouse an update~
Wow, I love the fabric you found for that sofa!
Incredible! Love it!
Loved seeing this process! Beautiful!!