
In this Part 3 of the series about making the spring landscape, Mossy Glen, I share photos and commentary about how I incorporated stone walls into the scene. Part 1 is all about making moss and Part 2 gives a glimpse at how I made the cherry trees.

Why did I use real stones instead of making them with felt, as I did for Frosty Morning, (which you can see here)? I’ve asked myself the same question and have no clear answer, besides a feeling that real stones somehow balanced out and matched the realness of the wooden doorways.

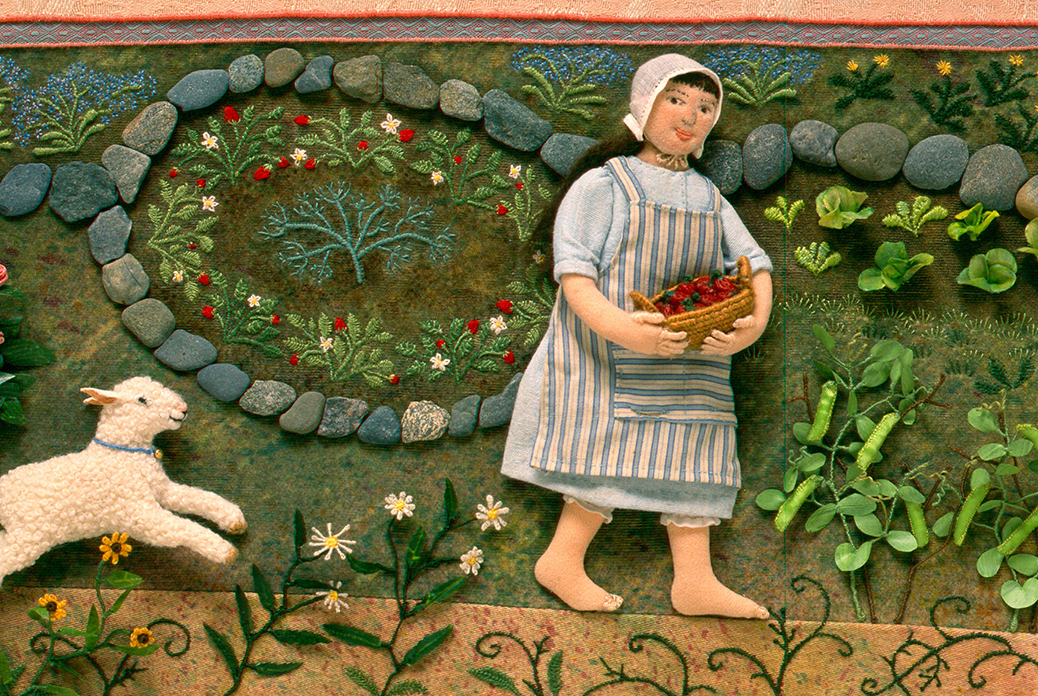
Mossy Glen is the spring scene in a series of seasonal landscapes that capture the wonder and magic of the natural world. Note cards, prints, bookmarks, and jigsaw puzzles of Mossy Glen and the other scenes in the series (Frosty Morning, Harvest Time, and Summertime) are available in my Etsy Shop.
I first time I used real stones in my artwork was in 1995 for the picture book, Mary had a Little Lamb. I can remember sitting on the beach, sifting through the sand for small flat stones to use in the garden scene. When it came time to glue them to the background fabric, I was a nervous wreck, afraid of dropping glue in the wrong place by mistake and ruining all my work.
This time, I found more stones than sand to sift through at the beach.

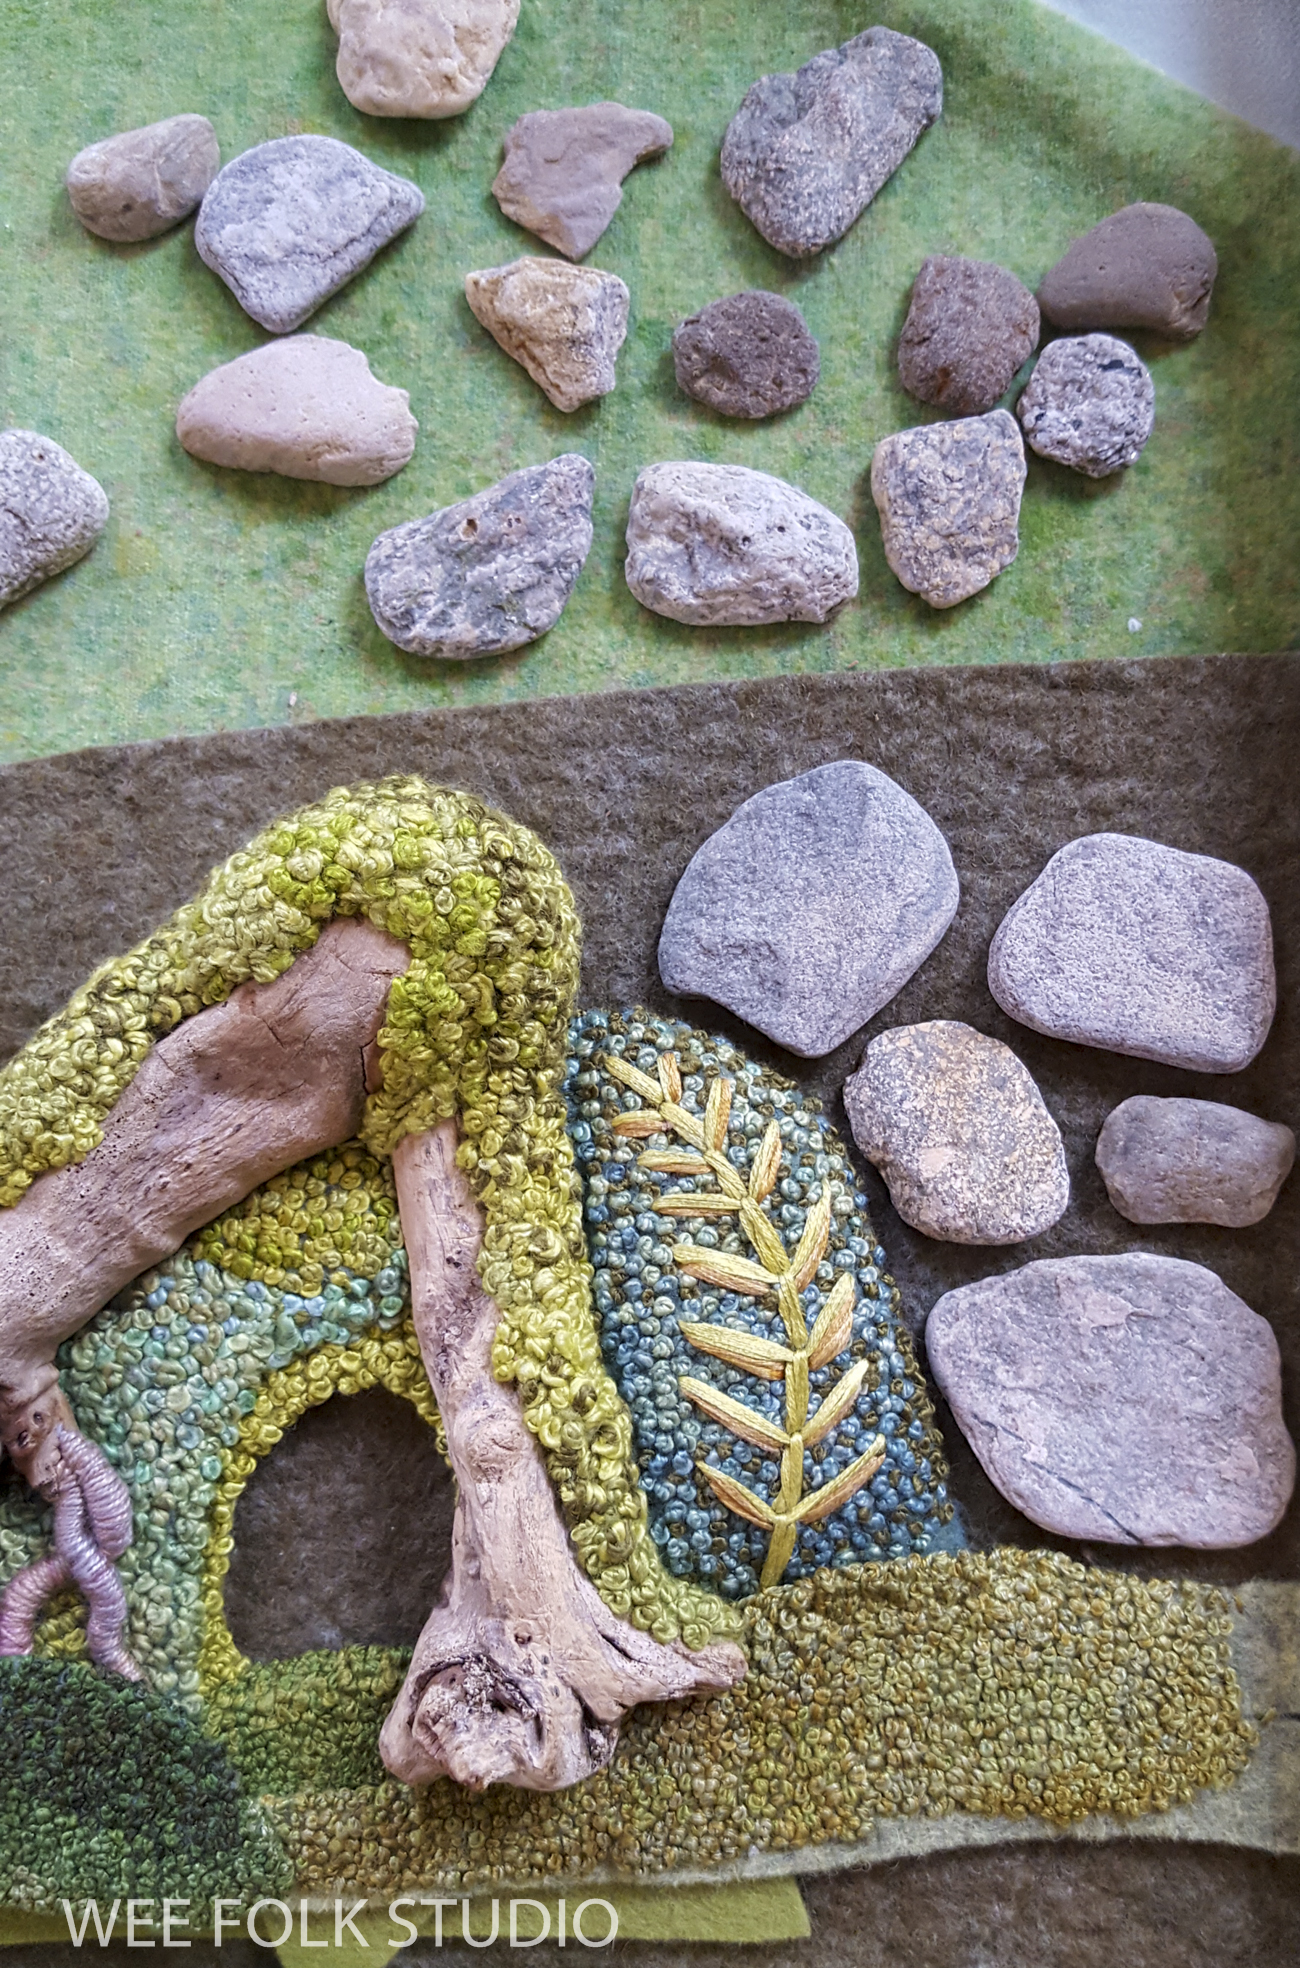
I came home with a varied selection of stones, ranging in size from 1/2″ to 1 1/4″. They needed to be thin so they wouldn’t be too heavy and flat on the back so the glue would have a surface to adhere to.
As I played around with their arrangement, I decided to add a mossy felt section to the composition, which I embellished with silk ribbon. This ribbon is made by Silk Road Fibers.

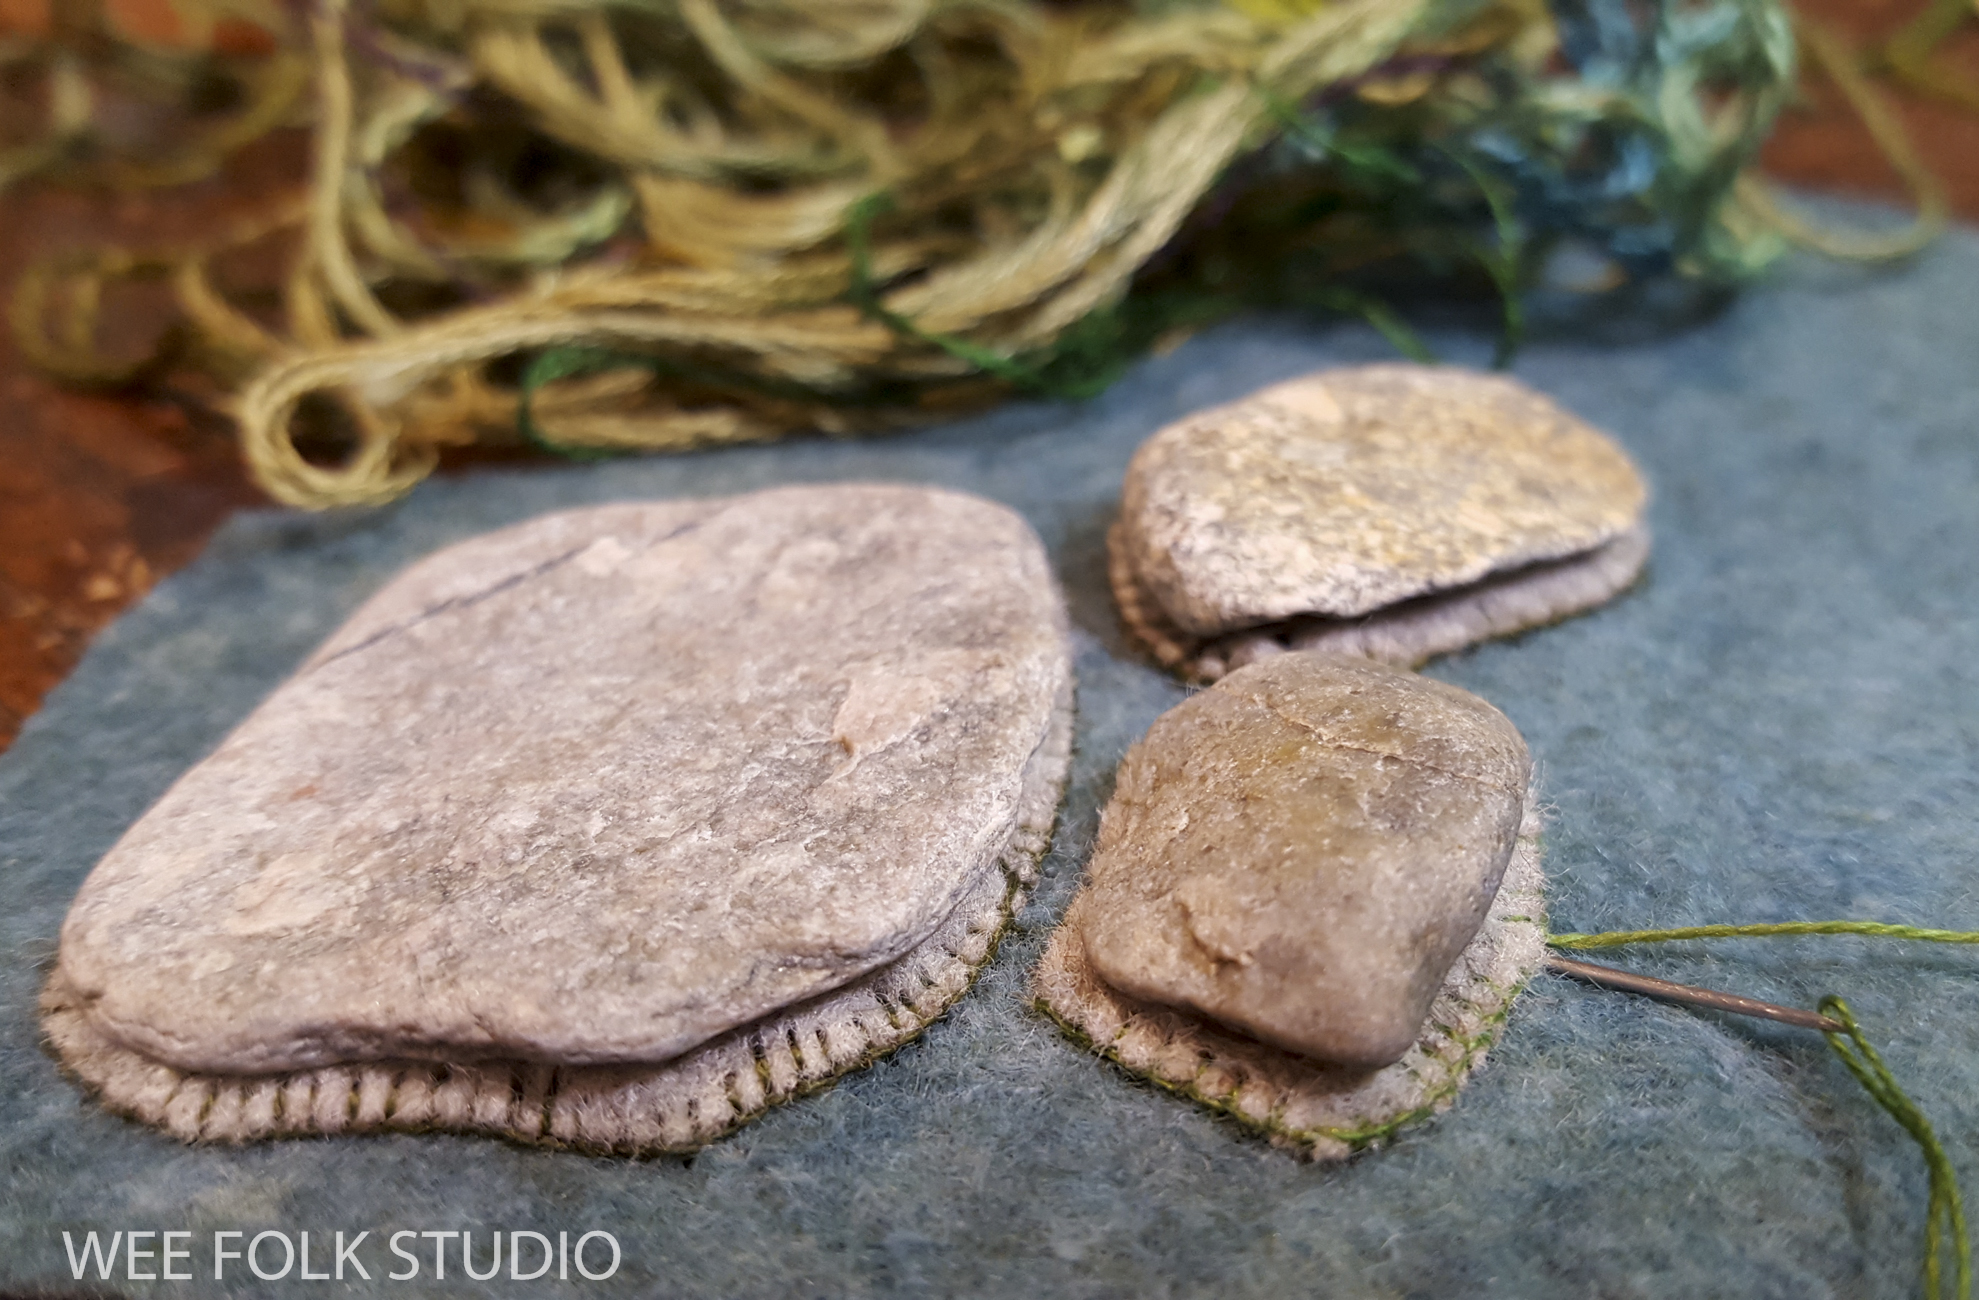
One downside of using glue is that once you’ve cemented something in place, that’s where it stays. I’d rather have the flexibility to move parts around, so I glued stones to individual pieces of felt. That way, I could make adjustments as I built the wall. It’s a lot easier to rip out a bunch of stitches than move a glued object.
Aleene’s makes a variety of fabric embellishing adhesives that all work well. Do I use hot glue? No, because it’s stringy, messy, shoddy looking and I don’t trust its holding capabilities.
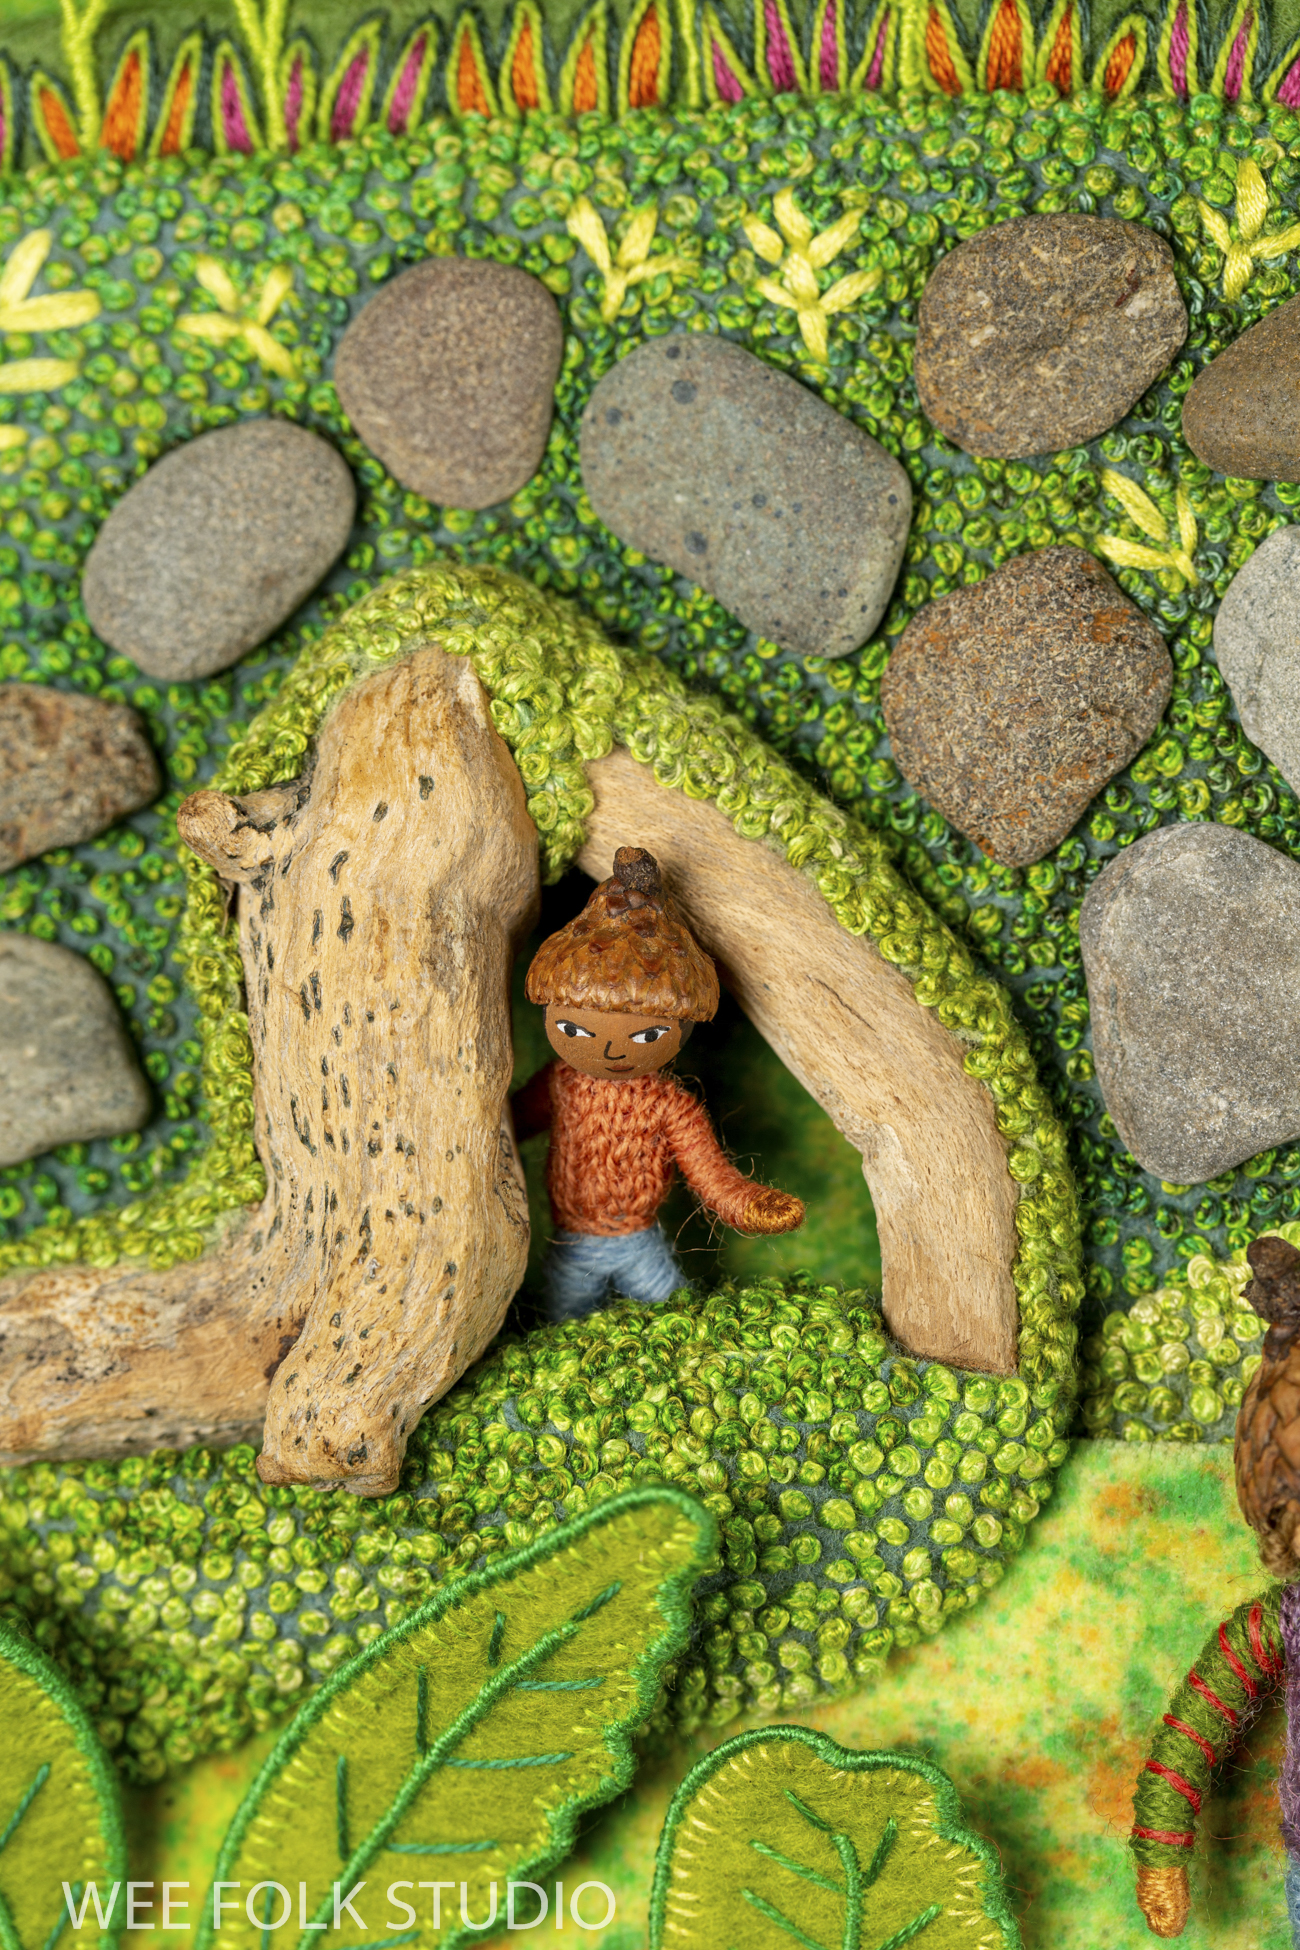
Once the stones and their felt backings were sewn in place, I covered the felt and filled in the cracks with a gazillion french knots, making a carpet of moss.

As with the moss in other parts of the Mossy Glen (that you can see here), I combined different shades of green embroidery floss to give it a naturalistic appearance.

As I stitched french knots around the stones, I realized that the mossy wall was too plain and would look better with something growing in front of it.

So, I formed a vine out of wire, silk ribbon and embroidery floss. Even though I documented the process with photos, it’s hard to remember exactly how I made it. All I know is that the silk ribbon loopy leaves came first and then I covered the wire and ribbon with embroidery floss. In my head, can hear my mother’s voice saying that the floss covered a multitude of sins.

I sewed the vine in place in the spaces between the stones.

I expanded the Mossy Glen neighborhood to include another stony bank with 2 more doorways.

This time, I glued the stones directly to the background fabric because I was more confident about their placement.

When I stitched around the stones, I left some room between the knots, so the blue green felt showed through. Again, I thought the hillside was too plain, so I stitched a few plants with silk ribbon.

As I embellished around the stones, I periodically checked the positioning of the moss covered wooden doorways, to make sure that they fit OK.

Here’s a photo showing the back of the hillside, with a green felt strip along the top edge. It’s kind of like piping without a cord filler inside.
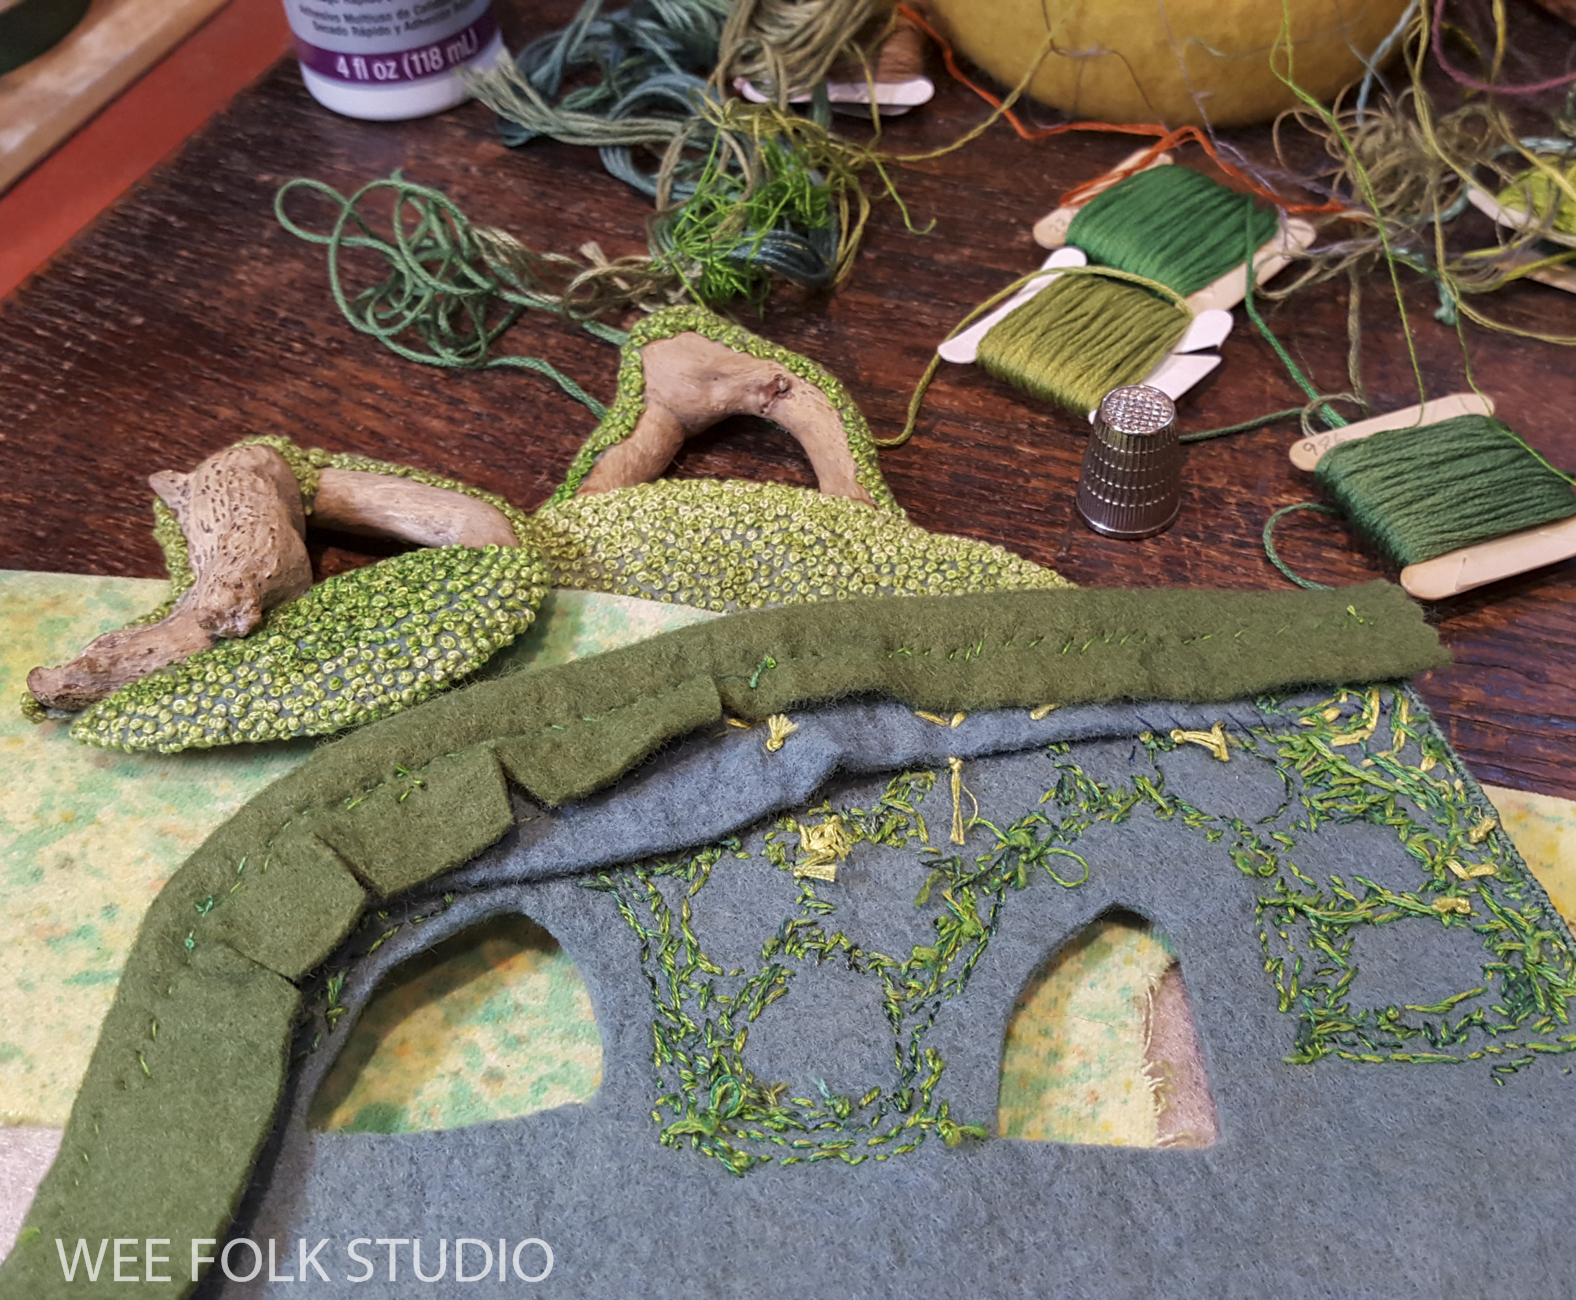
I added the green strip along the top of the mound to create a space for blades of grass. In contrast to the myriad of greens, I used bright warm colors to stitch the grass.

Stay tuned for more posts about making Mossy Glen. Other parts in the series will focus on the forsythia bush, leaves, embroidered embellishments and the wee folk characters.
Mossy Glen (overview)
Part 1 (moss)
Part 2 (cherry trees)
Part 4 (forsythia)


Thank you for providing these invaluable escapes. There is so little within our control, especially of late. Your posts are a wonderful reprieve and over the years I come to appreciate your art, your perspective, and your willingness to share it all, more and more. I sincerely thank you. Beth
Start where you are. Use what you have. Do what you can. – Arthur Ashe
>
Thank you for your kind words Beth. Creating and sharing my art makes me feel like I’m doing a little something to help heal this sorry world.
So clever of you to glue the stones to pieces of felt so you could stitch them down.
Years ago I taught my great grandchildren how to make your wee folk. They have now graduated college and are in the working world, and you have the patience still to create even more and more elaborate wee folk adventures. And I am still around to appreciate them. Thank you again for sharing.
Thank you for sharing you methods. It’s nice to know that even someone like you that has done this craft for years, questions themselves!! I hope to create one of these beauties for my granddaughter using people and places from her life. I’ve started a few wee folk but have a long way to go.
Thank you for bringing this sweetness to my world!!
You are so very welcome, Marianne. I hope that you have fun making a scene for your granddaughter. As for questioning myself, I’m constantly in a place of unknowing, solving problems as I go. So far, I’ve always found a way!
Now I’ve found the courage to come back, I can enjoy being in awe of your work again.
I didn’t know glue gun glue wasn’t permanent. I’m glad it isn’t just me who finds it messy. I thought I just didn’t have the skill. (But it is certainly not archival etc. which is obviously a concern.) Looking forward to the forsythia especially.
It’s nice to hear from you again Clea. About the glue gun – when I said it’s not permanent, I mean that it doesn’t reliably hold things in place over a period of time. Objects can break away from the glue. At least that’s my experience. Maybe a glue gun lover will say otherwise, but I don’t trust its holding capabilities.
I also have a dislike for hot glue. I only use it when there is no other option, which is rarely. Of course, other glues take more time, but as they say, patience is a virtue!