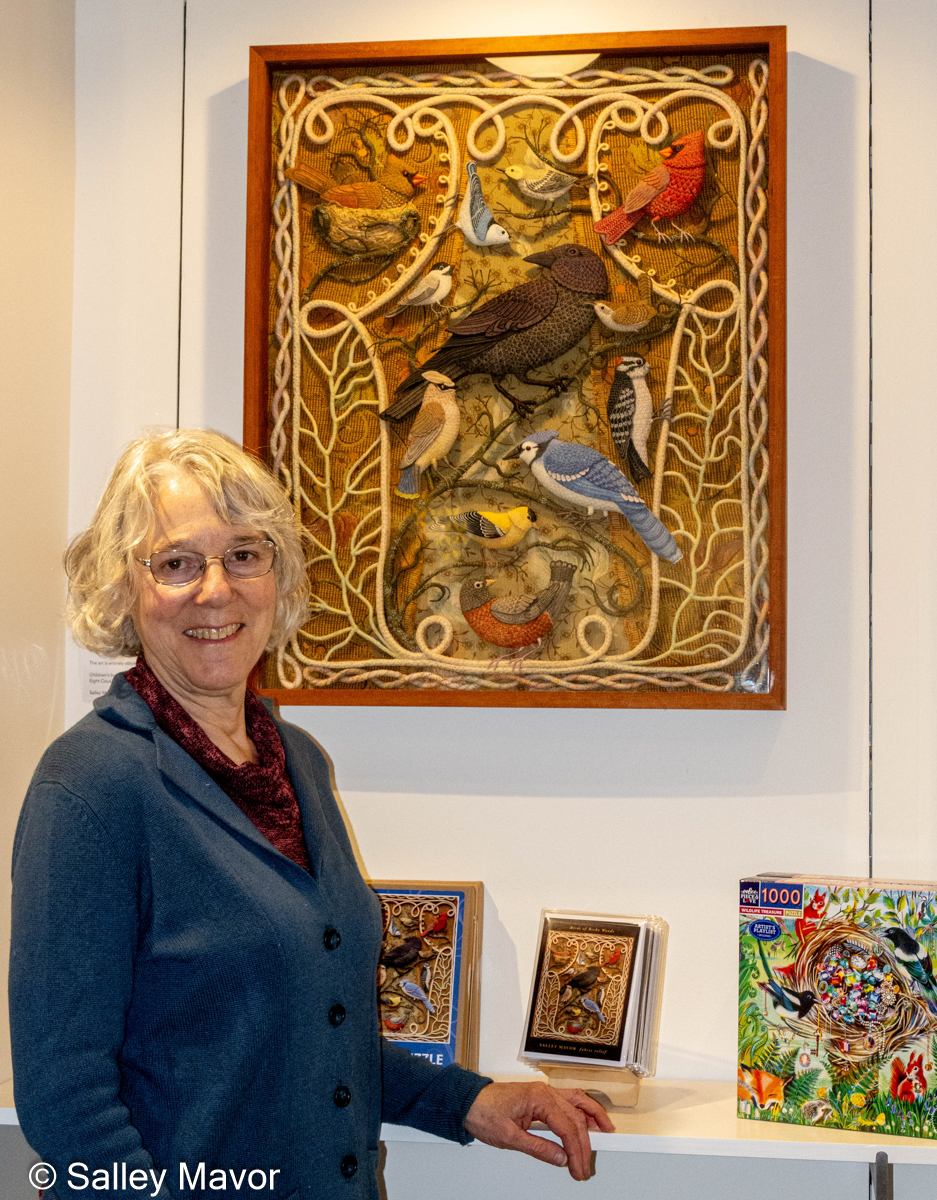
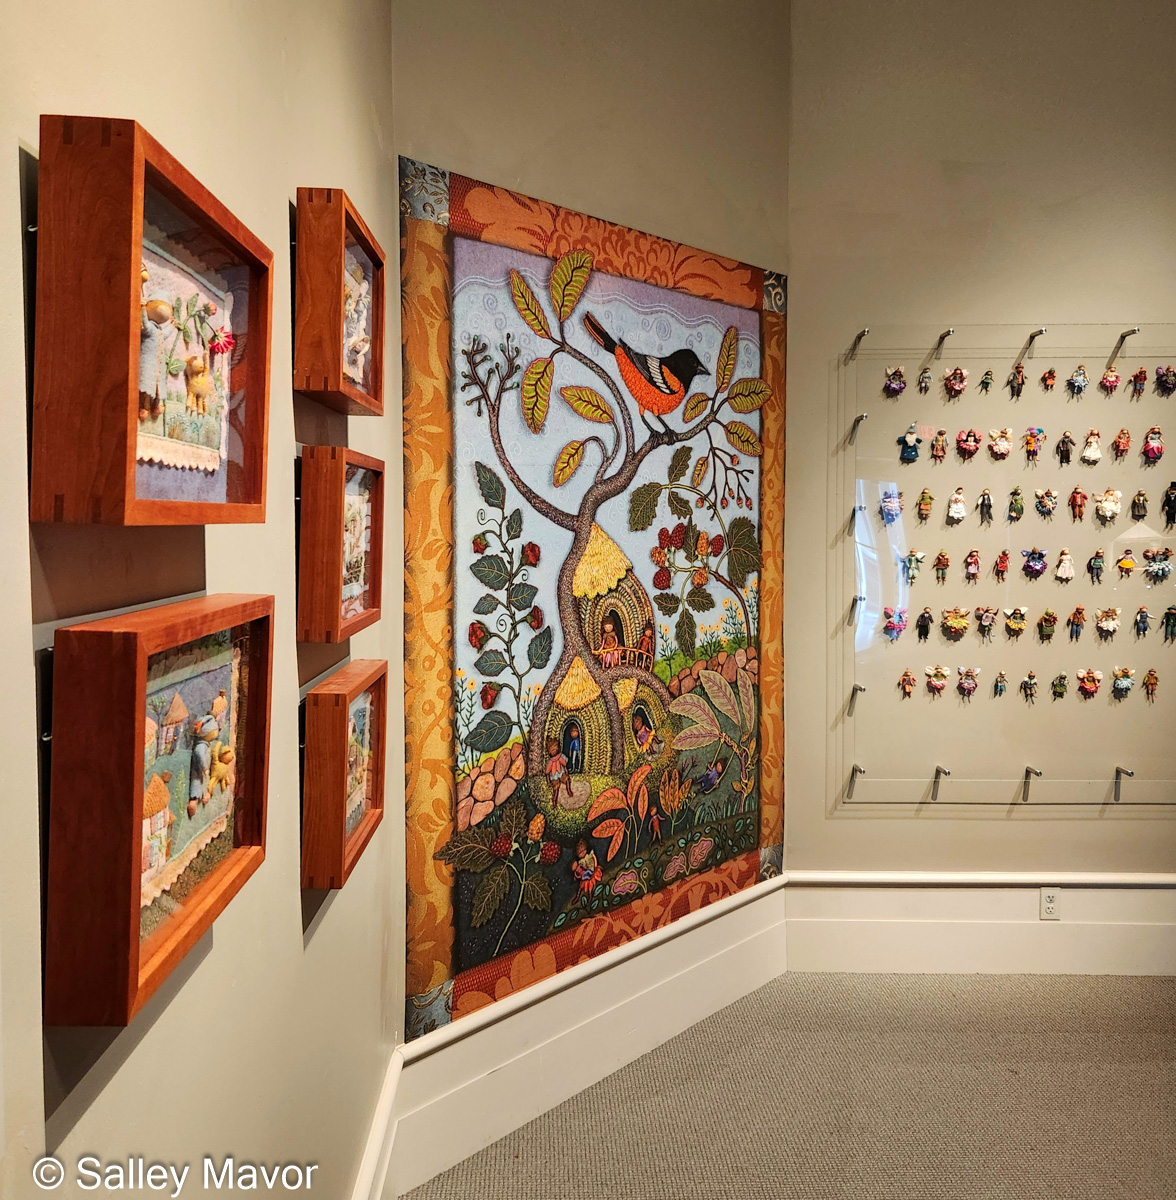
I’m excited to announce the opportunity to see Birds of Beebe Woods in person. The original framed piece is on display at Eight Cousins Bookshop (199 Main St. location) in my hometown of Falmouth, MA, on Cape Cod. It will be there for an extended time, until its next scheduled exhibition at another location.
Salley with Birds of Beebe Woods at Eight Cousins Bookshop in Falmouth, MA
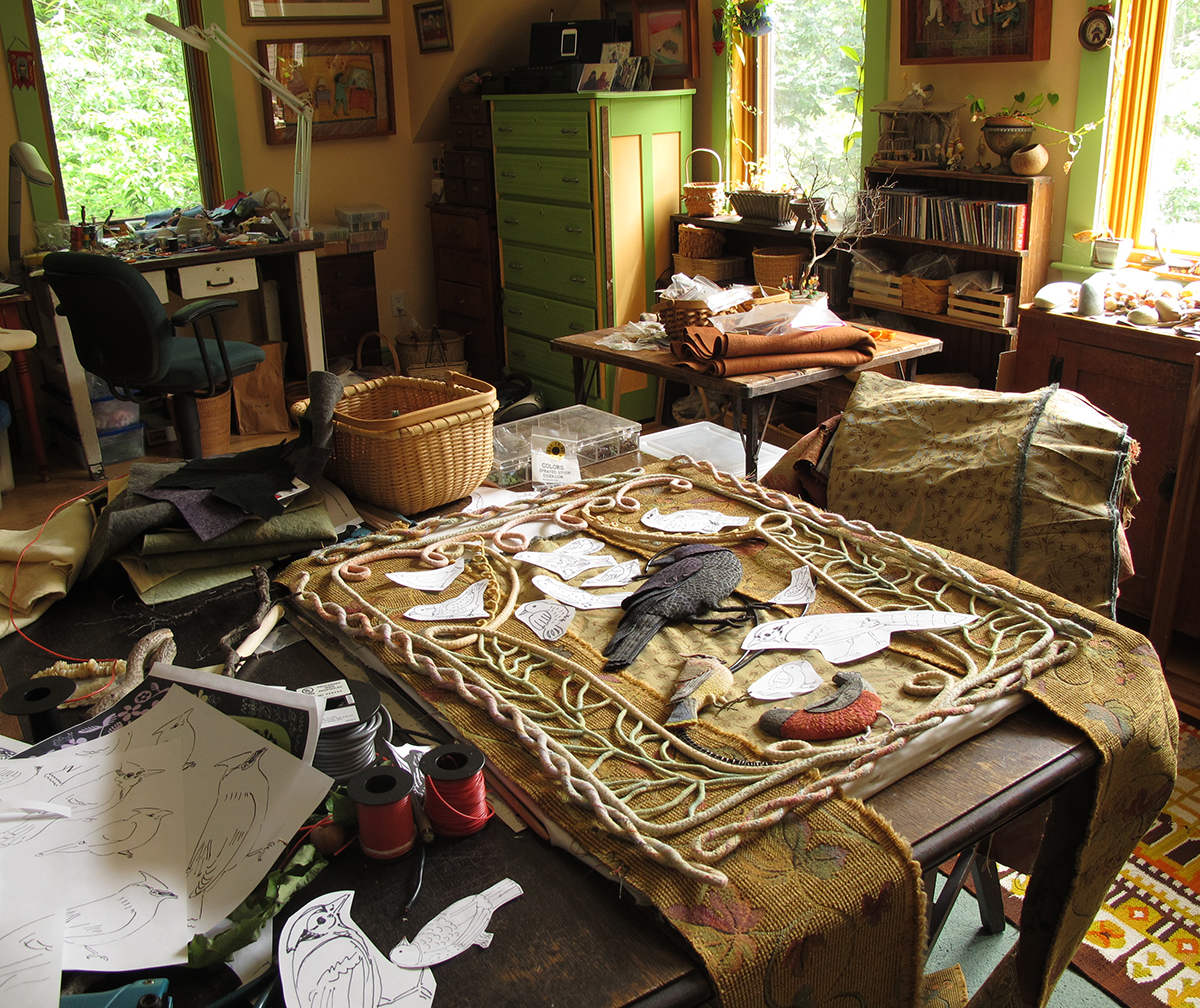
I was inspired to create the piece a dozen years ago while wandering through Beebe Woods, which is located a mile from the bookshop, at the top of Highfield Drive in Falmouth.
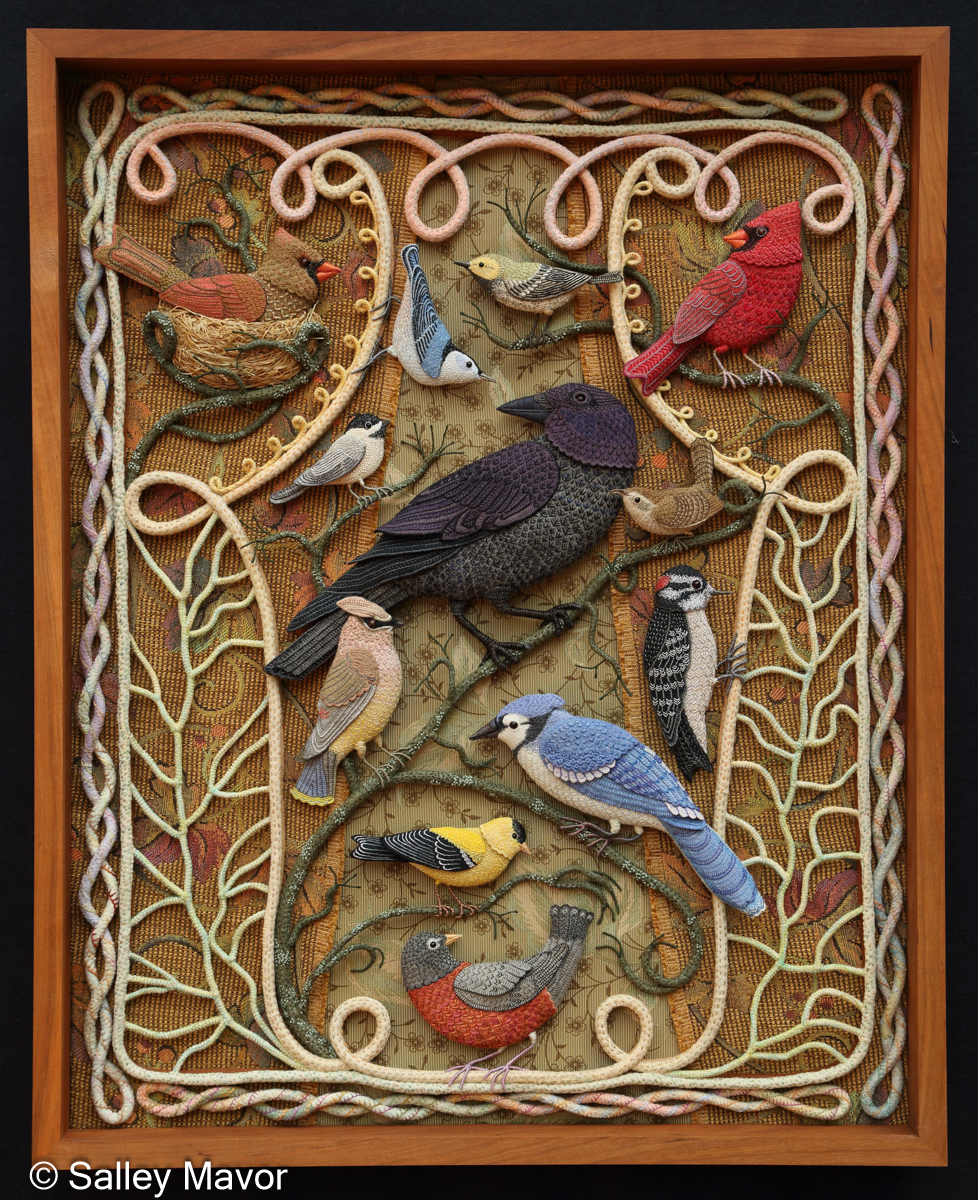
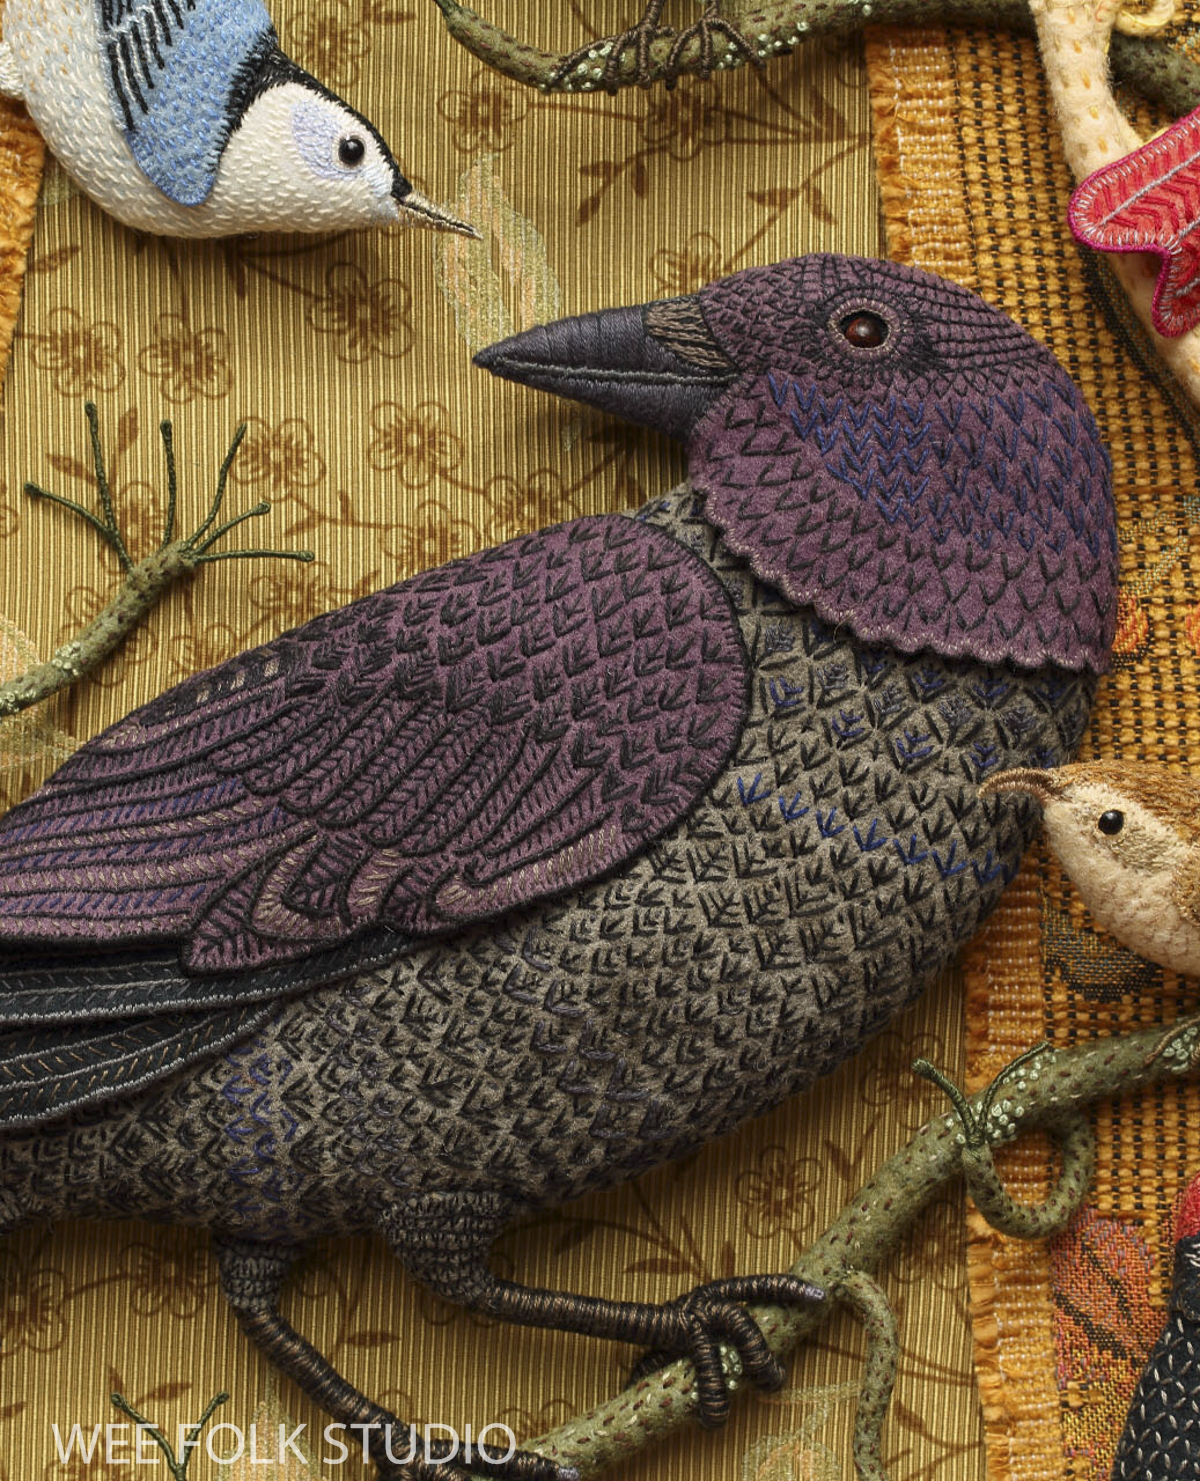
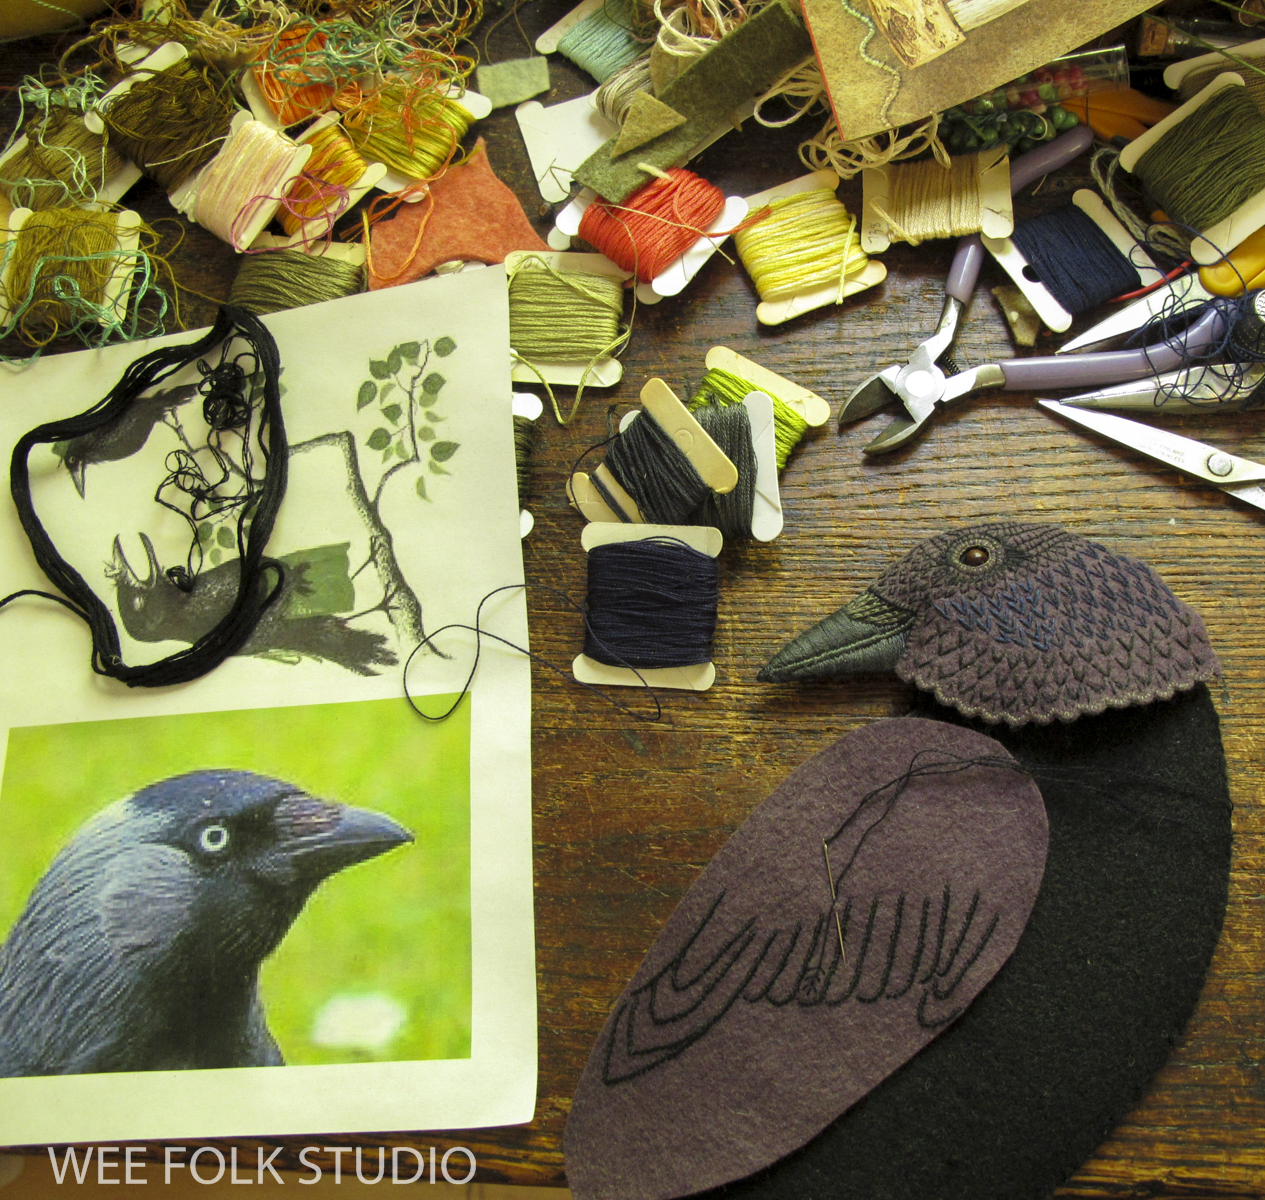
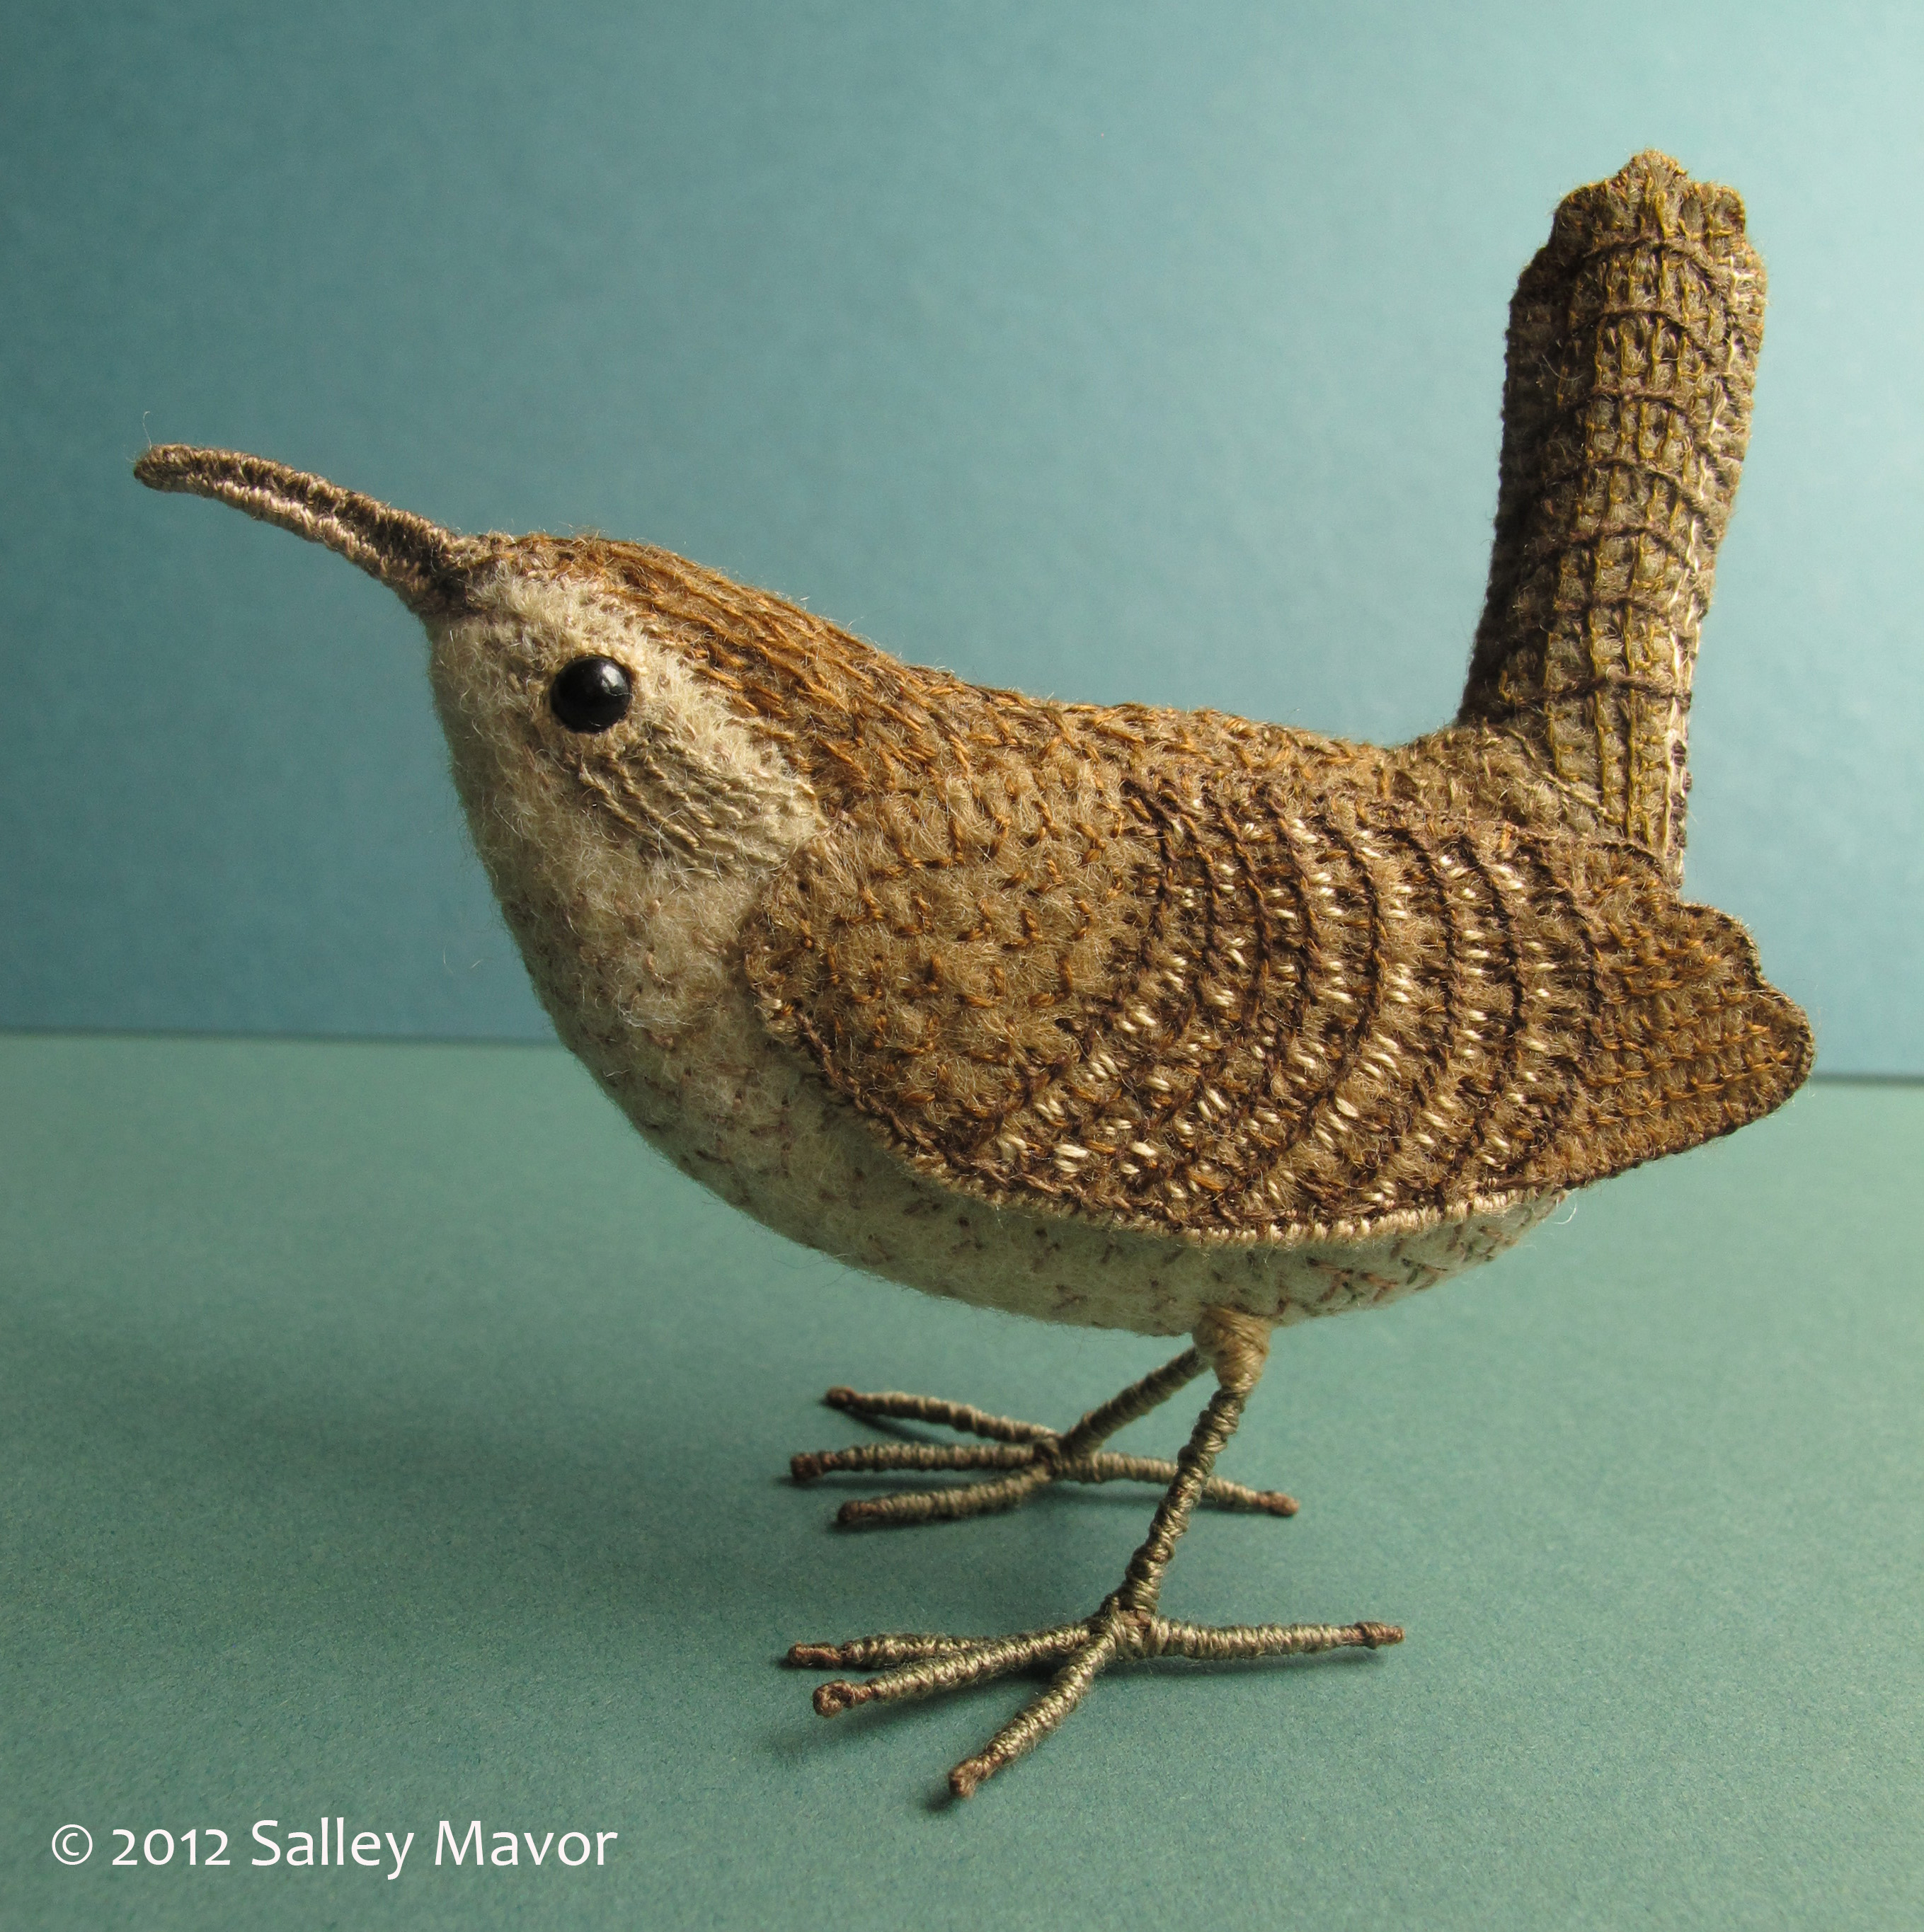
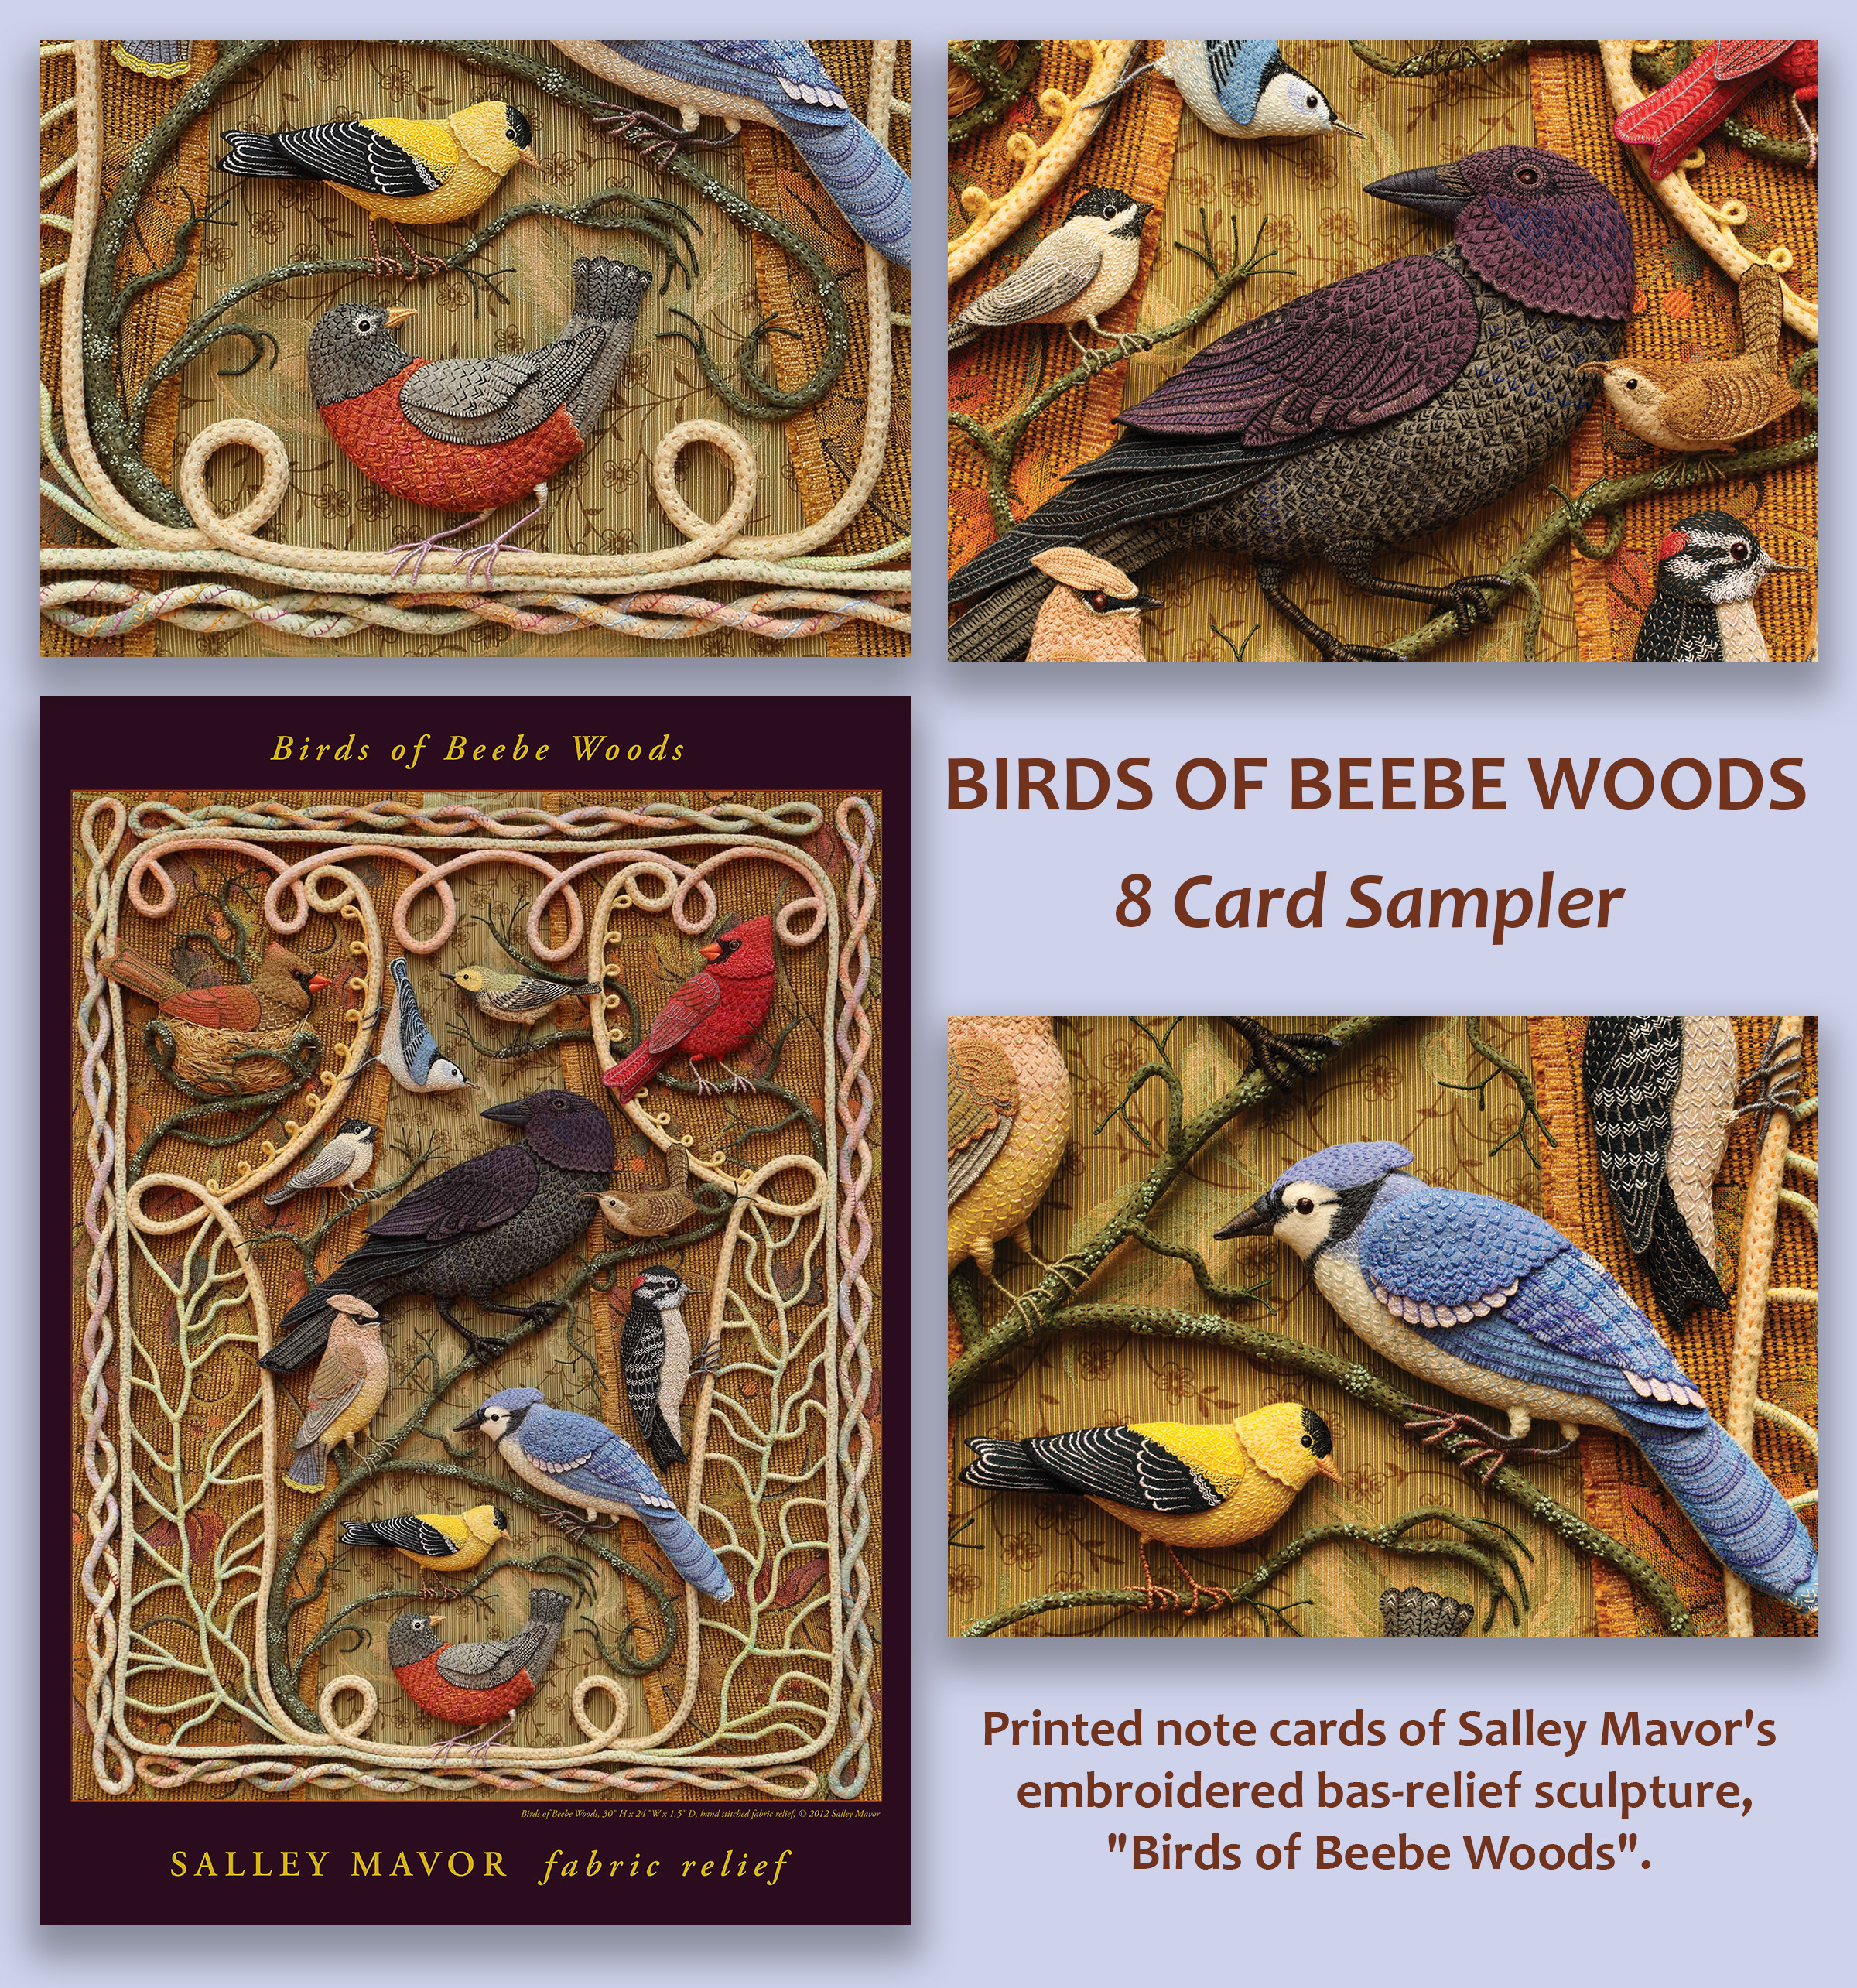
ABOUT THE ARTWORK:Birds of Beebe Woodswas made in 2012 for a fiber art exhibit celebrating the beloved forest in my home town of Falmouth, Massachusetts. I wanted to feature wildlife as well as convey the natural wooded environment in Beebe Woods. I chose to portray birds, making them realistic enough to be recognized, but patterned and abstracted in a way that made them fun to stitch. I started with a simple sketch and then got to work on the woodsy border, with its felt-covered wire filigree stage curtains. The crow came next and then the other birds common to our area of New England, making a dozen total. Listed clock-wise, they are female cardinal, nuthatch, black-throated green warbler, male cardinal, wren, downy woodpecker, blue-jay, robin, goldfinch, cedar waxwing, American crow and chickadee. I hand stitched the entire piece, using my unique blend of techniques and working methods.
ARCHIVES: To see posts about the making of the birds in the piece, go to these links: crow here, goldfinch, nuthatch and chickadee here, blue jay here, cedar waxwing here, cardinals here, robin here, wren here.
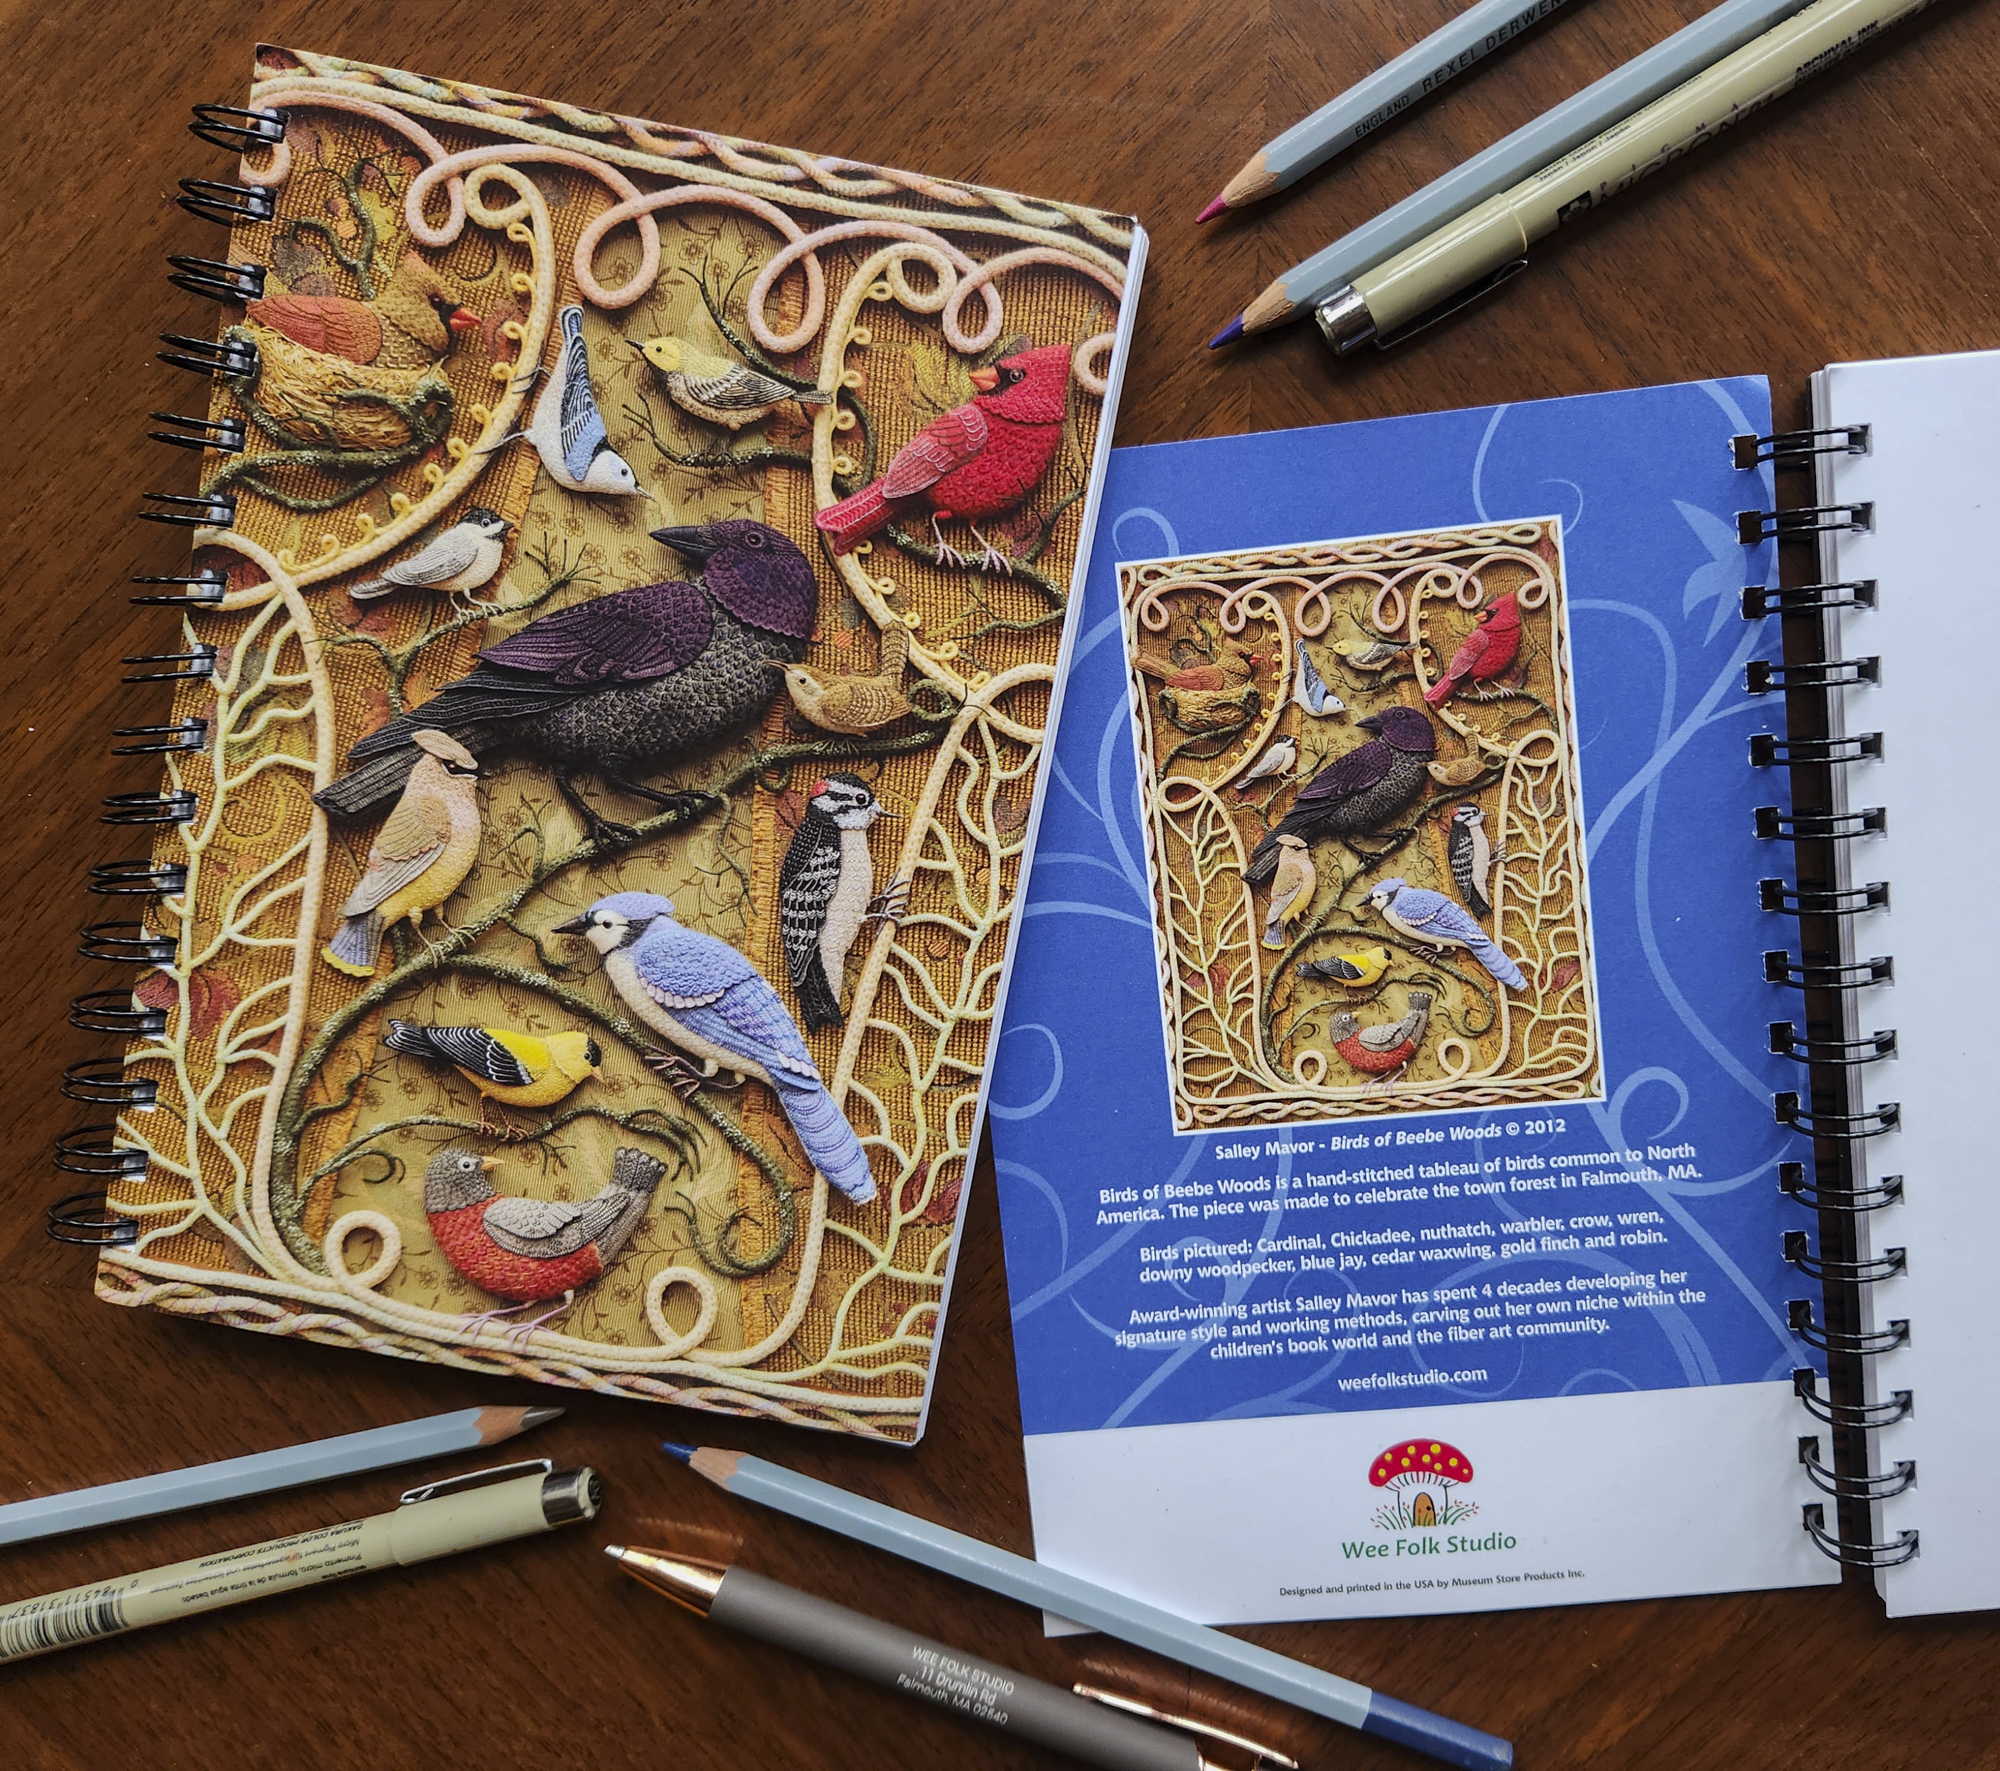
The original framed piece is not for sale, so that it’s available to show in public exhibitions. The next best thing to seeing it in person is to get the poster in my Etsy shop. Puzzles, notebooks, note cards, and bookmarks are also available.
jigsaw puzzlenote book
To keep up with new posts, please subscribe to this blog. Your contact info will not be sold or shared. If you’d like to see more frequent photos tracking the projects in my studio, please follow me on Facebook, Instagram and BlueSky.
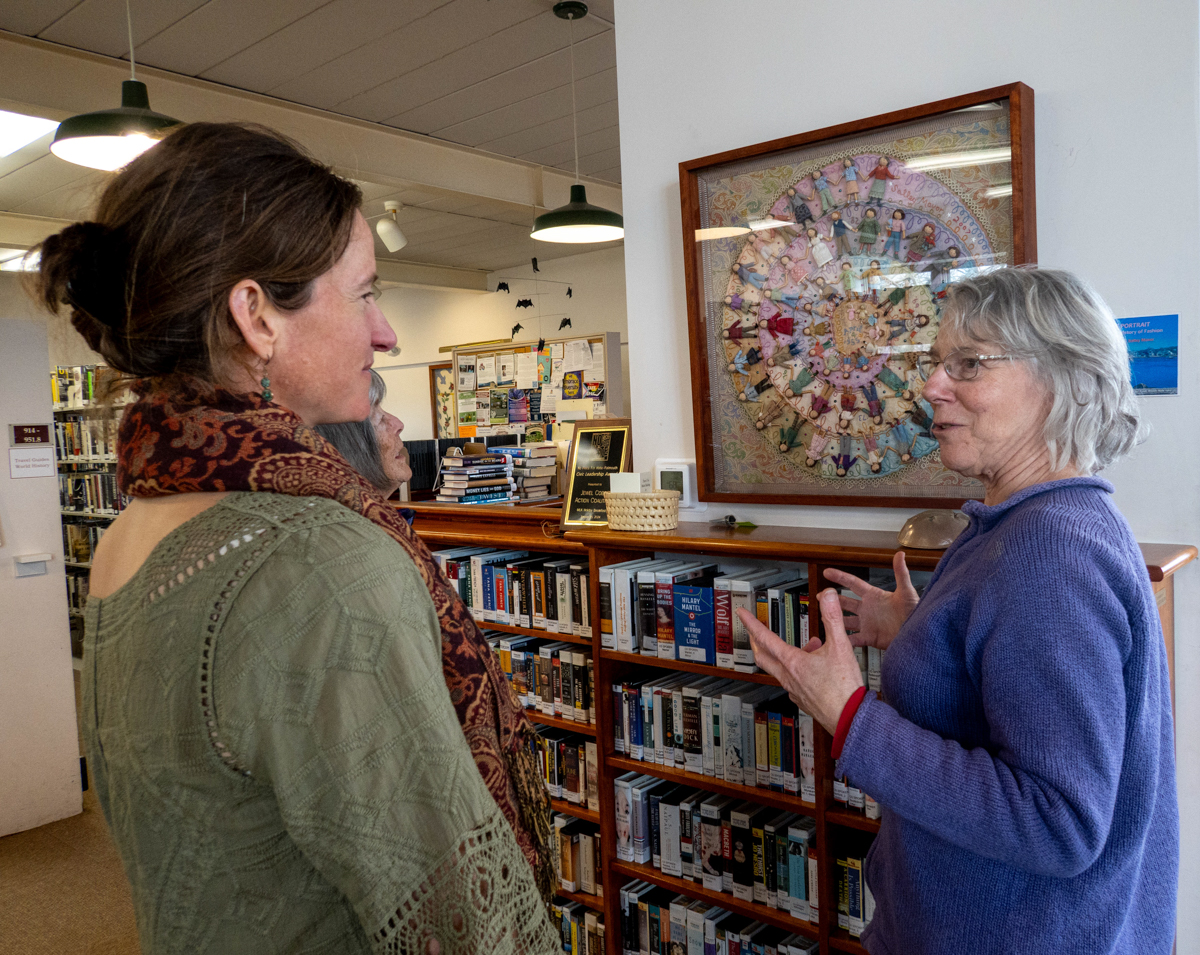
My Self Portrait: A Personal History of Fashionis back on public display at the Woods Hole Library. The library has been its semi-permanent home (except when it is exhibited elsewhere) since I made the piece in 2007. So, why loan it to the Woods Hole Library? Because this particular stone building has been a constant source of comfort and stability during my whole life. It’s a central part our community that reflects the unique charm and character of our village.15 years ago, I made a quilt square of the library for the Woods Hole Village Quilt, which is also on view.
Center square of the Woods Hole Quilt
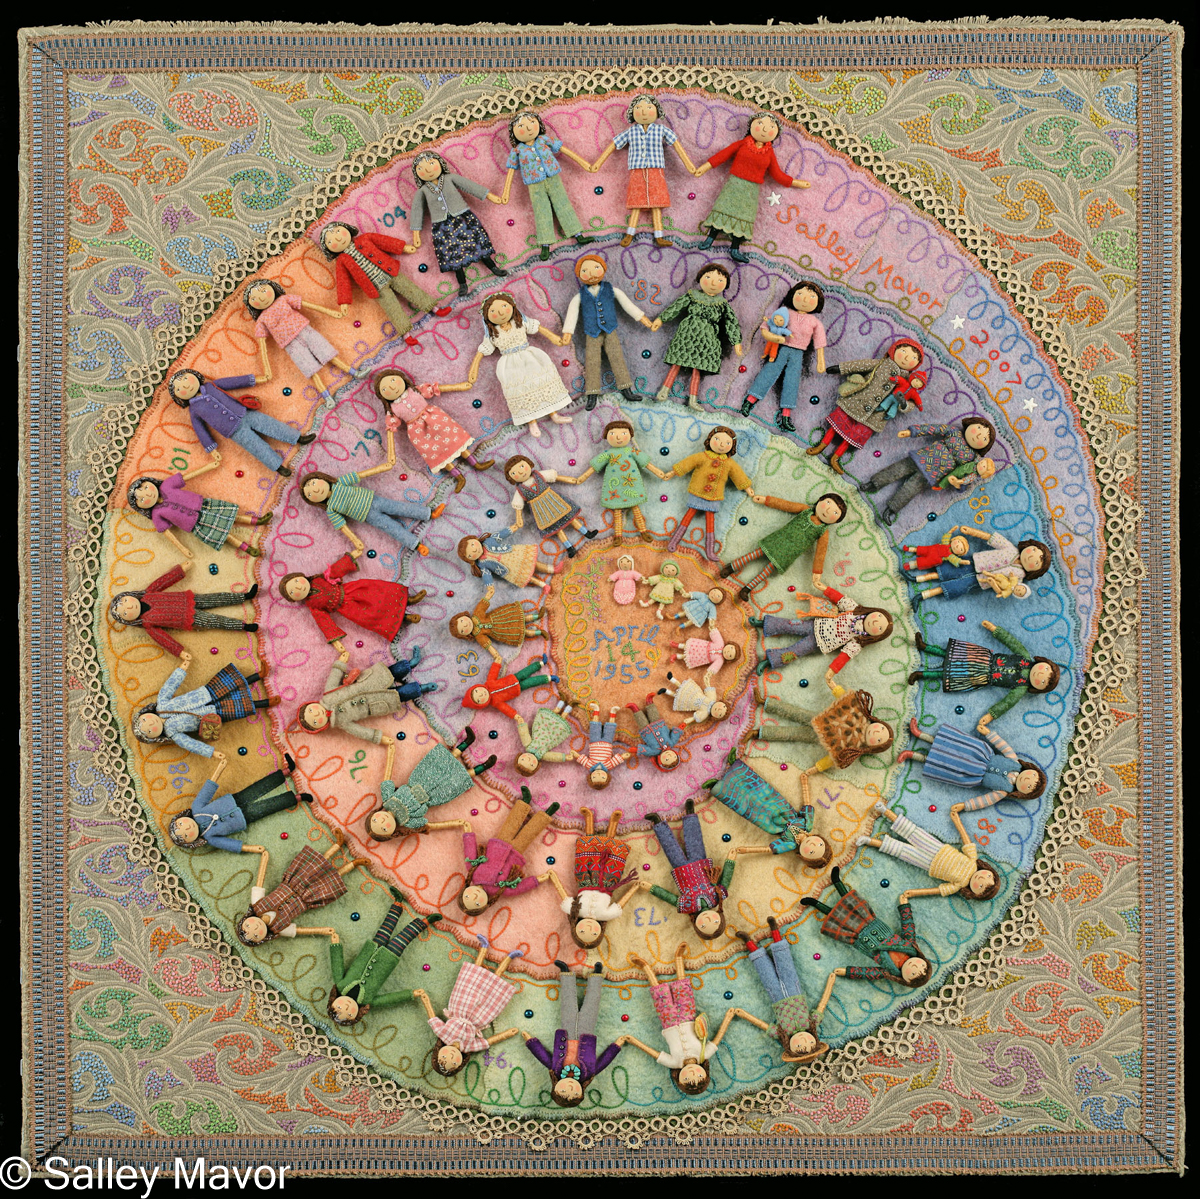
My Self Portrait shows a spiral of dolls, one for each year up to age 52, which was my age in 2007. My birth date is embroidered in the center. Yes, I’ll soon be turning 70! Each figure is dressed in an outfit I would have worn that year, taken from memories, family photos or my imagination. The figures range from 1 in. to 3 1/2 in. and are variations of the wee folk dolls in my how-to book, Felt Wee Folk.
Since I made many of my own clothes, I remember the fabrics and clothing styles. They are recreated here with smaller scale fabric and embroidered wool felt. My husband, Rob, appears the year we were married and my sons, Peter and Ian, are included through the years when they were little and physically connected to me. The tatting around the outside of the circle was made over 100 years ago by my grandmother. This piece resonates with a lot of people whose lives parallel the same time period. I can’t tell you how many women remark that they had an alpaca poncho, too!
A woman wrote to tell me that 3 generations of her family enjoyed seeing my work at a recent exhibition. She especially wanted me to know that her 4 year old granddaughter was so taken with my self portrait that they couldn’t tear her away. For little Emma, the progression of dolls opened up the concept of growing up and visualized the passage of time in a simple, direct way. I love hearing accounts like this, because it reaffirms my intention to make art for all ages, whether it’s book illustration or stand alone embroidered pieces like this one.
NEW PODCAST: In this podcast interview, I share the inspiration and process behind my Self Portrait: A Personal History of Fashion. The Object Itself Podcast, hosted by the Albany Institute of History and Art was published 1/23/25.
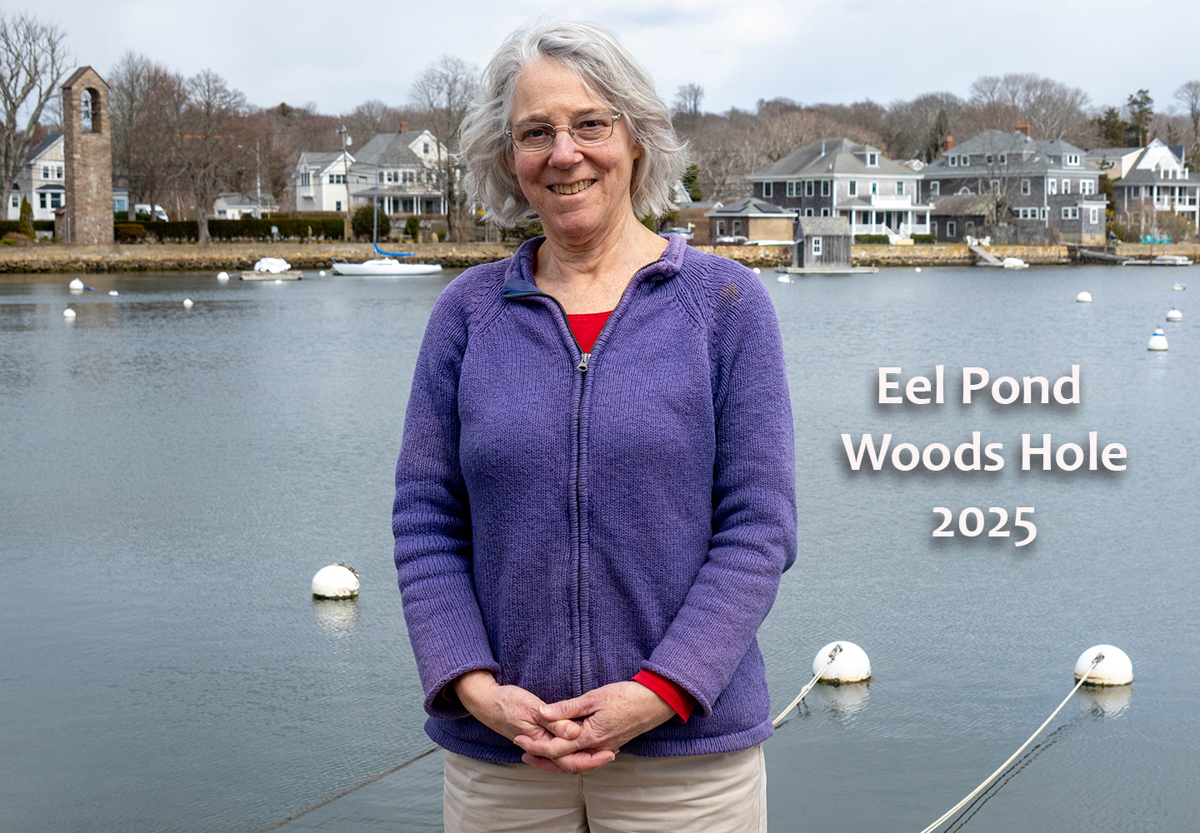
The following 2 photos of me with Eel Pond in the background, one taken in 1960 and the other in 2025, are hung on the wall next to the Self Portrait.
VIDEO tour through fashion and music: As well as clothing memories, we all have a personal soundtrack that goes with different times in our lives. This video is a nostalgic tour through fashion and music that my husband Rob and I put together. At the end, there’s a list of the music that I remember listening to.
10 minute nostalgic tour through fashion and music
Note cards and posters of the piece are available in my Etsy shop here.
To keep up with new posts, please subscribe to this blog. Your contact info will not be sold or shared. If you’d like to see more frequent photos tracking the projects in my studio, please follow me on Facebook, Instagram and BlueSky.
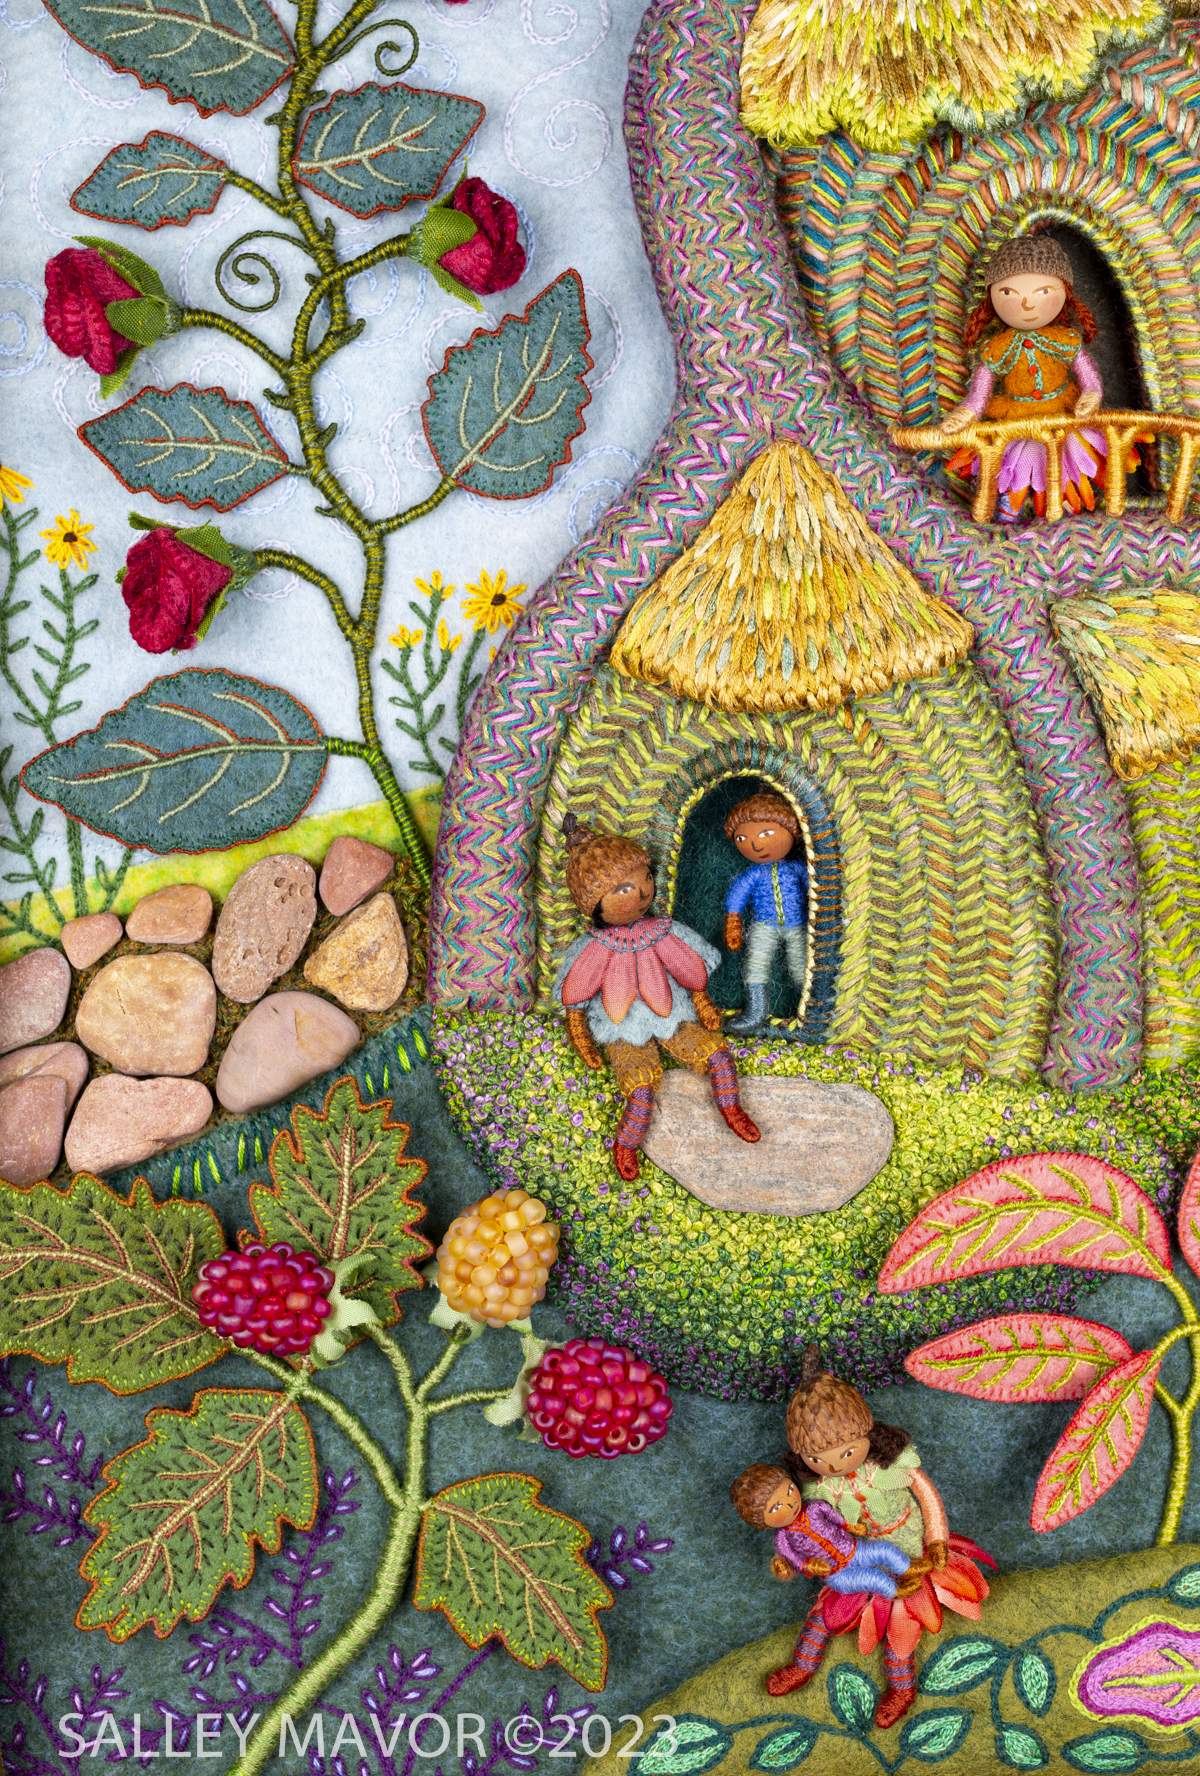
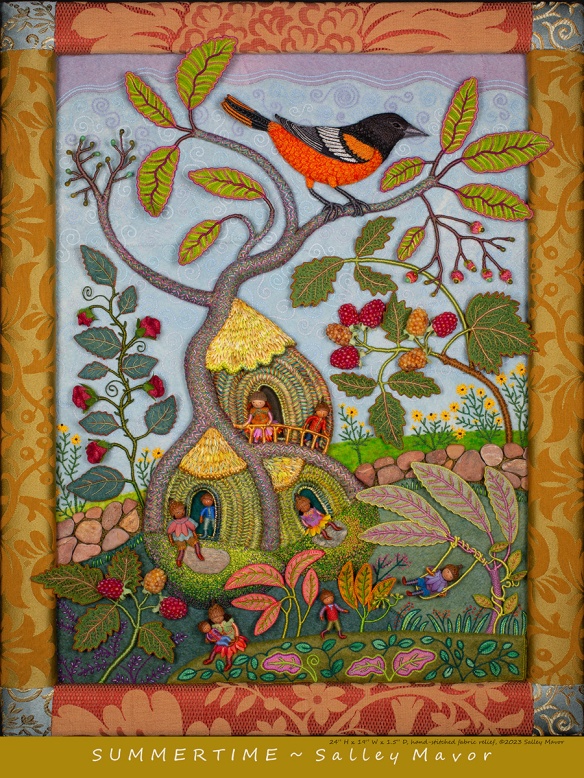
Part 6 in the series of posts about making my piece Summertime features photos and videos documenting the process of creating the rose vine.
For a more comprehensive understanding of my process, I encourage you to explore other posts in this series: Overview of the piece, Part 1 – Tree Trunks, Part 2– Tree Houses, Part 3 – leaves, stems and branches, Part 4– Baltimore Oriole (body), Part 5– Baltimore Oriole (head and feet), Part 6 – rose vine, Part 7– raspberry plants, Part 8– stitching flora, Part 9– moss, sky and stone wall, and Part 10 – wee folk.
Summertime is the summer scene in a series of four seasonal landscapes that capture the wonder and magic of the natural world. Posters, note cards, prints, bookmarks, and jigsaw puzzles of Summertime and the other scenes in the series (Frosty Morning, Mossy Glen and Harvest Time) are available in my Etsy Shop.
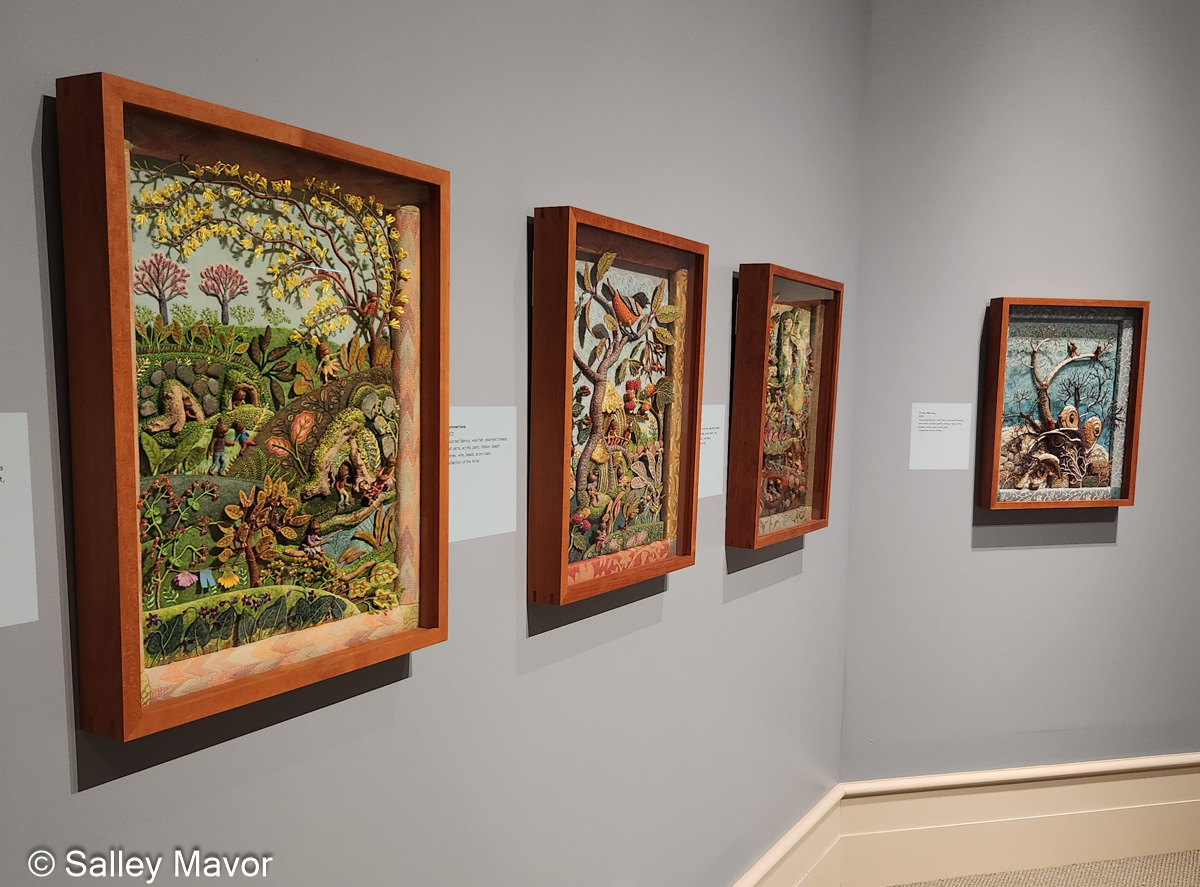
See the Four Seasons Series and dozens of other works in my exhibition, To Every Season: Works by Salley Mavor at the New England Quilt Museum, Sept. 9 – Dec. 31, 2025. The show includes recent work, as well as rarely seen early pieces on loan from private collections.
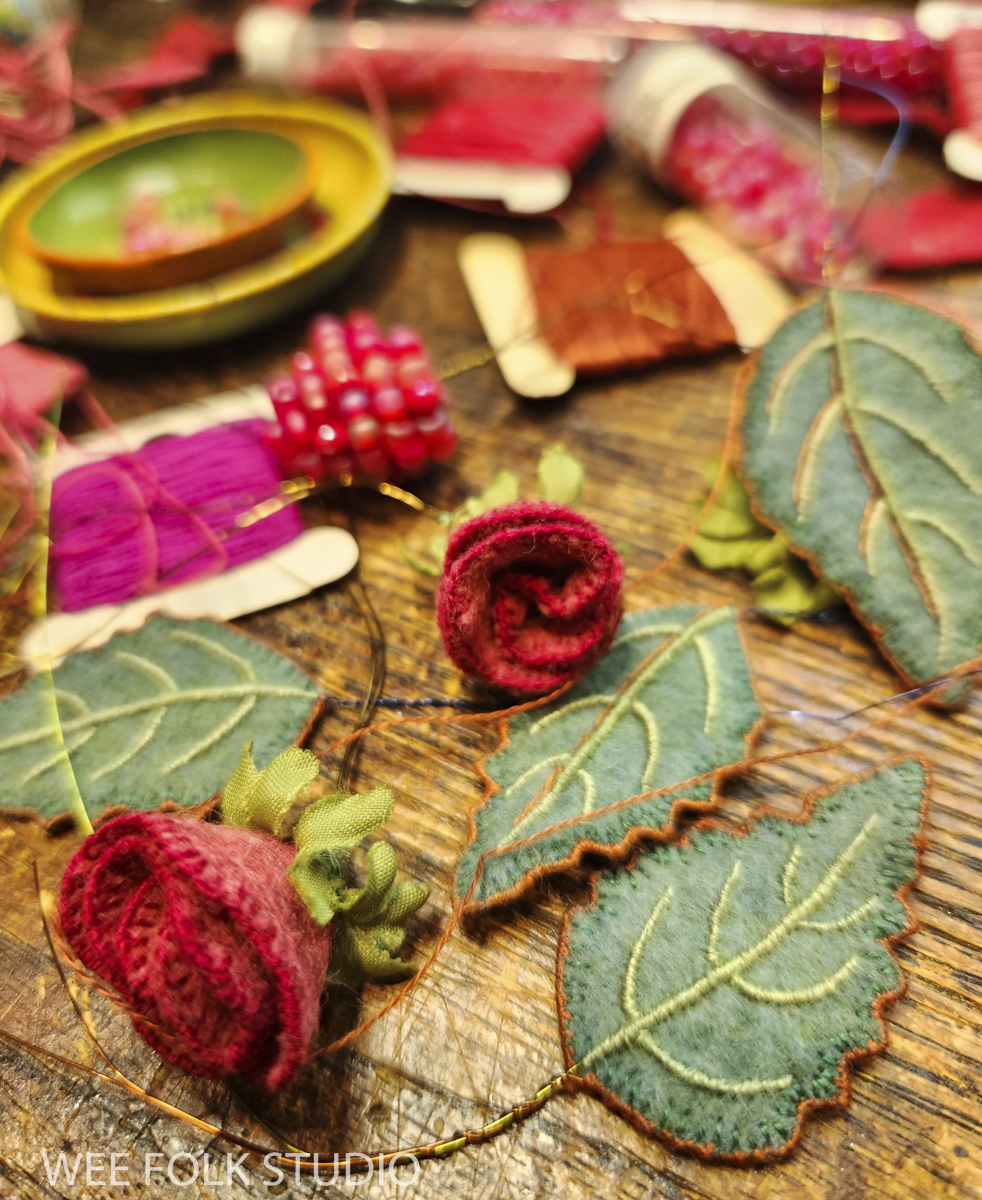
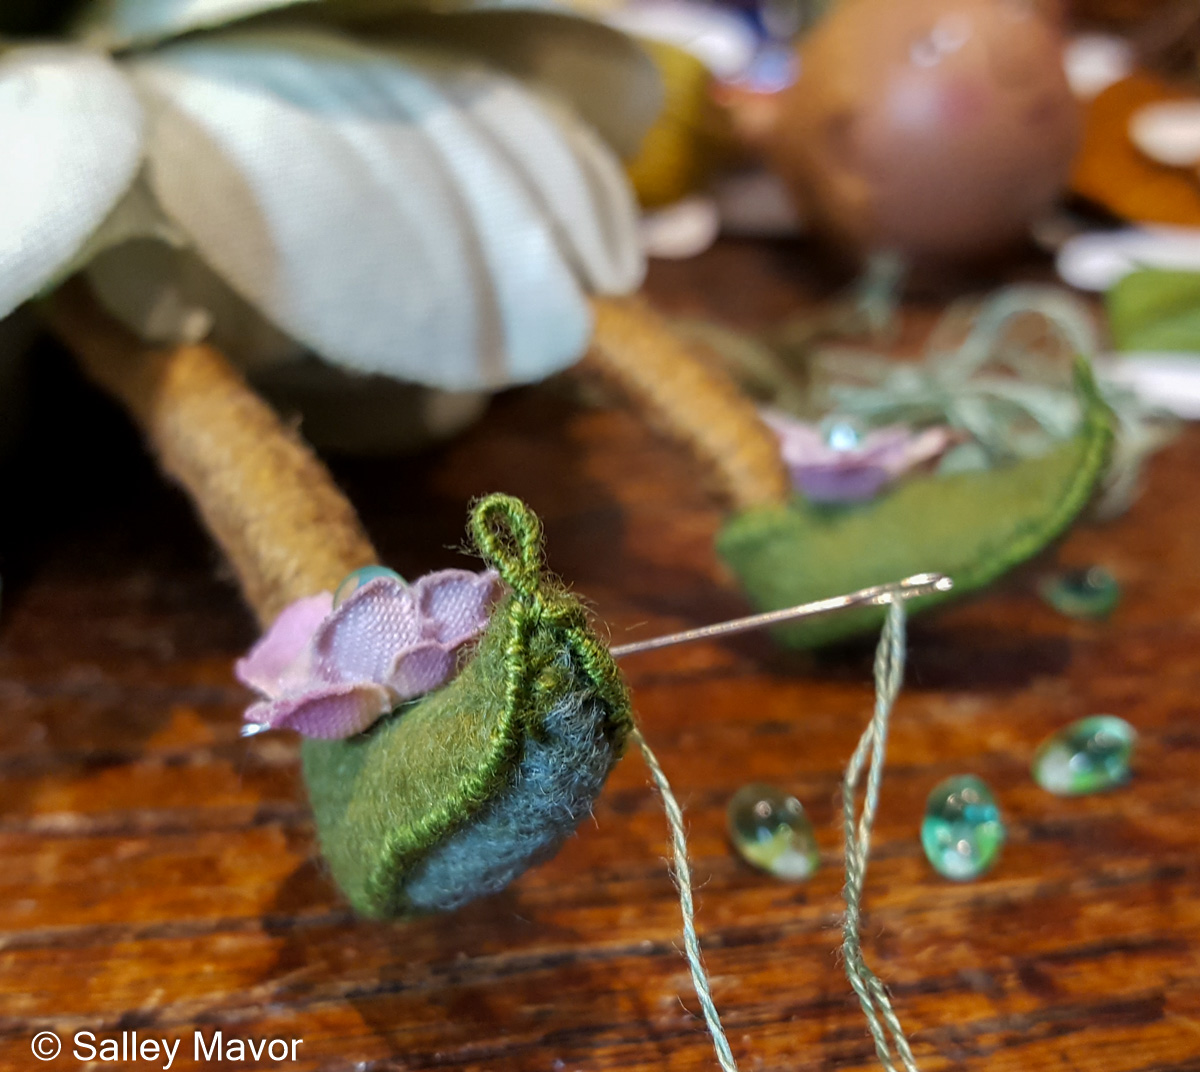
ROSES I learned how to make basic felt roses like these years ago from Mimi Kirchner’s blog. Mimi’s tutorial is available here. I love how deceptively simple the process is, starting with a circle of felt and folding it like origami to make a rose shape. Watch the following video to see how I finished off the raw felt edges with blanket stitching and folded the circle to make a rose.
Felt Rose
LEAVES To cut out the sharp-toothed edge around the rose leaves, I used pinking shears. The following video shows how I stitched wire around the outside of a felt leaf and embroidered its stem and veins.
Felt Rose Leaf
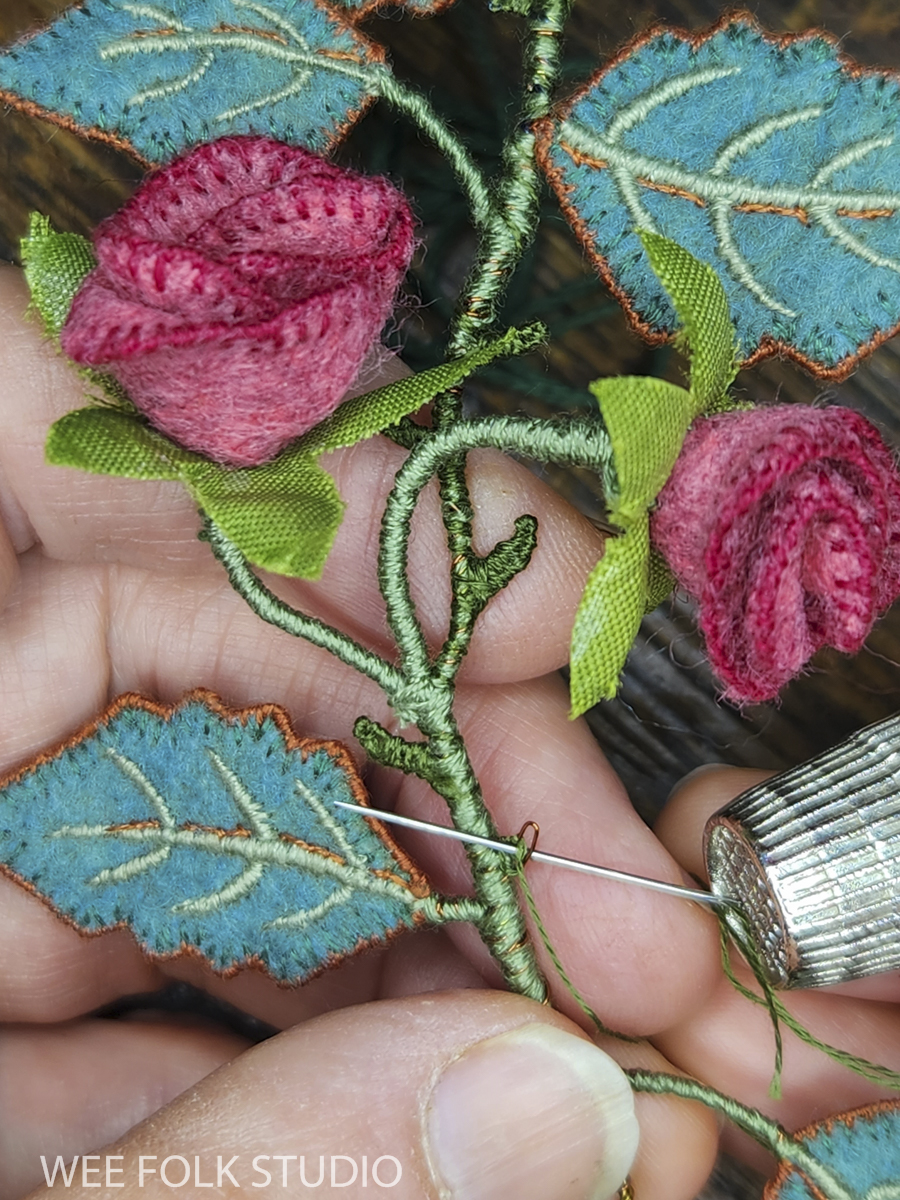
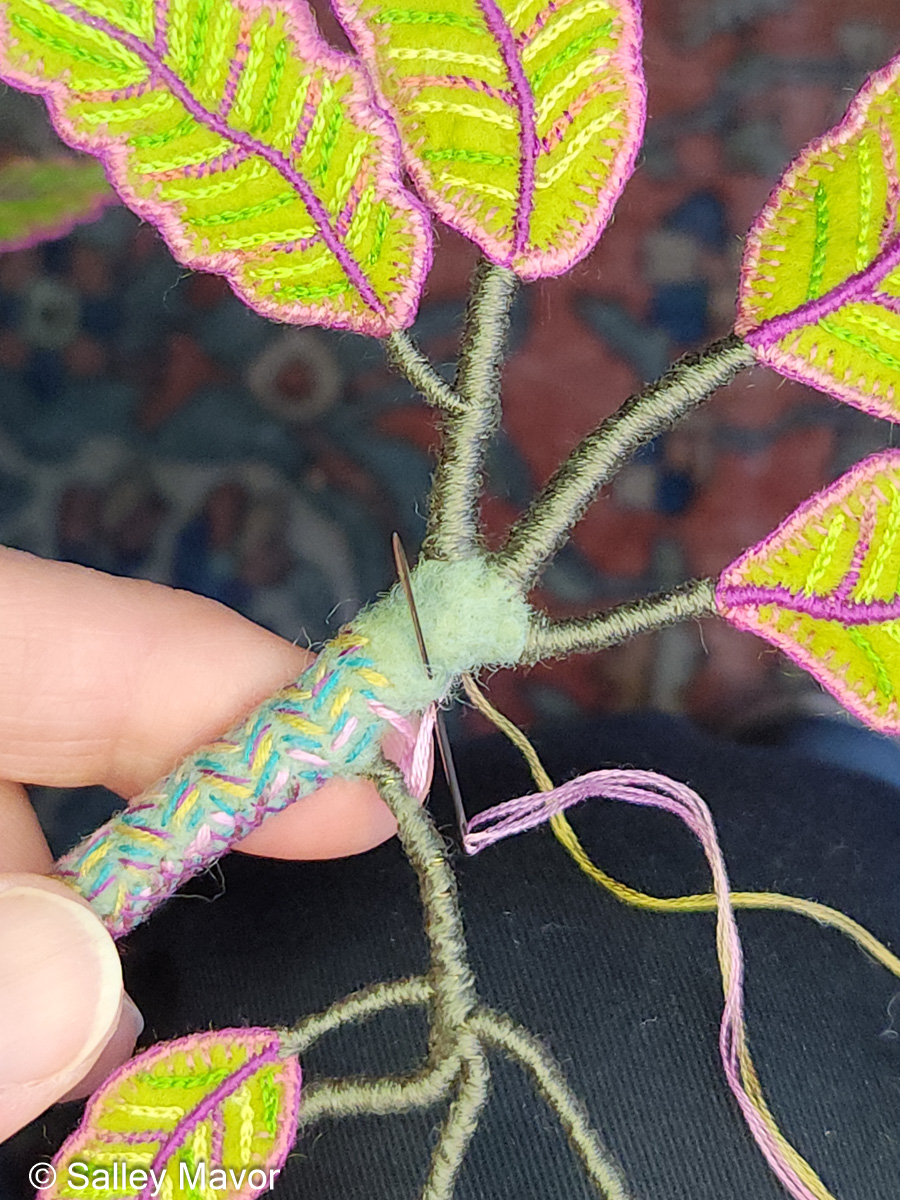
I twisted wire to make a central vine and added the roses, leaves, thorns, and curly tendrils. Besides felt and embroidery floss, the most common material in my artwork is wire. Felt alone is too floppy and needs structural supports. I used Parawire in a range of gauges, from 24 to 32, to build up the thickness and strength I wanted.
The last step was disguising the shiny metallic wire with embroidery floss. Part 3 in this series includes videos of wrapping wire stems and branches on other foliage in the Summertime piece. I wound 1 or 2 strands of floss around and around the stems until the surface was evenly covered. It was a bit tricky to make the thorns look sharp!
Stay tuned for Part 7, where I’ll share photos and videos documenting the process of making the raspberry plants in Summertime. To keep up with new posts, please subscribe to this blog. Your contact info will not be sold or shared. If you’d like to see more frequent photos tracking the projects in my studio, please follow me on Facebook, Instagram and BlueSky.
What is it about tiny shoes? There’s something irresistible about small scale footwear, whether it’s baby booties or doll shoes. Every time I post a photo with miniature shoes, there’s a huge response. So, I thought I’d share a selection of little slippers, boots and even high-heeled shoes I’ve made that range from precious to provocative (with a surprise guest near the end of the post).
detail from “MY BED”
Many of the illustrations in my picture book, MY BED, show pairs of shoes that were put aside at bedtime, including the slippers above and the hiking boots below.
detail of hiking boots in “MY BED”
detail from “MY BED”
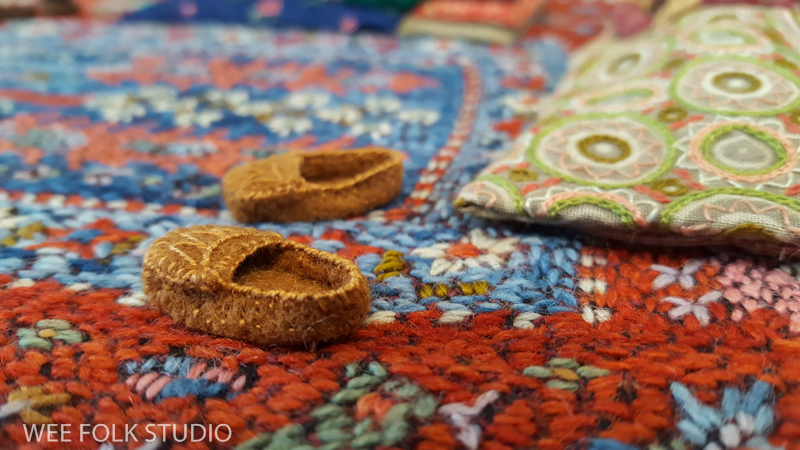
When making the Japanese interior scene for MY BED, I tried hard to convey a spare and ordered aesthetic, but couldn’t help myself from placing 2 pairs of slippers off to the side of the tatami mat. I thought that the shoes would break up the geometric blocks and give the space a lived in appearance. I’ve since learned that I don’t have a proper grasp of Japanese culture, because leaving one’s shoes out like that is a big no no! One follower pointed out that Japanese children would be spanked for being so careless. I was further corrected when the slippers were photoshopped out of the illustration in the Japanese edition of the book!
detail from “MY BED”
Early on, I made shoes out of old kid leather gloves that I painted brown, like the ones in this kitchen scene from Mary Had a Little Lamb. The kid leather was thin and pliable enough to cut with scissors and sew with a needle and thread.
from “Mary Had a Little Lamb”
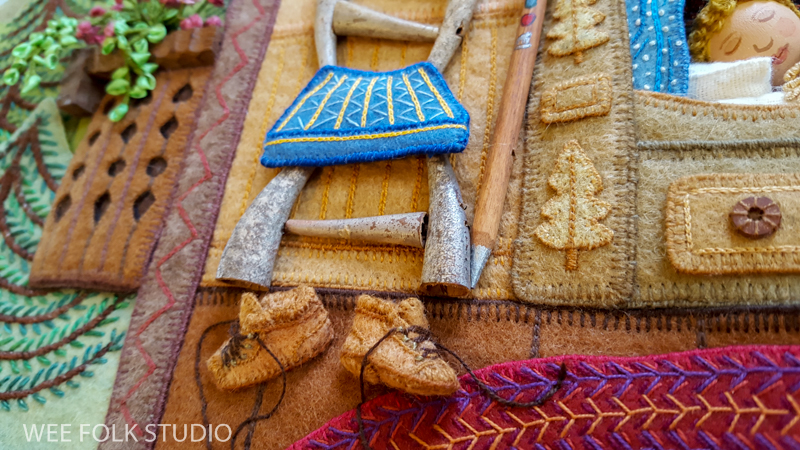
For the past 25 years or so, I’ve made shoes out of wool felt, which is much more forgiving than leather. For the rhyme, “Cobbler, cobbler, mend my shoe”, in Pocketful of Posies, I made felt boots, a leather work apron, and a wooden shoe sign, which I cut out with a jig saw.
detail in “Pocketful of Posies”
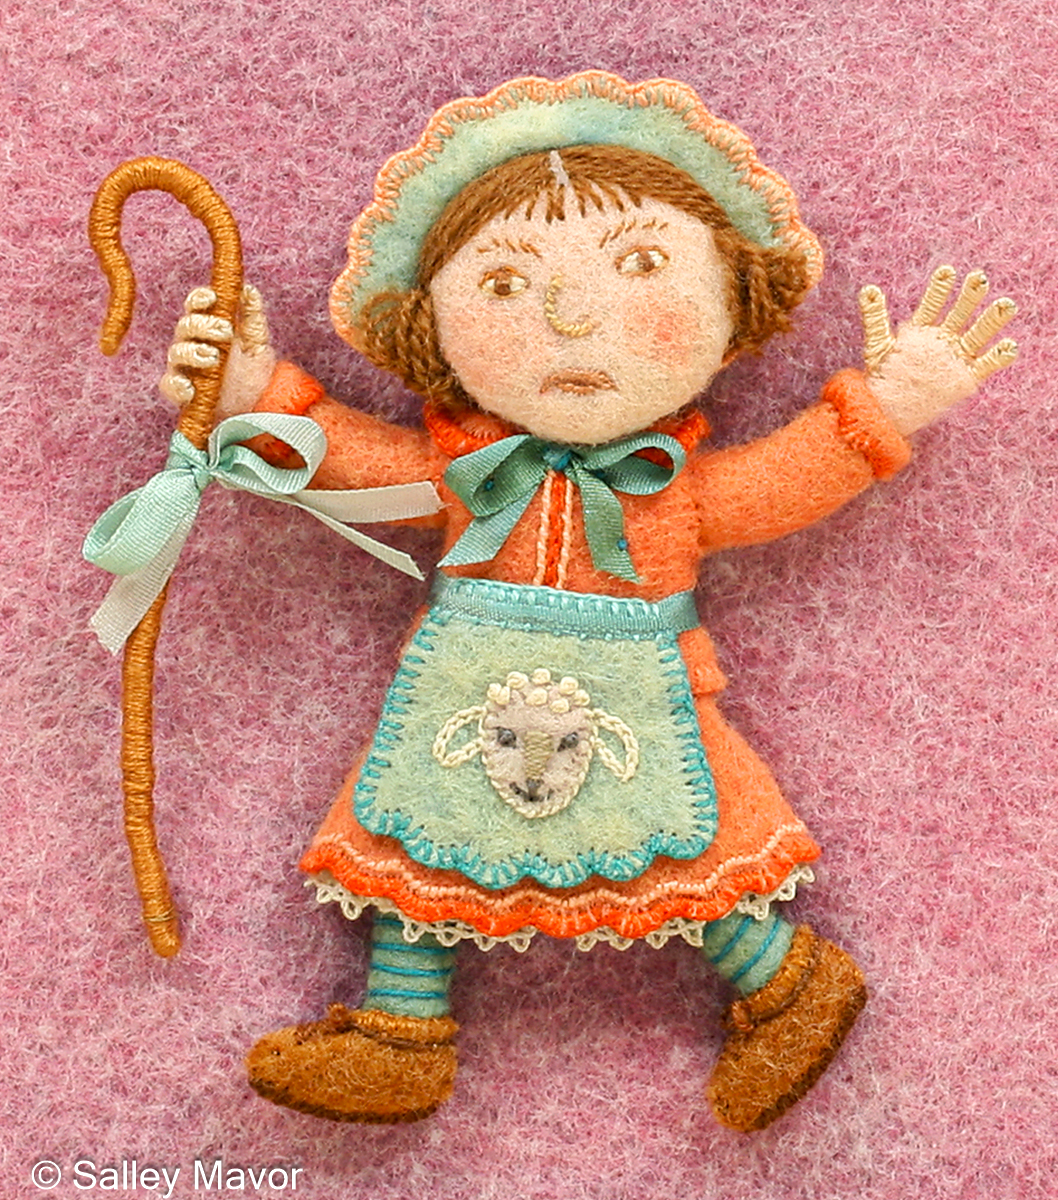
The different nursery rhyme characters in Pocketful of Posies wear over 100 shoes, in varying colors and sizes. There’s Little Bo Peep who lost her sheep…
the children playing Ring Around the Roses…
and the Crooked Man who walked a crooked mile in his hiking boots.
An old watch strap buckle came in handy for this shoe from “One, two, buckle my shoe”.
Does this shoe house look familiar? It was inspired by an LL Bean boot I found in the closet. Not only did the old woman who lived in a shoe have to feed all those children, she had to keep them all shod, too!
There was an old woman who lived in a shoe, from “Pocketful of Posies”
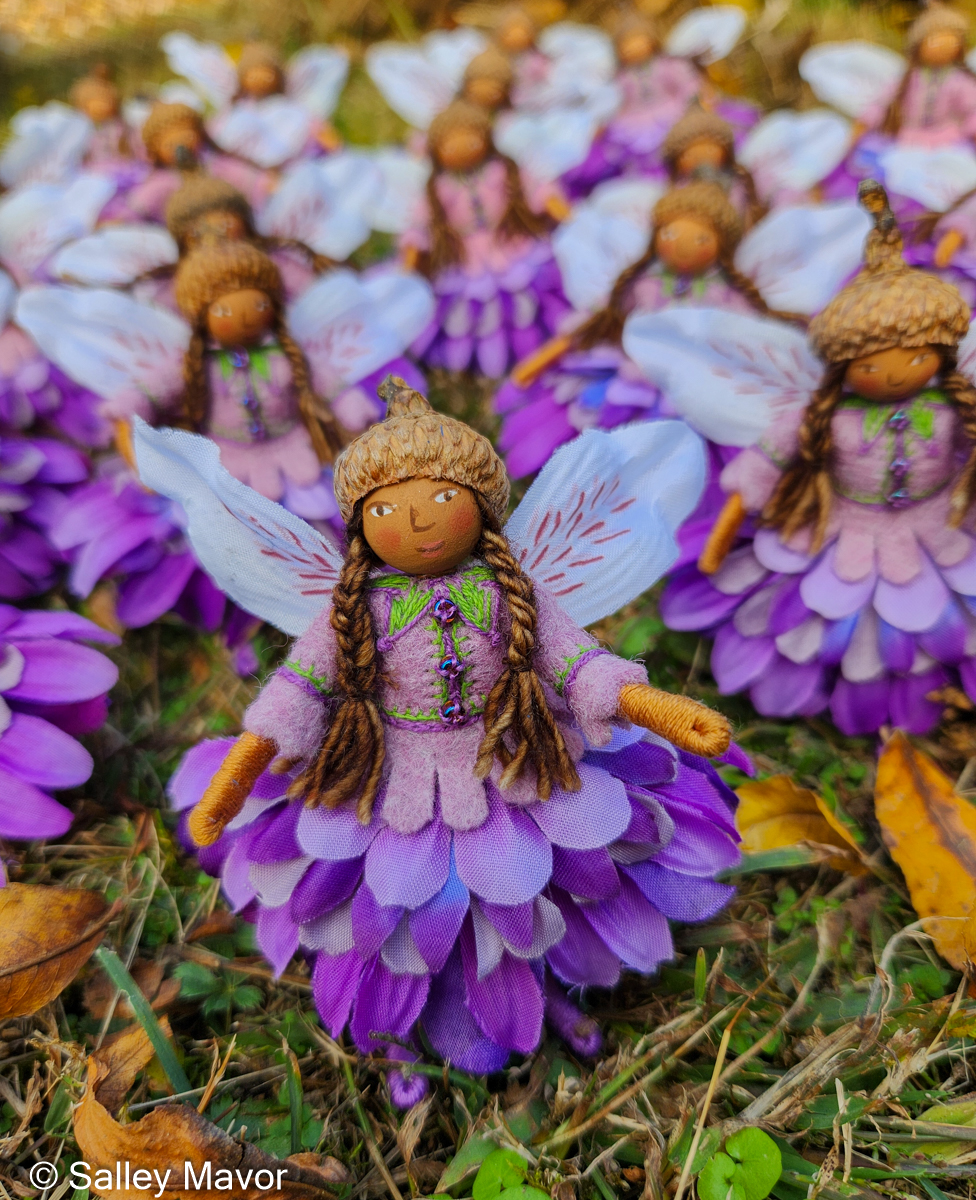
A few years ago, I made a pair of bigger than usual fairies to accommodate some large bur oak acorn caps from the Midwest. Because the Bur Oak fairies had nice big feet (1 1/4″), I could more easily cobble shoes for them. I made their slippers out of felt, with a bit of wire reinforcement to give them a pointy elfin look.
Most of the shoes I make are of the comfortable variety, but occasionally someone demands spike heels.
Like this pair of pink roach killers I made back in 2017, when Rob and I spent a year in the basement filming our stop-motion animation, Liberty and Justice: A Cautionary Tale in the Land of the Free. The film is just as relevant today as it was when it was released in 2018. In the photo below, the Melania character is getting a final fitting for her cameo appearance in the film.
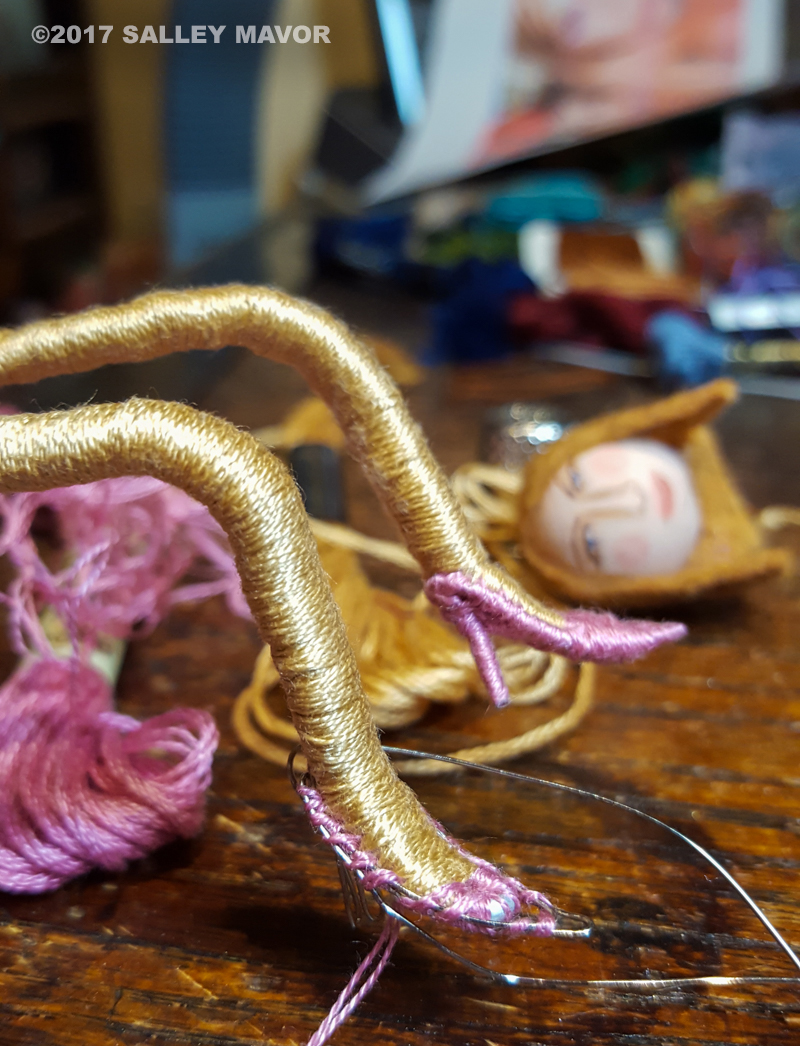
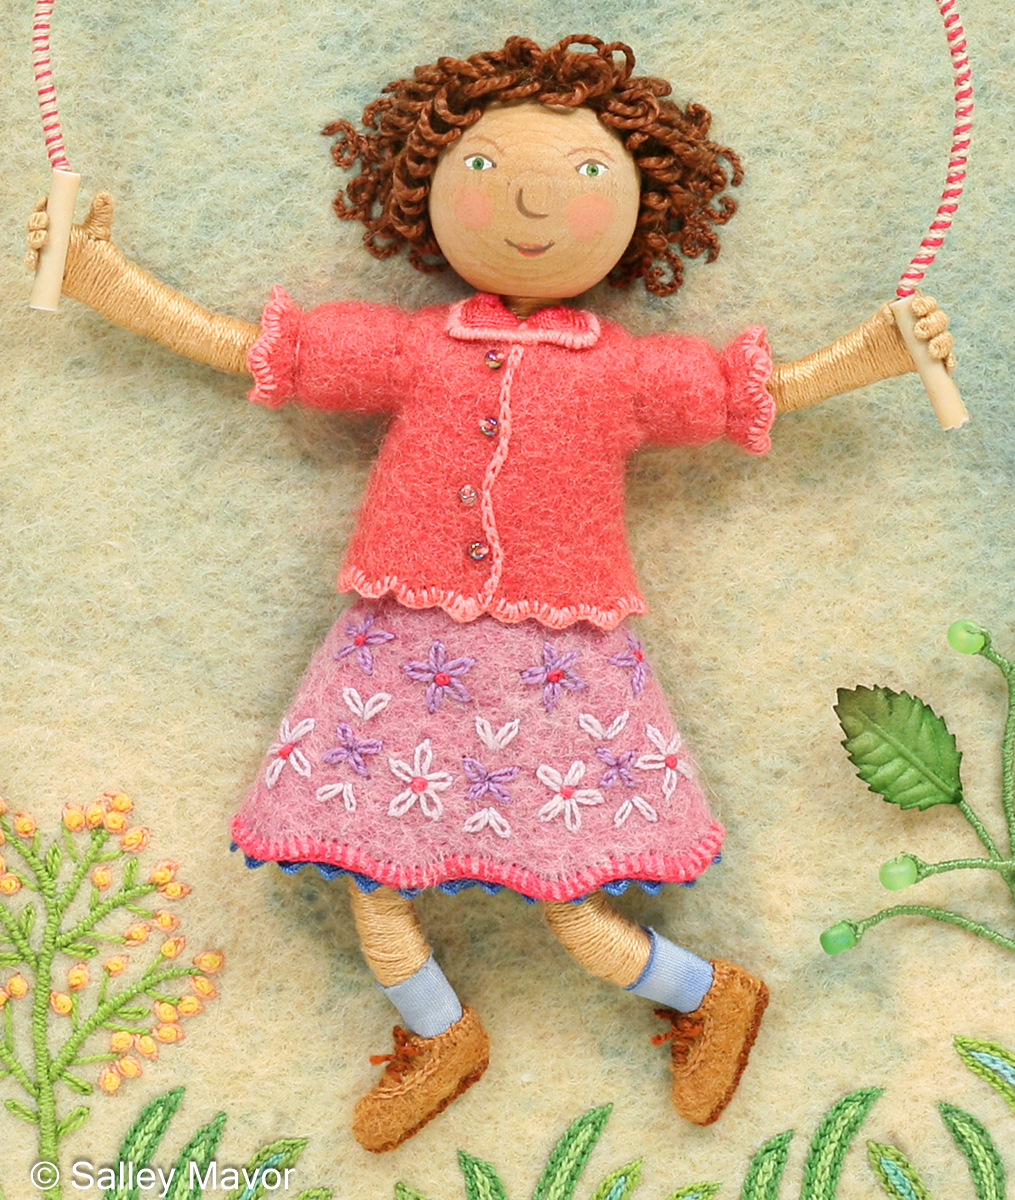
Let’s push aside all that glitz and glamor and finish up with “Jumping Joan”, who’s wearing a pair of sensible brown shoes, which everyone wore to school when I was growing up.
Jumping Joan from “Pocketful of Posies”
To keep up with new posts, please subscribe to this blog. Your contact info will not be sold or shared. If you’d like to see more frequent photos tracking the projects in my studio, please follow me on Facebook, Instagram and BlueSky.
Part 5 in the series of posts about making my piece Summertime features photos and videos documenting the process of creating the Baltimore Oriole’s head and feet.
For a more comprehensive understanding of my process, I encourage you to explore other posts in this series: Overview of the piece, Part 1 – Tree Trunks, Part 2– Tree Houses, Part 3 – leaves, stems and branches, Part 4– Baltimore Oriole (body), Part 5– Baltimore Oriole (head and feet), Part 6 – rose vine, Part 7– raspberry plants, Part 8– stitching flora, Part 9– moss, sky and stone wall, and Part 10 – wee folk.
Summertime is the summer scene in a series of four seasonal landscapes that capture the wonder and magic of the natural world. Posters, note cards, prints, bookmarks, and jigsaw puzzles of Summertime and the other scenes in the series (Frosty Morning, Mossy Glen and Harvest Time) are available in my Etsy Shop.
See the Four Seasons Series and dozens of other works in my exhibition, To Every Season: Works by Salley Mavor at the New England Quilt Museum, Sept. 9 – Dec. 31, 2025. The show includes recent work, as well as rarely seen early pieces on loan from private collections.
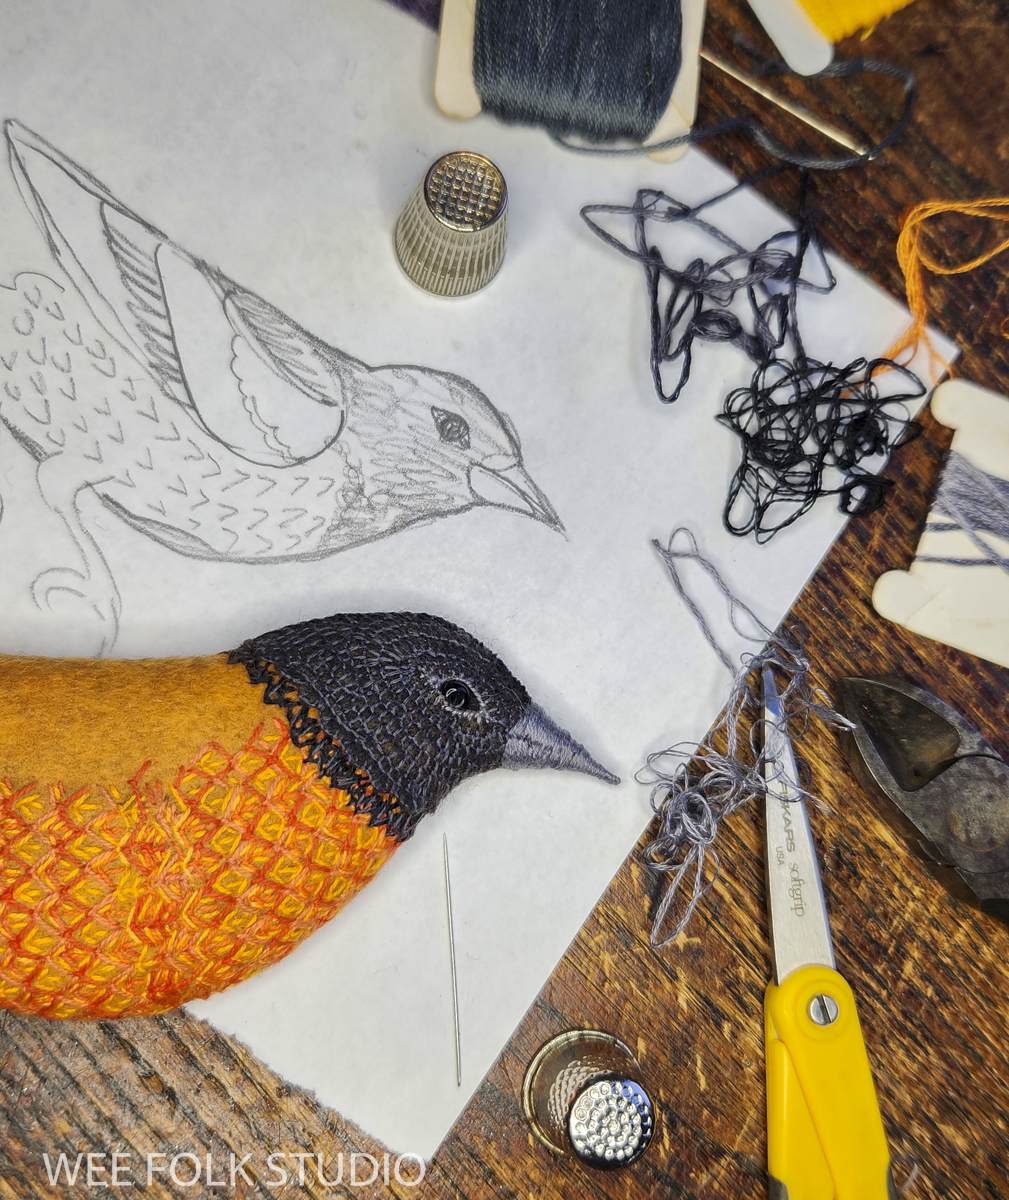
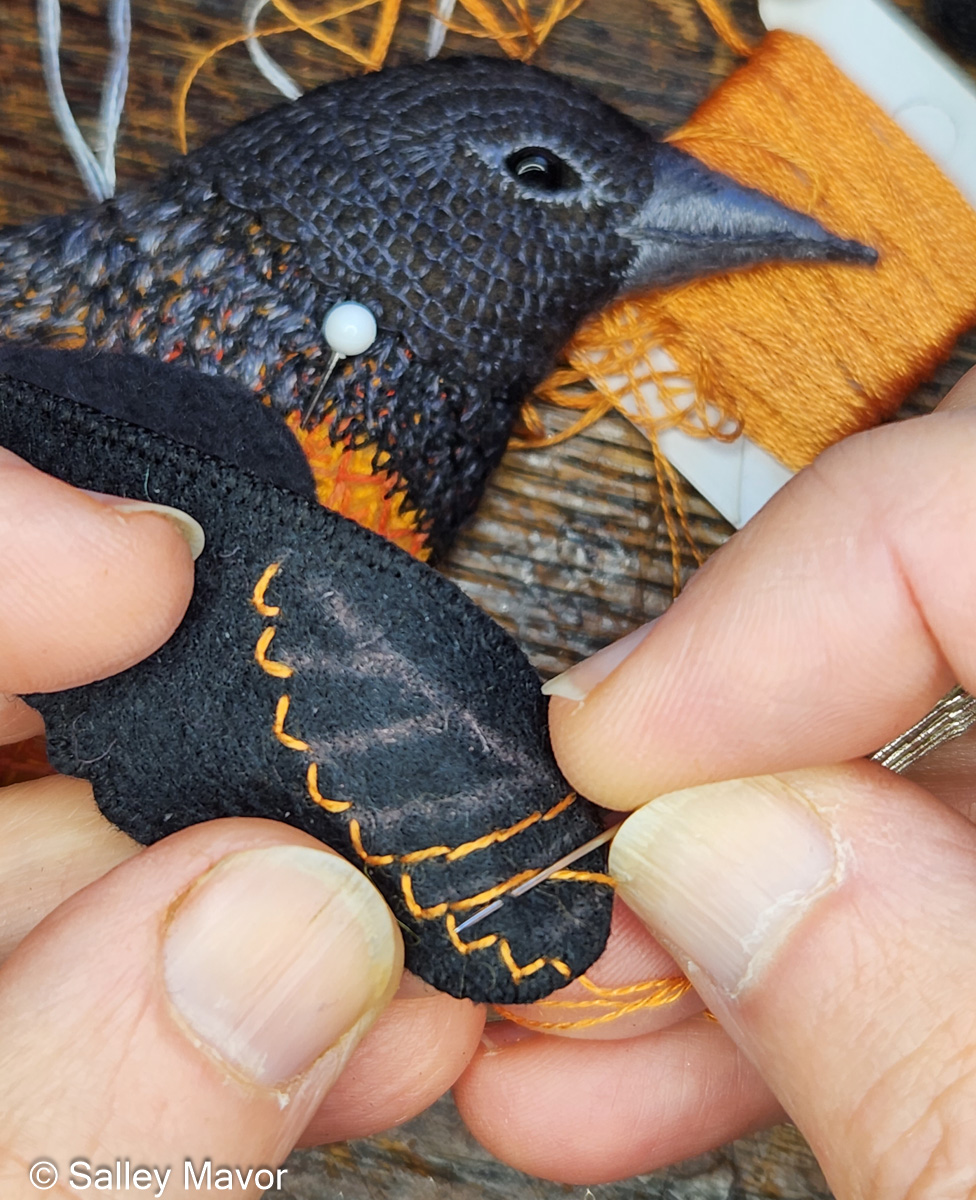
I wouldn’t call myself an avid bird watcher, but I do appreciate the subtle differences that make each species unique. For this piece, the trick was to capture the bird’s distinguishing features without being too scientific. To understand the nuances of an Oriole, I studied photos and made sketches, paying particular attention to the position, size and angle of its head, eyes and beak.
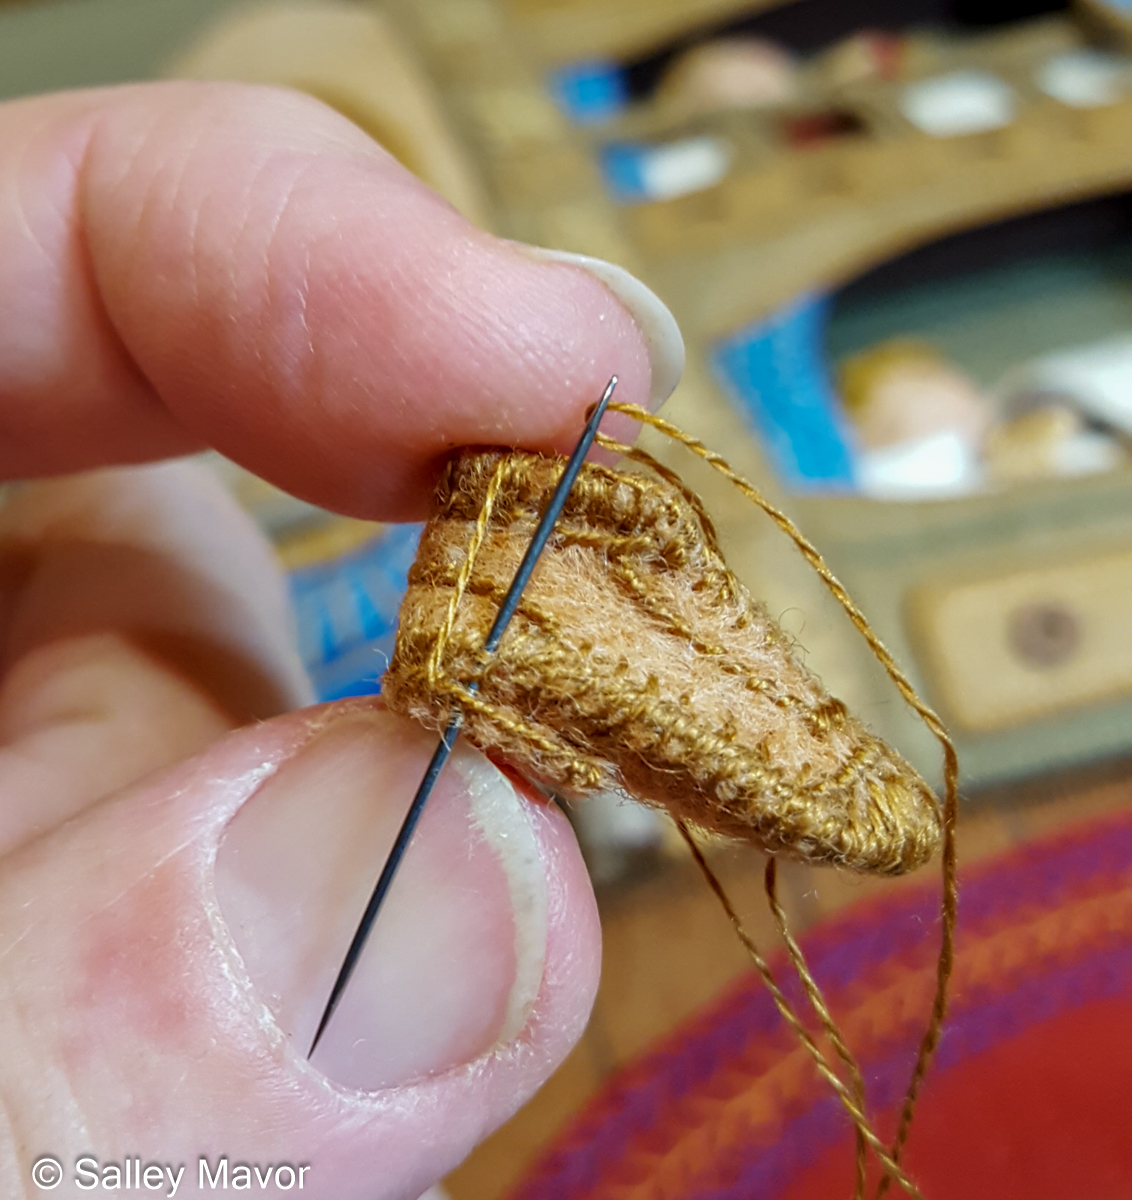
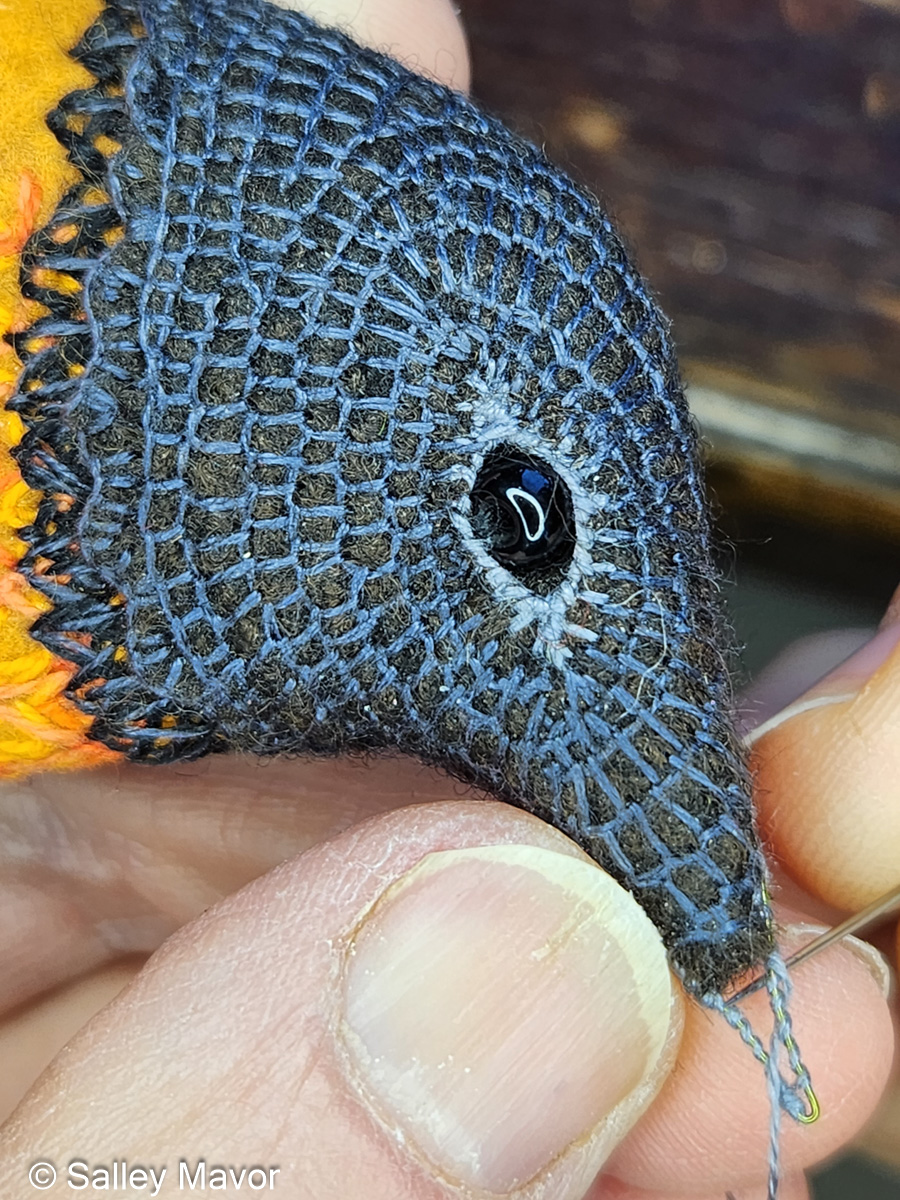
BEAK I must have been so focused on making the bird’s hood and eye (it’s a glass bead) that I forgot to take photos of that part. So, let’s skip ahead to the beak. To make it pointy, I formed a wire extension and wrapped it with embroidery floss.
I articulated the shape of the beak with floss, stitching over and around, until it had a smooth and seamless appearance.
Watch this video to see how I stitched the beak. It even shows what the back looks like!
After the beak was finished, I embroidered black feathers with fly stitches on the neck and throat area.
I sewed the wing and tail (see Part 4) in place and got to work on making the Oriole’s feet.
FEET I shaped the bird’s feet and legs with wire, twisting it around to form 4 toes – 1 short and 3 long. Then, I wrapped the wire with embroidery floss, winding the thread up and down until no shiny wire was exposed and the feet were the right thickness.
Watch this video to see how I constructed the legs and feet and attached them to the bird’s body.
Stay tuned for Part 6, where I’ll share photos and videos documenting the process of making the rose vine. If you want to receive email notices when I publish new posts, please subscribe to this blog using the form below.
To keep up with new posts, please subscribe to this blog. Your contact info will not be sold or shared. If you’d like to see more frequent photos tracking the projects in my studio, please follow me on Facebook, Instagram and BlueSky.
Part 4 in the series of posts about making my piece Summertime features photos and videos documenting the process of creating the Baltimore Oriole’s body, including its breast, wing and tail.
For a more comprehensive understanding of my process, I encourage you to explore other posts in this series: Overview of the piece, Part 1 – Tree Trunks, Part 2– Tree Houses, Part 3 – leaves, stems and branches, Part 4– Baltimore Oriole (body), Part 5– Baltimore Oriole (head and feet), Part 6 – rose vine, Part 7– raspberry plants, Part 8– stitching flora, Part 9– moss, sky and stone wall, and Part 10 – wee folk.
Summertime is the summer scene in a series of four seasonal landscapes that capture the wonder and magic of the natural world. Posters, note cards, prints, bookmarks, and jigsaw puzzles of Summertime and the other scenes in the series (Frosty Morning, Mossy Glen and Harvest Time) are available in my Etsy Shop.
See the Four Seasons Series and dozens of other works in my exhibition, To Every Season: Works by Salley Mavor at the New England Quilt Museum, Sept. 9 – Dec. 31, 2025.
Enchanting Threads: The Art of Salley Mavor at the Albany Institute of History and Art
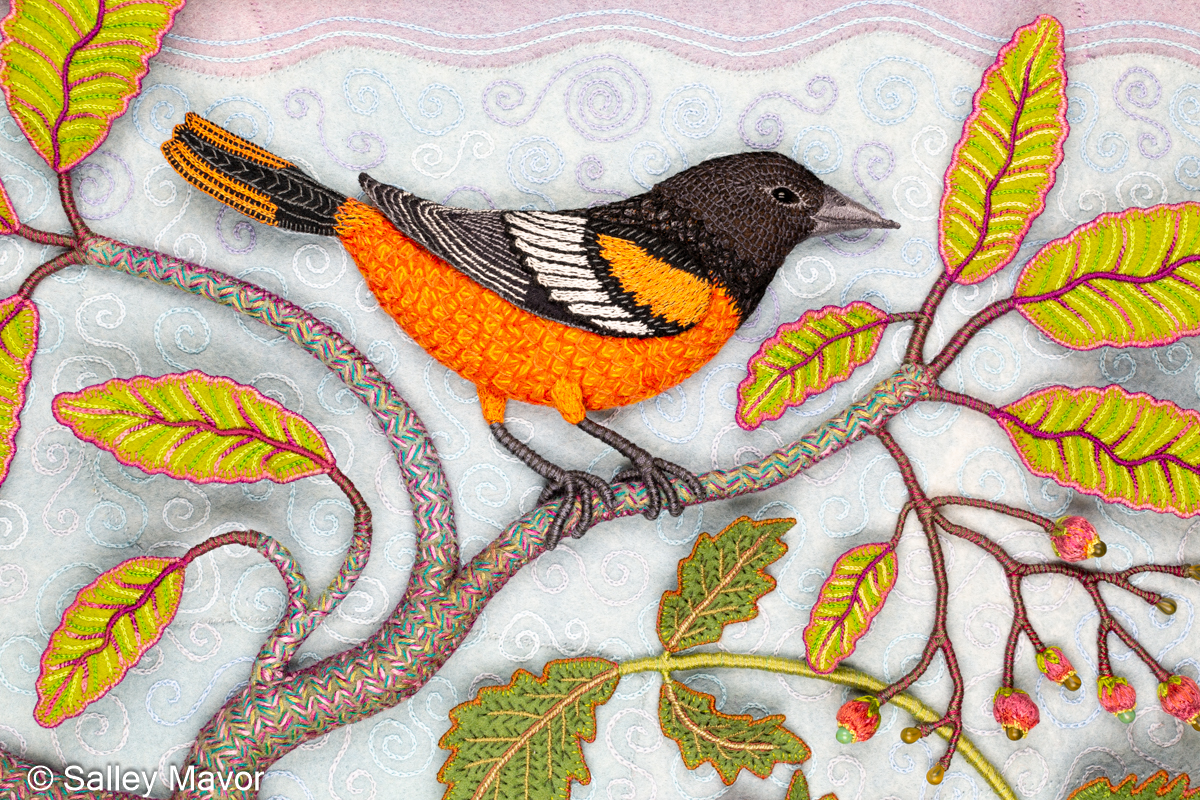
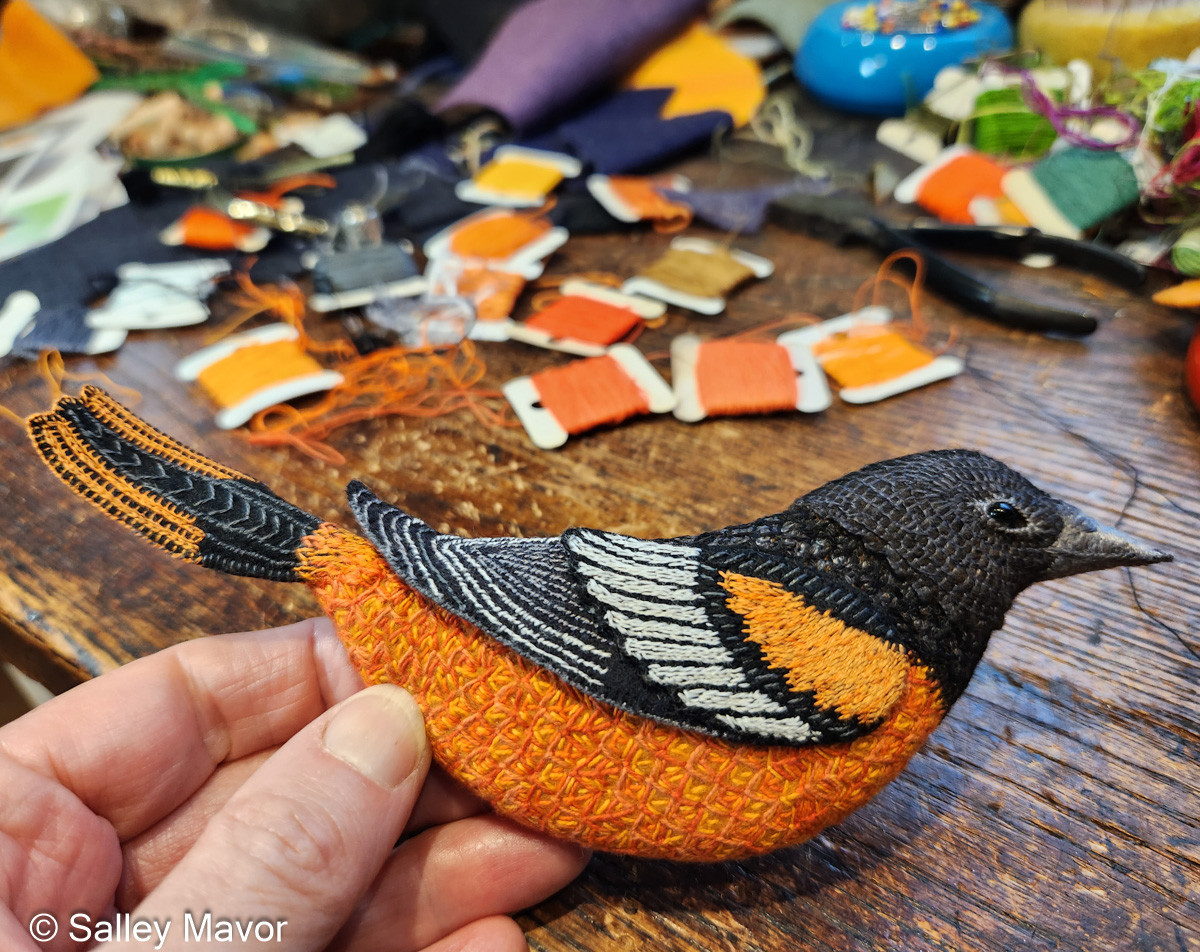
BALTIMORE ORIOLE I chose a male Baltimore Oriole for the summer scene mostly because of its flashy appearance. They also epitomize the season for me. Pairs of orioles are frequent visitors to our yard in early summer, when we lure them with orange halves and grape jelly. I hadn’t made a bird this size since Birds of Beebe Woods (2012), which you can get a glimpse of on the wall in the following video.
First, I looked at photos of orioles and made a simple drawing that showed its size and proper proportions. Then, I cut the basic shape out of acid-free matte board and padded it with thick felt (which is similar to how I made pins early in my career). Throughout the process of making the bird, I referred to photos, especially when selecting colors and stitches for the body, wing, and tail.
I wanted to make the bird realistic enough to be recognized as a species, but patterned and abstracted in a way that made it fun to stitch. It ended up being something between a stylized bird and a biological illustration.
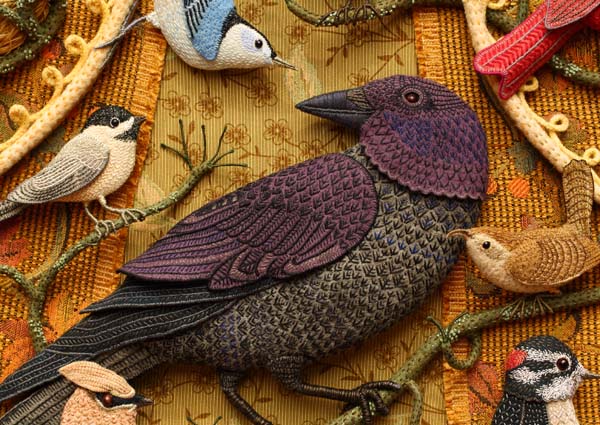
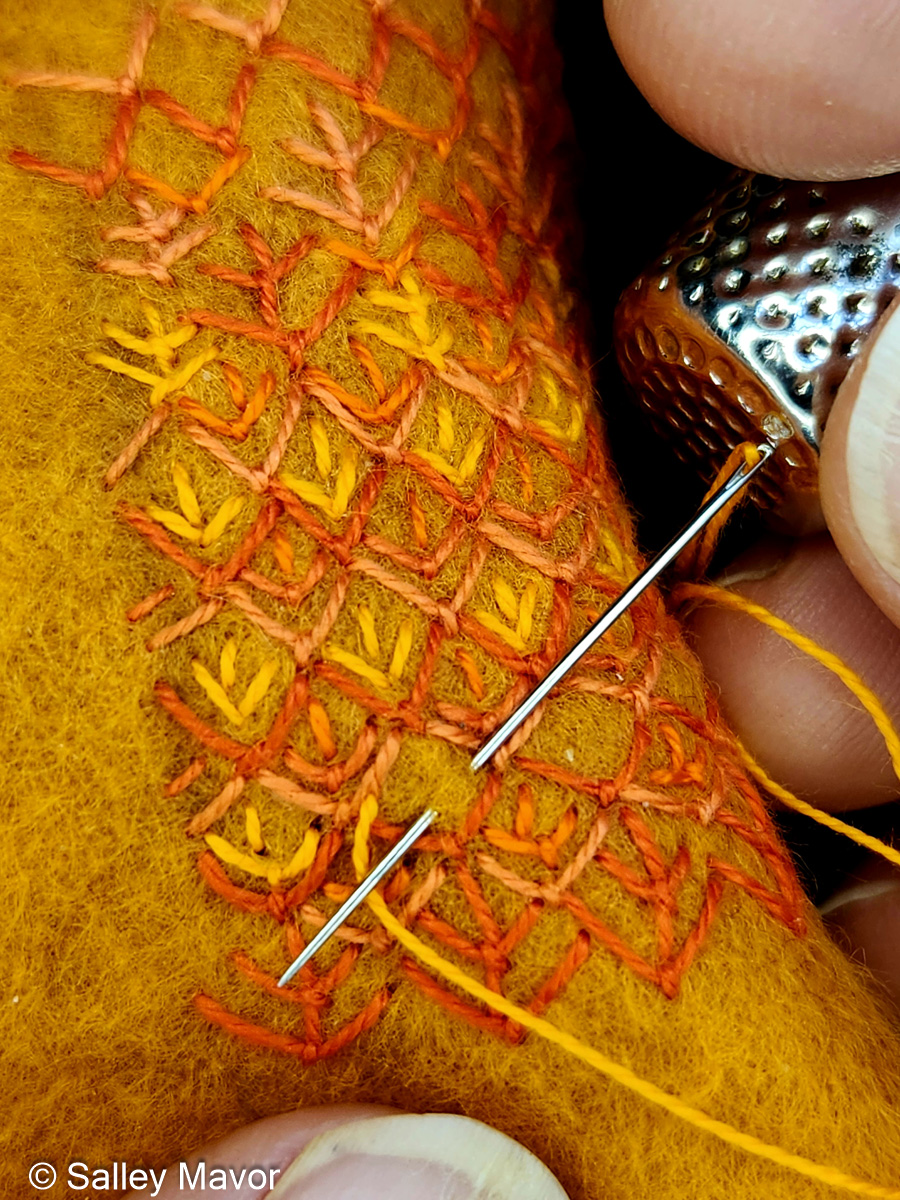
BREAST For the oriole’s distinctive orange breast, I embroidered different combinations of fly stitches that are reminiscent of Faire Isle patterns. It brought me back to a dozen years ago, when I stitched the crow’s breast in Birds of Beebe Woods.
detail from “Birds of Beebe Woods”
I used cotton flower thread, which has a matte finish that’s different from the glossy sheen of cotton embroidery floss. DMC flower thread is no longer available, so if you’re interested, Dutch Treat Designs has some of the discontinued thread in stock.
Watch a Stitch Minute video of embroidering the oriole’s breast with fly stitches.
WING I usually work freehand without marks, because it’s hard to draw on fuzzy wool felt. In this case, I was able to make chalk pencil lines on the black felt wing.
Watch a Stitch Minute video of embroidering the bird’s wing.
TAIL So much of a bird’s personality comes through in the angle and pose of its tail. Doing the stitching was the easy part. Positioning the tail and attaching it to the body took more patience and perseverance.
Watch a Stitch Minute video of embroidering and attaching the bird’s tail.
Stay tuned for Part 5, where I’ll share photos and videos documenting the process of making the Baltimore Oriole’s head and feet. If you want to receive email notices when I publish new posts, please subscribe to this blog using the form below.
To keep up with new posts, please subscribe to this blog. Your contact info will not be sold or shared. If you’d like to see more frequent photos tracking the projects in my studio, please follow me on Facebook, Instagram and BlueSky.
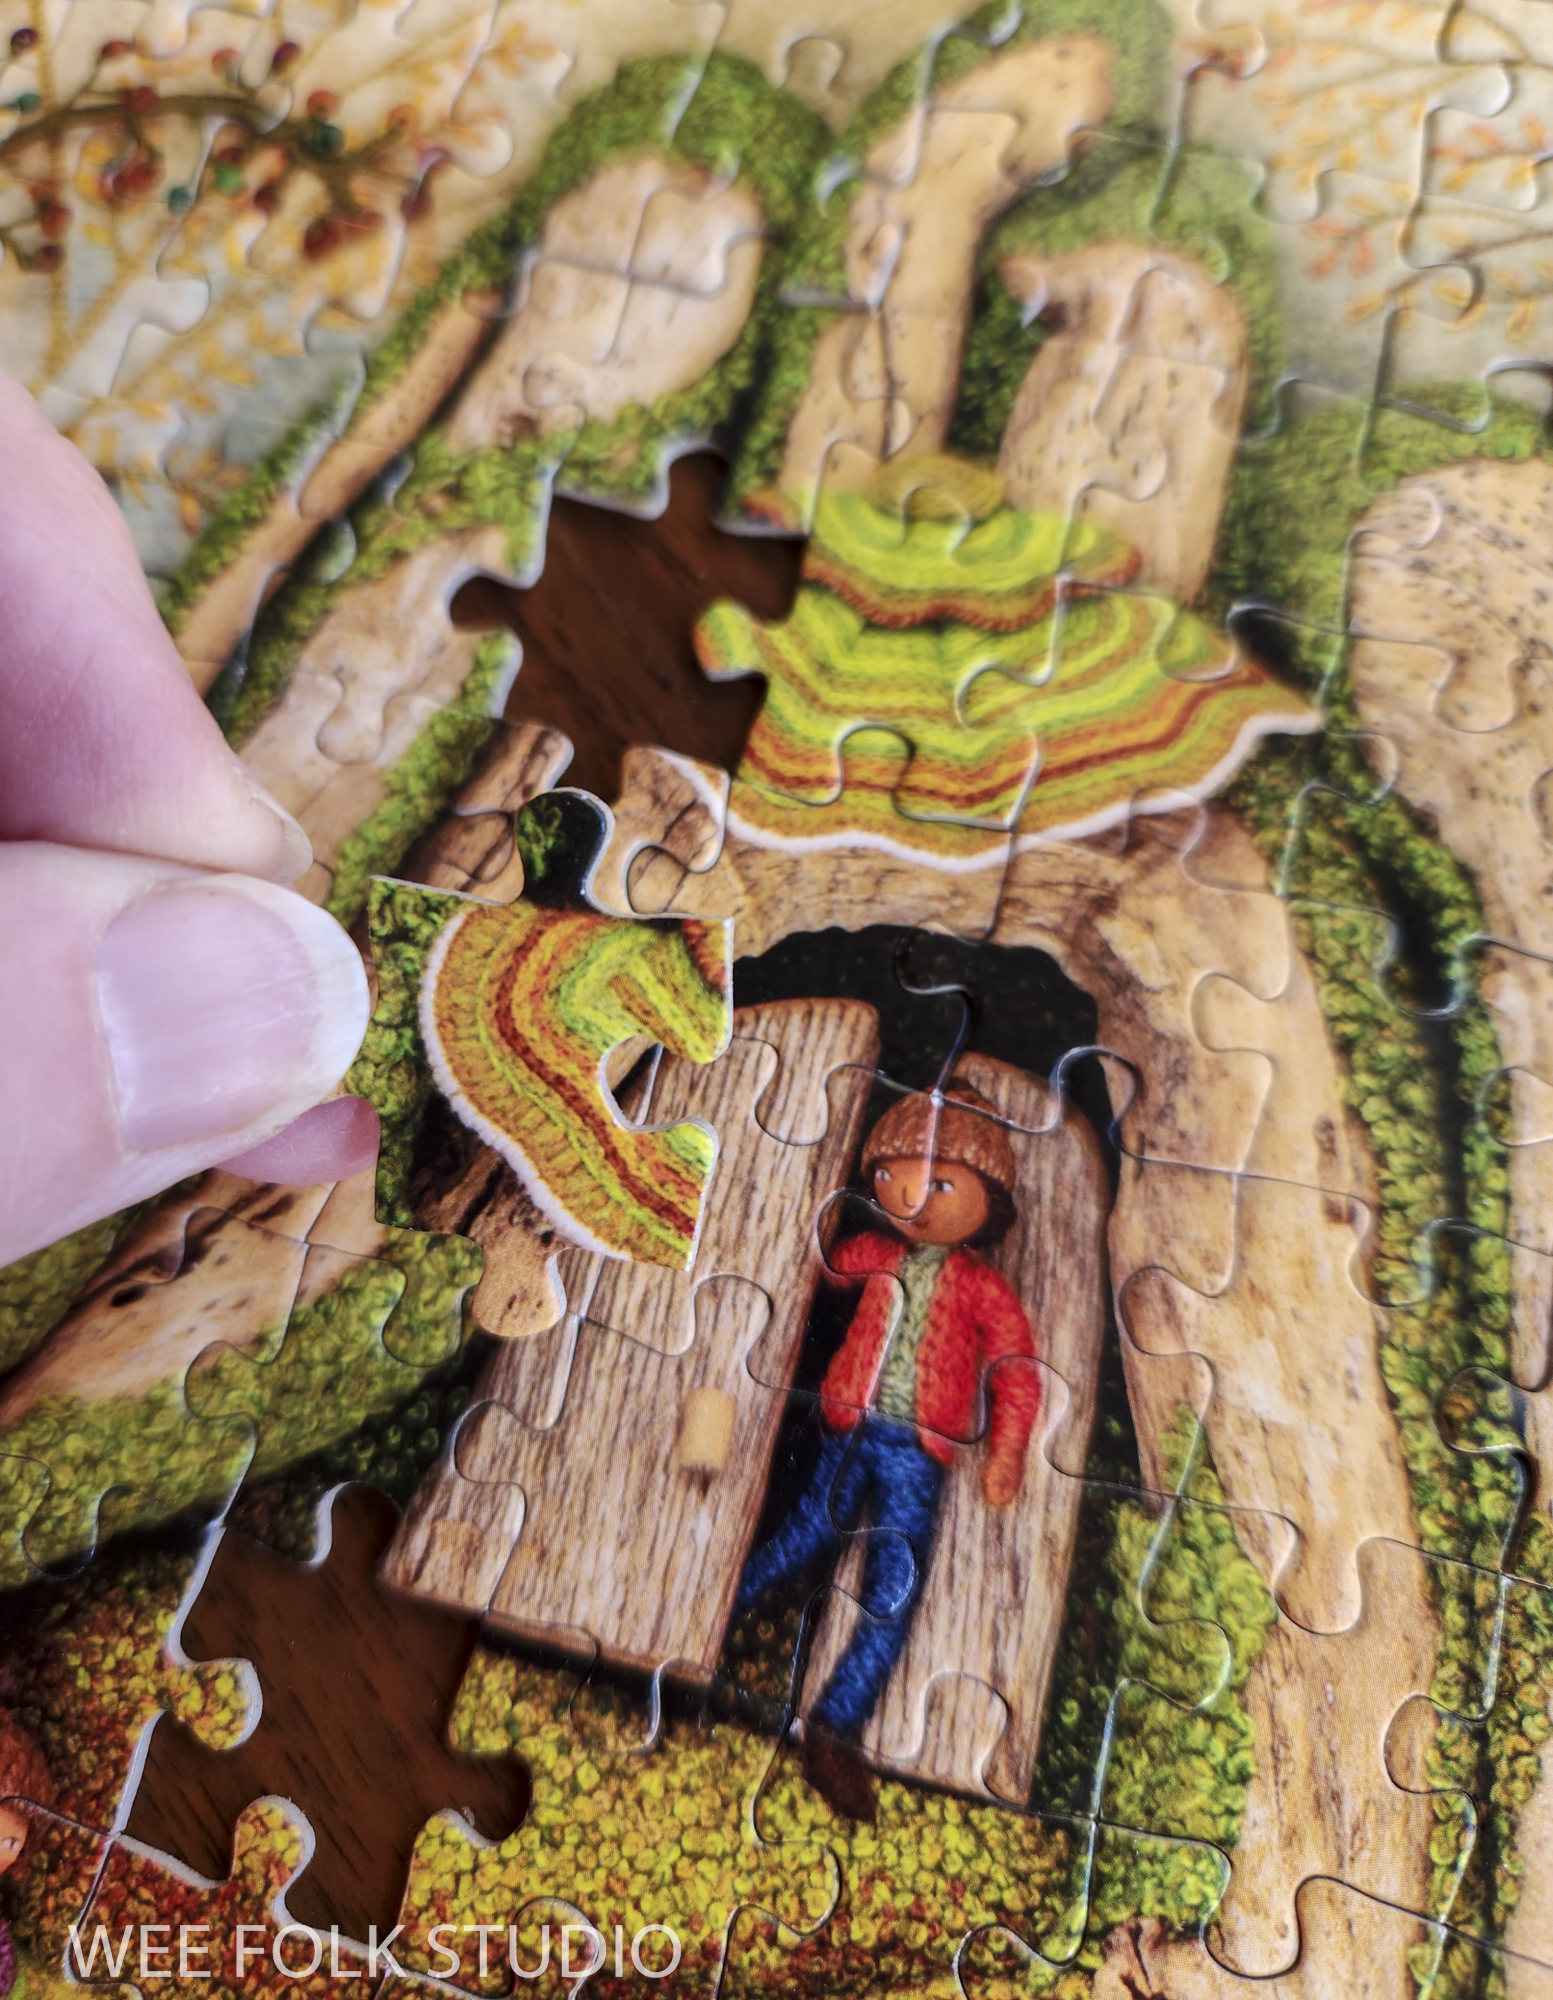
In Part 2 in the series about making Harvest Time, I share photos, commentary and a stitch-minute video about creating the turkey tail mushroom overhanging the doorway in the stump. In the coming weeks and months, I will post more stories that focus on different aspects of the process of making the fall scene, including the toad stool mushroom, wee folk figures, tunnels, roots, stones and foliage of all kinds. The overview introduces the Harvest Time piece. Part 1 features moss making. Part 2 is about making the turkey tail mushroom. Part 3 shows the construction of felt leaves. Part 4 gives a peek at embroidering the plants. Part 5 is about making the toadstool mushroom Part 6 shows the process of making the underground
Harvest Time is the fall scene in a series of seasonal landscapes that capture the wonder and magic of the natural world, both real and imagined. Harvest Time and the other scenes I’ve completed and written about, Summertime, Frosty Morning and Mossy Glen, are available as note cards and jigsaw puzzles in my shop here.
Harvest Time Puzzles are available in my Etsy shop.
Turkey tail mushrooms or shelf fungi are found all over the world. They usually grow on dead hardwood stumps and downed hardwood trunks or branches.
Turkey Tail Mushrooms
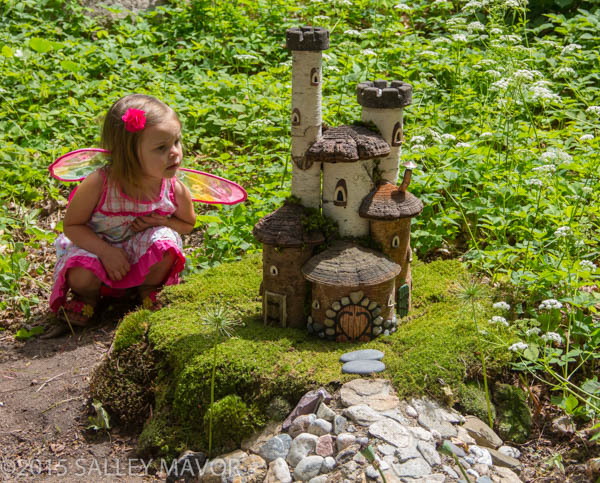
I love how Glen Carliss used shelf fungi for the roofs in “Glendell Towers”, which he made for The Fairy Houses of Highfield Hall, an outdoor exhibition that I curated in 2015. Glen told me that he’d been eyeing the mushrooms growing on trees along his road for years, imaging what to do with them.
Glendell Towers by Glen Carliss
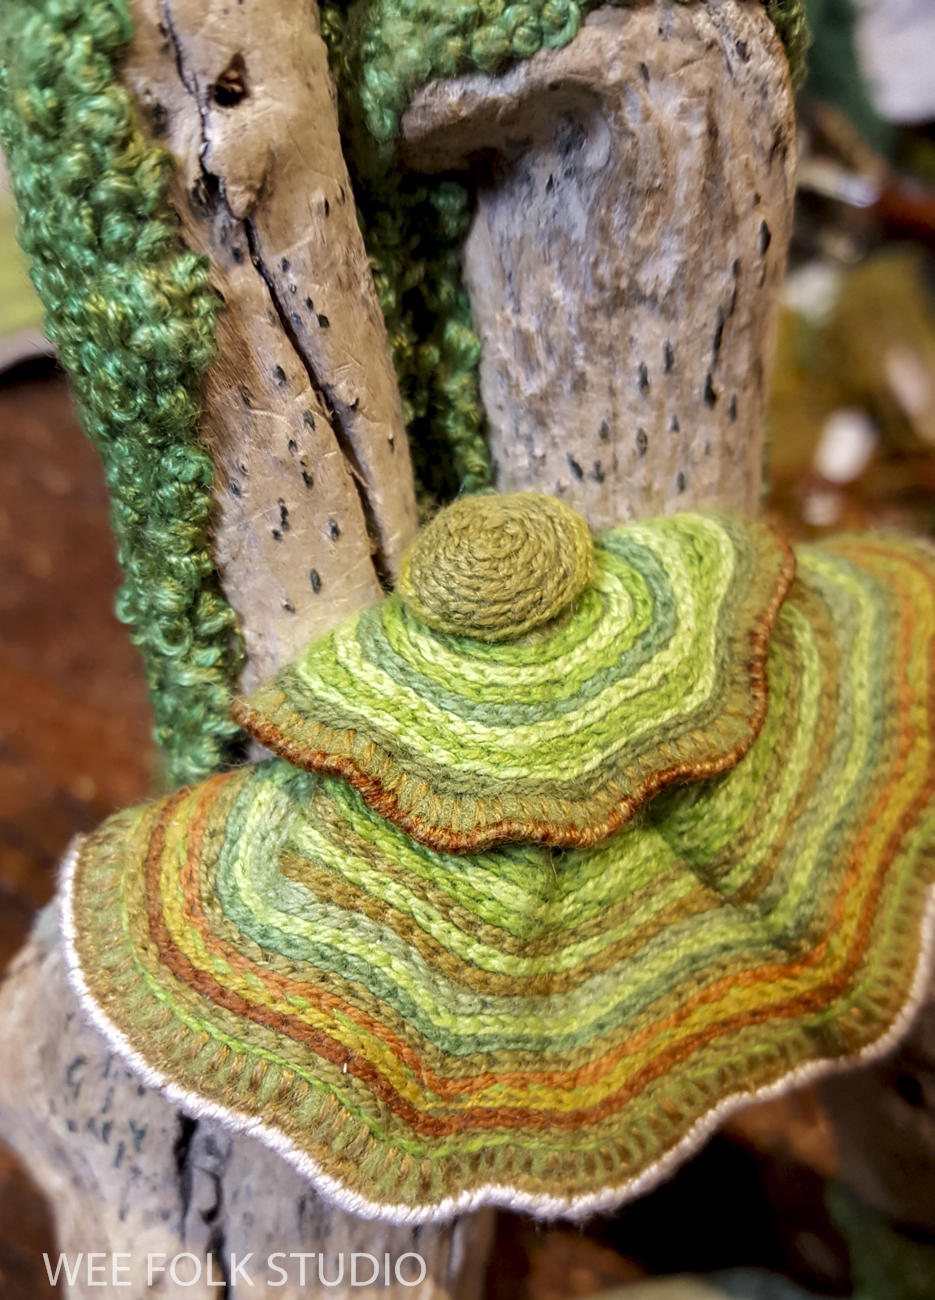
I didn’t use actual mushrooms in Harvest Time, but I was inspired by their fanciful appearance. My photo search came up with multiple color combinations, from earthy hues to shades as garish as 1960’s fashion. I chose a more subdued mixture of fall colors for the mushroom roof.
To make the striped concentric pattern, I chain stitched rows and rows of different shades of green and orange DMC cotton flower thread to a piece of felt. It took two tries to get the shape and colors the way I wanted it.
In this Stitch Minute video, I demonstrate chain stitching the stripes and adding wire.
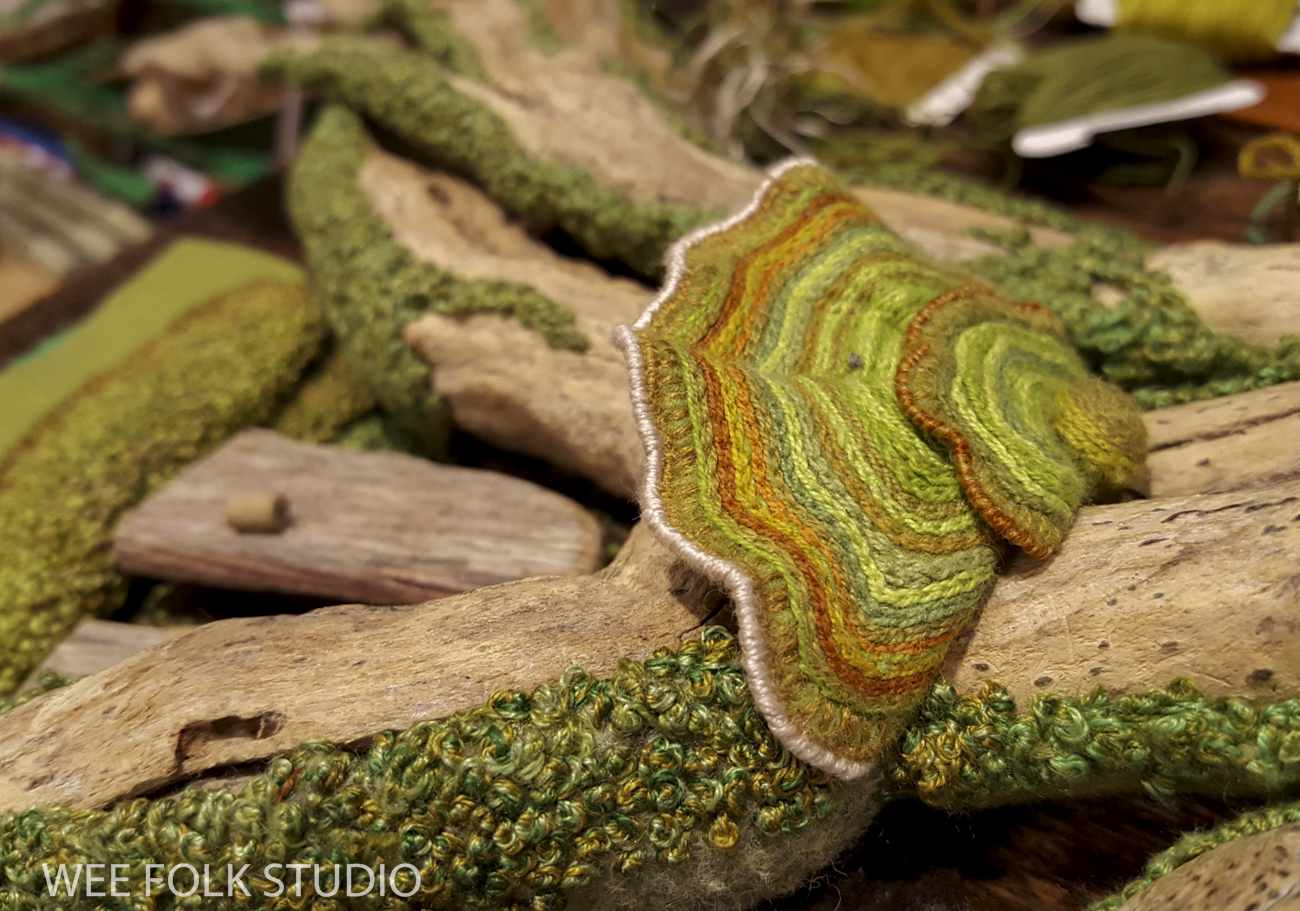
After we filmed it, I wasn’t happy with the overall shape and color combo, so I started over and made a new one that was more curvy and included orange and yellow.
I stitched wire around the outside edge and covered it with white embroidery floss.
Then I made a smaller mushroom and a really little one that looked like a pompom on top of a hat. It’s been a year since I started working on this piece, so my memory is a bit foggy. I can only guess at how I formed the layers into a roof shape and attached it to the driftwood. I do remember that the mushroom wasn’t very cooperative and I had to torture it into shape. Most likely, I glued felt to the wood and then sewed the mushroom to the felt.
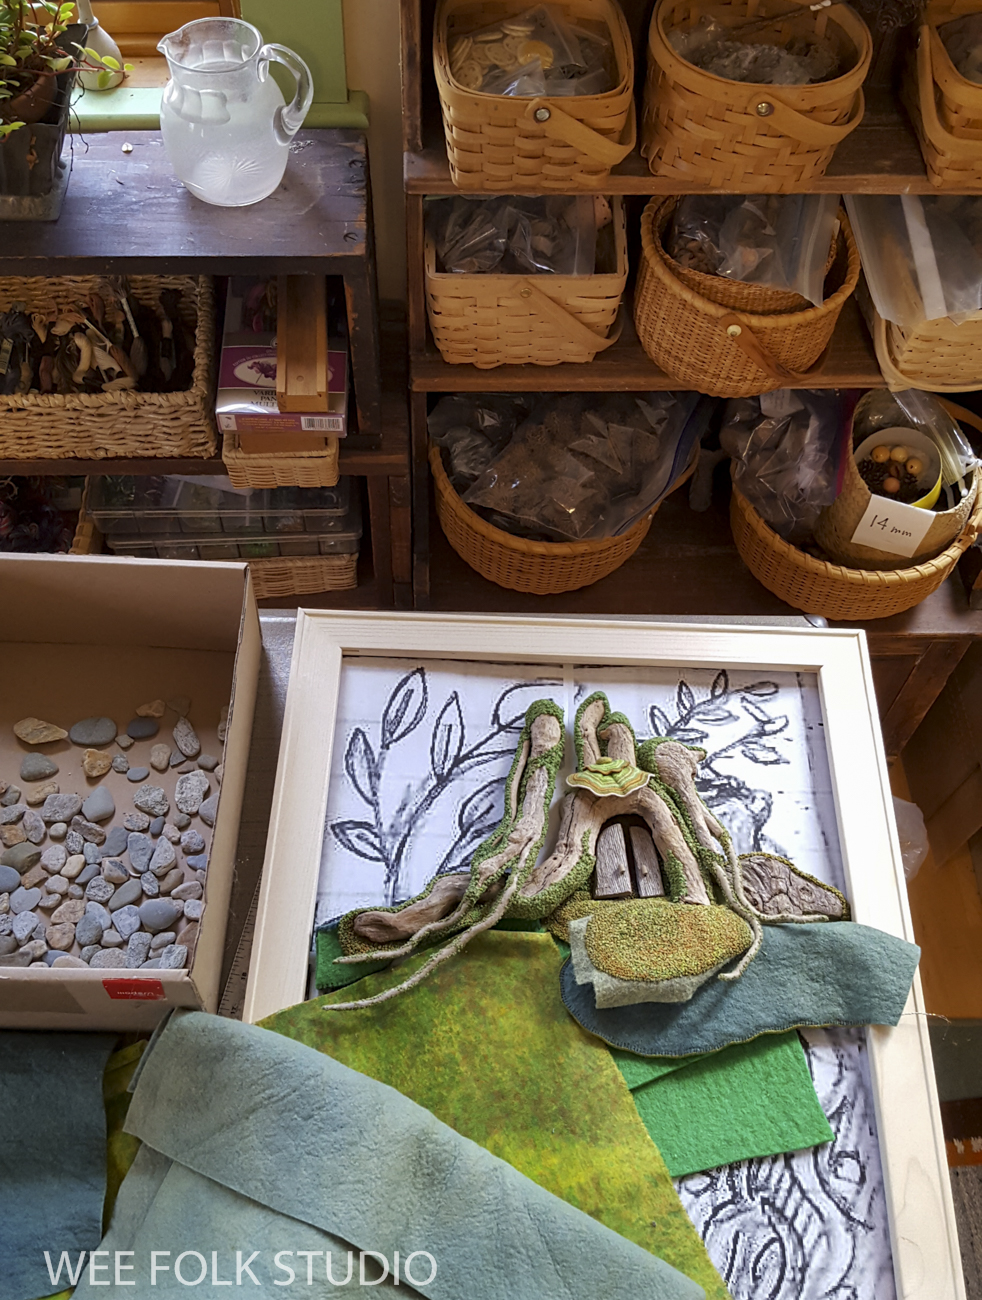
During the process, I constantly measured the depth of the trunk to make sure that it would fit behind the glass when the finished piece was framed. After the mushroom roof was added, there was just enough clearance!
My use of found objects is mostly limited to individual items that are sewn in place and incorporated into embroidered scenes. This trunk was different because it was made up of several driftwood parts that created a fairly large mass that stuck out from the background. Its depth and breadth would determine how I created everything else in the landscape.
Now that the trunk was finished, I could start building the other parts of the scene, including the ground at its base.
Part 3 will show the process of making the felt and stitched foliage growing on the ground at the foot of the tree trunk.
To keep up with new posts, please subscribe to this blog. Your contact info will not be sold or shared. If you’d like to see more frequent photos tracking the projects in my studio, please follow me on Facebook, Instagram and BlueSky.
As promised, I’m picking up where we left off last year and continuing the series about Summertime, the fourth of my seasonal landscapes. Part 3 features photos and videos documenting the process of creating the leaves, stems, and branches.
For a more comprehensive understanding of my process, I encourage you to explore other posts in this series: Overview of the piece, Part 1 – Tree Trunks, Part 2– Tree Houses, Part 3 – leaves, stems and branches, Part 4– Baltimore Oriole (body), Part 5– Baltimore Oriole (head and feet), Part 6 – rose vine, Part 7– raspberry plants, Part 8– stitching flora, Part 9– moss, sky and stone wall, and Part 10 – wee folk.
Summertime is the summer scene in a series of four seasonal landscapes that capture the wonder and magic of the natural world. Posters, note cards, prints, bookmarks, and jigsaw puzzles of Summertime and the other scenes in the series (Frosty Morning, Mossy Glen and Harvest Time) are available in my Etsy Shop.
See the Four Seasons Series and dozens of other works in my exhibition, To Every Season: Works by Salley Mavor at the New England Quilt Museum, Sept. 9 – Dec. 31, 2025.
Enchanting Threads: The Art of Salley Mavor at the Albany Institute of History and Art
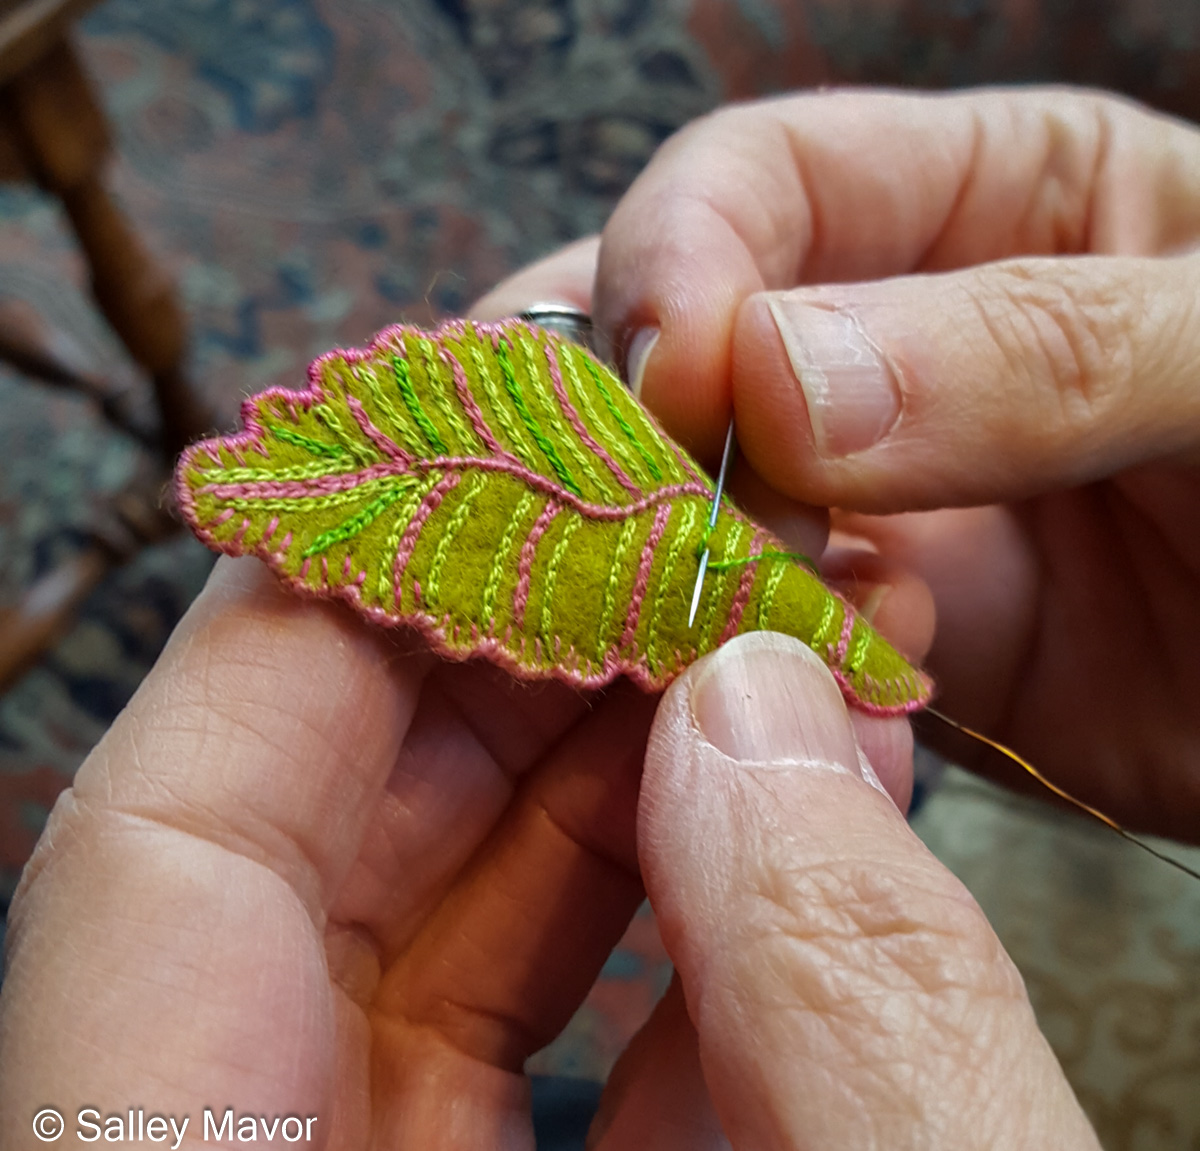
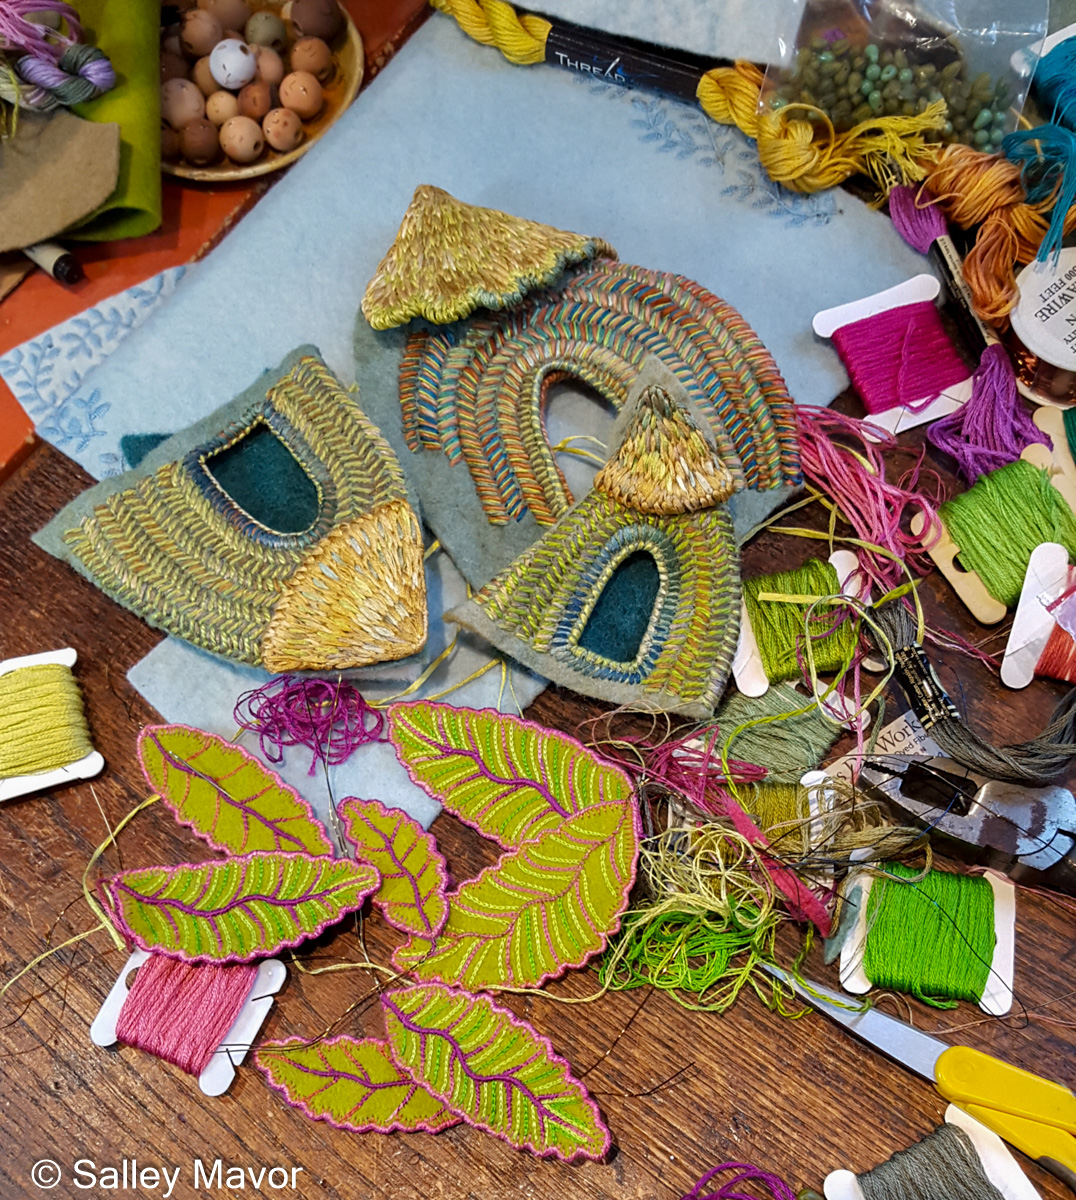
LEAVES Some of the foliage in this piece are realistic interpretations, like the leaves on the rose vine and raspberry plants (which will be covered in future posts), but others are pure fantasy. I wanted the scene to look believable, without being completely true to life. It’s not biological illustration; I was more interested in creating a unique ecosystem where little people could live alongside birds and berries.
I made the leaves with 3 basic materials – wool felt, wire, and embroidery floss. The following Stitch Minute video demonstrates how to make a simple leaf, edged in wire.
Stitch Minute – leaf
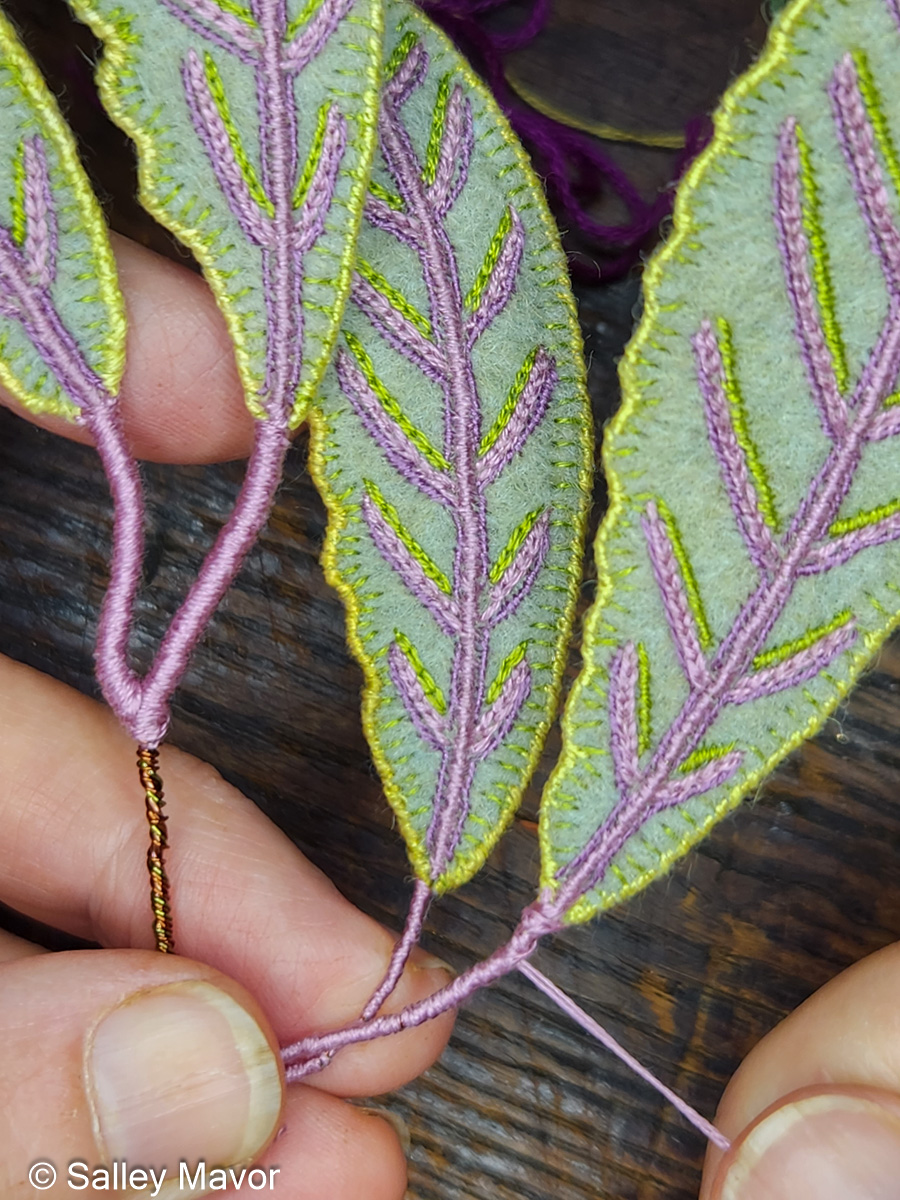
STEMS Wire is literally the backbone of my work. I use it as a structural framework to keep floppy materials (like felt) firm enough to exist in space, above the background fabric. In this piece, I used copper wire made by Parawire to edge the leaves and form their stems.
The trick is to cover all of the shiny metal with floss. It takes many passes around the wire to make a smooth surface.
This video shows how I wrapped the wire stems on the central tree in the Summertime scene.
For me, making curvy stems and bending them around is like doodling with wire. I’m never sure how a vine is going to grow and climb. This purple bush was calling out for something extra, so I made a curly vine to wrap around its trunk.
In this Stitch Minute video, you can see how I wrapped the curly vine, including its little corkscrew tendril.
BRANCHES After years of developing ways of making tree branches, my preferred method these days is forming wire armatures and covering them with felt or embroidery floss. I usually embroider a textured “bark” pattern onto the felt before sewing it around the wire. Thicker tree trunks involve a different process, which I wrote about in Part 1.
In the following video, you can see how I stitched felt to cover the section that branches off into 3 separate wire limbs.
Stay tuned for Part 4 in this series, which will be about the Baltimore Oriole. If you want to receive email notices when I publish new posts, please subscribe to this blog using the form below.
To keep up with new posts, please subscribe to this blog. Your contact info will not be sold or shared. If you’d like to see more frequent photos tracking the projects in my studio, please follow me on Facebook, Instagram and BlueSky.
Happy New Year! As I reflect on the past year and enter a new one, I feel grateful for the opportunity to share my life’s work with the world, both in person and virtually. Sometimes I wake up and think how lucky I am to spend every day making art! If you’ve followed me for years, thank you for coming along for the ride. And for those of you who’ve just discovered my doll-infested needle and thread universe, welcome!
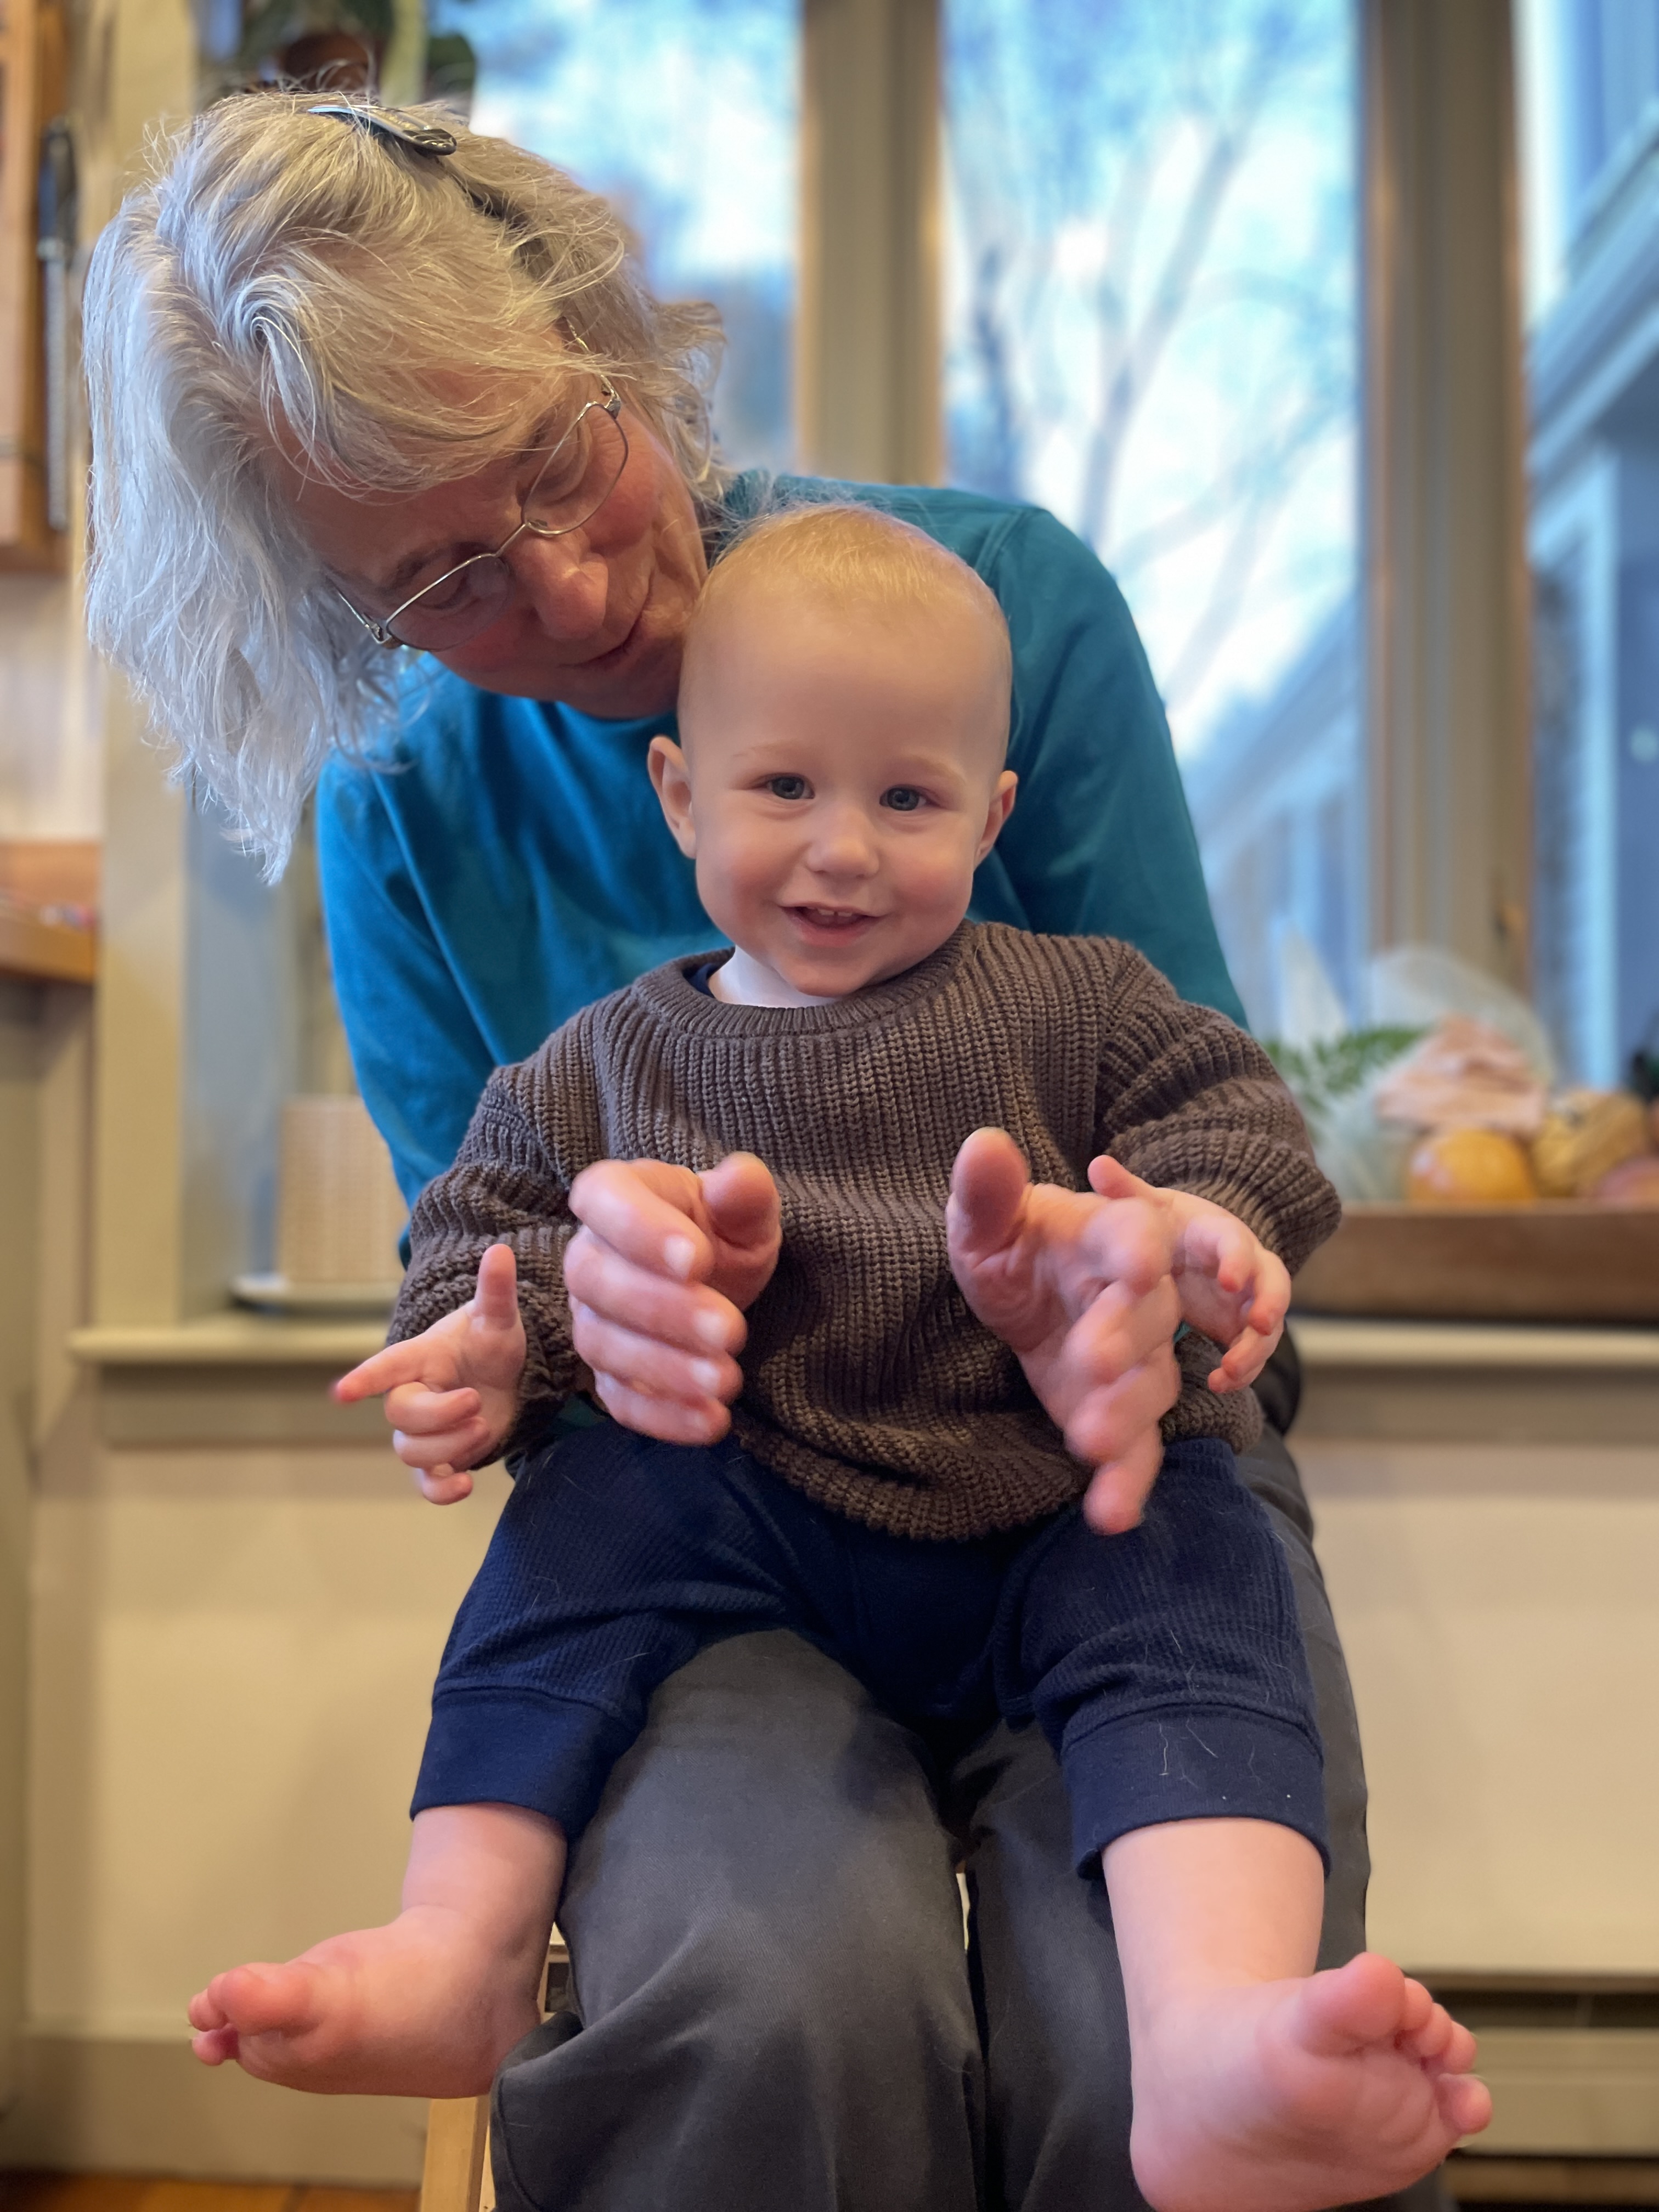
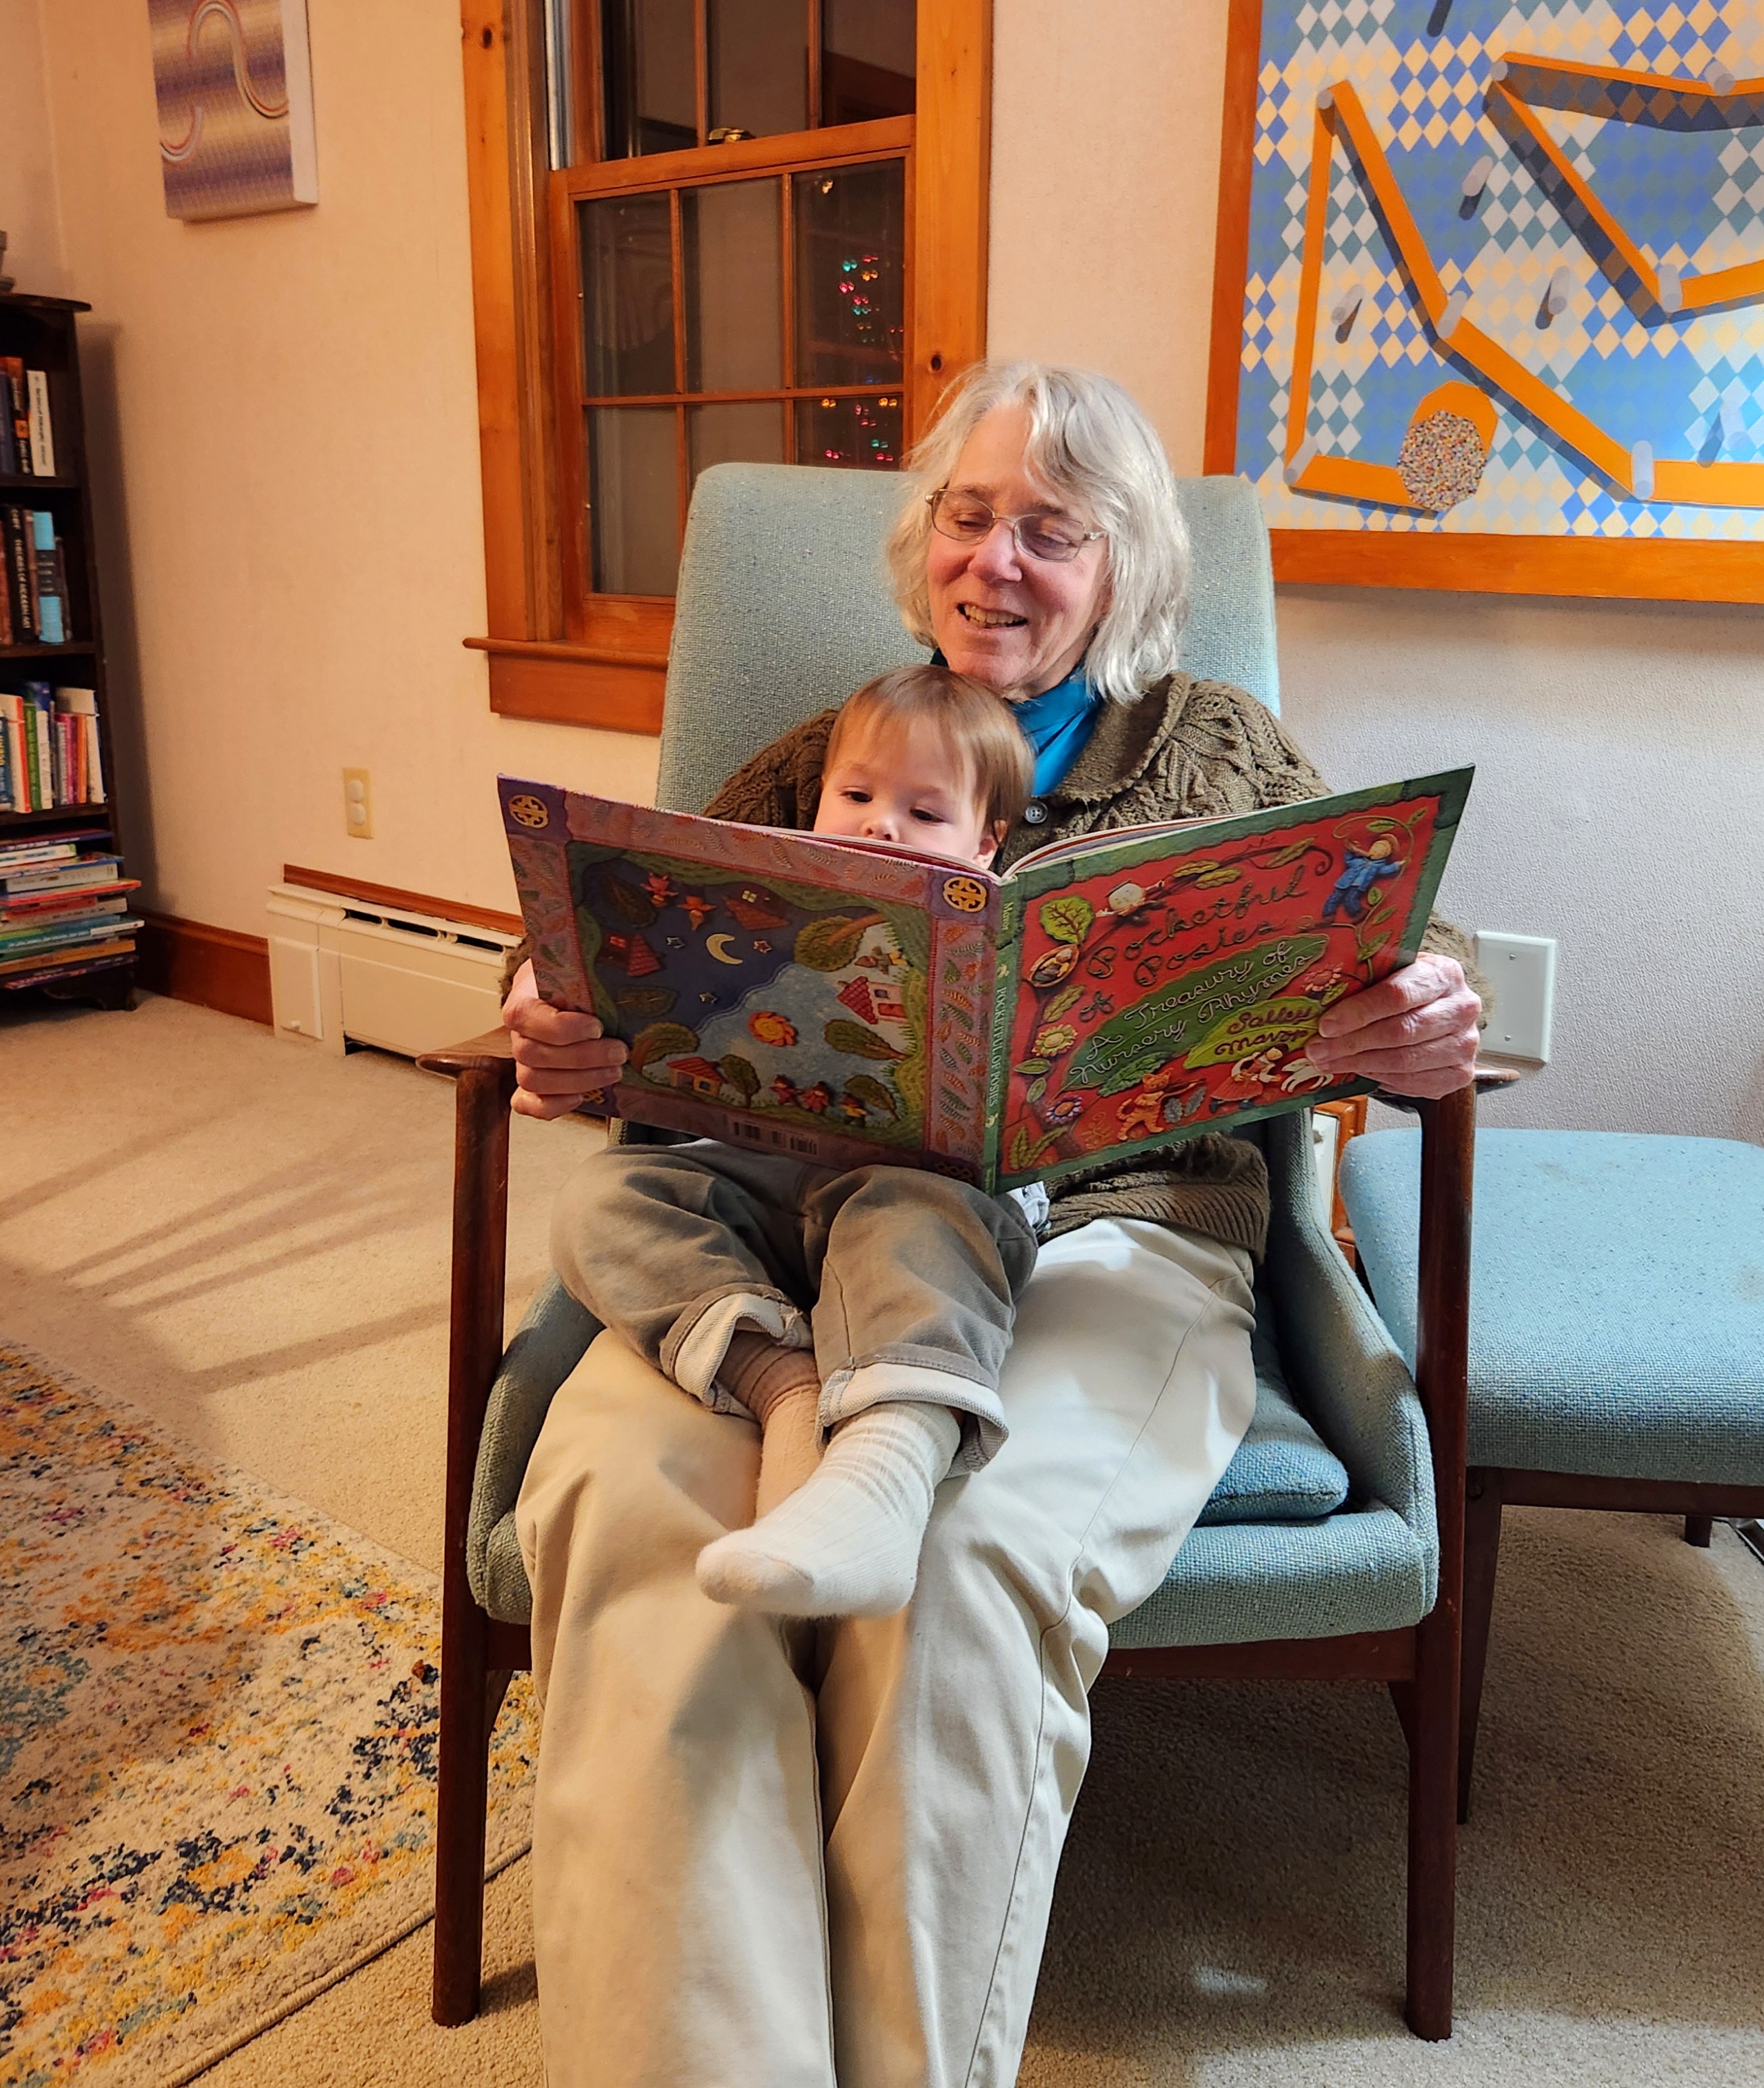
For the past couple of years, I’ve felt a shift in my work habits. Instead stitching every spare minute, I’m happy to spend some part of my day playing with my grandchildren and puttering in the garden. Even though I’ll be turning 70 this year, retirement is out of the question! However, I like the idea of less pressure to make “important” artwork. With that in mind, I spent most of the past year making projects that are meaningful to me, no matter how small and seemingly insignificant. I caught up on gifts that were years overdue, sewing dolls and baby banners for friends and my grandchildren. It felt exhilarating to come up with designs that could be completed in a week or two, instead of months and months! Please come along as I review the past 12 months and share posts published in 2024.
So, what does 2025 have in store? I’ll soon be in winter hibernation mode, exploring alternative ways of working that require less time, which may be a futile exercise. I hope to make some new installations for this fall’s exhibition at the New England Quilt Museum (Sept. 9 – Dec. 27, 2025).
Eddie and meElias and me
ENCHANTING THREADS: The Art of Salley Mavor opened in July at the Albany Institute of History and Art. The show, which is extended to March 2, 2025, is one of the most artful and tasteful presentations of my life’s work that I’ve seen. I’m astounded by the number of people who’ve traveled far to see the show! They’re coming by plane, train and car and could probably get there by boat as well, since Albany is on the Hudson River. Post links: Enchanting Threads opens! Video tour of Enchanting Threads exhibition
Enchanting Stitches, Albany Institute of History and Art
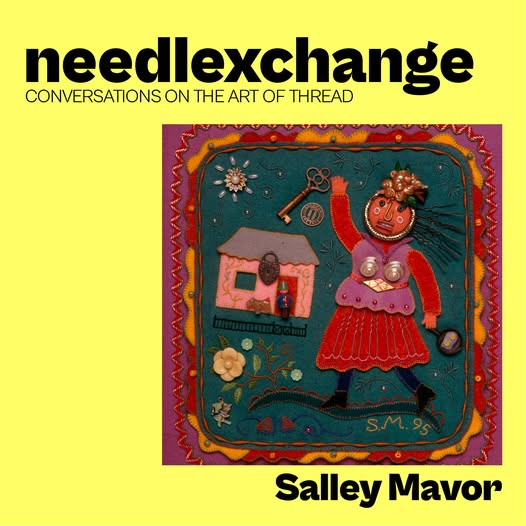
PODCASTS Throughout the year, I gave several slide presentations about my work, both in person and via Zoom. Podcasts are a different and effective way to reach an audience and I was delighted to be interviewed by two hosts from the UK. NeedleXChange Salley Mavor – Telling Wee Folk Tales PART 1 and PART 2. I really enjoyed chatting with Mr X Stitch (Jamie Chalmers), who hosts a series of interviews with needlework and textile artists. He has a talent for disarming his guests and guiding the conversation in sometimes surprising philosophical directions.
Textile Talk with Salley Mavor – I had the pleasure of chatting with Gail Cowley from the School of Stitched Textiles. We delved into where my art comes from, how it’s evolved and why I do it. You are invited to listen to the podcast on the YouTube link below.
SALLEY MAVOR:BEDTIME STITCHES The touring exhibition of original illustrations for MY BED keeps chugging along.
BABY GIFTS With the arrival of Eddie, our 2nd grandchild this year, all I wanted to do was make things for babies I know. I shared several projects in that vein, including a baby banner, dolls and ornaments.
RABBITAT Last spring, I revisited Rabbitat (2012), with tons of process photos and recollections about making the piece. Post link: Rabbitat revisited
HORNBOOK MAGAZINE As part of their centennial celebration, the Hornbook Magazine held a “very-subjective, not-serious” contest to pick favorite covers from previous issues. While scrolling through Instagram, I discovered than my 2012 cover illustration won the Jan/Feb category! It seemed like a good time to republish a post about how I made it. Post link: Cover Madness at the Hornbook
To keep up with new posts, please subscribe to this blog. Your contact info will not be sold or shared. If you’d like to see more frequent photos tracking the projects in my studio, please follow me on Facebook, Instagram and BlueSky.
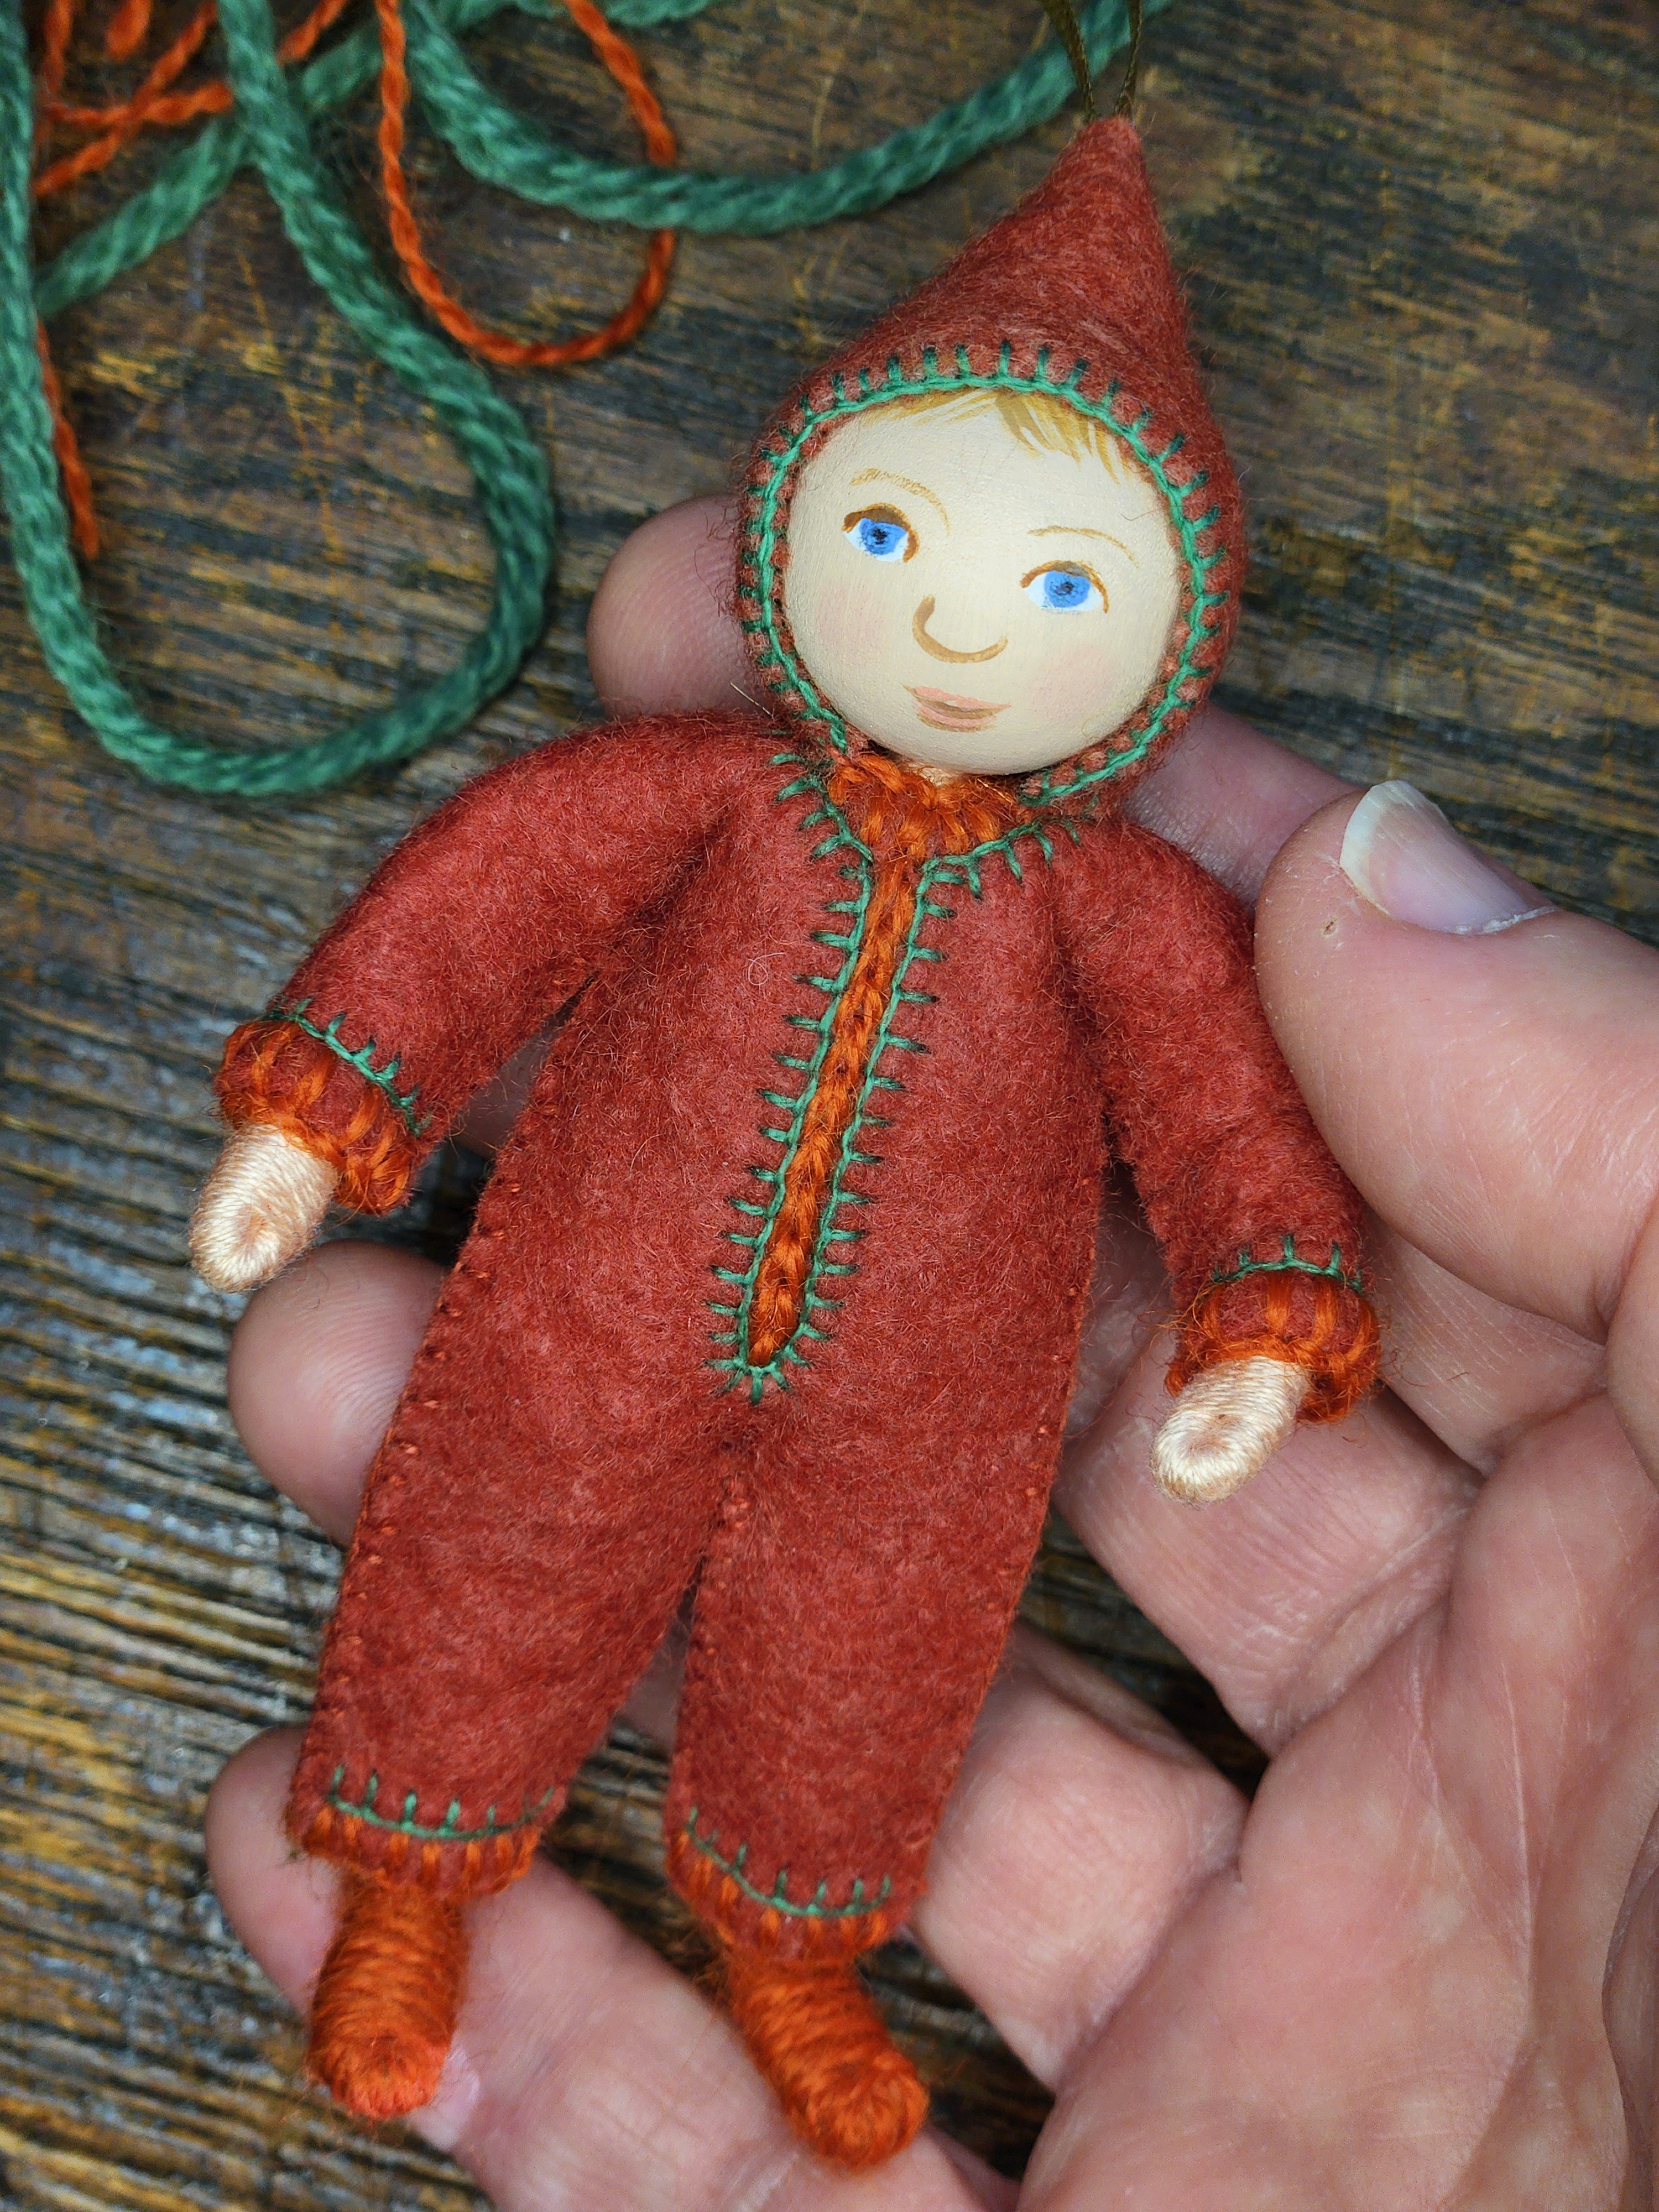
Last year, I started a family tradition of making personalized wee folk ornaments to give as gifts. The miniature Baby Polar Bear Suit ornament of my grandson Elias was so much fun to make that I couldn’t wait to come up with this year’s depiction. And with the birth of his cousin Eddie in February, I got to make two little versions of my grandkids! The dolls were constructed the same way as the 4″ figures in my how-to book, Felt Wee Folk.
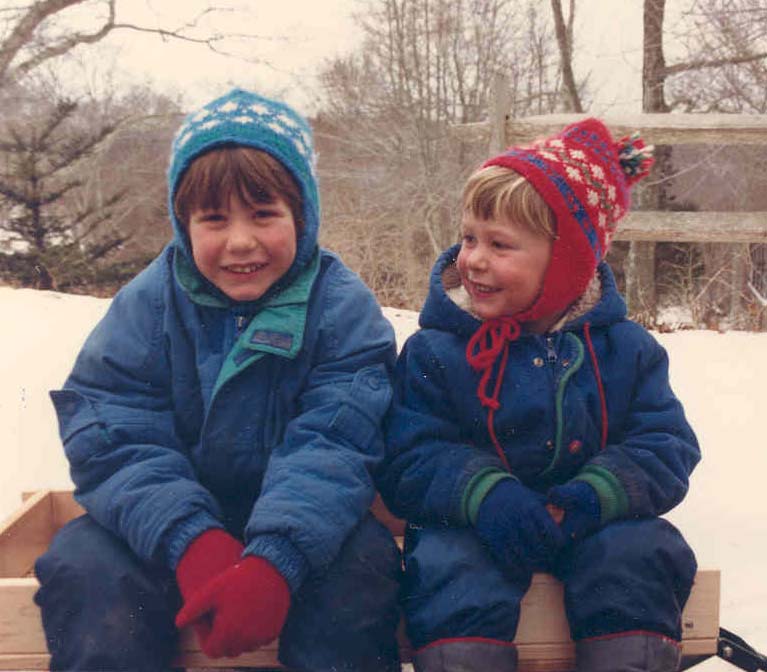
My mother set a wonderful example, by always making things to give to her friends and family. In her lifetime, she produced hundreds of hats, sweaters and blankets, offering them like warm hugs. She was most prolific with hats, which had side flaps and and a pompom on top. She started making them in the 50s, when we were kids. The hats weren’t just for children, but for her adult friends, too. She’d find out the colors they liked and measure their heads, frequently testing the hat sizes half way through the knitting process. Her hats were the subject of one the first posts on this blog. She made hats for my sons Peter and Ian (pictured below in 1989), who have grown up to be the proud fathers of Eddie and Elias, respectively.
My sons Peter and Ian in their grandmother’s hats, 1989Eddie and meElias and me
Elias, who will be 2 next month, loves being outside best of all. He’s my little helper in the garden and loves pointing out the moon and stars in the darkened sky when I stroll him home after his afternoon visit. He has spent nearly half his life wearing a particular green hat, so it had to be included!
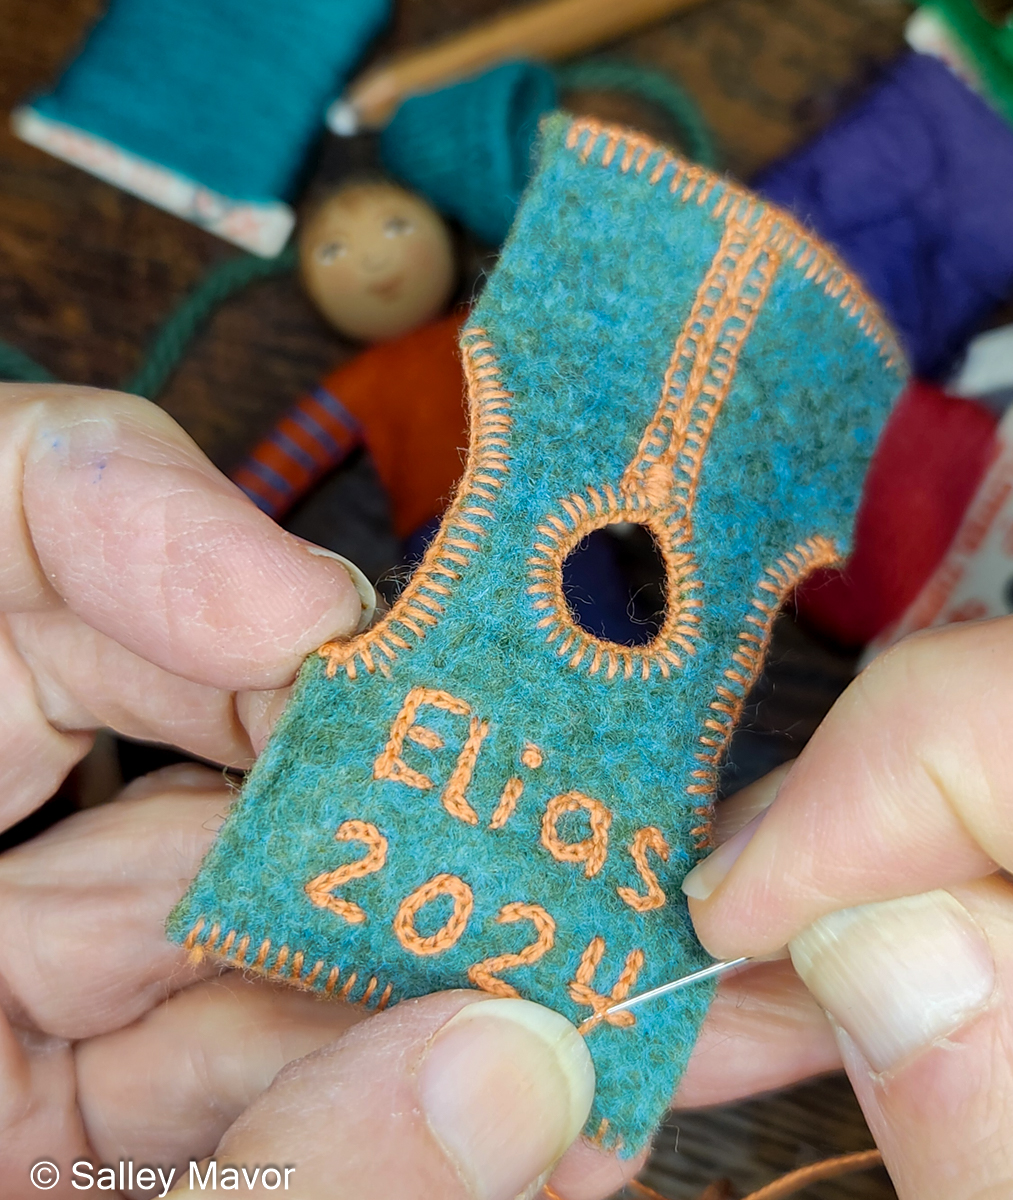
Elias often wears vests, too. I embroidered his name and the year on the back.
The following video shows how I stitched the clothing and glued on the head and hat.
10 month-old Eddie lives 2 hours away and I visit him every few weeks. Right now, his favorite things are singing, clapping his hands and smiling.
In the following video, you can see how I stitched the baby bunting and glued on the head and hood. I’m not sure if he has a full-sized red suit like this, but he now has one in miniature. I’m already looking forward to making next year’s ornaments! If you want to receive email notices when I publish new posts, please subscribe to this blog using the form below.
To keep up with new posts, please subscribe to this blog. Your contact info will not be sold or shared. If you’d like to see more frequent photos tracking the projects in my studio, please follow me on Facebook, Instagram and BlueSky.