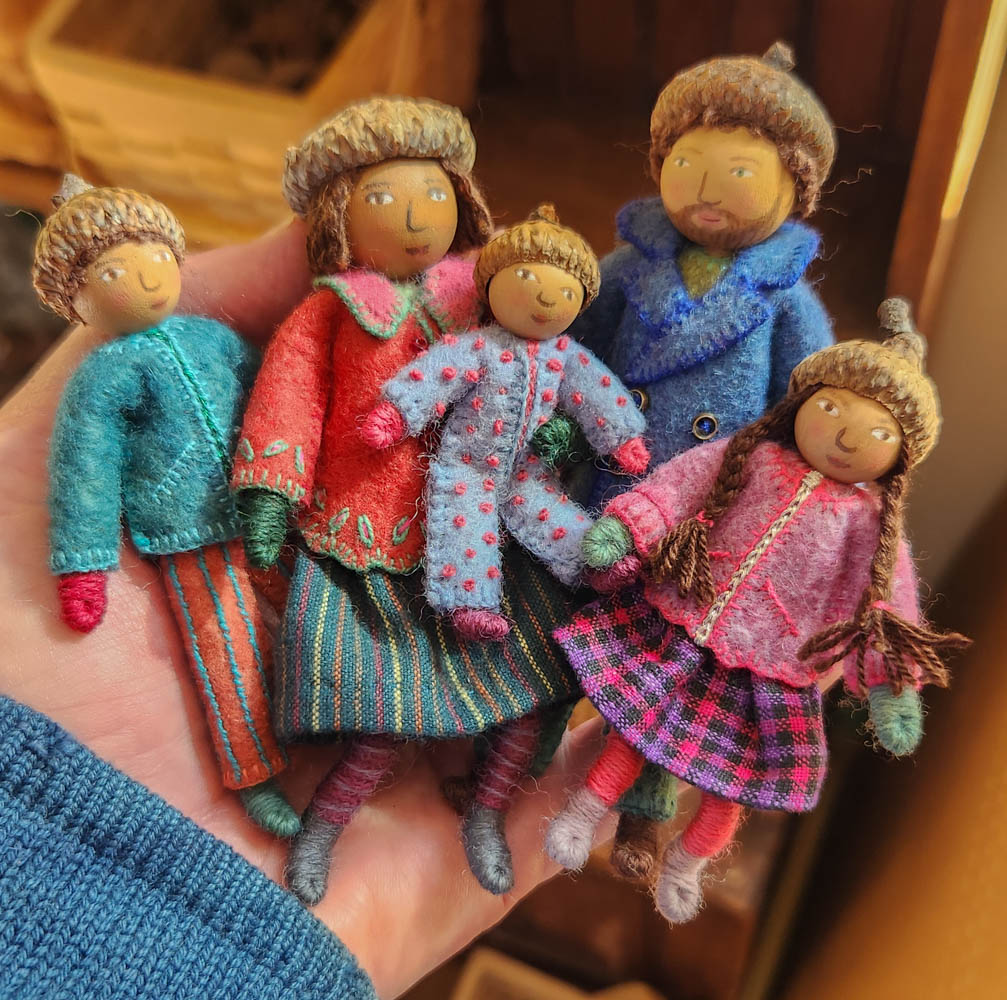
WEE FOLK FAMILY RAFFLE If you’ve followed this blog for a while, you’ll know that I no longer sell my original work. But occasionally, I can be persuaded to make something for a special fundraiser. So, I’m thrilled to announce this rare opportunity to win a Wee Folk Family of 5. Tickets are $25 each and proceeds are supporting the newly renovated kindergarten classroom at the Waldorf School of Cape Cod (my children’s alma mater). Raffle tickets can be purchased here. The winner will be announced on Dec. 10th. Good Luck!
The Wee Folk Family is based on the doll projects featured in my how-to book, Felt Wee Folk: New Adventures. The dolls’ armatures are the sturdy variety, with reinforced frames that hold up better to repeated bending and handling. Their sizes range from 2″ (baby) to 4″ (adult) tall.
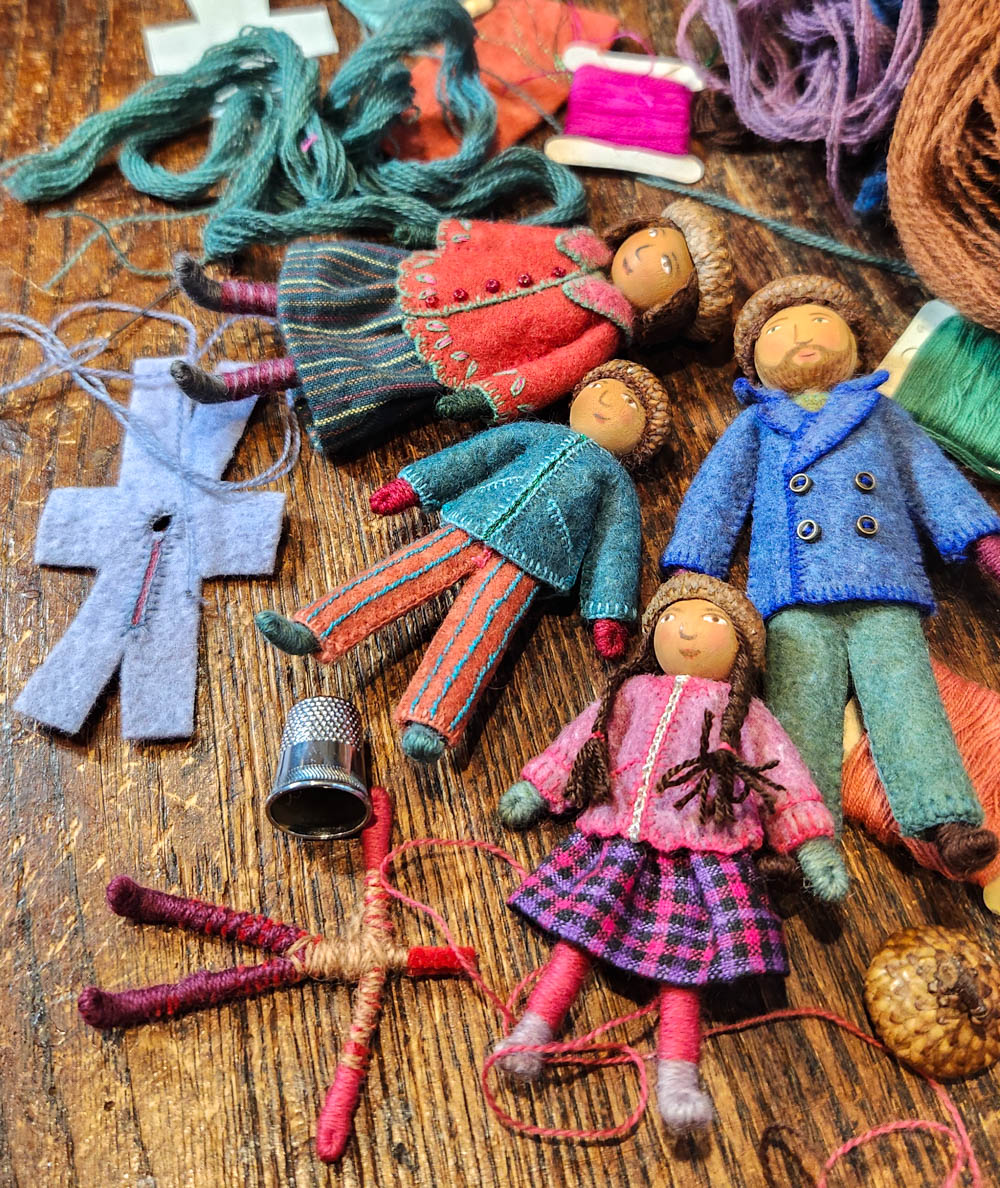
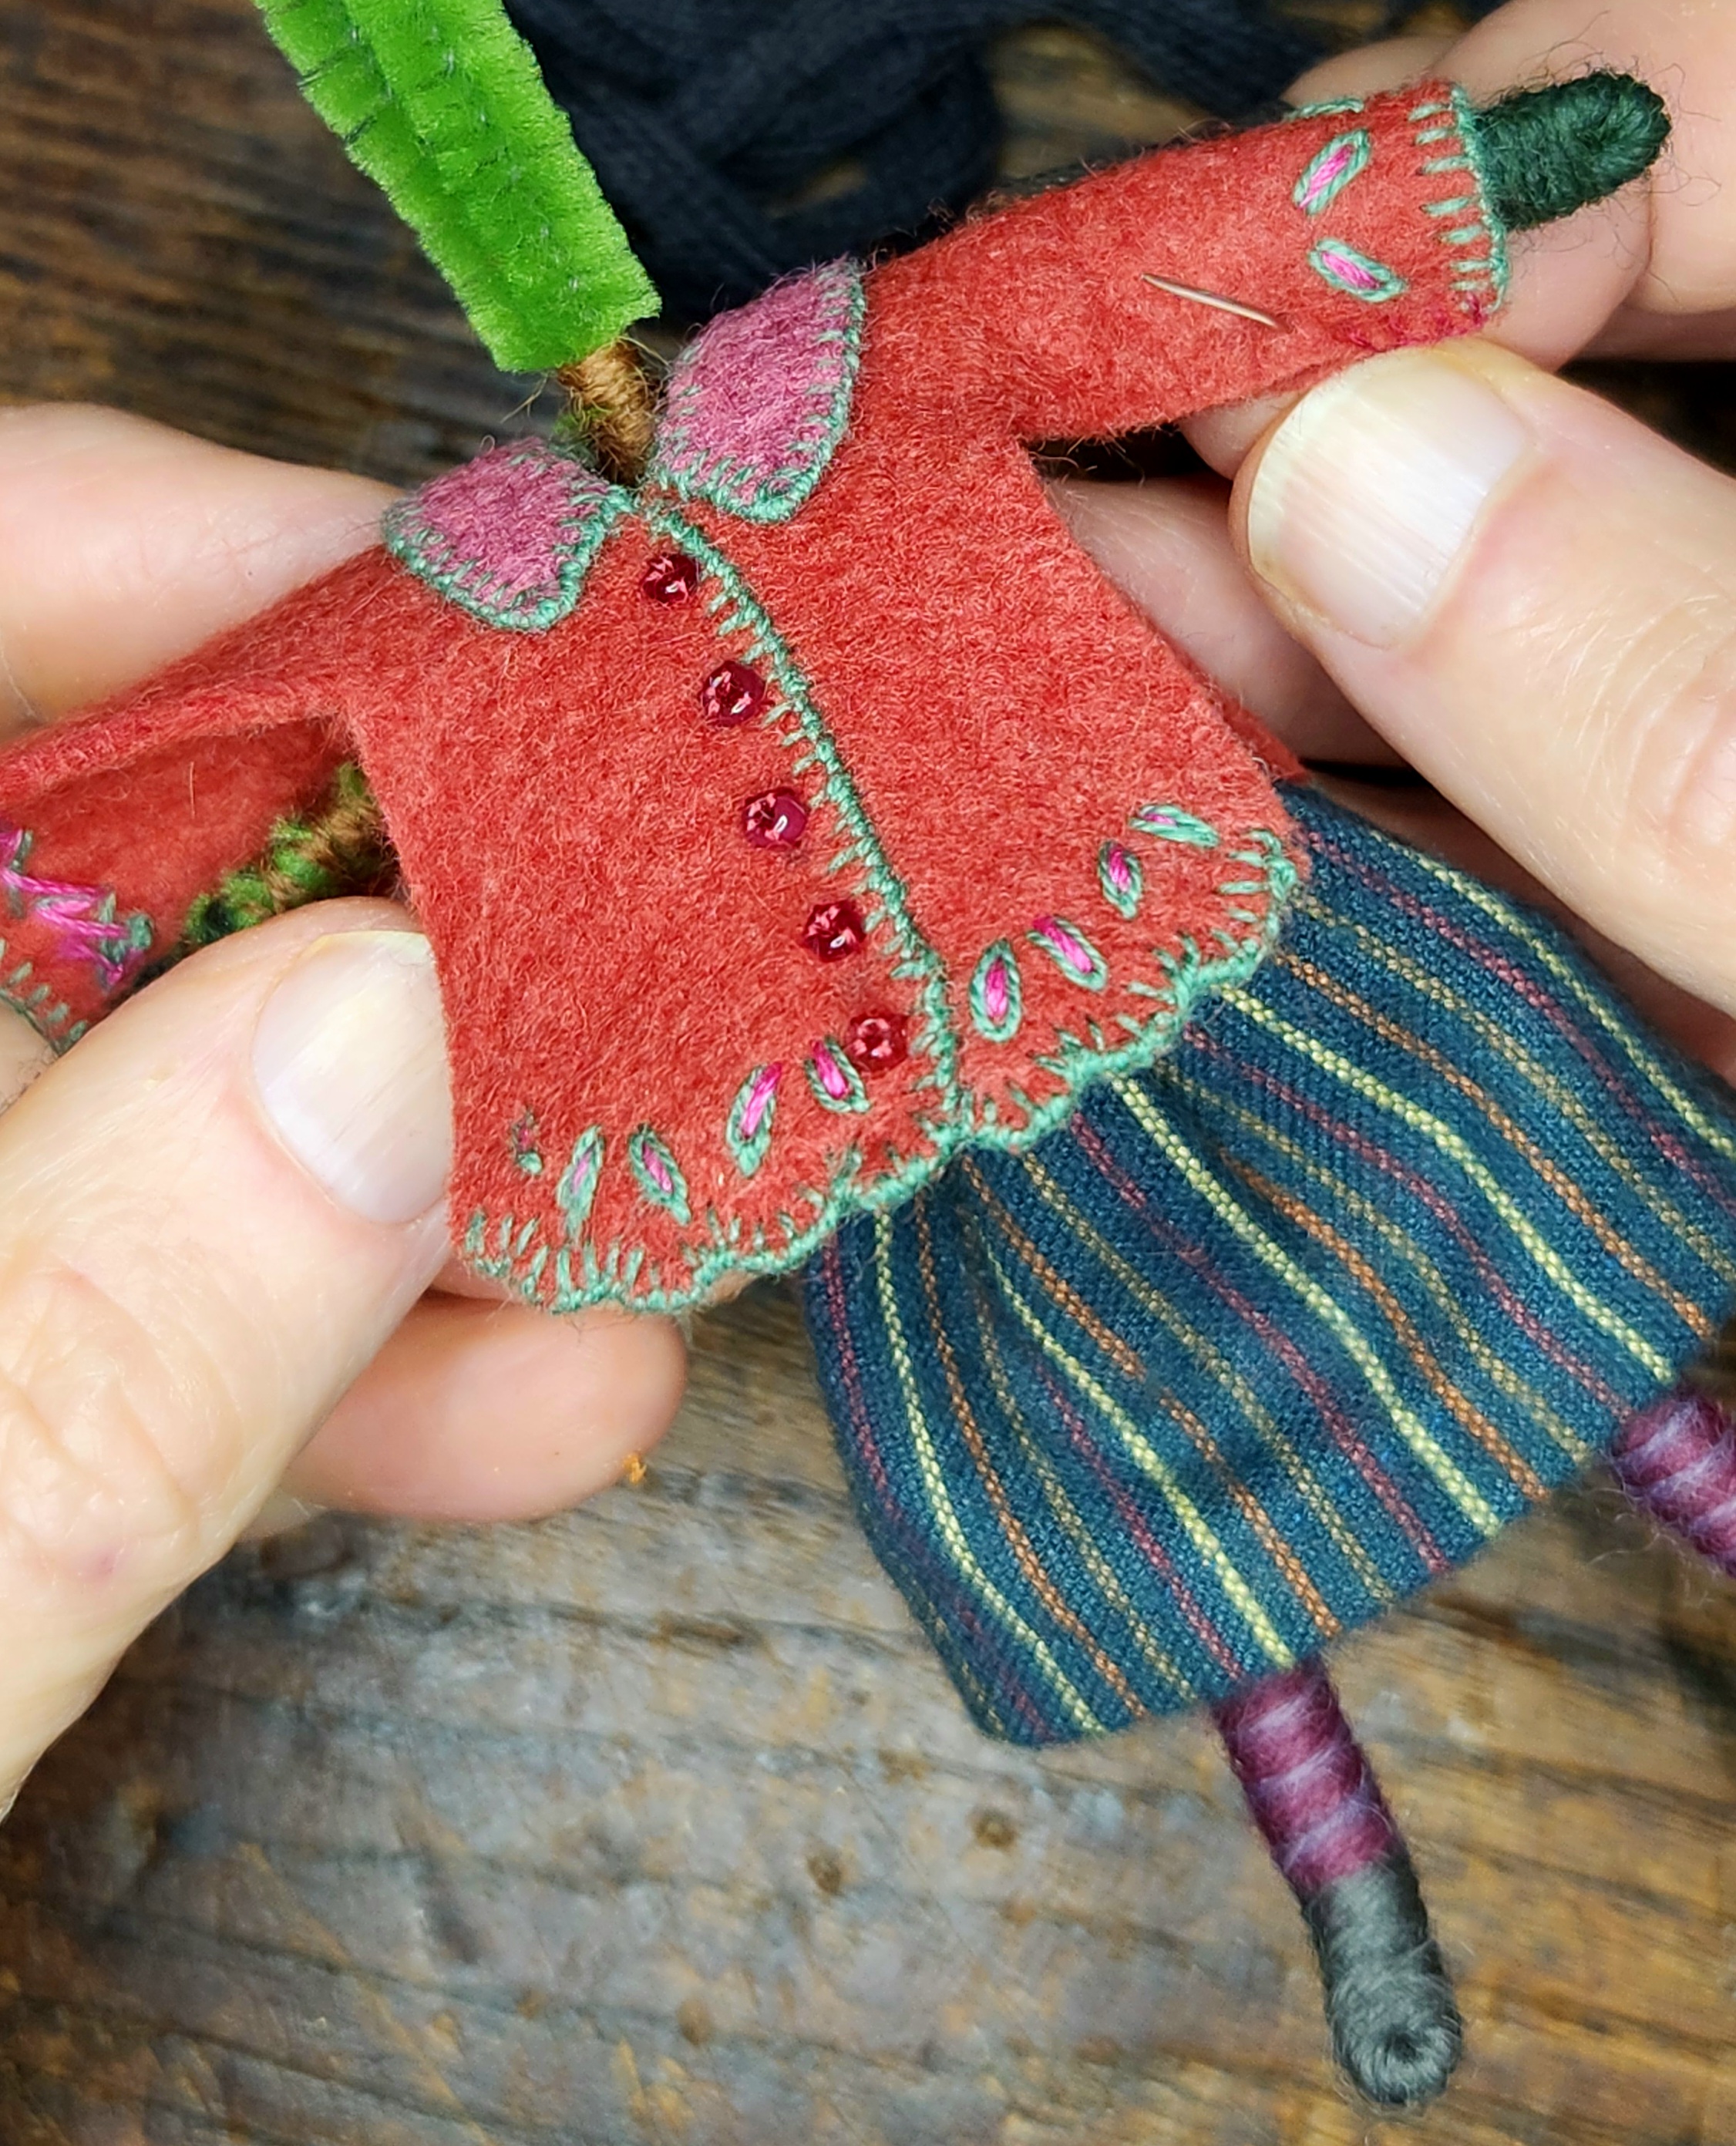
I really enjoyed all aspects of making this little family, from painting their faces, to embellishing their felt outfits, to sewing their wigs. After years of mass-producing fairies, it was so satisfying to put all my energy toward creating one special family. Different parts of the process were documented in videos, which you can watch near the end of this post.
Wee Folk Family Raffle tickets can be purchased from the Waldorf School of Cape Cod here. The winner will be announced on Dec. 10th.
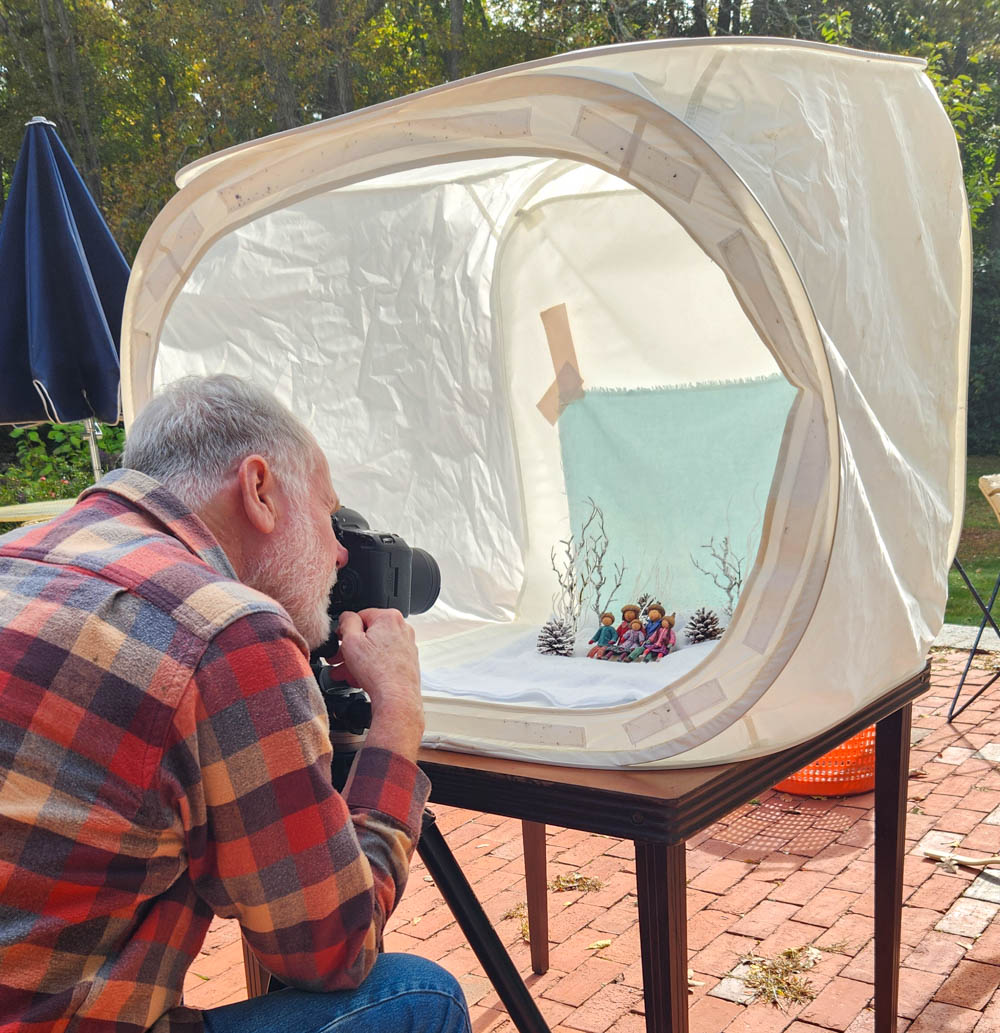
It was fun setting up the winter scene and posing the dols for their family portrait. Rob photographed them outside in a light box, which helps defuse harsh shadows.
The following videos give a glimpse at how I made the Wee Folk Papa, Mama and children. Instructions and patterns for making the dolls and their outfits are in my how-to book, Felt Wee Folk.
Wee Folk Papa
Wee Folk Mama
Wee Folk Family Raffle tickets can be purchased from the Waldorf School of Cape Cod here. The winner will be announced on Dec. 10th. Good Luck!
Wee Folk Children
To keep up with new posts, please subscribe to this blog. Your contact info will not be sold or shared. If you’d like to see more frequent photos tracking the projects in my studio, please follow me on Facebook, Instagram and BlueSky.
This fall has been particularly fruitful in my needle and thread universe and I’m pleased to share a growing list of good things that are happening. I’m astounded by the number of fans who are driving long distances with carloads of friends to see my art in person at both the Mariposa Museum in Peterborough, NH and the New England Quilt Museum in Lowell, MA.
New England Quilt MuseumMariposa Museum
A year from now, those of you in southern California will be able to do the same when my touring exhibition, Bedtime Stitches is shown at the Mingei International Museum in San Diego! Please read ahead to learn about multiple displays, a wee folk raffle, and other opportunities to experience my art and meet me in person.
Salley Mavor will give an Artist Talk at the Mariposa Museum on Nov. 22nd at 2PM.
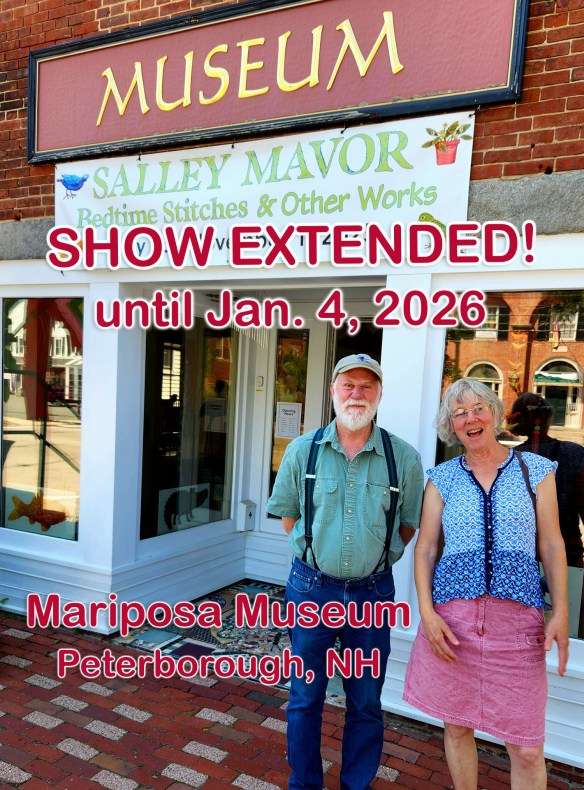
SHOW EXTENDED My exhibition at the Mariposa Museum & World Culture Center in Peterborough, NH is being extended through Jan. 4, 2026! The show, Bedtime Stitches & Other Works, has been so popular that the museum decided to keep it open for another 2 months. I’m so happy that more people will have a chance to experience the 3-dimensional quality and detail of my art in person. ARTIST TALK I look forward to returning to the Mariposa Museum to talk about my work on Sat., Nov. 22 at 2:00 PM. This is an opportunity to learn about where my art comes from, how it’s evolved, and why I do it. Seating is limited. Please register here.
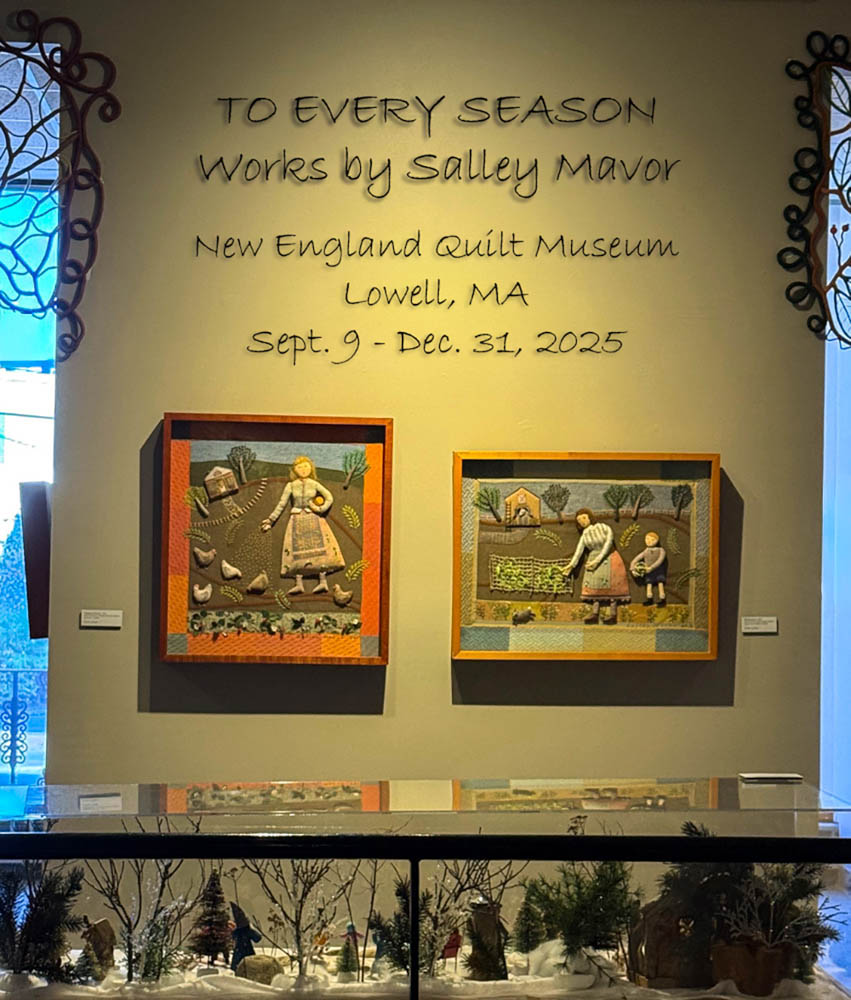
To Every Season: Works by Salley Mavor at the New England Quilt Museum in Lowell, MA
TO EVERY SEASON Since my show opened at the New England Quilt Museum in Lowell, MA an unusually high number of visitors have been spied walking around with smiles on their faces. One visitor named Susan summed up her experience this way – “Absolutely loved this show. I felt overwhelmed with joy!” How wonderful is that? My exhibition, To Every Season: Works by Salley Mavor is on view thru Dec. 31, 2025.
Salley Mavor signing books at the New England Quilt Museum
A big thank you to the lovely folks who came to hear my talk at the museum on Nov. 1st. I was surprised to learn that some people got up in the wee hours of the morning to drive from as far away as New York City, Vermont, and the mid-coast of Maine. It was was such a pleasure to meet everyone and hear about their creative lives!
Salley Mavor speaking about her work at the New England Quilt Museum
WEE FOLK RAFFLE If you’ve followed this blog for a while, you’ll know that I no longer sell my original work, including dolls. But occasionally, I can be persuaded to make something for a special fundraiser. So, I’m thrilled to announce this rare opportunity to win a Wee Folk Family of 5 that I made based on the projects in my how-to book, Felt Wee Folk. Tickets are $25 each and proceeds are supporting the newly renovated kindergarten classroom at the Waldorf School of Cape Cod (my children’s alma mater). Raffle tickets can be purchased here. The winner will be announced on Dec. 10th. Good Luck!
Wee Folk Family RAFFLE
Wee Folk MamaPocketful of Posies Tree
HOLIDAY TREE and STORYTIME at the Cahoon Museum I’m so happy that the Cahoon Museum in Cotuit, MA is displaying my Pocketful of Posies tree this Holiday Season. The tree is decorated with a collection of nursery rhyme ornaments based on my picture book, Pocketful of Posies. I made them in 2013 for the Concord Museum’s annual Family Tree event. Since then, the individual ornaments have been shown alongside my framed artwork in numerous exhibitions. Winter Open House – Sat., Dec 20th – 10 AM to 4 PM Please join me at the museum at 11:00 AM for a STORYTIME. All ages are welcome. Please register here.
EXHIBITION at the MINGEI MUSEUM I’m excited to share the news that next year, Bedtime Stitches, the touring exhibition of original 3-dimensional embroidered artwork for my picture book, My Bed: Enchanting Ways to Fall Asleep Around the World, will be shipped across the country to the Mingei International Museum in San Diego, California. The show will be on view for a nice long while, from Oct. 31, 2026 to April 18, 2027.
The Mingei /min-gey/ (art of the people) is an extraordinary museum dedicated to furthering the understanding of folk art, craft, and design from all eras and cultures of the world. Having my work shown in such a well-matched venue is truly a dream come true!
To keep up with new posts, please subscribe to this blog. Your contact info will not be sold or shared. If you’d like to see more frequent photos tracking the projects in my studio, please follow me on Facebook, Instagram and BlueSky.
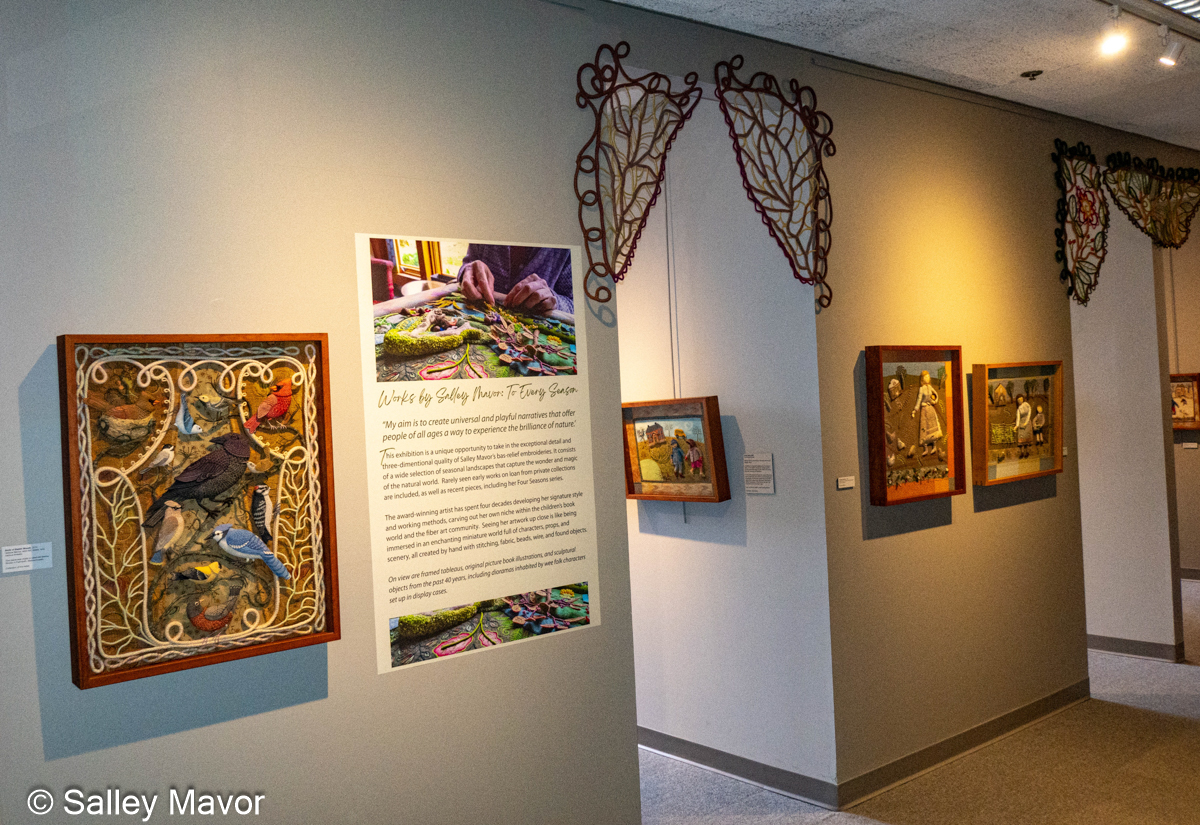
My current exhibition at the New England Quilt Museum in Lowell, MA features a collection of botanical sculptures hanging in the gallery entrances. In this post, I share photos, videos, and commentary about my new “Felt Filigree” work. The show, To Every Season: Works by Salley Mavor, will be on view through Dec. 31, 2025.
This is the first time I’ve created works that are entirely made with covered wire. For me, they are a way of drawing lines in space, without the interference of a background.
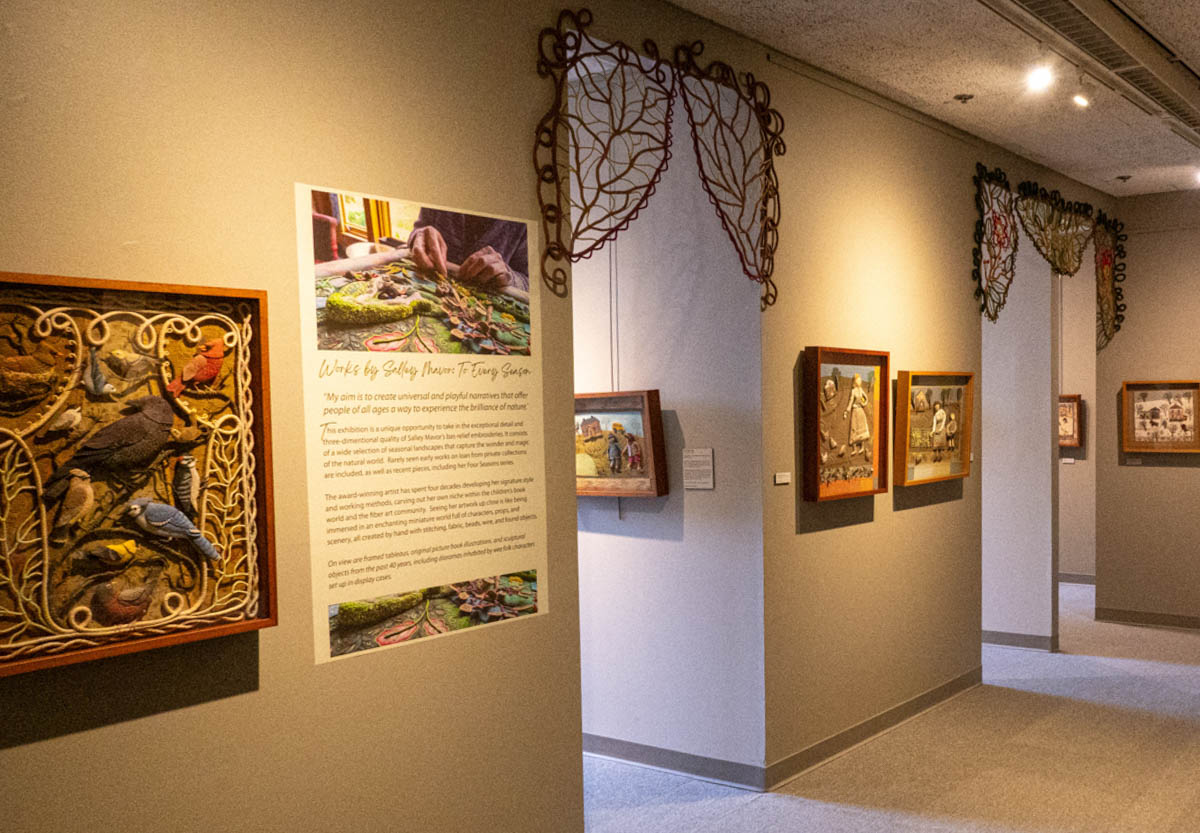
Where did the idea come from? When visiting the museum last year to choose which areas to display my work, a cluster of four small galleries drew me in. Having visitors experience my art in intimate spaces where they could spend time peering into my little worlds was a priority. But, the floor to ceiling doorways leading into the galleries seemed too imposing and hard-edged, especially for a nature themed show. My first inclination was to do something to soften the edges and create more welcoming entrances. In other words, embellish!
I ended up spending all winter and spring making a group of intersecting felt-covered wire forms to frame the upper portions of the doorways. When installed, they would look like valances and parting stage curtains that invite people inside. At this point, I didn’t know how to describe what I was making, let alone what to name this new concept.
During the process, I took a photo of my son Ian holding up one section, so I could see how they would look.
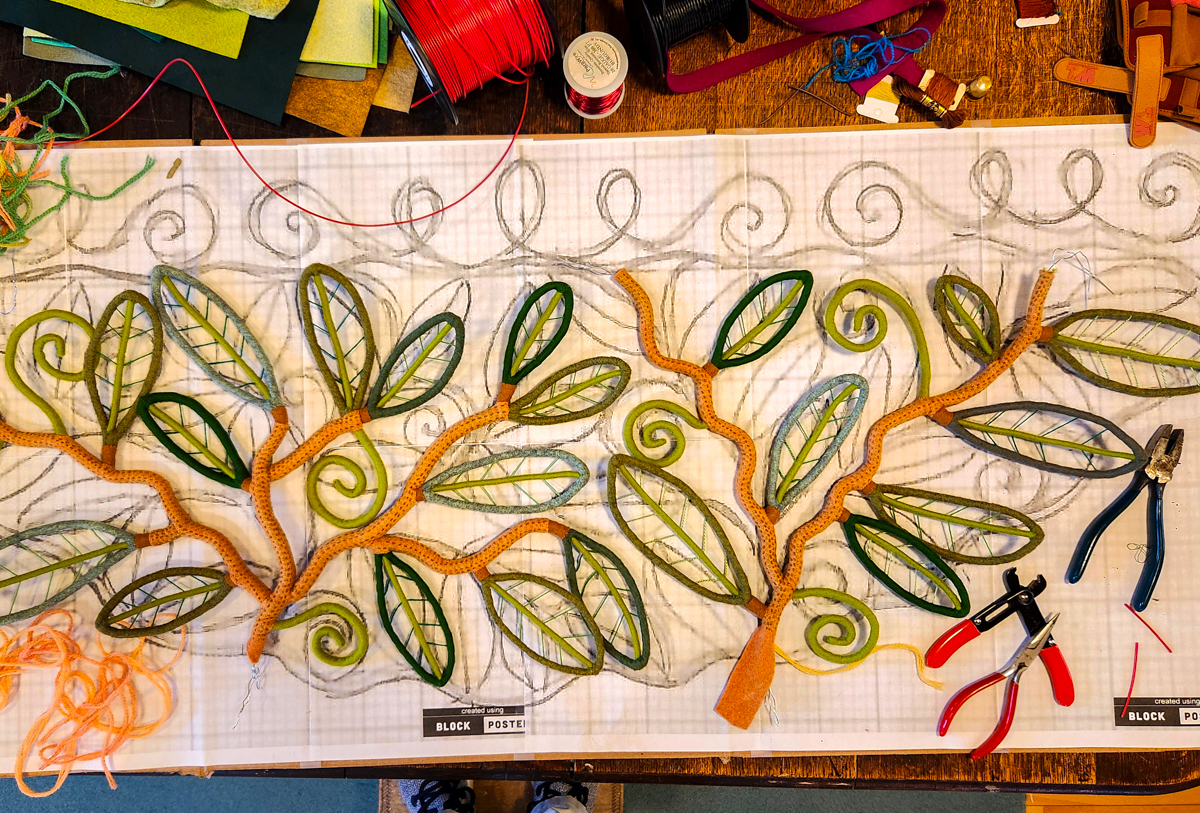
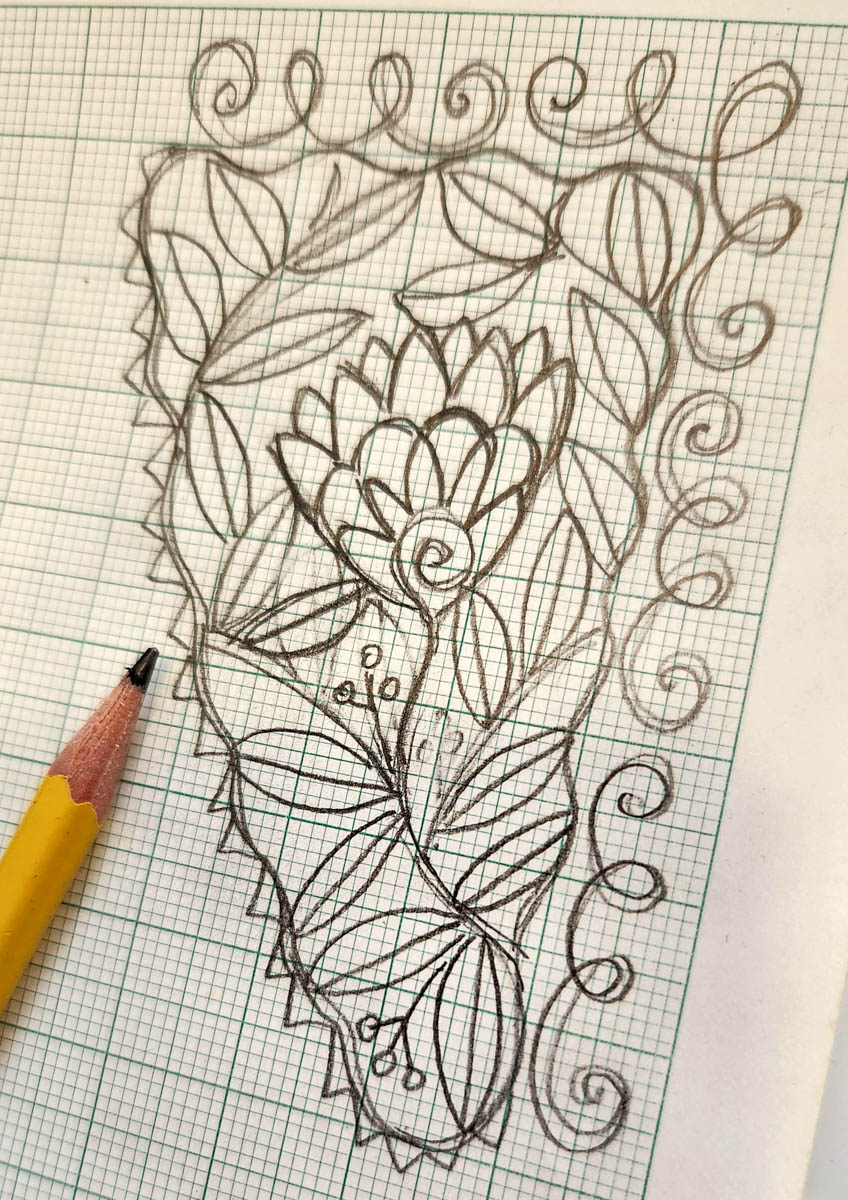
The process: To prepare, I measured the doorways and made sketches on some ancient graph paper passed down from my grandparents. I then scanned the drawings and enlarged them using Block Poster.
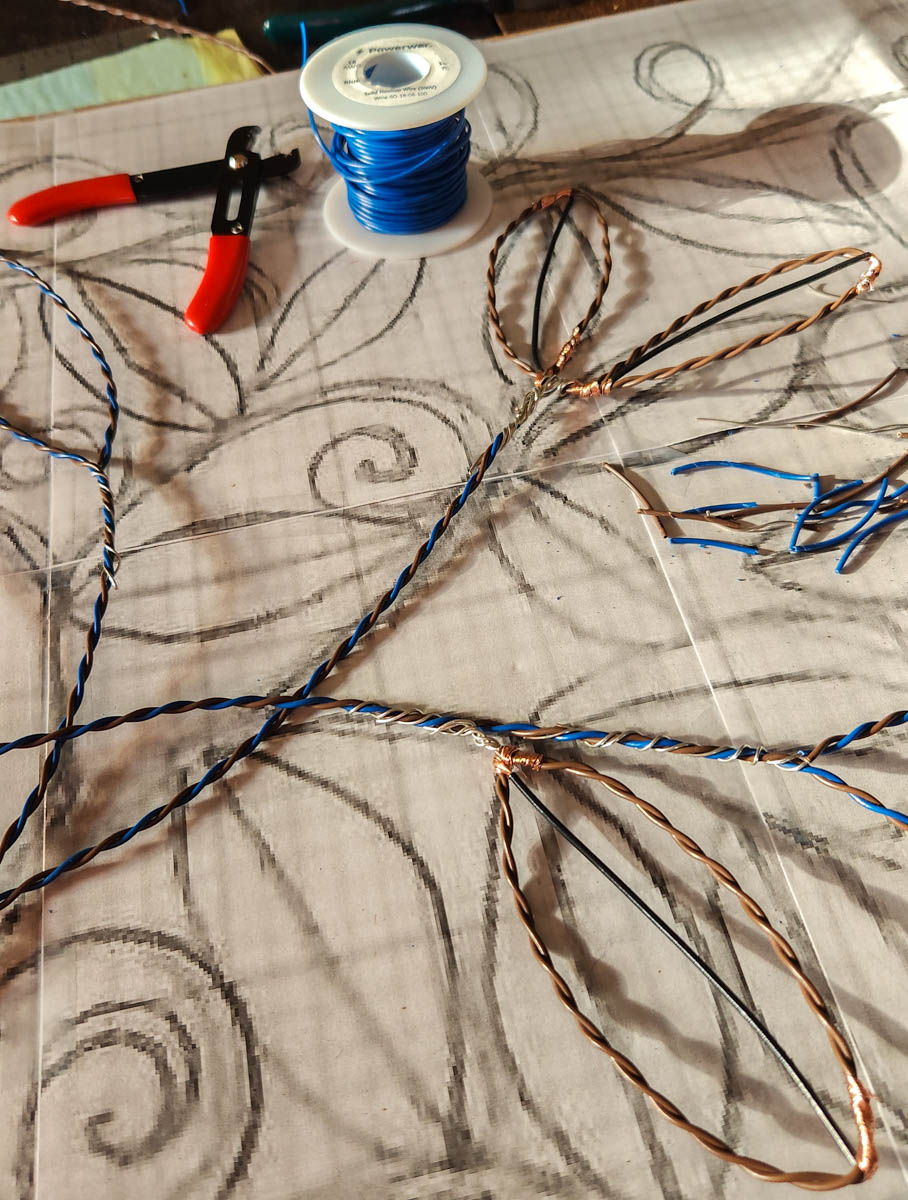
I printed out the sheets and taped them together to make full sized patterns to use as guides. I formed leaves, branches and other linear shapes with 18 gauge insulated electrical wire. Working with wire was tough on my hands, so I took to wearing gloves.
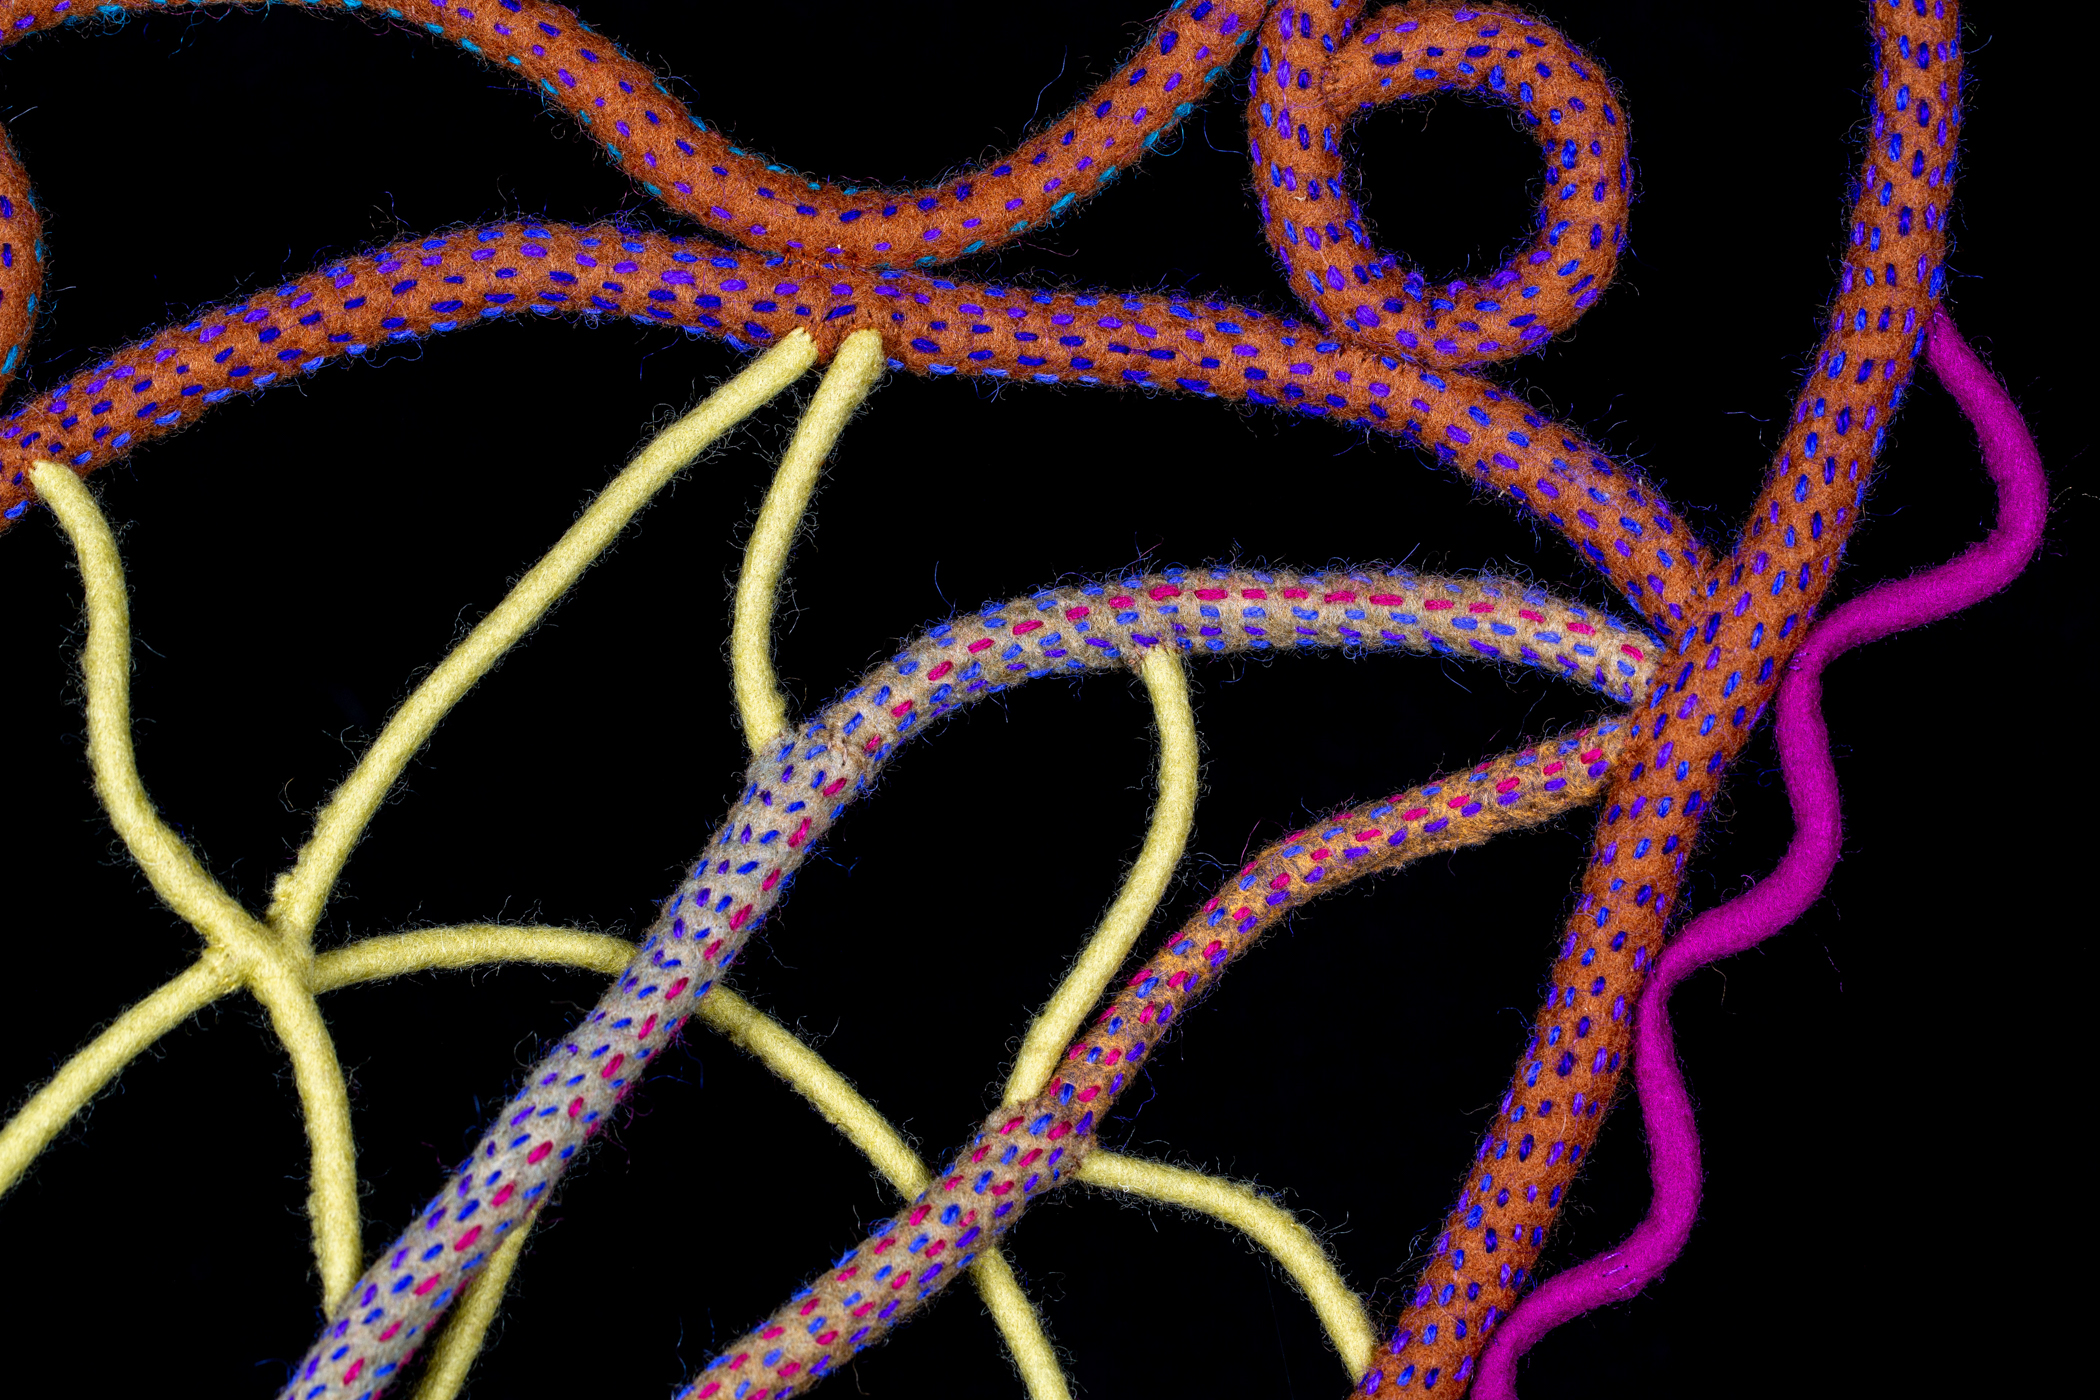
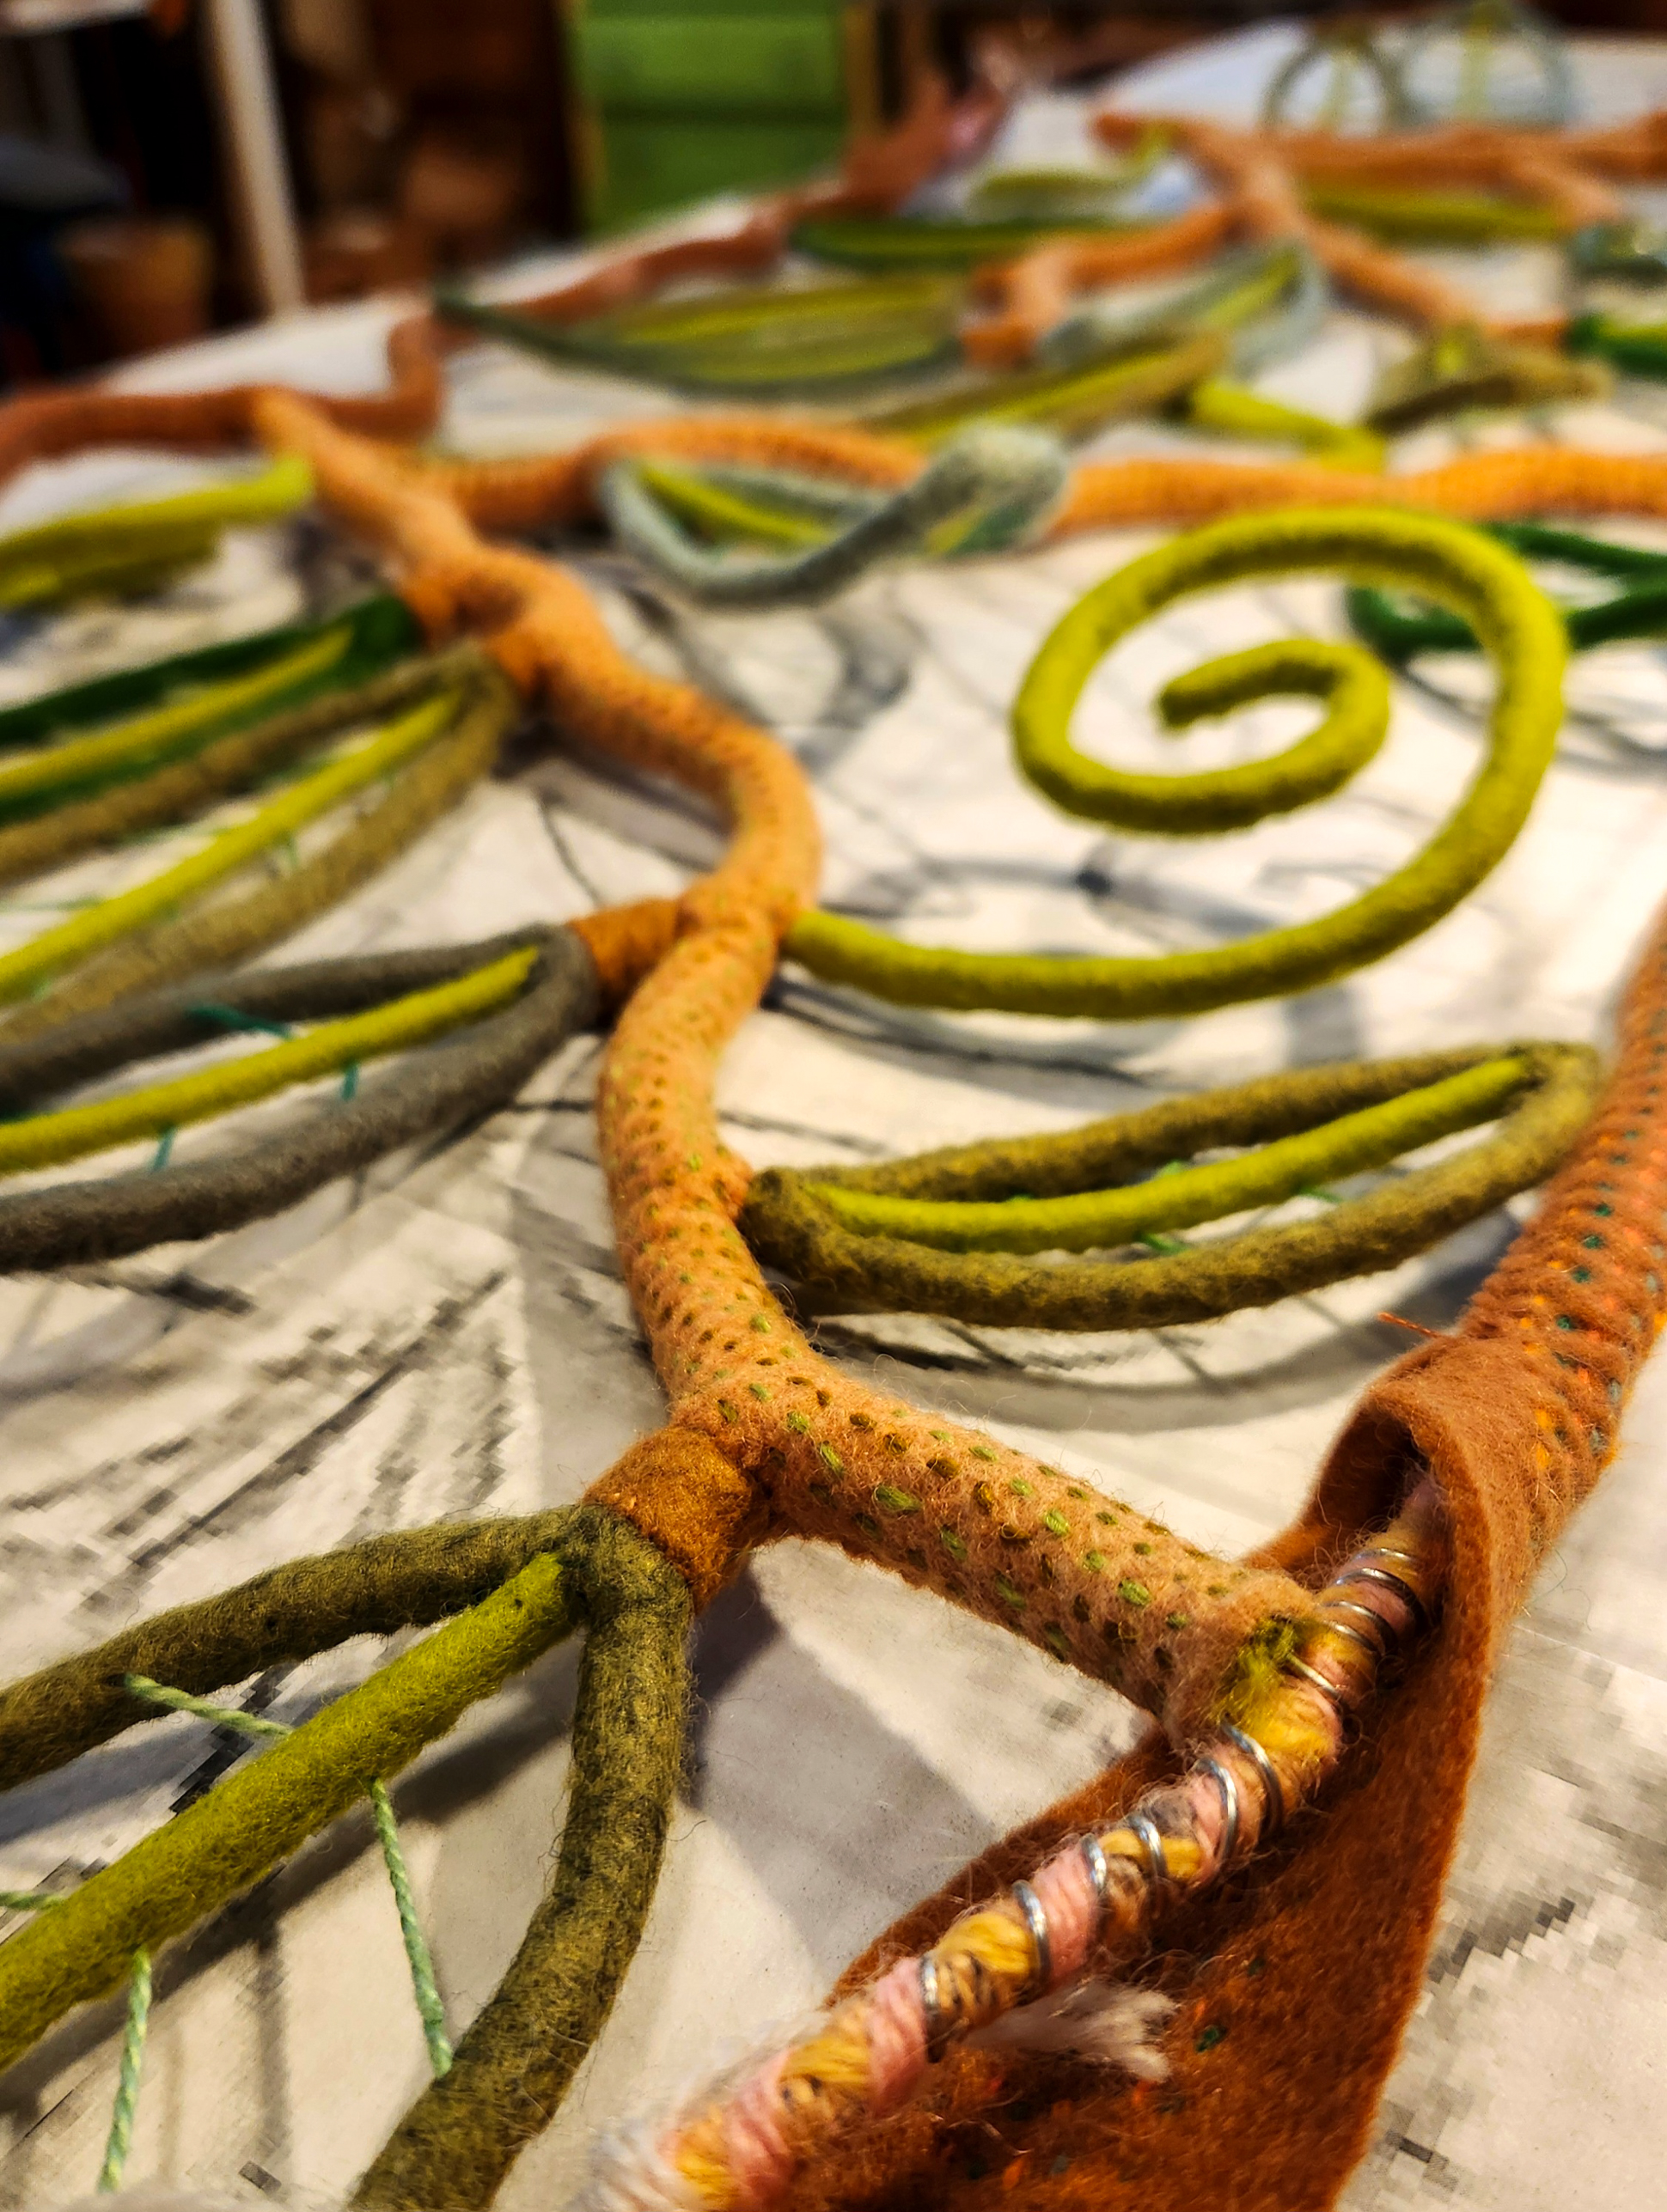
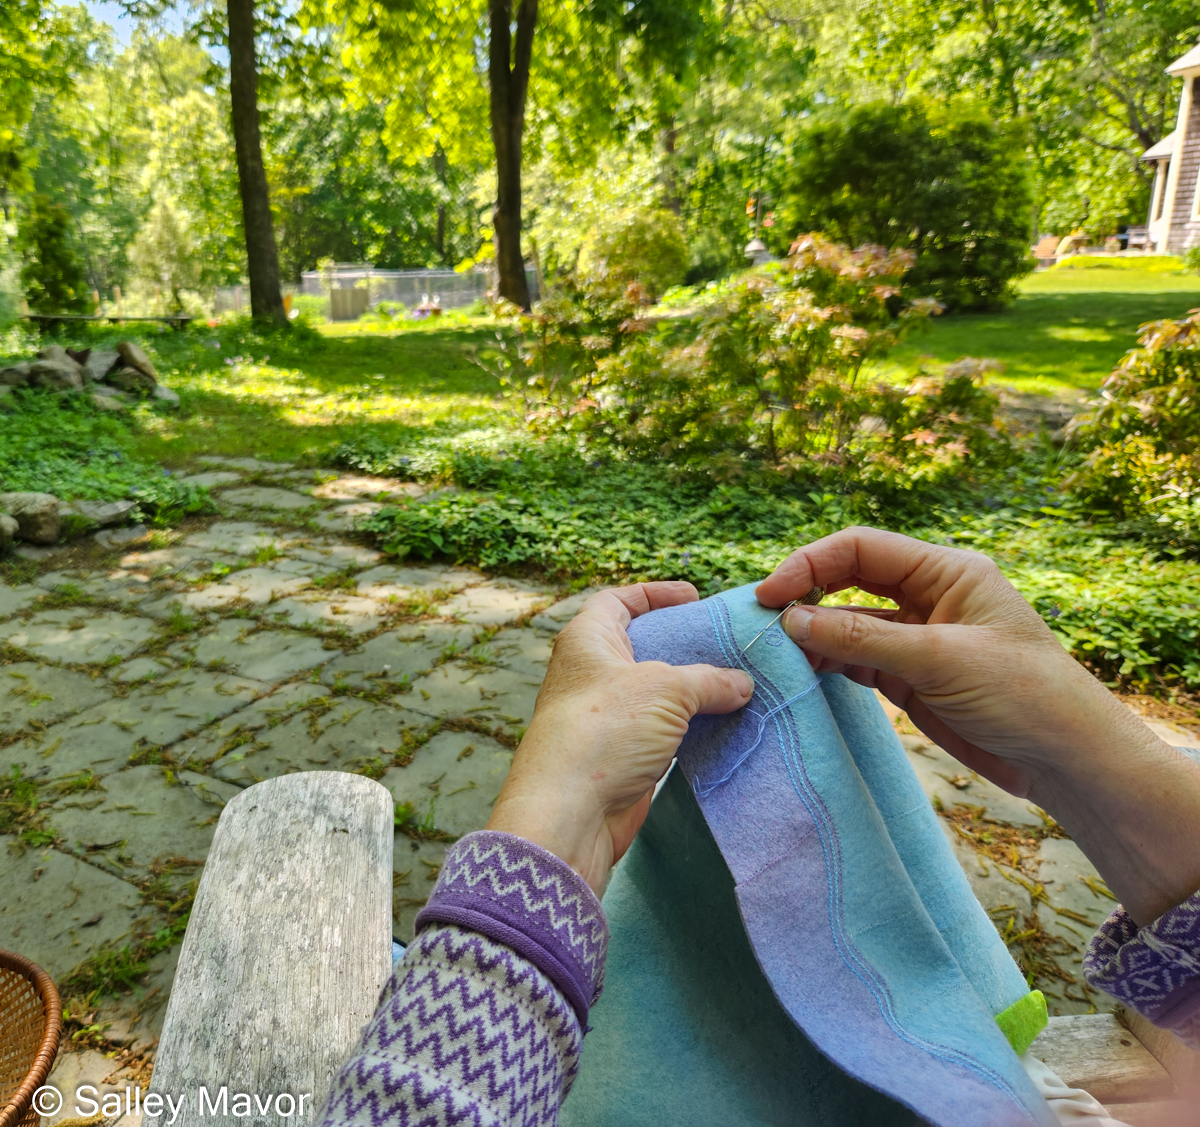
I wrapped layers of yarn around the wire shapes to smooth out the bumps and add a little thickness. Watch the following video to see how I stitched strips of felt around the wire.
Manipulating the wire and getting it to lay flat was tricky at times. Pliable materials like thread and yarn are much easier to handle, but what I envisioned required a strong structure that would hold its shape. No droopy, floppy, stringy fiber art for me!
I’d like to make more pieces like these and can imagine covering large expanses with felt filigree. My original thought was to create larger works that took less time, but I can’t seem to help myself from making little stitches. Still, the ratio of working hours to square footage is a big improvement.
Speaking of tiny stitches, the following video shows how I covered wire shapes with felt and embellished branches with seed stitches.
Even though these felt filigree sculptures are site specific, they can be reused in other ways in future exhibitions. For more versatility, I purposely made them in sections that can be arranged in different ways. Also, in addition to being suspended in open spaces, they could be mounted on light or dark colored walls.
The following video shows how I stitched strips of felt around the wire intersections.
I hope that you’ve enjoyed this peek at my process. The exhibition, To Every Season: Works by Salley Mavor will be on view at the New England Quilt Museumin Lowell, MA through Dec. 31, 2025. I will be giving an Artist Talk on Sat., Nov. 1 at 10:30 AM. Please register here.
To keep up with new posts, please subscribe to this blog. Your contact info will not be sold or shared. If you’d like to see more frequent photos tracking the projects in my studio, please follow me on Facebook, Instagram and BlueSky.
I am pleased to announce that a new exhibition of my work opened earlier this month at the New England Quilt Museum in Lowell, MA. To Every Season: Works by Salley Mavor is on view through Dec. 31st, 2025. I will give two Artist Talks at the museum on Nov. 1st., at 10: 30 AM and 1:00 PM. The afternoon program is filled, but there are still available seats for the morning talk. Please register here.
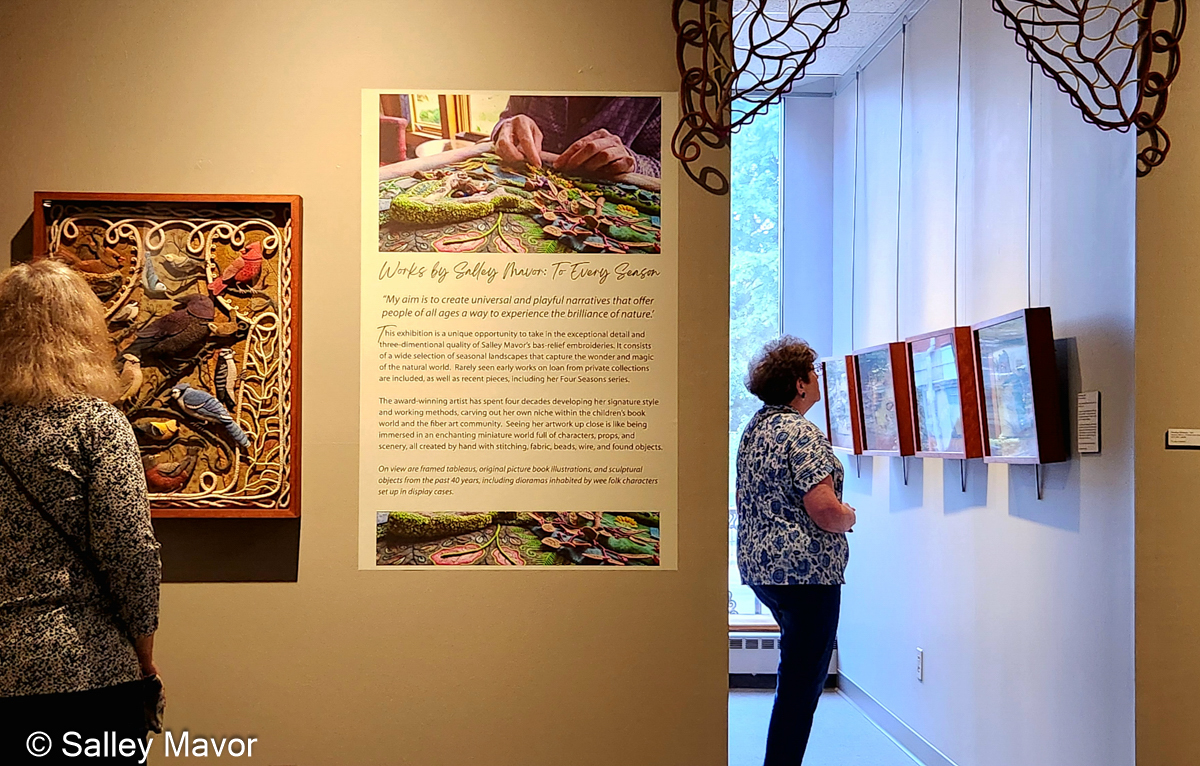
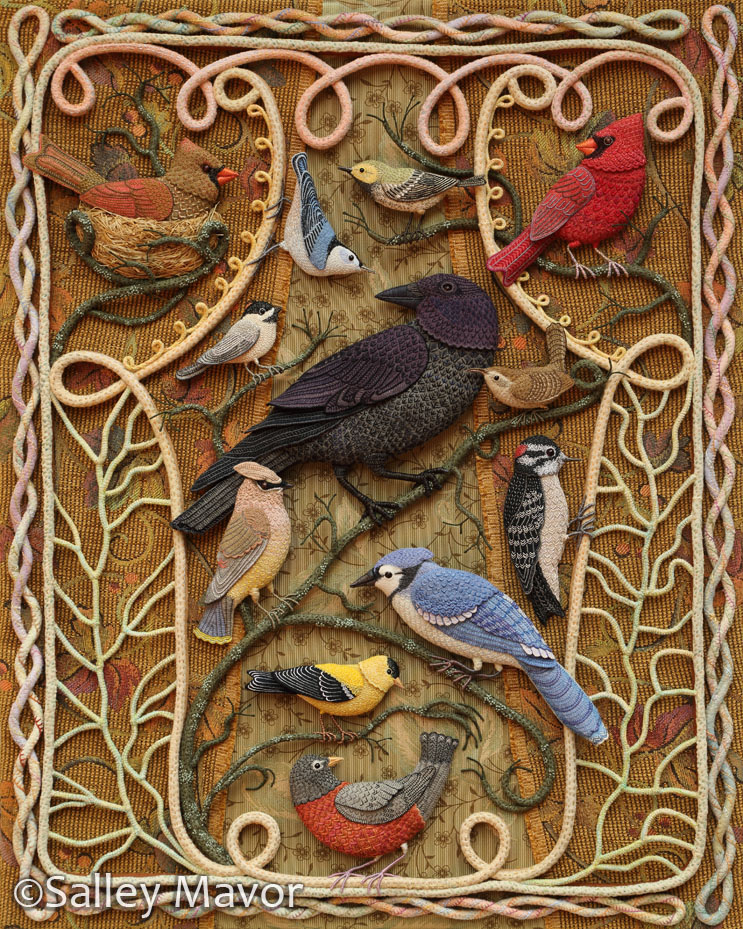
The exhibition includes a wide selection of three-dimensional embroidered scenes that celebrate the wonder and magic of the natural world, including Birds of Beebe Woods. On view are pieces spanning 40 years of my career, including rarely seen early works on loan from private collections, as well as recent creations.
The following video gives a brief tour of the exhibition. At the bottom of this post is a slide show of a representative sampling of individual works on display at the museum.
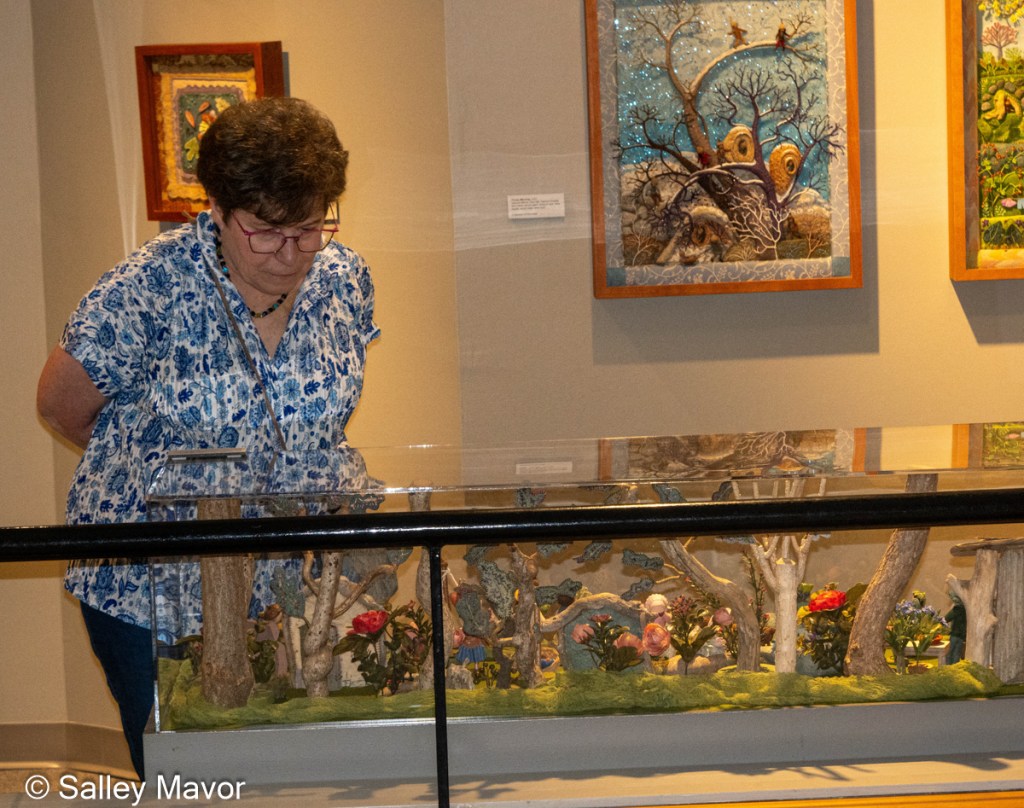
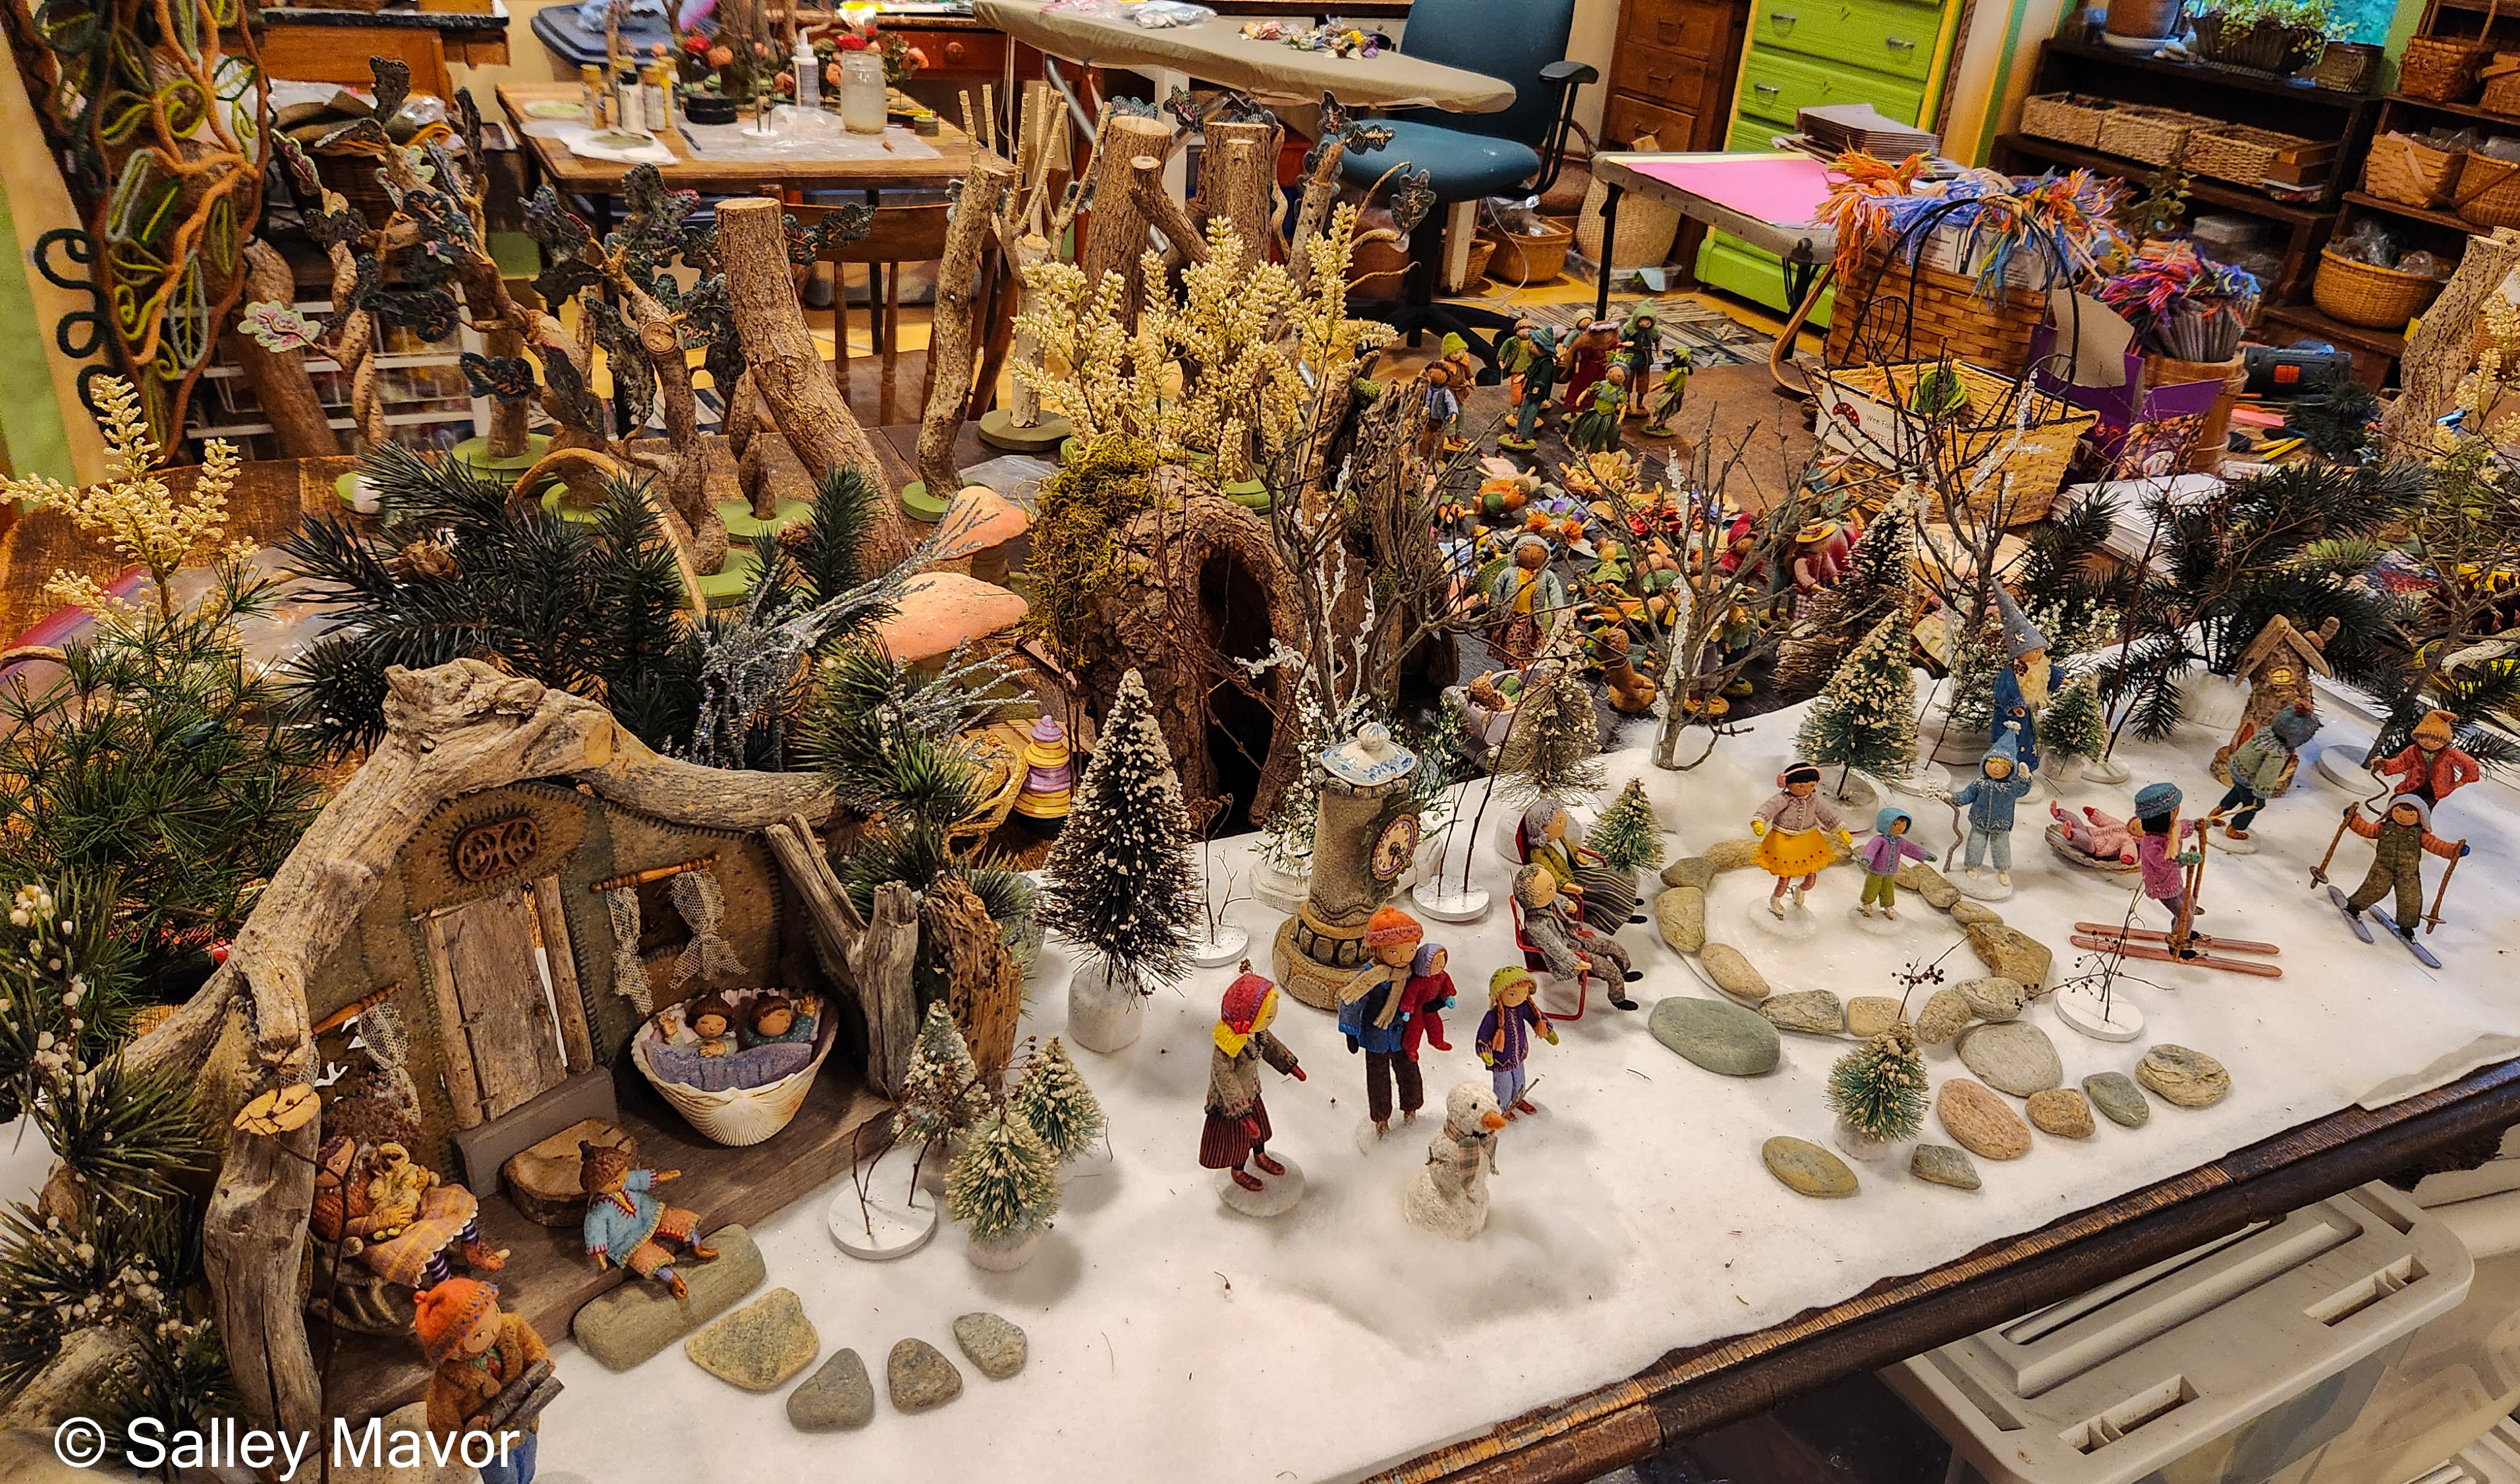
Visitors will see over 40 framed tableaus and original picture book illustrations, spread out in multiple galleries. Four glass cases are filled with dozens of wee folk characters, all set up in miniature environments made with houses, furniture, trees, and foliage saved from other projects. This is what my studio looked like during the summer, when I gathered the wee folk and props and figured out how to arrange the scenes. See more of my practice set-ups here.
New artwork is also on display, including my series of seasonal landscapes. Frosty Morning, Mossy Glen, Summertime, and Harvest Time. To see how these pieces were made, please click on the titles.
There are currently two opportunities to see my original art in New England, in museums located 50 miles apart. So, if you’re coming to the area, it’s worth planning to visit both exhibitions. Between the two venues, you can see just about everything I have available to show!
All last winter, I made a group of felt-covered wire filigree forms to soften the edges of the museum’s gallery entrances. The idea was to create nature-inspired valences that help set the stage and invite visitors inside.
To make them, I covered wire forms with felt, creating linear designs that hold their shape when suspended. The sculptures were specifically made for this show, but they could be reused in different ways in future exhibits.
My intention was to work bigger and faster than normal, but my strong impulse to make tiny stitches slowed down the process. Still, I was able to increase the square footage/time ratio! I’ll share more photos, videos and commentary about these sculptures in a future post.
Here’s a slide show of a representative sampling of individual works on display at the museum. To Every Season will be on view at the New England Quilt Museum in Lowell, MA through Dec. 31st, 2025. If you can, please come see my work in person. It’s a totally different experience than looking at reproduced images!
Birds of Beebe Woods 2012
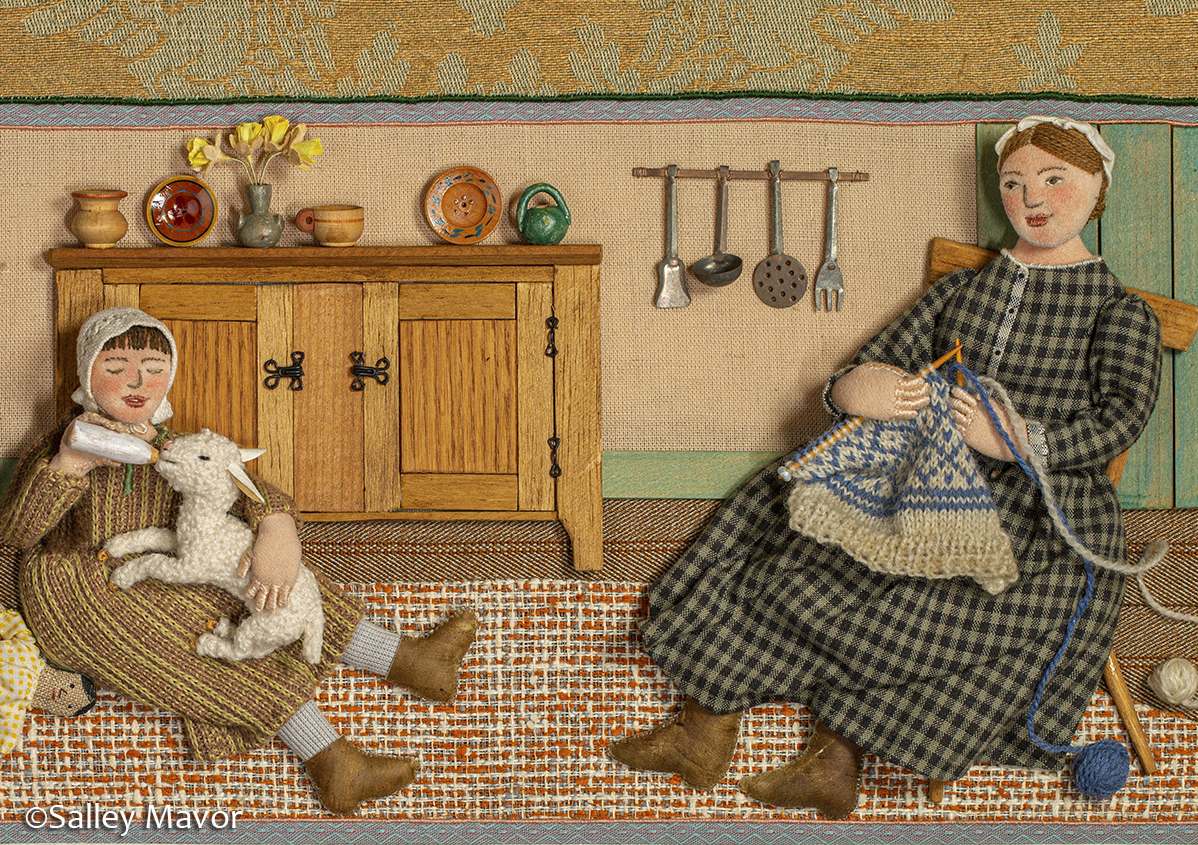
Mary Had a Little Lamb 1995
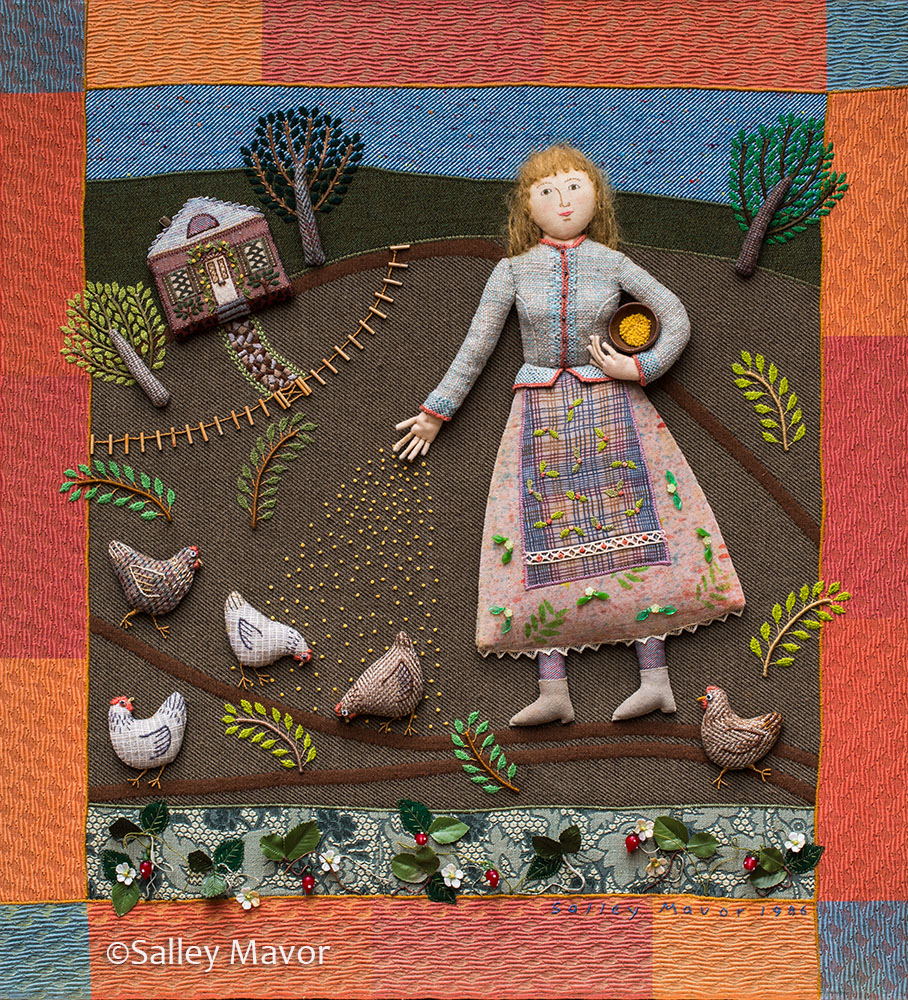
Feeding Chickens 1986
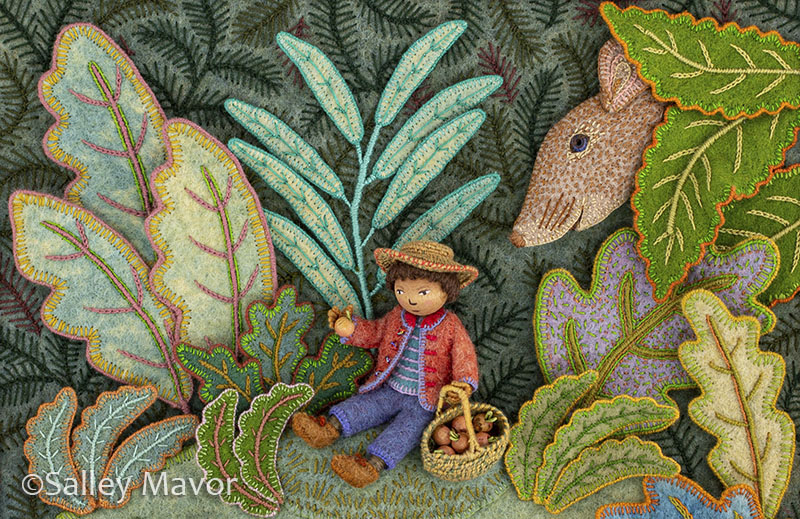
Fast Friends 1997
Frosty Morning 2021
In the Heart 2001
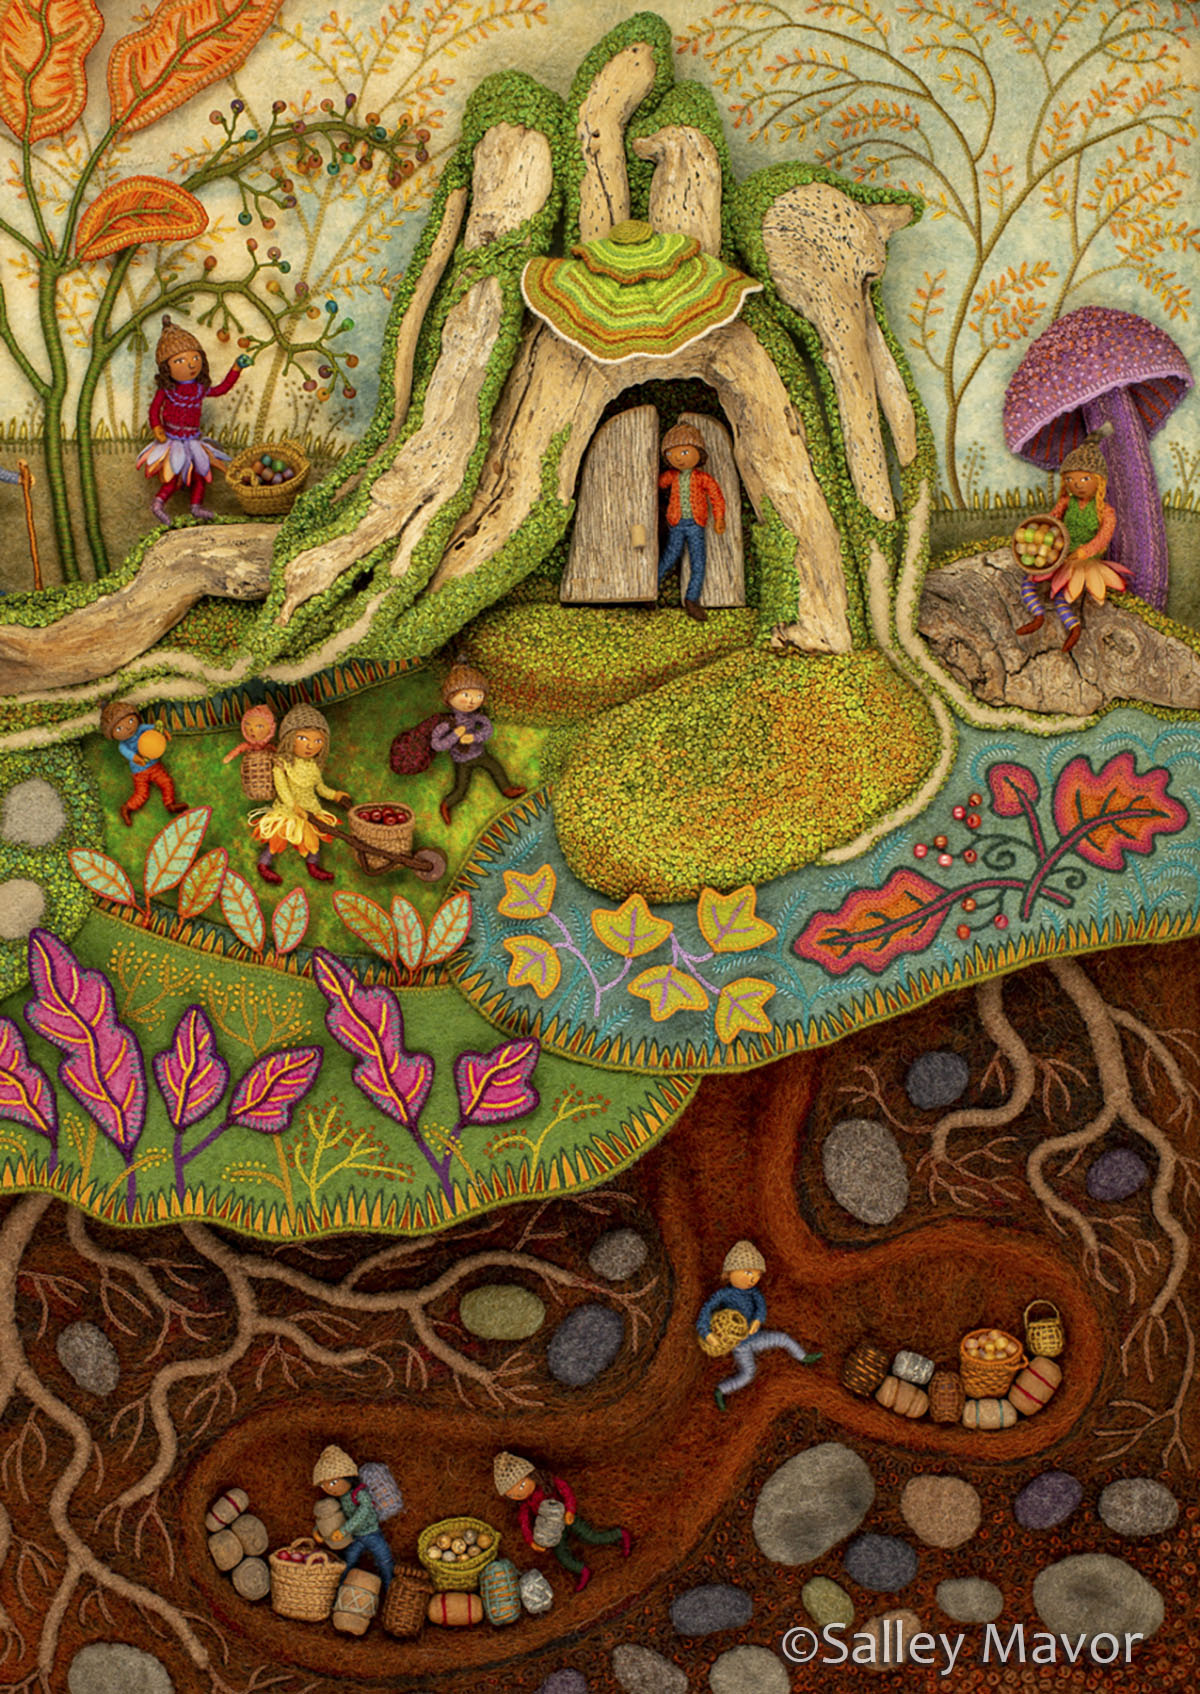
Harvest Time 2022
Jerry Hall 2010
Mary Had a Little Lamb 1995
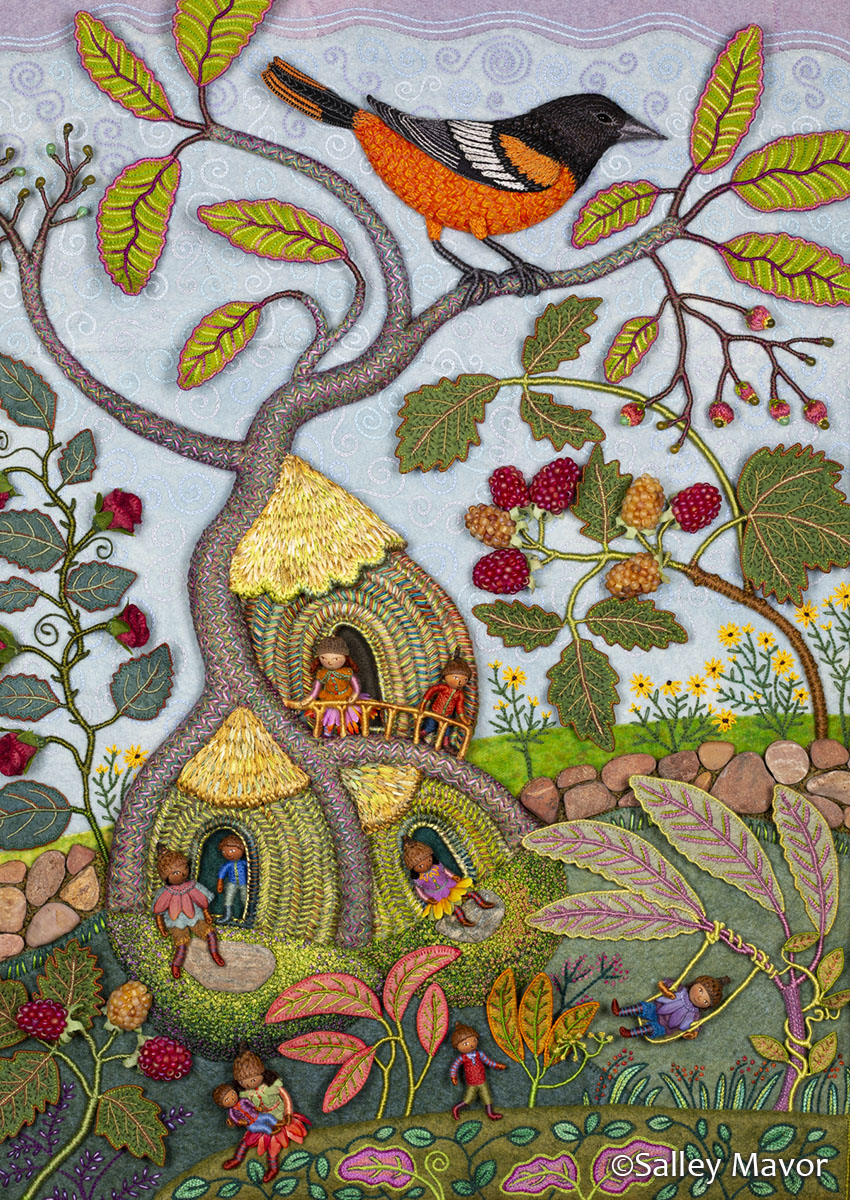
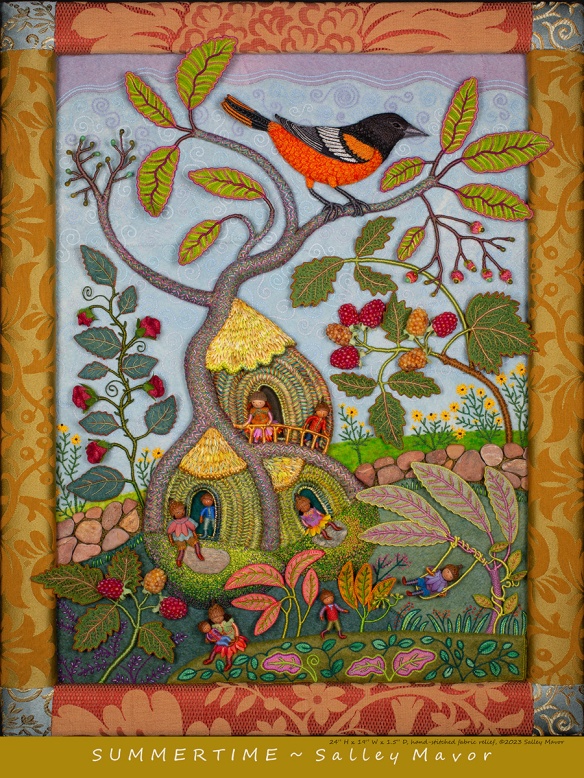
Summertime 2023
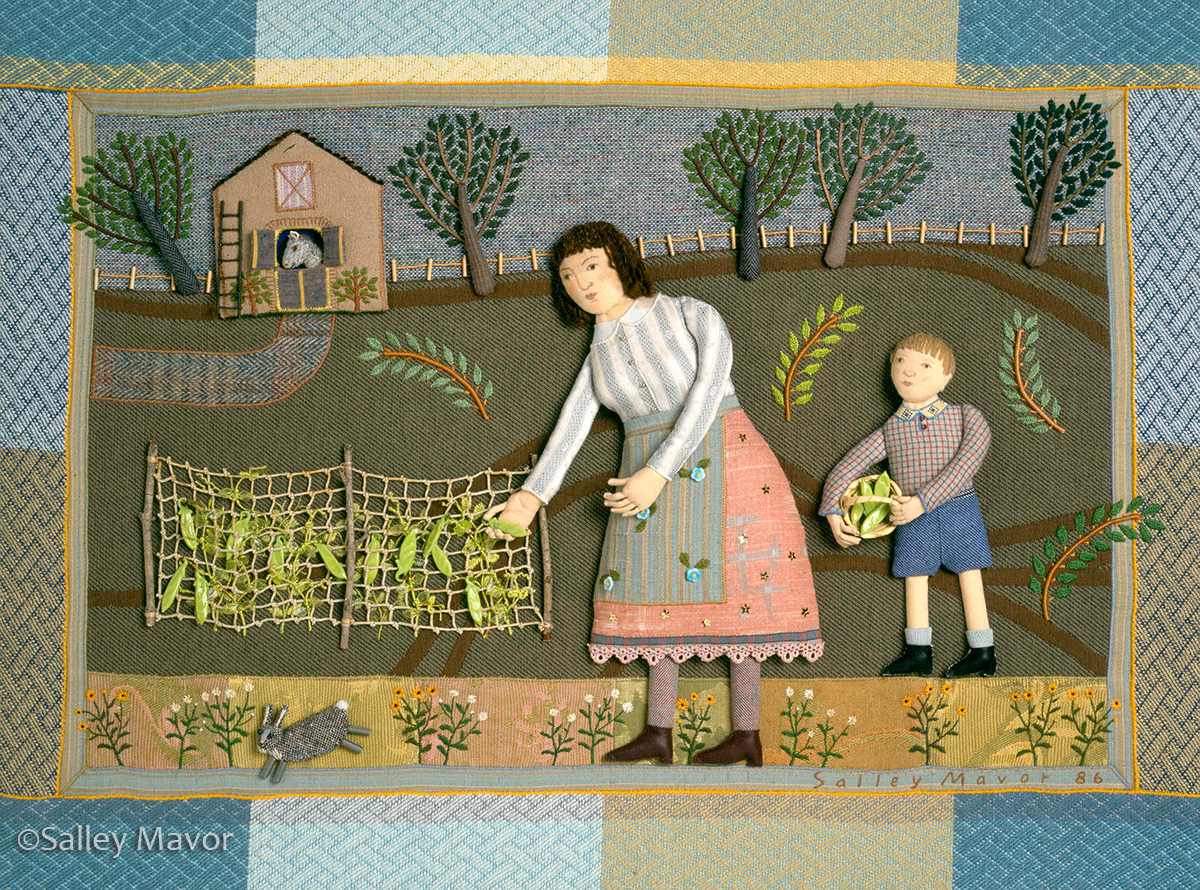
Picking Peas 1986
Beach 1982
Mary Had a Little Lamb 1995
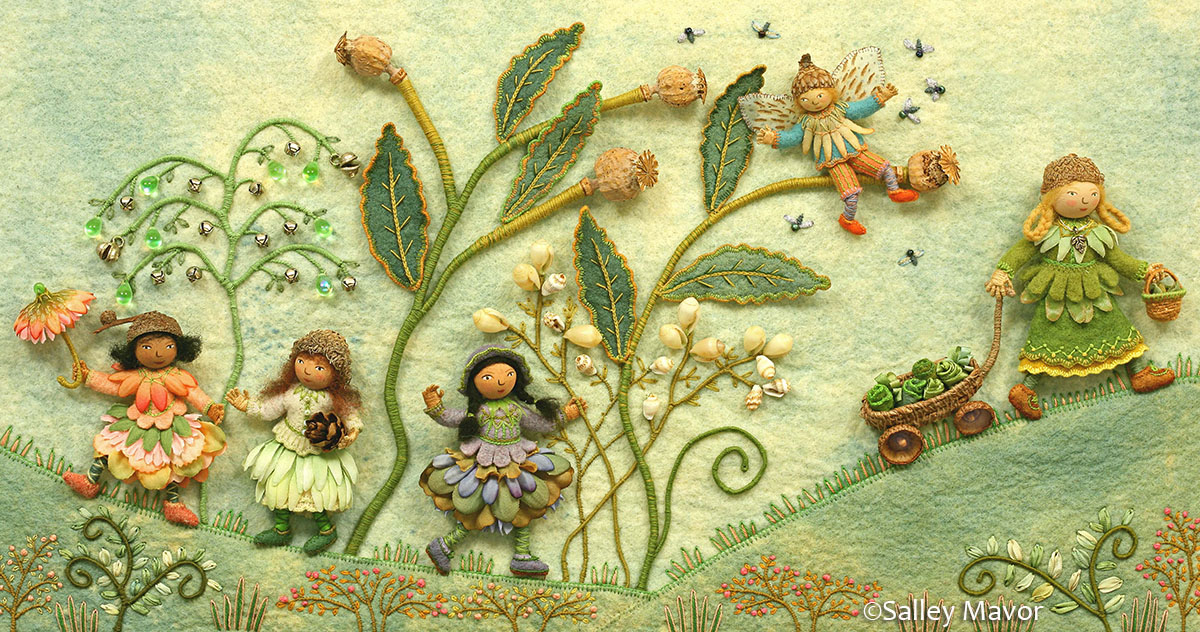
Pocketful of Posies 2010
Pocketful of Posies 2010
Pocketful of Posies 2010
Pocketful of Posies 2010
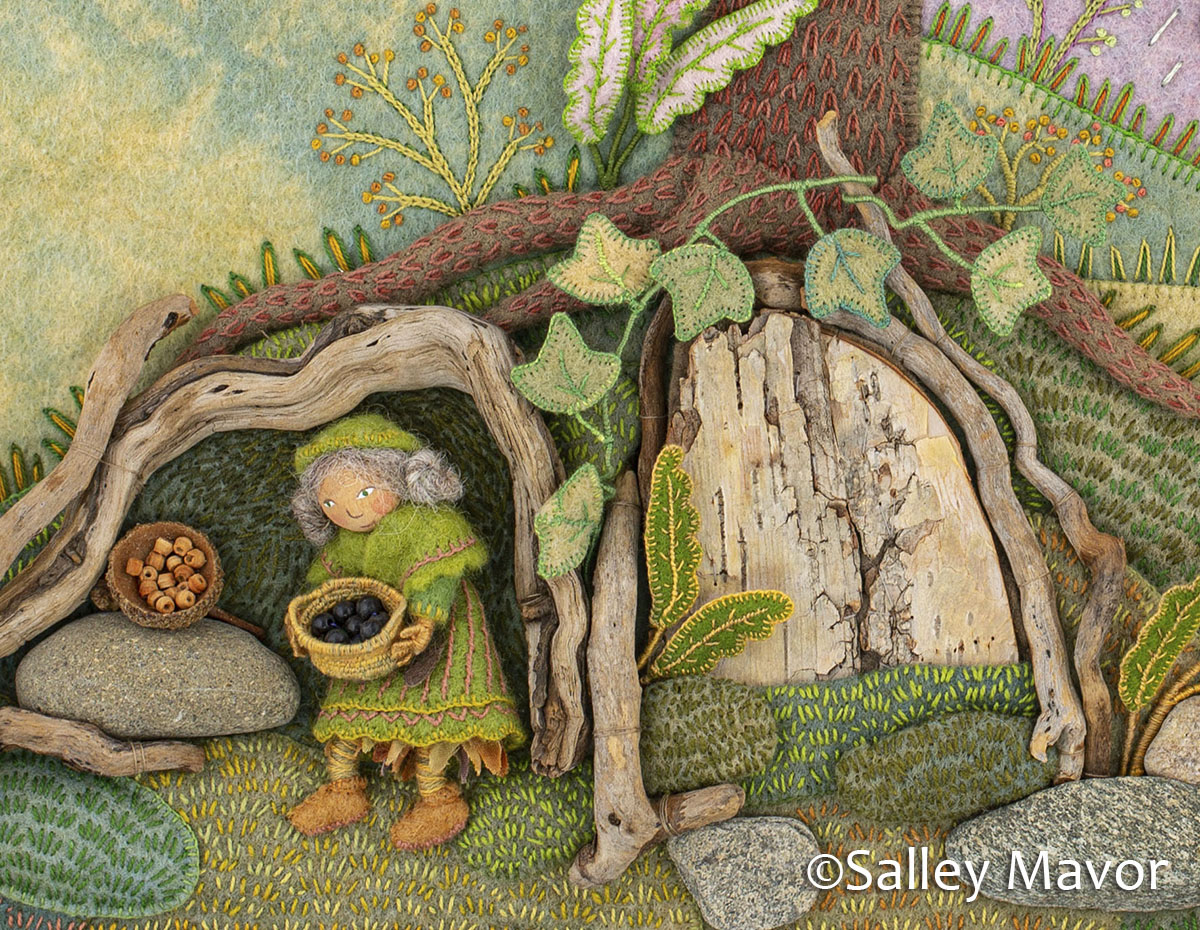
Rabbitat 2011
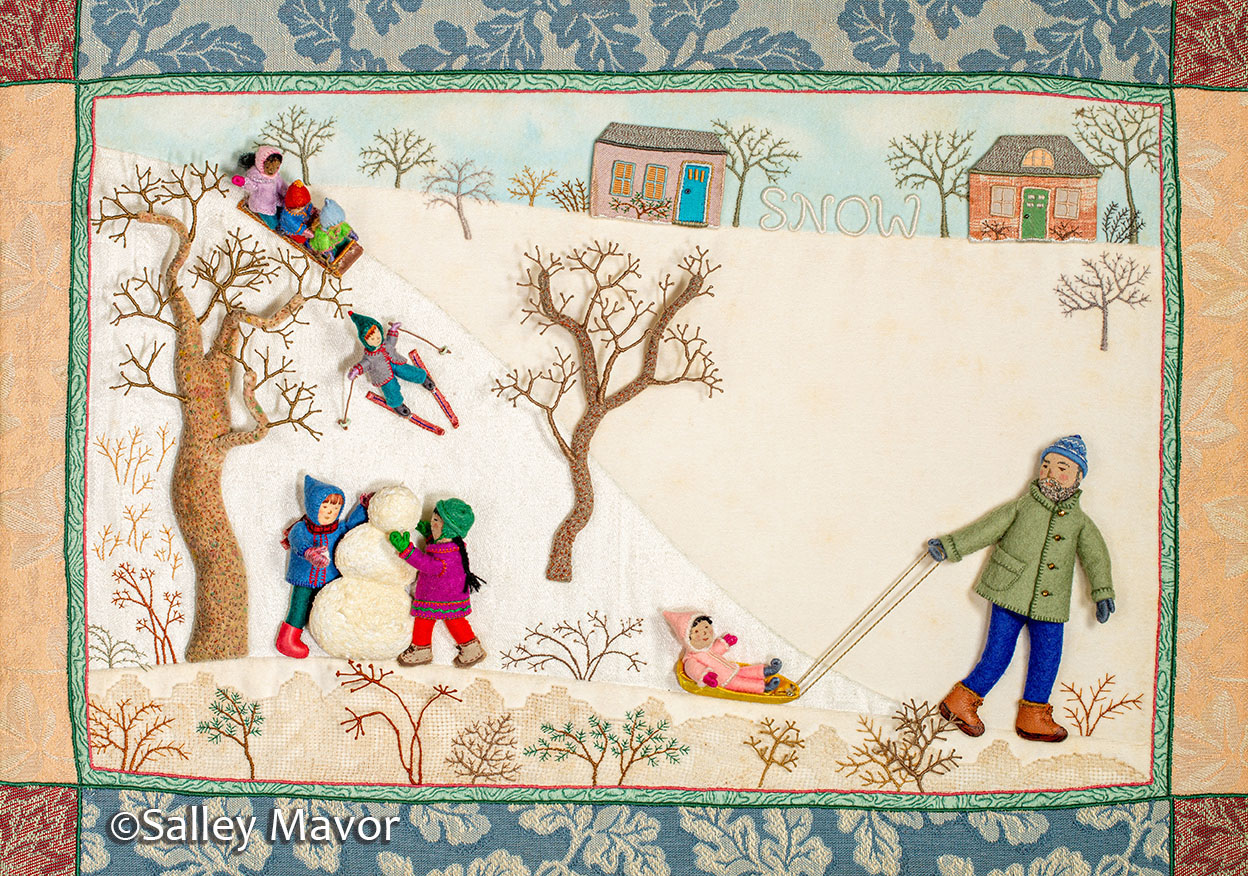
Snow 1997
Rana is Born 1991
To keep up with new posts, please subscribe to this blog. Your contact info will not be sold or shared. If you’d like to see more frequent photos tracking the projects in my studio, please follow me on Facebook, Instagram and BlueSky.
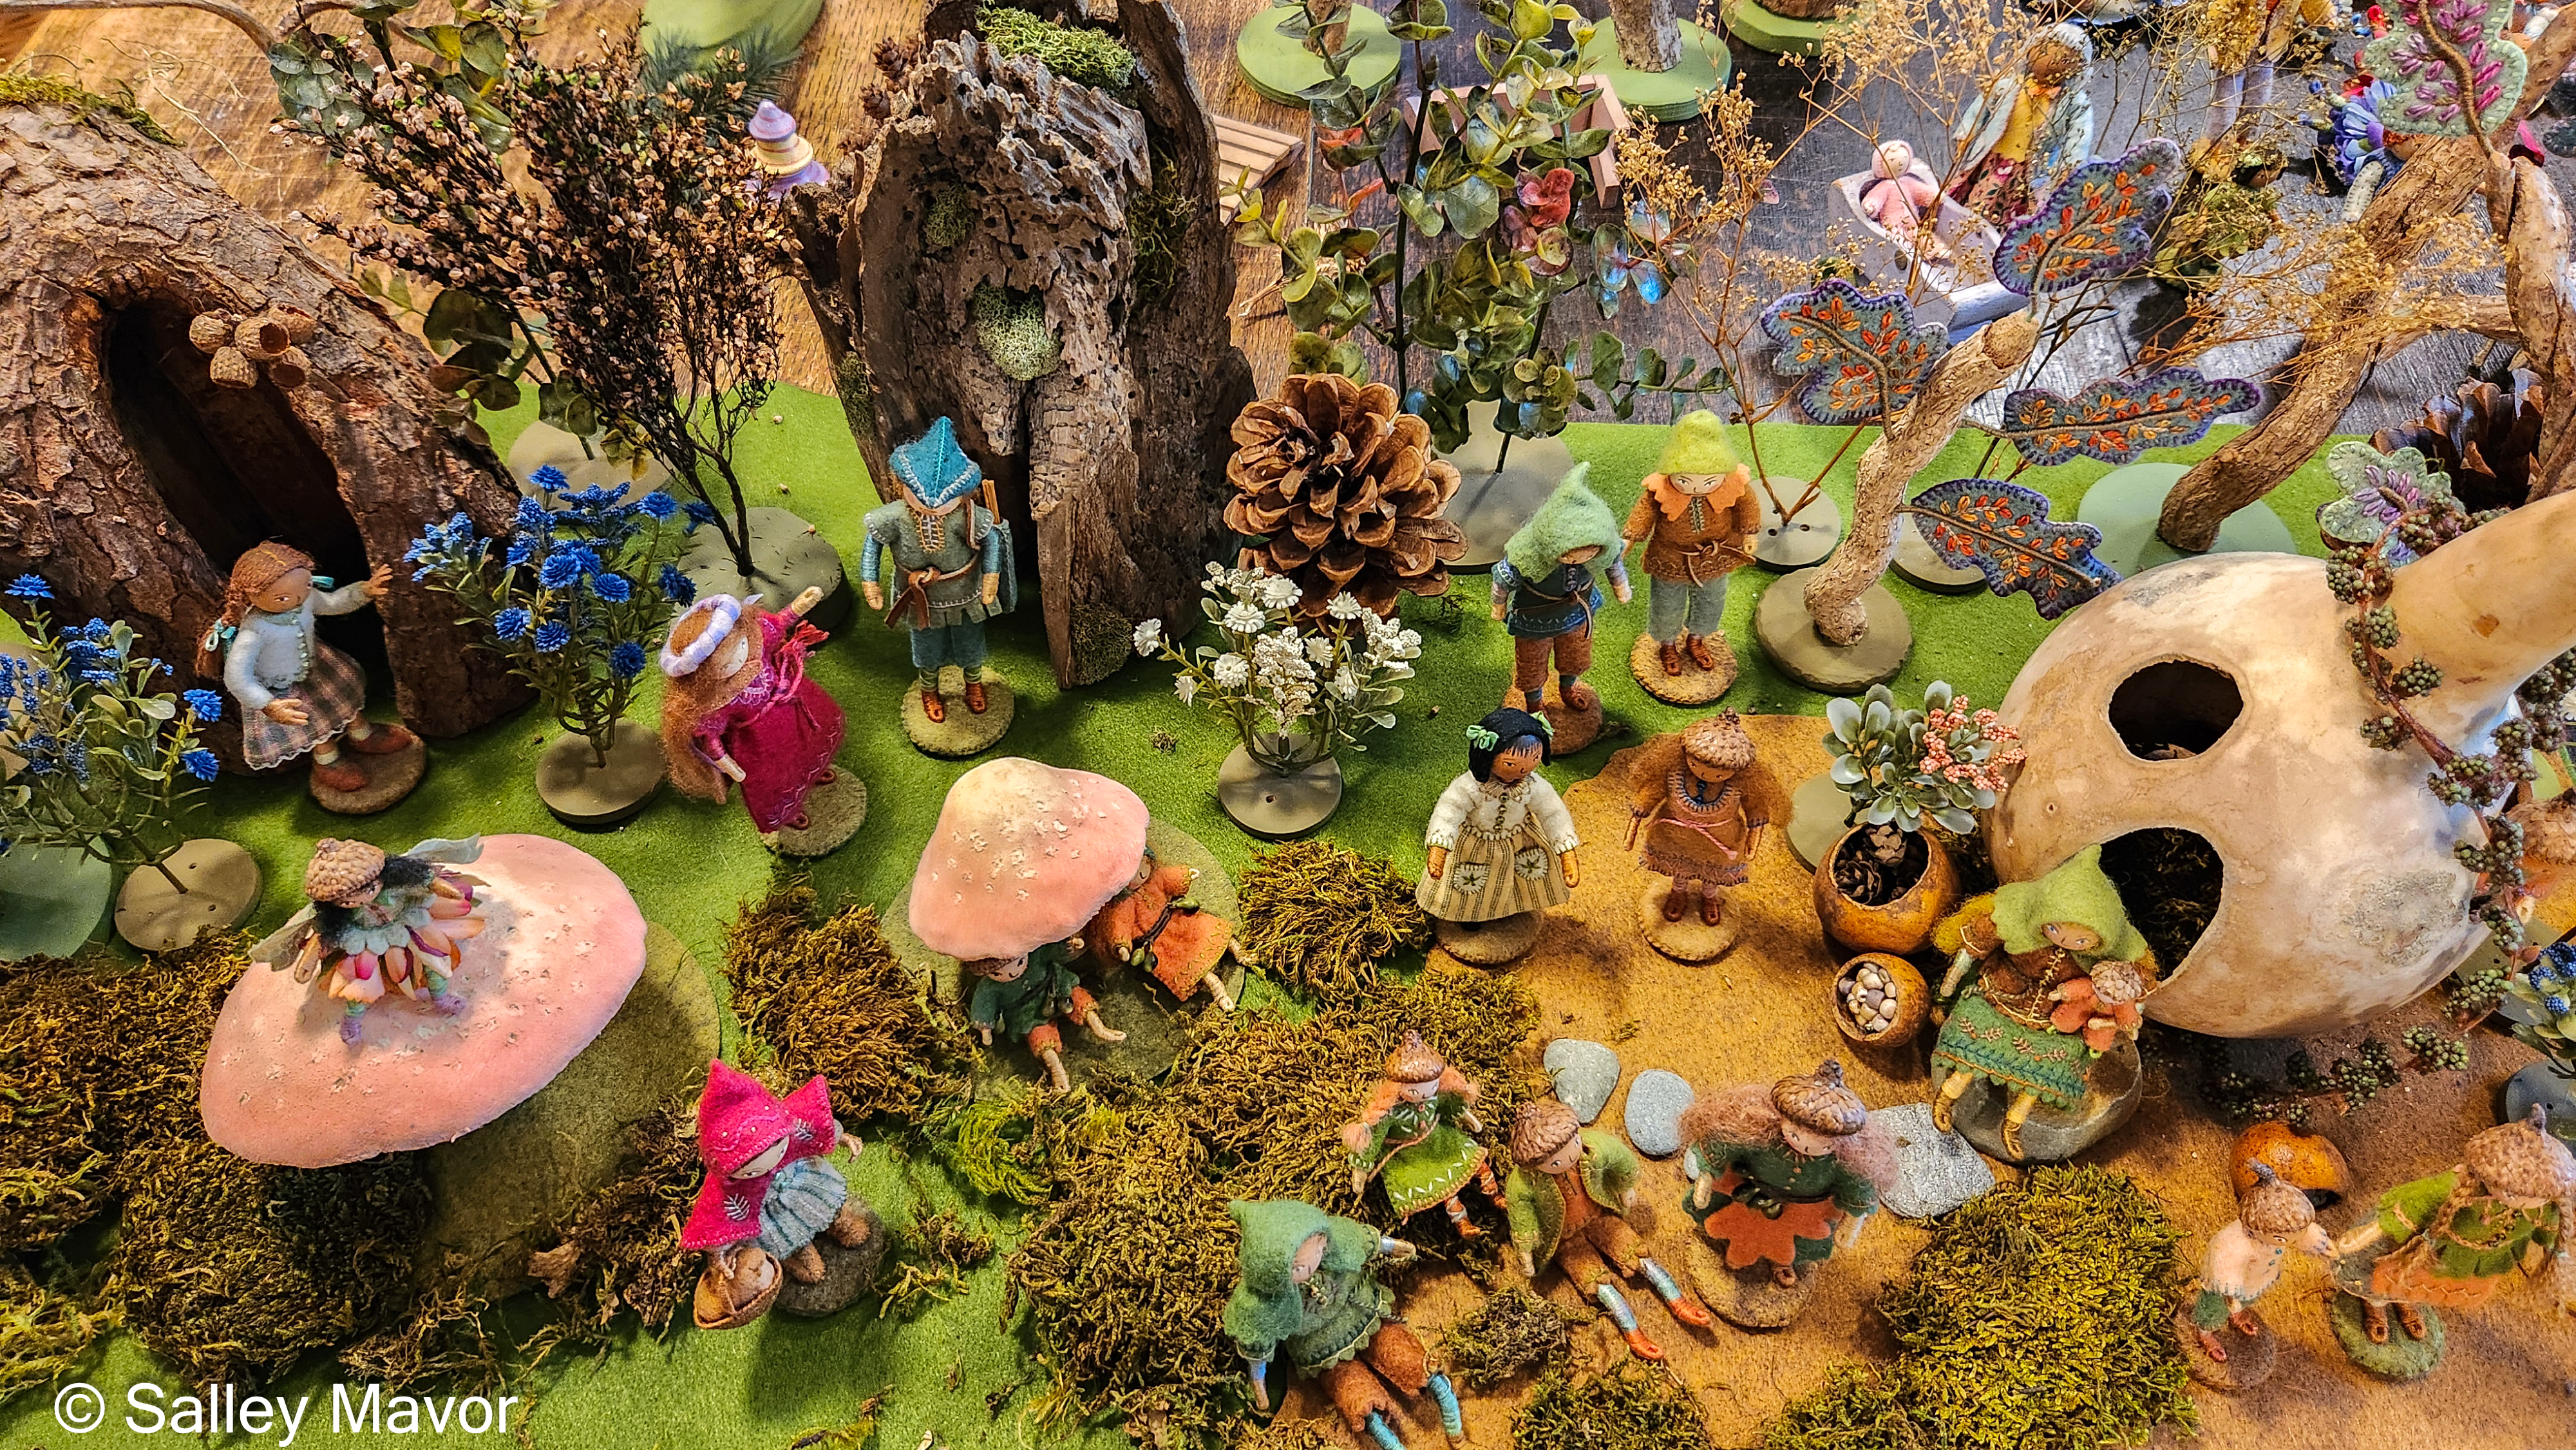
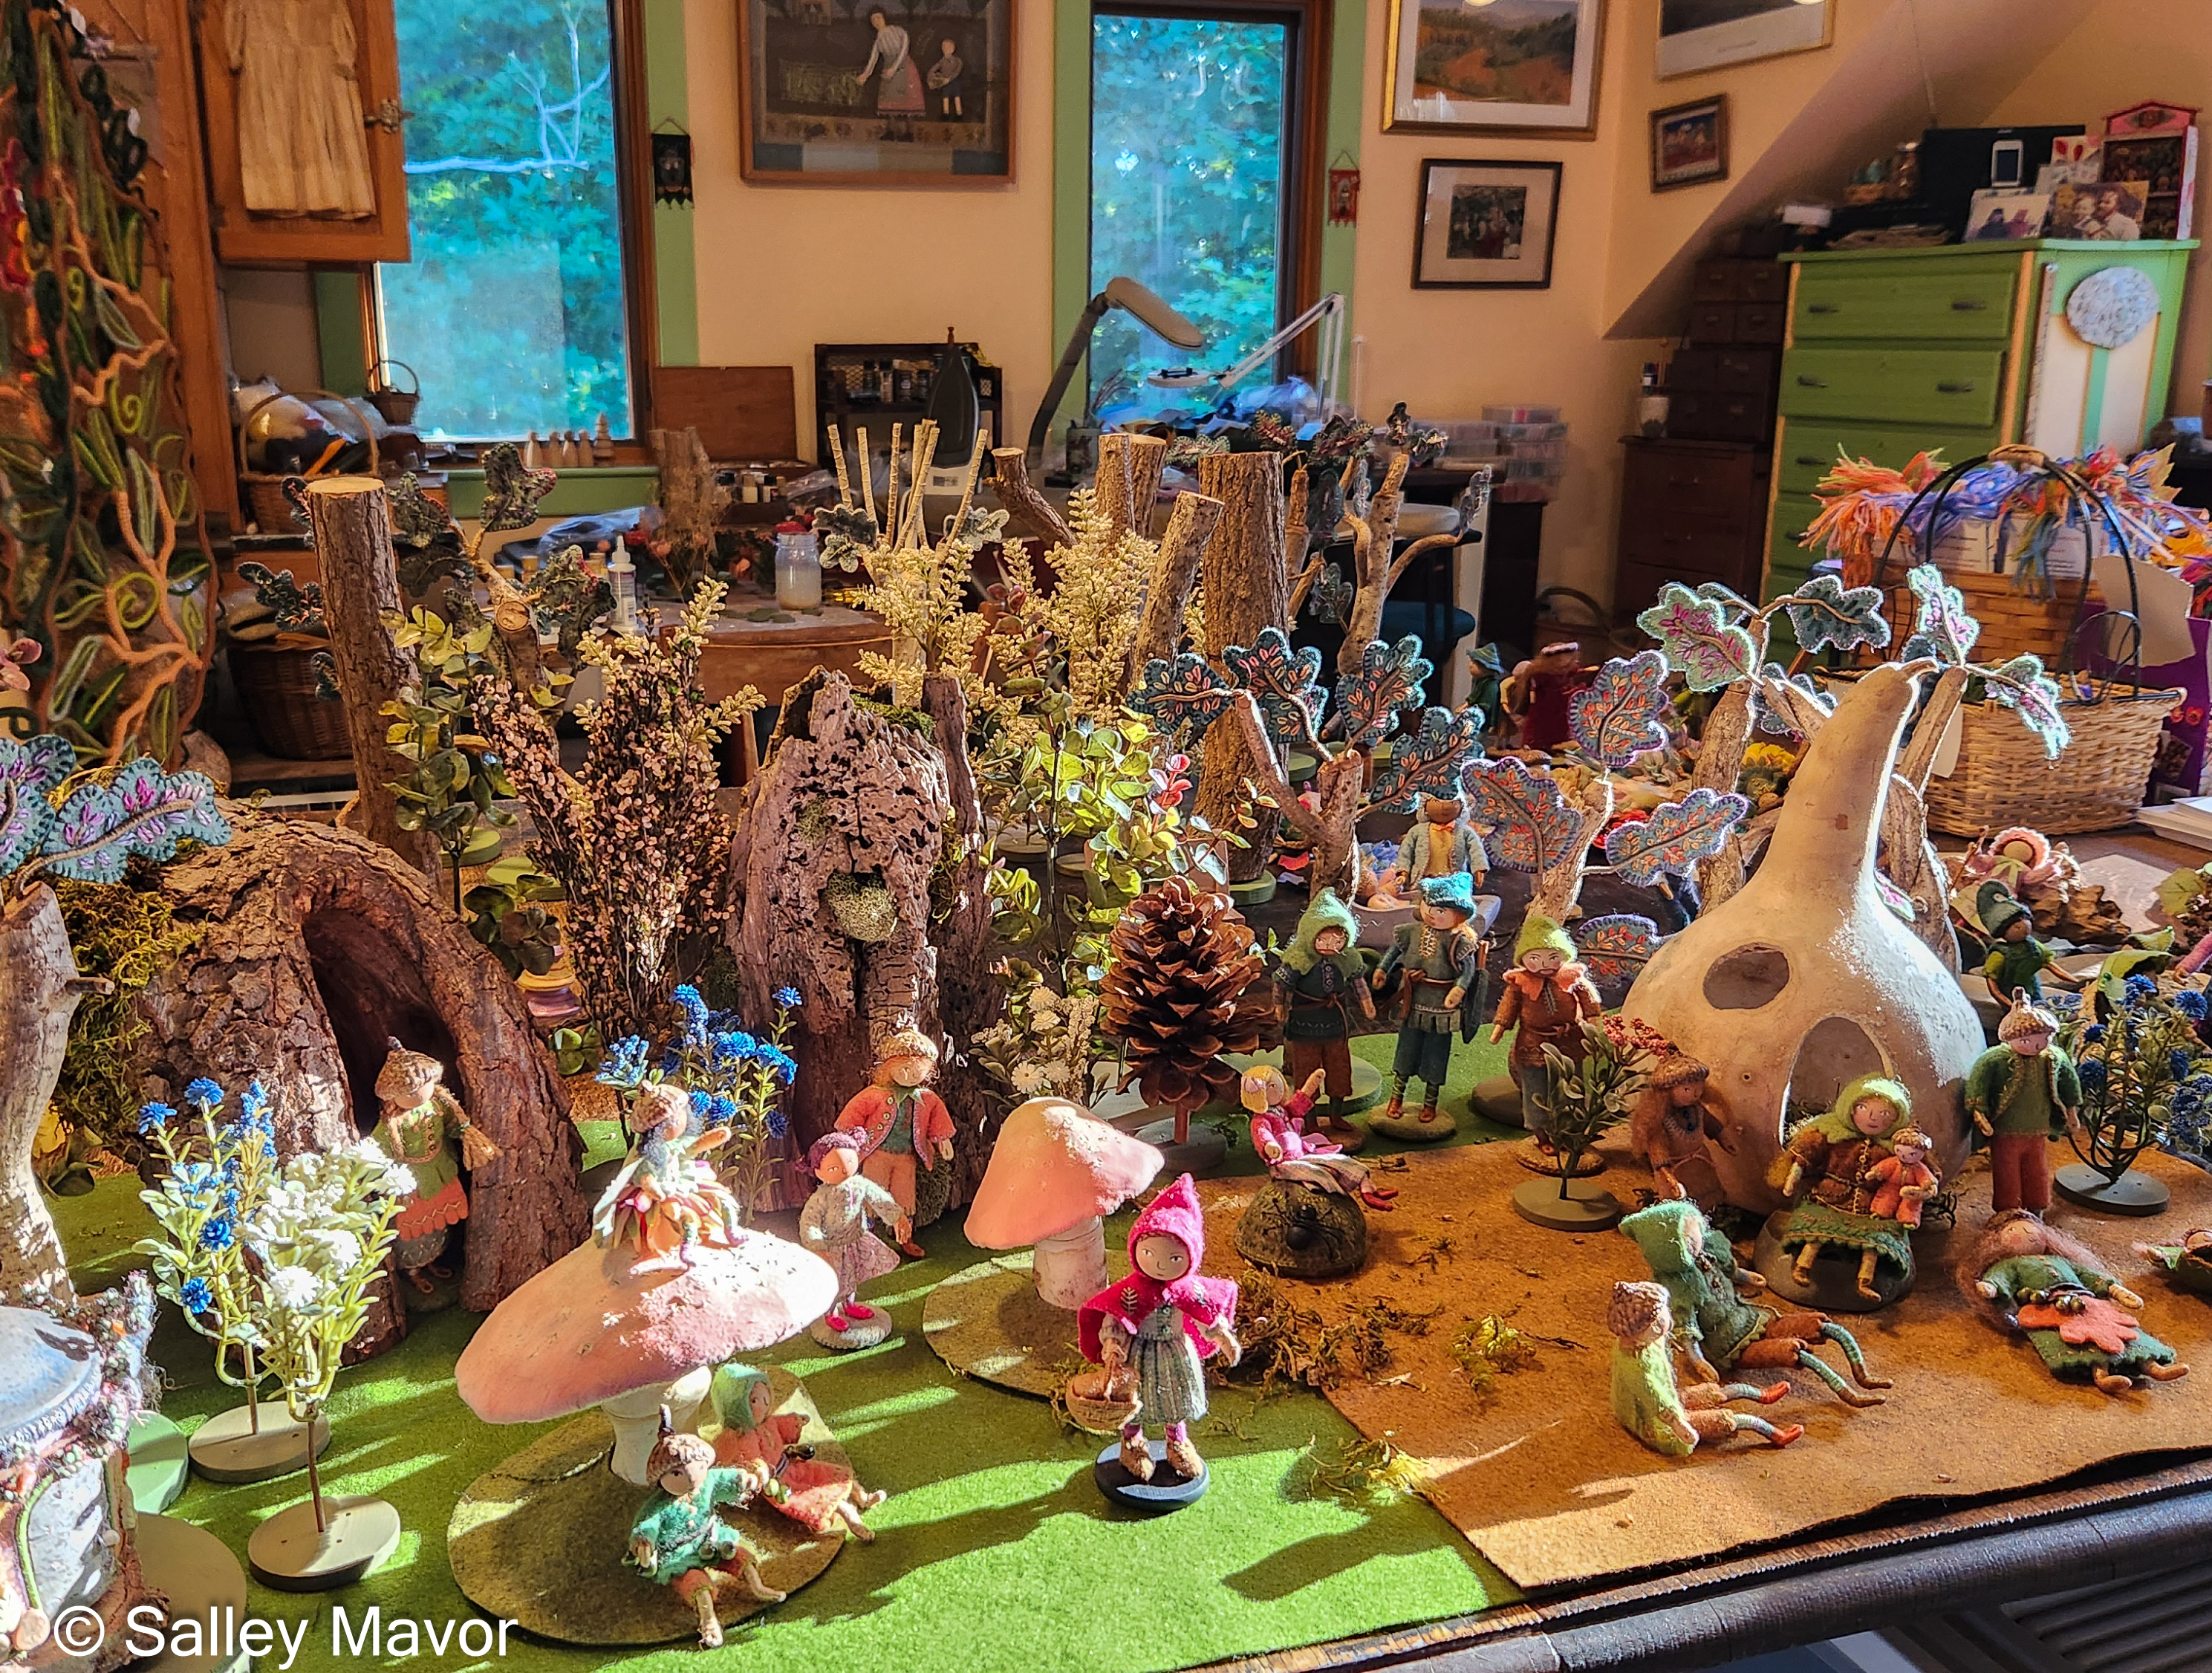
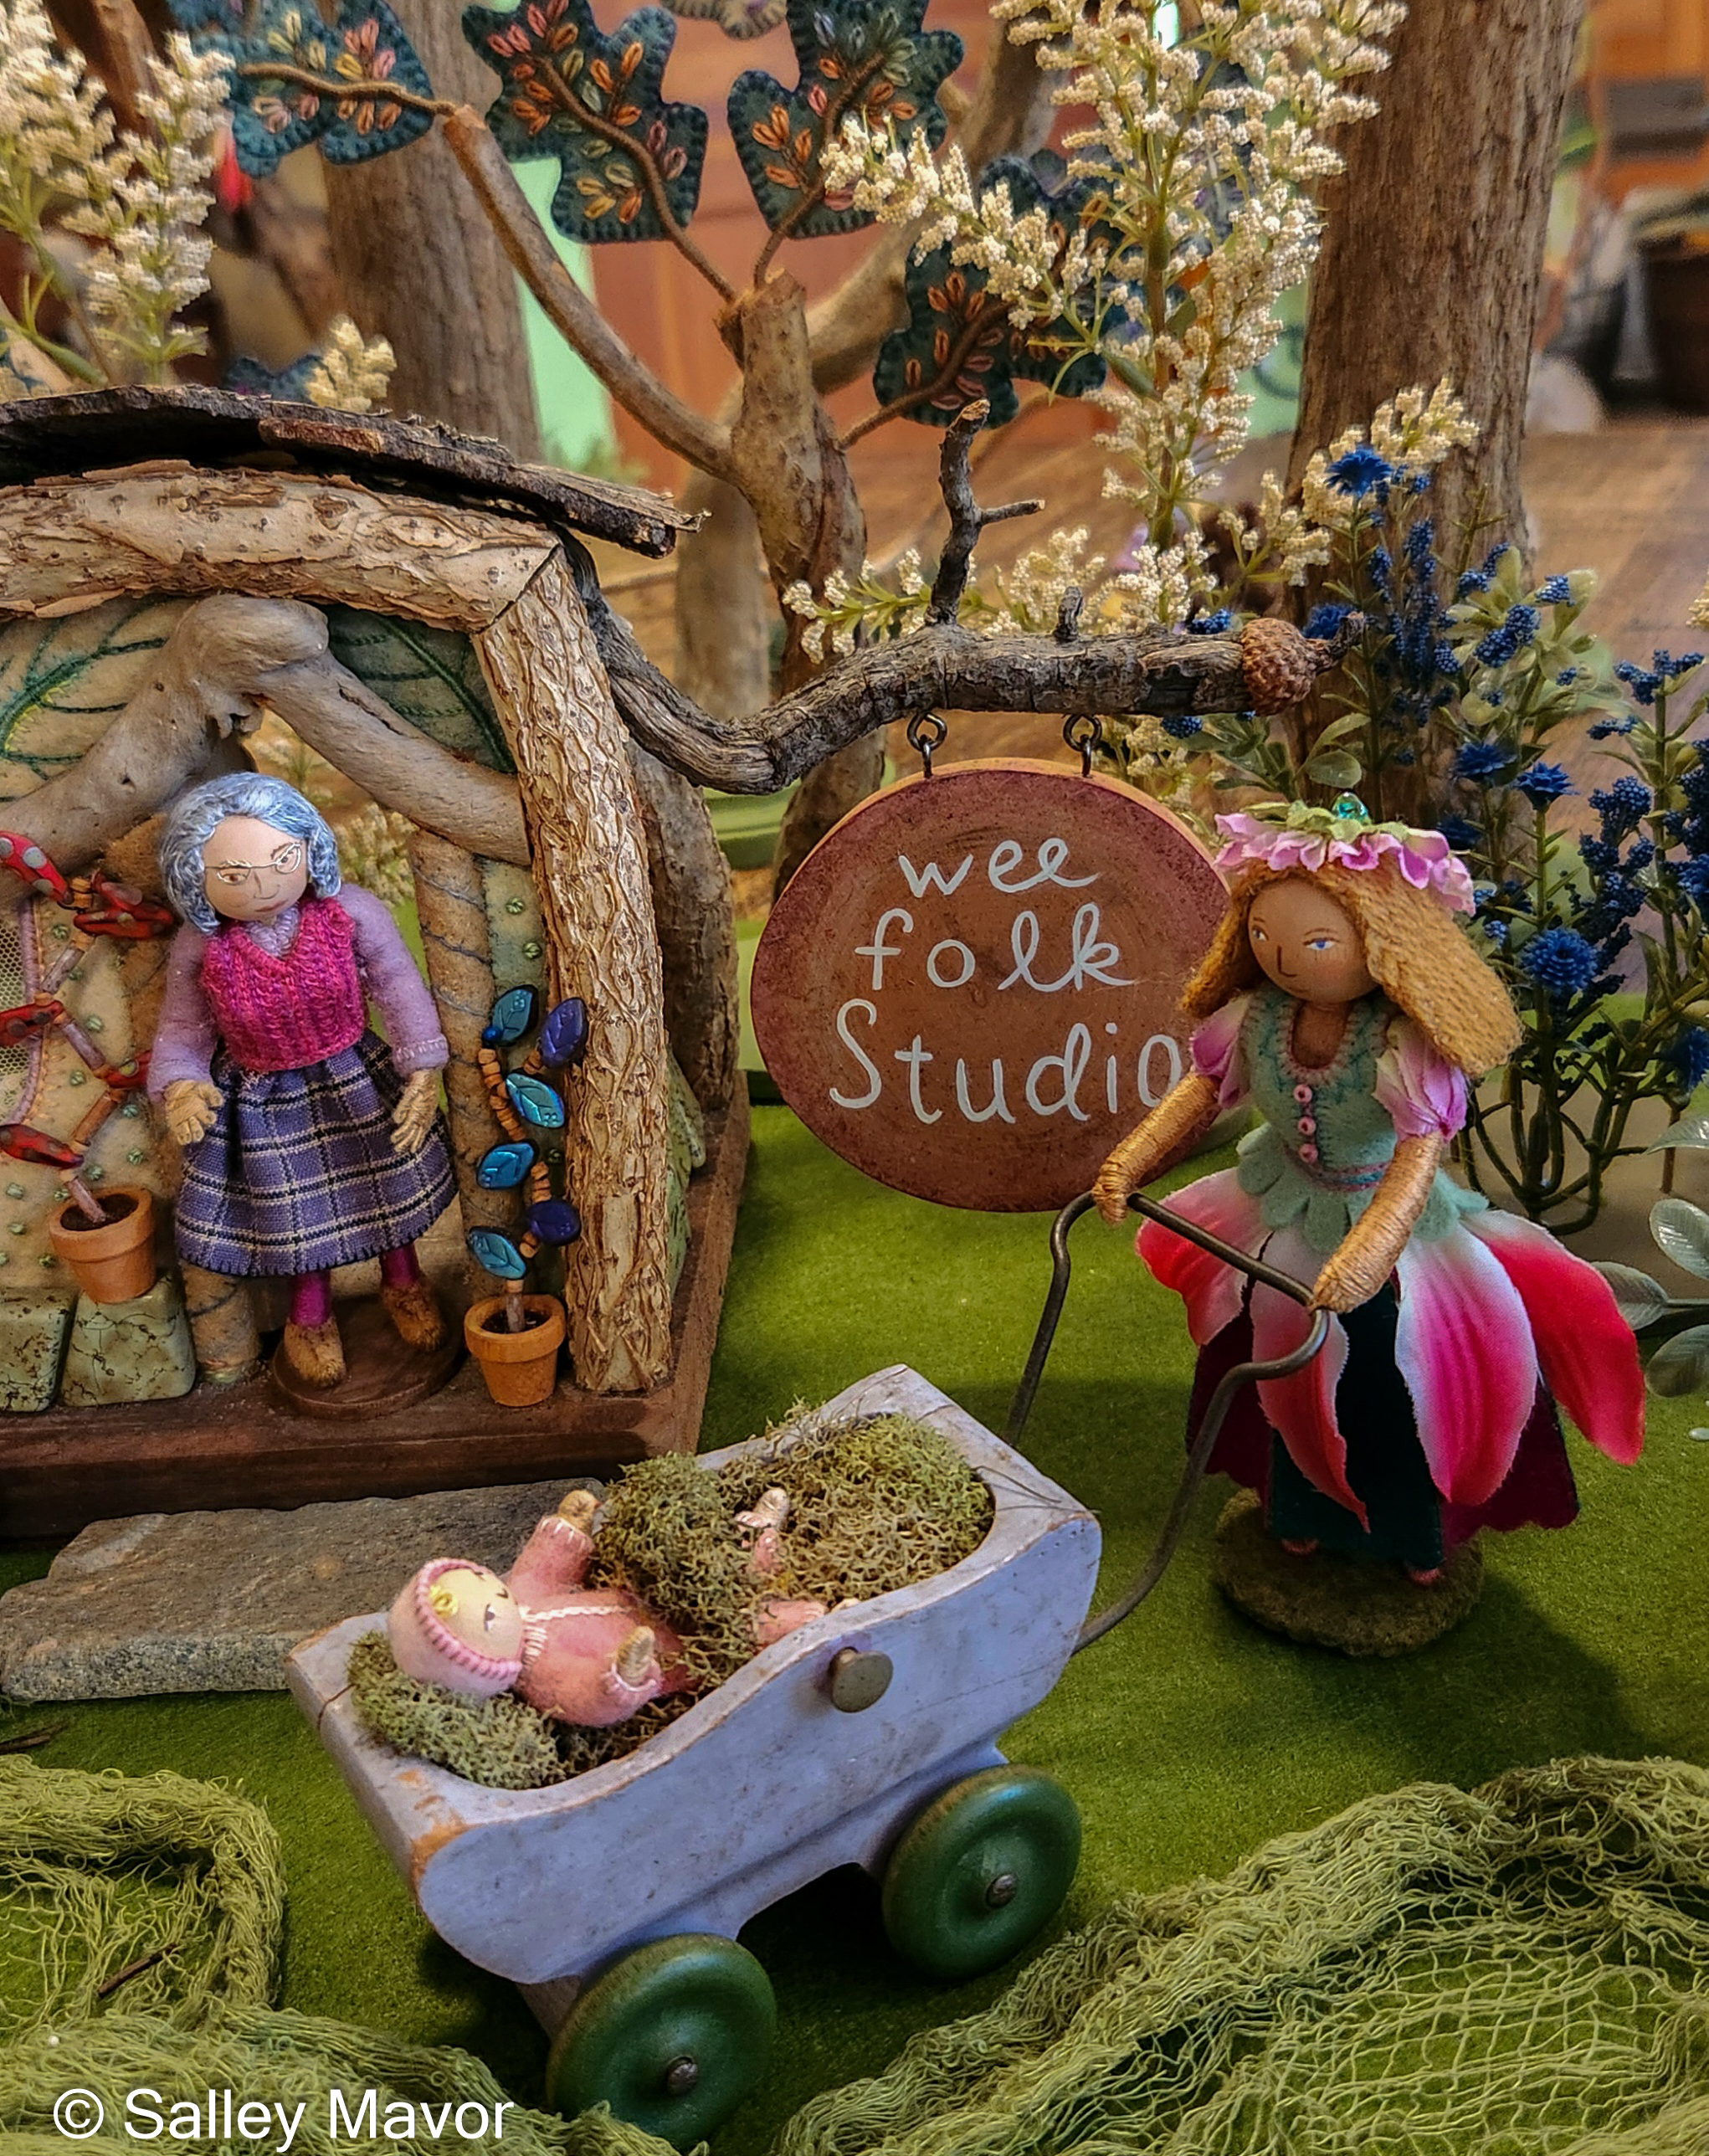
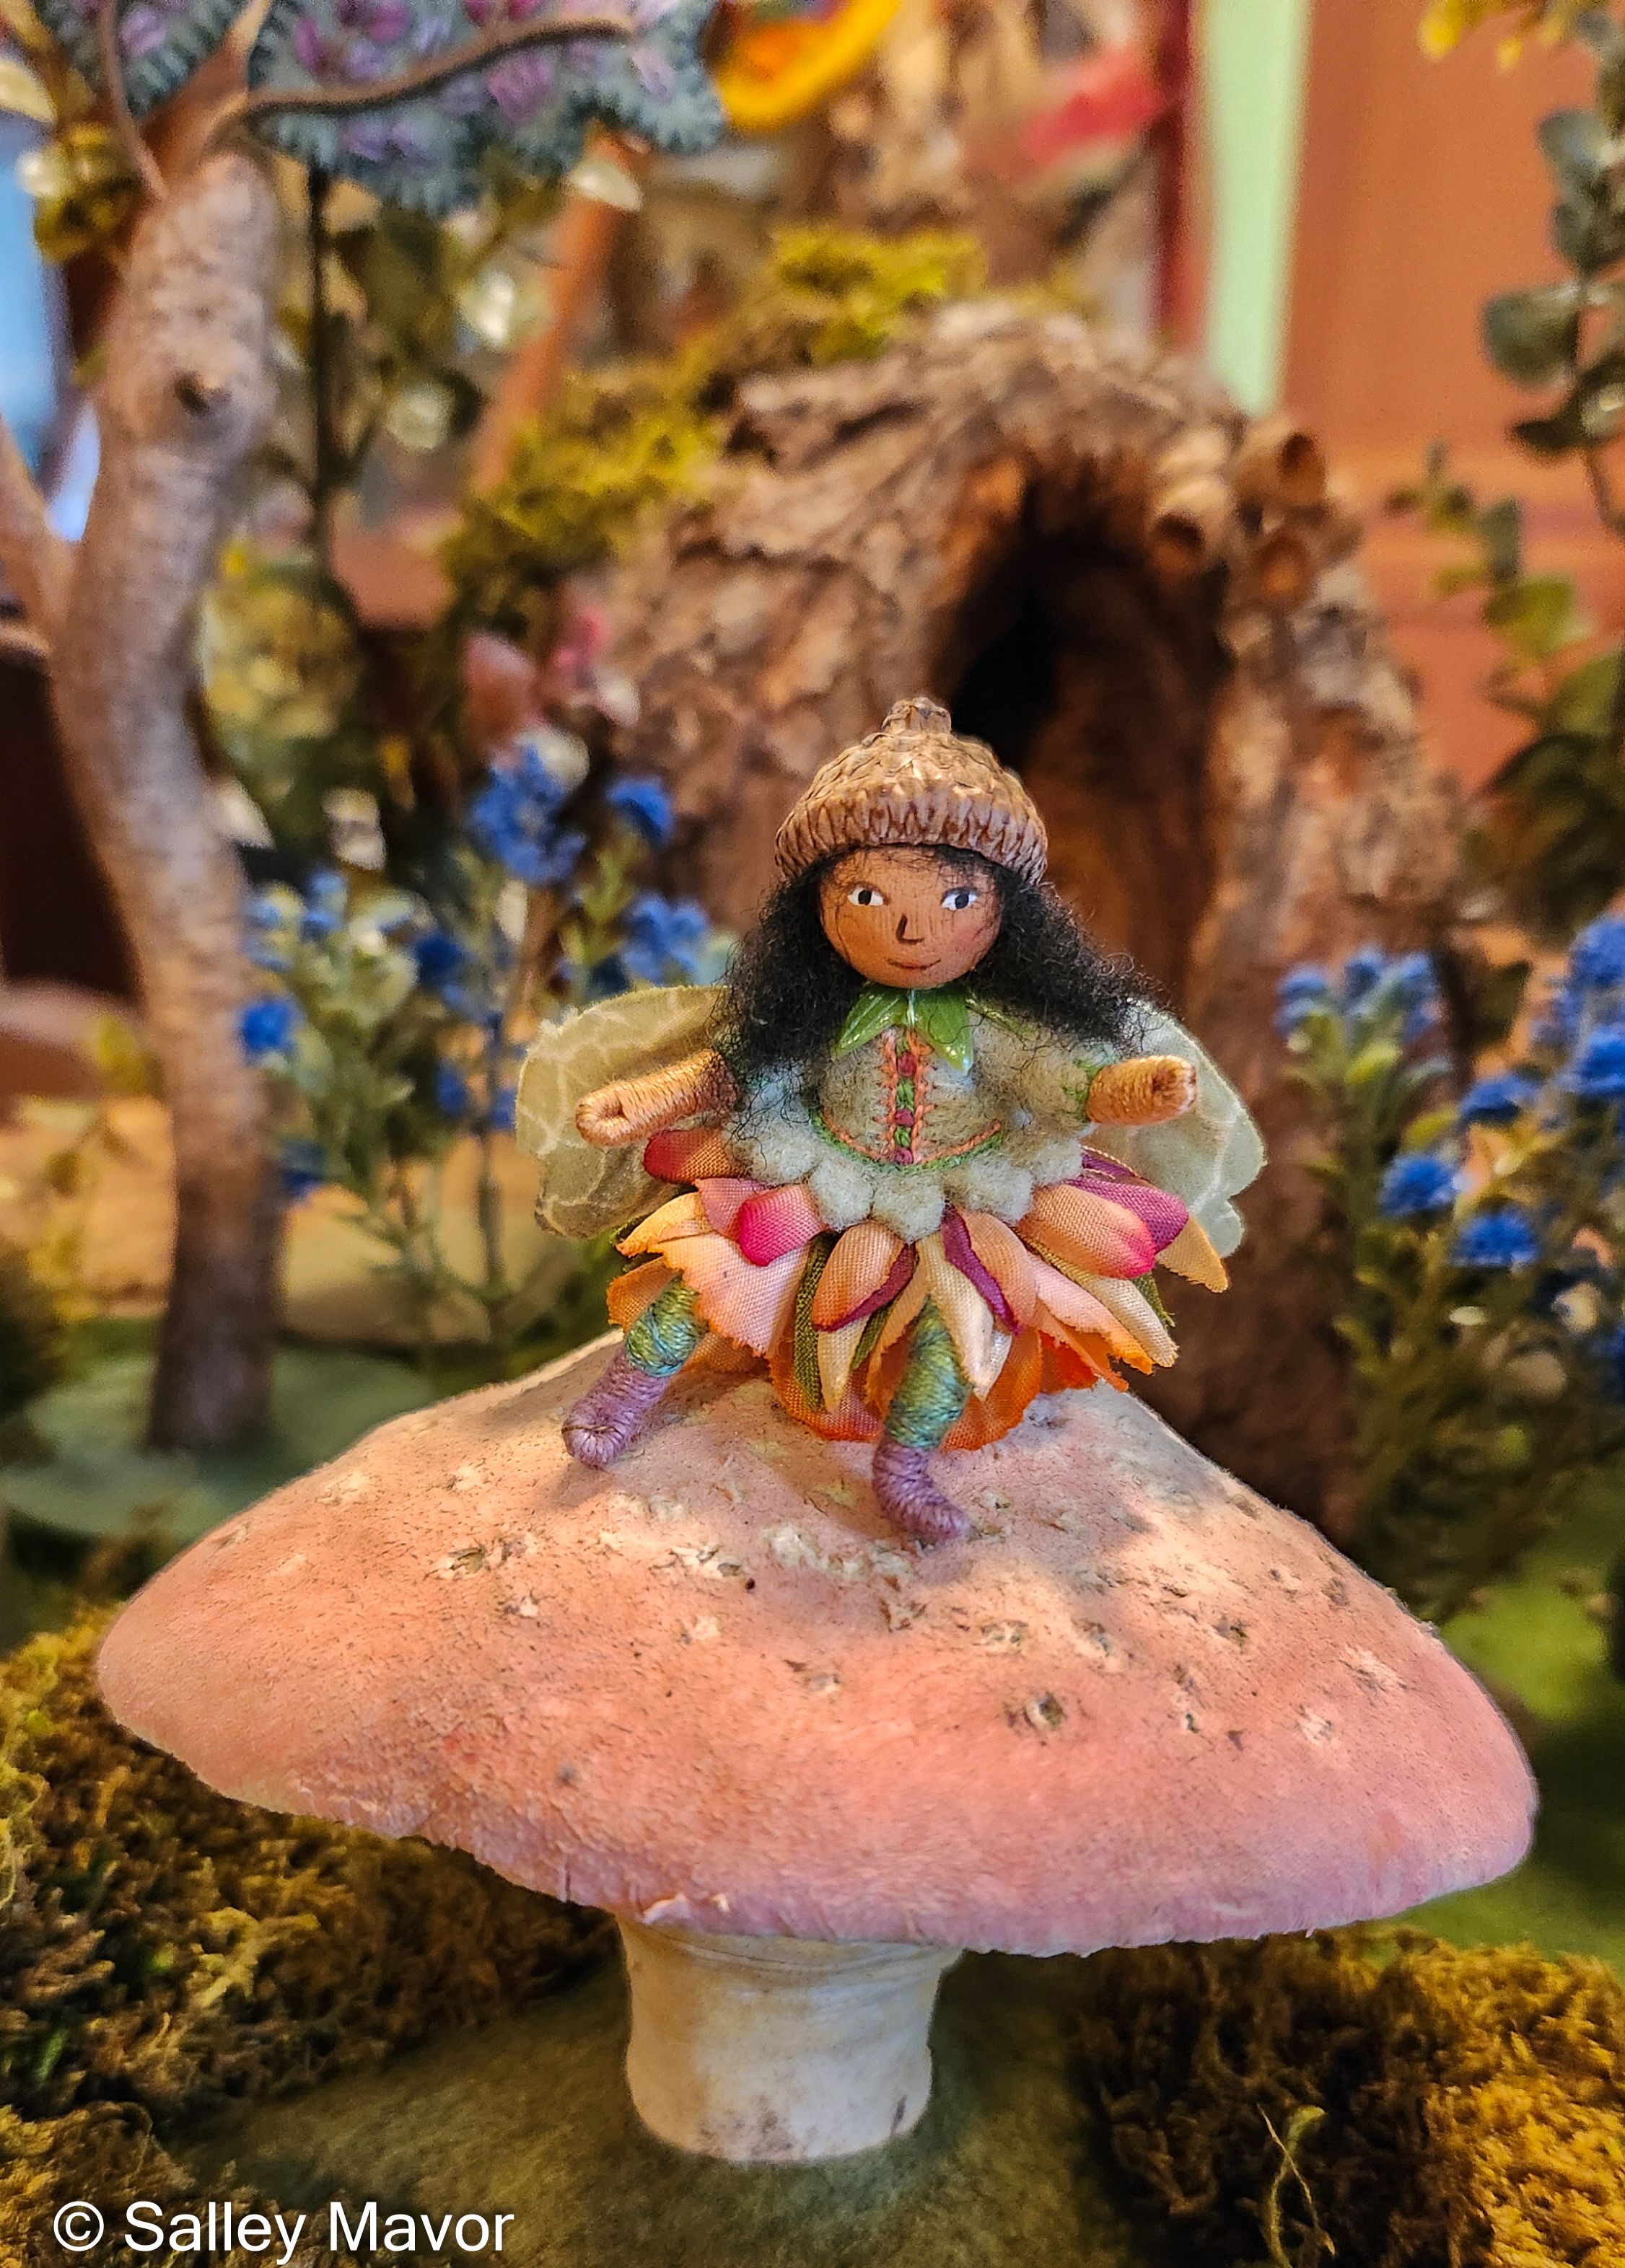
For the past few weeks, I’ve been playing with dolls and setting up miniature scenes in my studio. They’re for my exhibition at the New England Quilt Museum in Lowell, MA, which opens on Sept. 9, 2025. While working on these dioramas, I felt just as absorbed and transfixed as I did as a child. My imagination and abilities may have evolved since then, but the overwhelming desire to create other worlds is the same. I thought it would be fun to share photos and videos of these practice set-ups before everything was moved and installed at the museum.
Four scenes, depicting winter, spring, summer and fall, are reassembled and on view in display cases in my exhibition, To Every Season: Works by Salley Mavor. In addition to the dioramas, a wide selection of embroidered pieces that celebrate the wonder and magic of the natural world can be seen, including framed tableaus on loan from private collections and original picture book illustrations from the past 40 years. The show will be on view through Dec. 31, 2025 at the New England Quilt Museum in Lowell, MA. I will be giving an Artist Talk on Sat., Nov. 1, 2025 at 1:00 PM (pre-register here).
video of the practice Fall Scene
When I visited the museum last year to choose which galleries to hang my art, the curator, Pam Weeks, also pointed out 4 large display cases for 3-dimensional work. It seemed like the perfect opportunity to comb through all of my treasures and create miniature worlds! I ended up using a mishmash of figures, houses, furniture, trees, and other stage dressing materials that I’ve made and collected over the years.
Many of the 80 wee folk characters are sample projects from my how-to book, Felt Wee Folk: New Adventures. In addition to providing patterns and instructions for making the figures, the book explains how to make the weighted doll stands you see here.
Some of the trees and houses were used in Liberty and Justice, the stop-motion animation that Rob and I made.
The winter scene is modeled after the Winter Wonderland that I once created for a display case at Boston Children’s Hospital. The bottle brush evergreen trees included in the arrangement are vintage pieces from the 1950s, originally belonging to my mother-in-law.
video of the practice Winter Scene
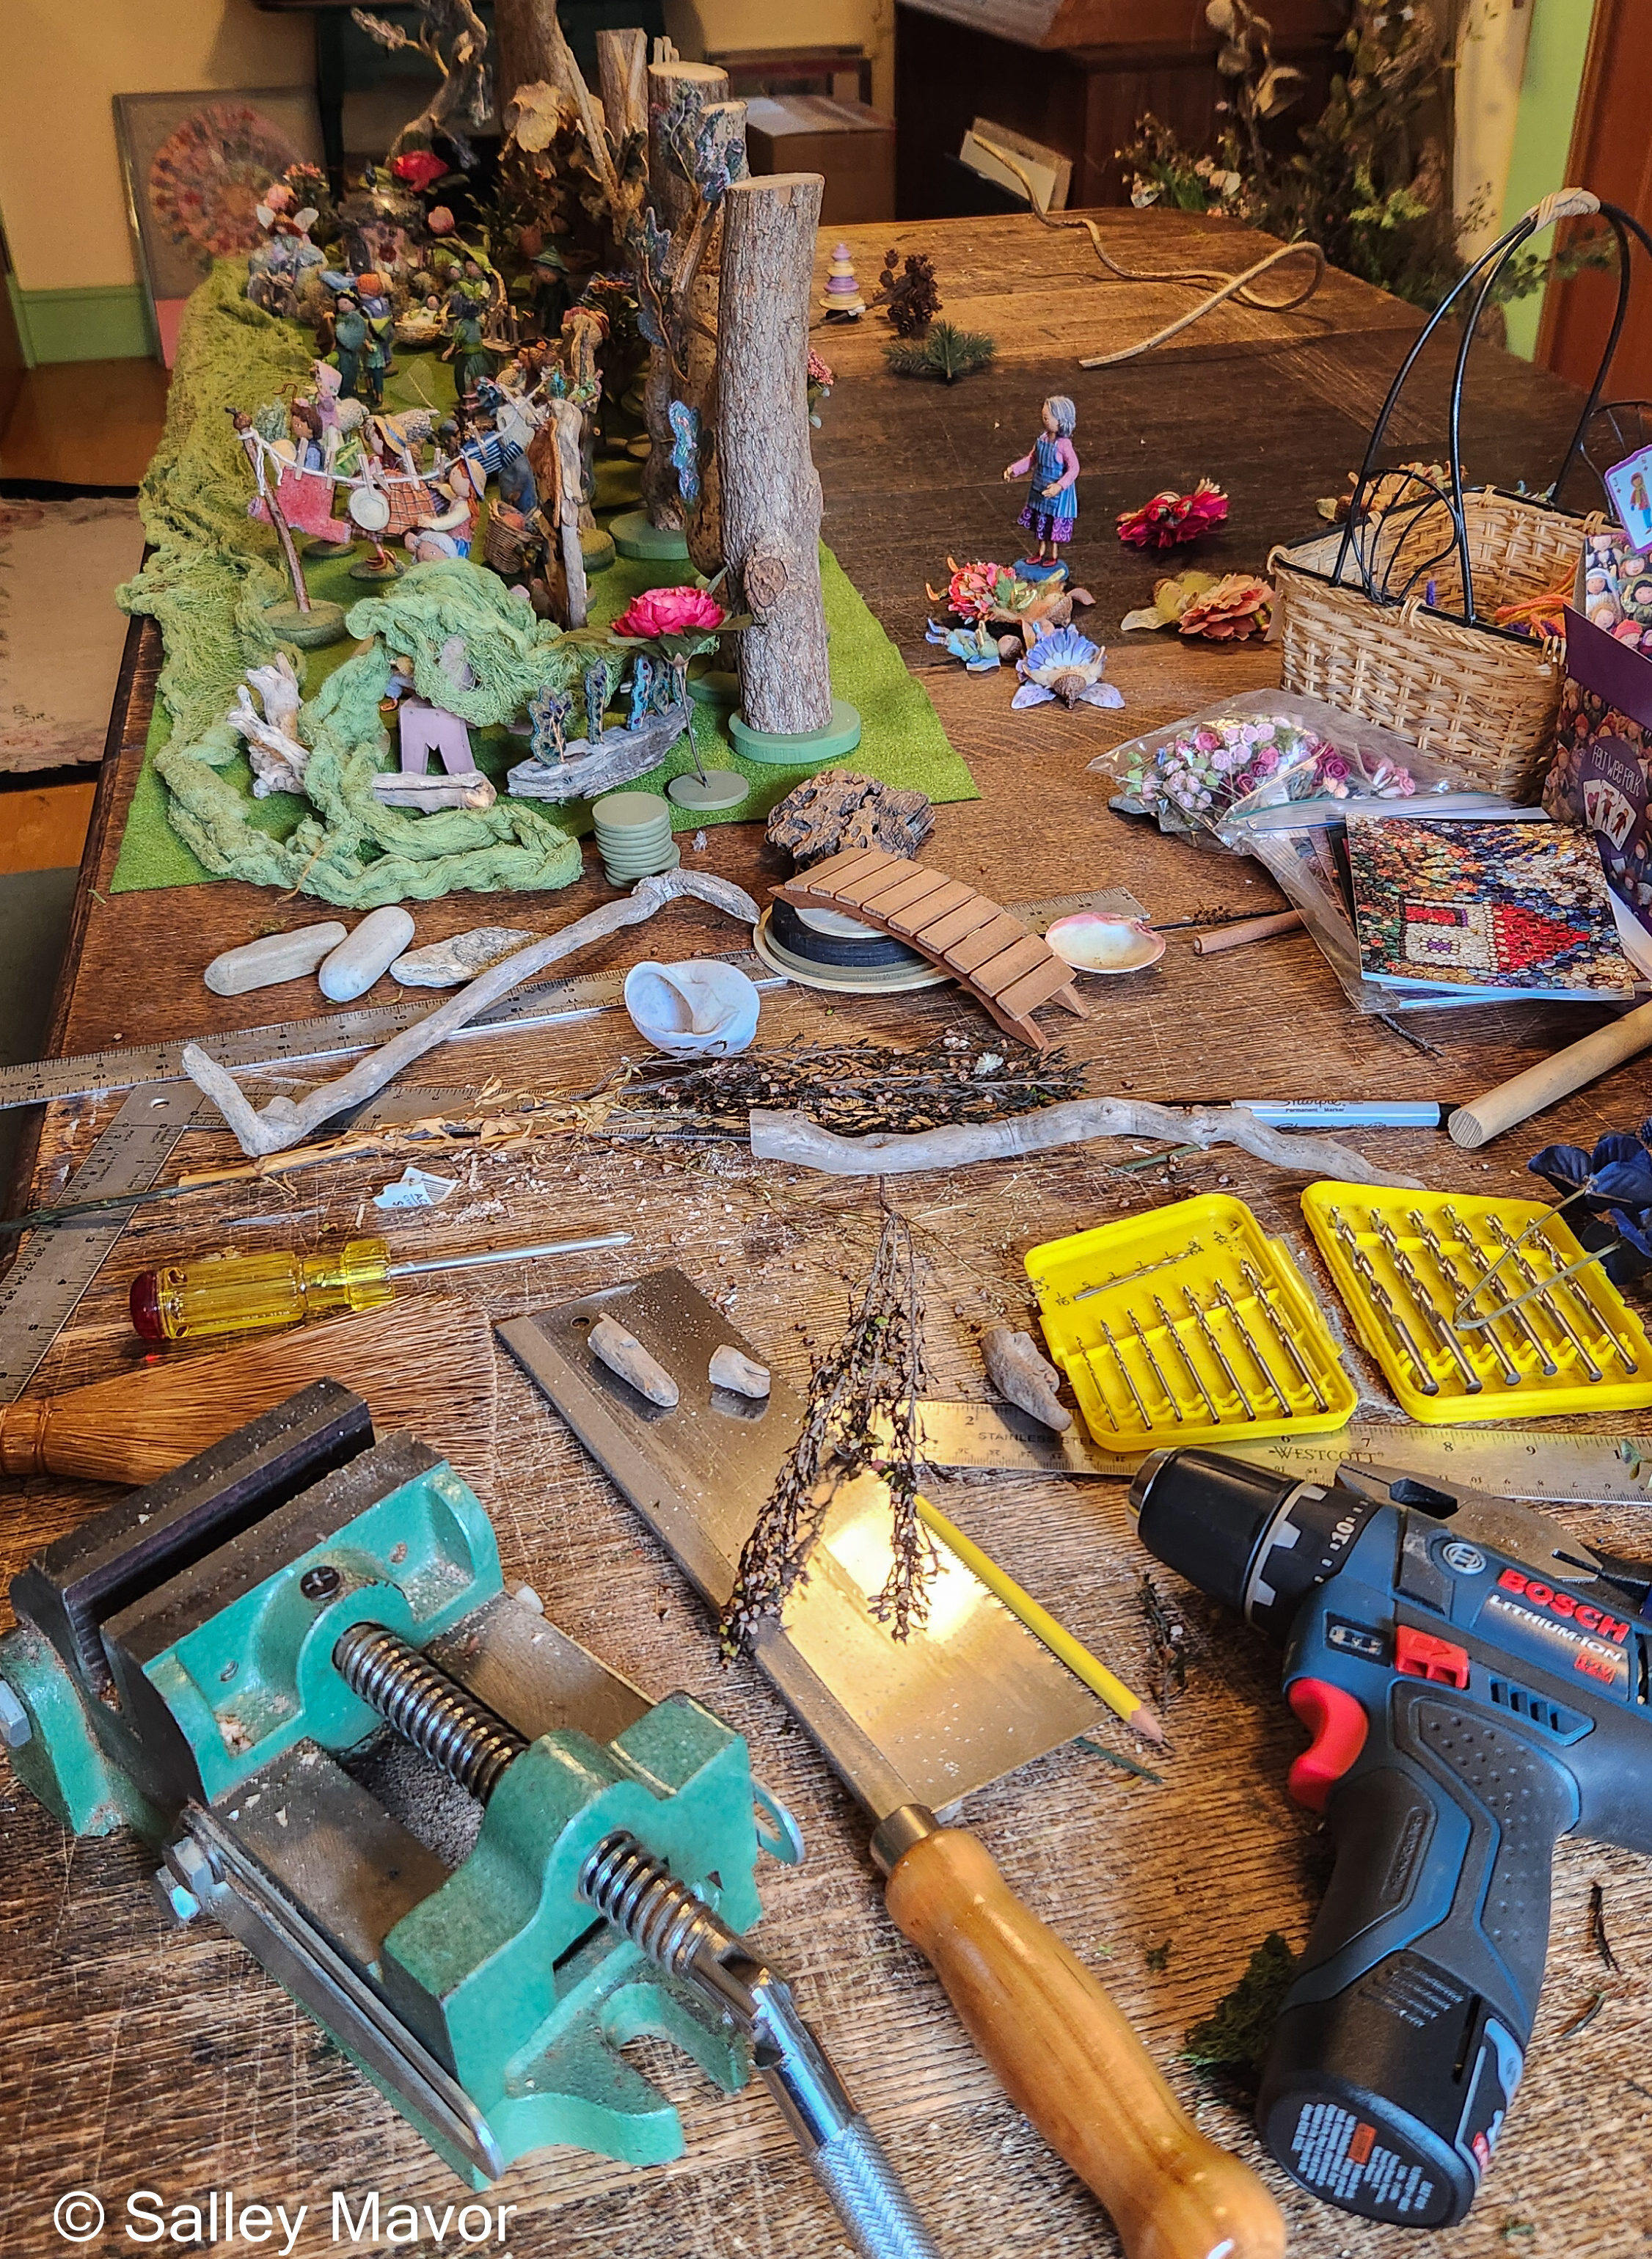
One end of the old oak table served as a work bench where I sawed tree branches and drilled holes to screw them to wooden bases.
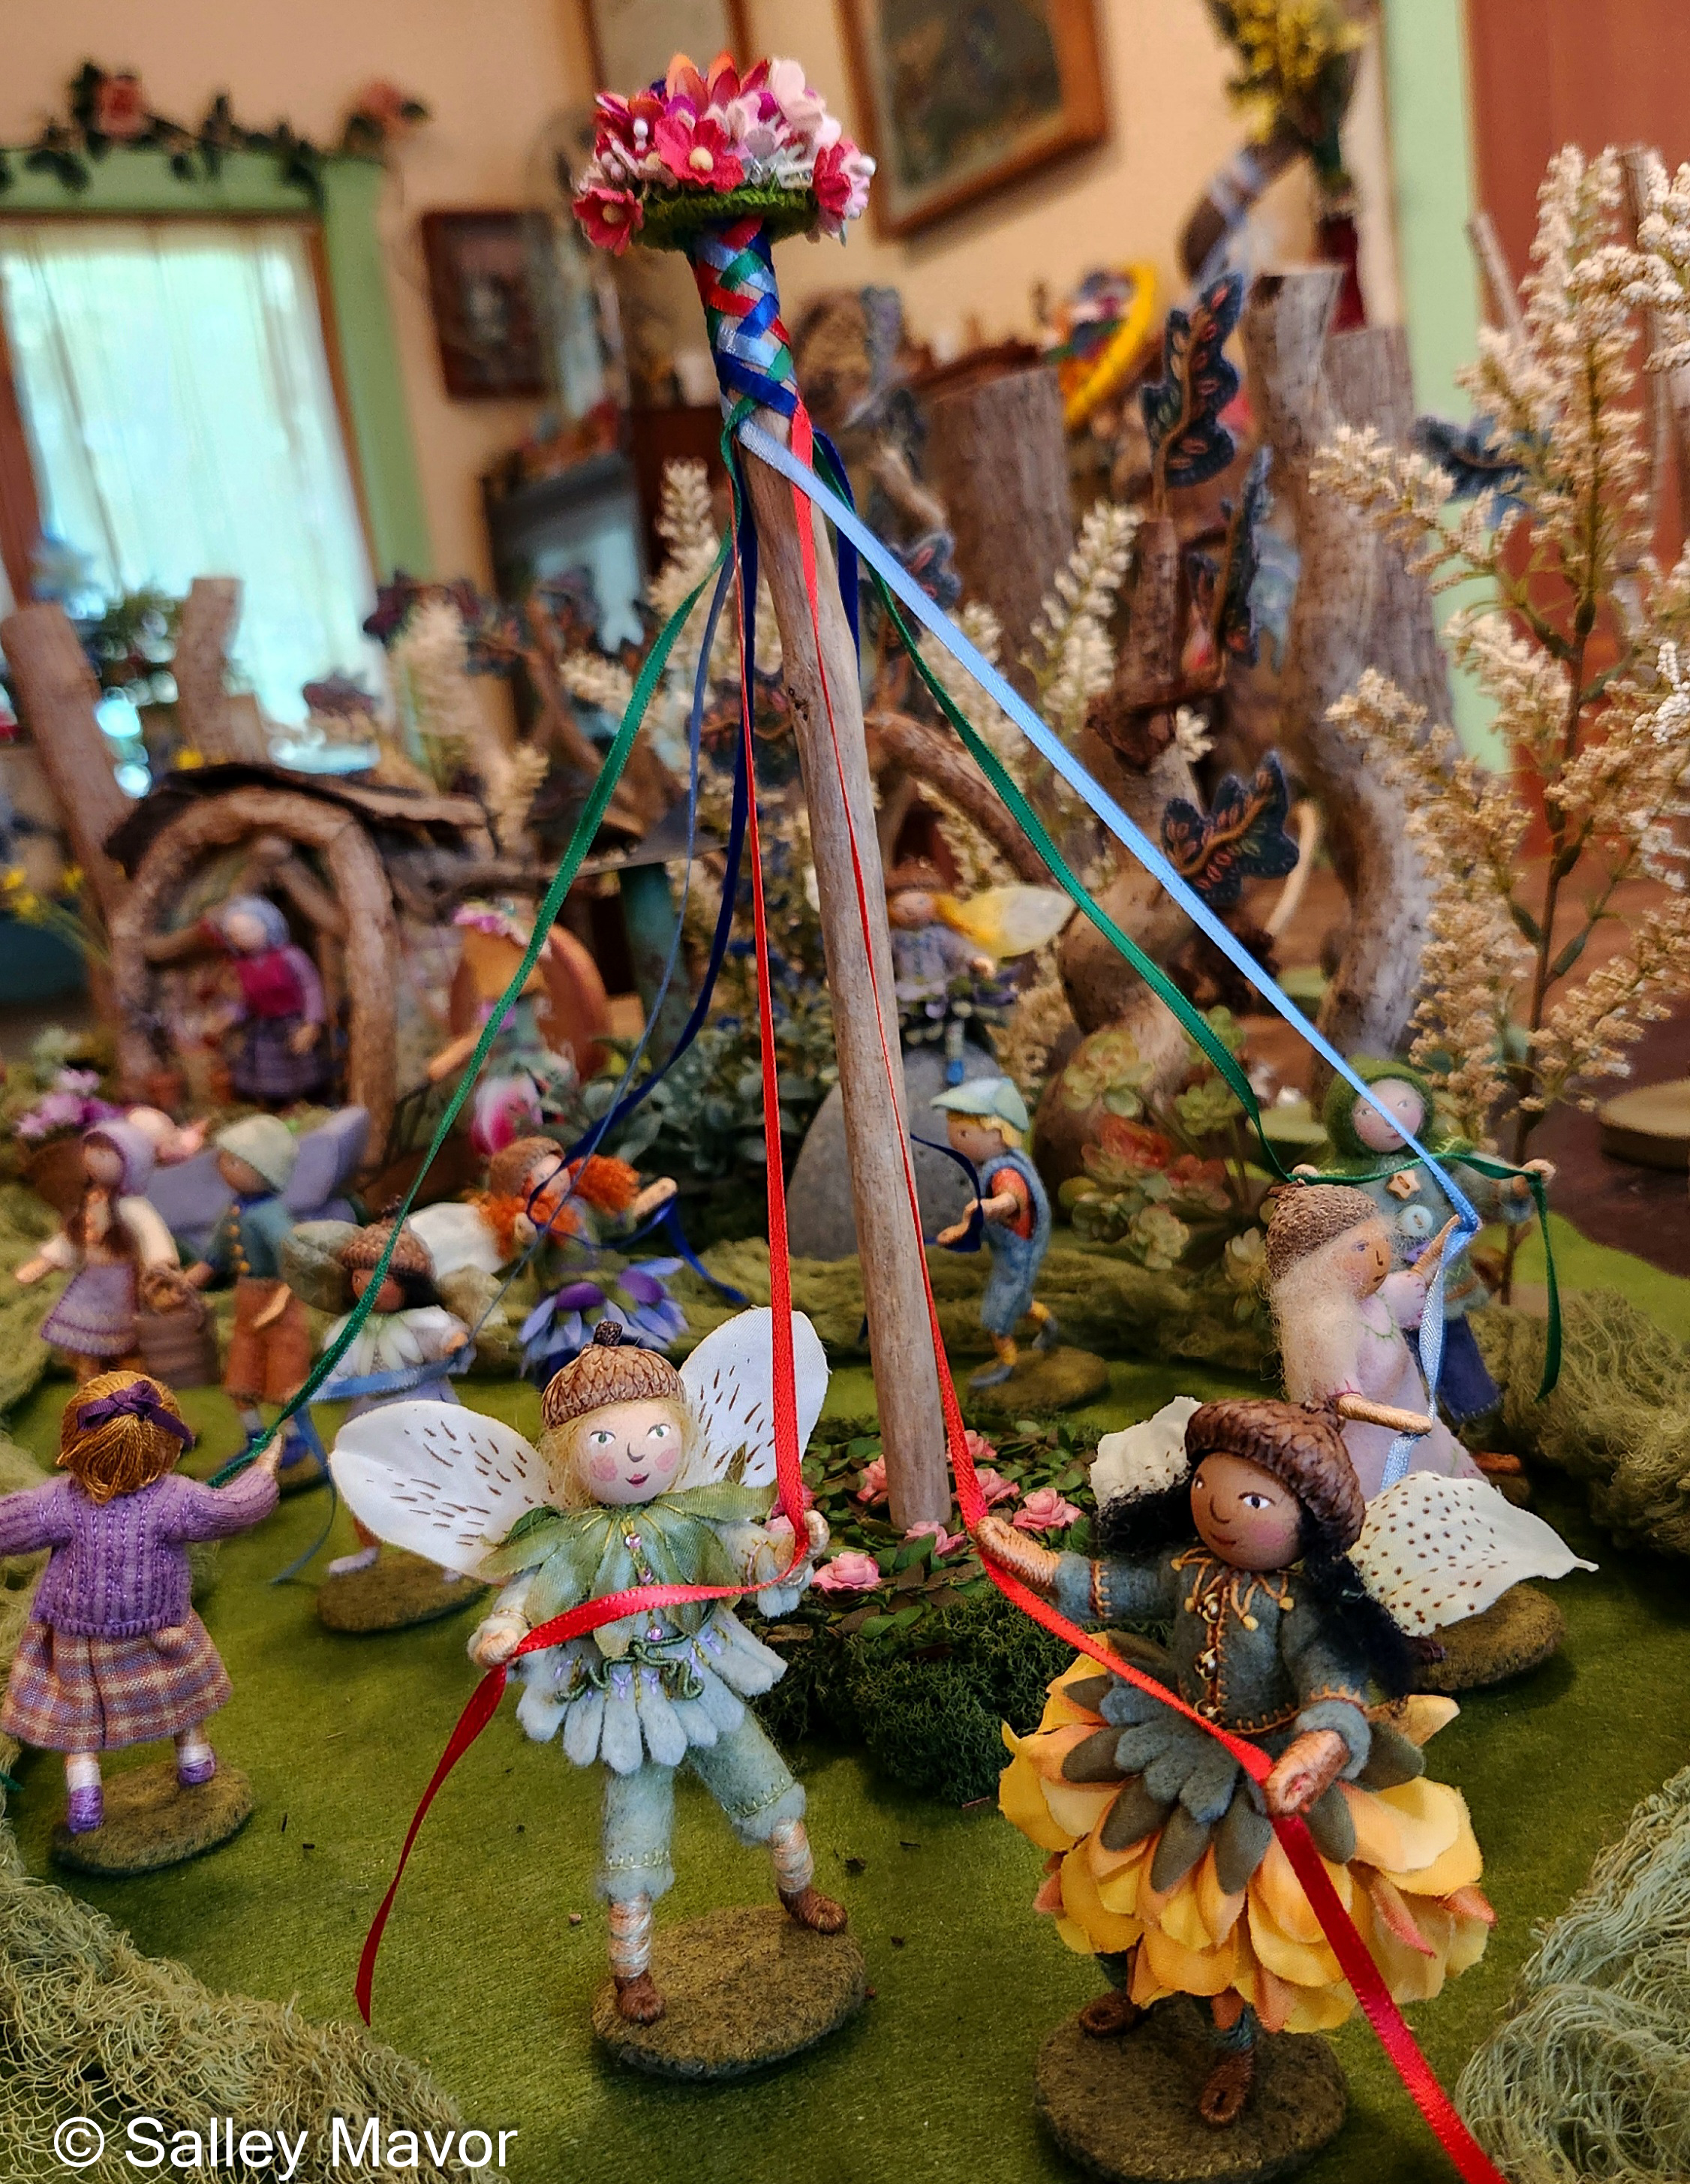
For the spring scene, I built a May Pole for the wee folk to dance around. The most complicated part was figuring out how to weave the ribbons around the pole.
video of the practice Spring Scene
Most of the materials I used to build things are gathered from nature, but I like to include special items, such as this 1920’s vintage baby carriage that belonged to my mother.
The summer scene is jampacked with figures posing in different vignettes.
This pair of wee folk are proudly showing off some oversized vegetables that are left over from my stuffed pins period.
Even Polly Doll makes an appearance doing her laundry.
video of the practice Summer Scene
I hope that you’ve enjoyed this preview. Rob and I plan to visit the museum soon to see the exhibition and take photos, which I’ll share in future posts.
To keep up with new posts, please subscribe to this blog. Your contact info will not be sold or shared. If you’d like to see more frequent photos tracking the projects in my studio, please follow me on Facebook, Instagram and BlueSky.
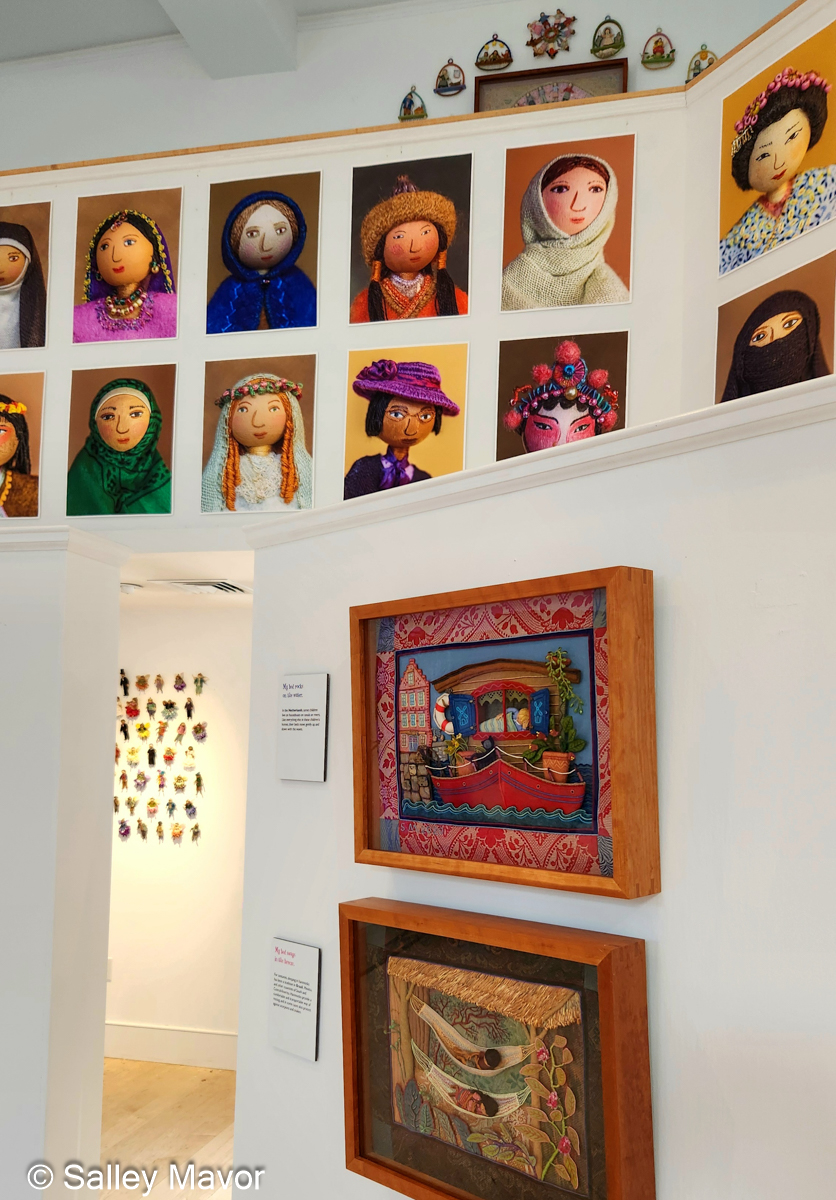
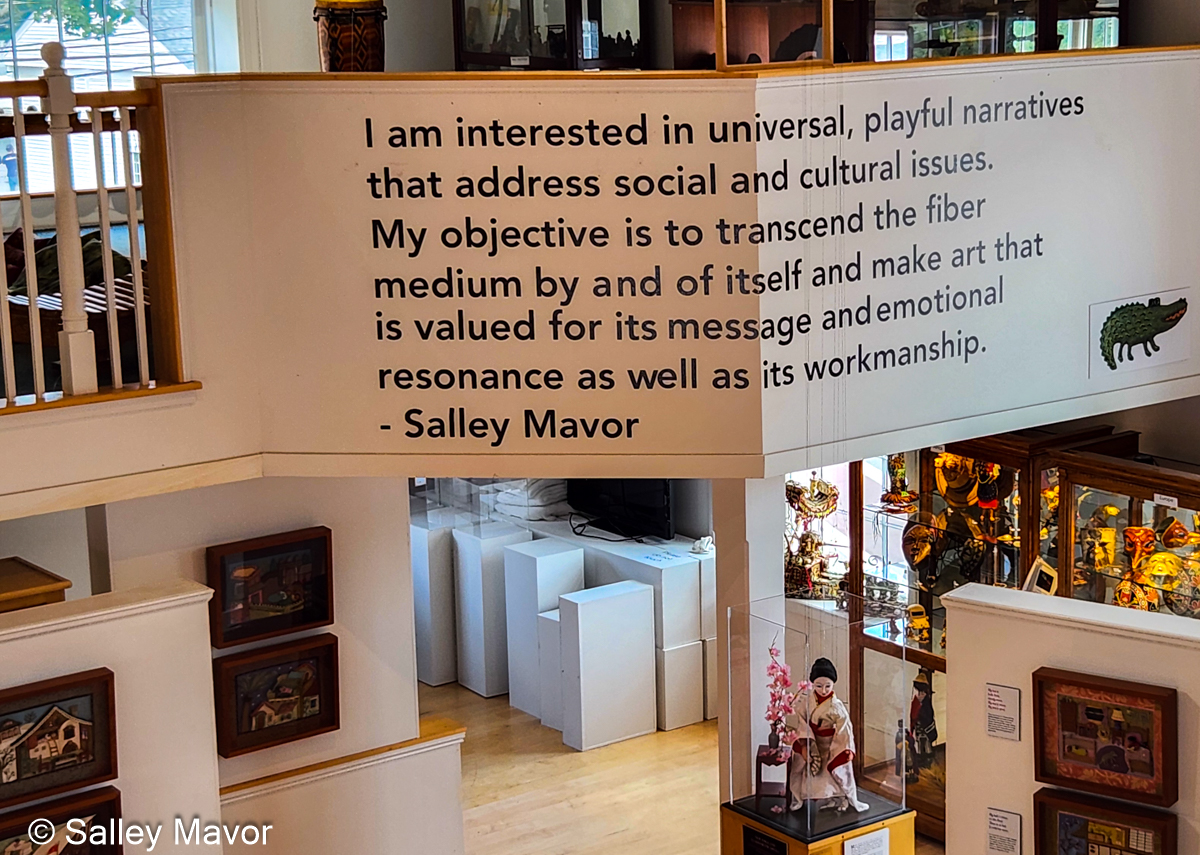
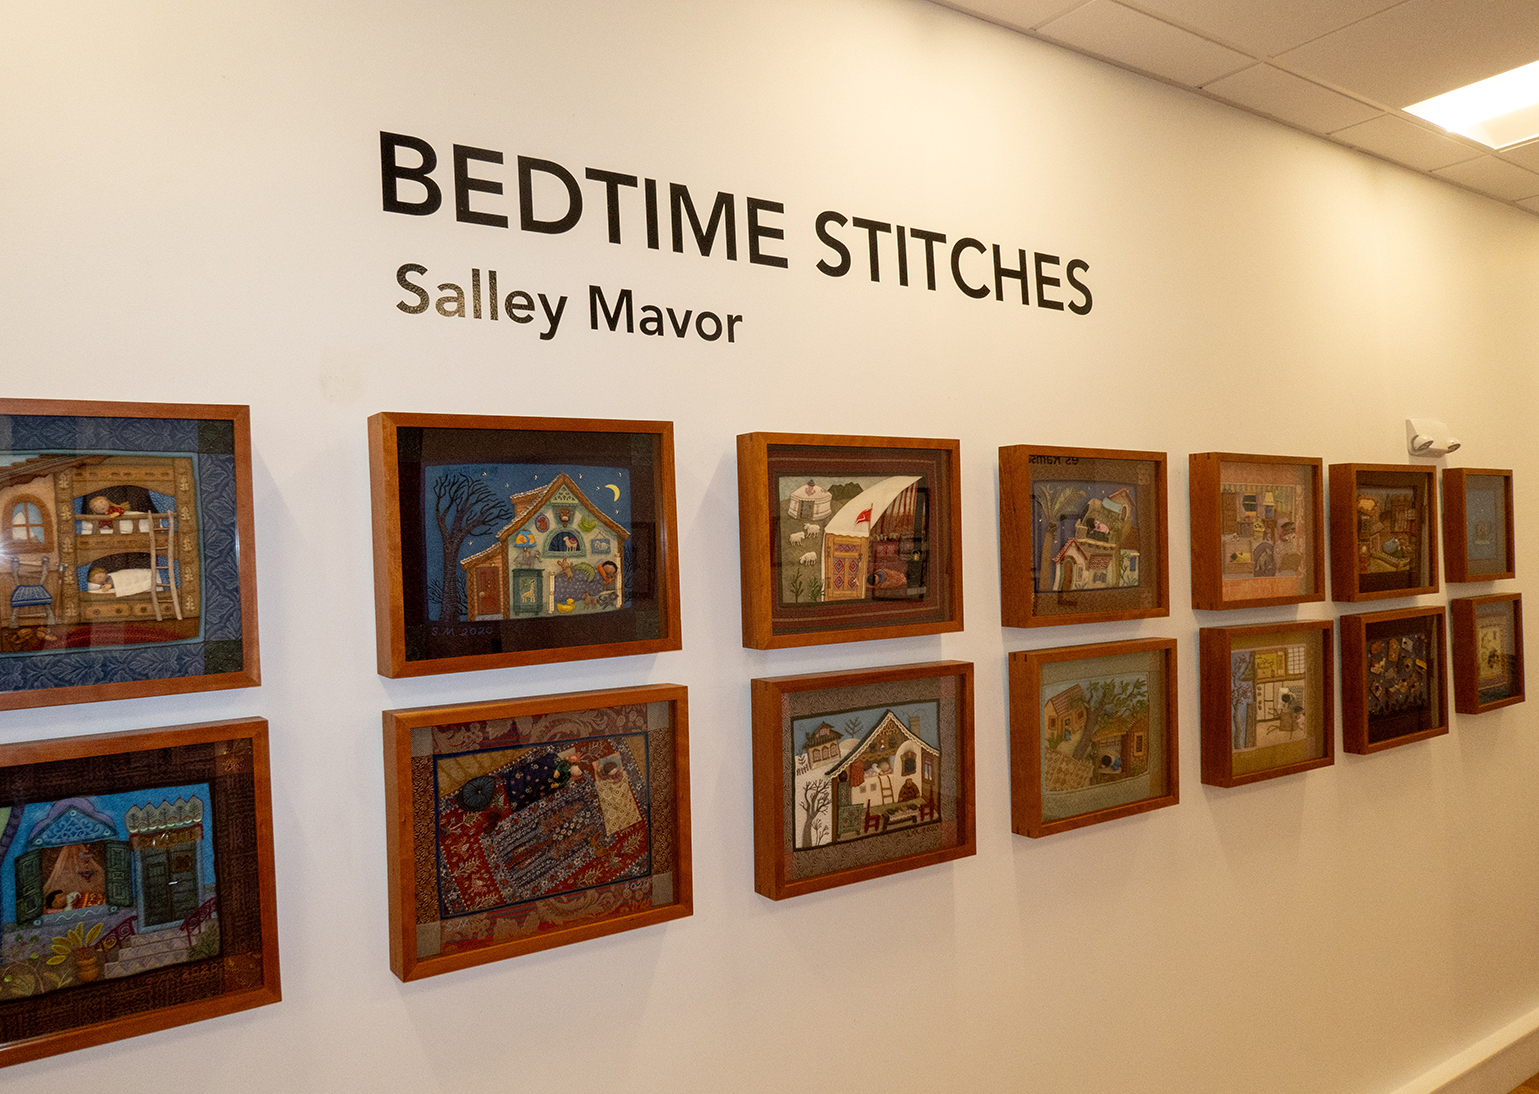
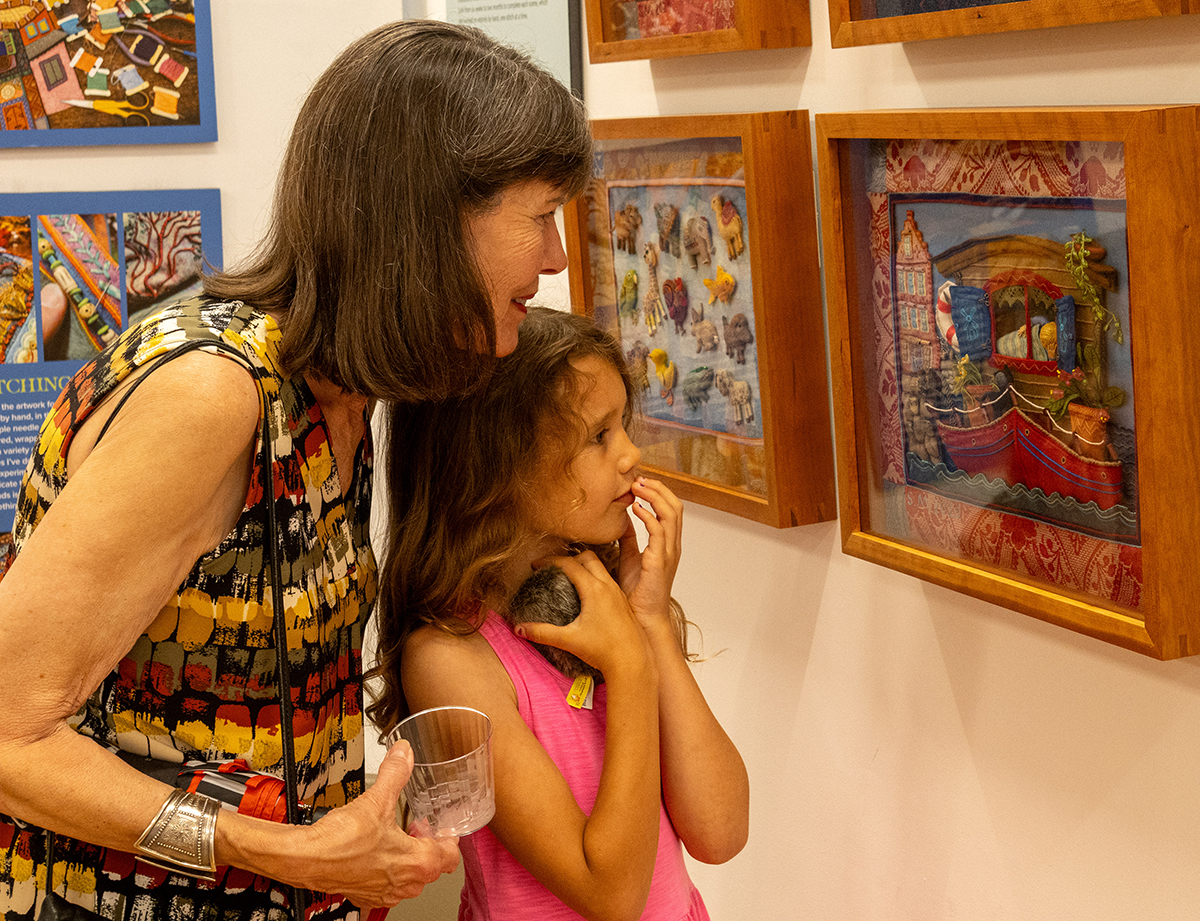
I’m pleased to announce that the Mariposa Museum & World Culture Center in Peterborough, NH is hosting my exhibition, Bedtime Stitches & Other Works, through January 4, 2026. Rob and I visited the museum for the first time last week and were delighted by what we saw. The museum staff did a remarkable job hanging my work, which is spread throughout the building’s 3 levels.
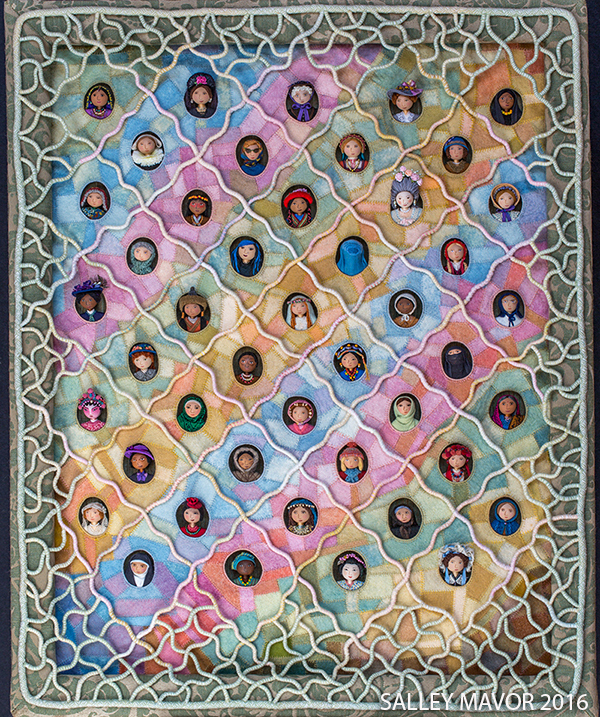
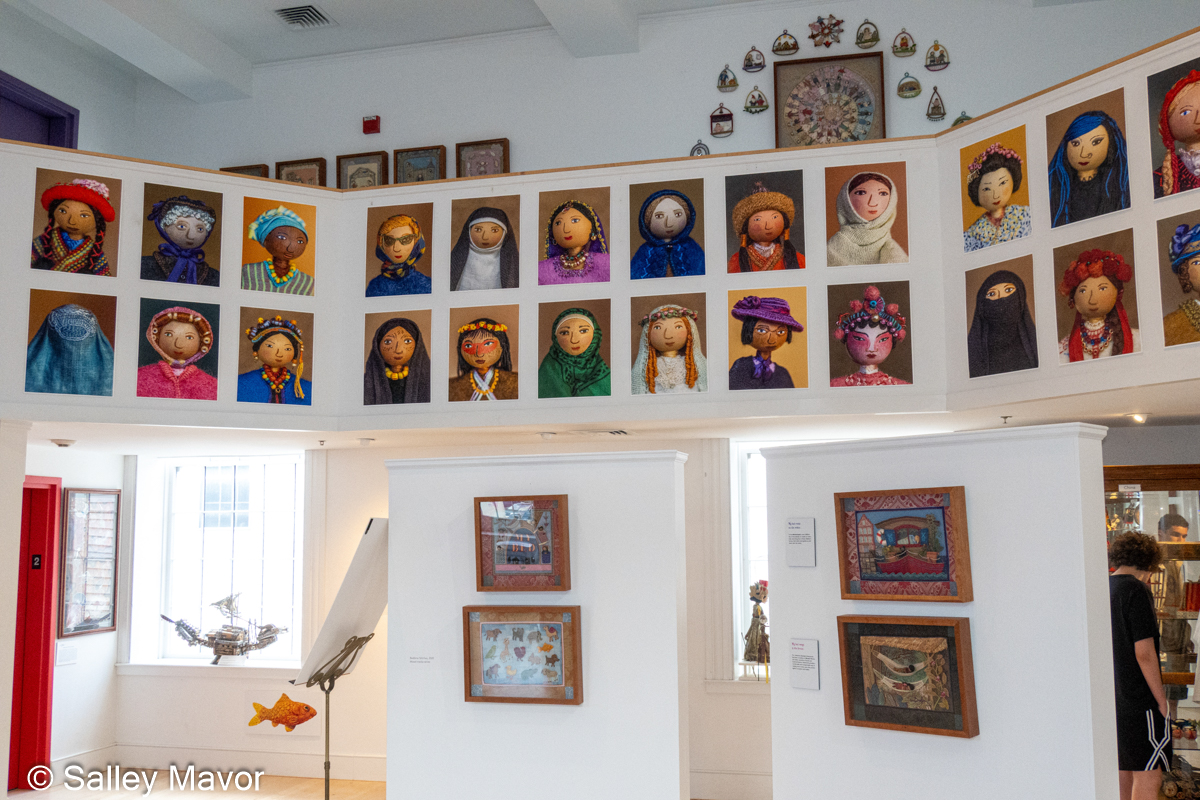
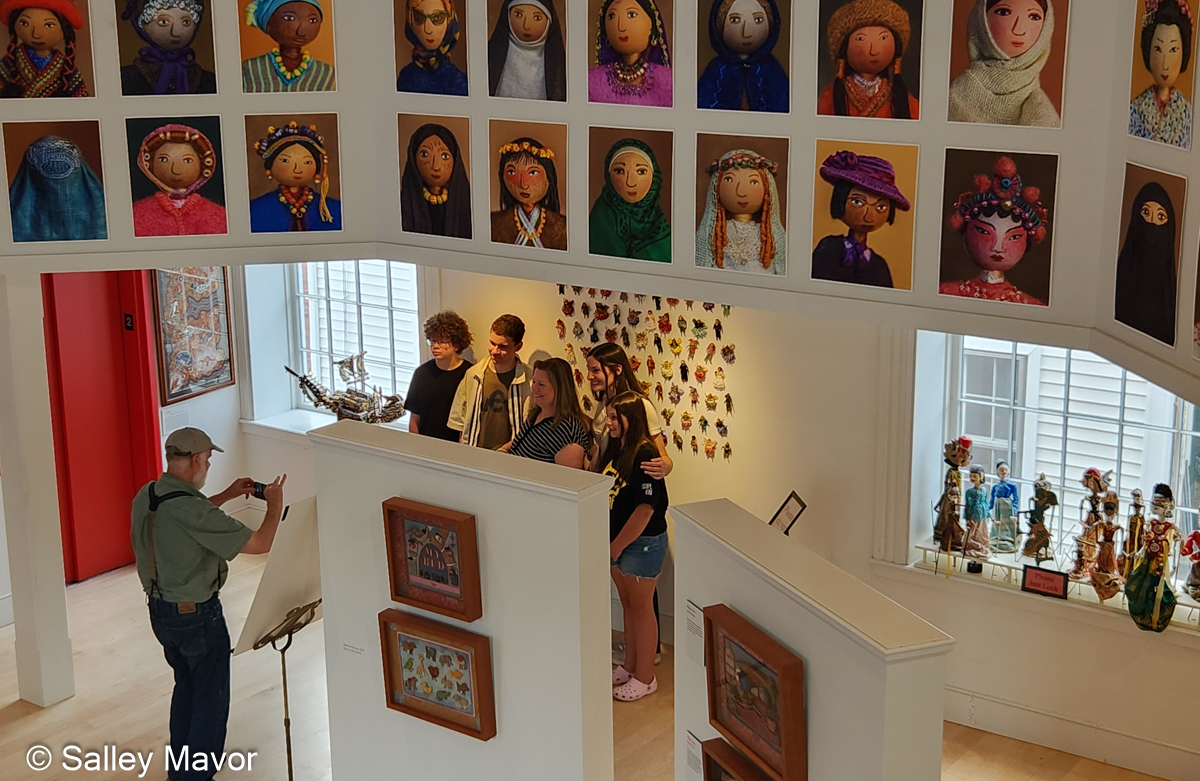
The exhibition includes a wide selection of framed tableaux and sculptures that span the past 30 years of my career, including the Wall of Women (printed enlargements of portraits from “Cover Up”) and the complete set of original art for my most recent picture book, MY BED.
While we were there, Rob took a photo for a family that posed in front of the display of wee folk. Many of the dolls are sample projects from my how-to book, Felt Wee Folk.
I enjoyed meeting some wonderful folks who told me about what they like to make.
I’m looking forward to returning to the museum to give an Artist Talk on Sat., Sept. 27 at 4:00 PM ~ Seating is limited, so if you plan on coming, please register here soon.
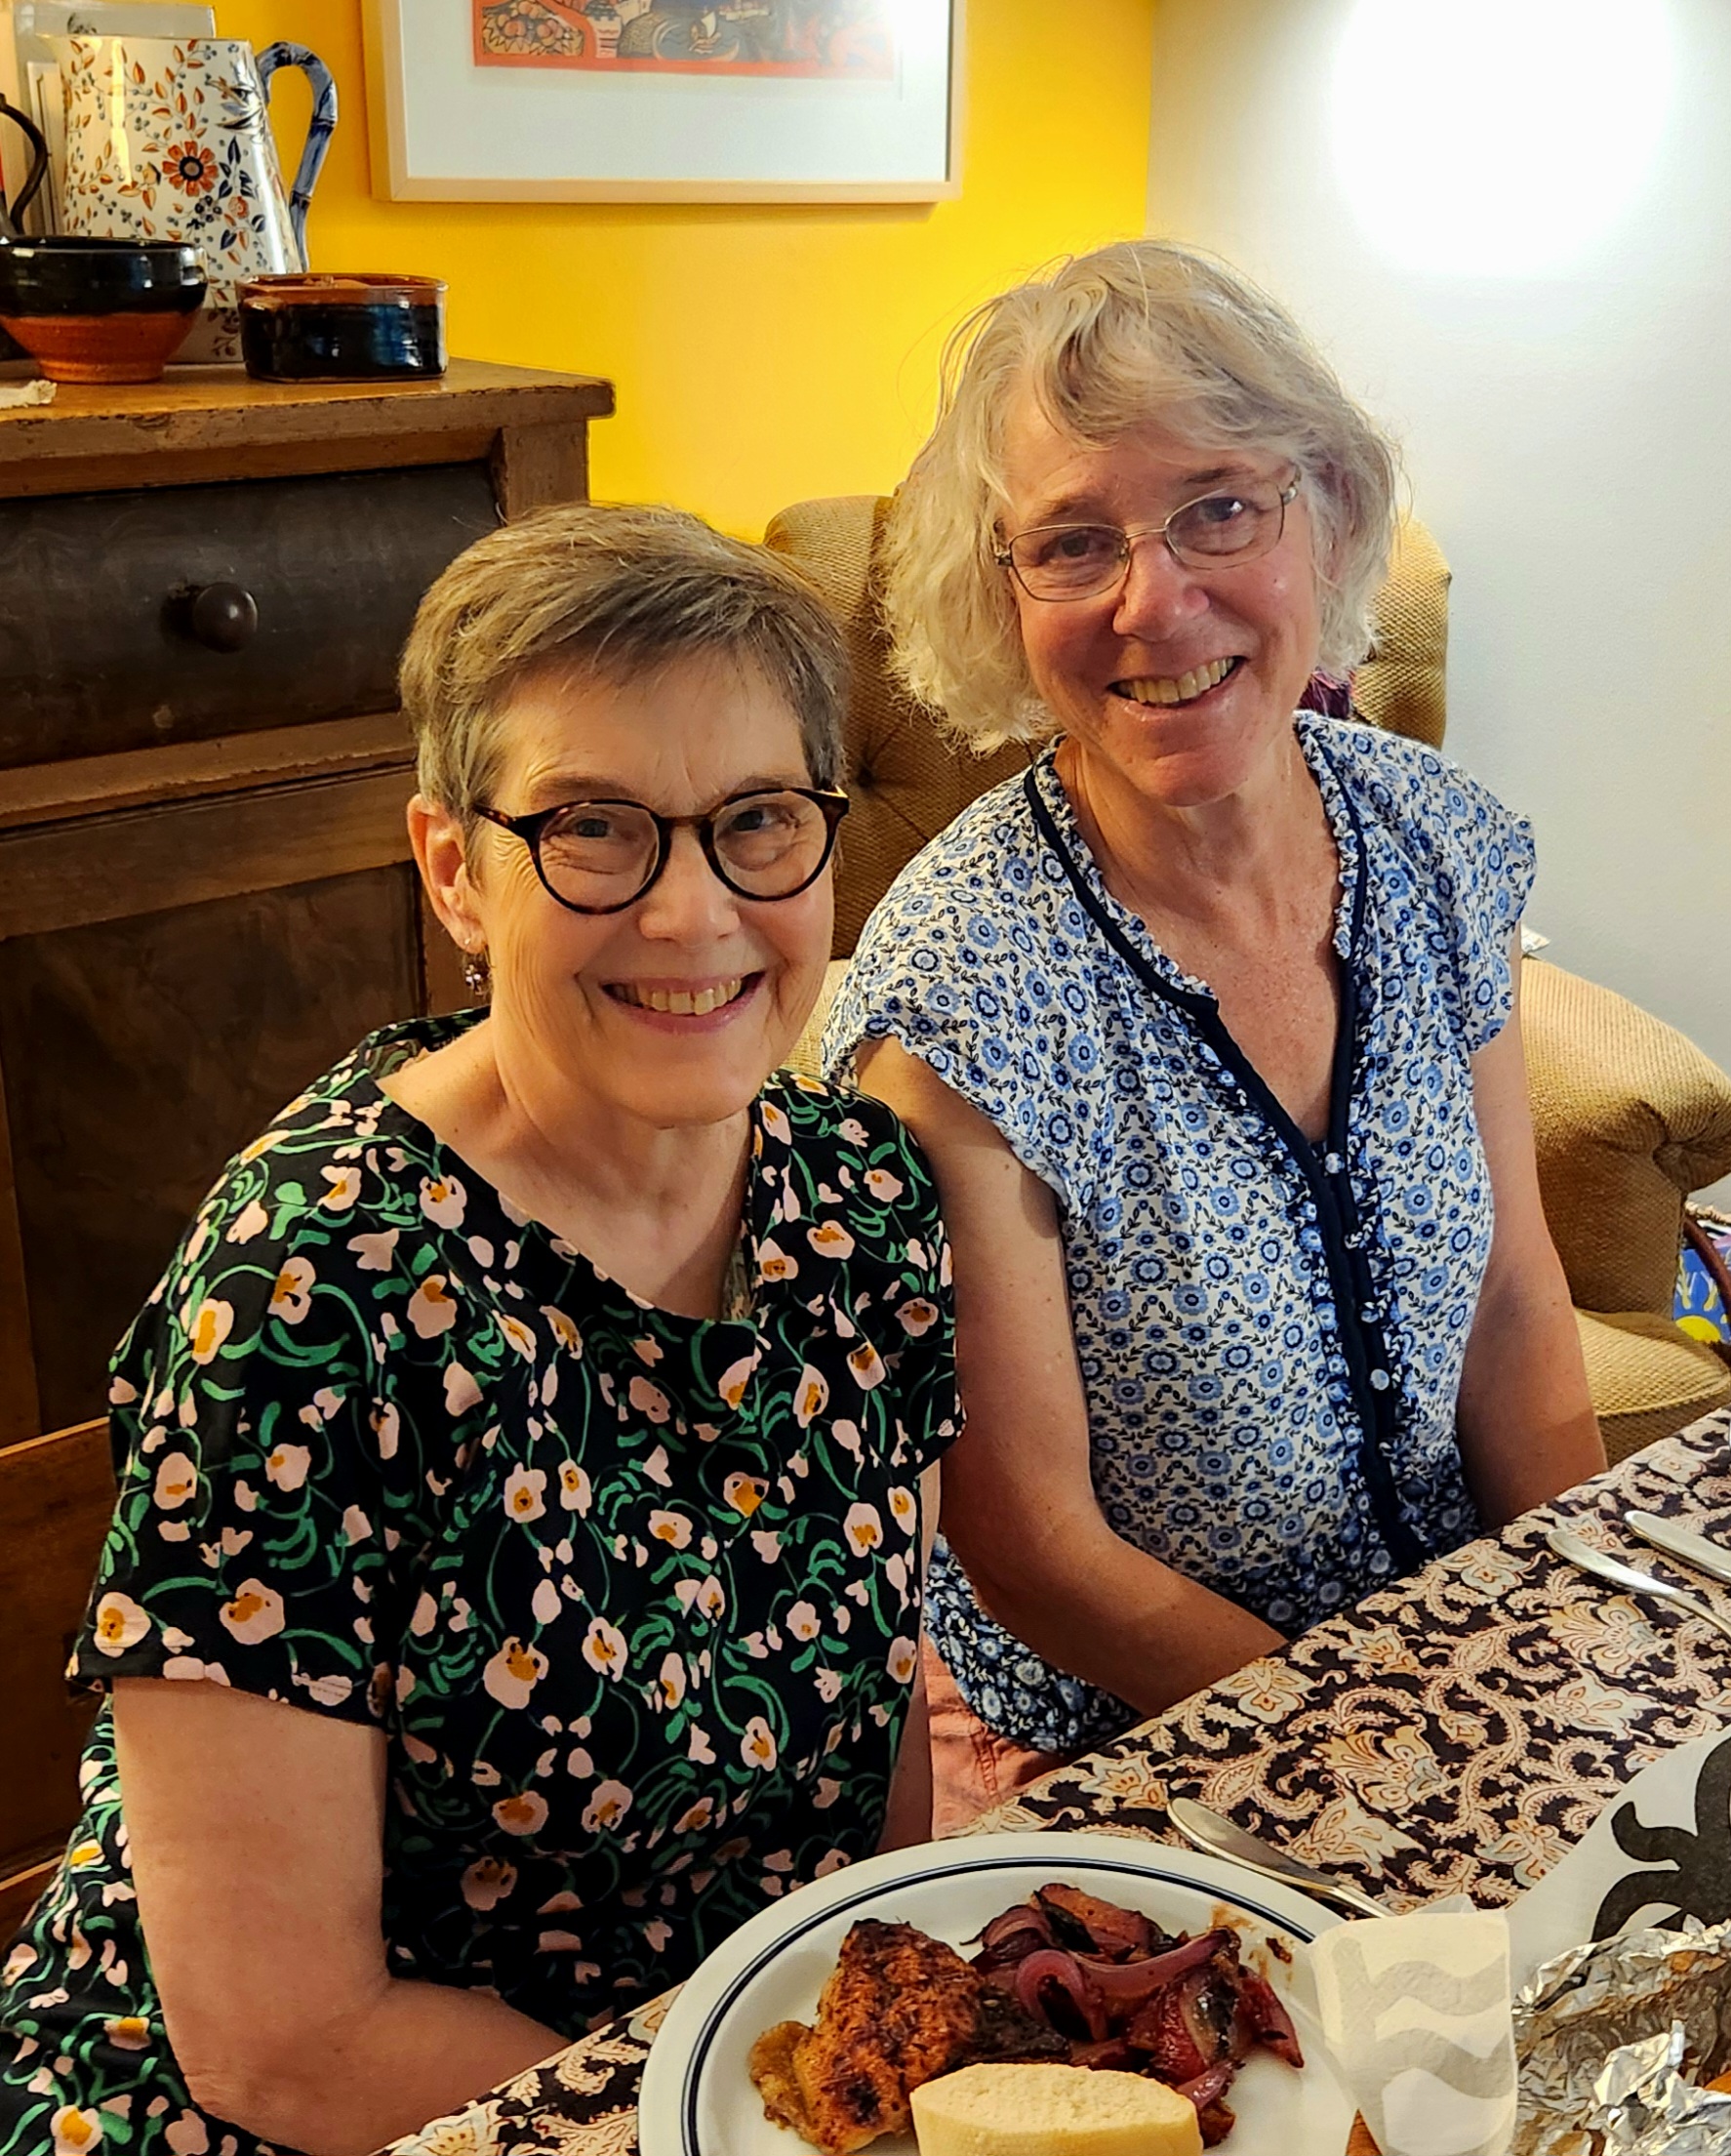
Another highlight of our trip was connecting with my artist friend, Beth Krommes, who lives in Peterborough. Beth and I first met 50 years ago, in a printmaking class at Syracuse University. She then took a junior year abroad in London and I transferred to the Rhode Island School of Design. We’ve kept in touch all these years, periodically talking about our current projects and commiserating about the challenges of working in the children’s book industry. It’s interesting that both of us have delved into a variety of mediums, including picture book illustration and textiles. Another aspect we have in common is our primary interest in design and visual communication, and our impulse to explore different ways of achieving that.
Beth is mostly known for her beautiful scratchboard illustrations, but she has always explored other ways of working, including fabric design, rug hooking and weaving. What is consistent is her incredible sense of design and attention to detail.
Beth Krommes will be participating in the Monadnock Art Open Studio Tour, which is being held Oct. 11, 12, 13, 2025. If you go to her studio, I guarantee that you will not be disappointed!
To keep up with new posts, please subscribe to this blog. Your contact info will not be sold or shared. If you’d like to see more frequent photos tracking the projects in my studio, please follow me on Facebook, Instagram and BlueSky.
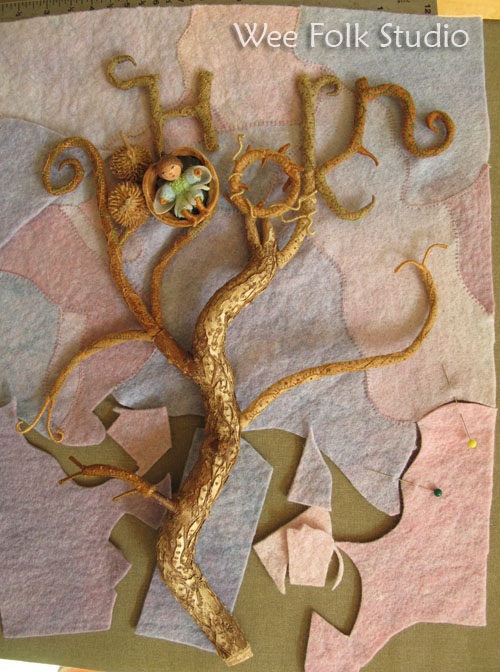
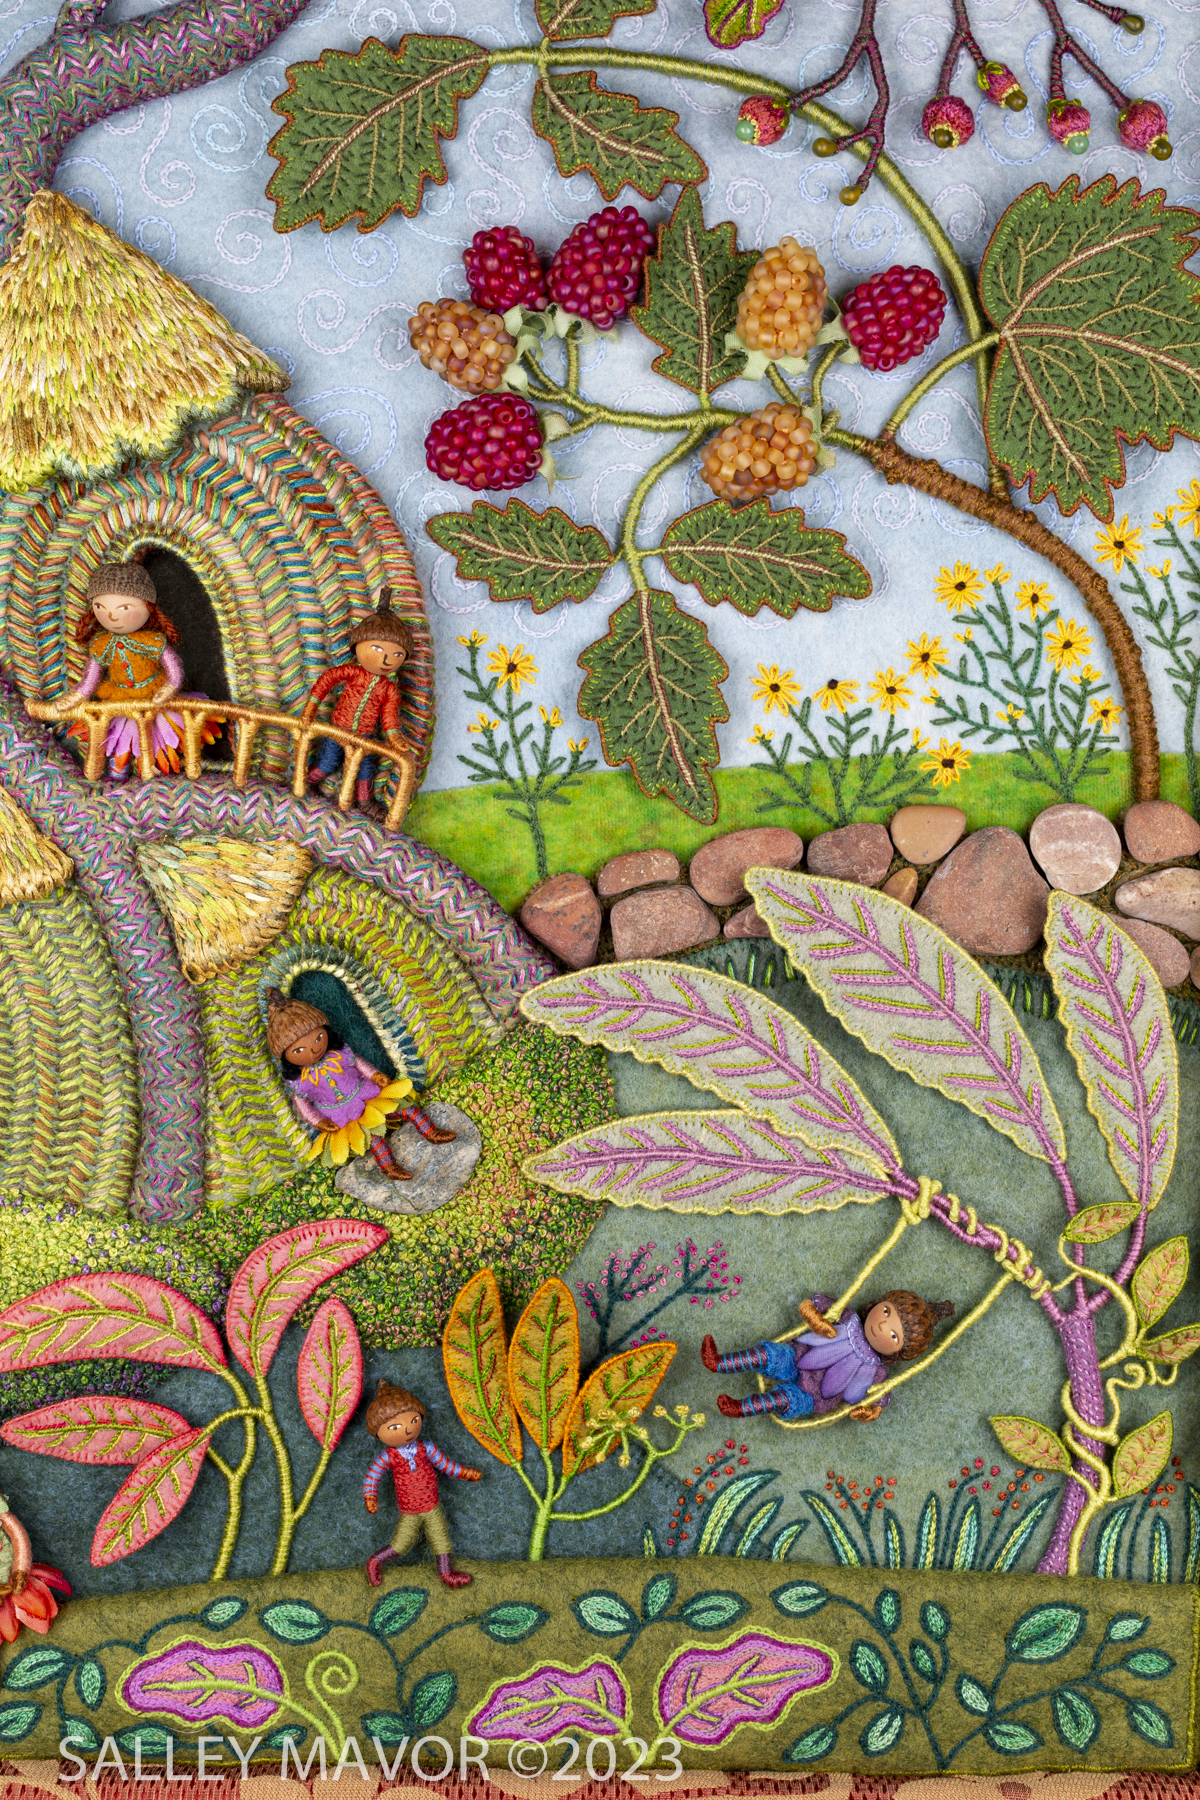
Part 9 in the series of posts about making my piece Summertime features photos and videos documenting the process of creating landscape details, such as moss, sky and the stone wall. For a more comprehensive understanding of my process, I encourage you to explore other posts in this series: Overview of the piece, Part 1 – Tree Trunks, Part 2– Tree Houses, Part 3 – leaves, stems and branches, Part 4– Baltimore Oriole (body), Part 5– Baltimore Oriole (head and feet), Part 6 – rose vine, Part 7– raspberry plants, Part 8– stitching flora, Part 9– moss, sky and stone wall, and Part 10 – wee folk.
Summertime is the summer scene in a series of four seasonal landscapes that capture the wonder and magic of the natural world. Posters, note cards, prints, bookmarks, and jigsaw puzzles of Summertime and the other scenes in the series (Frosty Morning, Mossy Glen and Harvest Time) are available in my Etsy Shop.
See the Four Seasons Series and dozens of other works in my upcoming exhibition, Works by Salley Mavor: To Every Season at the New England Quilt Museum, Lowell, MA, Sept. 9 – Dec. 27, 2025. The show will include recent work, as well as rarely seen early pieces on loan from private collections.
MOSS Wouldn’t it be nice to step out your front door onto a mossy carpet every morning? The simple idea of stitching multiple French knots side by side to form a naturalistic ground cover isn’t a new concept. But it reached a heightened level of obsession for me throughout this Four Seasons series. It’s one of those repetitive activities that has you totally mesmerized.
To make the moss, I used all kinds of thread, from silk to cotton floss, depending on what kind of look I was after. The naturalistic appearance comes from combining different colors and shades of thread in groups of 3 or 4 strands. After all, the world is made up of variegated shades, not solid colors.
SKY To make the blue sky background, I patched together scraps from my stash of plant-dyed wool felt. My supply of this extra special felt is limited because the cottage business that produced it is longer in operation. Luckily, I stocked up and have enough felt to keep me going for the rest of my productive life, although the blue pieces are dwindling. When asked where to find felt, I usually refer people to A Child’s Dream, which offers a nice selection, including similar subtly hued plant-dyed wool felt.
This approach harkened back to 2012, when I pieced scraps of lavender and blue felt to make the background of my Hornbook Magazine cover illustration.
With Summertime, I was not content to leave the blue expanse alone, especially with its distracting scars stretching across the sky. My solution was to divert attention away from the patched pieces by filling the blue background with swirly lines and spirals.
The following video shows how I chainstitched the spirals in subtle hues of cotton flower thread. Its matte finish is different from the glossy sheen of cotton embroidery floss. DMC flower thread is no longer available, but if you’re interested, Dutch Treat Designs has some of the discontinued thread in stock.
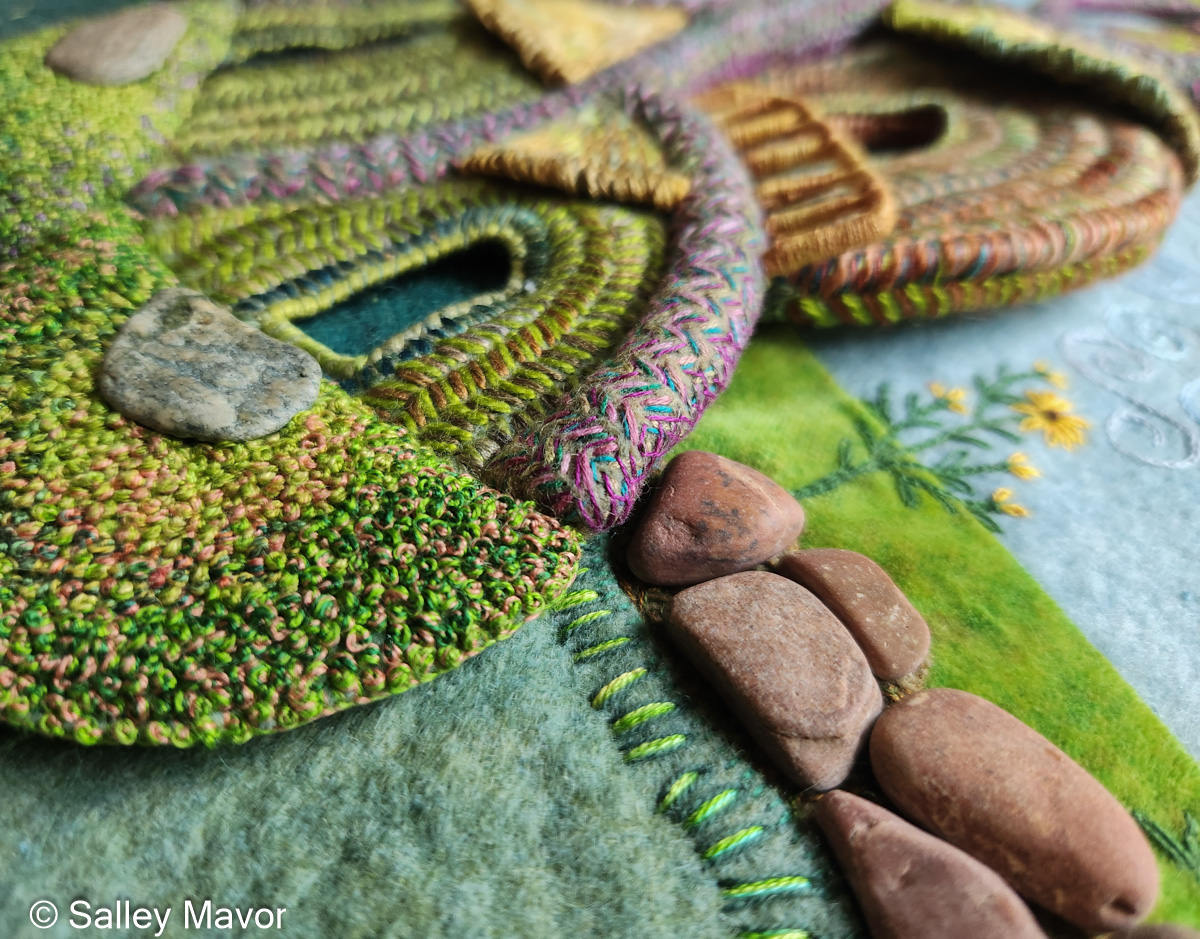
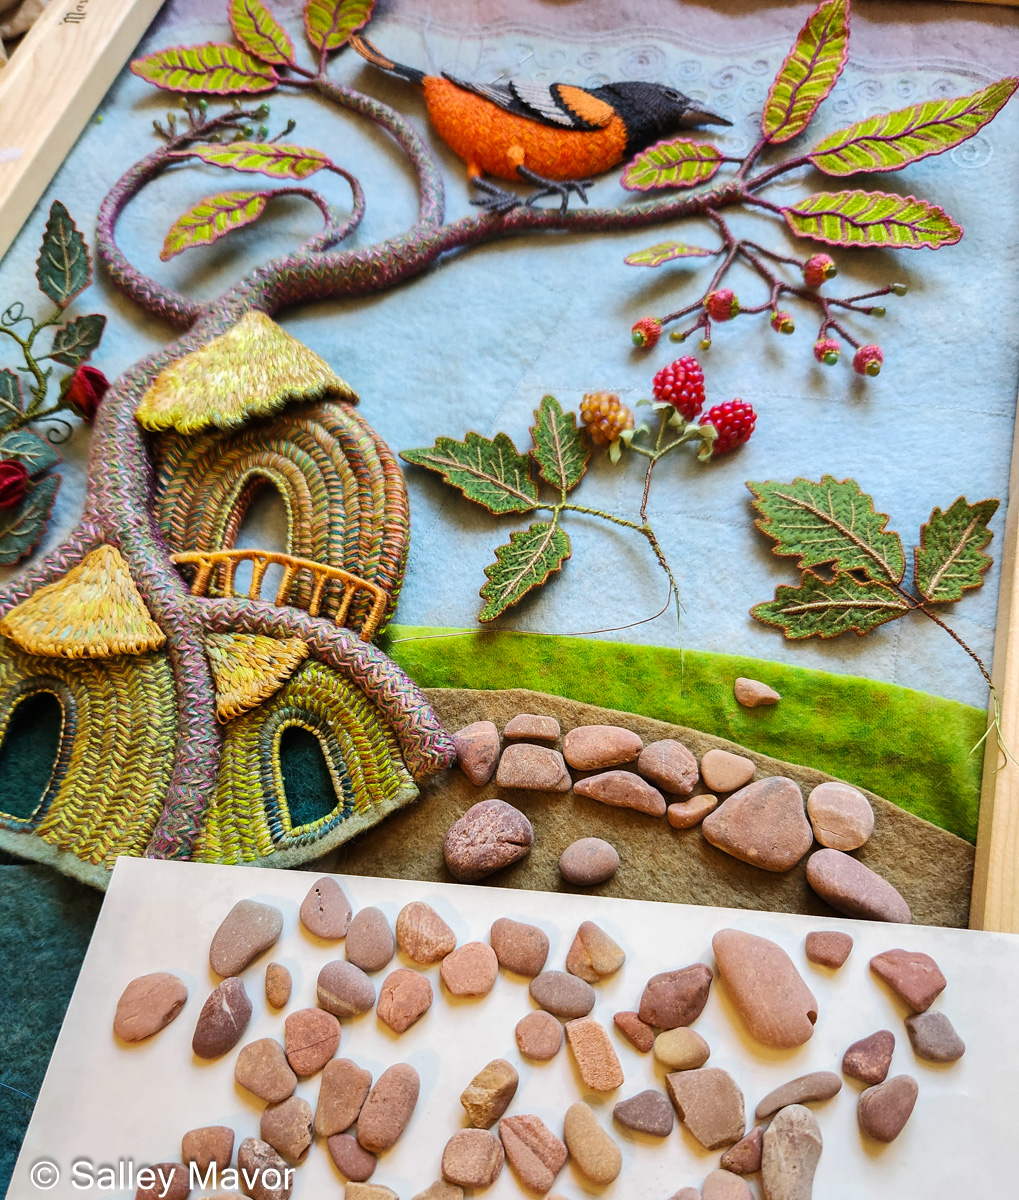
STONE WALL Sometimes, I incorporate natural objects in my work. For the Summertime scene, I built a wall with stones that I gathered at the beach. I picked out a selection of small thin ones with a flat surface area on the back, which were glued to a piece of felt. I used Alene’s Jewel-It, which is a fabric embellishment adhesive.
The following video shows how I arranged different parts of the scene before sewing the pieces in place.
Stay tuned for Part 10, where I’ll share photos and videos documenting the process of making the wee folk characters in Summertime. Unless I discover that I’ve overlooked something, Part 10 will be the final segment about making Summertime.
To keep up with new posts, please subscribe to this blog. Your contact info will not be sold or shared. If you’d like to see more frequent photos tracking the projects in my studio, please follow me on Facebook, Instagram and BlueSky.
After touring the country for 5 years, Bedtime Stitches, the exhibition of original embroidered bas-relief artwork for my picture book, MY BED, is winding down. There will be 2 more showings this year in New England. Both exhibitions are hosted by the Mariposa Museum in their two locations, in Oak Bluffs, MA on the island of Martha’s Vineyard and in Peterborough, NH. UPDATE:Next scheduled location: Mingei International Museum, San Diego, CA, Oct. 31 , 2026 – April 18, 2027
Bedtime Stitches ~ June 10 – July 20, Mariposa Museum, Oak Bluffs, MA Meet the Artist Event~ Wed., July 9th at 4:00 PM ““““““““““““““““““““““““““““““““““ Bedtime Stitches and Other Works ~ July 25 – Nov. 1, 2025 Mariposa Museum, Peterborough, NH. This location will include a wide selection of Salley Mavor’s art.
On Wed., July 9th, I’ll be taking the short ferry ride from my hometown of Woods Hole to Oak Bluffs, for a Meet the Artist event at 4:00 pm at the Mariposa Museum. If you’re visiting Martha’s Vineyard or live on the island, I’d love to meet you!
Right around the corner from the museum are hundreds of gingerbread-style cottages in the Martha’s Vineyard Camp-Meeting Assoc. Campground. The cottages have an interesting history, with their tiny plots originally holding tents for religious revival meetings started in the 1840’s.
Since the 2020 premiere of Bedtime Stitches at the Cahoon Museum, 5 heavy duty shipping boxes full of framed artwork and mounted information panels have been shipped thousands of miles, to and from a dozen museums around the country.
Many of you’ve written to tell me how you made the trip to see my work, driving for hours in carloads of friends and family, and sometimes even coming by train or airplane. I so appreciate all of your extraordinary efforts to see the show. And I’m thankful to the different host venues that made it possible for the public to see up close the fine detail and 3-dimensional quality of my bas-relief sculptural embroideries. Even though the tour is officially ending in Nov., 2025, interested museums and curators are welcome to contact me for information about hosting an exhibition of these pieces and/or other artwork from my personal collection. To get in touch, please use the contact form at the bottom of this page.
For those of you who live too far away to experience my work in person, the following 2 videos offer a way to relish the scenes and see every little stitch. Also, autographed copies of MY BED: Enchanting Ways to Fall Asleep around the World are available in my shop here.
It took 2 to 3 years to make the 18 illustrations for MY BED. During that period, I shared the process of making the stitched 3-dimensional artwork. Posts about each page are listed here:
To keep up with new posts, please subscribe to this blog. Your contact info will not be sold or shared. If you’d like to see more frequent photos tracking the projects in my studio, please follow me on Facebook, Instagram and BlueSky.
Part 8 in the series of posts about making my piece Summertime includes photos and videos documenting the process of stitching flora. For a more comprehensive understanding of my process, I encourage you to explore other posts in this series: Overview of the piece, Part 1 – Tree Trunks, Part 2– Tree Houses, Part 3 – leaves, stems and branches, Part 4– Baltimore Oriole (body), Part 5– Baltimore Oriole (head and feet), Part 6 – rose vine, Part 7– raspberry plants, Part 8– stitching flora, Part 9– moss, sky and stone wall, and Part 10 – wee folk.
Summertime is the summer scene in a series of four seasonal landscapes that capture the wonder and magic of the natural world. Posters, note cards, prints, bookmarks, and jigsaw puzzles of Summertime and the other scenes in the series (Frosty Morning, Mossy Glen and Harvest Time) are available in my Etsy Shop.
See the Four Seasons Series and dozens of other works in my exhibition, To Every Season: Works by Salley Mavor at the New England Quilt Museum, Sept. 9 – Dec. 31, 2025.The show includes recent work, as well as rarely seen early pieces on loan from private collections.
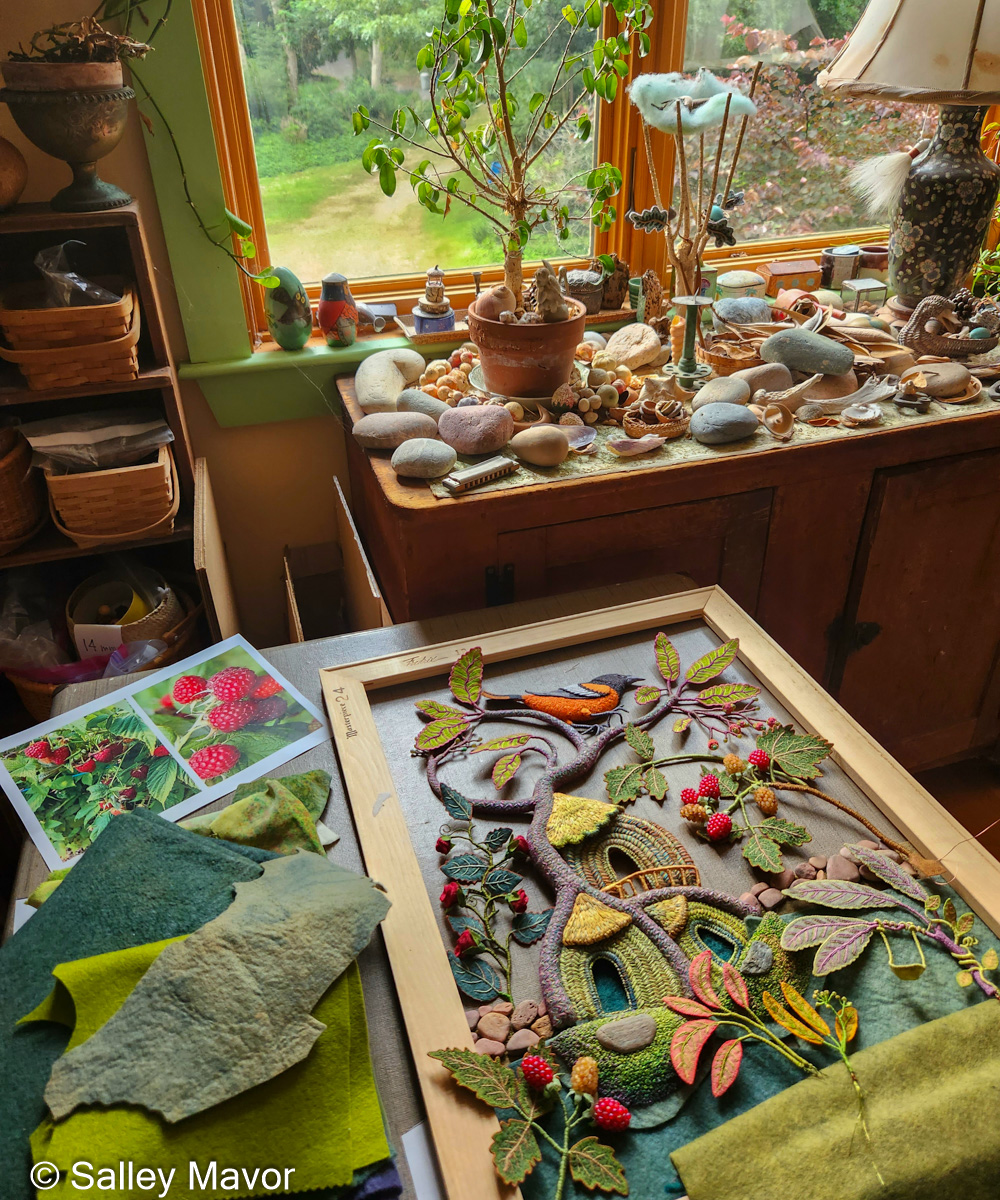
Towards the end of the project, after months of constructing most of the 3-dimensional parts of the scene, I was ready to zero in and add embroidered leaves and flowers where they were needed. In the following video, you can see how I spread out on different work tables in my studio. Every horizontal surface was full of materials and tools, as well as the bits and pieces I’d finished making.
To do the stitching, I require very few things – a piece of felt, a needle, thread, and a thimble. And good lighting, of course. And closeup glasses. No hoop, no cumbersome magnifying equipment and no fancy needles or scissors.
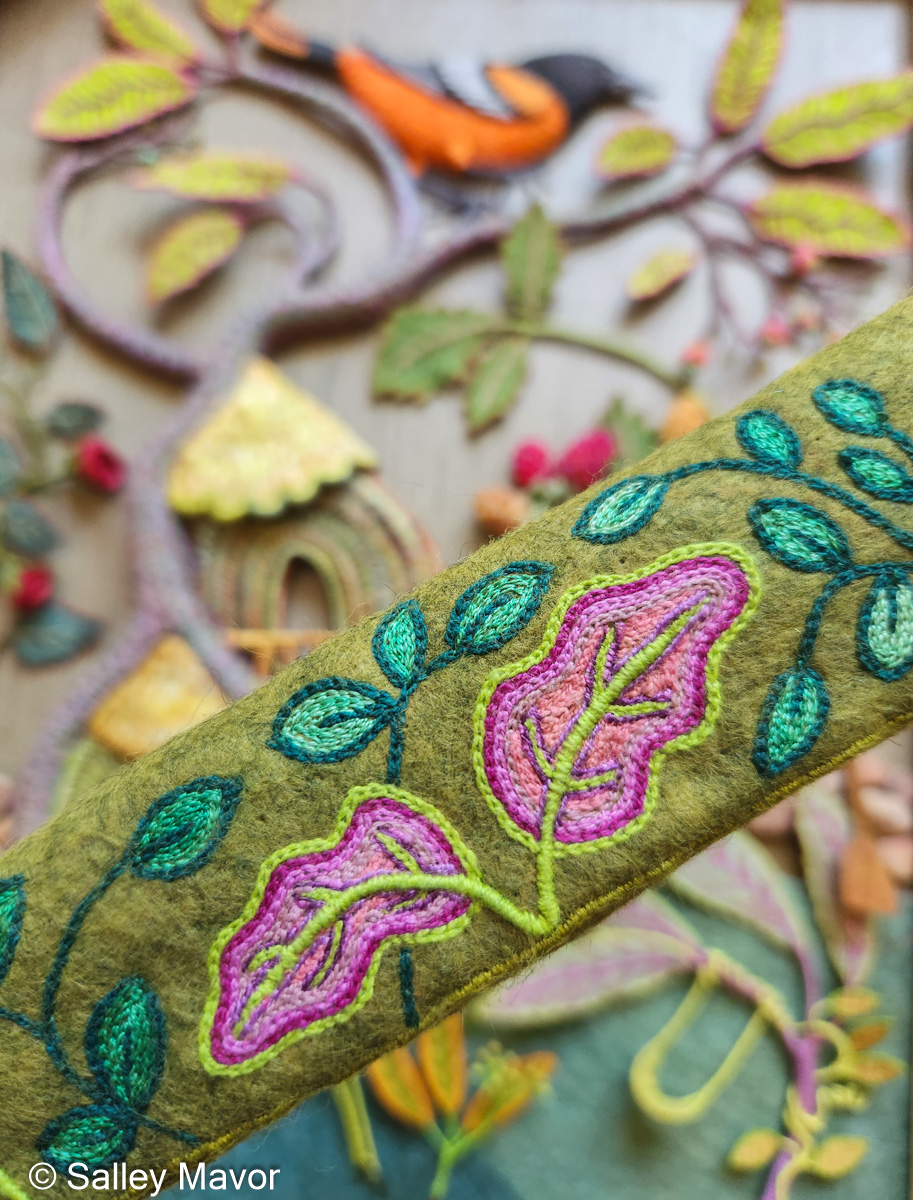
It was almost impossible to draw markings on this fuzzy wool felt, even with chalk. So, I mostly worked freehand and removed the stitched red guide lines later in the process. I used DMC cotton flower thread, which is thicker and bolder than embroidery floss. In this video, watch how I chain-stitched leaves and added Parawire stems on top.
Chain-stitching these leaf shapes was as soothing as filling in a coloring book.
I added patches of black-eyed susans to open areas of blue sky below the raspberries and above the stone wall (coming in part 9).
In other open areas, I chain-stitched blades of grass, dotted with little French knot flowers.
I was nearing the end of the project, which meant that it was time to tackle the border. I got out my stash of upholstery fabric and tried out different color combinations. Red and gold popped out at me; they contrasted with the blue sky and brought out the color of the raspberries. I padded the wooden stretchers with cotton quilt batting and sewed the upholstery fabric around the frame, which created a shallow box to fill with all of the parts.
Stay tuned for Part 9, where I’ll share photos and videos documenting the process of stitching moss and the sky, and building the stone wall in Summertime.
To keep up with new posts, please subscribe to this blog. Your contact info will not be sold or shared. If you’d like to see more frequent photos tracking the projects in my studio, please follow me on Facebook, Instagram and BlueSky.
Summertime is the summer scene in a series of four seasonal landscapes that capture the wonder and magic of the natural world. Posters, note cards, prints, bookmarks, and jigsaw puzzles of Summertime and the other scenes in the series (Frosty Morning, Mossy Glen and Harvest Time) are available in my Etsy Shop.
See the Four Seasons Series and dozens of other works in my exhibition, To Every Season: Works by Salley Mavor at the New England Quilt Museum, Sept. 9 – Dec. 31, 2025.The show includes recent work, as well as rarely seen early pieces on loan from private collections.
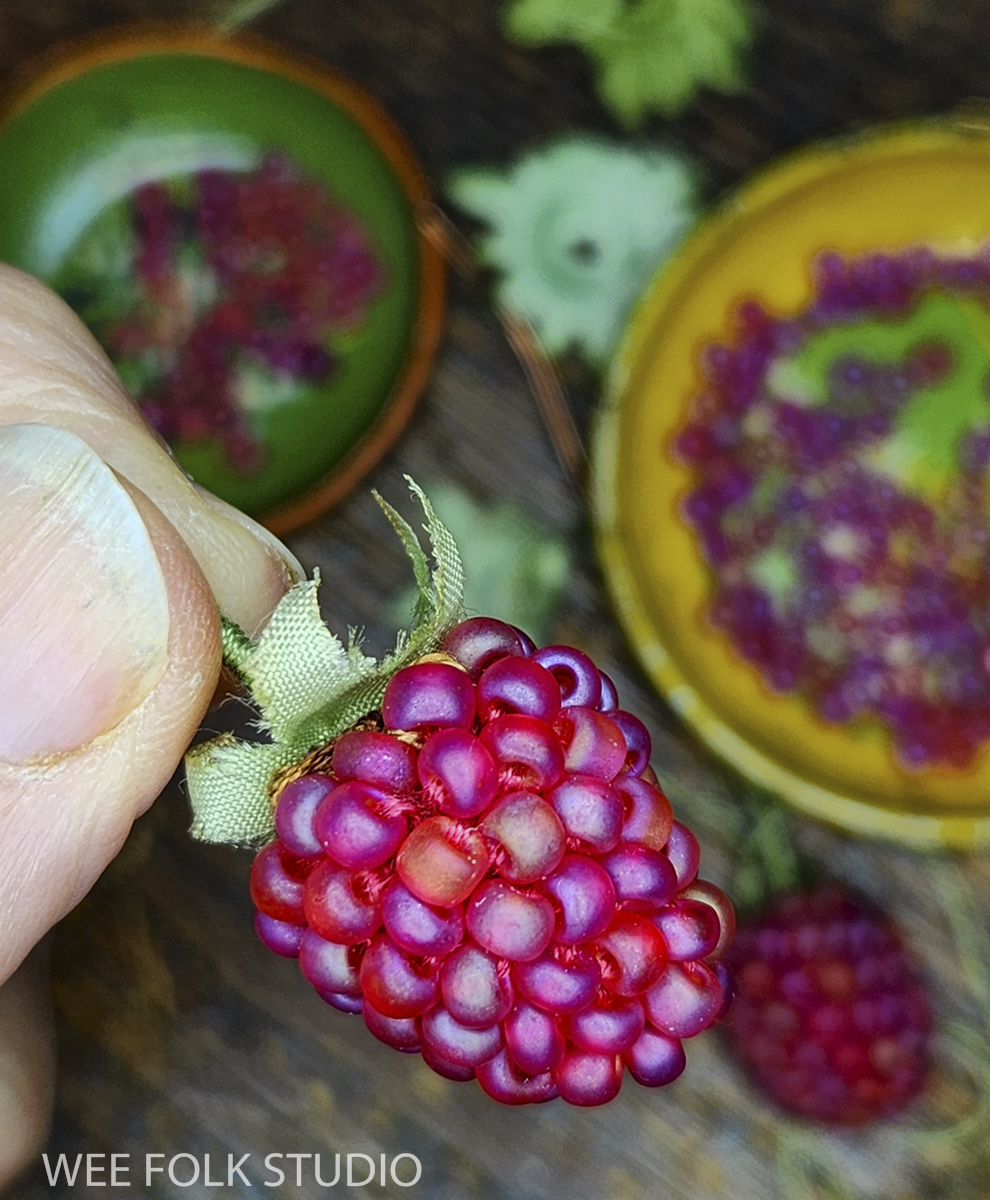
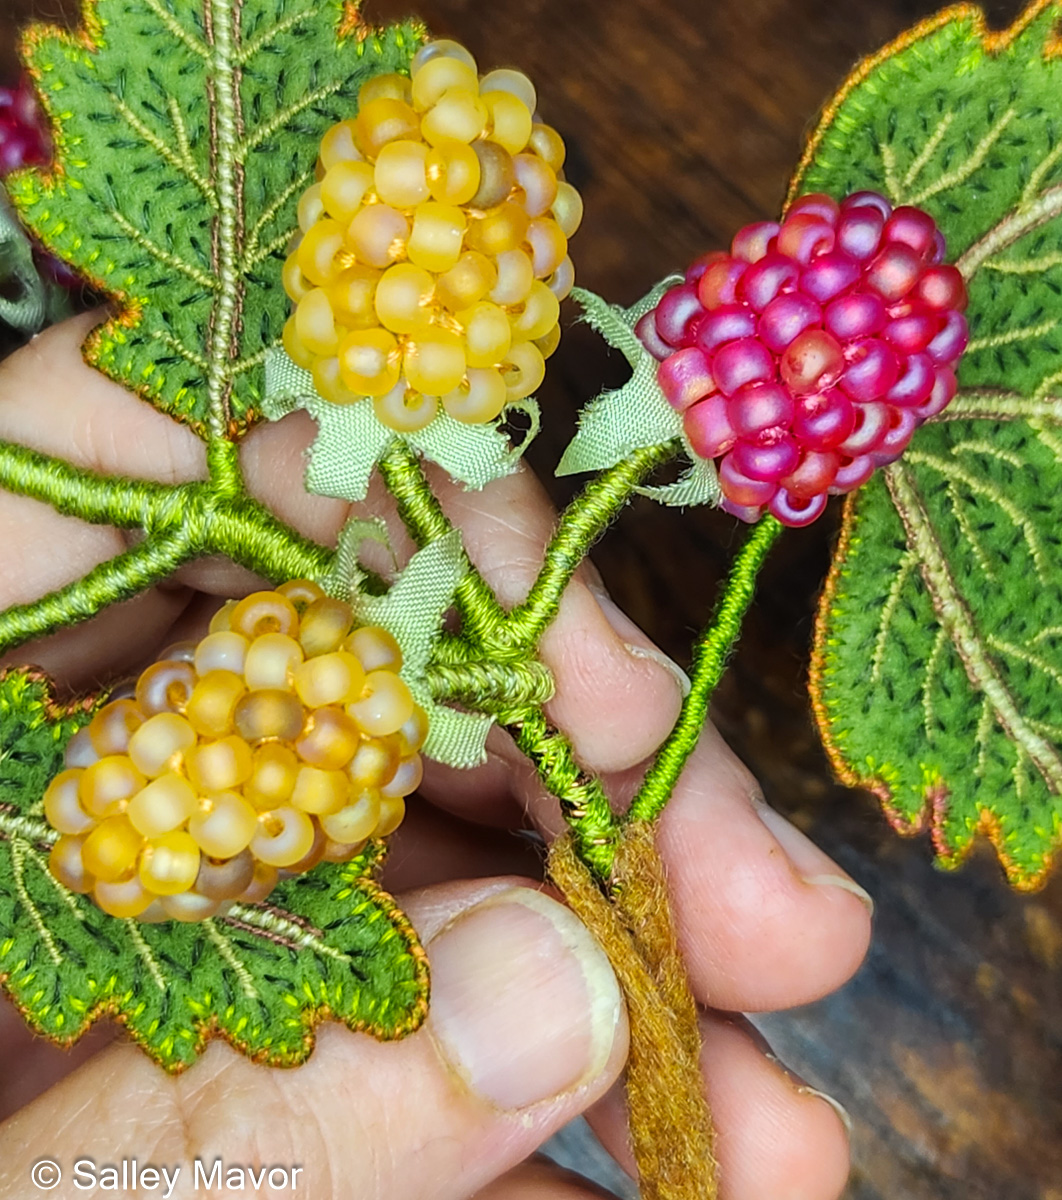
RASPBERRIES The idea to add raspberries came late in the process, months after I’d begun stitching and constructing the piece. I was inspired by our new raspberry patch, which was producing the most succulent fruit I’d ever grown. The raspberries practically begged to be featured in the summer scene! My original design included flowers, but I was much more excited about making raspberries.
Now came the fun part, where I examined raspberries, both real and in photos, imagining how to replicate them with stitching and found objects. I searched through my stash and found some frosted glass beads that were just the right shade of reddish pink. The goal wasn’t to reproduce exact copies, but to make the imitation raspberries look even more scrumptious than real ones. The following video demonstrates how I made the felt core, sewed on the beads, and wrapped the stem with embroidery floss.
My supply of beads was limited, so I conserved them by covering just the top and sides of the felt core, leaving a bare back that could more easily be sewn to the background fabric. When I ran out of red beads, I used yellow ones to make more raspberries.
RASPBERRY LEAVES Looking closely, I noticed that raspberry leaves were quite complex, with fine saw-like teeth that would be hard to replicate in felt. I ended up making a stylized version that was as pointy as I could get.
The following video shows how I sewed wire around the outside edge and embroidered veins on a felt raspberry leaf.
Once there were enough berries and leaves, I linked them together with wire branches. Then, I covered the wire with embroidery floss.
This video shows how I twisted Parawire to make stems and branches and then wrapped the wire with embroidery floss.
This video shows how I covered the thicker bottom branches with a strip of brown felt.
This project is a clear example of the importance of flexibility in my working process. There’s a reason that I steer away from textiles and needlework that involve grids, graphs or patterns. In the beginning, I’m not so certain about how my art is going to develop. Sure, I start with a basic design and structure, but I like to keep a door open for change. In this case, raspberries showed up.
Stay tuned for Part 8, where I’ll share photos and videos documenting the process of stitching flora in Summertime.
To keep up with new posts, please subscribe to this blog. Your contact info will not be sold or shared. If you’d like to see more frequent photos tracking the projects in my studio, please follow me on Facebook, Instagram and BlueSky.