

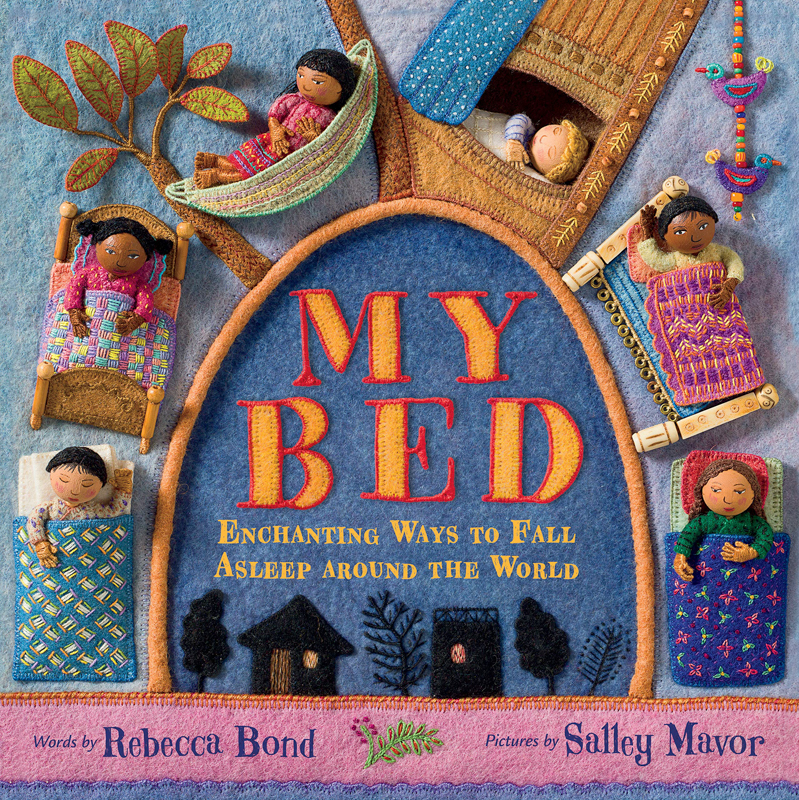
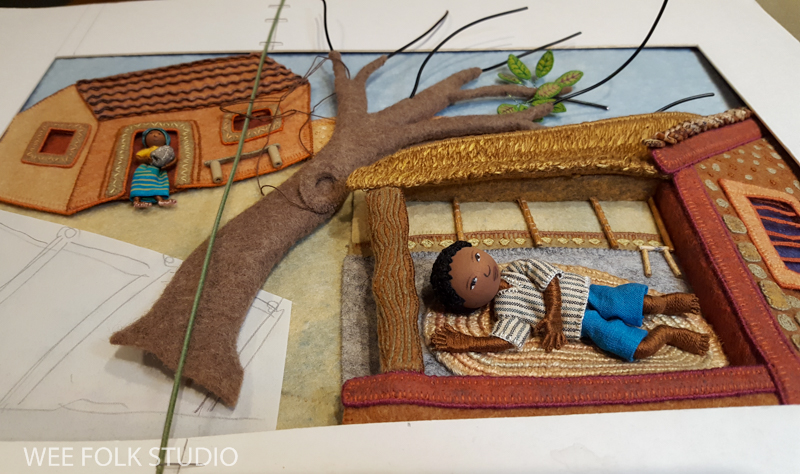
This is Part 3 in a series of posts about how I made the stitched bas-relief scene set in the West African country of Ghana. A photograph of the piece will be reproduced in my upcoming picture book, MY BED: Enchanting Ways to Fall Asleep around the World. An accompanying US tour of the original artwork used to illustrate the book will begin in the fall of 2020. Information about the exhibition is on this page.
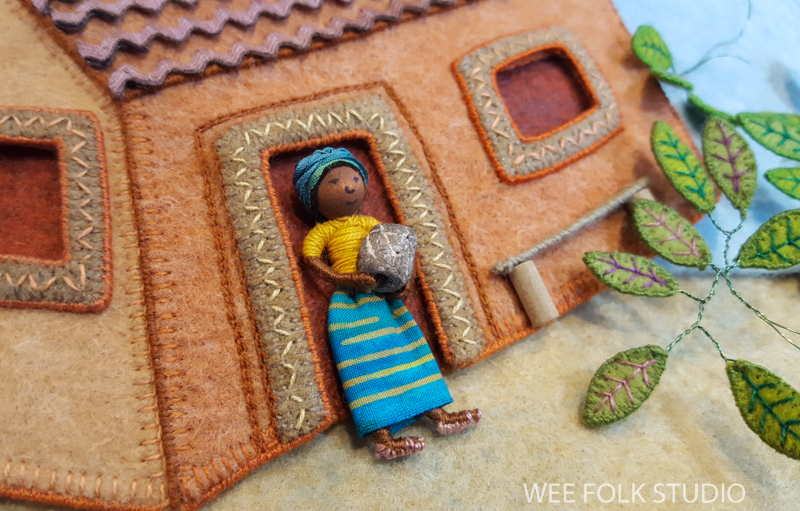

Part 1 shows the process of making the smaller house and figure in the background and Part 2 is about making the child and his house in the foreground.
The book is about where children sleep around the world, with each spread depicting a different culture and living environment. The story is written by Rebecca Bond and will be published by Houghton Mifflin Harcourt in Sept. 2020. Here are links to posts showing other finished illustrations for the book: South America, Japan, India, Afghanistan, Russia, North America, Scandinavia, Holland and Iran. To see a list of all my books, click here.
In this part, I’ll show how I made the shade tree and the bird. Please bear with me while I try to explain ways of working that don’t easily fit into a logical sequence. These are techniques I’ve figured out intuitively over many decades of manipulating materials in my hands and I will do my best to translate into words what my hands have taught me.
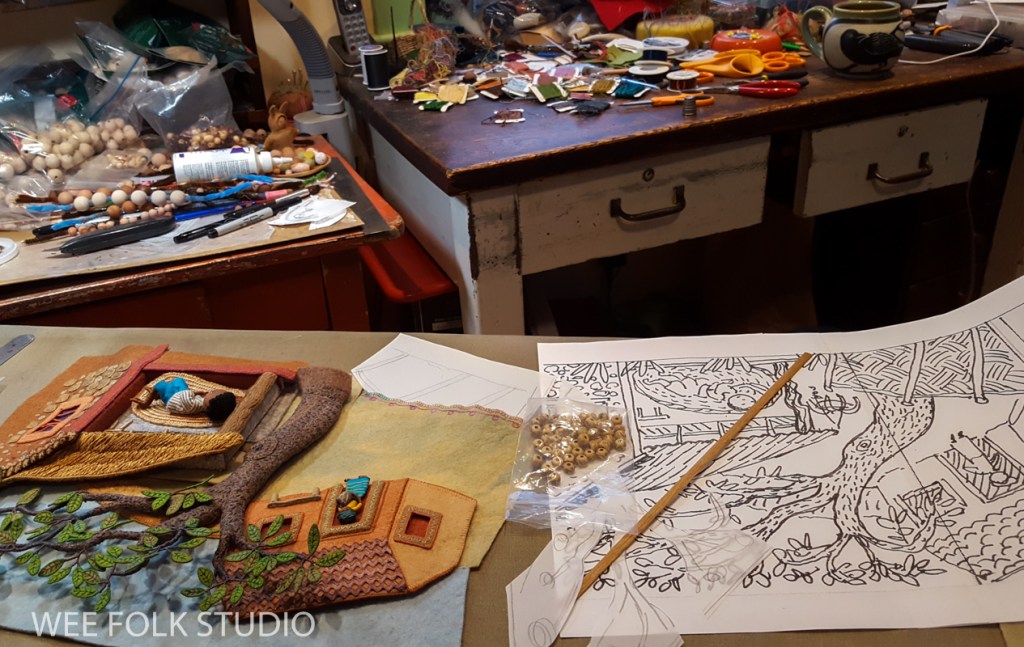
In the beginning, I made thumbnail sketches of all of the pages in the book and enlarged them to full size. I used the drawing of the Ghanaian scene to trace and cut out a template of the tree.

Using the template, I traced and cut the trunk shape out of acid-free mat board. Over the years, I’ve gotten more diligent about using archival materials that won’t deteriorate or stain over time. You can read how I learned my lesson in this post about repairing an older piece.
To give the mat board a stitch-friendly surface, I glued layers of thin quilt batting to the front and back of the mat board. That way, there was something to catch the needle onto. I built up the thickness of the trunk by sewing tapered layers of felt to the top.
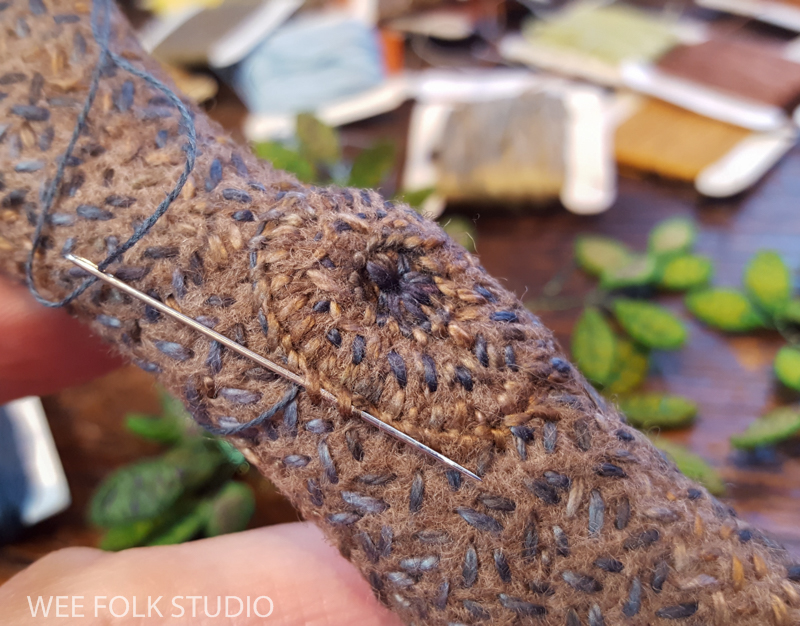
To make thinner branches, I sewed insulated electrical wire to the top where the trunk divides into 3 sections. I covered the tree trunk and thicker branches with brown felt, using a gazillion stitches on the back to pull it tight around the front.

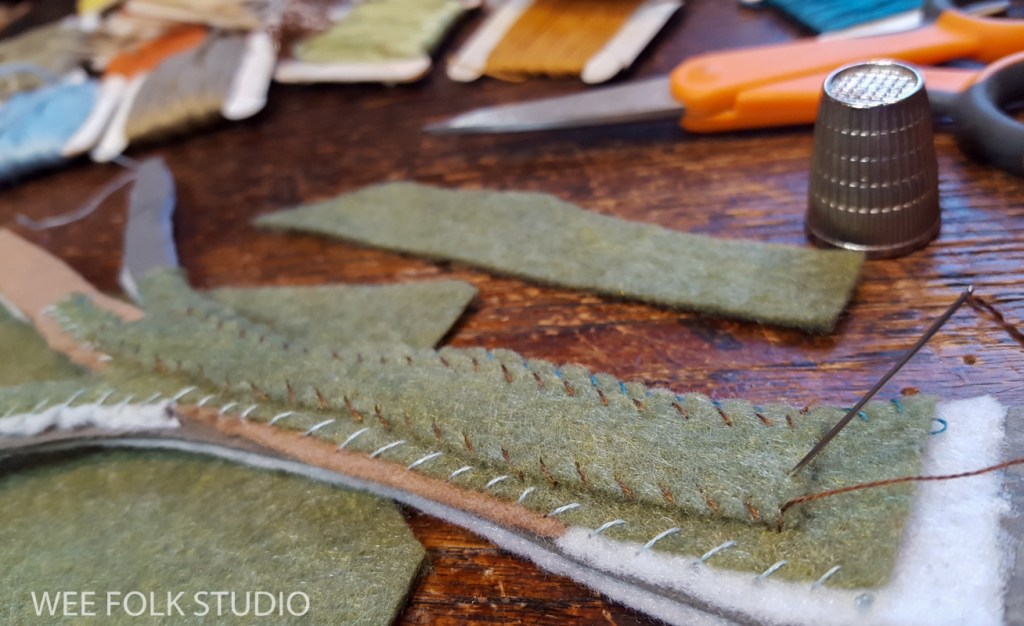
I stitched a zigzag bark texture to the front with variegated pima cotton (Watercolours by Caron). To make the knot in the tree, I cut out a donut shaped piece of felt and blanket stitched it to the trunk.

To make leaves, I cut out pieces of felt and edged them with blanket stitches. Then, I stitched jewelry wire around the outside edges and formed stems by twisting wire.
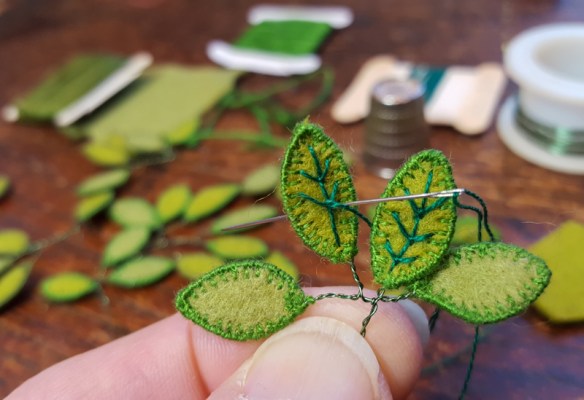
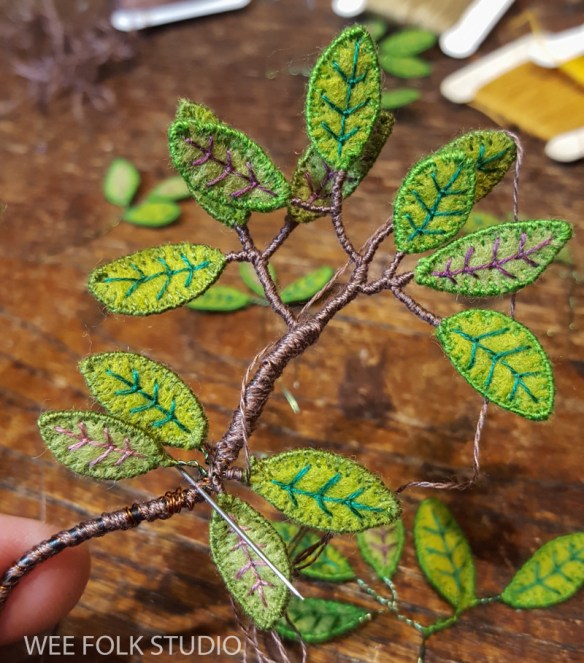
I attached clumps of 3 or 4 leaves to the tree branches by winding the thin jewelry wire around the thicker insulated electrical wire.

Then, I wrapped the thick and thin wire with embroidery floss, covering the bumps and lumps until it looked smooth.
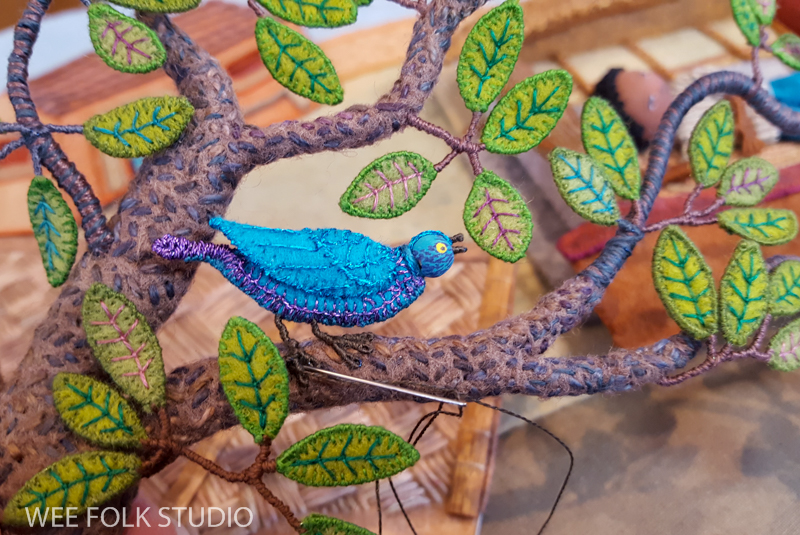
The original sketch didn’t include a bird, but after watching the scene come together, I decided to add a third blue focal point to catch the eye. The other 2 are the boy’s blue shorts and the blue skirt worn by the woman in the doorway. They stand out in contrast with the overall orange, brown and green color palette. I researched birds in West Africa and found a spectacular bird called the splendid glossy-starling.

For the bird’s head, I painted a wooden bead blue and formed a beak out of jewelry wire, which I wrapped with embroidery floss. Then I stuck the wire through the bead hole and used the extra length of wire to make the bird’s feet.
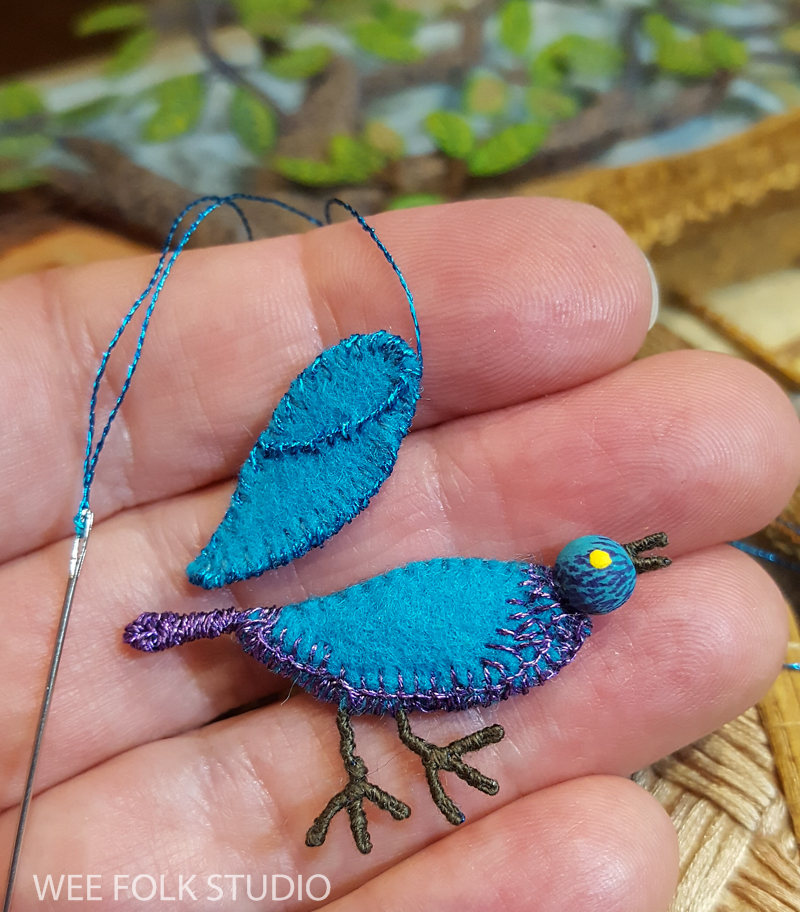
I made the bird’s body out of felt and added a wire tail. This starling is really glossy, so I stitched some bling with purple metallic thread on its tail and underbelly.

After sewing the bird’s wire feet to a thick branch on the tree, I could almost hear it sing!
Please stay tuned for Part 4, which will cover how I made the plants and woven fence.

To keep up with new posts, please subscribe to this blog. Your contact info will not be sold or shared. If you’d like to see more frequent photos tracking the projects in my studio, please follow me on Facebook and/or Instagram.

Sally, your posts are so detailed and inspirational. Thank you for your generous sharing spirit! I’ve already ordered your book and cannot wait to see the final published version.
Your work is beyond wonderful!! It’s magnificent…so inspiring!! Thk you for sharing.
just soooo amazing
Salley, I am so very grateful that you share the how-tos of your art the way you do. I´ve learned so much with you. I love your gift of art.