I make 3-dimensional fabric relief pictures that are photographed and used to illustrate children’s books. I sew together different materials to create fanciful scenes in relief, much like a miniature stage set, with figures imposed on an embellished fabric background. My work is decorative and detailed, full of patterns from nature and found objects, all sewn together by hand with a needle and thread.
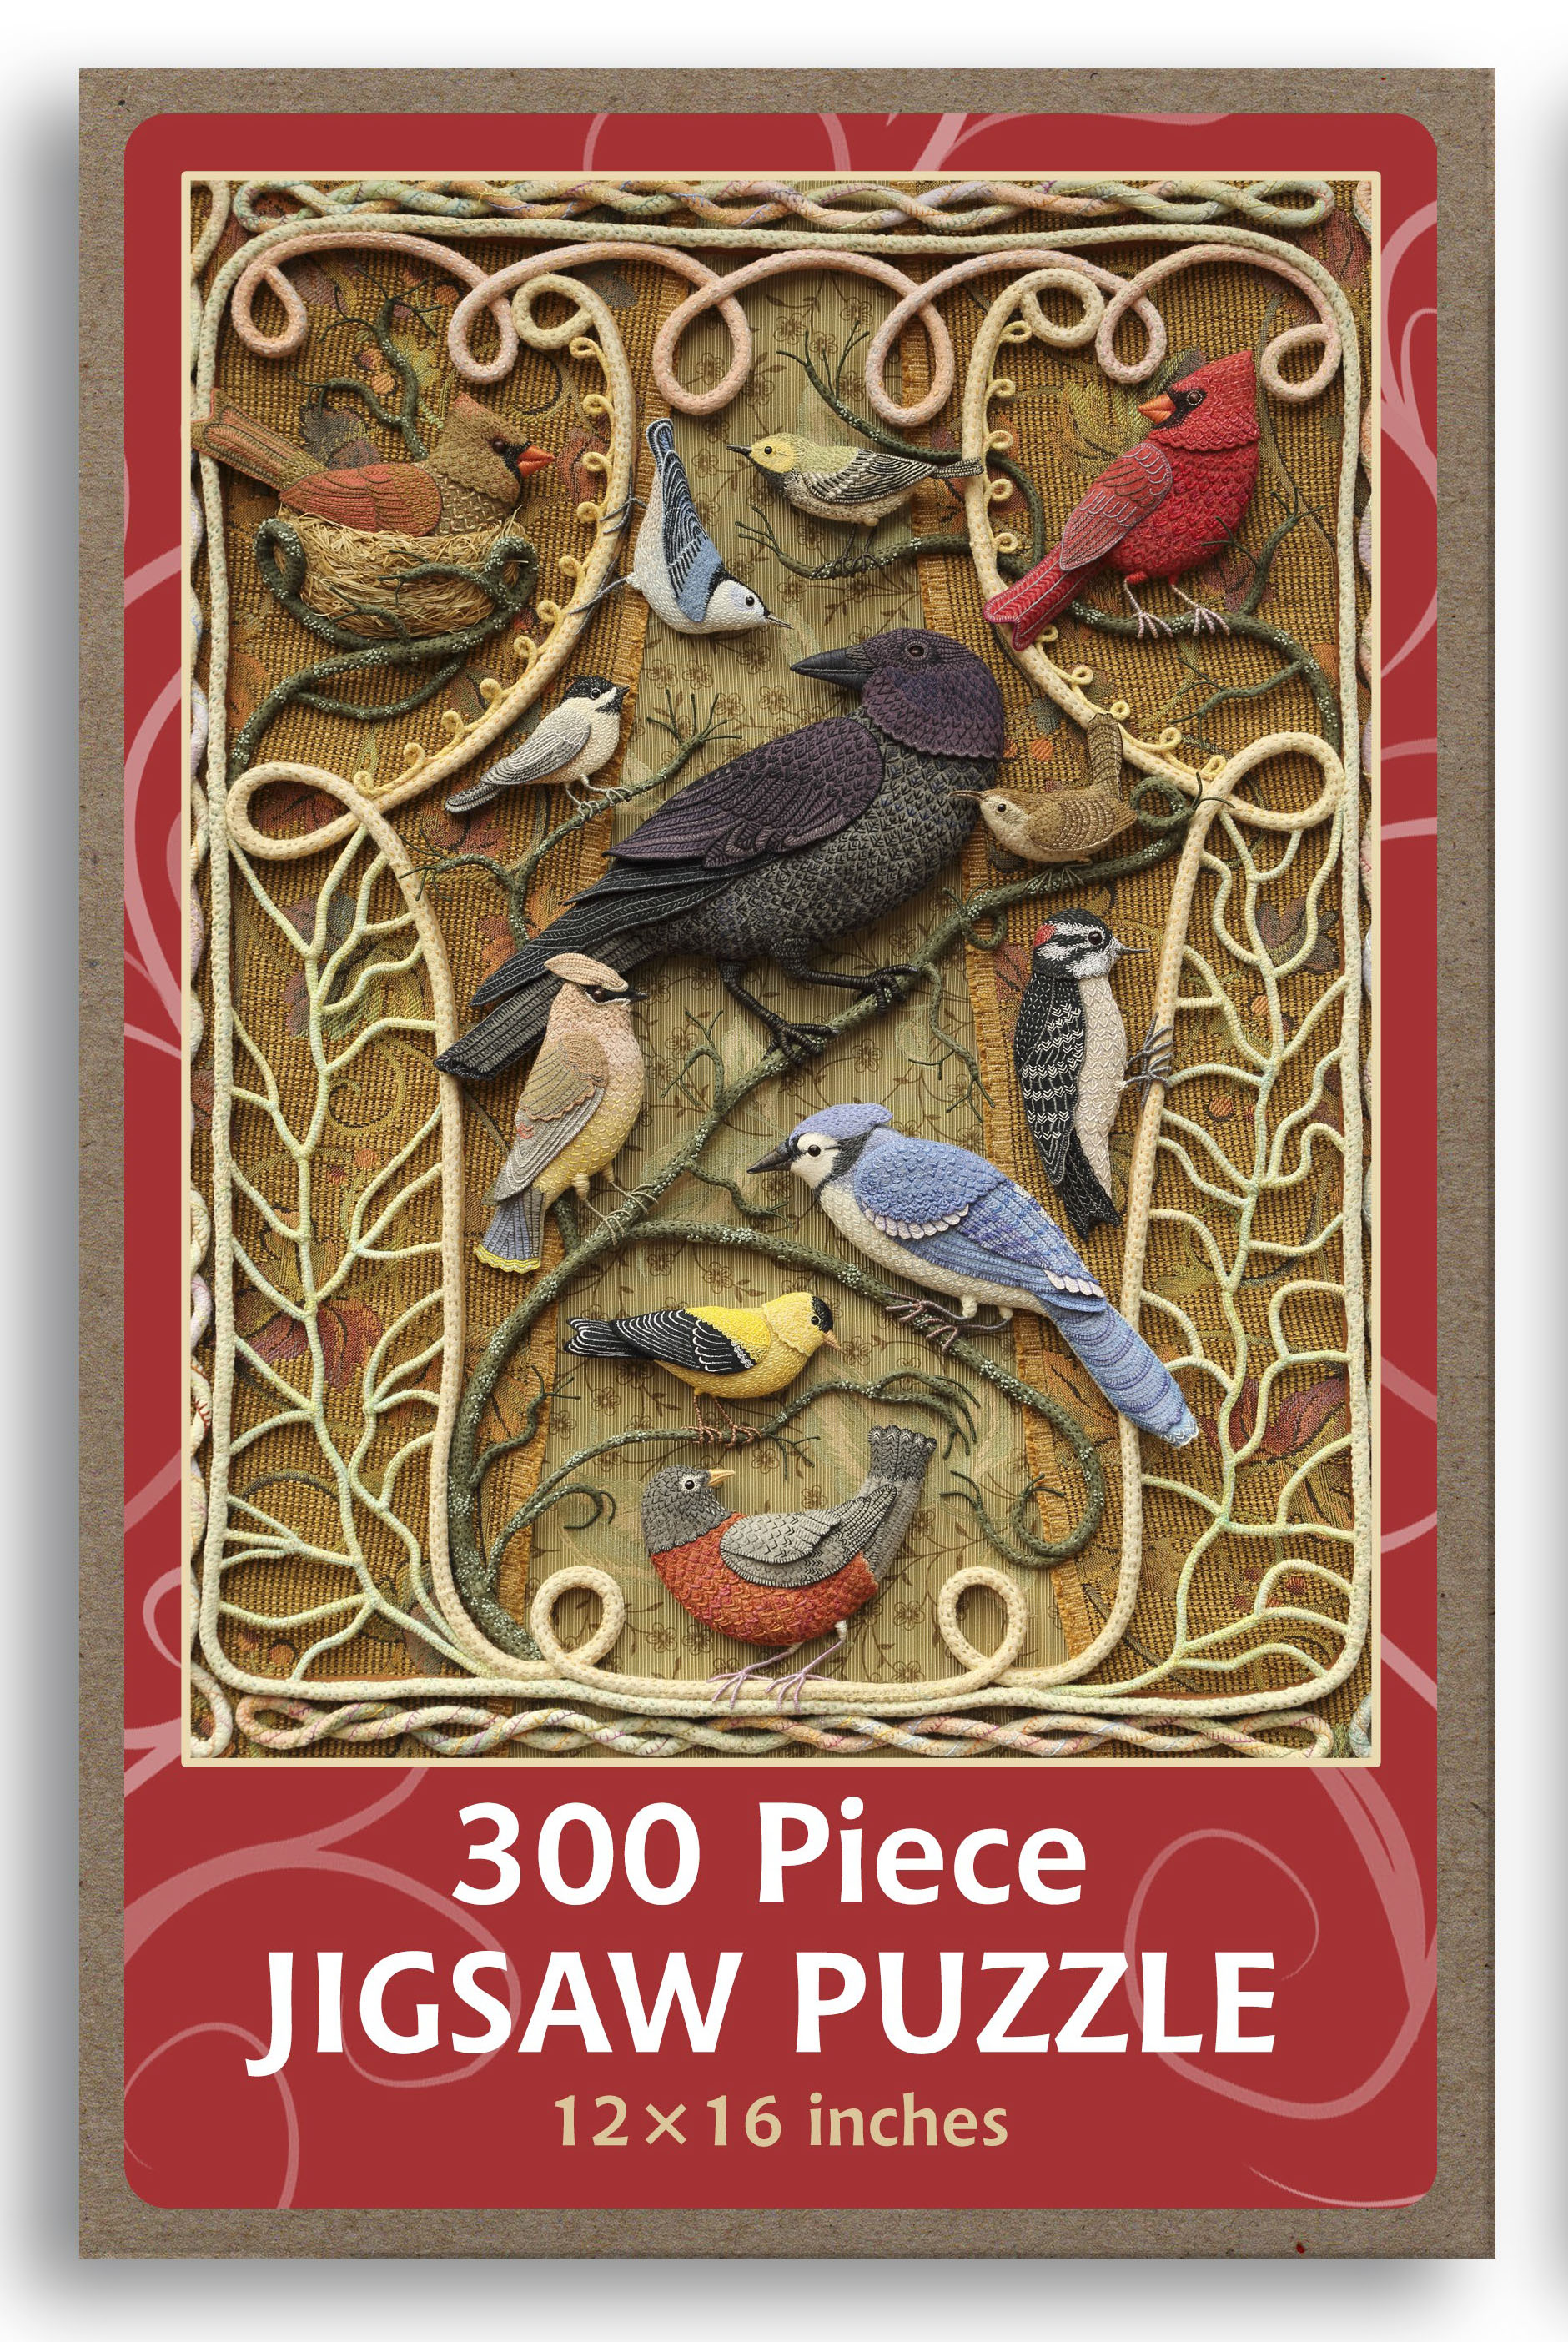
I’m excited to share the news that jigsaw puzzles are now available in my Etsy Shop! For a long time, fans have suggested that my work would translate well into puzzle form. I thought so, too, but was too busy stitching to do anything about it. After years of searching for a high quality product and an economically feasible manufacturing arrangement, I’ve finally decided to test the market with two puzzle designs; Birds of Beebe Woods and Harvest Time.
Birds of Beebe Woods jigsaw puzzle
The 300 piece 12″ x 16″ puzzles are suitable for older children as well as adults. At this size, the puzzle pieces can easily spread out on a card table instead of taking over the dining room table. And it won’t take an interminable amount of time to piece together the image. Of course, some people love nothing more than to get sucked into a seemingly never-ending puzzle. I’m kind of like that and have to regulate my puzzle time, lest my obsessive nature takes over.
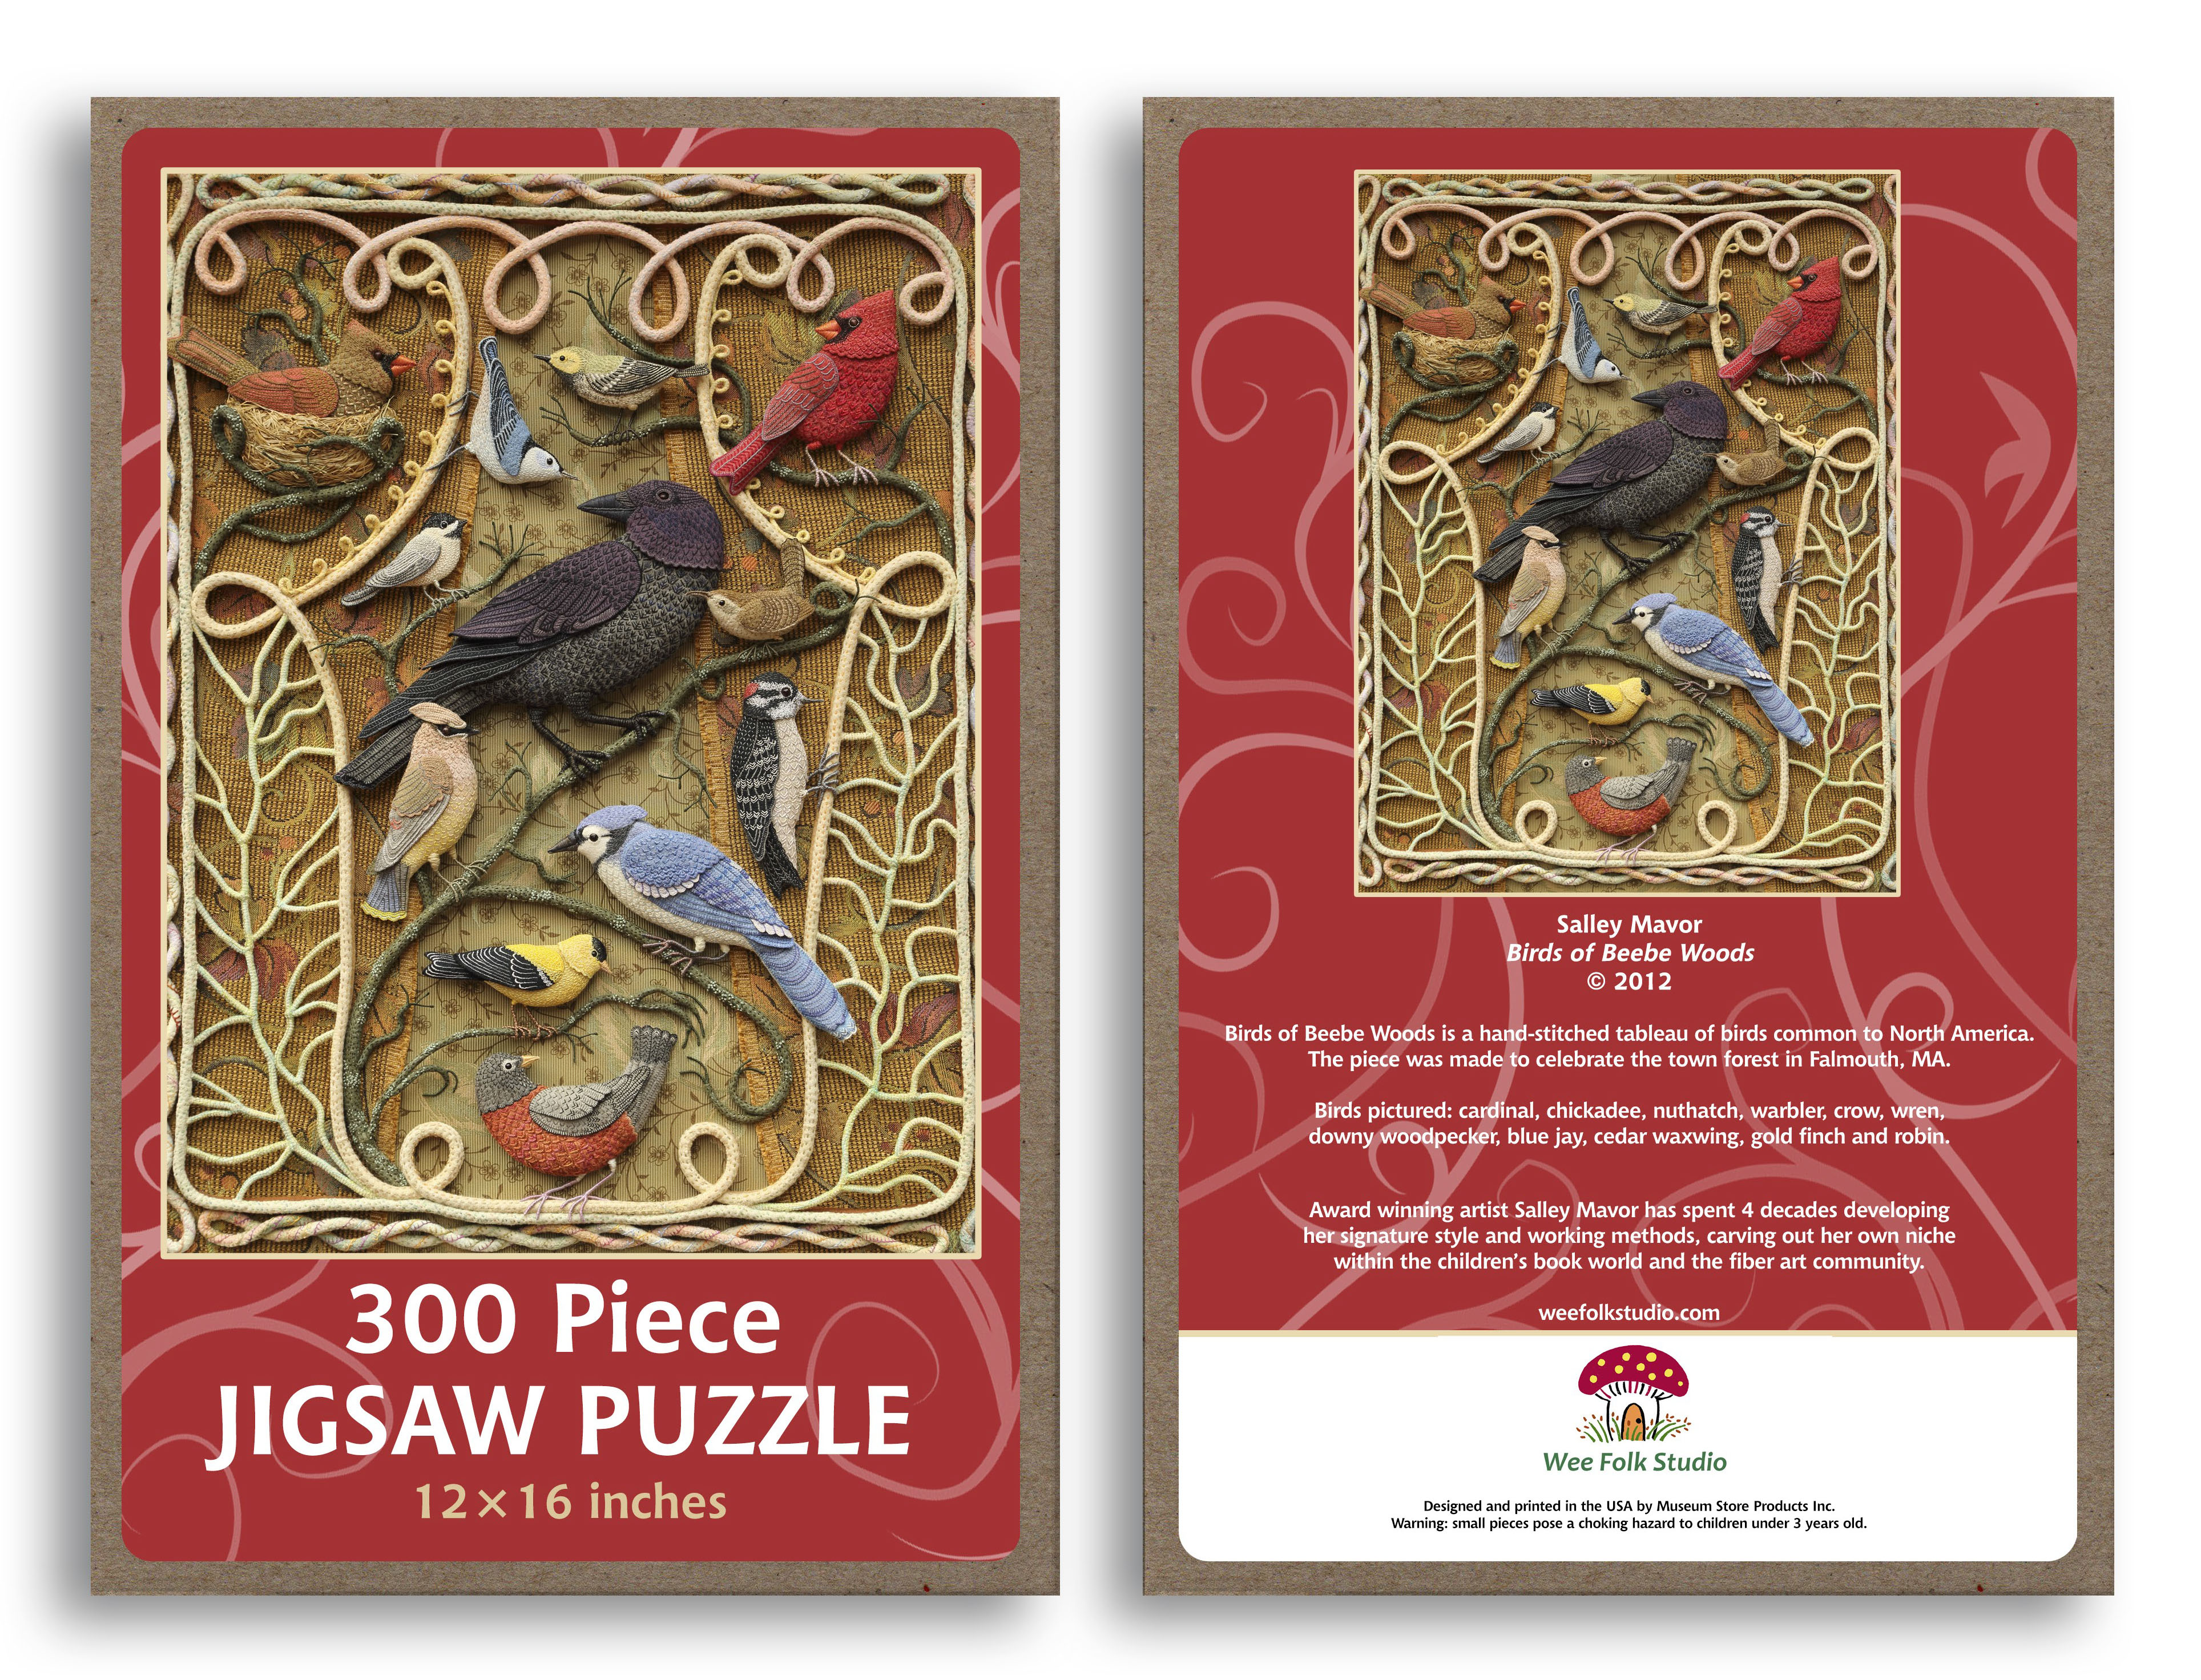
Birds of Beebe Woods jigsaw puzzle, box front and back
After our Thanksgiving meal, my family put together the Birds of Beebe Woods puzzle. It was more challenging than expected!
The puzzles are exclusively available through my Etsy Shop. They were just listed a few days ago and are selling so well that I’m having more made. A note to my international fans: I’m really sorry, but due to the high cost of shipping overseas and unreasonable delays, I now only ship within the US and to Canada.
Is there a particular piece of mine that you would like to see in puzzle form? I’m planning to have more puzzles made and would love to hear your suggestions. Illustrations from my booksMY BED and Pocketful of Posies can’t be reproduced, but other stand alone pieces are a possibility, if I have hires photos. Please leave a comment with your suggestions.
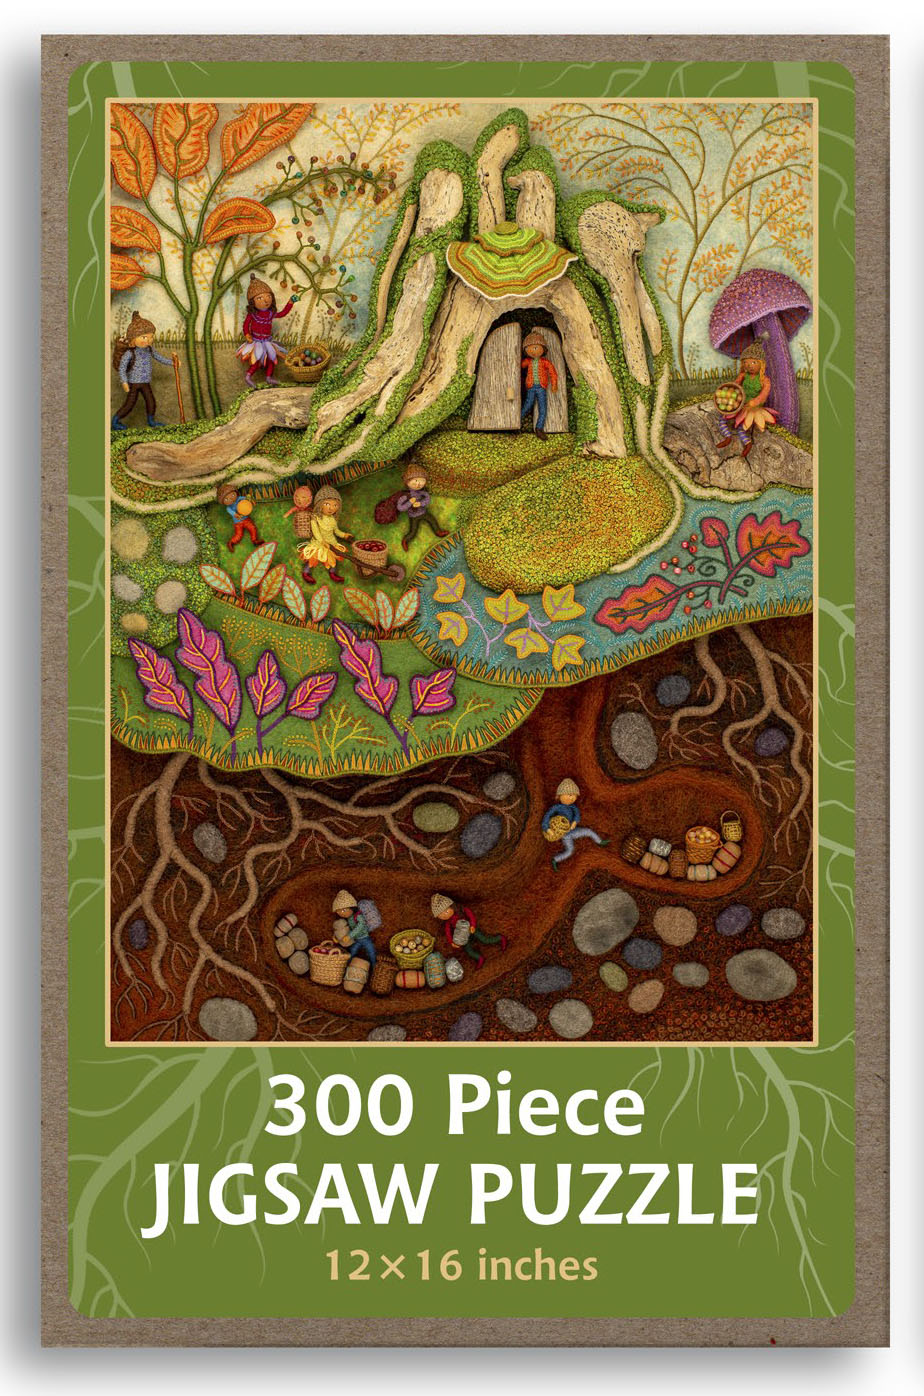
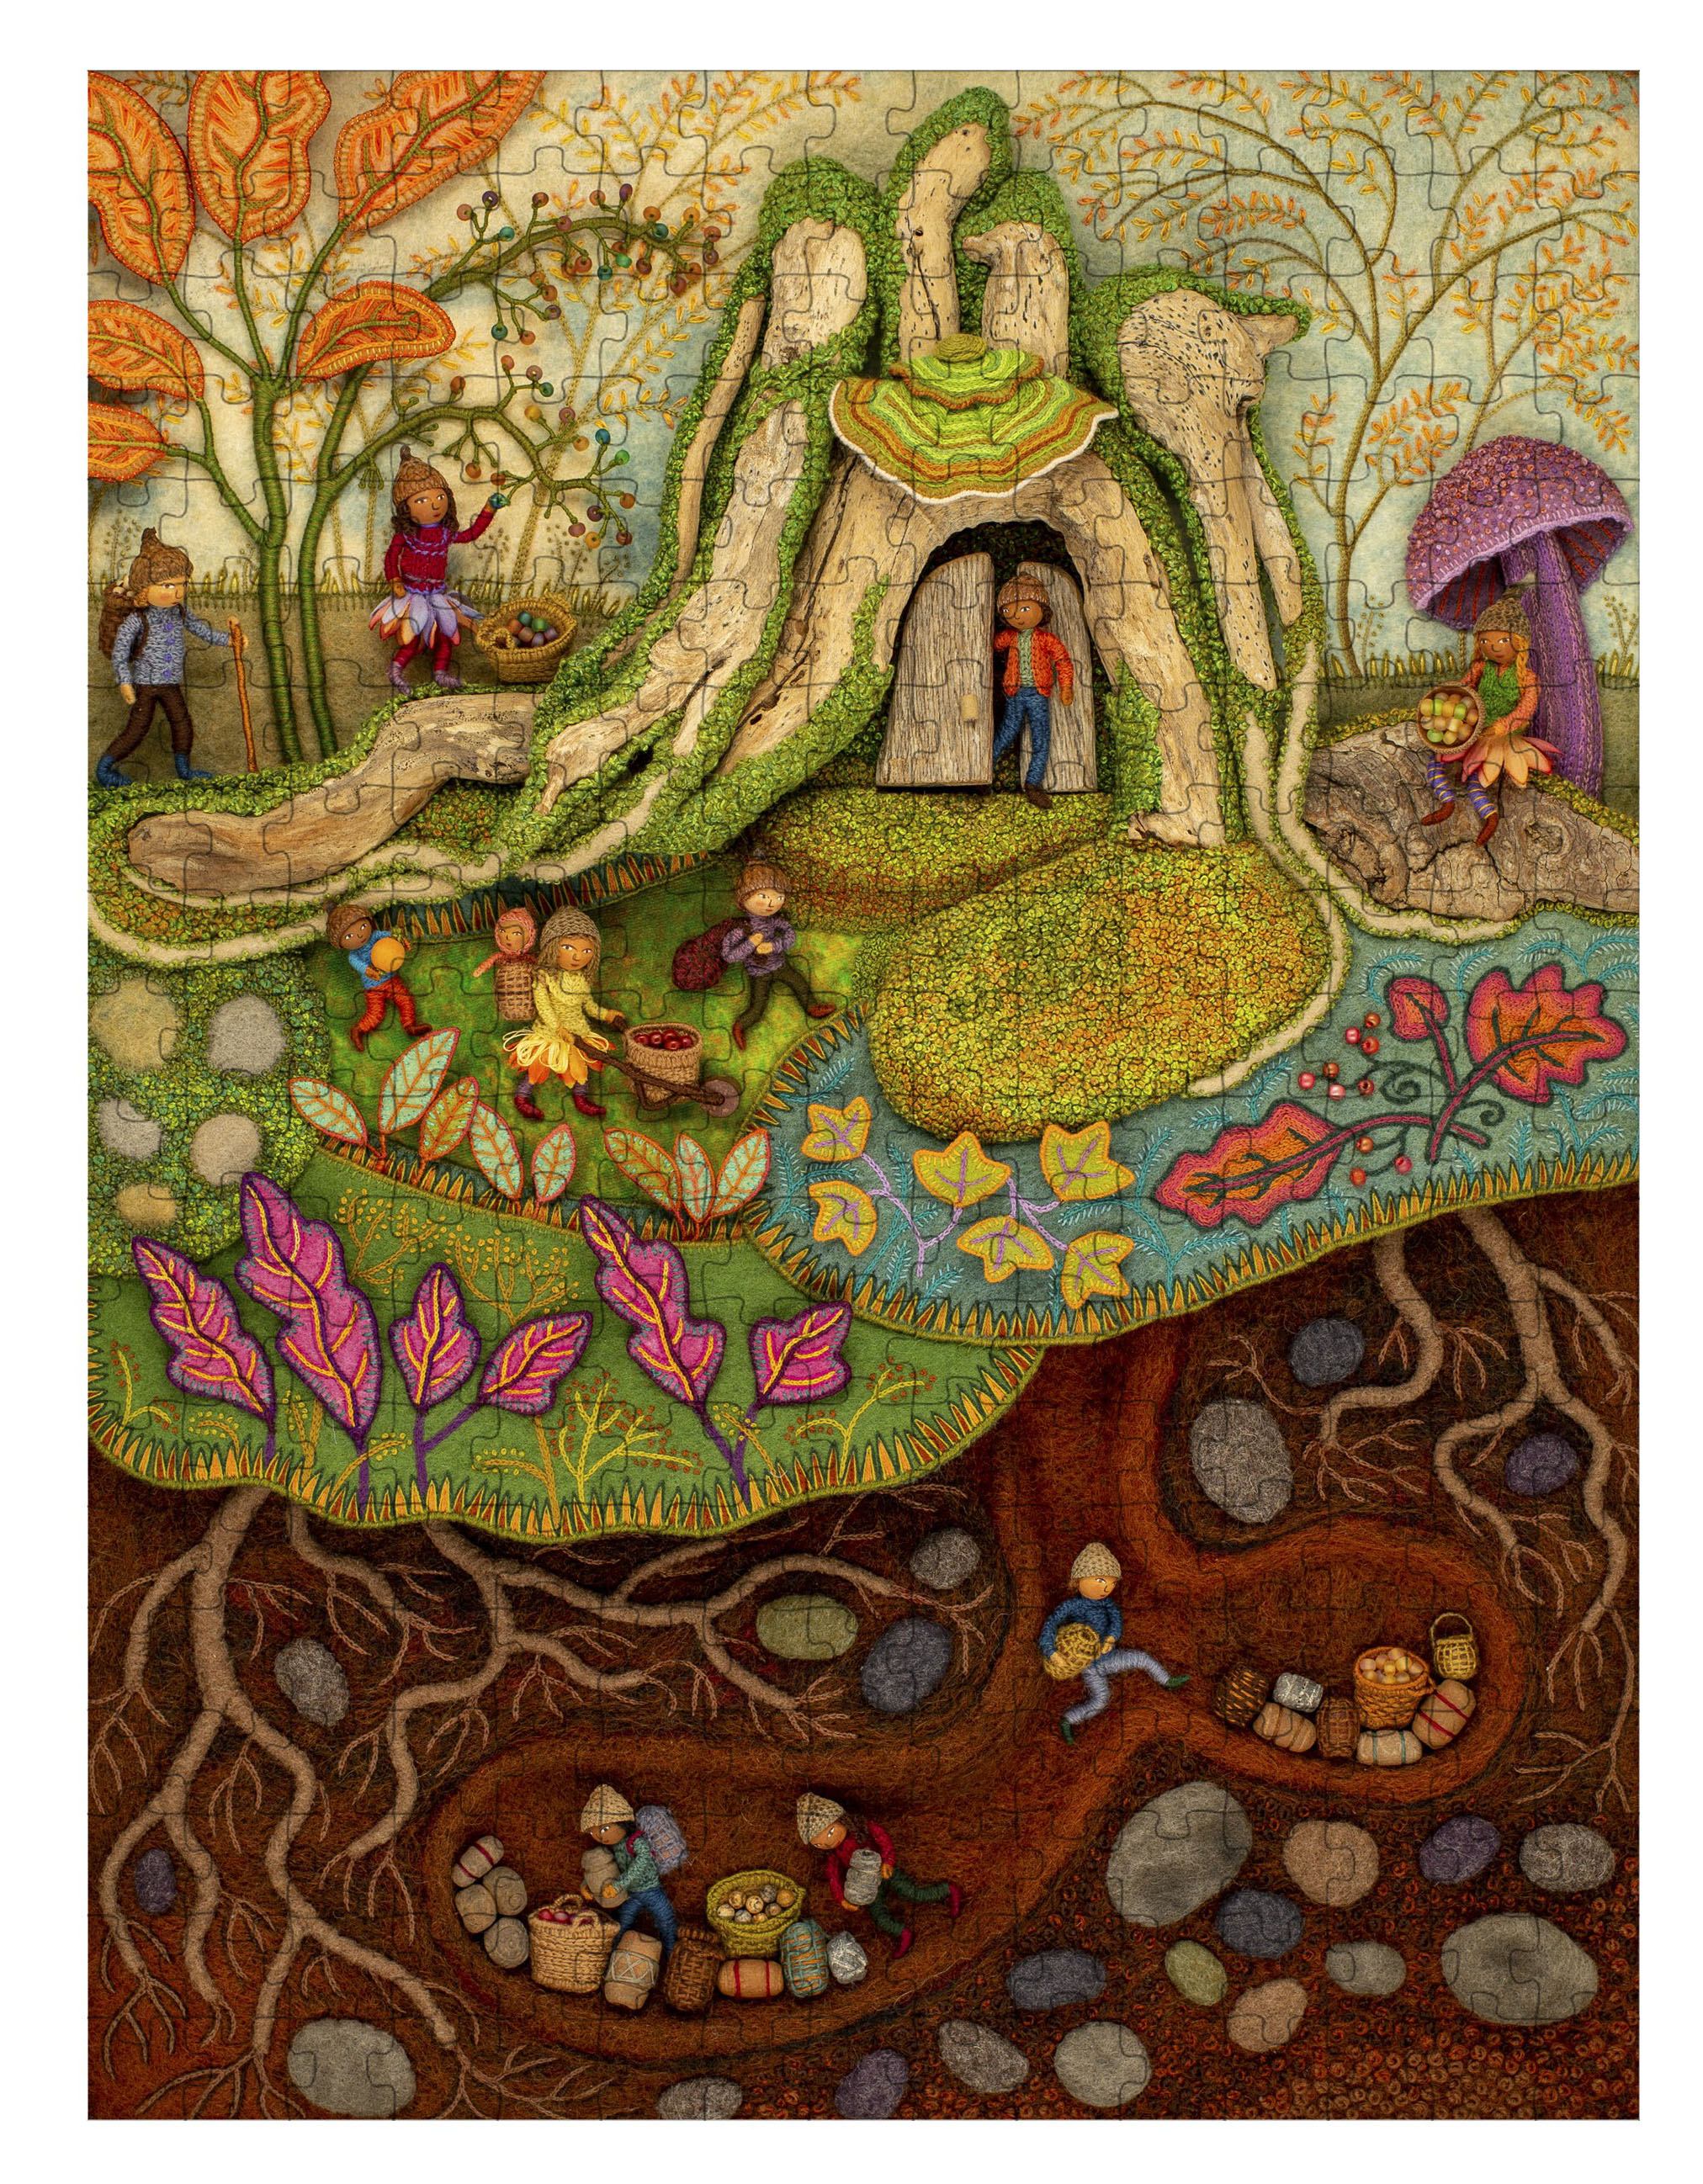
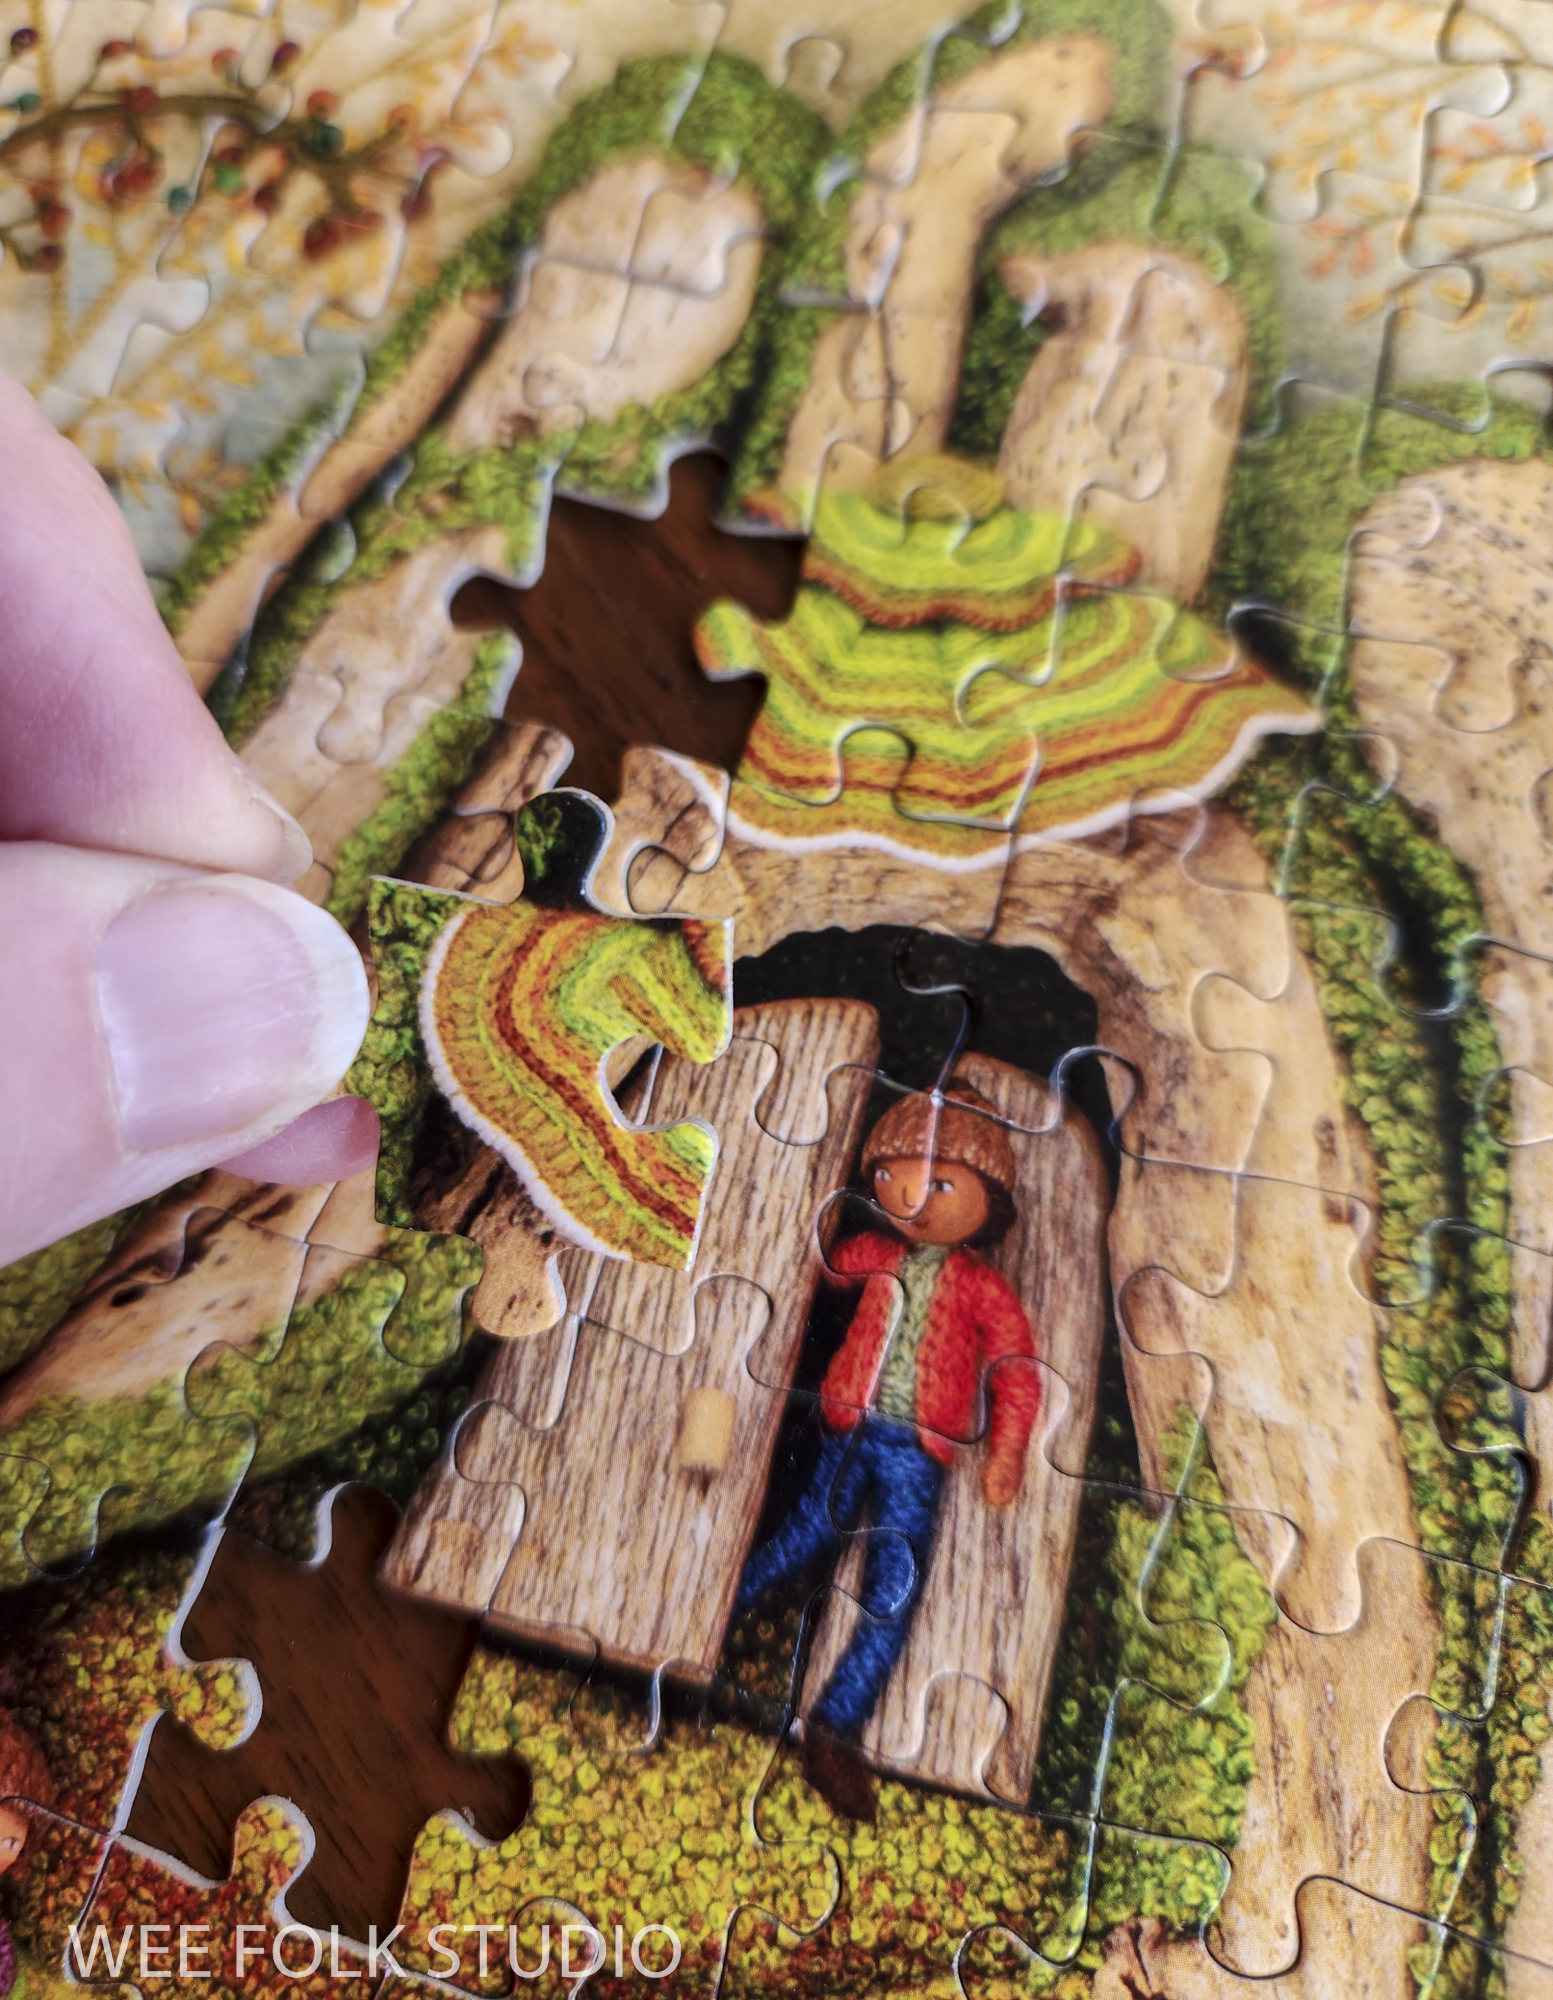
Harvest Time Jigsaw PuzzleHarvest Time jigsaw puzzle, box front and back
BIRDS OF BEEBE WOODS is a hand-stitch tableau of birds common to North America. I made the piece to celebrate the town forest in Falmouth, MA. Birds pictured: cardinal, nuthatch, warbler, crow, wren, downy woodpecker, blue jay, cedar waxwing, gold finch and robin.
Birds of Beebe Woods jigsaw puzzle
HARVEST TIME is the fall scene in a series of seasonal landscapes that capture the wonder and magic of the natural world, both real and imagined. The piece is entirely stitched by hand and incorporates a variety of materials, including driftwood, wool felt, beads and wire.
In Part 2 in the series about making Harvest Time, I share photos, commentary and a stitch-minute video about creating the turkey tail mushroom overhanging the doorway in the stump. In the coming weeks and months, I will post more stories that focus on different aspects of the process of making the fall scene, including the toad stool mushroom, wee folk figures, tunnels, roots, stones and foliage of all kinds. The overview introduces the Harvest Time piece. Part 1 features moss making. Part 2 is about making the turkey tail mushroom. Part 3 shows the construction of felt leaves. Part 4 gives a peek at embroidering the plants. Part 5 is about making the toadstool mushroom Part 6 shows the process of making the underground
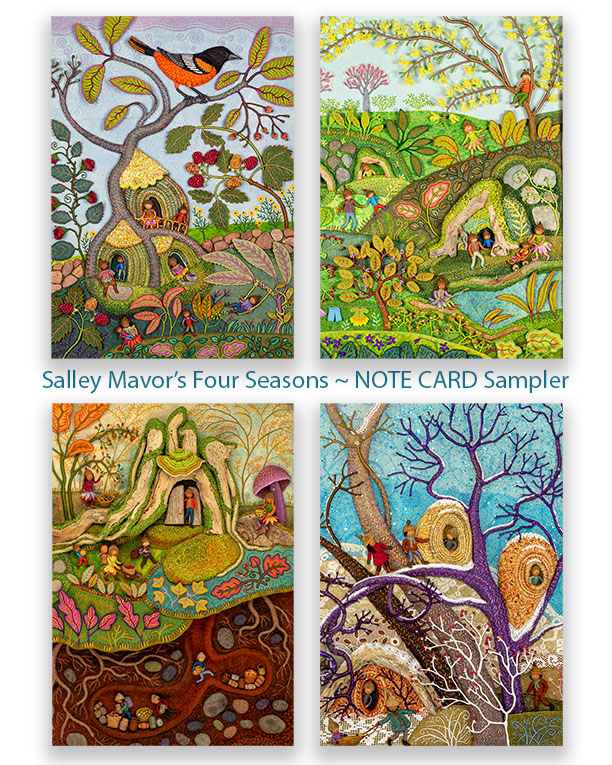
Harvest Time is the fall scene in a series of seasonal landscapes that capture the wonder and magic of the natural world, both real and imagined. Harvest Time and 2 other scenes I’ve completed and written about, Frosty Morning and Mossy Glen, are available as note cards and jigsaw puzzles in my shop here.
Harvest Time Puzzles are available in my Etsy shop.
Turkey tail mushrooms or shelf fungi are found all over the world. They usually grow on dead hardwood stumps and downed hardwood trunks or branches.
Turkey Tail Mushrooms
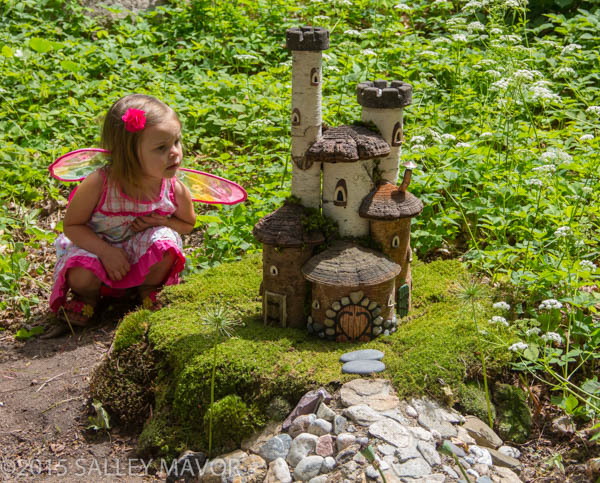
I love how Glen Carliss used shelf fungi for the roofs in “Glendell Towers”, which he made for The Fairy Houses of Highfield Hall, an outdoor exhibition that I curated in 2015. Glen told me that he’d been eyeing the mushrooms growing on trees along his road for years, imaging what to do with them.
Glendell Towers by Glen Carliss
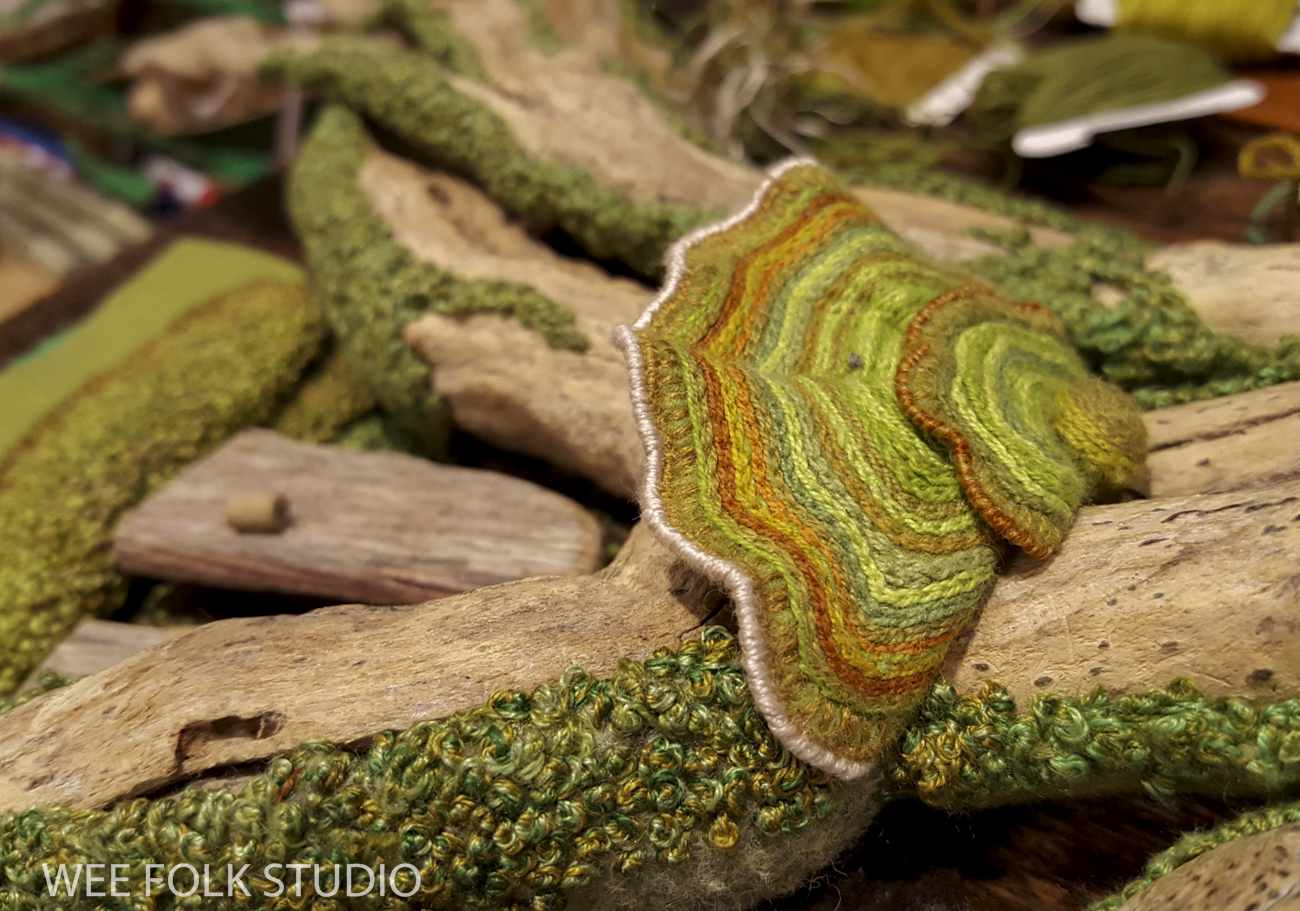
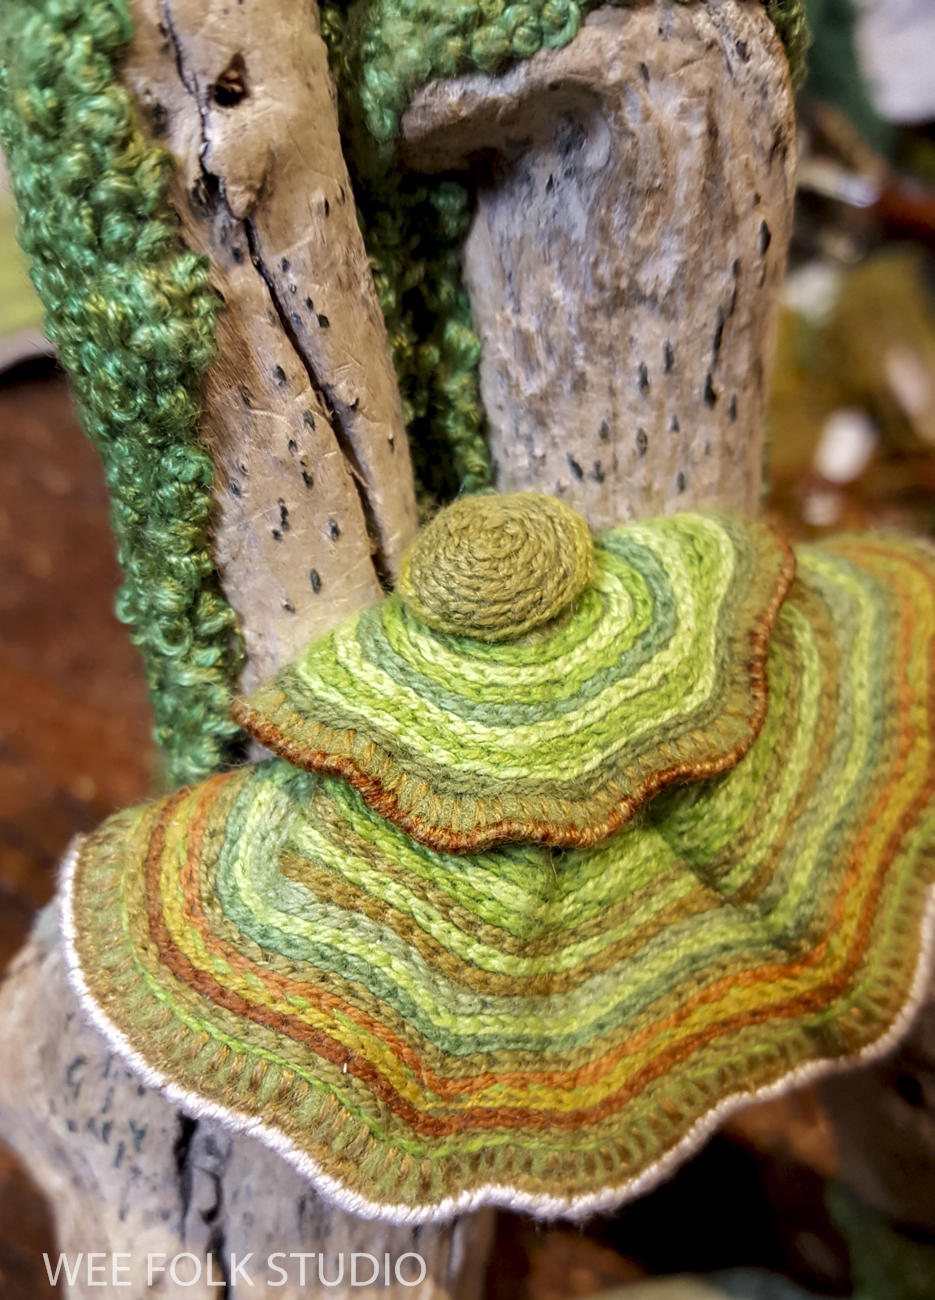
I didn’t use actual mushrooms in Harvest Time, but I was inspired by their fanciful appearance. My photo search came up with multiple color combinations, from earthy hues to shades as garish as 1960’s fashion. I chose a more subdued mixture of fall colors for the mushroom roof.
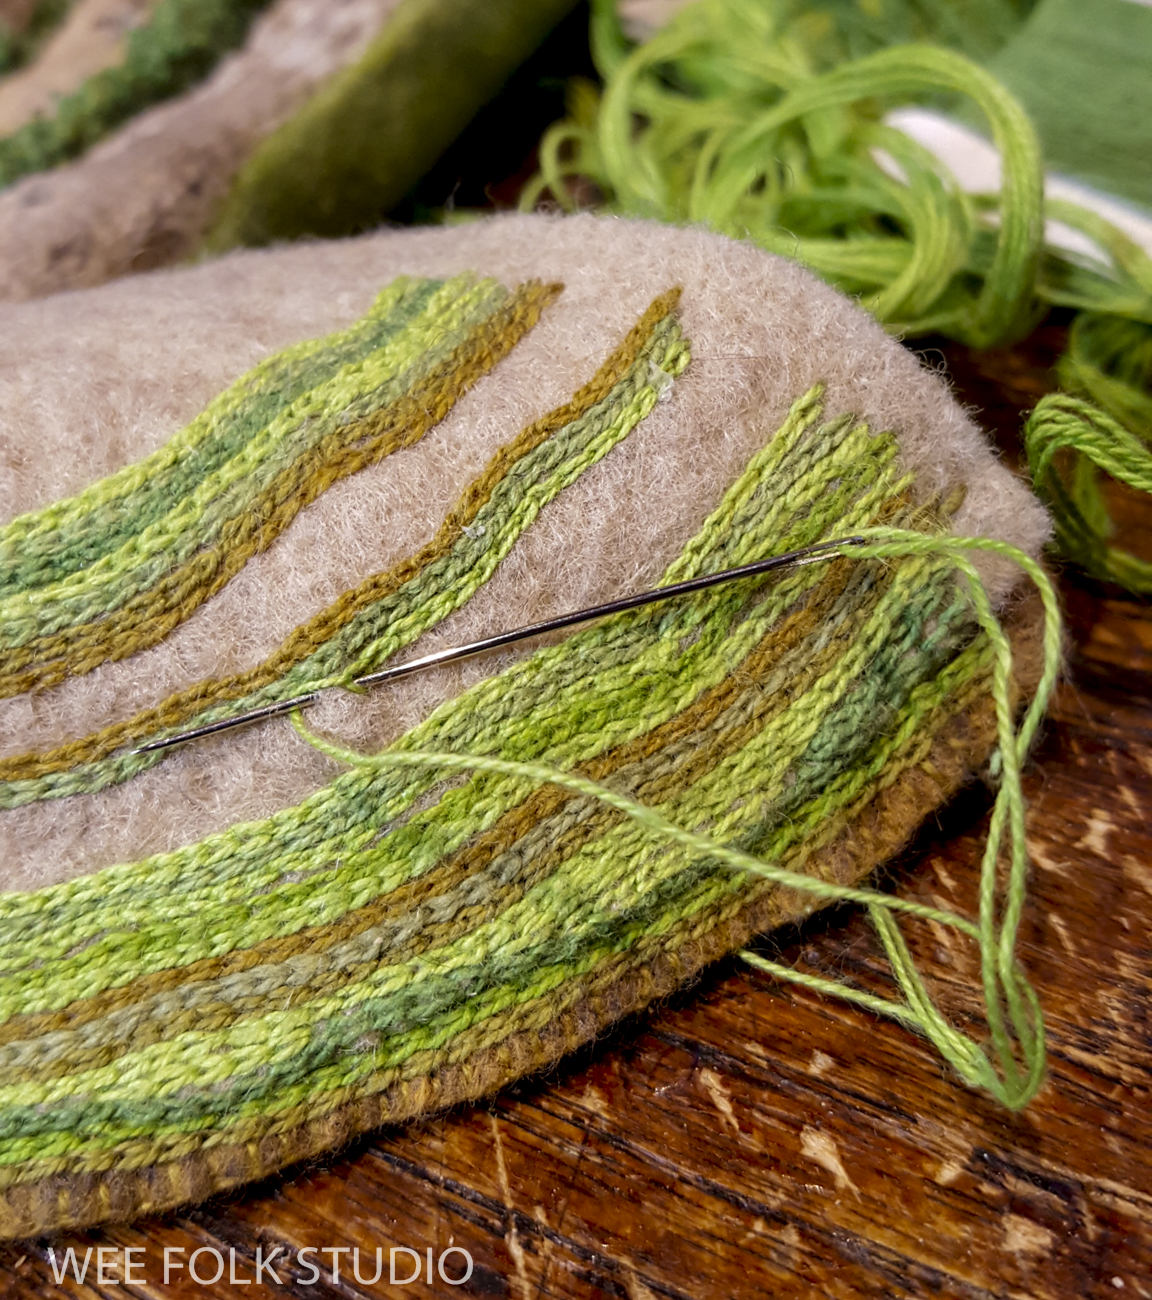
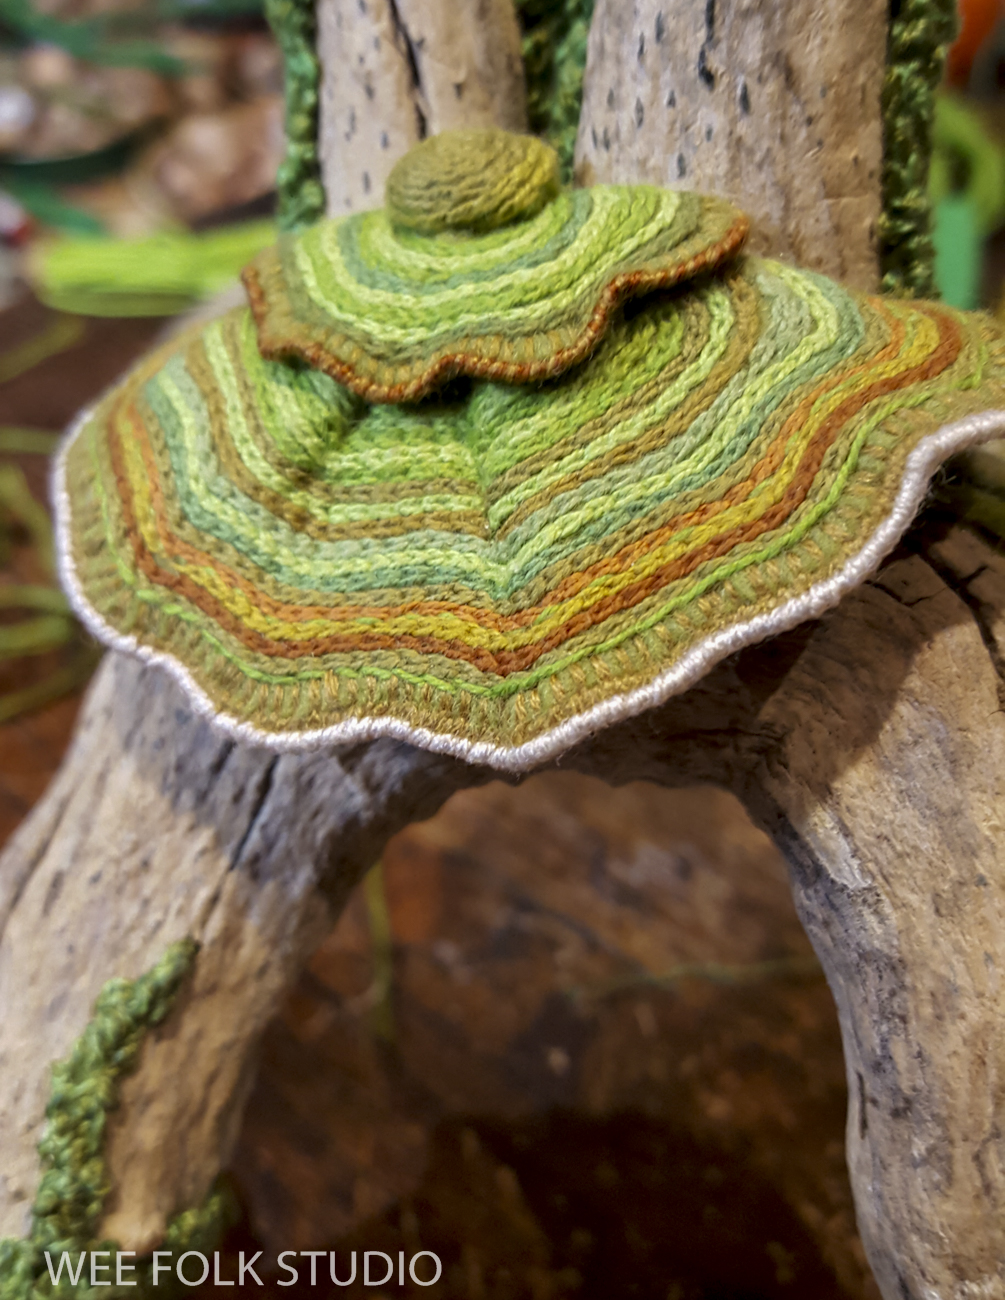
To make the striped concentric pattern, I chain stitched rows and rows of different shades of green and orange DMC cotton flower thread to a piece of felt. It took two tries to get the shape and colors the way I wanted it.
In this Stitch Minute video, I demonstrate chain stitching the stripes and adding wire.
After we filmed it, I wasn’t happy with the overall shape and color combo, so I started over and made a new one that was more curvy and included orange and yellow.
I stitched wire around the outside edge and covered it with white embroidery floss.
Then I made a smaller mushroom and a really little one that looked like a pompom on top of a hat. It’s been a year since I started working on this piece, so my memory is a bit foggy. I can only guess at how I formed the layers into a roof shape and attached it to the driftwood. I do remember that the mushroom wasn’t very cooperative and I had to torture it into shape. Most likely, I glued felt to the wood and then sewed the mushroom to the felt.
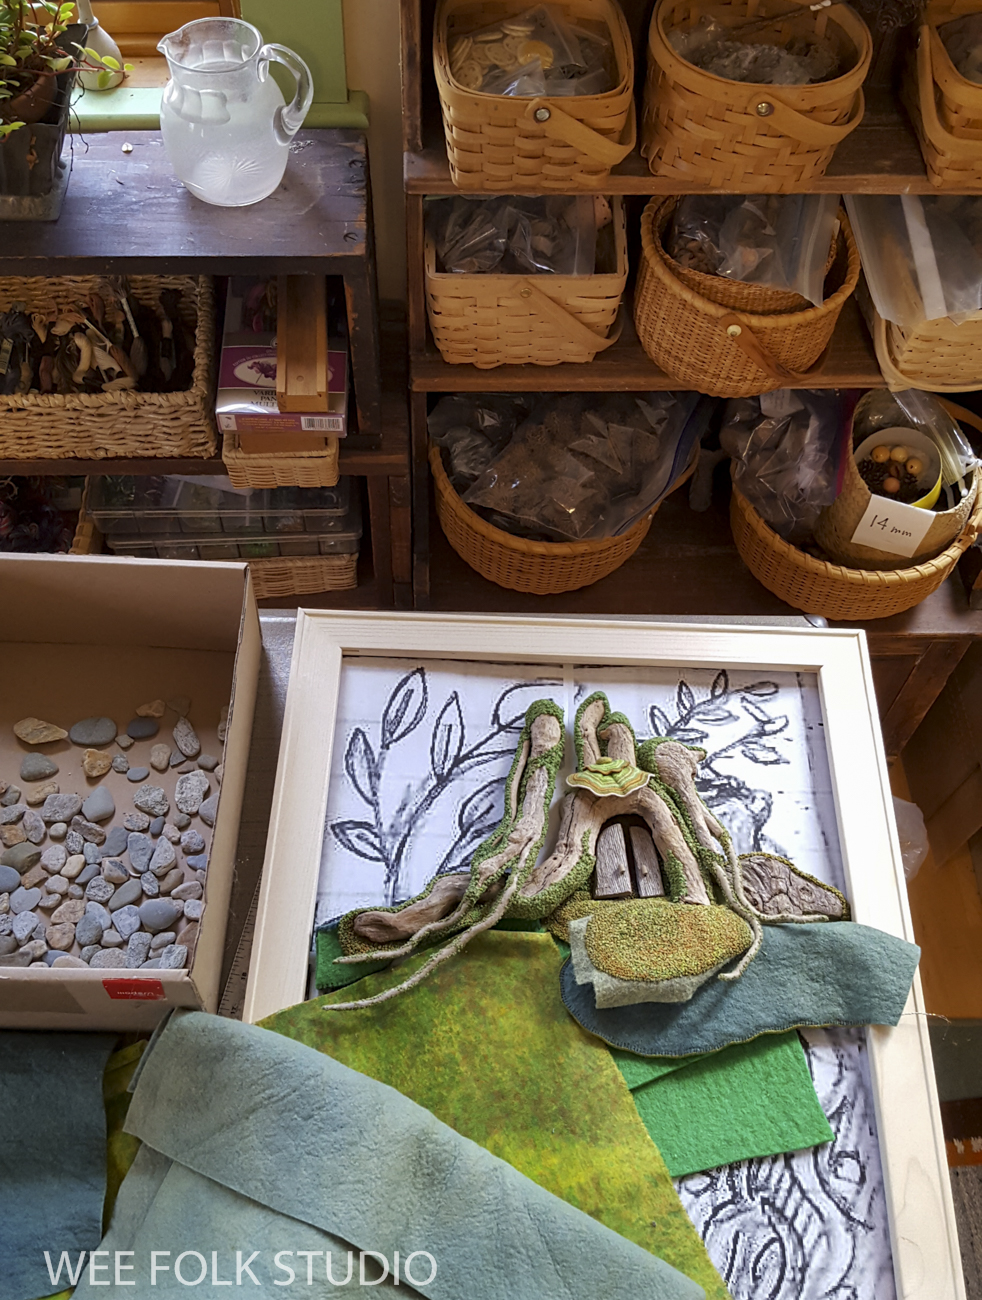
During the process, I constantly measured the depth of the trunk to make sure that it would fit behind the glass when the finished piece was framed. After the mushroom roof was added, there was just enough clearance!
My use of found objects is mostly limited to individual items that are sewn in place and incorporated into embroidered scenes. This trunk was different because it was made up of several driftwood parts that created a fairly large mass that stuck out from the background. Its depth and breadth would determine how I created everything else in the landscape.
Now that the trunk was finished, I could start building the other parts of the scene, including the ground at its base.
Next time, I will show the process of making the felt and stitched foliage growing on the ground at the foot of the tree trunk.
This family recipe was first published on my blog 10 years ago and the post has been a constant favorite ever since. If you want to bring something special that’s not hard to make to a holiday party this season, try it out!
Cheese straws are my favorite offering to bring to holiday gatherings. The recipe comes from my maternal grandmother’s family, the Salley’s from Orangeburg, South Carolina. The tradition has been passed down from mother to child for generations. There are cheese straws and then there are these cheese straws, which always get a lot of attention. I’m working on teaching my sons how to make them – they sure like to eat them! The trick is to use the sharpest cheddar cheese you can get and to roll them as thinly as possible.
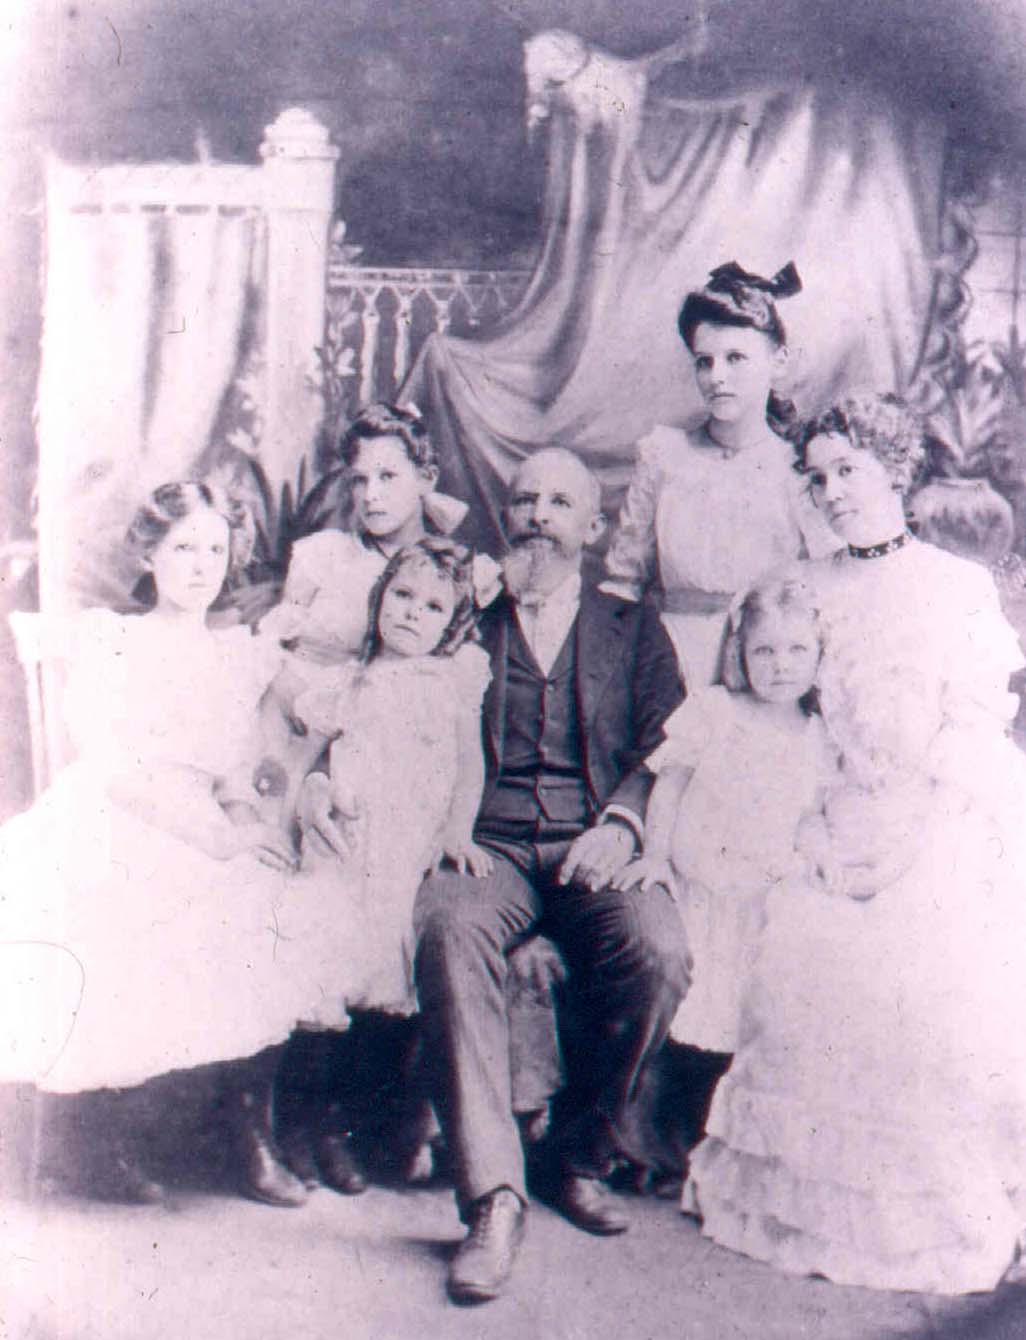
My grandmother (2nd from left) with the Salley family, in about 1900.
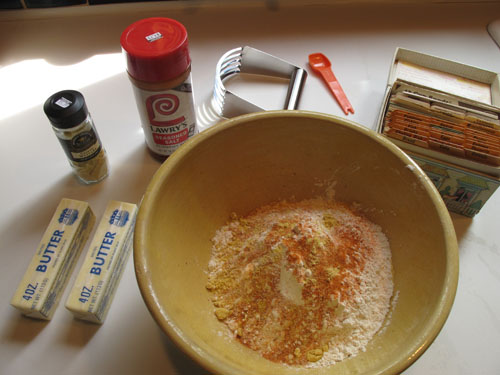
Ingredients: 3 Cups flour, 2 tsp. seasoned salt (I use Lawry’s), 1 tsp. dried mustard, 1 cup butter, 8 oz. very sharp cheddar cheese. Start by mixing the flour, salt and dried mustard in a bowl.
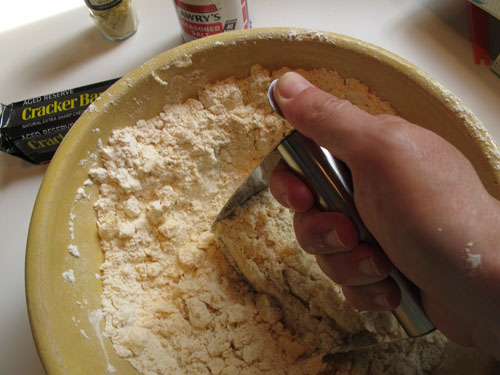
Cut in the butter with a pastry cutter, like you are making pie crust.
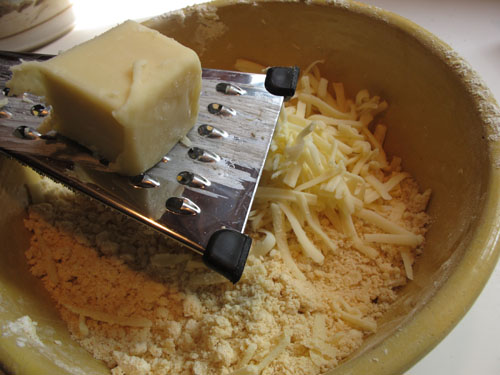
Grate the cheddar cheese and stir it in with the flour mixture.
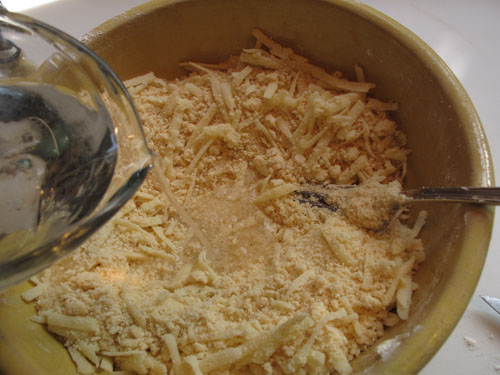
Dribble ice water into the mixture and combine until it sticks together in a doughy consistency. Don’t let it get too soggy!
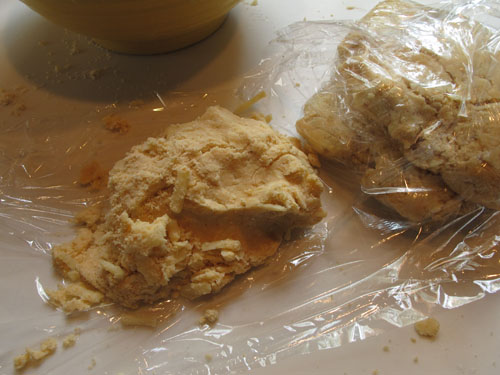
Divide into balls, handling the dough as little as possible. Then wrap the balls and refrigerate for a few hours.
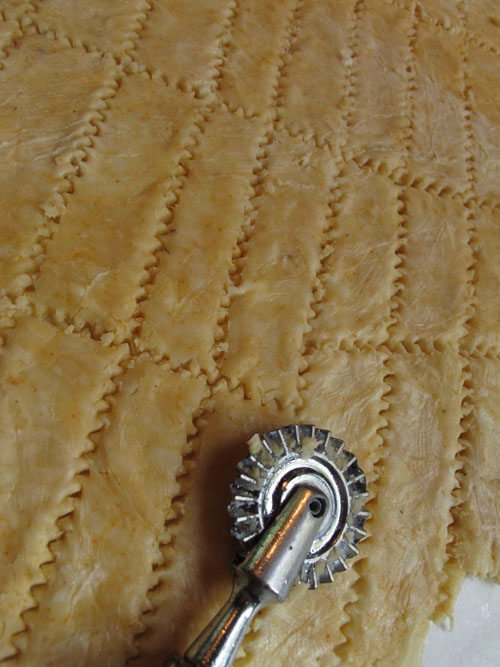
Roll out the dough balls as thinly as possible and cut in strips with a pastry crimper.
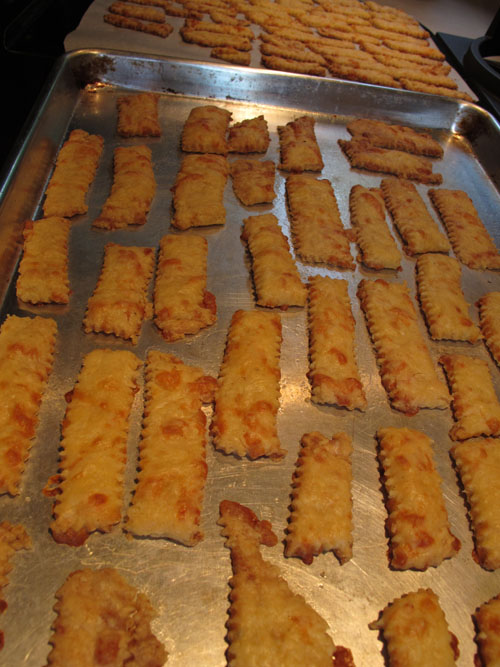
Spread the straws out on a cookie sheet and bake in a 350 degree oven for 15 to 20 minutes, until golden brown. They may take longer to cook, so check them often and switch pans to different racks during baking time.
They don’t take long to cool, so immediately sample a few. Now, put them out and watch them disappear! They can be saved in a tin and make a great gift, too.
Since so many of you’ve enjoyed the recipe over the years, I decided to make a card with the cozy kitchen scene on the front and the recipe for making cheese straws printed on the back. That way, it’s a greeting card (or Holiday card) and recipe card all in one. The Cheese Straws card is available in my shop in packs of 4 or 8.
To keep up with new posts, please subscribe to this blog. Your contact info will not be sold or shared. If you’d like to see more frequent photos tracking the projects in my studio, please follow me on Facebook and/or Instagram.
Do you ever see little hollow openings at the foot of trees and wonder who could live there? In Part 1 of the series about making Harvest Time, I share photos, commentary and a stitch-minute video about how I created such a place. In the coming weeks and months, I will post more stories that focus on different aspects of the process of making the fall scene, including the turkey tail mushroom roof, the toad stool mushroom, wee folk figures, tunnels, roots, stones and foliage of all kinds.
Harvest Time is the fall scene in a series of seasonal landscapes that capture the wonder and magic of the natural world, both real and imagined. Harvest Time and 2 other scenes I’ve completed and written about, Frosty Morning, Mossy Glen, and Summertime are available as note cards and jigsaw puzzles in my shop here.
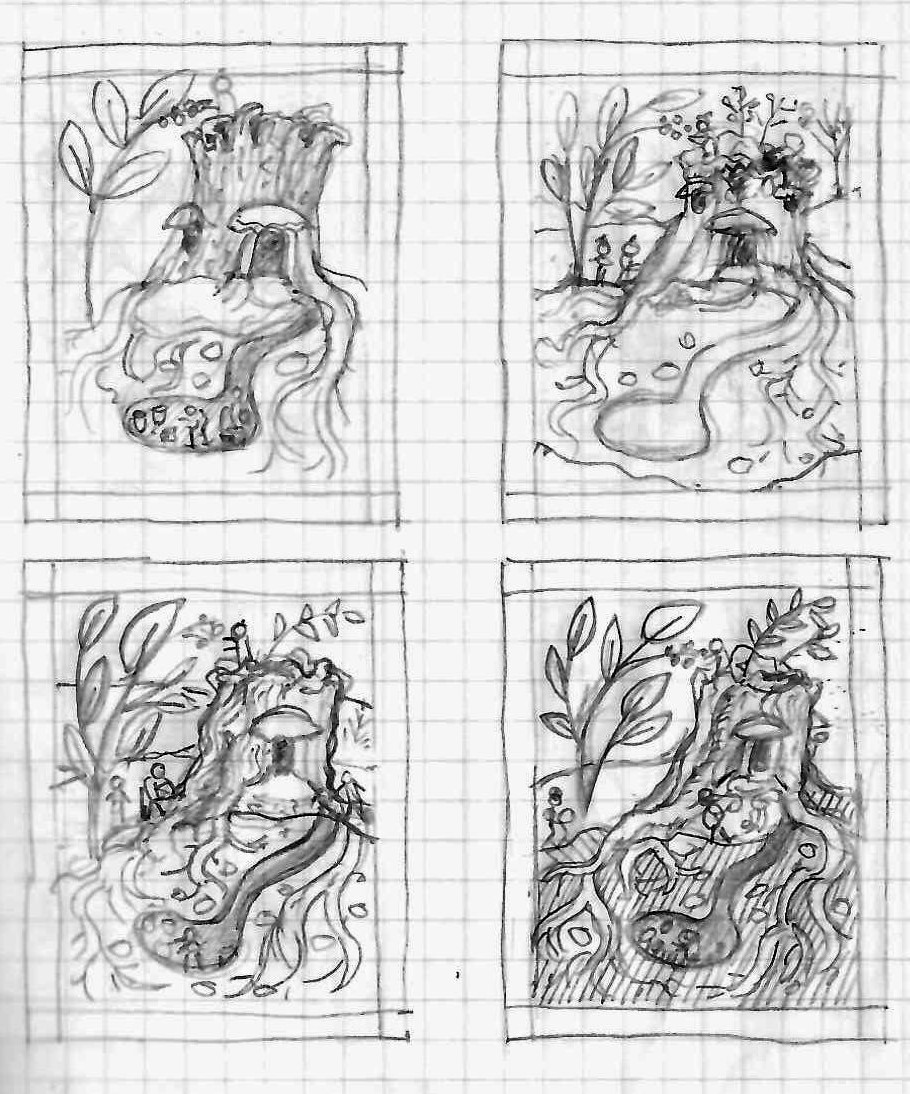
A project like this generally begins with a concept in my head, where it germinates for a certain amount of time until the image is compelling enough to translate into something real. Sometimes I can visualize an idea right away, but other times it takes months to develop a thought into a clear picture in my imagination. I mulled over this fall piece for a while before hitting on the idea of creating a cross section of an underground root cellar. Then, I was ready to put something down on paper. I made a bunch of thumbnail sketches, which helped solidify the composition. At this stage I didn’t bother with the details. They would come later, when I formed the individual parts.
I enlarged the drawing on the lower right to full size (19″ x 24″), which gave me something to go by throughout the months-long process of making the scene. I thought of it as a guide more than a pattern or template because the design changed, depending on the objects I used and construction techniques I figured out along the way.
To make the tree trunk, I searched through my supply of driftwood and played around with the pieces until I came up with a plausible arrangement. Once I found a curved arch of the right size for the doorway, I could relax and build around it.
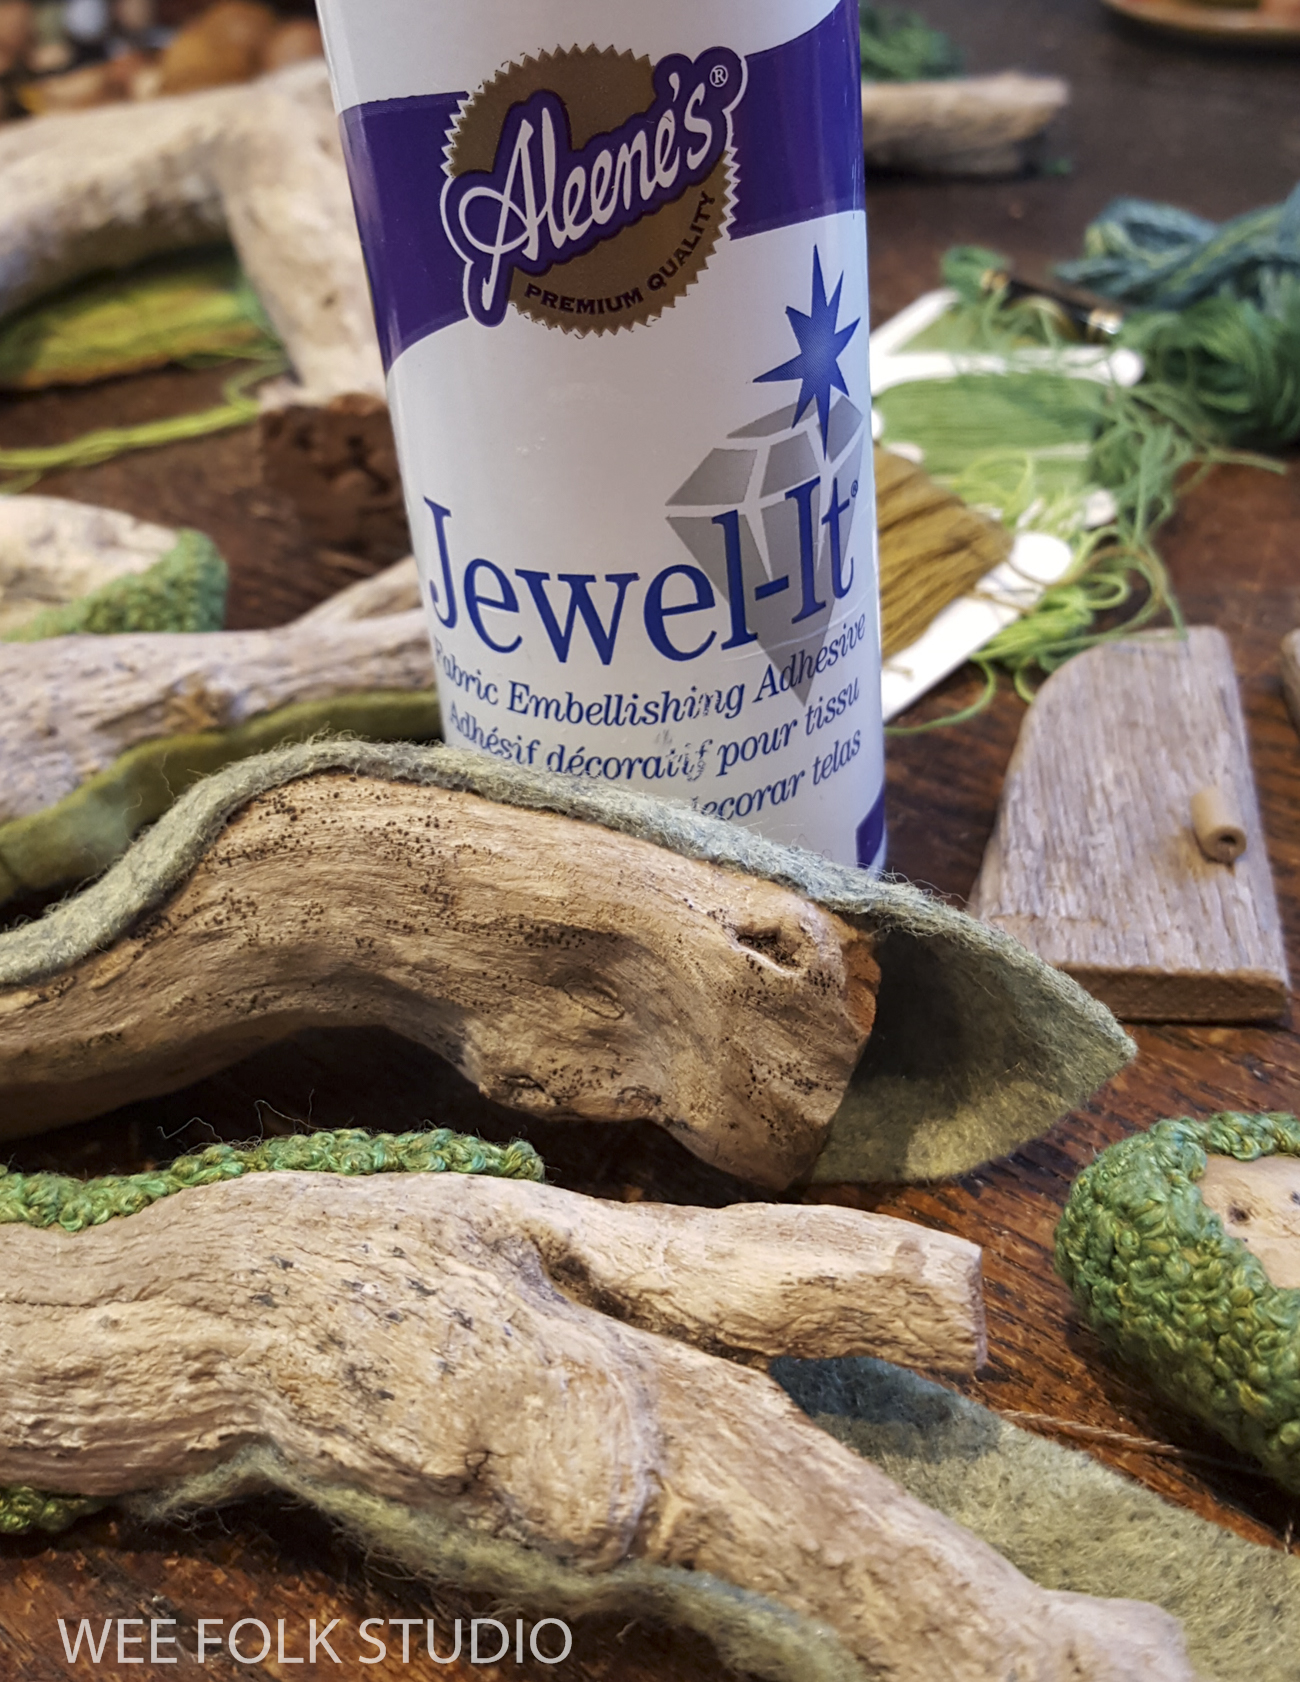
Moss covered trees Last year, when I made Mossy Glen, the spring scene in this series, I devised a method of showing moss growing on wood. It involved using glue, which I don’t normally use because it’s messy and undependable. I also don’t use a glue gun because it’s stringy and shoddy looking and I don’t trust its holding capabilities. But, how else was I going to provide a surface that a needle could catch onto? So, out of necessity and with a fair bit of trepidation, I tried gluing pieces of felt onto the driftwood. And it did the job, without being visible! Aleene’s glue makes a variety of fabric embellishing adhesives that all work well.
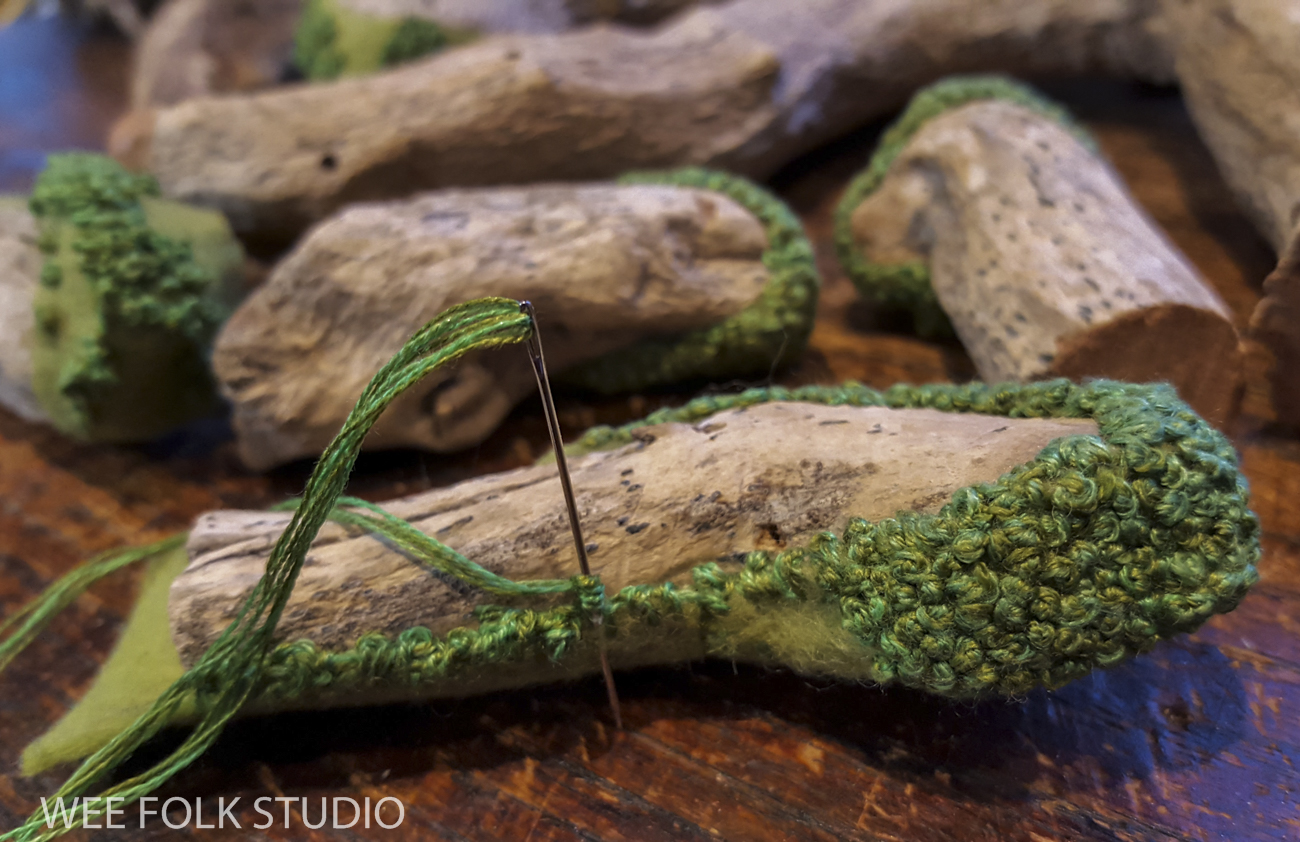
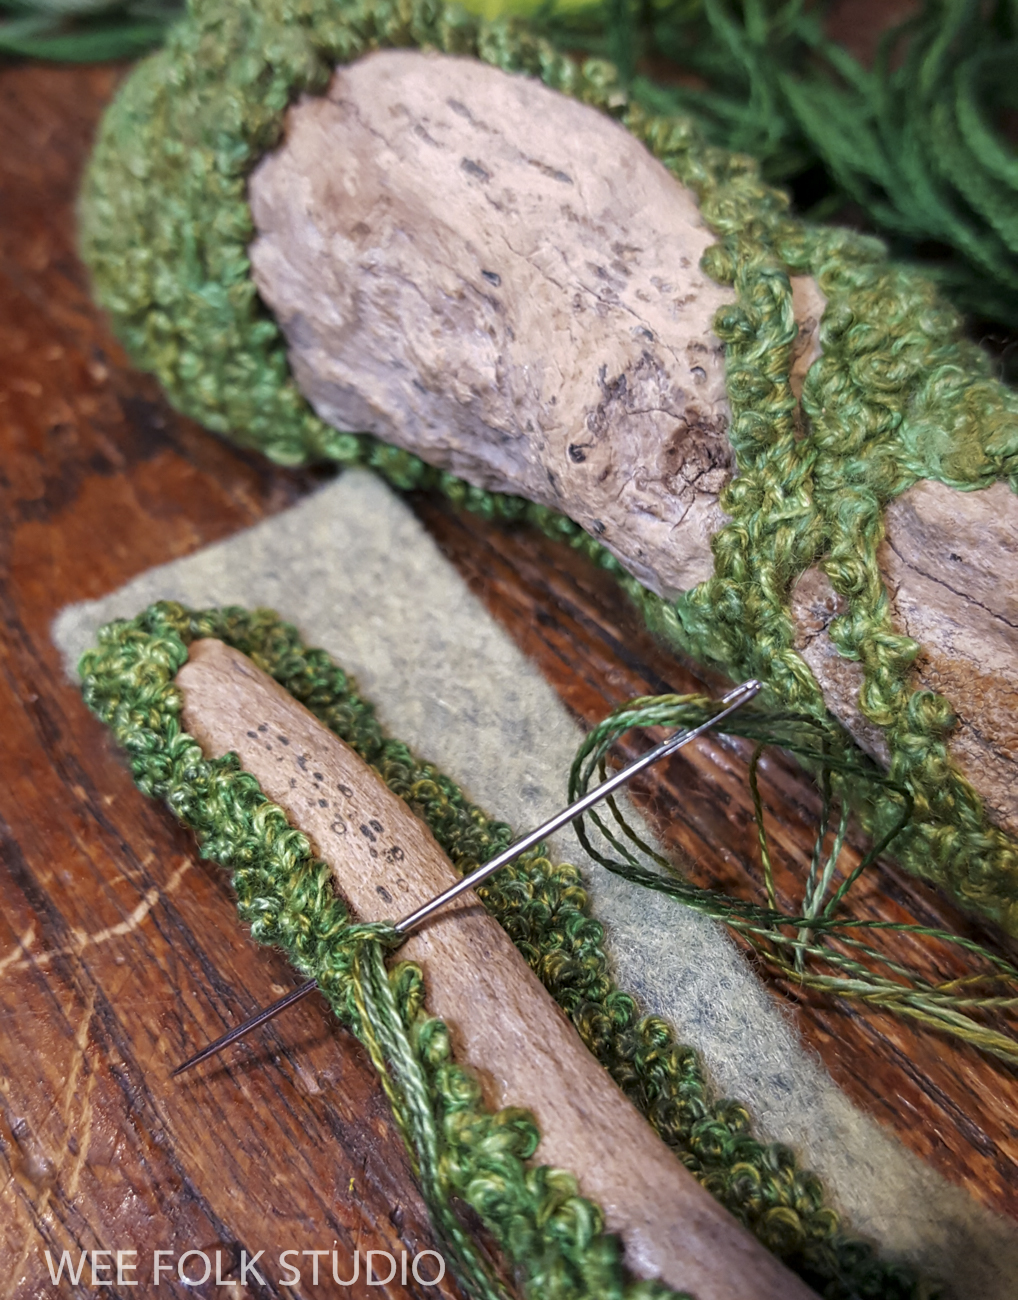
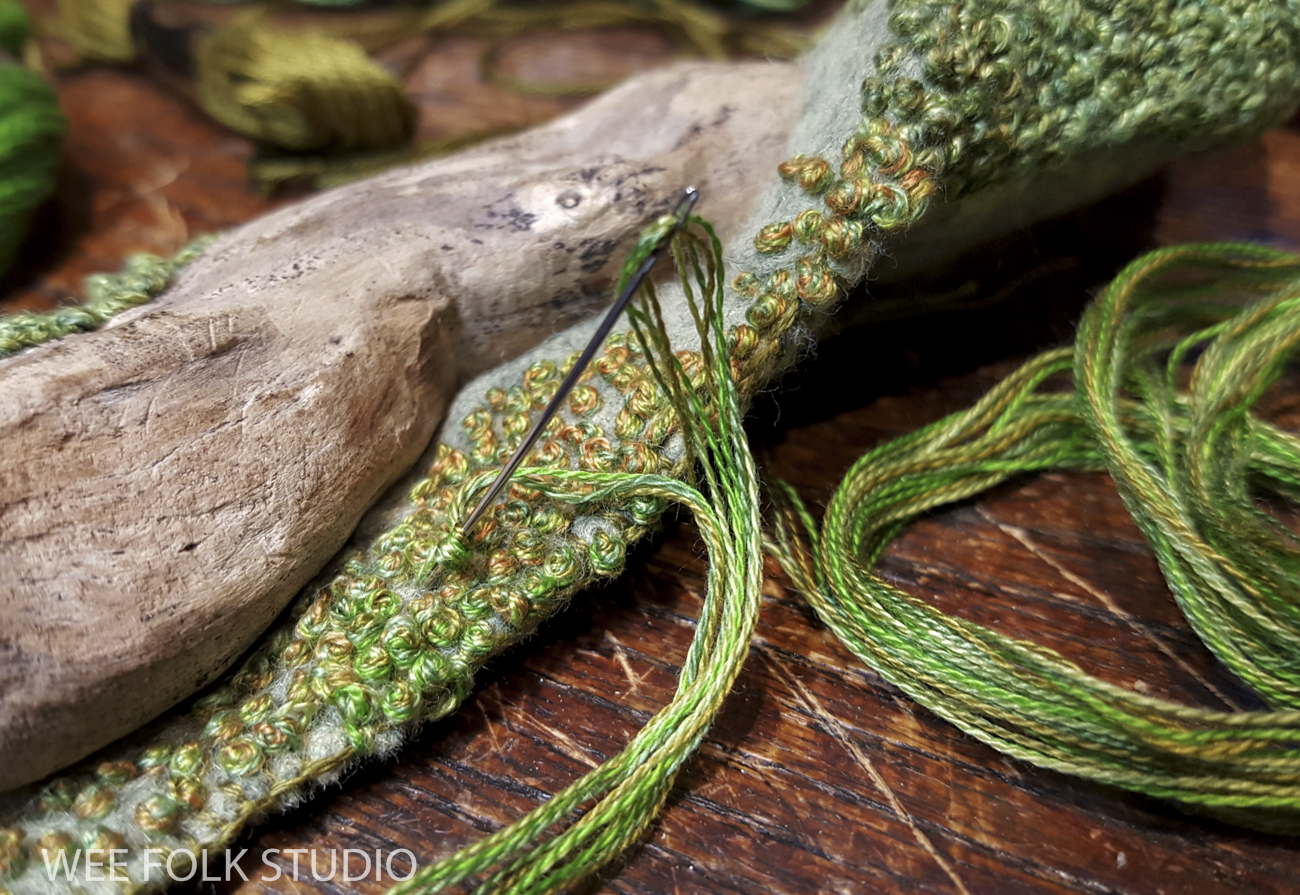
Now came the gloriously obsessive part, when I spent at least a month stitching moss “knots” onto the felt. It might appear tedious, but to me the act of repetitive stitching is heavenly! I’d also like to mention that no fingers or joints were harmed in the process. Here’s a Stitch Minute video that shows how I stitched the knots.
French knots/Colonial knots It’s been pointed out by people who know such things, that I’m actually making a Colonial knot, not a French knot. It has something to do with the twist at the end. Being self-taught, I’ve never paid attention to the names of different stitches or doing them the “right” way. I just use the basics in combinations that work for me.
Thread To make the moss, I used DMC cotton floss. The naturalistic appearance comes from combining different shades of green in groups of 3 or 4 strands.
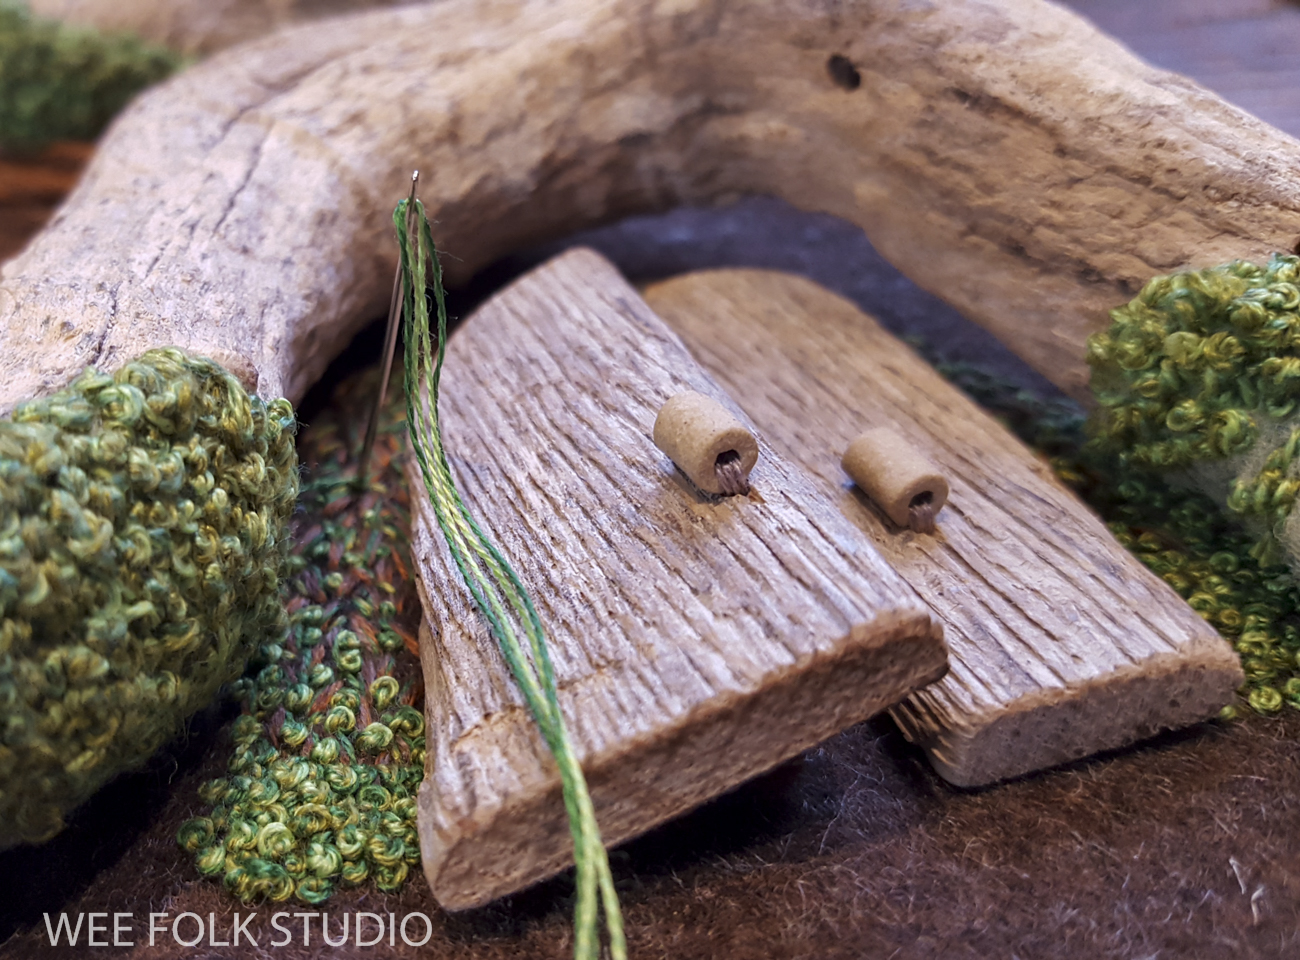
I made doors out of an old wooden sail batten that had washed up onto the beach, sawing and sanding it to fit the opening. The doorknobs are beads sewn through drill holes. I glued felt to the back of the wooden doors and sewed them to a piece of felt. Then, I filled in the area around it with seed stitches.
To open the door a crack, so a little guy could peek out, I layered (glued or stitched, perhaps?) extra felt pieces behind the door. Then, I stitched moss to the felt on both sides of the door.
My work is made up of several parts that eventually come together, so the whole time I worked on the tree trunk, I planned ahead and thought about how it would merge with the other elements yet to be made.
I also wanted to create an inviting entrance for the wee folk to step onto when coming and going.
Stay tuned for more posts about making Harvest Time. Next time, I’ll share photos, commentary and a video about creating the turkey tail mushroom roof over the doorway.
To keep up with new posts, please subscribe to this blog. Your contact info will not be sold or shared. If you’d like to see more frequent photos tracking the projects in my studio, please follow me on Facebook and/or Instagram.
Fall, the glorious time of year that reminds us it’s time to prepare for cold weather, has arrived in New England. Over the coming months, I will be sharing a series of posts with photos, videos and commentary about making Harvest Time, which is a fall themed piece I finished earlier this year. Each story will focus on a different aspect of the process, from stitching moss to needle felting to creating the busy little characters. Part 1 features moss making. Part 2 is about making the turkey tail mushroom. Part 3 shows the construction of felt leaves. Part 4 gives a peek at embroidering the plants. Part 5 is about making the toadstool mushroom Part 6 shows the process of making the underground Part 7 is about making the wee folk figures Part 8 features miniature storage containers Part 9 is about the embroidered trees
Harvest Time is the fall scene in a series of seasonal landscapes that capture the wonder and magic of the natural world, both real and imagined. Harvest Time and 2 other scenes I’ve completed and written about, Frosty Morning and Mossy Glen, are available as jigsaw puzzles and note cards in my Etsy shop.
Harvest Time Jigsaw Puzzle
From the start, I imagined the fall landscape as a cutaway view, showing both above and below ground. Future posts will give a close look at making the moss covered stump, the area around it and the earth underground, including the tunnel and storage areas.
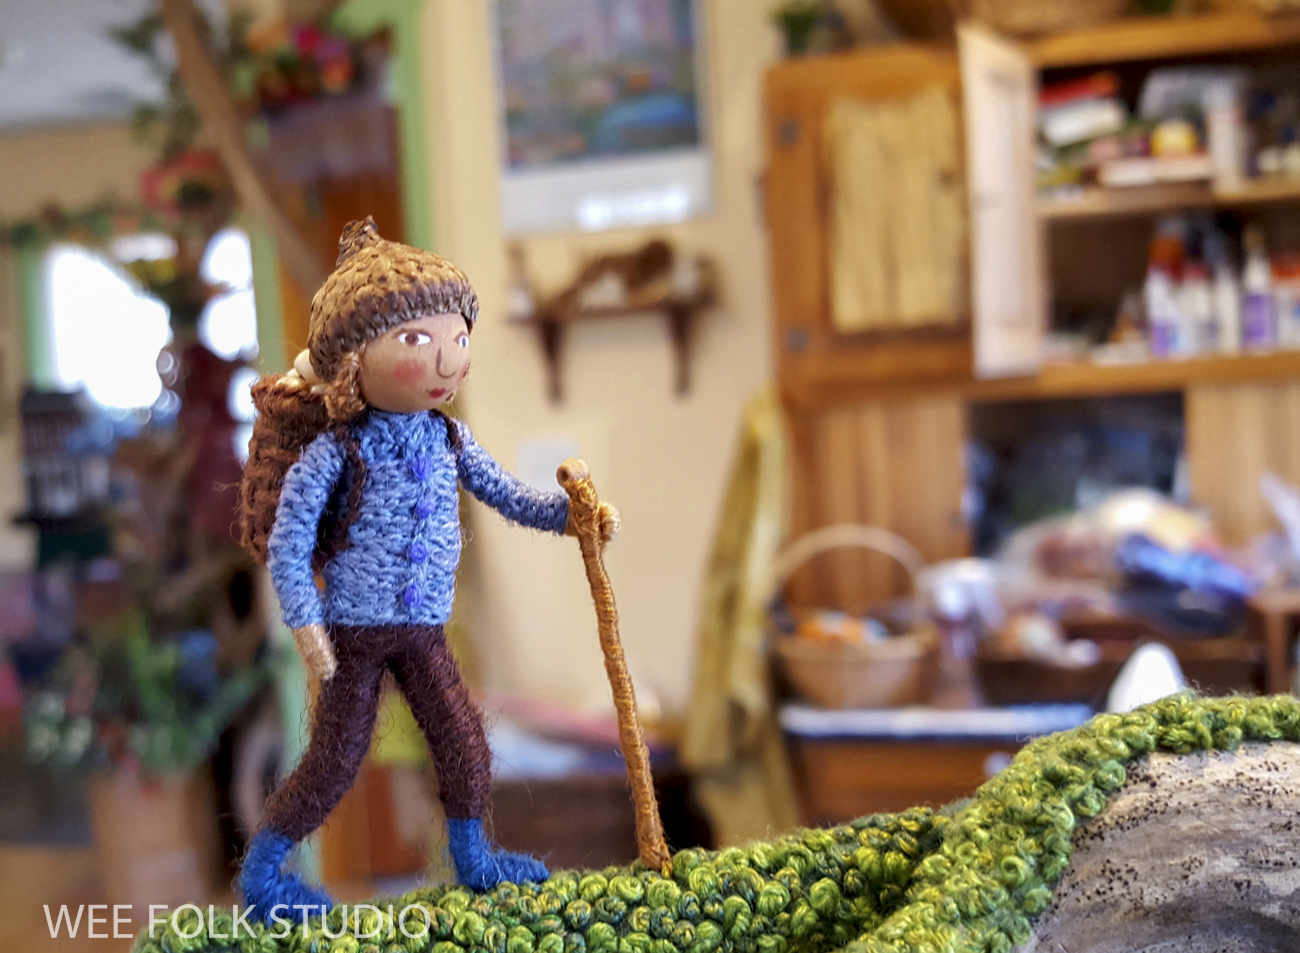
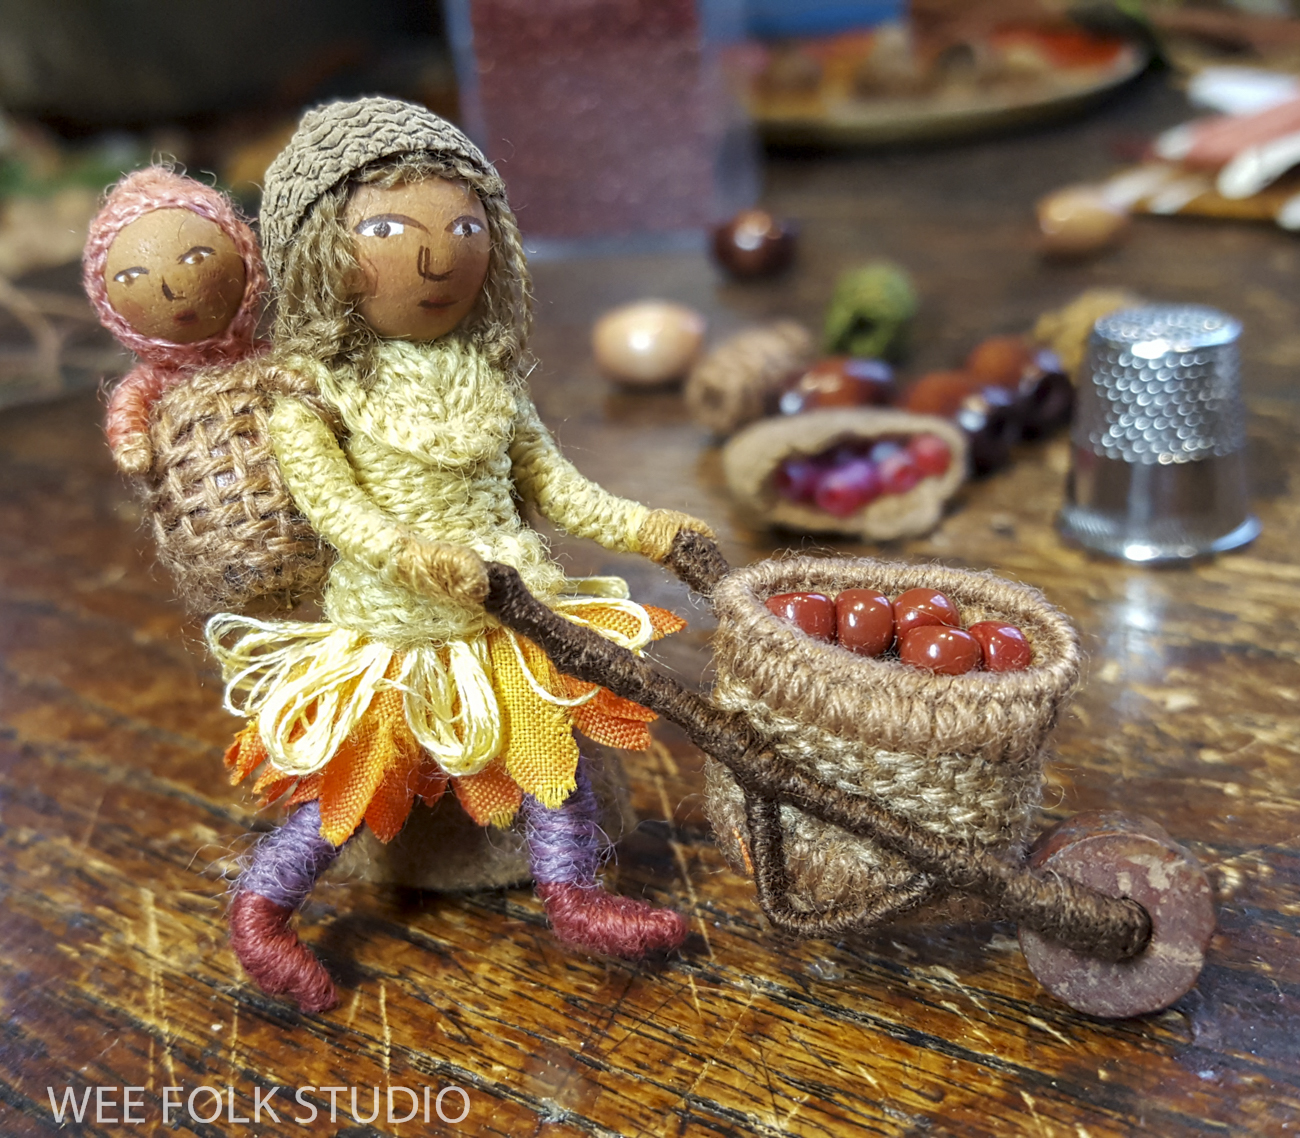
I will show the process of making the industrious wee folk…
and the storage containers for them to transport their harvest.
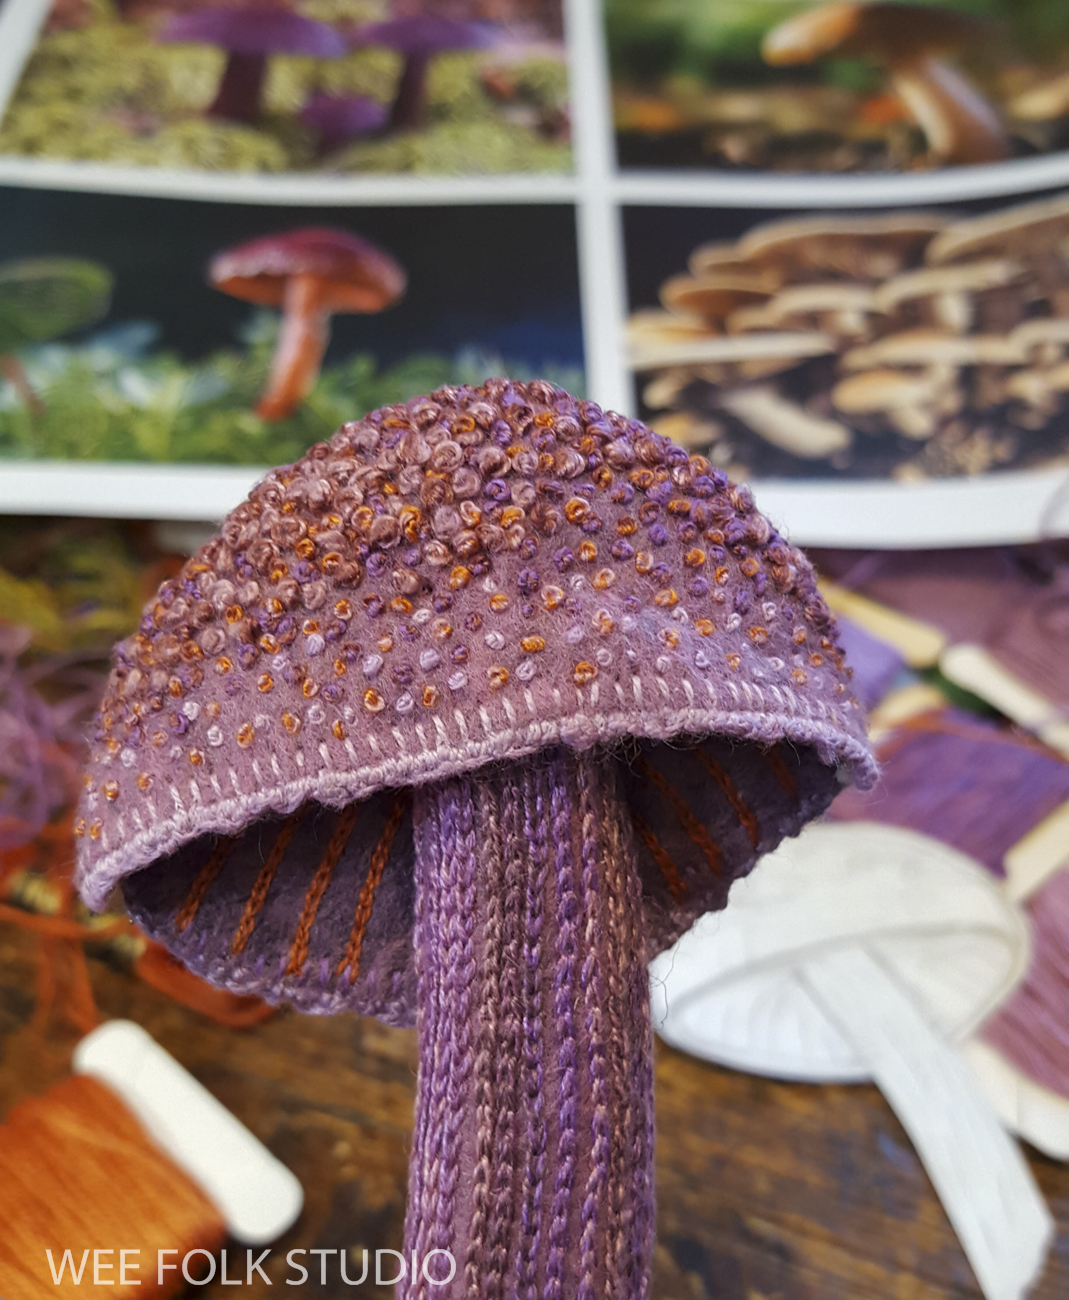
There will be a whole post devoted to making this purple mushroom…
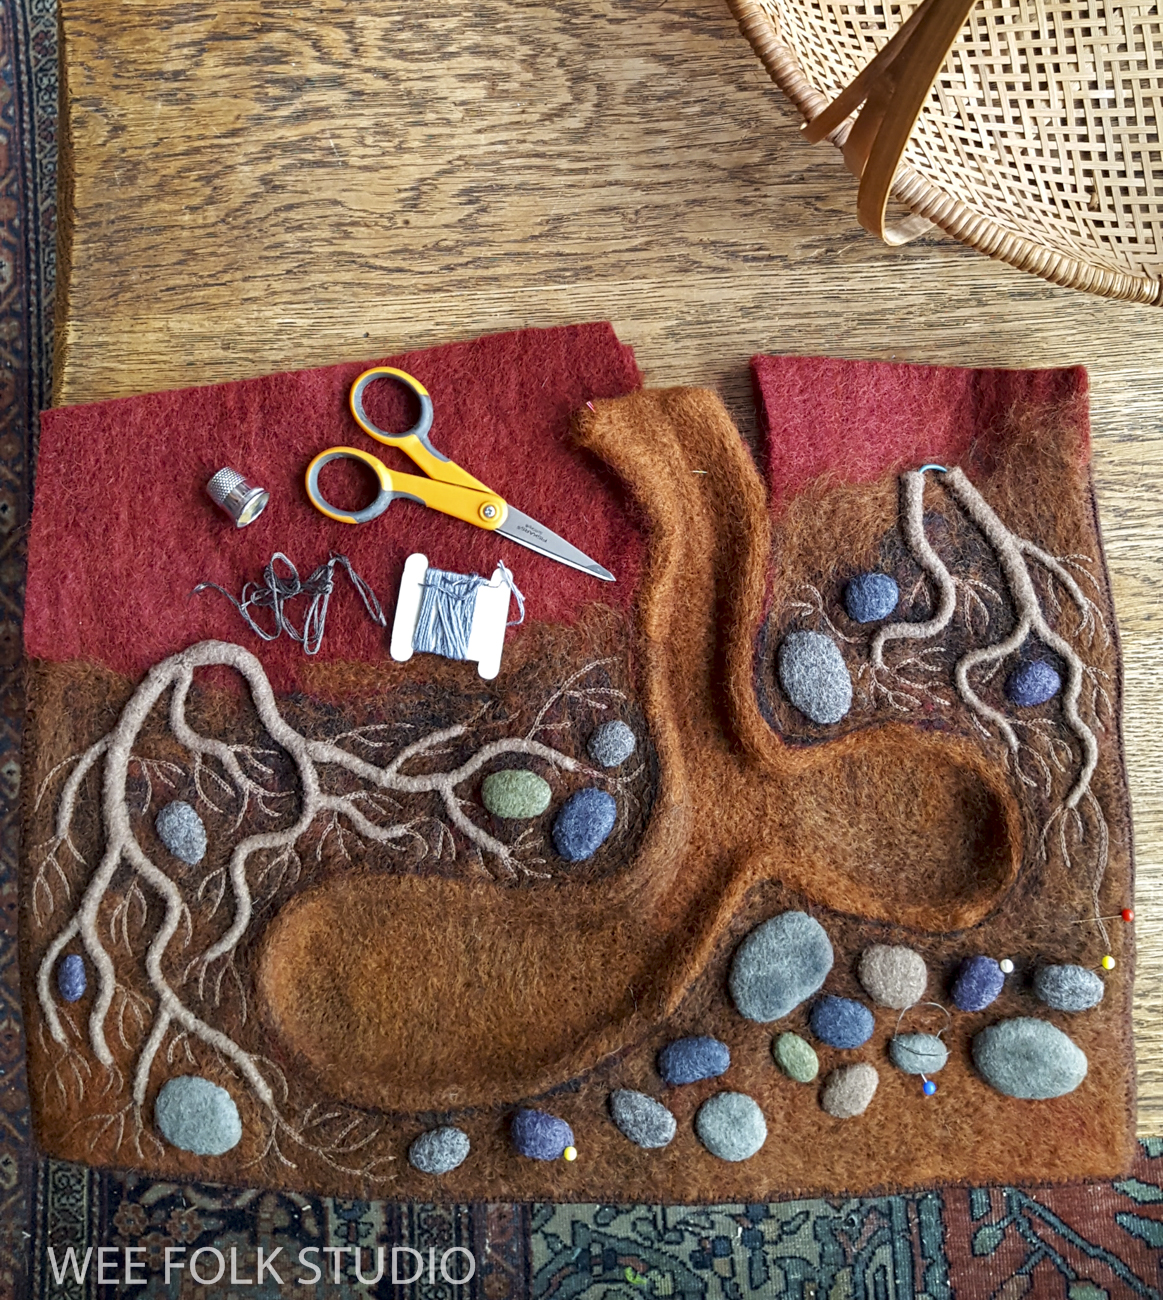
and another about creating the underground root cellar.
I’ll write about different ways I embroidered plants…
both flat and 3-dimensional.
I’ll explain how I covered driftwood with mossy French knots…
and filled the felt sky with delicate foliage.
I look forward to delving into this multi-part series with you. Right now, I’m sifting through about a gazillion photos I took along the way. Just like with Frosty Morning and Mossy Glen, there will be a lot of little details to cover!
To keep up with new posts, please subscribe to this blog. Your contact info will not be sold or shared. If you’d like to see more frequent photos tracking the projects in my studio, please follow me on Facebook and/or Instagram.
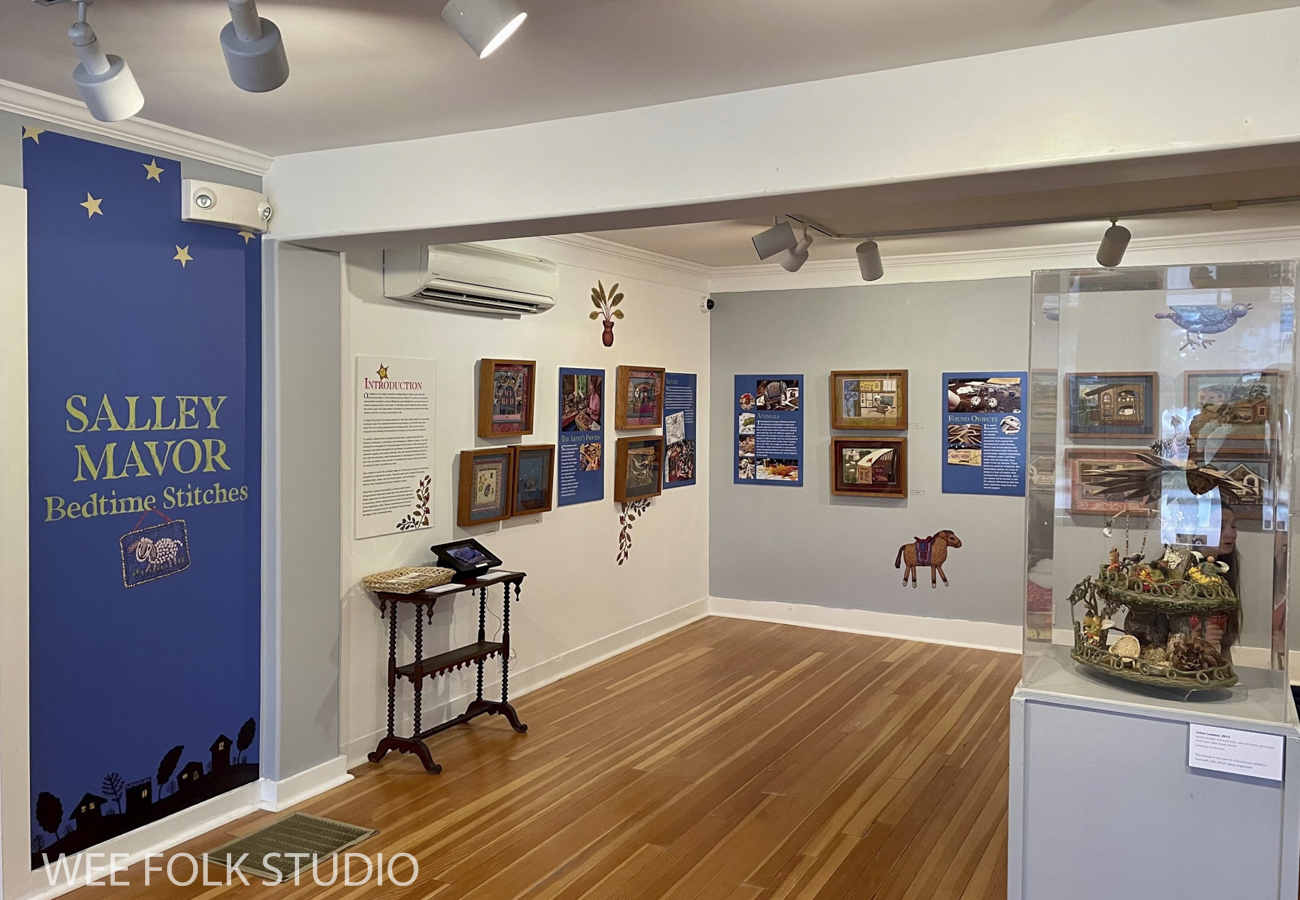
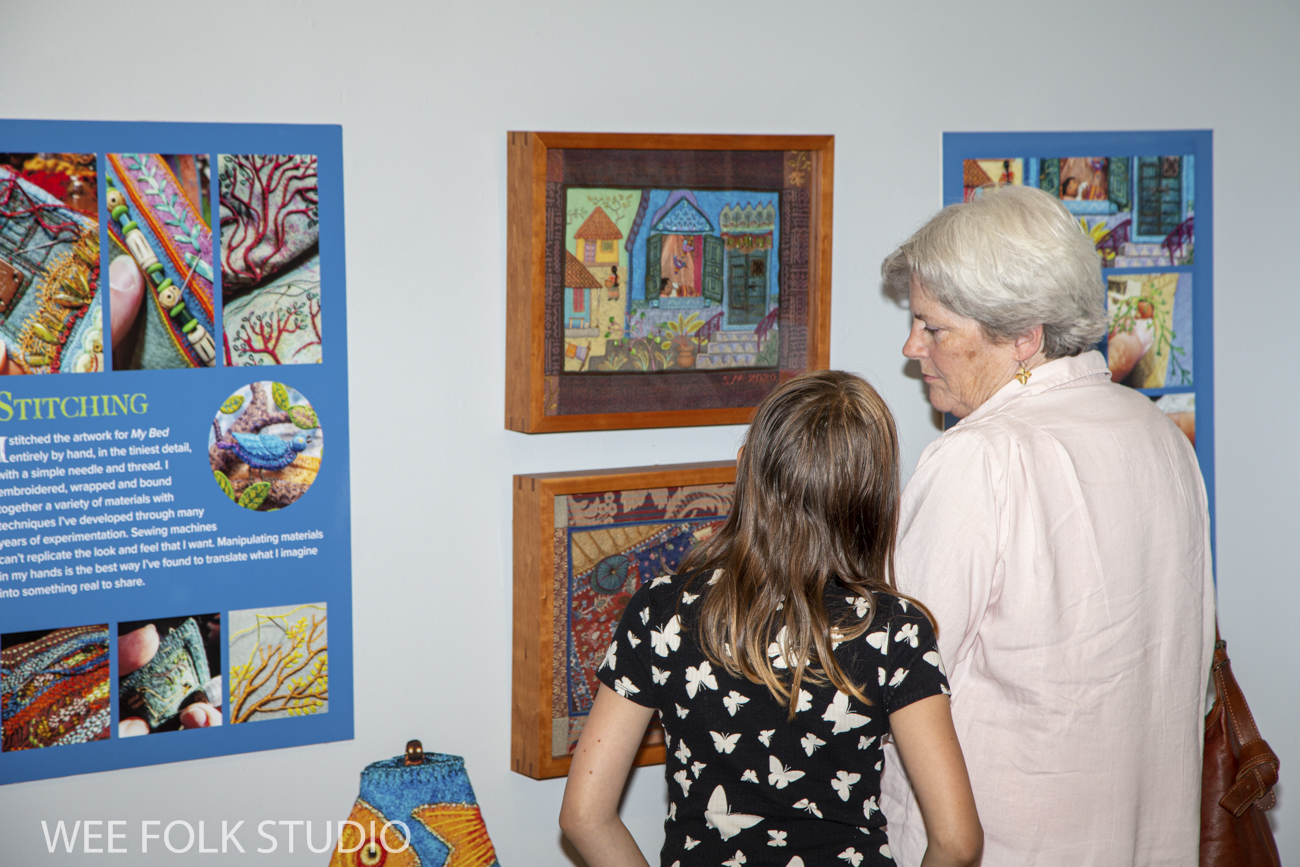
In the two years since Bedtime Stitches, the touring exhibition of original bas-relief artwork for my book, MY BED debuted at the Cahoon Museum, the show has been enjoyed by thousands of visitors at five different museums in Illinois, Nebraska and parts of New England. I’m excited that even more people will have the opportunity to experience the detail and 3-dimensional quality of my work as the exhibition continues to travel to other parts of the country during the next few years. You can see the schedule here.
Here I am at the Brick Store Museum in Kennebunk, Maine, with a van packed full of my life’s work from last summer’s retrospective exhibition, What a Relief(which included Bedtime Stitches).
Artwork from last summer’s exhibition, “What a Relief” packed up and heading home.Bedtime Stitches being installed at the Brick Store Museum in the summer of 2022.
I’m happy to announce that the next location of Bedtime Stitches will be the Historical and Cultural Society of Clay County in Moorhead, Minnesota from Oct. 15 through Jan. 1, 2023. I’m envisioning carloads of friends making the trip north from Minneapolis and south from Winnipeg, across the Canadian border, to visit the show!
Opening Event – Oct. 15, 1-5 PM. Dr. Sandra Gordon will give a presentation about my life-long passion with 3-D embroidery at 1:00 PM. I am grateful to Sandra for suggesting that the museum host the exhibition. She is active in the Embroiderer’s Guild of America and has written 2 articles about my work for their publication, Needlearts.
Signed copies of My Bed can be ordered in my shop here. Watch this 8 minute documentary about how I created the illustrations for the book.
The collection of artwork brings the viewer on an international journey, showing children in varying cultures and home environments around the world. Each intricately rendered scene captures the spirit of a different place and way of life, all the while illuminating the universal theme of children sleeping safe in their beds.
After its time in Minnesota, the exhibition will be heading further west, to the Pacific Northwest Quilt and Fiber Art Museum in LaConner, WA, Feb. 1 – April 30, 2023. See the tour schedule through 2024 here.
Will Bedtime Stitches continue to tour after 2024? I’m open to having the exhibition travel for a little longer, as long as museums are interested in hosting it. I would love to keep the series together for as long as possible and create more opportunities to view the original embroidered pieces in person, which is a completely different experience than seeing them on a screen or on the printed pages of a book.
I constantly hear from people who want to see my original work in their home territory, from Texas to Australia. I wish I had the power to just point a magic wand and send my pieces all over the world. But the reality is much more complicated. You see, there are all kinds of things that need to happen to make an exhibition possible, starting with an invitation from a museum. At this point, I’m more engrossed in making-mode than promo-mode and am no longer actively searching out locations. But, I’m very willing to answer inquiries directly from museums and curators.
Actually, the most effective approach has been for fans to reach out to their local museums and tell them about the opportunity to show my work. That’s how several bookings came about, including the one in Minnesota. Interested museums can contact me through the form below.
To keep up with new posts, please subscribe to this blog. Your contact info will not be sold or shared. If you’d like to see more frequent photos tracking the projects in my studio, please follow me on Facebook and/or Instagram.
This summer, both my son Ian and Sam, his best friend from childhood, got married. Here they are at age 3 and at Sam’s wedding last weekend. So, I had the pleasure of making personalized cake toppers for 2 wedding couples! You can see the post I wrote about Ian and Liz’s dolls here.
Sam and Louisa hosted a heart-felt and whimsical ceremony and reception, full of do-it-yourself touches, at their home in Falmouth, MA. Sam is a radio announcer and reporter for WCAI, our local NPR station and Louisa teaches ballet and is also the handwork teacher at the Waldorf School of Cape Cod.
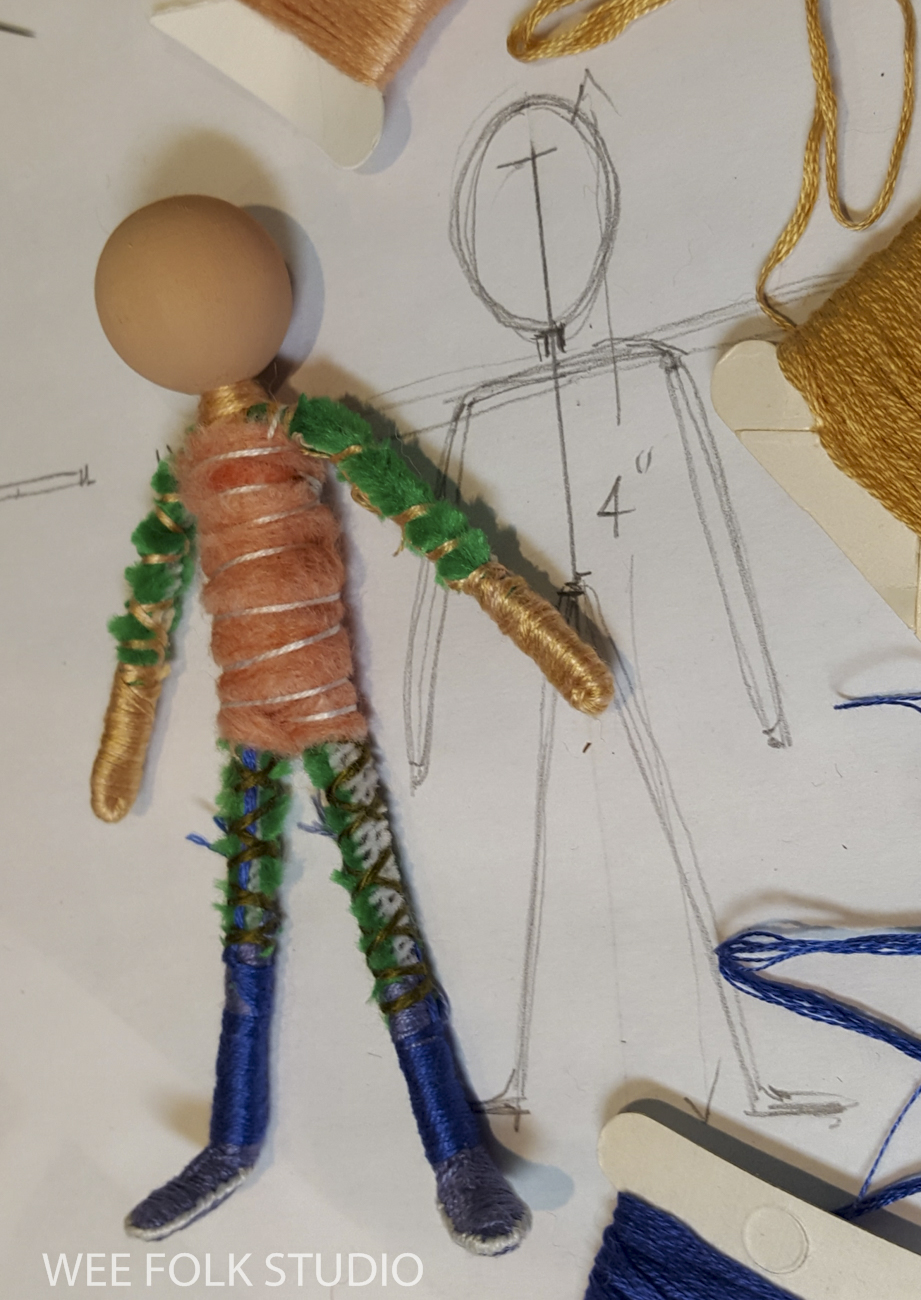
A few weeks before the wedding, Sam and Louisa sent photos of their wedding attire and accessories, including their shoes. As I teach in my how-to book, Felt Wee Folk, the figures are constructed from the feet upward.
I also asked them to send head shots, specifically with closed mouths – no toothy grins, which are difficult to paint. When depicting real people, I like to paint their likenesses way in the beginning of the process. That way, I feel attached to them. They aren’t just dolls, but individuals with unique characteristics who are dressing up for a special occasion.
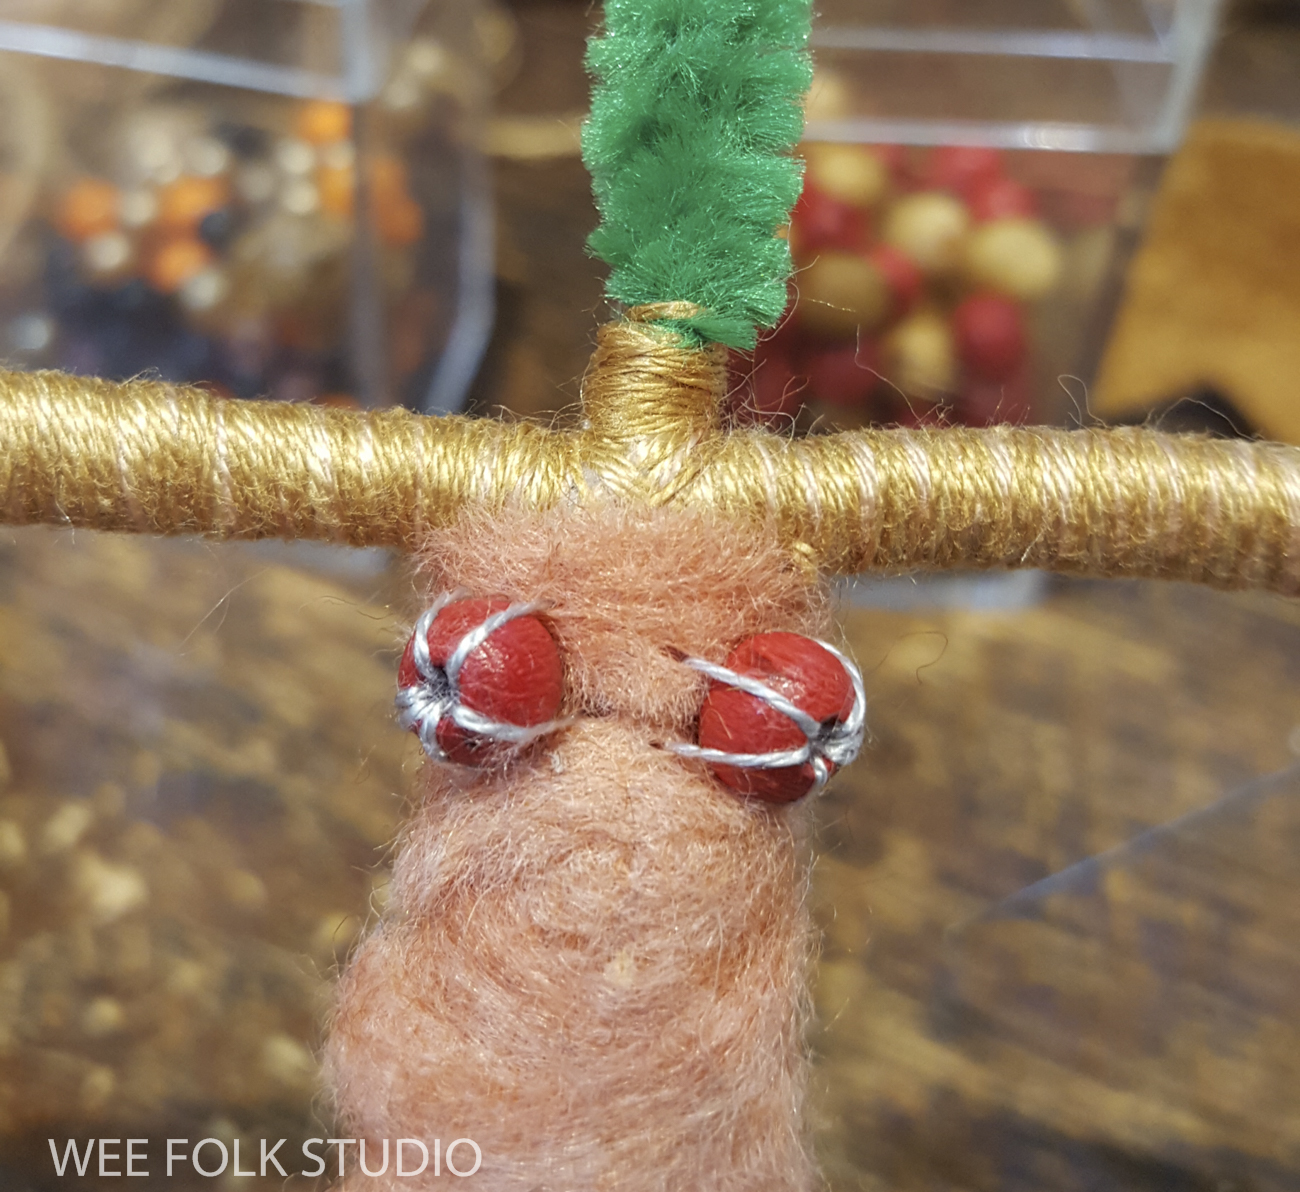
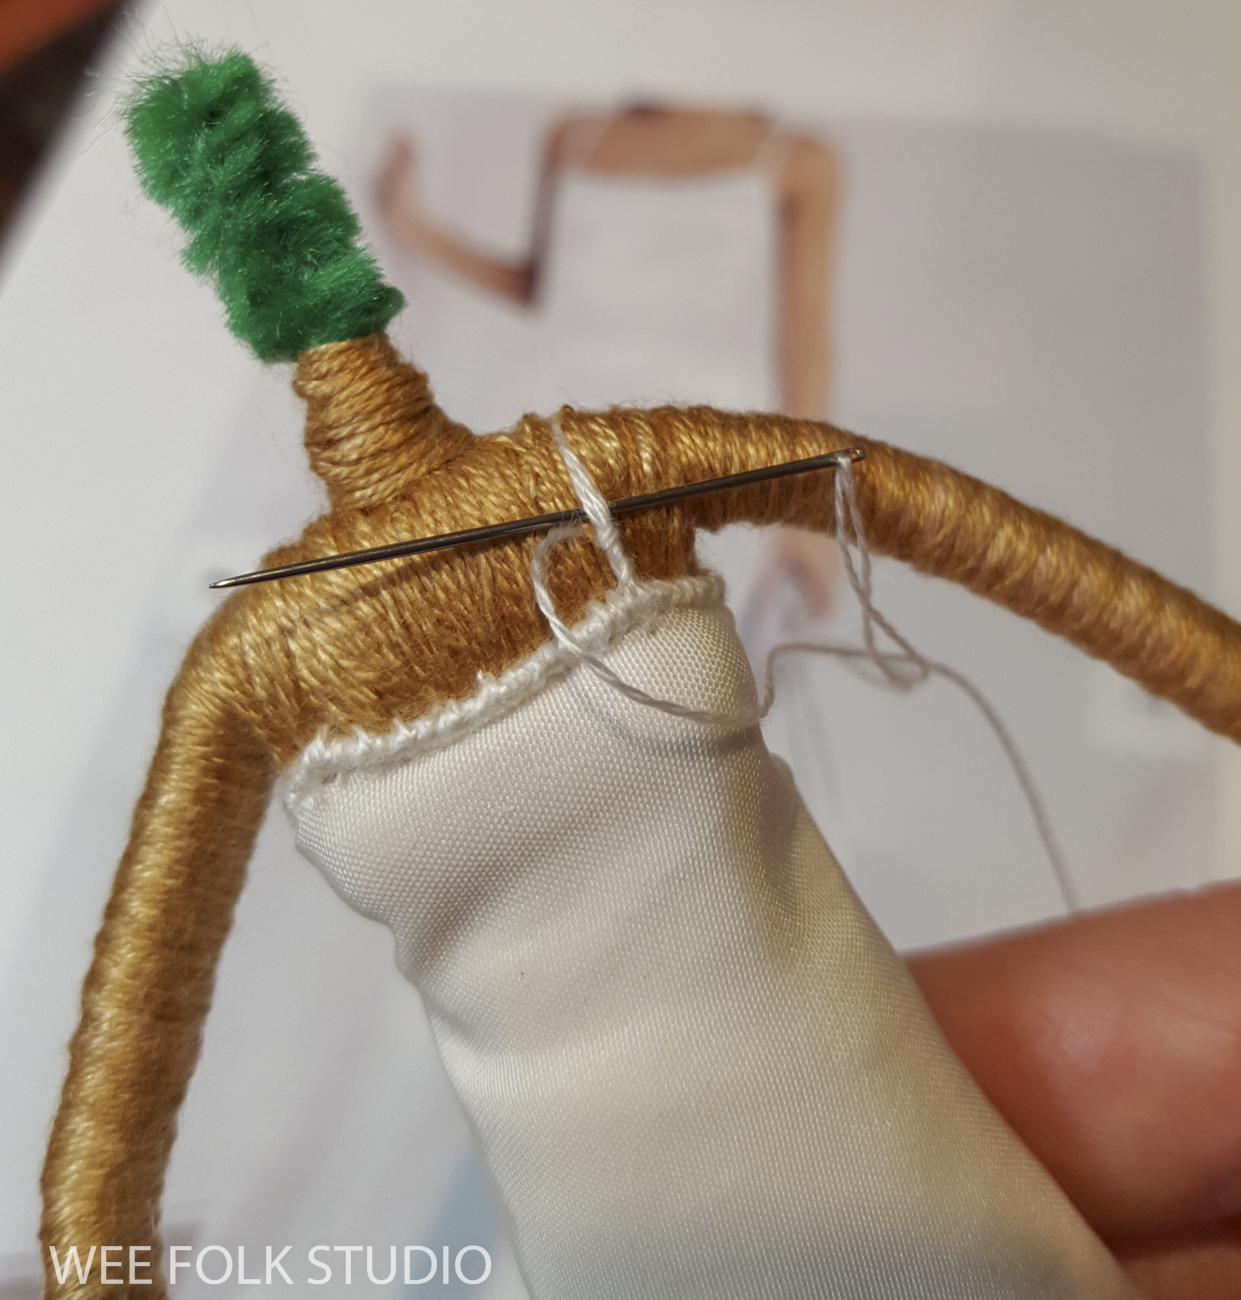
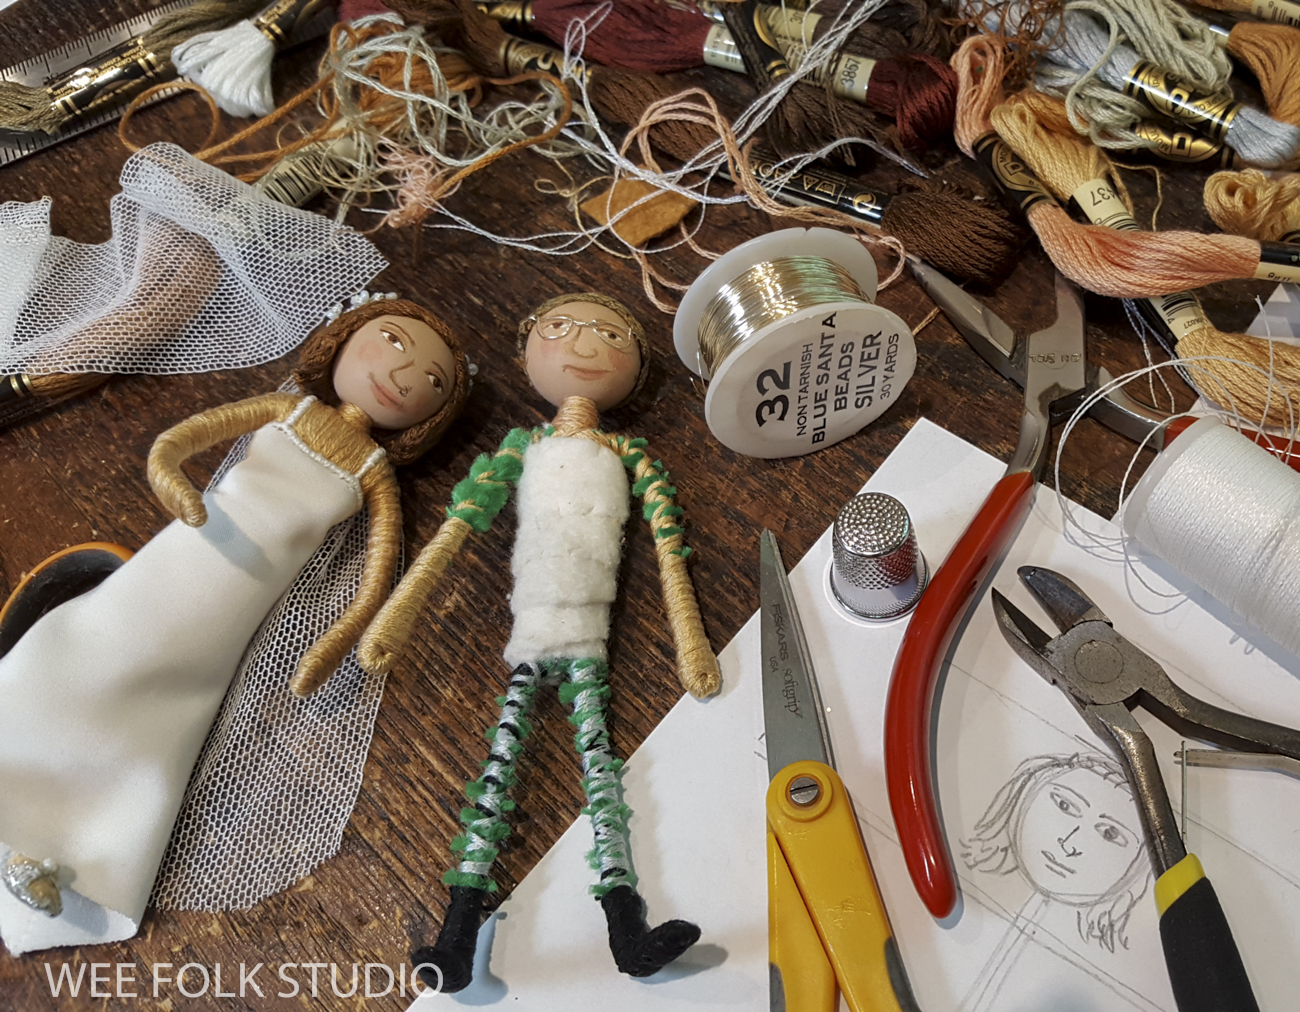
After forming the bride’s limbs with pipe cleaners and wrapping the arms and legs with embroidery floss, I sewed felt around the torso and stitched on boob beads.
Then, I covered the torso and boob beads with a layer of cotton batting and stitched more embroidery floss onto the upper chest area. Dressing bride dolls is a challenge because so often they wear skimpy gowns that show a lot of exposed skin. It’s so much easier to make the groom’s suit out of wool felt!
To make Louisa’s hair, I stitched embroidery floss onto the felt “wig”, which I’d previously glued onto her wooden bead head (see photo above). I should mention that at this point, her head is not yet glued onto the neck. That came at the end, after her clothing was finished. I popped her head on and off throughout the process to check how it looked.
I found some white silk (or silk-like) fabric in my stash to make Louisa’s gown.
I formed Sam’s pipe cleaner body and he lay on my work table in his underwear, while I waited for photos of his suit.
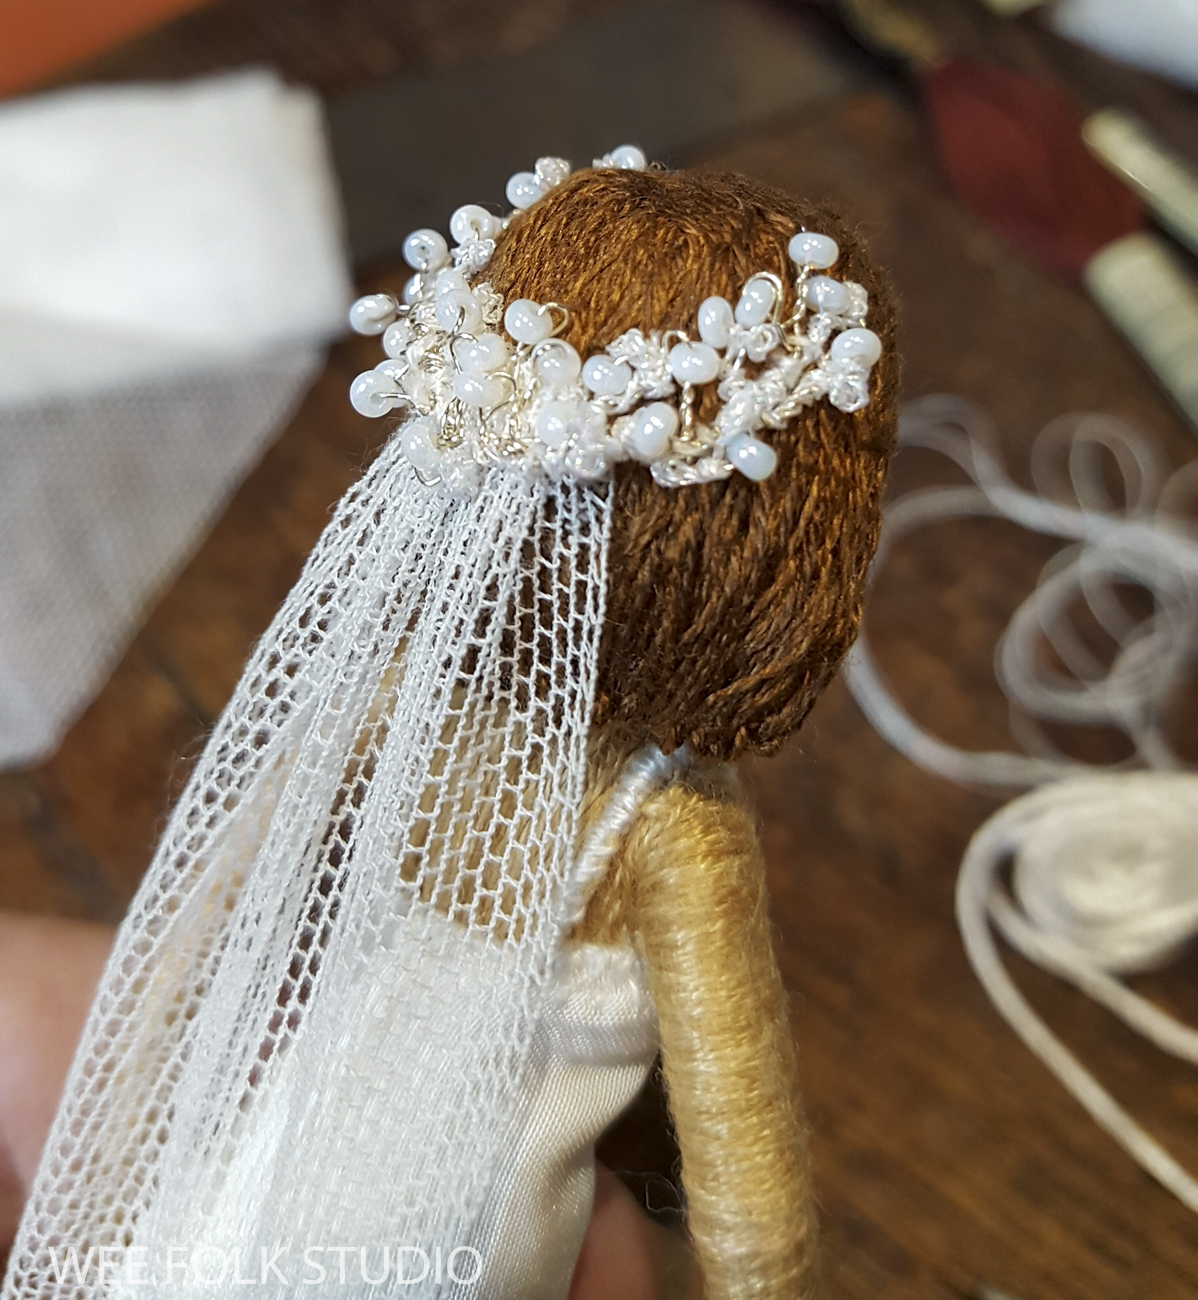
Using photos of Louisa’s family heirlooms, I fashioned her veil and pearl necklace.
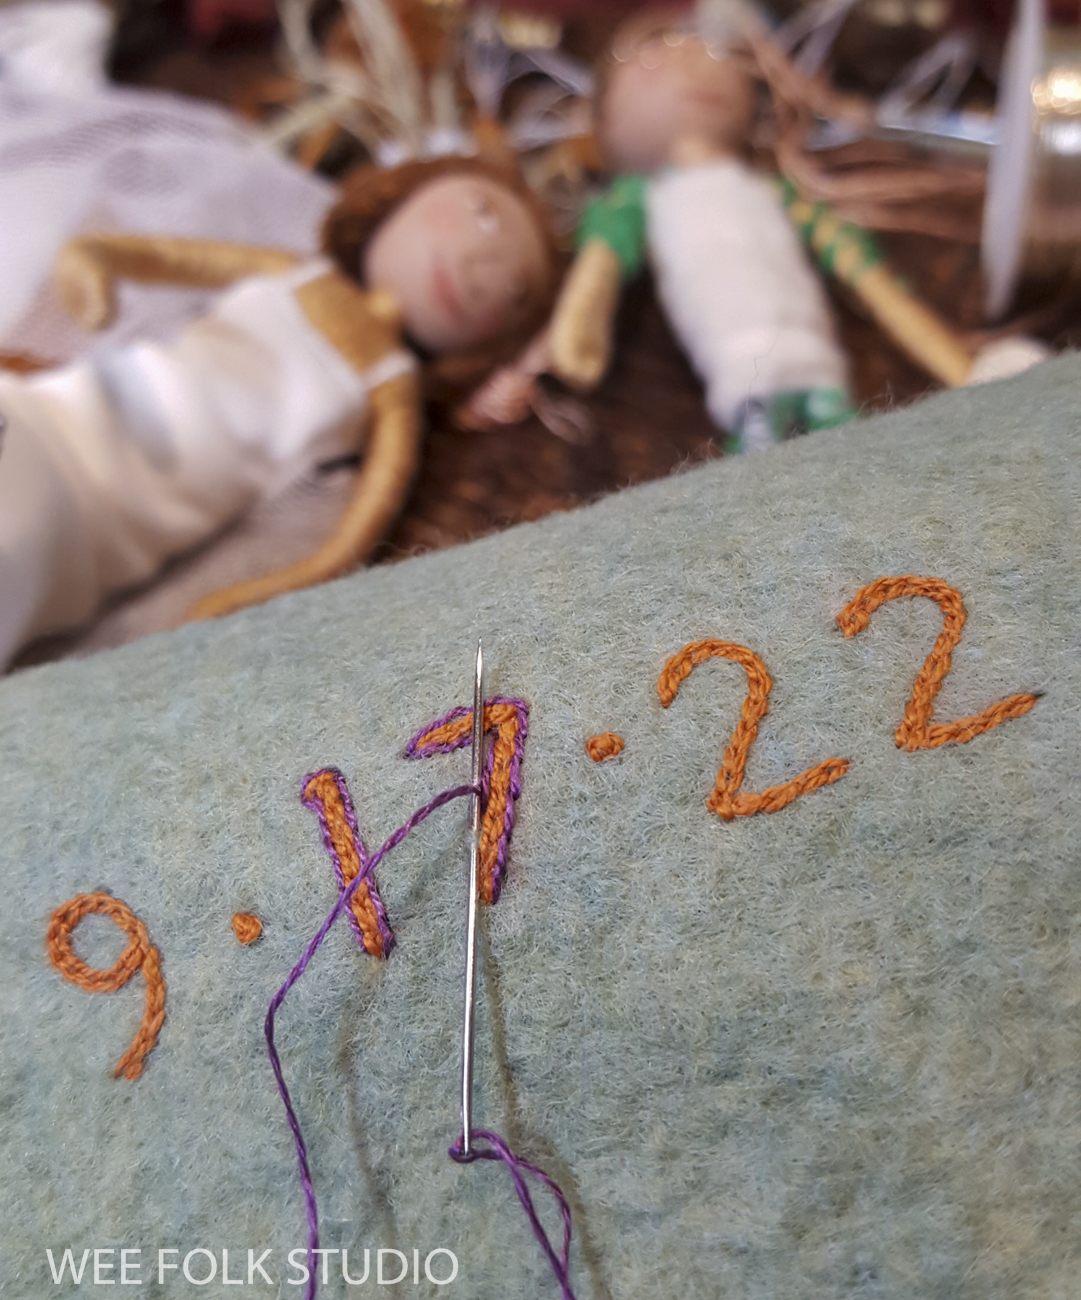
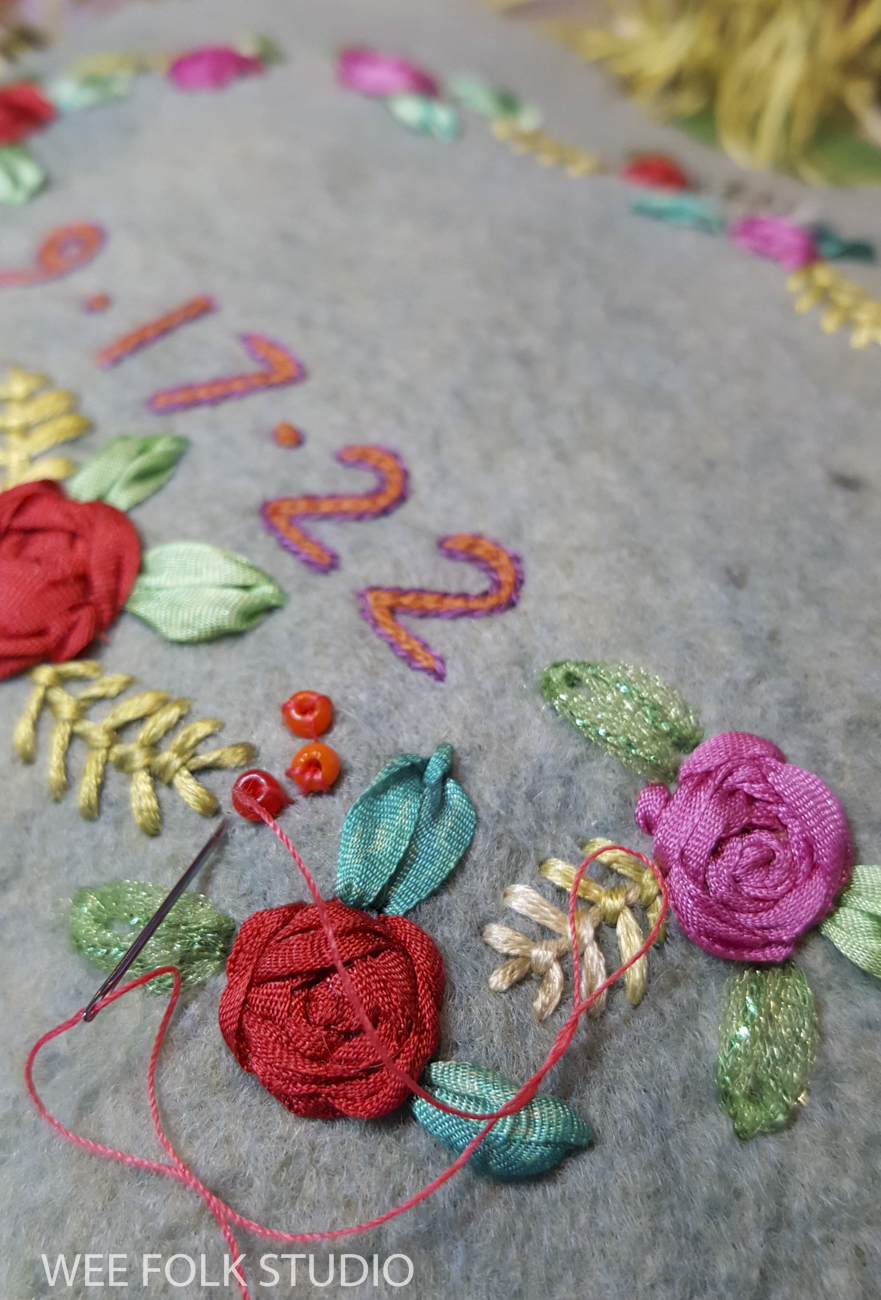
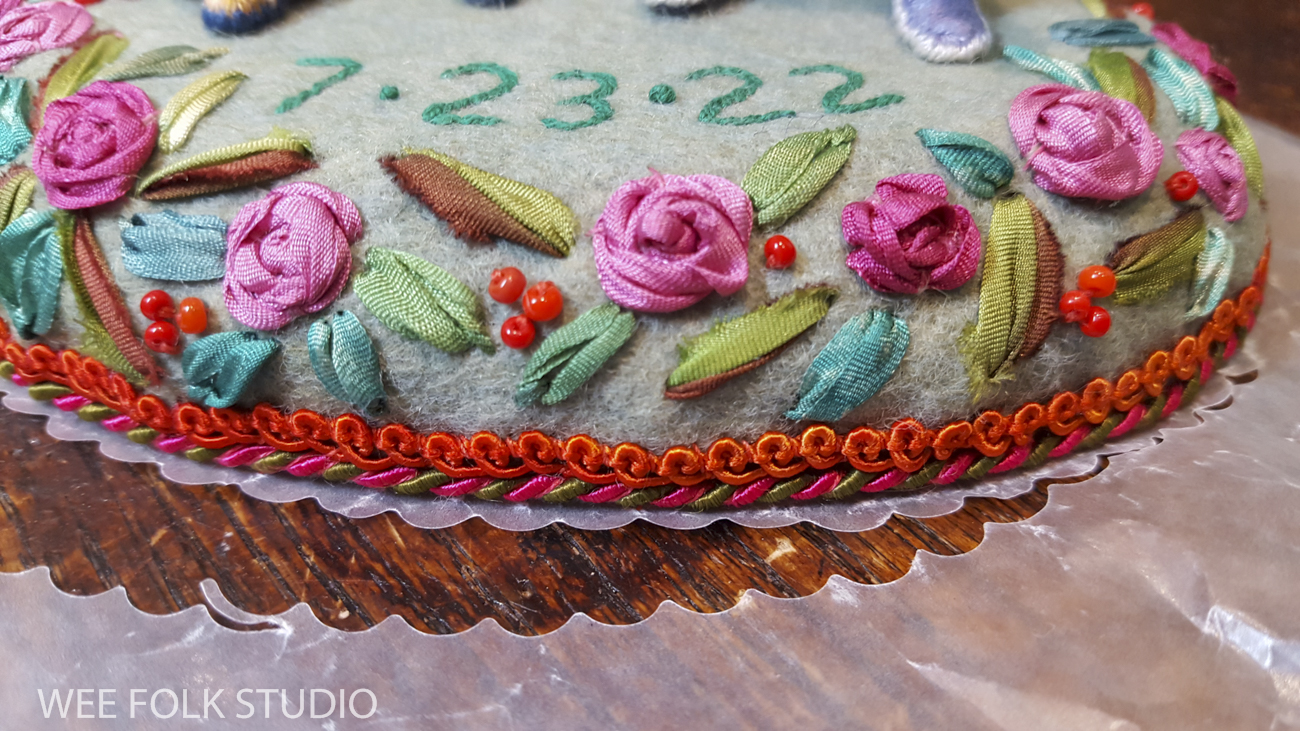
With Sam still in his underwear, I pressed forward and made the platform that they would stand on, which is basically a piece of wood covered with felt. I chain stitched their wedding date in orange and outlined the numbers in purple to make them more prominent.
I used a spider web technique to embroider ribbon roses, which I learned on YouTube.
I added more ribbon embroidery and bead embellishments.
I glued a piece of felt to the bottom of the wooden platform and stitched the embellished felt top piece to it around the outside edge. Then I edged the base with twisted memory wire and braid.
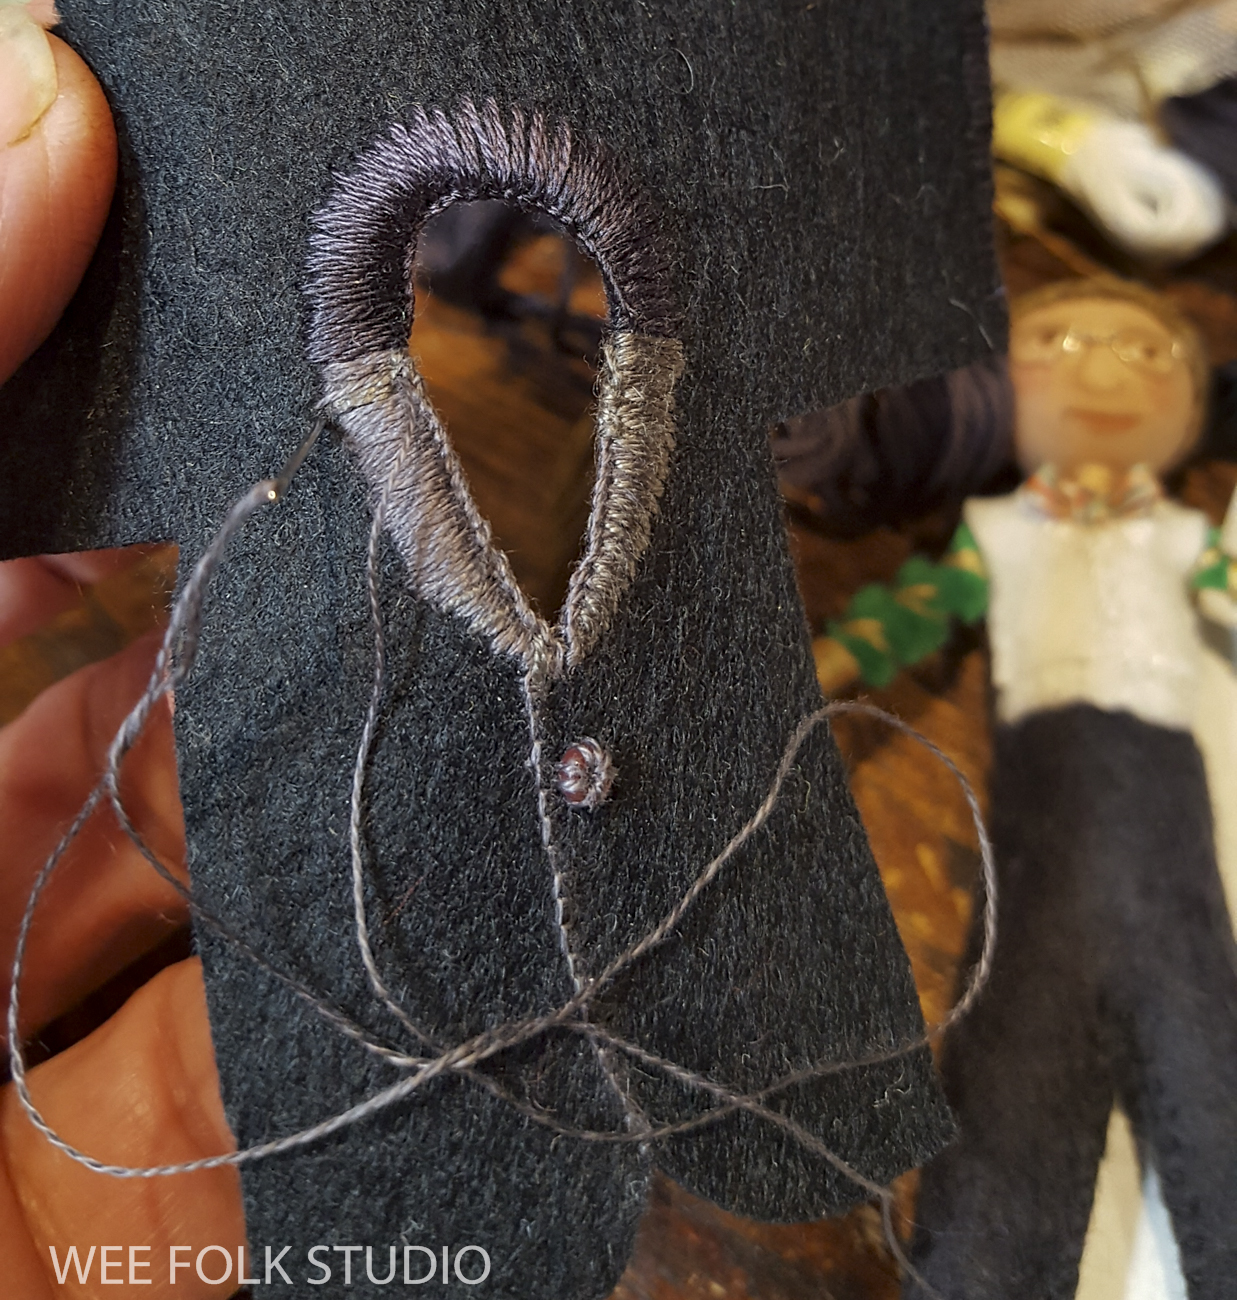
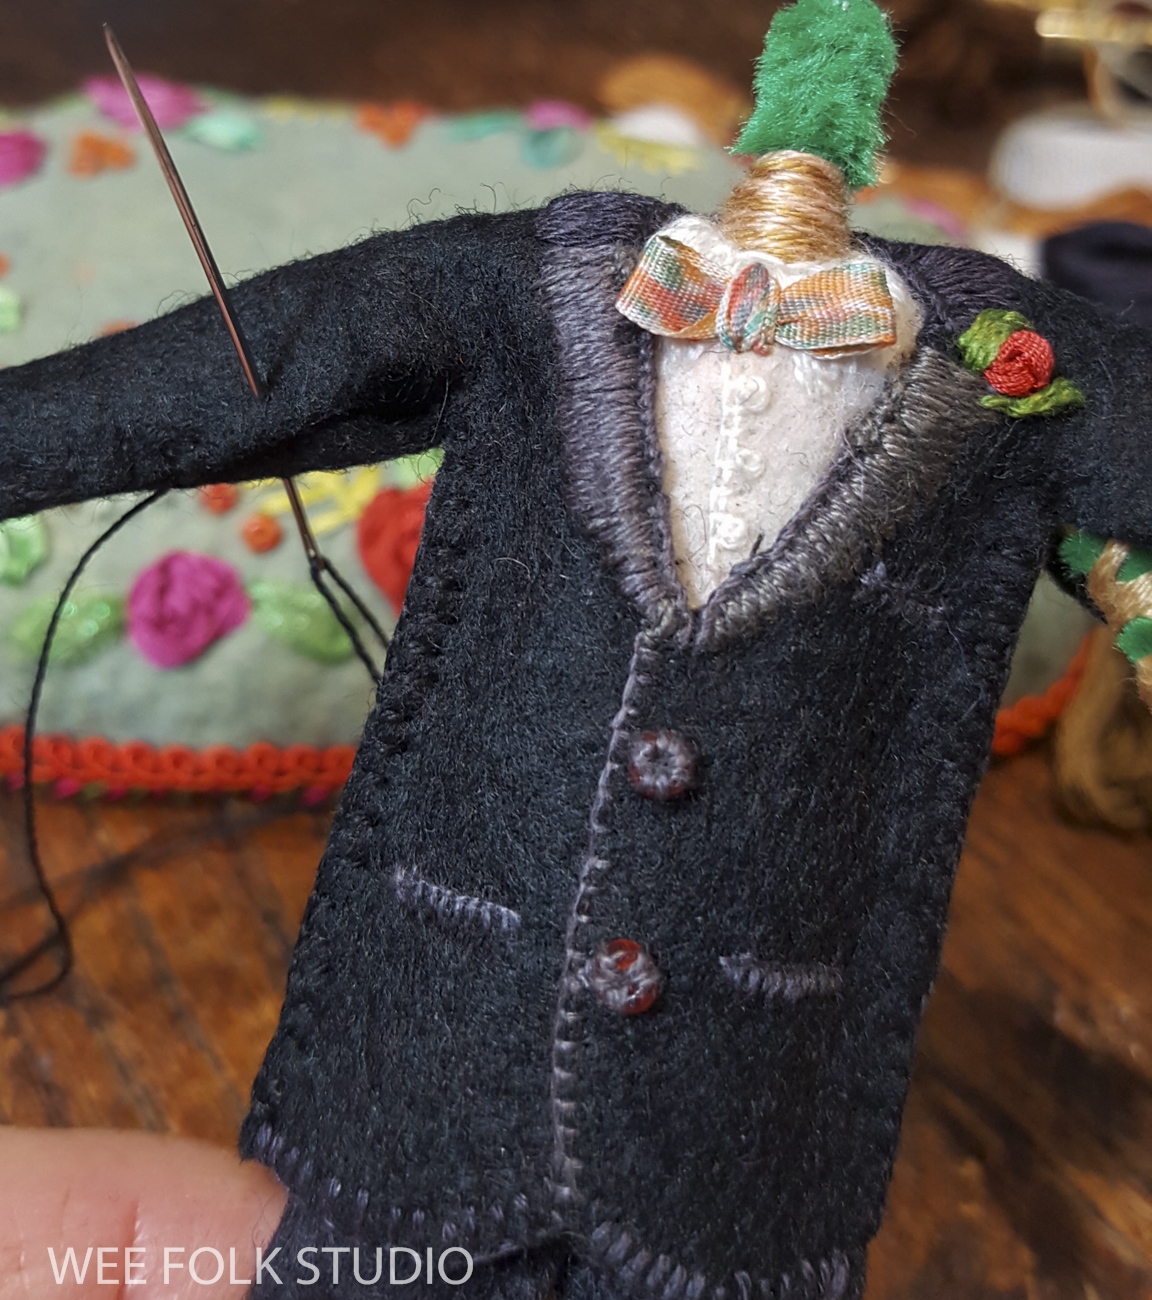
As soon as the photo of Sam in his black velvet jacket appeared on my phone, I got to work creating its wee version.
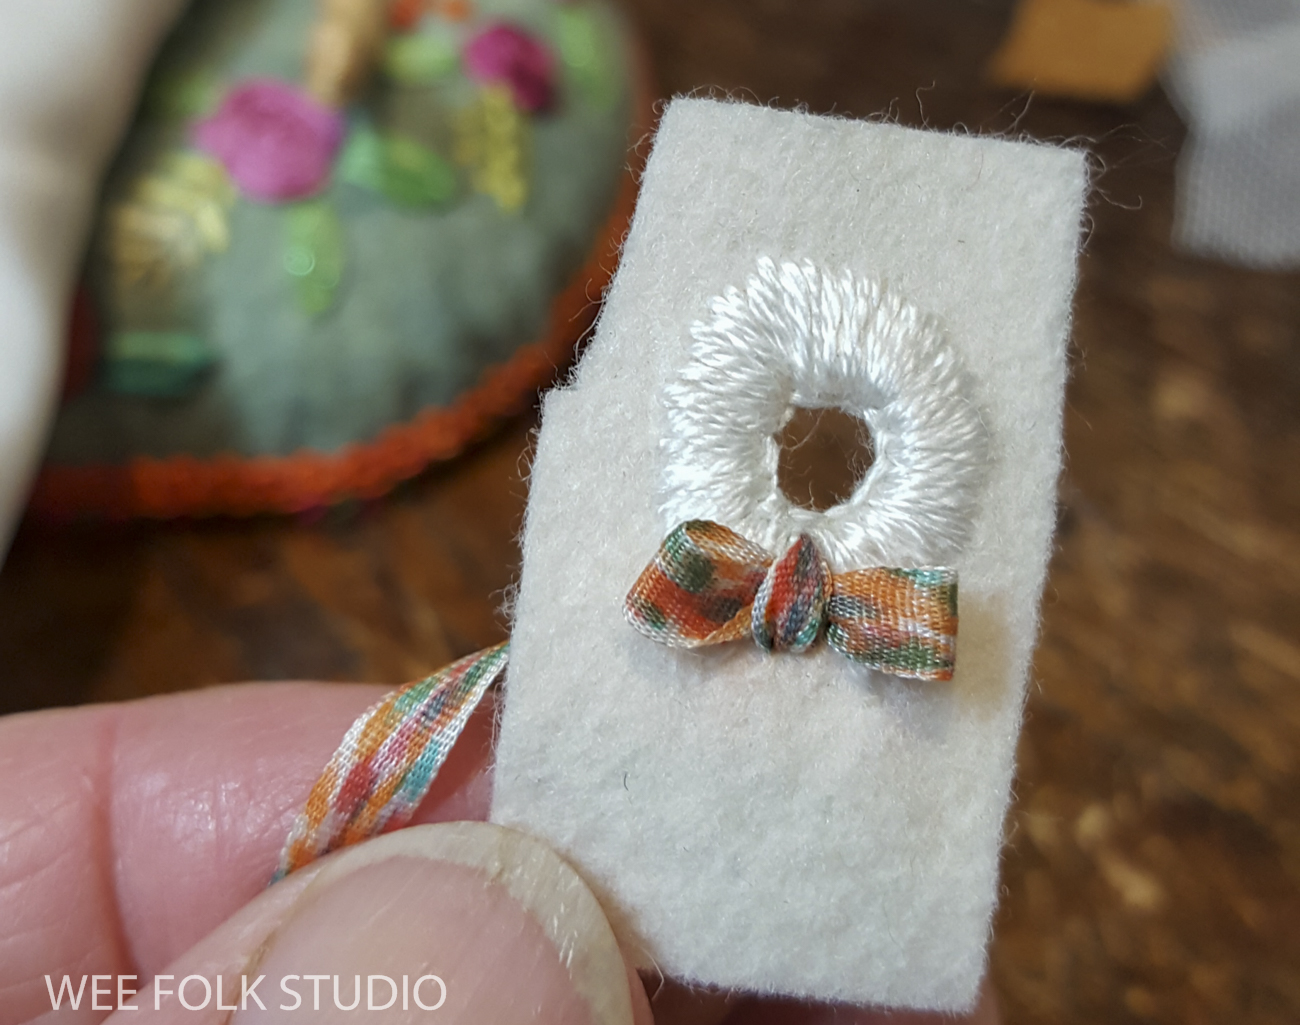
To make Sam’s floral bow-tie, I decorated silk ribbon with markers and stitched it to his shirt.
It didn’t take long to sew his jacket onto the pipe cleaner body, and glue his head on top. Now, he was all ready to get married!
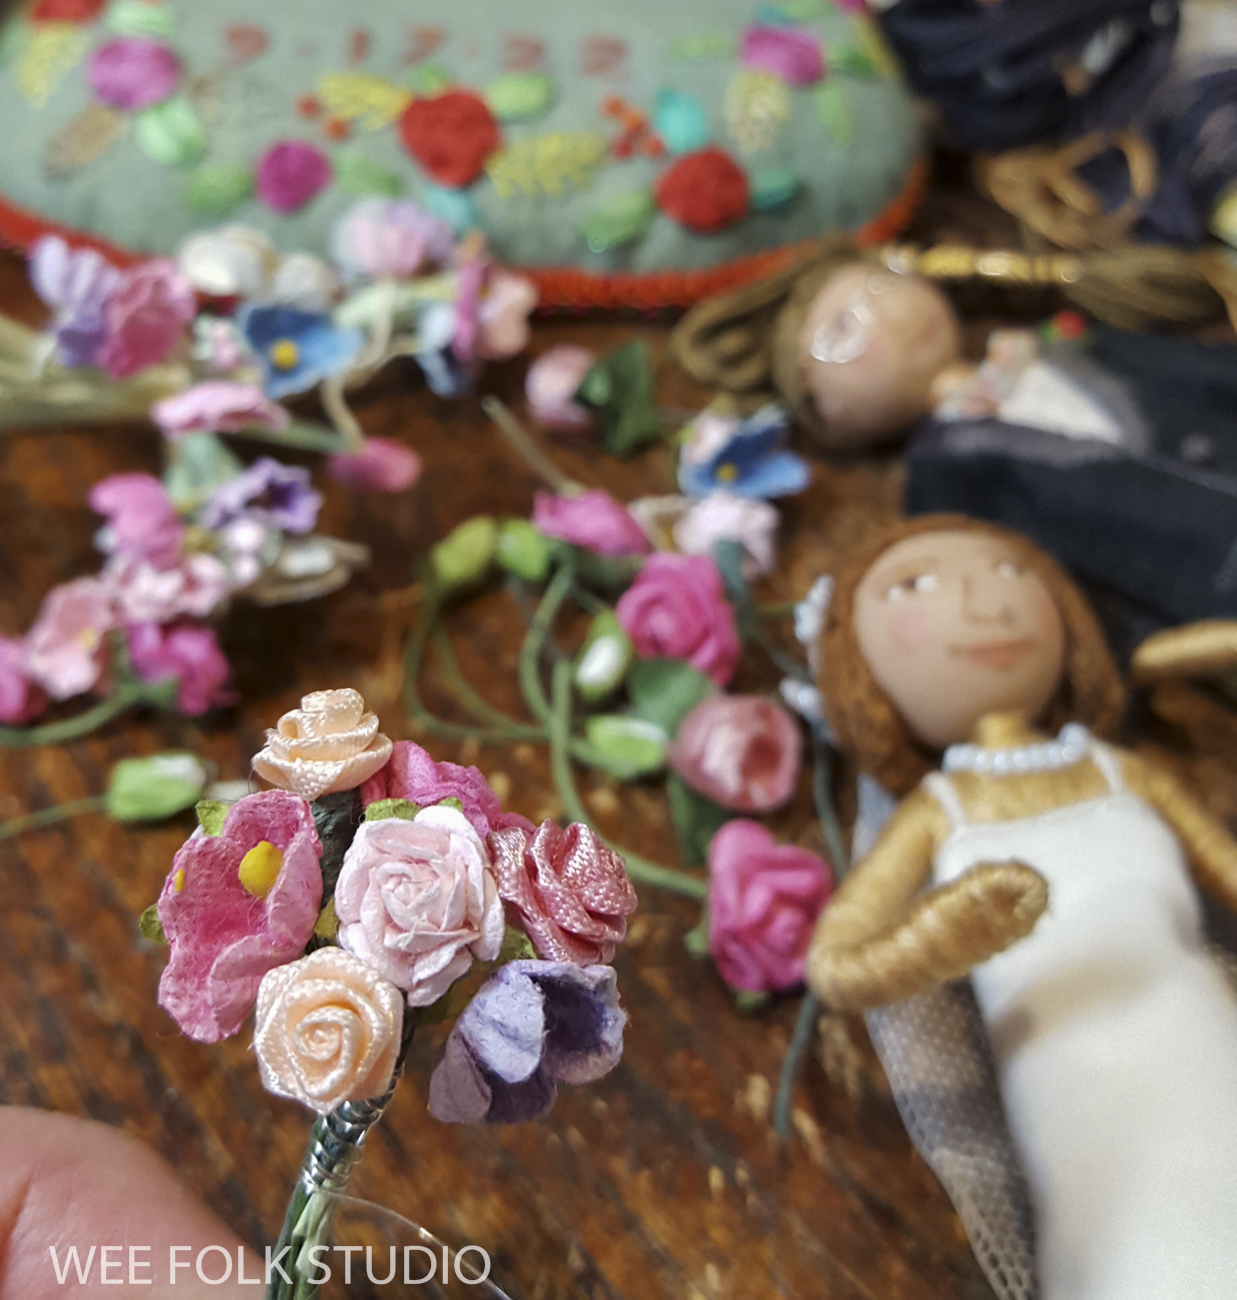
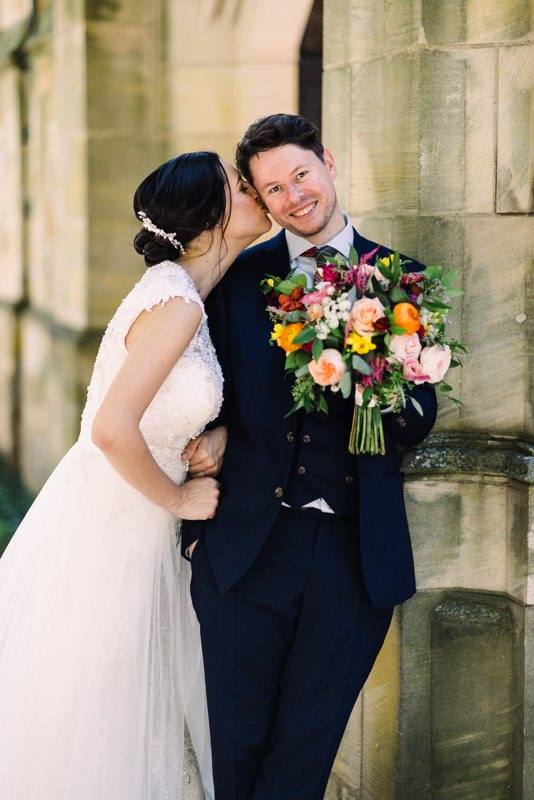
For her bouquet, i weeded through my collection of miniature flowers, guessing what it might look like. In reality, it turned out that she held a bouquet of dahlias in a very similar color scheme.
Before covering the wooden base with felt, I had drilled holes for sewing their feet in place. I had marked the location of the drill holes on the felt, so it was easy to anchor their feet with a few stitches using a long sewing needle.
Here they are, atop their lemon poppy seed wedding cake, which was homemade by the bride’s sister. Congratulations and best wishes to Sam and Louisa!
To keep up with new posts, please subscribe to this blog. Your contact info will not be sold or shared. If you’d like to see more frequent photos tracking the projects in my studio, please follow me on Facebook and/or Instagram.
Before sharing the process of making wedding cake topper dolls for my son Ian and his new bride Liz, I want to remind you to sign up for a ZOOM Talk that I’ll be giving on August 25th at 2:PM (eastern time). “An Afternoon with Salley Mavor” will be hosted by the Brick Store Museum, where my retrospective exhibition is currently on view until Sept. 11. The Talk will be recorded so that those registrants unable to attend the live chat will receive the recorded version the next business day. I look forward to seeing your smiling faces, as I share the story of my life’s work, touching on where it came from, how it has evolved and why I do it. Have your questions ready! Please register HERE.
My first major retrospective exhibition, “WHAT A RELIEF: The Art of Salley Mavor” is currently at the Brick Store Museum in Kennebunk, Maine until Sept. 11, 2022
Now back to Ian and Liz, who are as adorable in real life as they are in doll form. Their wedding, which took place on July 23rd in New Haven, CT on what could have been the hottest day of the year, was a wonderful and joyous event. Rob and I are thrilled to welcome Liz into our family!
Ever since they announced their engagement a year ago, I’ve looked forward to making Ian and Liz a personalized set of wedding cake toppers. Over the years, I’ve made wedding dolls for close friends (see them HERE) and samples for a chapter in my how-to book, Felt Wee Folk, but this is the first time in several decades that someone in our family has had a wedding to make them for!
I had a short window of time to work on them in late June and early July, after my exhibition in Maine was underway and when Ian and Liz could provide reference photos of their clothing, hair styles and other details. If you’ve made figures using the instructions in Felt Wee Folk, you’ll know that you start with the feet, so I couldn’t begin until I had photos of their shoes.
Ian chose a tartan tie (Buchanan from my mother’s side) that we bought for him on our last trip to Scotland. We have Scottish ancestors through many branches of the family, so there are a few different tartans to choose from, but those are never available in souvenir shops.
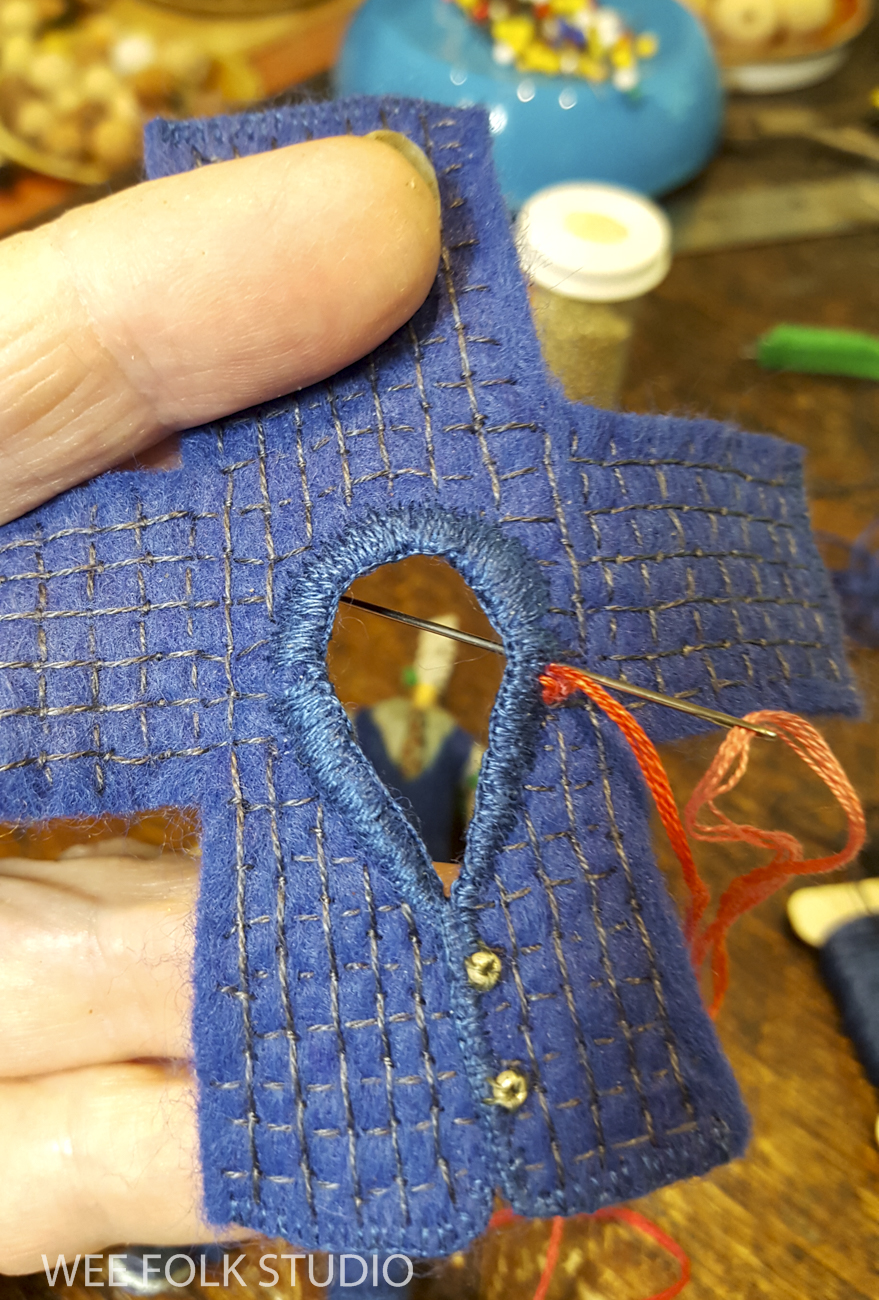
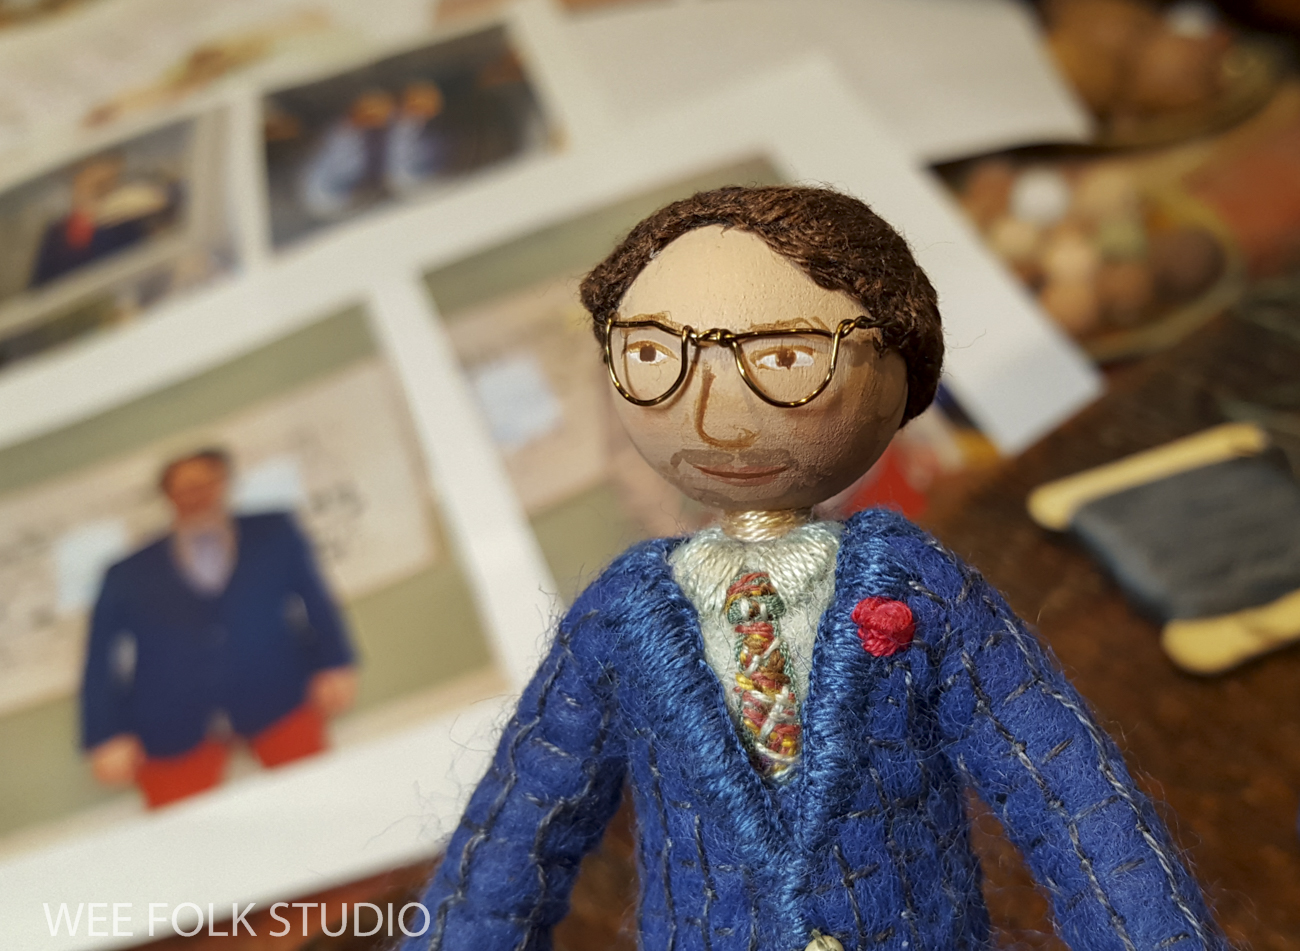
I matched the window pane weave of Ian’s suit with a stitched grid of embroidery floss and added a French knot boutonniere to the button hole stitched collar.
It’s been a while since I’ve made glasses, so I referred to my Cover Up poster to see how I twisted wire to form their shape.
Before painting his face, I asked Ian if he would be clean shaven or sport a beard on his wedding day. He carefully planned for a 3 day old scruff look, a favorite with millennials.
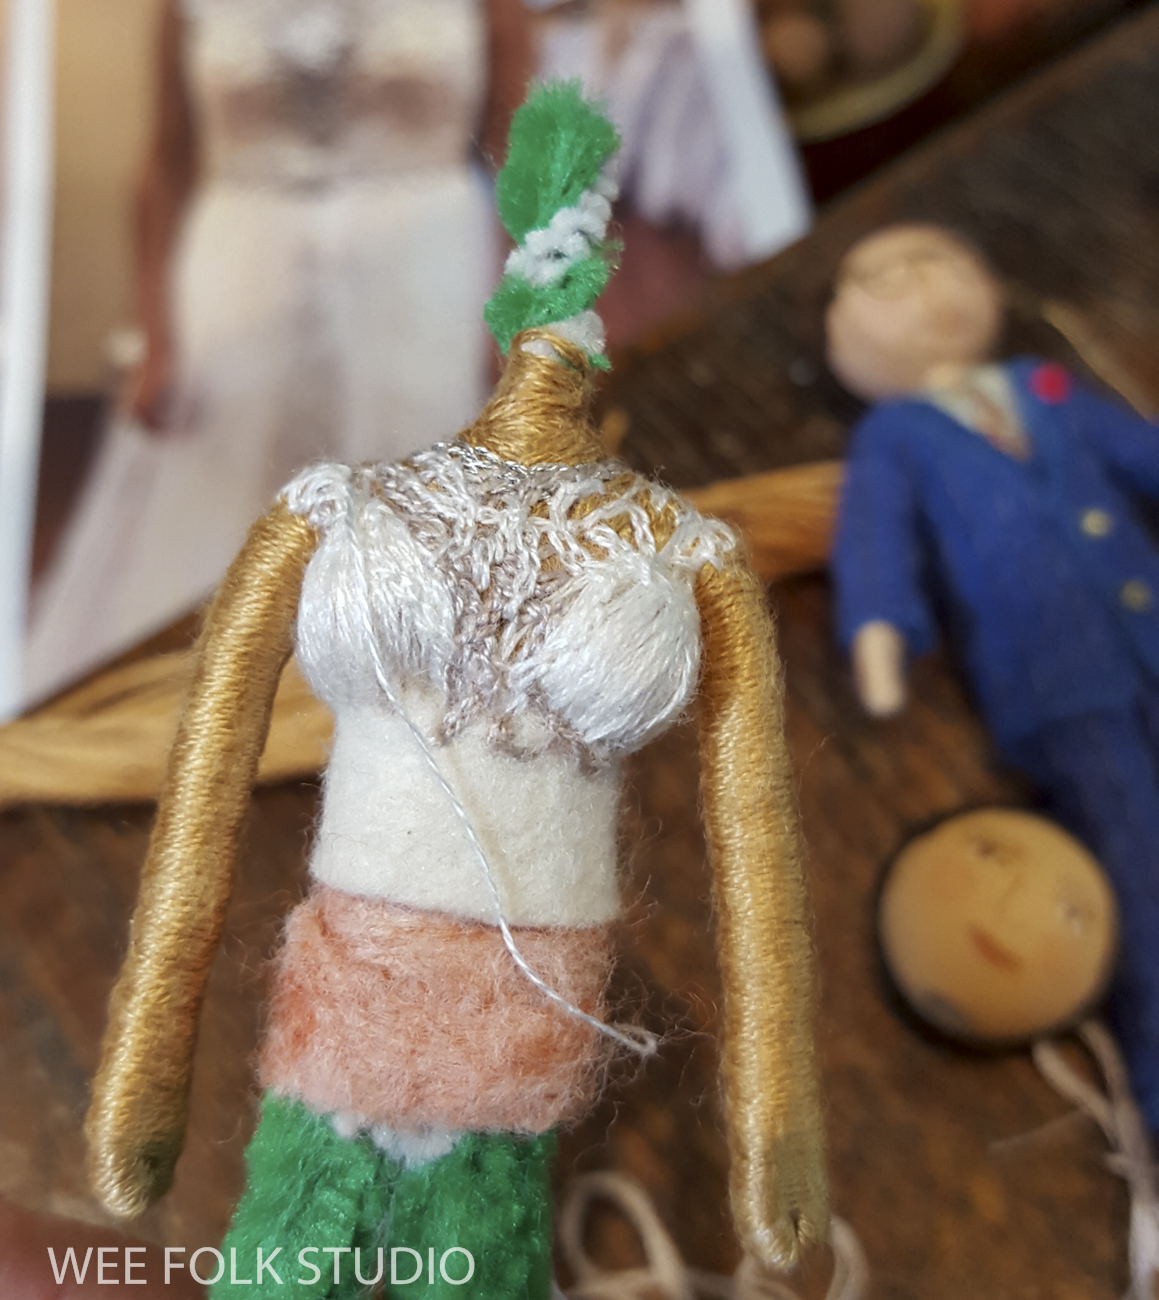
The bridal gown was so much fun to replicate in miniature. To get a womanly shape, I sewed a pair of boob beads onto the armature and then created the bodice with a combination of felt, embroidery floss and metallic thread.
The metallic thread was a pain to work with, but it did the job!
Liz sent photos of her hair in a low bun, which I copied.
To make the curly tendrils in front, I smeared glue on a few strands of floss and wound it around a piece of insulated wire until it dried.
When the dolls were finished, I moved onto their platform, which was an oval shaped piece of wood I found at Michael’s.
Planning ahead for when I would sew them in place, I drilled 4 holes (one for each foot) through the wood.
I cut out a piece of wool felt and chained stitched their wedding date in the space that would be in front of their feet. In the photo, the dolls aren’t sewn in place yet, just balanced there while I gauged the spacing.
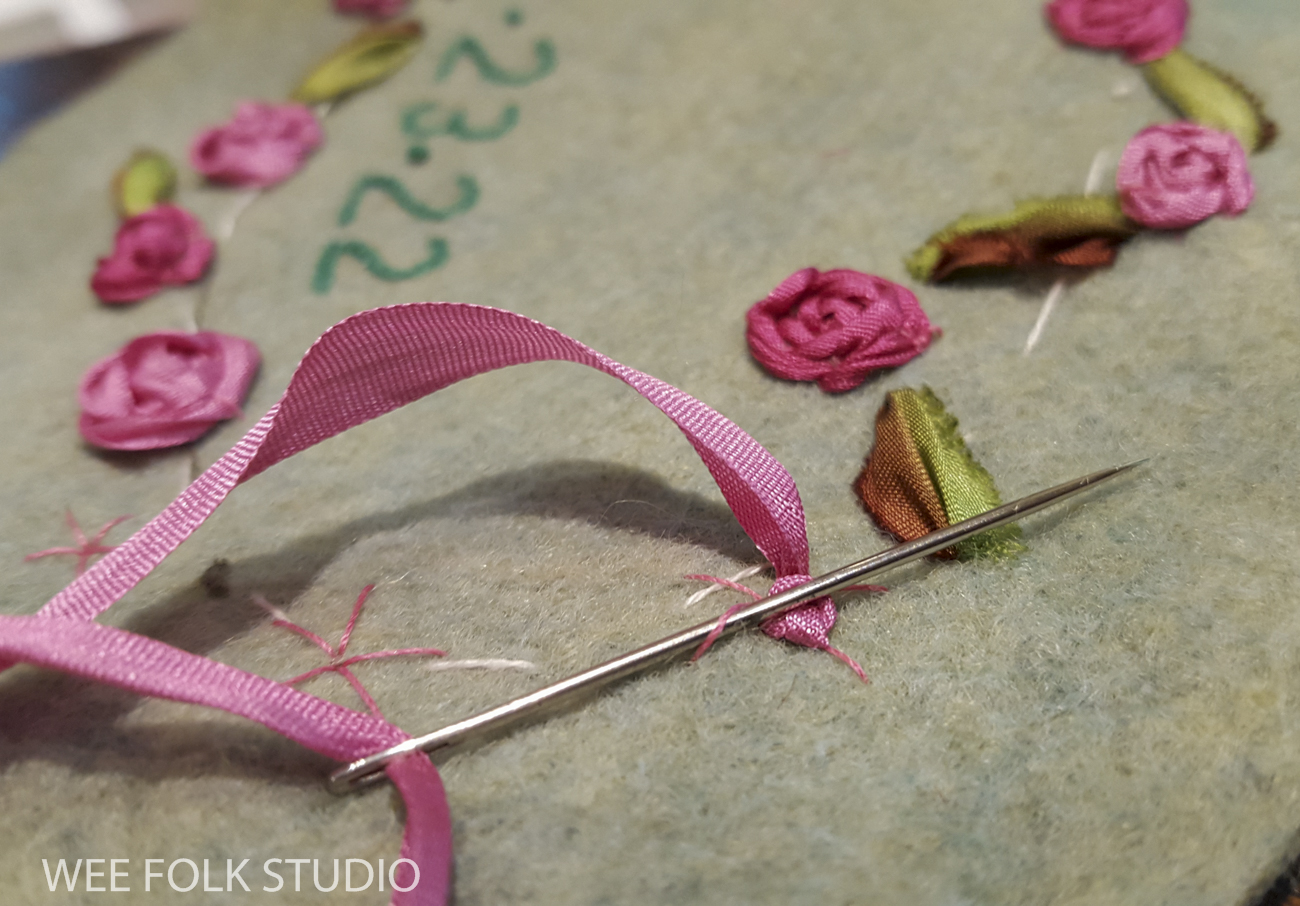
I used a spider web technique to embroider ribbon roses, which I learned on YouTube.
It was a chance to use some of my collection of silk ribbon, which usually just sits in a basket looking pretty.
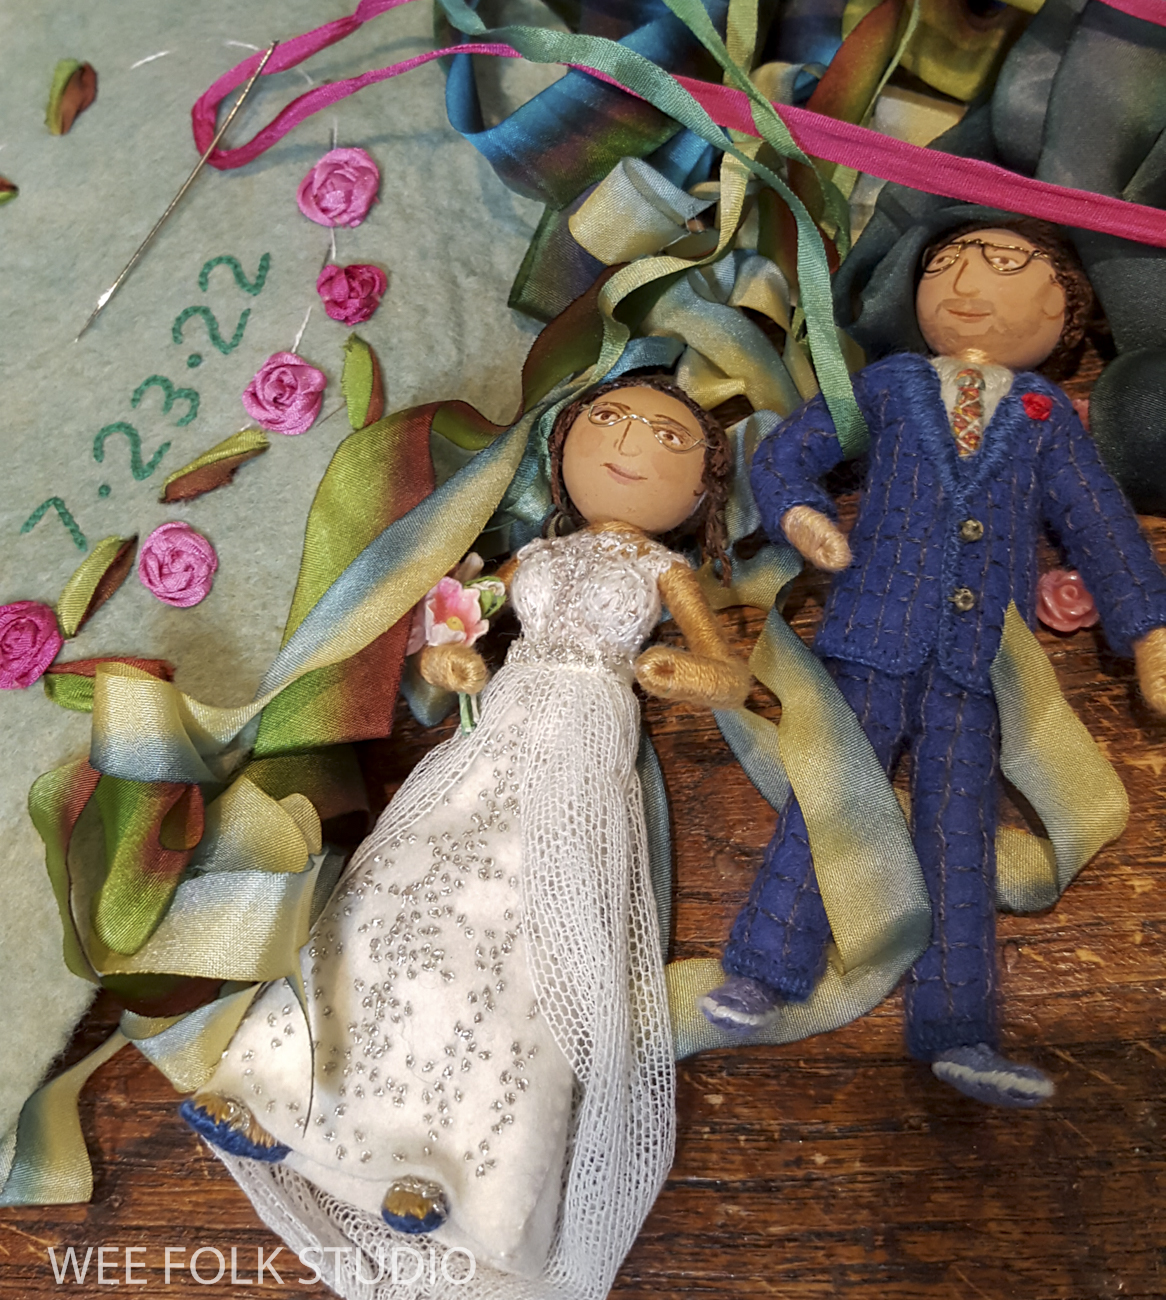
The dolls relaxed while I decorated their stand.
I glued a piece of felt to the bottom of the wooden platform and stitched the embellished felt top piece to it around the outside edge.
For a finishing touch and to add some visual weight, I sewed rows of braid and twisted red and green memory wire to the bottom edge of the stand. I had marked the location of the drill holes, so it was easy to anchor their feet with a few stitches using a long sewing needle.
In anticipation of the fact that the wedding couple would be placed on top of a frosted cake (it was carrot cake with cream cheese frosting), I stitched a layer of wax paper to the bottom to protect the felt. It was a good thing, because afterward the wax paper was a bit sticky when I ripped it off.
To keep up with new posts, please subscribe to this blog Your contact info will not be sold or shared. If you’d like to see more frequent photos tracking the projects in my studio, please follow me on Facebook and/or Instagram.
I’m overwhelmed by the response to my first major retrospective exhibition, WHAT A RELIEF: The Art of Salley Mavor. In its first 6 weeks, visitors have streamed in from all over to see a big portion of my life’s work at the Brick Store Museum in Kennebunk, Maine. There’s a lot to see – four galleries on the Museum’s first floor contain over 150 works that span 40 years (more if you count my childhood pieces), from early sculptures, to picture book illustrations to my recent foray into current affairs. If you’re considering traveling to see the exhibit, there’s still time, since it’ll be there for another 8 weeks, through Sept. 11th. I’d thought that people would drive in from the surrounding New England states, which they are, but I’m flabbergasted to hear that fans are actually flying in from other parts of the country to see my work in person!
I’m touched that so many of you’ve gone out of your way to see my work in person. It makes me feel that all of the effort that went into this exhibit was worth it! These are just a few of the comments coming in:
“Hands down, one of the most beautiful, inspiring and creative museum exhibits I have ever seen. I will remember this forever!” -Lucinda Shattuck, Dover, NH
“We are blown away with wonder and delight. We spent over three hours gazing up close at every inch of your amazing work. Best weekend ever!!’ – Julie Steller of Minneapolis, MN
“There is so much to feast your eyes on! I love that women, diversity, and politics all take center stage, too.” – Marty Lapointe-Malchik, Concord, MA
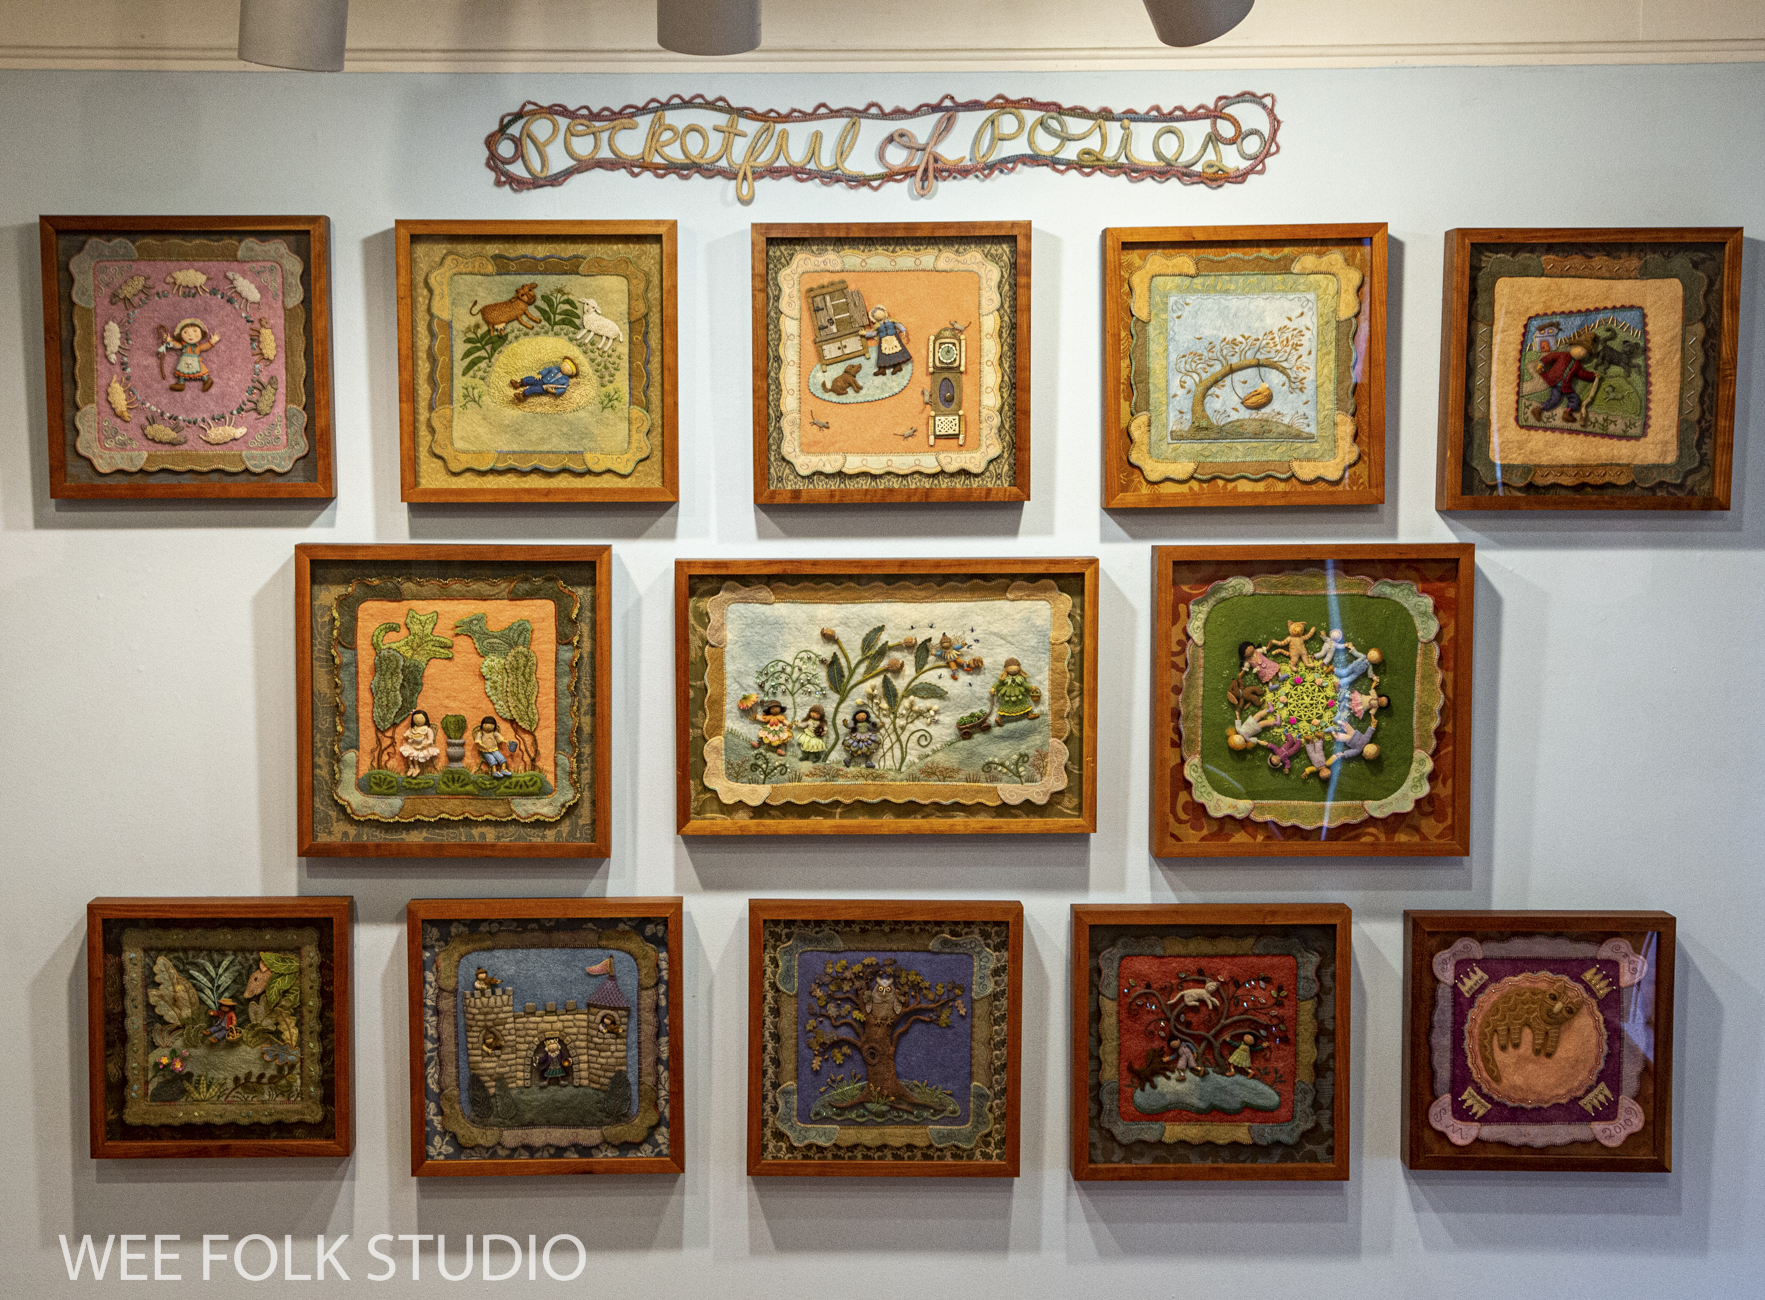
For those of you from the other side of the world, I’ll do my best to show what the exhibit looks like. In this video, I walk through one the galleries that contains original artwork for Pocketful of Posies and MY BED.
Bedtime StitchesBedtime Stitches
WHAT A RELIEF: The Art of Salley Mavor Brick Store Museum 117 Main St., Kennebunk, Maine June 7th thru Sept. 11th ZOOM Talk, Aug, 25, 2 PM, Register HERE
I look forward to seeing your smiling faces (via Zoom) when the Museum hosts “An Afternoon with Salley Mavor” ZOOM Talk on Aug. 25 at 2:00 PM (eastern time). After my presentation, there will be an opportunity for participants to ask questions. Please register HERE. Don’t worry if you live in another time zone, the event will be recorded to watch later.
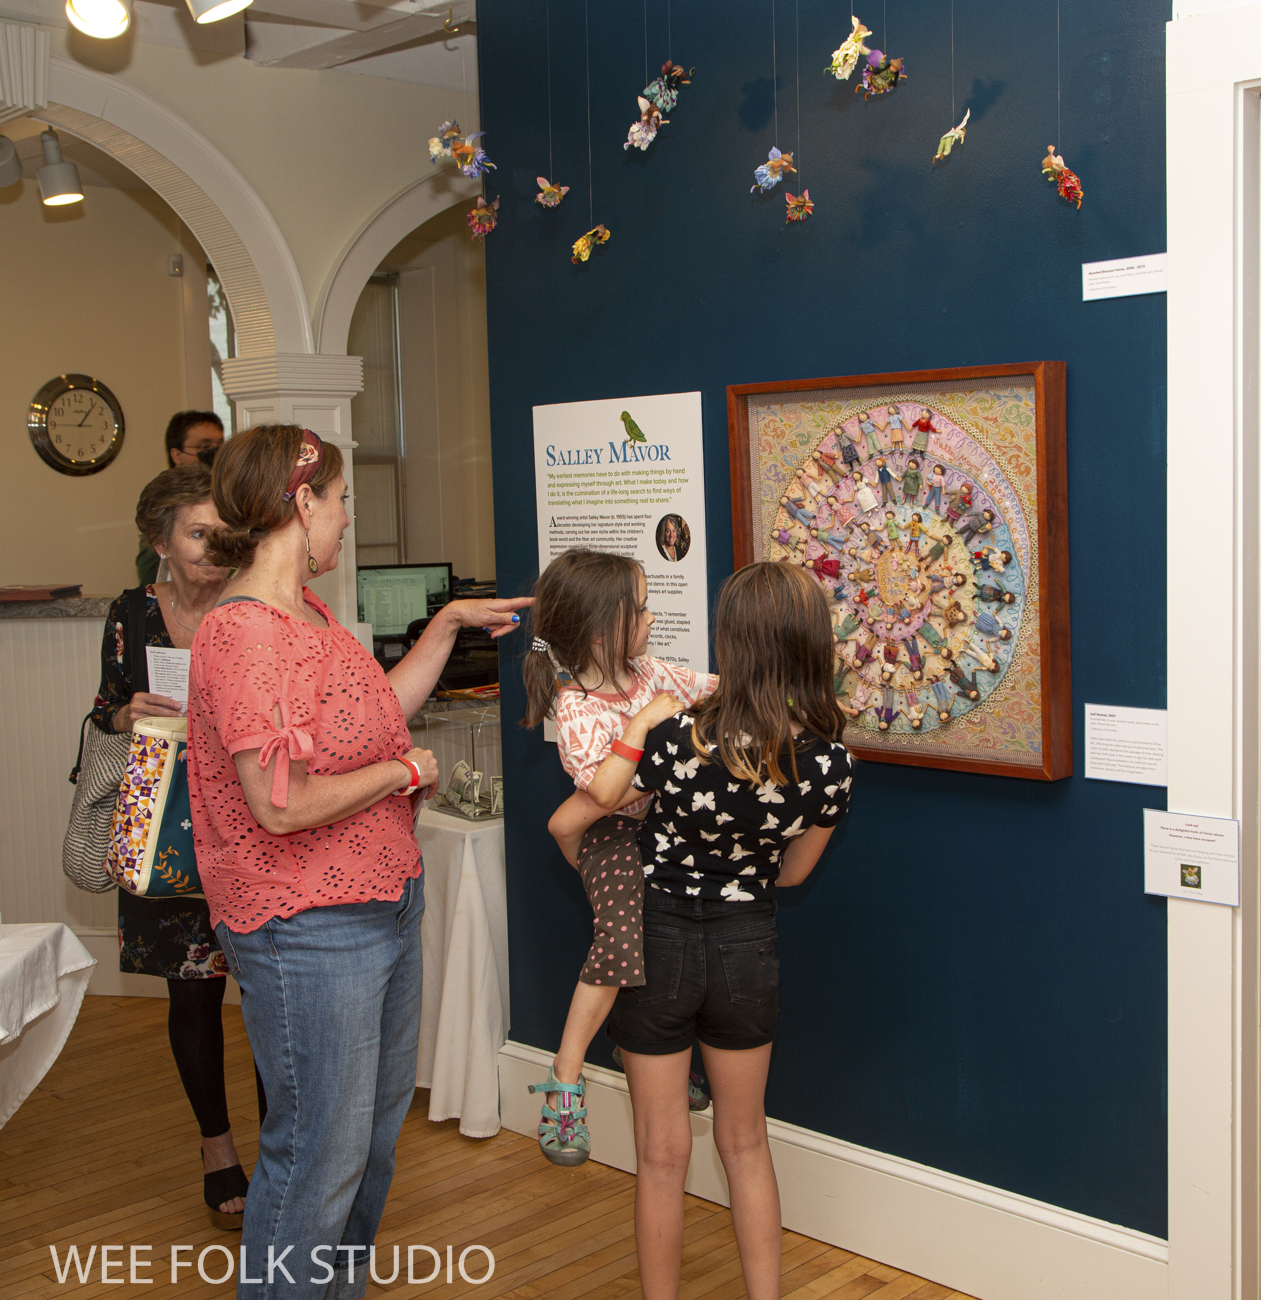
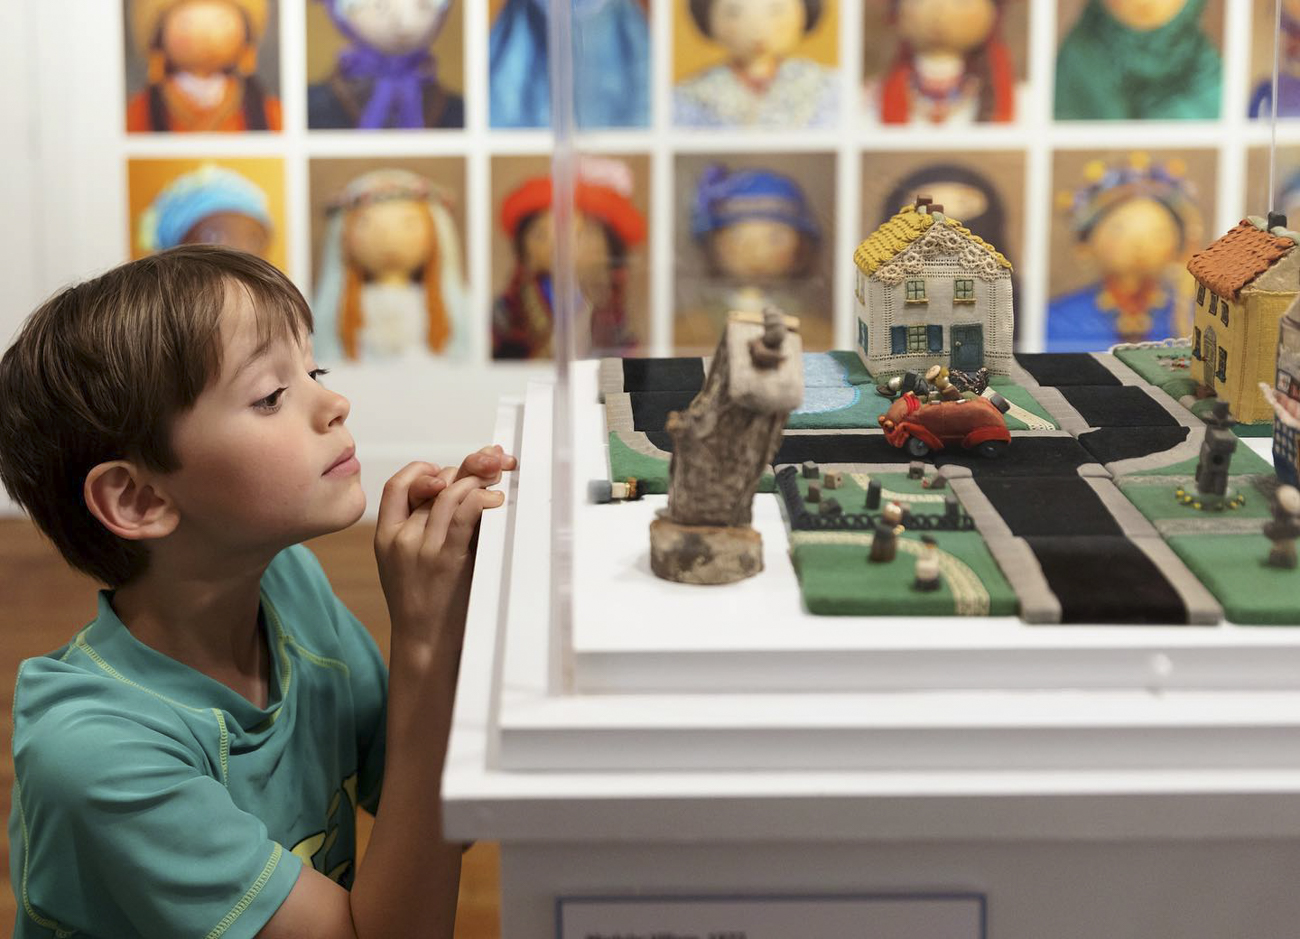
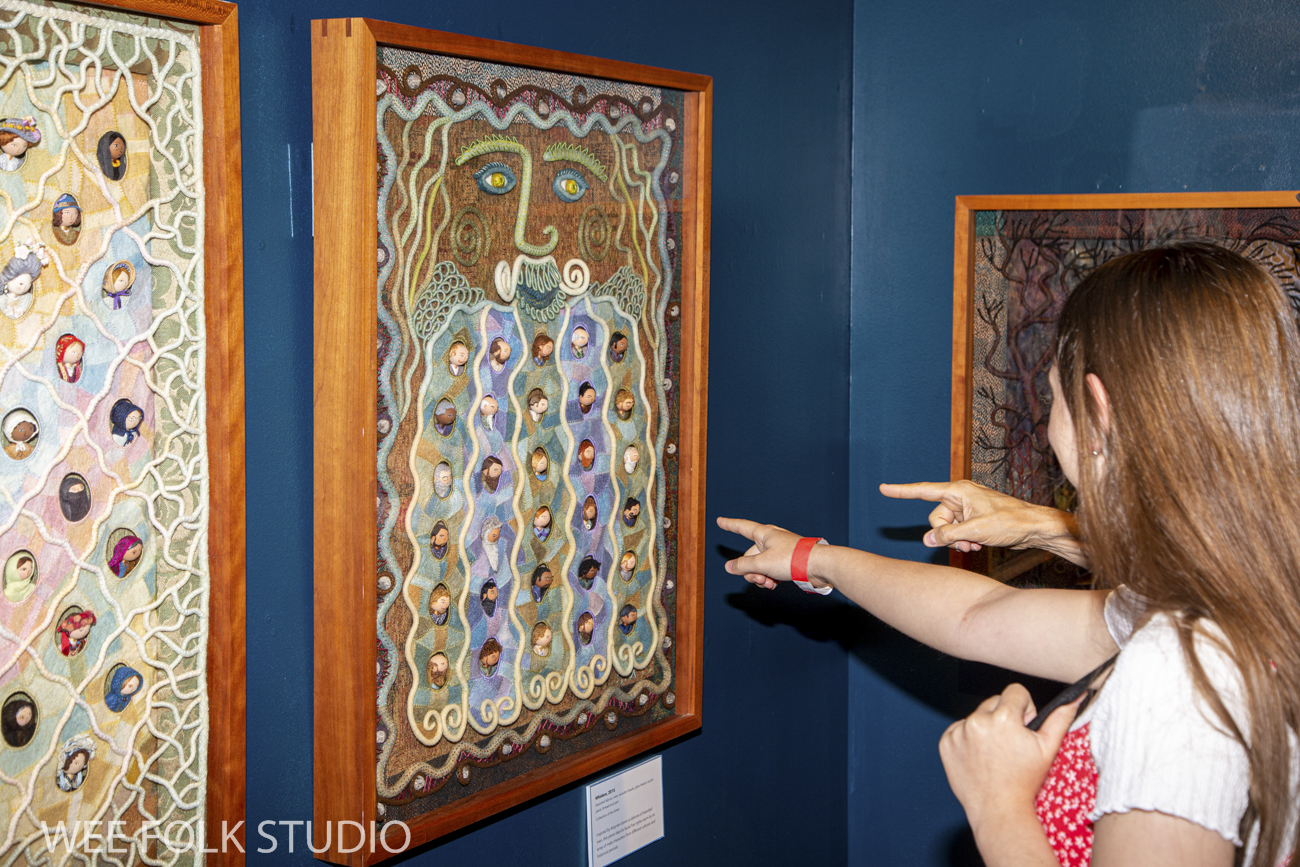
Visitors of all ages are enjoying the show. We hung the artwork a little lower than usual, so that children and short adults can see the detail more easily.
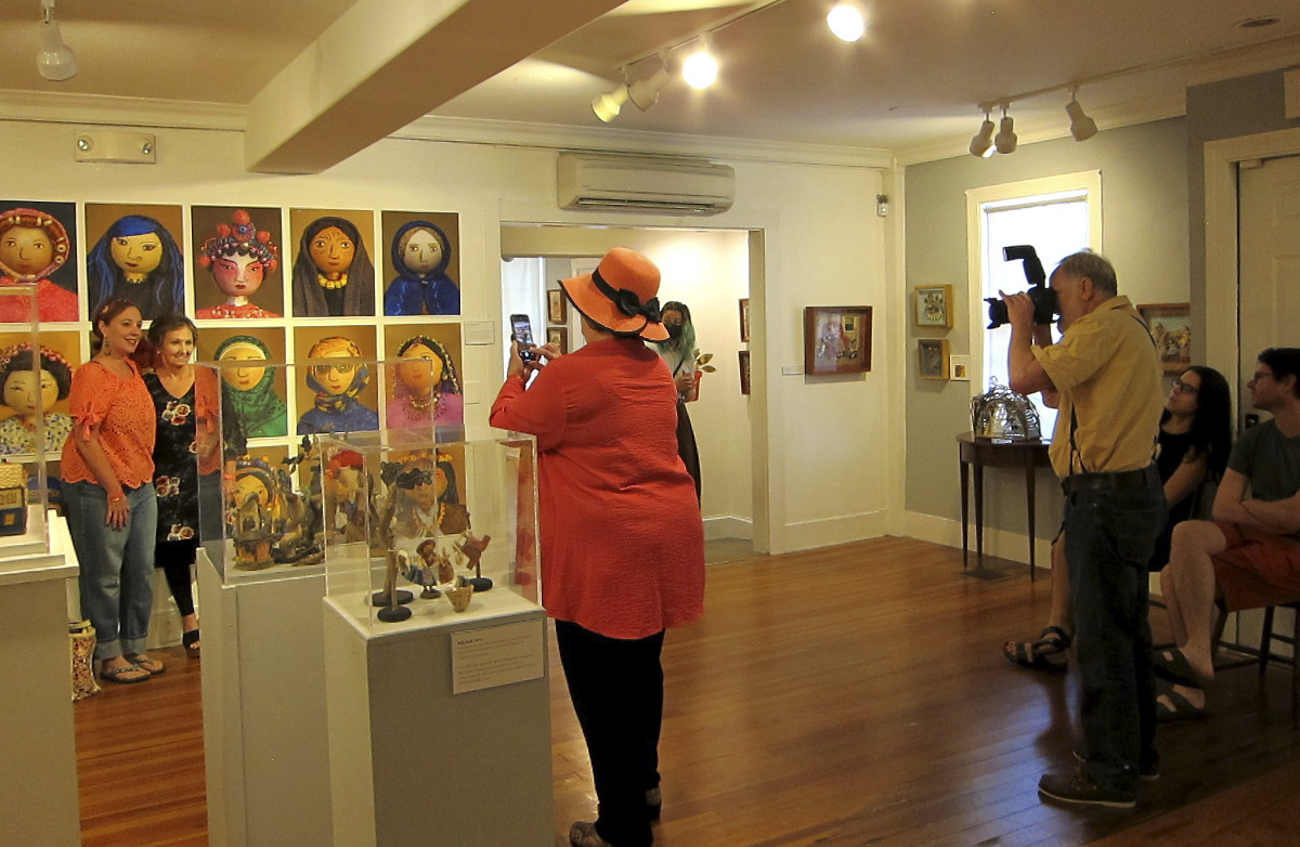
The wall of women has turned into a popular photo-op spot.
Whiskers
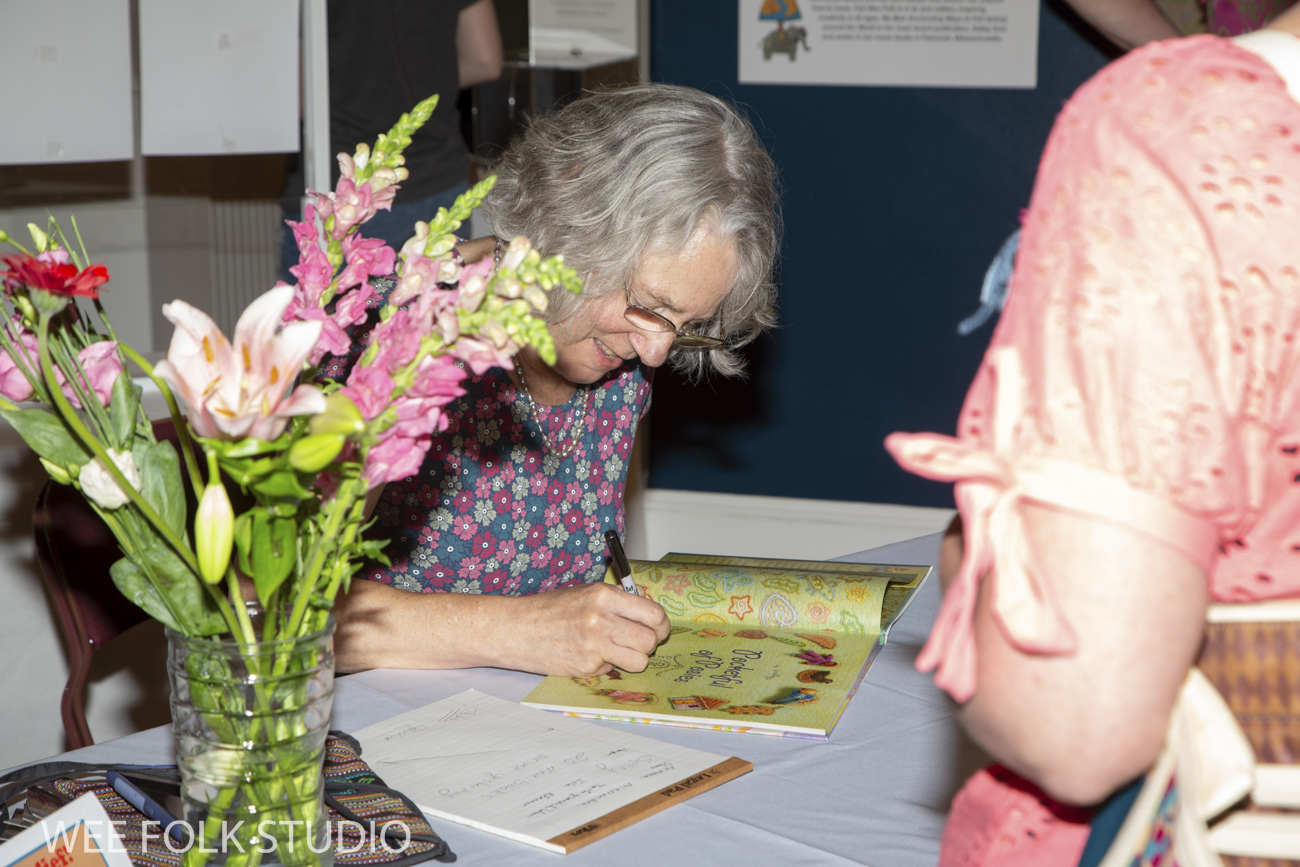
At the opening reception in June, I loved meeting people, signing books and
admiring a pair of adorable fairies made from my how-to book, Felt Wee Folk.
This exhibit follows my career through many twists and turns, including my recent venture into political satire. The “Liberty and Justice” room holds the Wee Folk Players cartoons and the props and characters from our stop motion animation, Liberty and Justice: A Cautionary Tale, which visitors can watch on a video monitor.
Liberty and Justice
Jim Newman of Woods Hole, MA wrote to tell me this tidbit:
“My favorite moment was in the Liberty and Justice room, where an elderly lady, bent over a walker, looked over at me and started a nice conversation with “EVERYONE needs to come see this.”
Liberty and Justice
I want to thank the staff at the Brick Store Museum, particularly Leanne Hayden, who believed in me and supported the idea of a large solo exhibition like this. Let’s be honest, when your medium is embroidery, it can be a challenge to have your work taken seriously by the art and museum world. There is no question that Leanne viewed my work as art from the first time she saw it. After years of planning, it’s gratifying to have everything magically fall into place. I’m thrilled to share my work in such a warm and inviting venue!
Leanne’s kind words about the show left me speechless.
” It has been such a pleasure to work with Salley and host her first major retrospective. I knew it would be a great summer exhibit for the whole family but I never could have imagined the enthusiastic and heartwarming response we receive every day from visitors. I love to hear stories of visitors who have traveled from all over the country to see this exhibit. But my favorite reactions are from those who had never heard of Salley Mavor and are seeing everything for the first time. I have actually had visitors stop me in the galleries just to tell me that this is the best exhibit they have ever seen. Or to hear audible gasps from a particular piece. That is the kind of experience you always hope for when putting an exhibit together.”
Leanne Hayden, Collections Manager, Brick store Museum
Felt Wee FolkPocketful of Posies
To keep up with new posts, please subscribe to this blog. Your contact info will not be sold or shared. If you’d like to see more frequent photos tracking the projects in my studio, please follow me on Facebook and/or Instagram.
If you’ve followed me for a while, you know that my artwork runs the gamut from precious to poignant to provocative, making it hard to categorize. One thing is for certain, I love creating and sharing my vision with you, whether on social media, in books or in person! This summer, from now until Sept. 11th, there’s an opportunity to see over 150 of my bas-relief pieces and sculptural objects at the Brick Store Museum in the quintessential New England town of Kennebunk, Maine.
WHAT A RELIEF at the Brick Store Museum
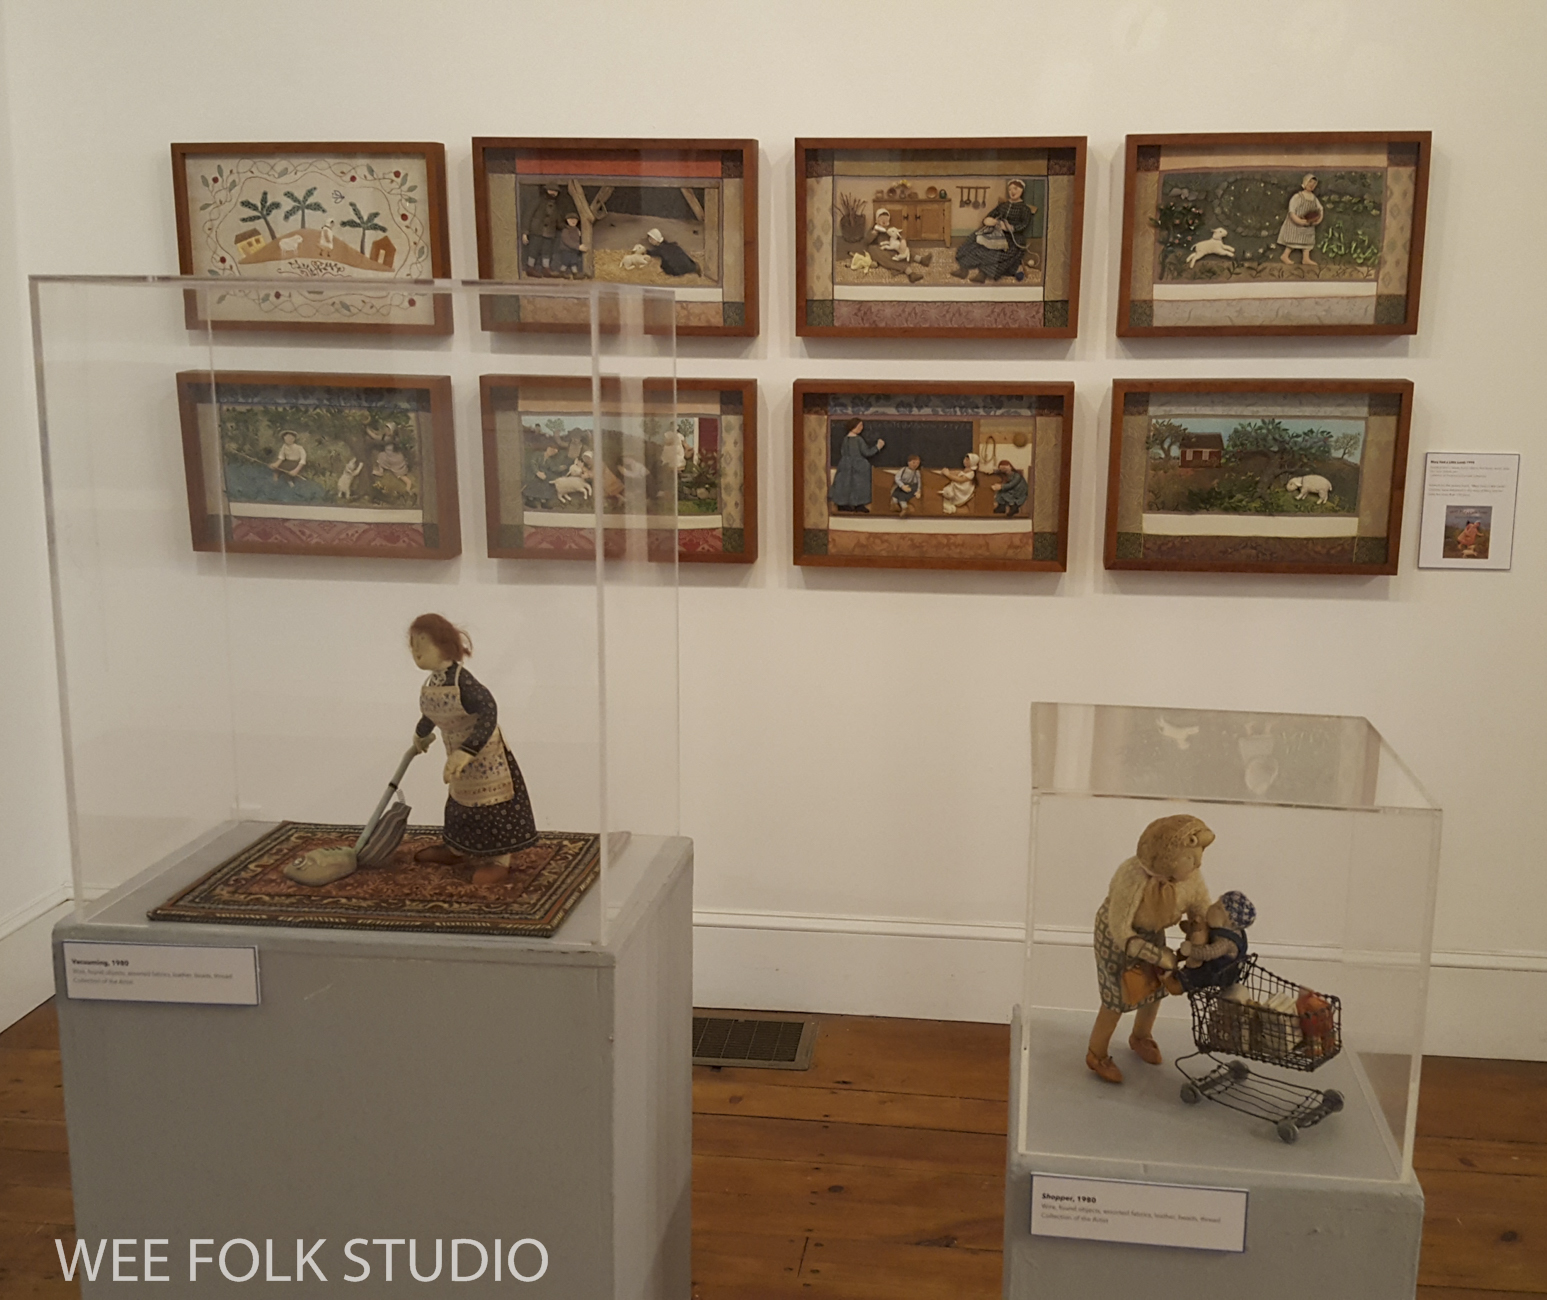
The retrospective exhibition, WHAT A RELIEF: The Art of Salley Mavor contains a large selection of my life’s work, showing everything from a folksy fairy world to full-frontal nudity (in the Garden of Eden). The exhibition spans over 40 years, from early in my career to the present day. Rarely seen works on loan from private collections fill multiple galleries on the Museum’s entire first floor. The show is laid out somewhat chronologically, so visitors can see the evolution of my style and techniques through the years..
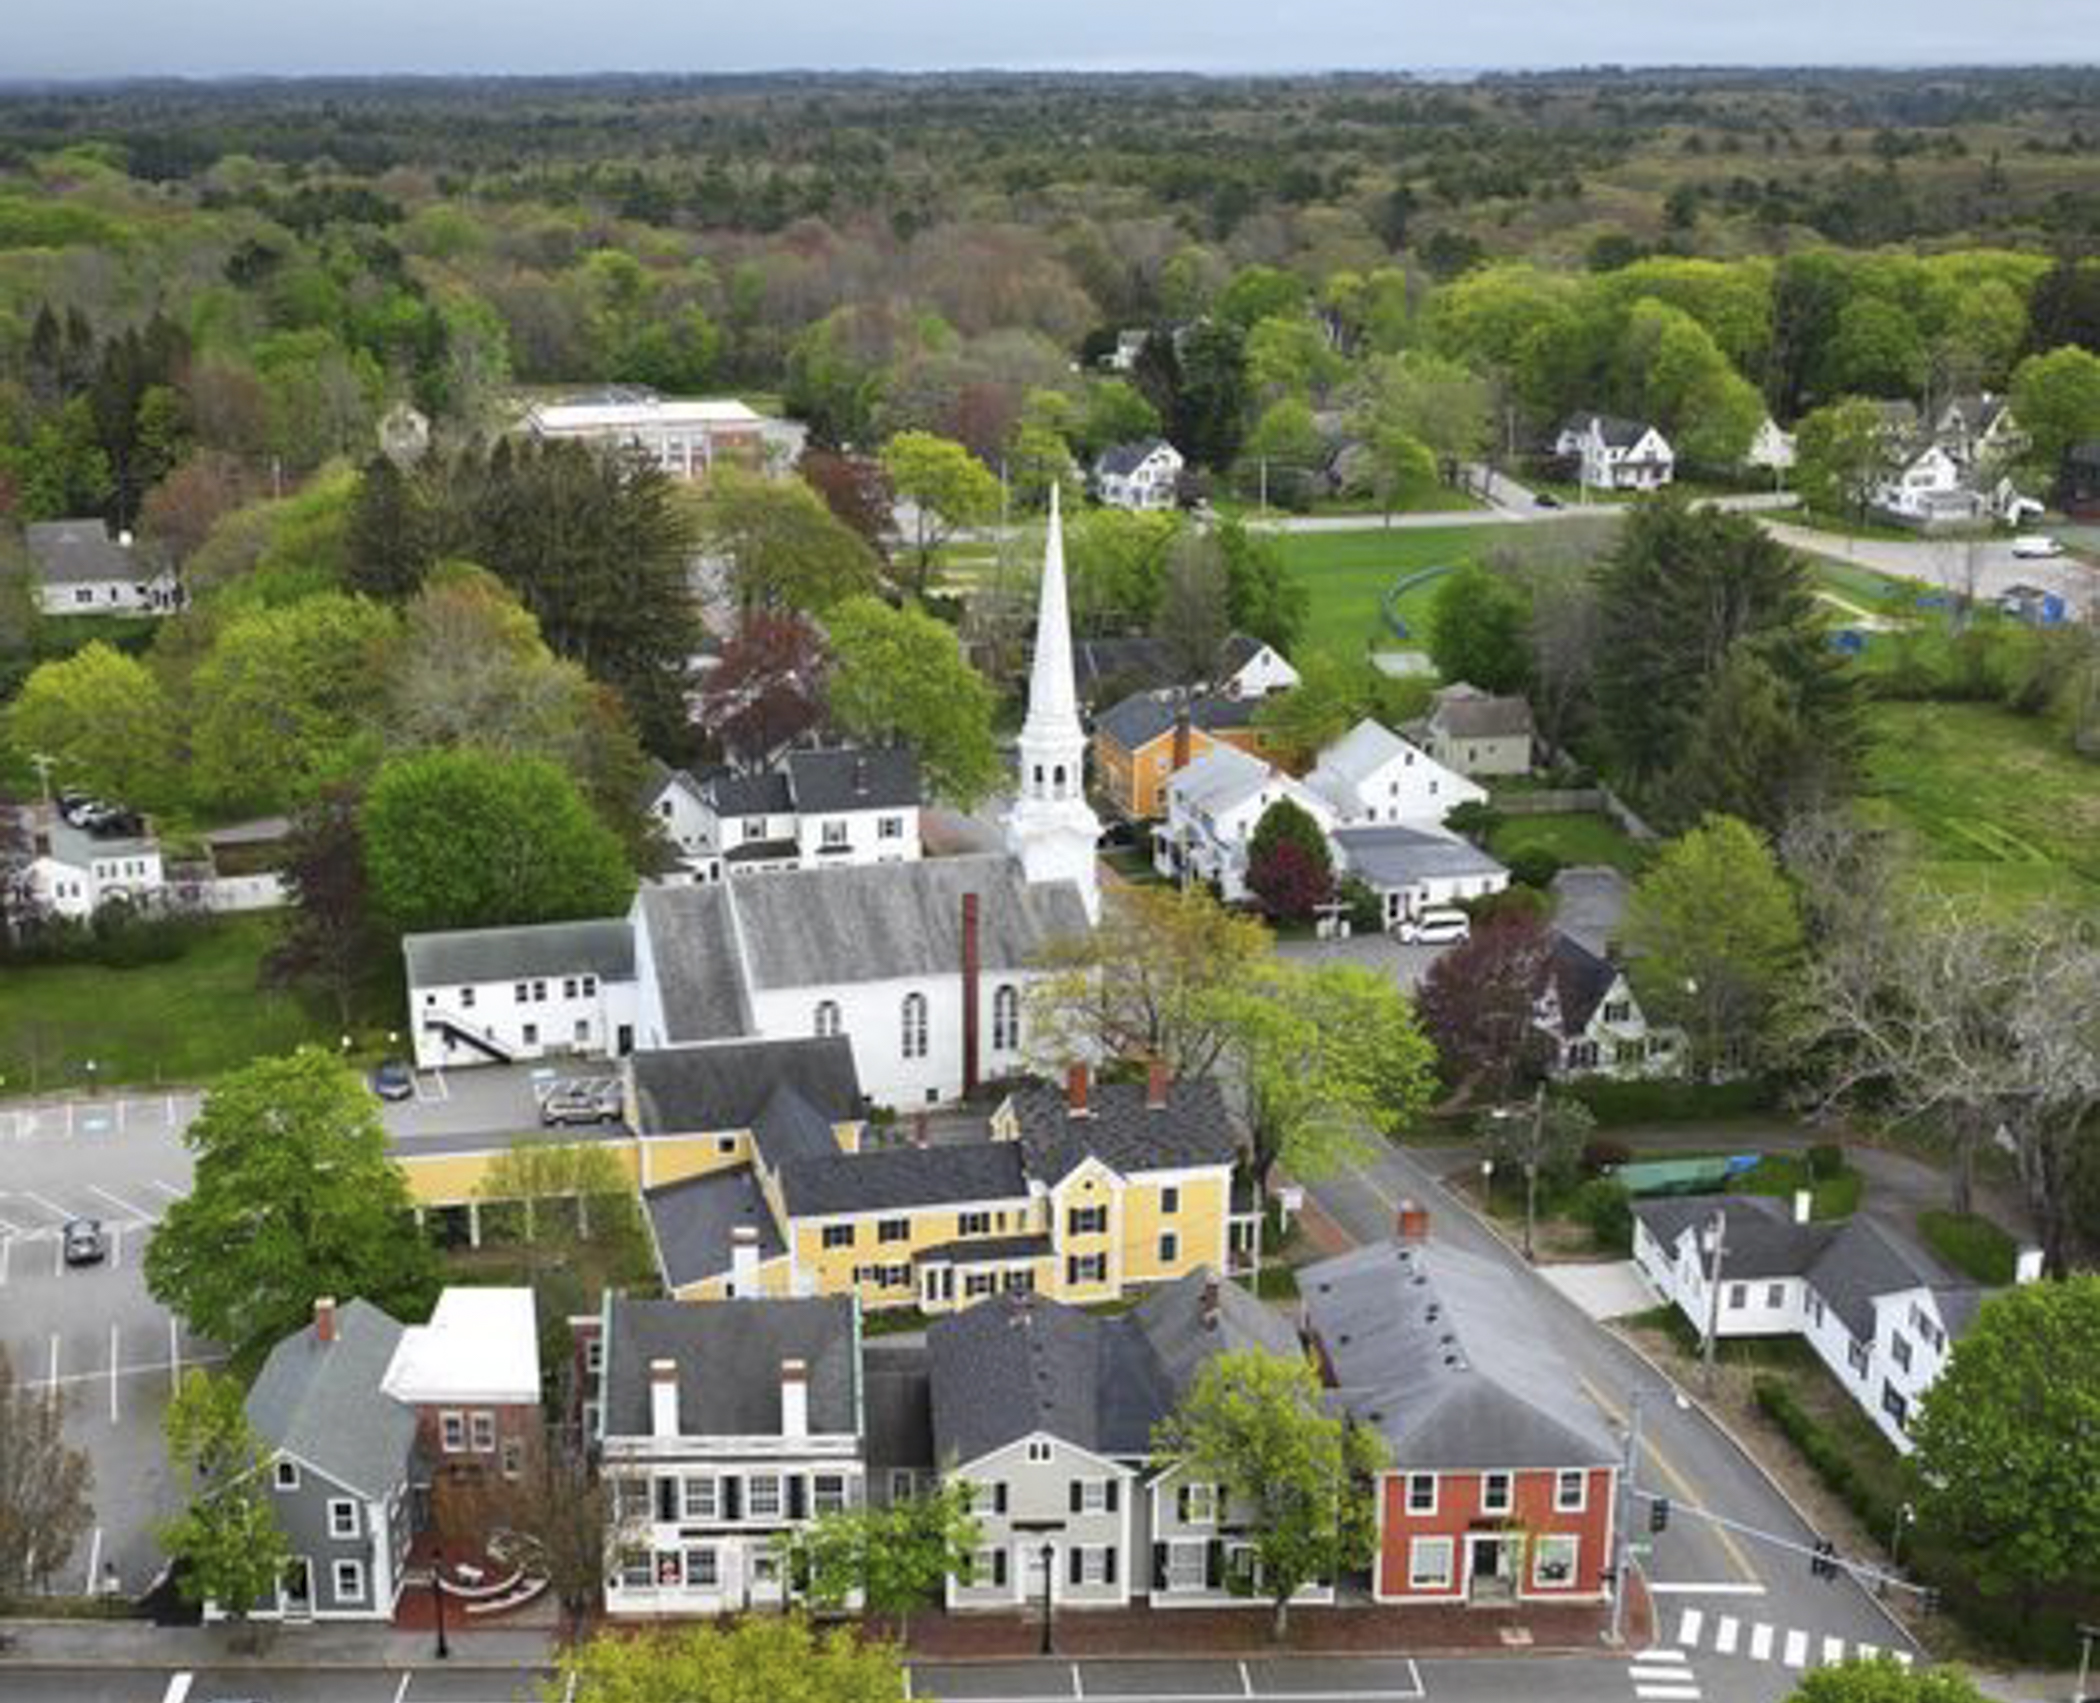
Brick Store Museum block, Kennebunk, Maine
So what’s my connection to the Brick Store Museum? In 2019, my recent topical pieces, including Displaced and the animated film, Liberty and Justice were included in their exhibit “The Art of Cute”. The show, which was curated by the Illustration Institute, included a broad spectrum of art and products that could be considered “cute”, from endearing to edgy. My topical and political work were part of the Meta cute or “beyond” cute category. The museum received such rave reviews about my work that we immediately started planning a larger solo exhibit and here we are!
The Art of Cute at the Brick Store Museum in 2019
Curating a show of this size takes a lot of time and preparation. In addition to figuring out what to include, I’ve spent the past couple of years studying the museum’s floor plan and visualizing how my work could be organized in the galleries.
Since it is a retrospective exhibition, I needed to track down people who’d purchased my work decades ago. My records are spotty, so I don’t know where everything ended up, but I was able to contact several owners who live within a reasonable driving distance who were willing to loan their pictures for the duration of the exhibit. So, in the early spring, I personally picked up artwork from various locations around New England. It was wonderful to meet some owners for the first time and hear how much they’ve enjoyed living with the pieces for 25 to 40 years! After bringing them back home, I removed the artwork from their frames and cleaned the glass, as well as took digital photos. Keeping them protected under UV glass for all these years really made a difference because they were in excellent condition inside.
In addition to early work on loan, the exhibition includes more recent pieces that I’ve purposely not offered for sale, so that they are available to exhibit. One consequence of all this laborious hand stitching, is that it takes forever to accumulate enough work to have a solo show. For instance, I completed just 3 pieces in the past year and a half (Frosty Morning, Mossy Glen and Harvest Time), even though I spent every spare moment working on them. At this stage of my career, I feel that the value of my work lies in its ability to be shared publicly. So that means I’ll be holding onto my recent work for the time being. See a schedule of current and upcoming exhibitions here.
Two weeks ago, Rob and I stuffed a UHaul cargo van with crates and boxes filled with artwork and drove up to Maine to deliver everything to the Museum. We spent a few days helping the staff set up the show, which you can see in photos and videos further ahead in this post. We left before the installation was fully completed, so we’ll take more pictures when we go back for the opening event on June 25th.
WHAT A RELIEF: The Art of Salley Mavor Brick Store Museum 117 Main St., Kennebunk, Maine June 7th thru Sept. 11th Meet the Artist on June 25th, 1 to 3 PM ZOOM Talk, Aug, 25, 2 PM, Register HERE
Once the artwork was unpacked, the museum staff got to work installing the show. Here’s Leanne Hayden, the collections and exhibition manager hanging Noah’s Ark and a group of ornaments over the mantelpiece in the first gallery. I made the ornaments about 10 years ago for the Family Trees event at the Concord Museum.
One wall in the center gallery features enlarged photographs of women from my piece, Cover Up. Their faces are blown up to about 12 times the size of the 1″ wooden bead doll heads. I like playing with scale, taking something tiny and making it huge. They certainly demand your attention when you walk into the room.
Cynthia Walker, the museum’s executive director, skillfully hung the prints on the wall with sticky Command strips.
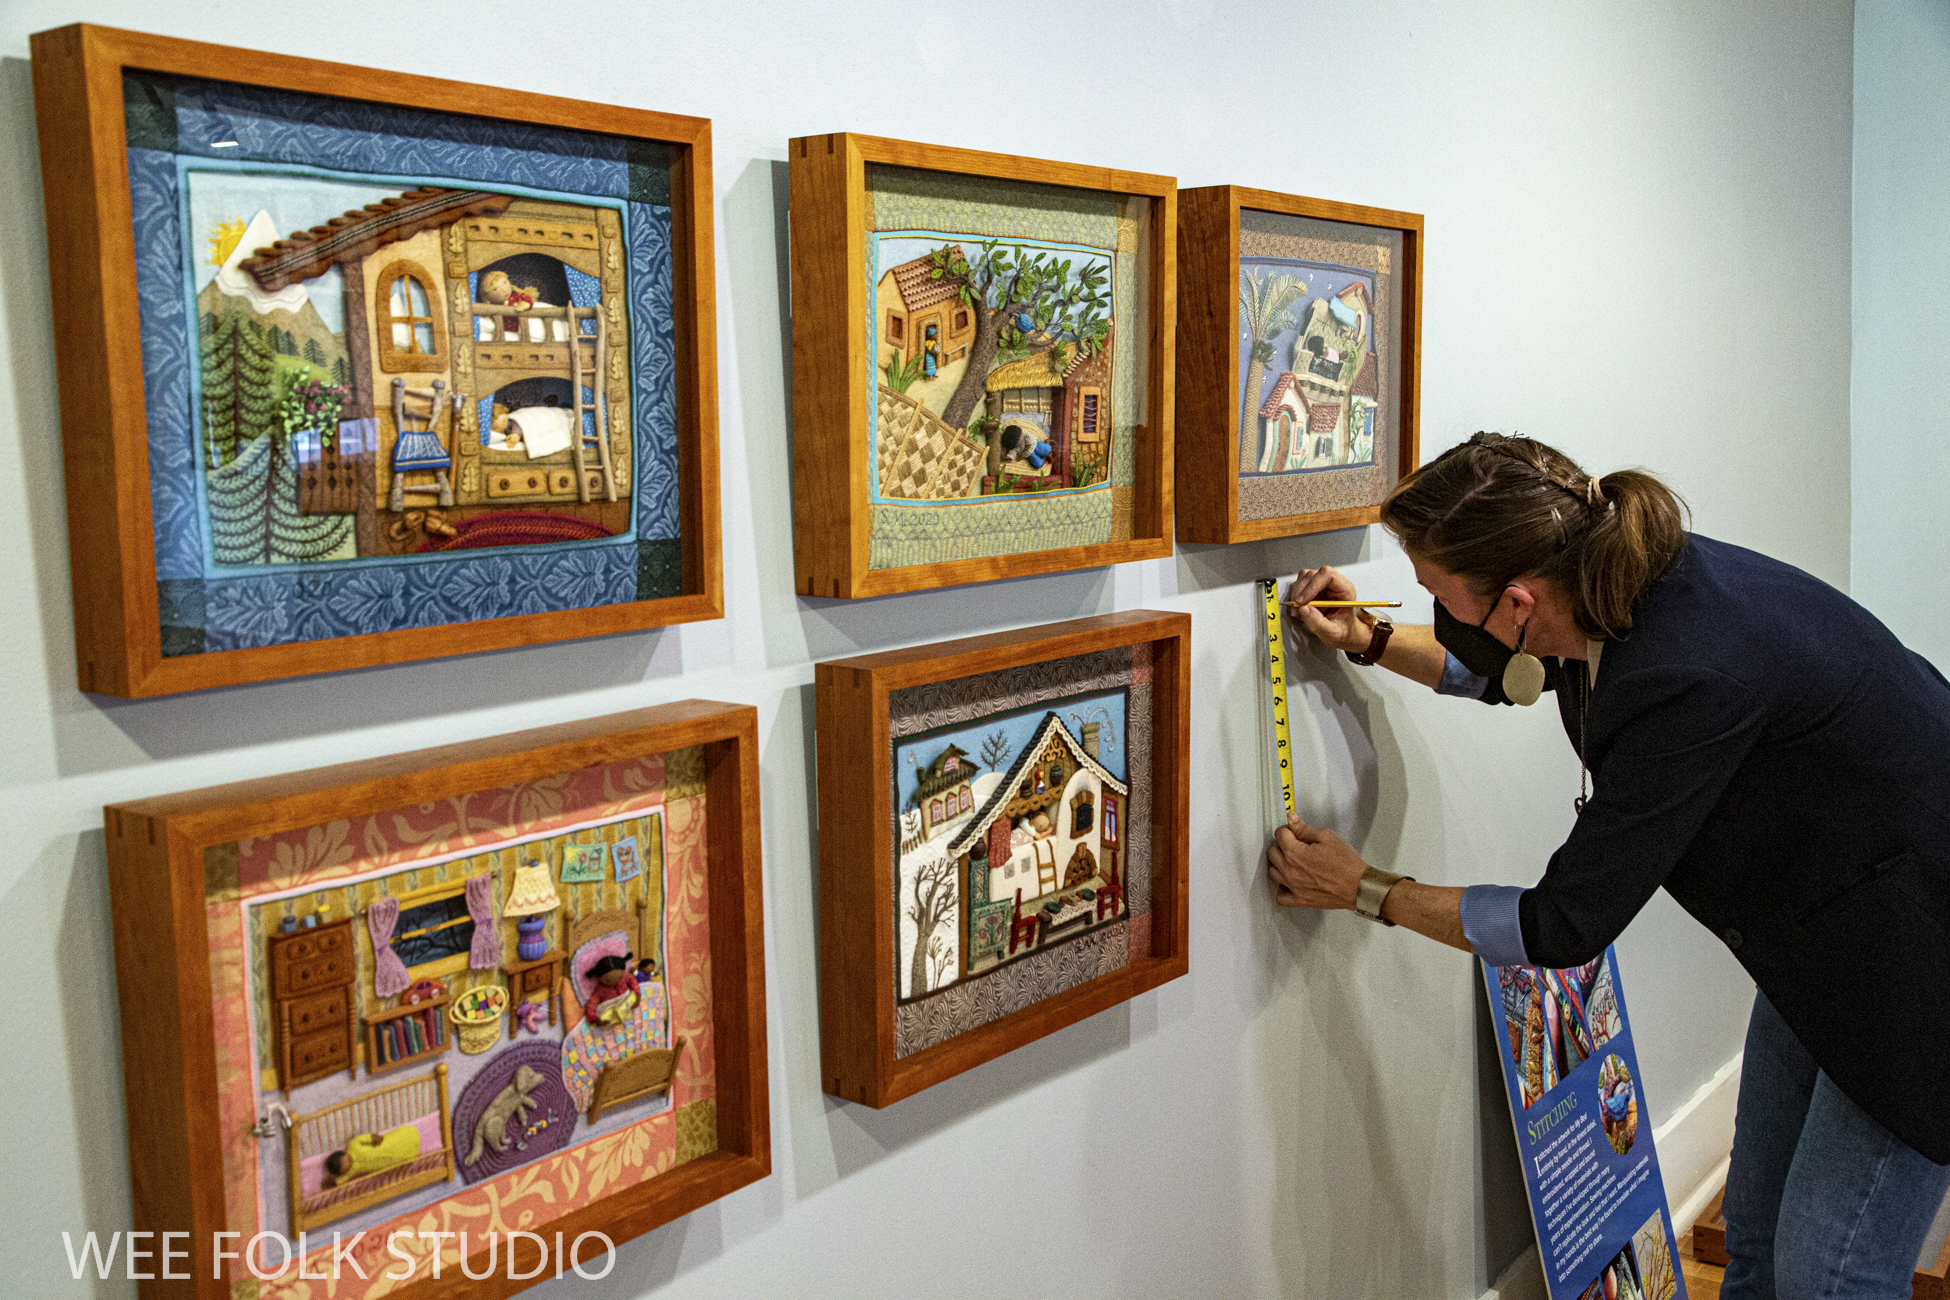
I was so impressed by how quickly everything went up. While I set up sculptural items in display cases, Cynthia and Leanne measured and hung the framed pieces.
Props and characters from the animated film Liberty and Justice.
In this video, I bring you around the room, pointing out what’s on display.
With her baby and dog looking on, Cynthia hung Bedtime Stitches. How impressive is that?
The Bedtime Stitches portion of the exhibit has been touring for the past 2 years and is scheduled at other locations around the US through 2024.
Video tour of Bedtime Stitches
It’s wonderful to hear that the exhibition is already attracting many visitors from near and far. I look forward to meeting some of you at the opening event on Sat., June 25th from 1 to 3 PM. And for those of you from very far away, we’ll take more photos and share them!
To keep up with new posts, please subscribe to this blog. Your contact info will not be sold or shared. If you’d like to see more frequent photos tracking the projects in my studio, please follow me on Facebook and/or Instagram.



























































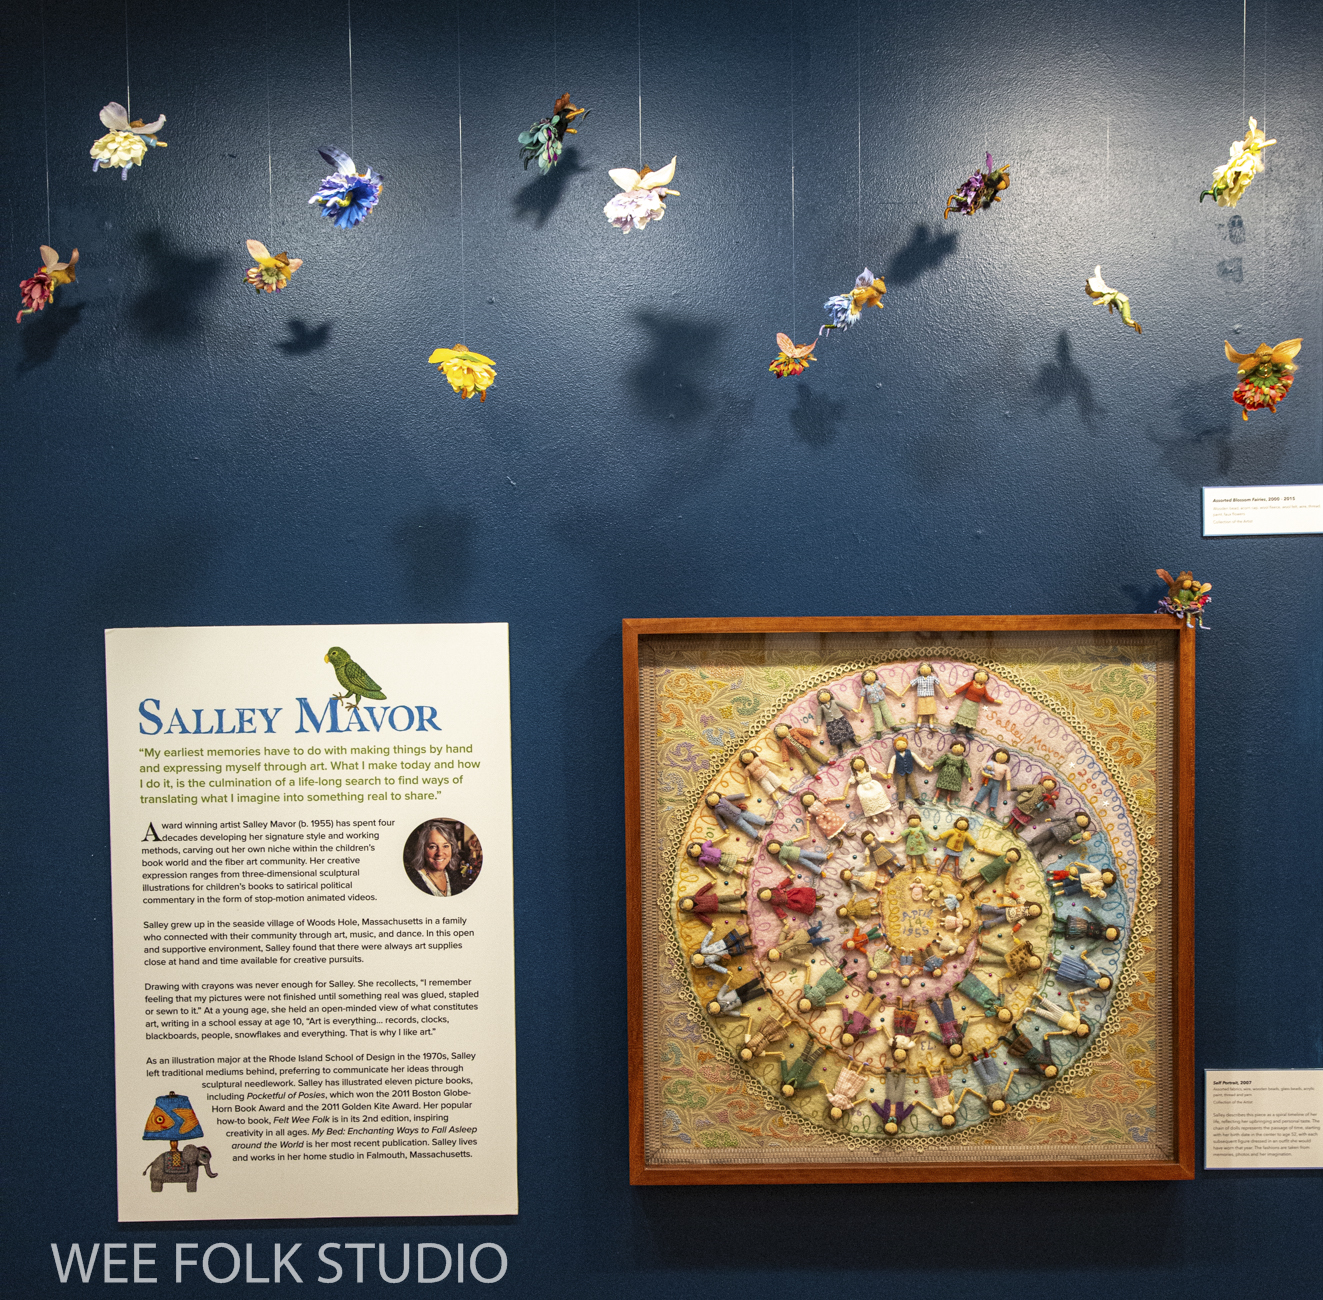


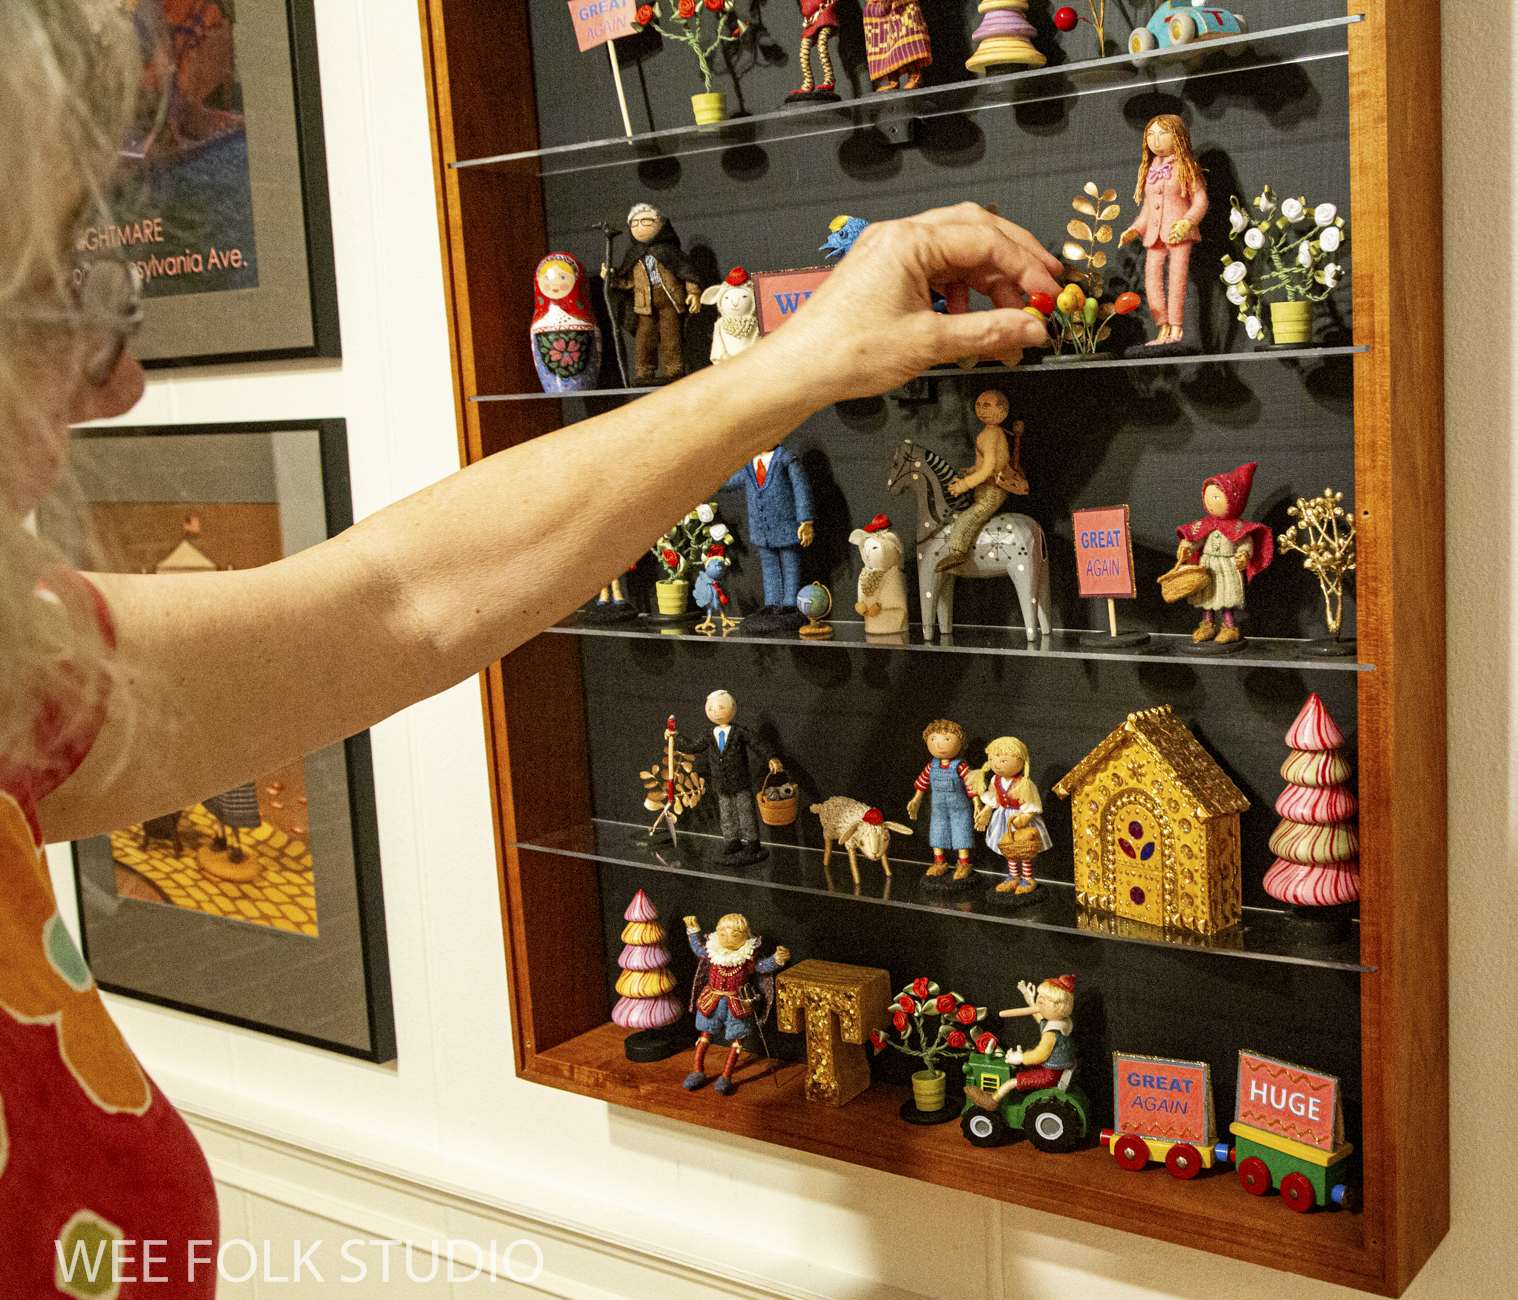


 SALLEY MAVOR