Pocketful of Borders: Old woman who lived in a shoe, etc.

This double page spread from Pocketful of Posies has three rhymes dispersed throughout; There was an old woman who lived under a shoe, Lillies are white and See saw, Margery Daw. Since I’m so busy stitching, I’ll just show pictures of the border making process without description.

Note: See other posts from the Pocketful of Borders series here.

Pocketful of Borders: Humpty Dumpty

Here’s a shot of my work table (ironing board) with a border in progress. It shows the illustration from Pocketful of Posies that includes “Humpty Dumpty”, “Peter picked a peck of pickled peppers” and “Two little dicky birds sitting on a wall”.

There’s lots of foliage and a stone wall build with a combination of stone beads and individually appliqued felt stones. Peter Piper’s hat and basket of peppers are made with thread wrapped and coiled wire.

I had fun using some interesting pieces of driftwood and other found objects.

detail from “Pocketful of Posies” 2010

Note: See other posts from the Pocketful of Borders series here.

Picture frames are finished!

After slaving away for most of the summer, Rob has finished all 51 picture frames for the Pocketful of Posies exhibit and they look beautiful! In my last post about the frames (see here) , the partly made pile was stacked up on his work bench.

Rob cut off the excess from the corner ears on the table saw…

and used a planer to smooth off the surface. 

Here you can see a before and after, with one ear planed and another still bumpy with glue and wood.

Then the frames were sanded with 2 grades of sand paper until they were really smooth.

Then he carried the frames up from the basement into his new workshop and applied Tung oil, which brings out the natural color and wood grain.

To make a good finish, the oil has to be rubbed off after it has soaked in.

Here’s a frame with the inside slats. I love the way cherry looks with the oil.

But they are not finished yet! The last step is rubbing on paste wax to make a satiny finish.

Now, they are lying in wait for my artwork. The UV Plexiglas will be arriving soon and we’ll start assembling the pictures!

Pocketful of Borders: my black hen

This illustration from Pocketful of Posies is for the rhyme, Hickety, pickety, my black hen, she lays eggs for gentlemen. My descriptions will be brief, as I’m working hard to finish all of the borders for the upcoming traveling show. The colors vary in this series of photos becuase I took them at different times of day, under different lighting conditions. The color green is famously difficult to reproduce anyways. Here’s the fabric relief piece sewn to foam core board, before a border was attached. Yes, I made the egg basket, by wrapping and coiling wire around and around. Pretty obsessive, but necessary!

The arched hen-house is made with bittersweet vine, with driftwood floor boards.

The border need a little punch, so I sewed some purple perle cotton around the outside edges.

The embroidered leaves could also be seen as feathers.

The hen’s nest is made from some curly excelsior packing material and her feathers are highlighted with purple metallic thread.

This coloring is more true to the original piece.

Note: See other posts from the Pocketful of Borders series here.

Pocketful of Borders: Donkey & Elsie Marley

I’m making good progress on the borders for the Pocketful of Posies Exhibit and thought I’d show one from earlier this summer. This double page spread illustrates the nursery rhymes “Donkey, donkey, old and gray…” and “Elsie Marley has grown so fine, she won’t get up to feed the swine…”.

UPDATE: Autographed copies of Pocketful of Posies: A Treasury of Nursery Rhymes are available in my Etsy Shop here.

The hungry swine were fun to make! The stones on the path were made with chain stitches in a tight spiral.

See a detail shot of the driftwood roofs and tree in an earlier post here.

Note: See other posts from the Pocketful of Borders series here.

To keep up with new posts, please subscribe to this blog (top right column on the home page). Your contact info will not be sold or shared. If you’d like to see more frequent photos tracking the projects in my studio, please follow me on Facebook and/or Instagram

Pocketful of Borders: Ring around the Rosie

The one woman border stitching factory is running double shifts to get the illustrations finished and framed in time for my Pocketful of Posies traveling exhibit, which you can read about here.  This one is from the page for the rhyme “Ring around the rosie”. The border turned out to be much more involved than I planned and took several days to complete. From now on, I can’t afford to play around, trying out different approaches for each piece. It’s time to get serious. My goal is to complete one a day, so I’ll have all 51 ready by mid Sept., when we hang the show.

I picked out some upholstery fabric for the background and then chose the felt border colors.

I like to lay out different skeins of pima cotton from the Caron Collection next to the artwork and pick a color scheme that matches.

Then I edge the border pieces with a blanket stitch.

There’s a lot of open green space around the dancing figures in this illustration, so I thought that the border could take some embellishment. I did a little sketch of some leafy curled stems and embroidered them.

One thing led to the next and before I knew it, I was filling the leaves with orange floss and scattering french knots around like confetti.

When I put the finished border piece next to the artwork, it looked too busy and the many colors detracted from the circle of characters. It was clear to me that the first try didn’t look right and instead of wasting time trying to make it work, I quickly moved on. I put it aside and decided to make another design that was still embellished, but was limited to green chain stitching.

They were true doodles, done free hand, with every border section different. That way, I don’t have to plan it out and repeat exactly the same design for all 4 side pieces. Also, without a set pattern, the border more accurately reflects the lighthearted and uninhibited mood of the characters.

I then embroidered the date and my initials on the bottom corner pieces.

And continued doodling…

After sewing the side and corner pieces together to make a square border, I thought that it needed a little lift off the surface, so I added some wire around the outside edge.

Later, after I’d sewn the wire all around, I realized that I should cut and adjust the wire to conform to the curves of the corner pieces.

I then covered  the wire by wrapping it with variegated embroidery floss.

And to help define the form, I slipped some wire through the stitches on the backside of the inside edge, like a underwire bra.

Now, I sewed the whole wire supported border to the artwork and bent waves into the outside scalloped edge.

I’m half way through making the borders, with about 25 to go! I’ll try to remember to pause and take pictures as I go, but know some steps won’t be documented because I’m so intent on finishing this project.

Note: See other posts from the Pocketful of Borders series here.

Picture Frame update

My husband Rob has been spending several weeks in his basement workshop making picture frames this summer. He has made frames for my fabric relief artwork for 30 years and this is the biggest job yet. The frames will look like this, cherry wood, shadow box style with glass.

He is making 51 frames for my Pocketful of Posies exhibit this September and has made good progress. I thought I’d show you how far he’s come!

He first cuts the lengths from cherry boards.

Then he rips the pieces on the table saw to get an L shape.

Then he cuts 45 degree angles and glues the corners together. 

He cuts 1/4 inch thick slats that will be placed inside the frame to keep the glass separate from the artwork.

This a special design that Rob figured out years ago to solve the problem of how to display  and protect my relief artwork.

For extra strength in the corners, he cuts across the corners and adds slivers of wood.

Here he is wiping off excess glue.

He calculated that cutting and gluing the corners takes 1/2 hours per frame, so just that step took about 25 hours for all the frames. 

Now the corners need to be trimmed and sanded. I’ll show the final steps when they’re all done. Thanks, Honey!

Pocketful of Borders: Jack and Jill

detail from “Pocketful of Posies” 2010

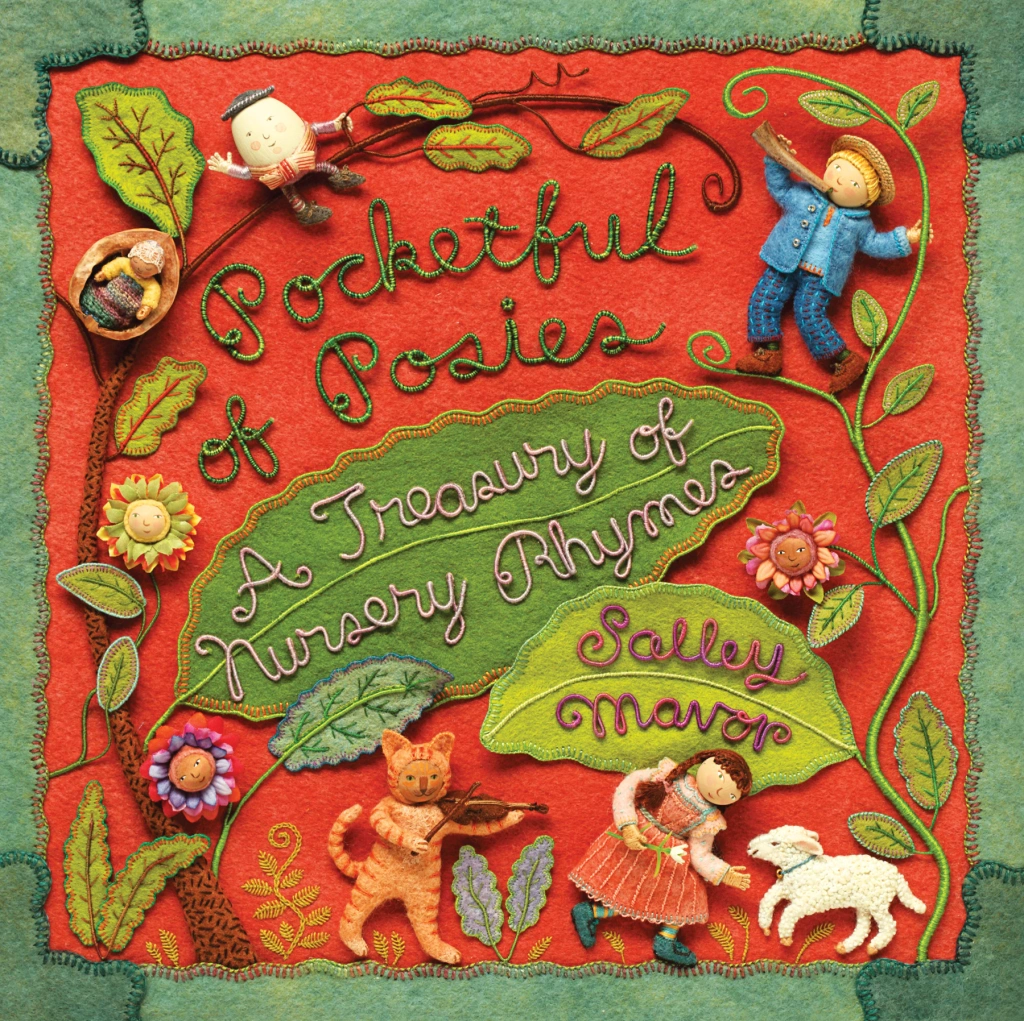
I’ve just finished adding a border to the double page illustration for Jack and Jill, which is part of my upcoming book, Pocketful of Posies. For those of you who are new to this blog, I am preparing 51 illustrations for framing, so that they can be displayed in a traveling show.

The artwork was previously mounted on foam core board for photography purposes. Now, it will be dressed up and given a new border and background. I stretched upholstery fabric and picked out felt colors that complimented and contrasted with the blue and green scene.

I looked through my basket of Watercolour pima cotton threads from the Caron Collection.

And used bright blue and variegated light pastel thread for the blanket stitch edging along the felt border pieces.

I then chain stitched my initials and the date on the bottom corner pieces with variegated embroidery floss. I’m enjoying the mindless doodling of the chain stitching.

The outside blanket stitch and the embroidery floss curls pick up colors from the illustration.

Then the border pieces are sewn to the inside artwork and onto the stretched back ground.

Now, it is ready for framing!

Note: See other posts from the Pocketful of Borders series here.

Pocketful of Borders: In spring

detail from "In Spring" Pocketful of Posies 2010

The pressure is mounting to get these borders finished by September for the Pocketful of Posies show. I’ve completed four in the past week, including this one of a seasons rhyme, which begins “In spring I look gay decked in comely array”. 


It took several tries to get the background fabric and border colors right. I can’t explain why one shade or pattern works better, but it helps to compare and narrow it down until you’re satisfied. 


I chose a bright red floss for my initials and the date embroidery on the bottom corners. The photo doesn’t show the subtle variegation in the red thread. I have my eye out for variegated thread to purchase and find myself reaching for it first. It adds a complexity that mirrors nature better than solid colors. 


I had just finished writing the post about lettering and was inspired to add some words to this one. So, instead of doodling along the border, I wrote out the names of the seasons on the four side sections. 


Sometimes I write on the felt with a pencil and then embroider over it, but it can show through and look messy. For the seasons, I wrote out the words on a piece of paper to get the spacing and then eye balled the stitching. 


I made sure there were some doodles in the corners and sewed it all together. 


This piece is relatively shallow compared to the other illustrations from the book. To get an idea of scale, the birds are under 1 inch long. 


Note: See other posts from the Pocketful of Borders series here.

Pocketful of Borders: Hey, Diddle, Diddle!

board book version

The next border  to finish up for Pocketful of Posies: A Traveling Exhibit  is the illustration for the rhyme, “Hey, Diddle, Diddle!”. The new book includes all of the rhymes from my board book series, but they are represented by new illustrations. I really liked compressing the scene into one image, instead of stringing out the action over several pages. Most of  the main characters from “Hey, Diddle, Diddle!” are similar to the ones in my board book version, with the exception of the cat, which is made in a different style. The plate is made from polymer clay and the spoon is a doll house miniature.   

detail from " Pocketful of Posies" Houghton Mifflin 2010

cat from "Pocketful of Posies"

The new book, Pocketful of Posies: A Treasury of Nursery Rhymes includes many cats made in my new Halloween costume style. The head is a wooden bead, with face painting and a felt hood with ears attached. The cat’s paws and chest are whitened with acrylic paint. The fiddle is felt, with a thread-wrapped wire neck and bow. The illustration’s existing brown border was wide enough to cut in a wavy pattern, so I didn’t add another felt border. After several tries with different colors, I chose a blue pima cotton for the blanket stitched edging.   


I then embroidered my initials and the date with some variegated dark purple raw silk thread. It called out for embellishment, so I started doodling along the border with light blue raw silk thread.  


The light blue line lacked contrast, so I outlined it with a single strand of orange embroidery floss.   


For the corners, I added  spirals and unintentionally doodled a pattern in the Celtic style.  After outlining a few sections, I decided that the orange floss attracted too much attention, so I ripped it all out. That’s what is so great about stitching, you can change your mind mid stream. Borders, like any kind of framing, should compliment the artwork, not compete.  


I thought that a little height and firmness would perk up the border, so I added 32 gauge florist’s wire to the outside edge.  


I then covered the wire with 2-ply orange/red variegated embroidery floss.  


At this point, I was glad that I’d removed the orange outline around the doodles and saved the color for the outside edge, which defined the border against the upholstery fabric background.  


I bent the wavy wire so that it lifted up the outside edge.  


Here is the finished “Hey, Diddle, Diddle!” piece, ready to frame for the traveling exhibit of original art.  


My husband, Rob, has been making shadow box style frames in the basement. He’s doing a beautiful job and the 51 cherry wood frames are about half way done. We are both making progress toward the Sept. deadline for the first show in Falmouth.

Note: See other posts from the Pocketful of Borders series here.