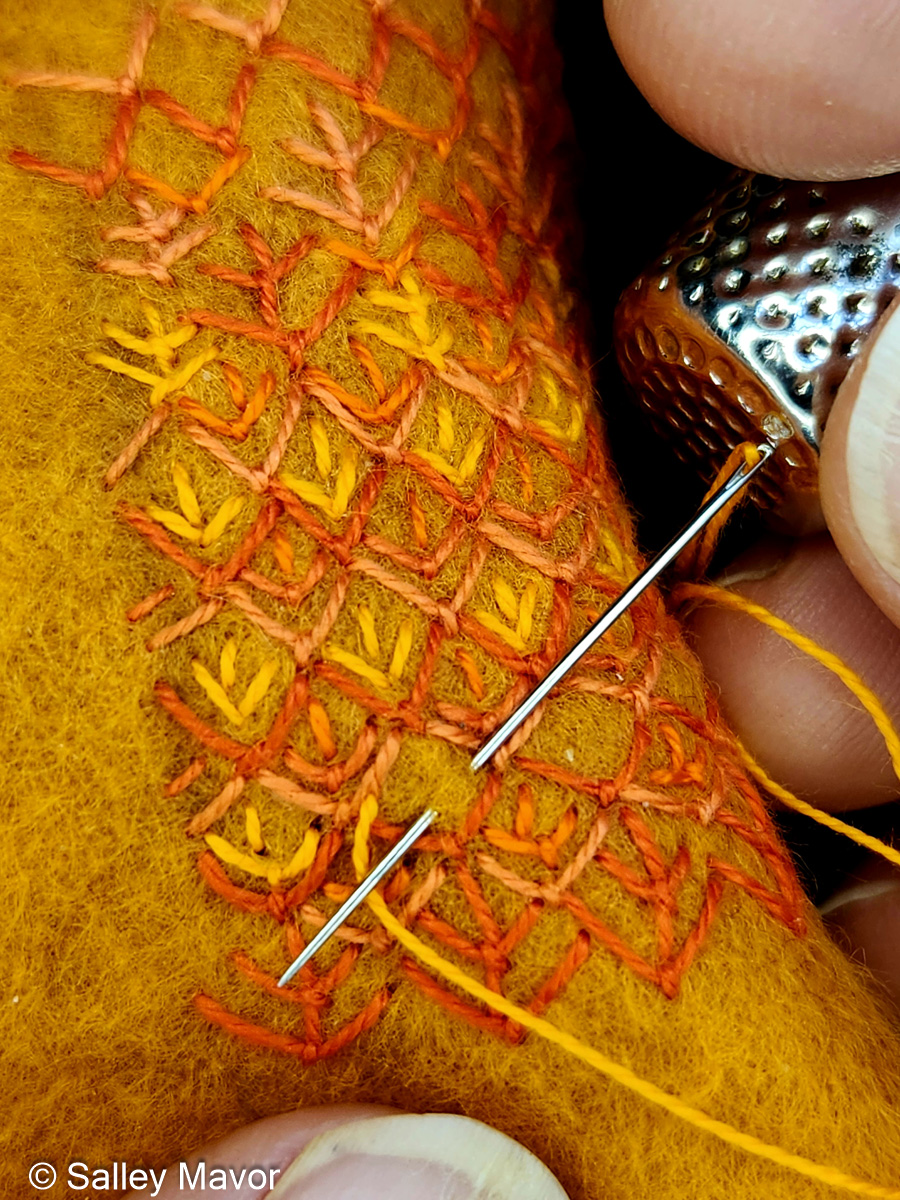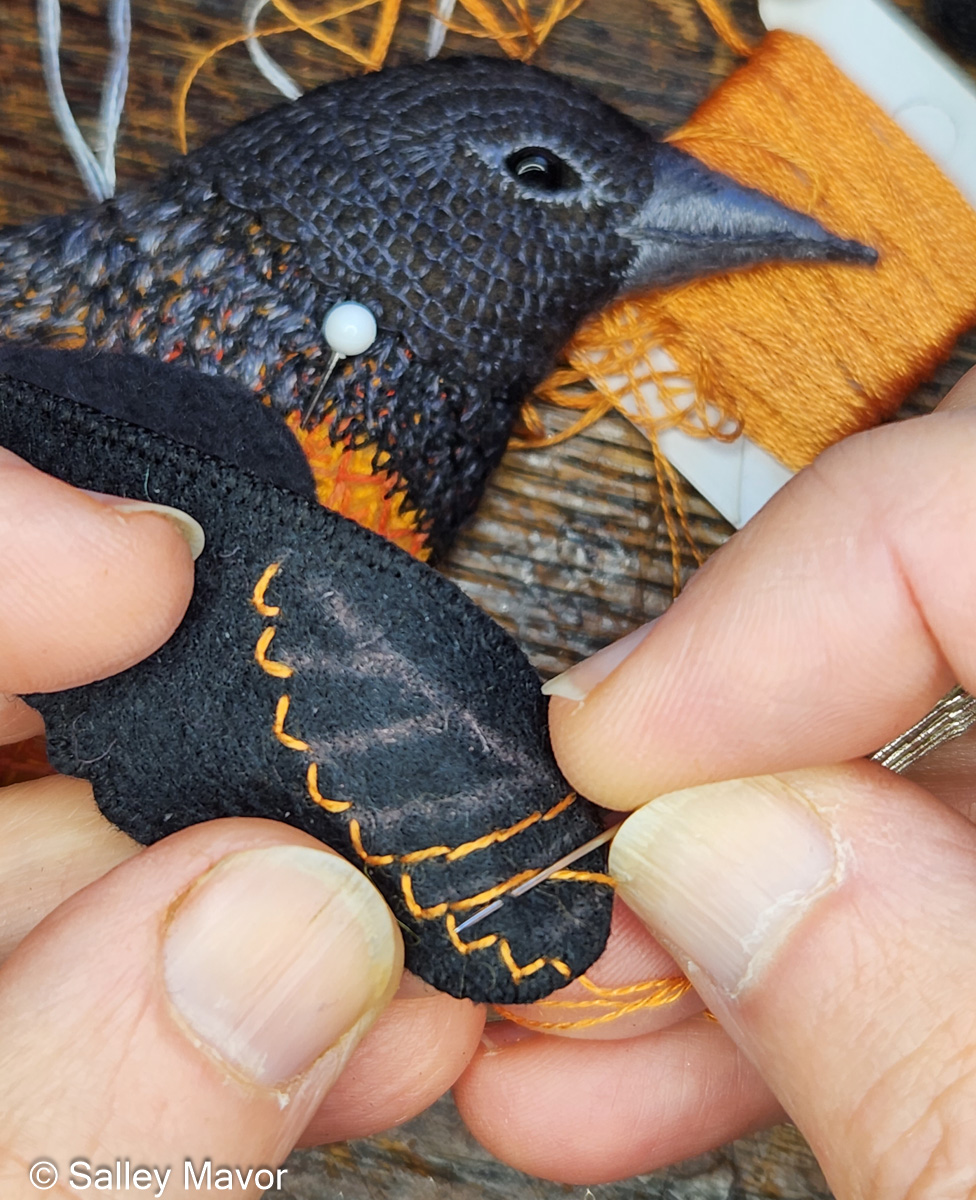
Hendrix Baby Banner

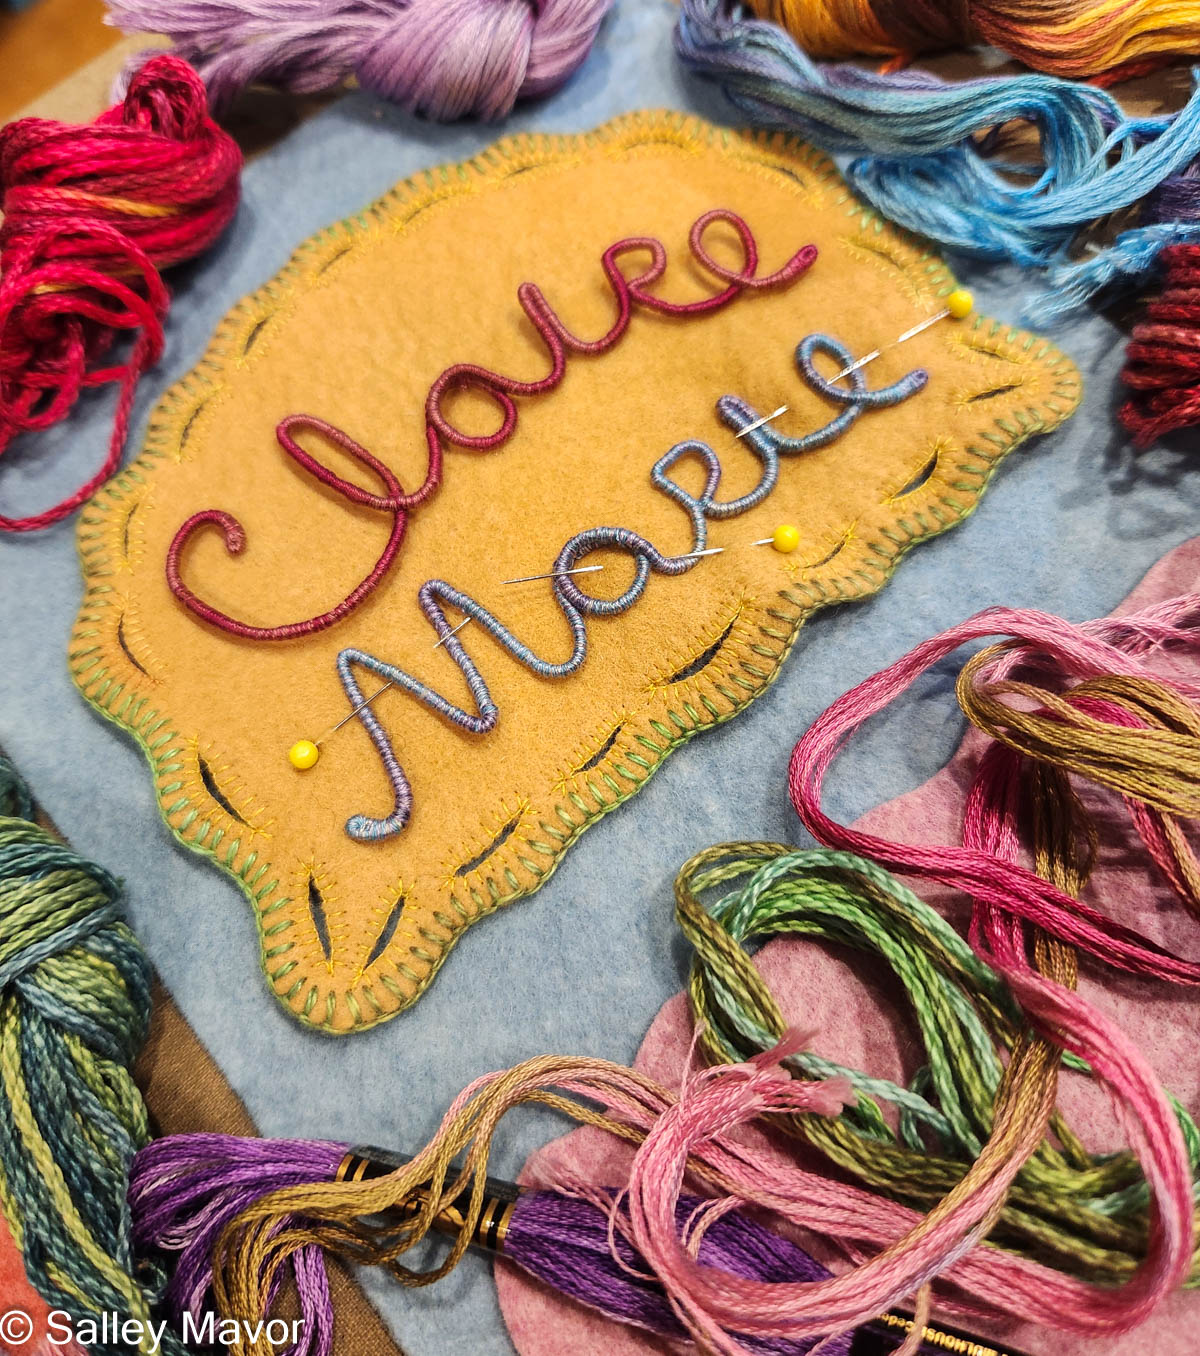
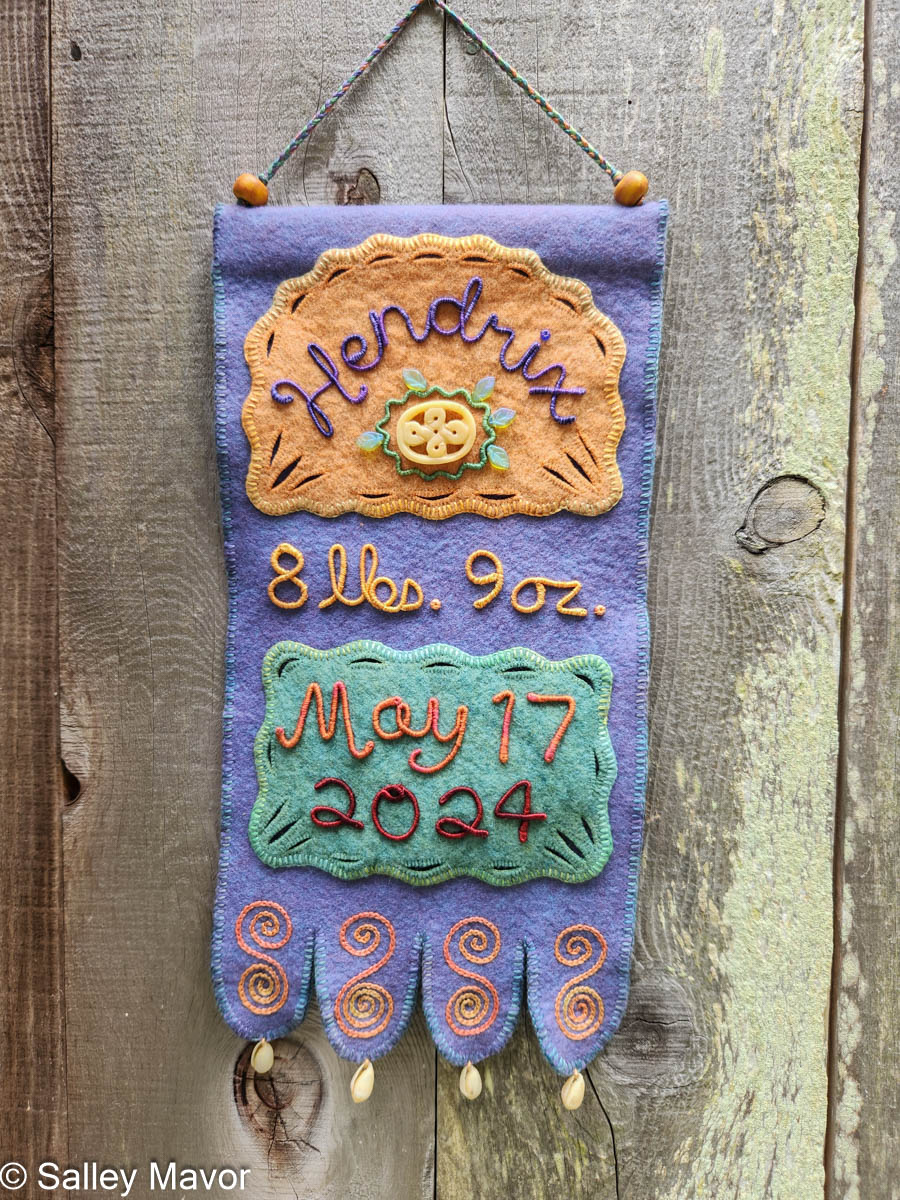
I’m delighted to share the baby banner I made for Hendrix—Henny for short—who is celebrating his second birthday today. If you’ve followed this blog for a while, you may already be familiar with these felt banners, which have become my go-to gifts for friends and family. You can browse posts about this banner and others in the archives here.
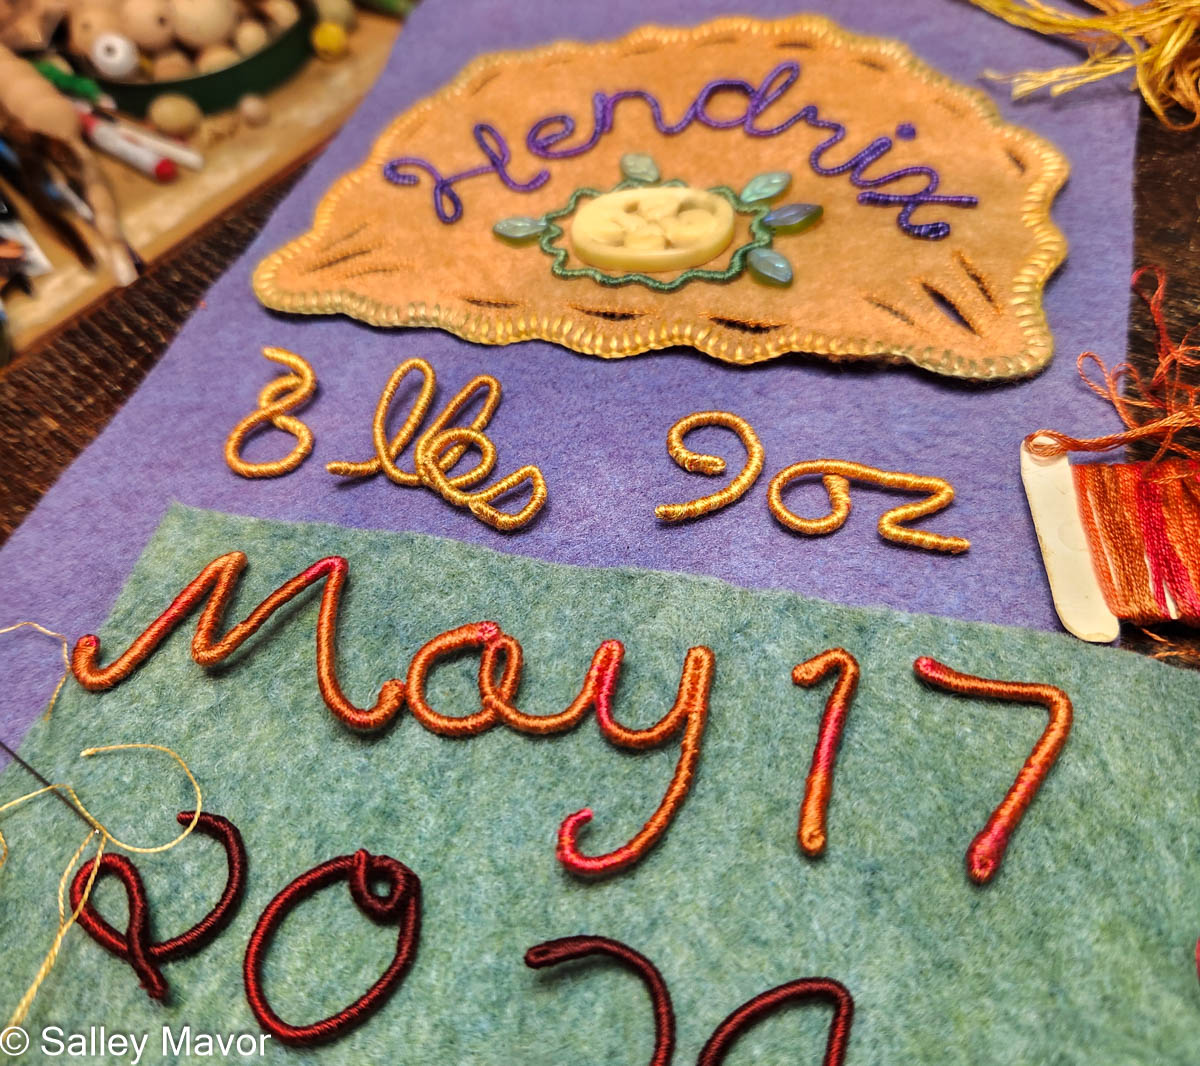
A BANNER FOR HENDRIX
In today’s post, I’m sharing a behind-the-scenes look at how this banner came together, with photos, videos, and commentary. I made the banner for Hendrix shortly after he was born in 2024. His parents, Sam and Louisa, are dear friends, and I also had the pleasure of creating their wedding cake topper, which you can see here.
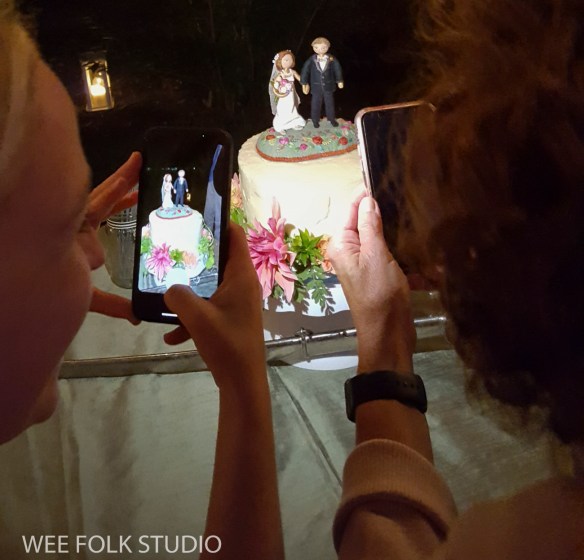
Hendrix’s parents, Sam and Louisa’s wedding cake topper

STITCH MINUTE VIDEO
The following video offers a brief overview of the banner-making process, with close-up views of wrapping, stitching, and embellishing. For a closer look at the finer technical details, continue reading for additional videos later in this post that explore some steps in more depth.

WRAPPING WIRE LETTERS
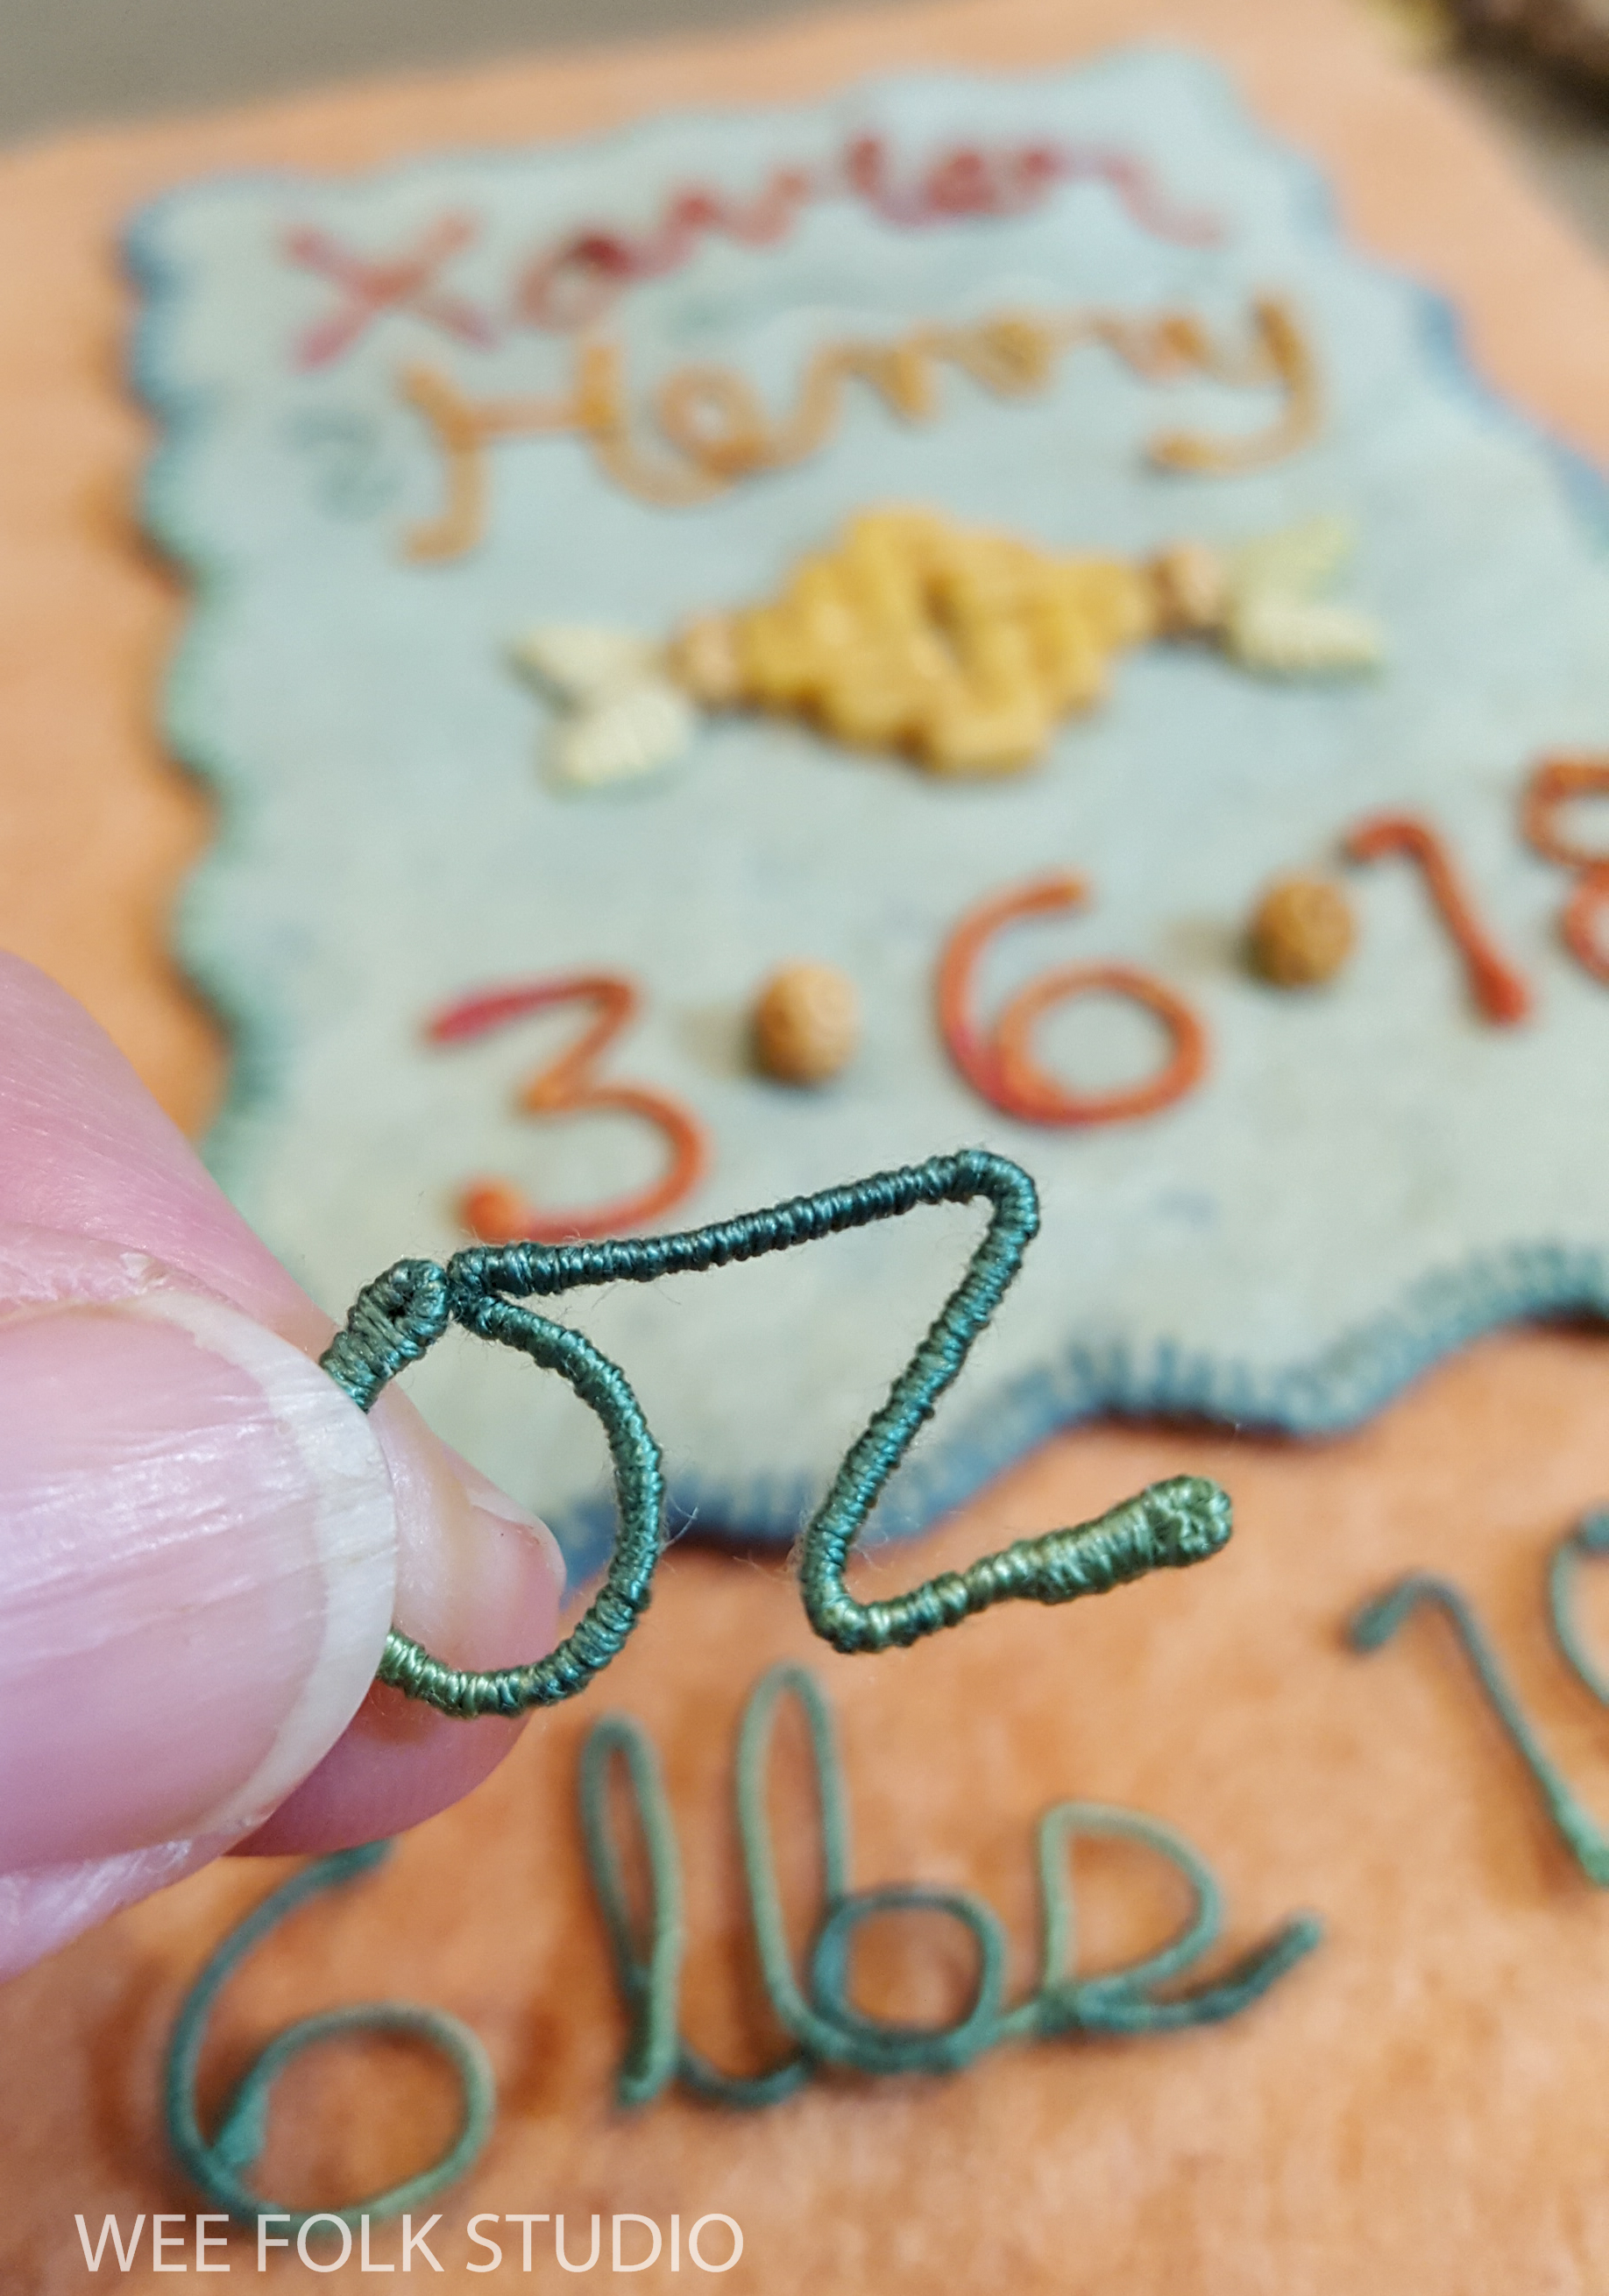
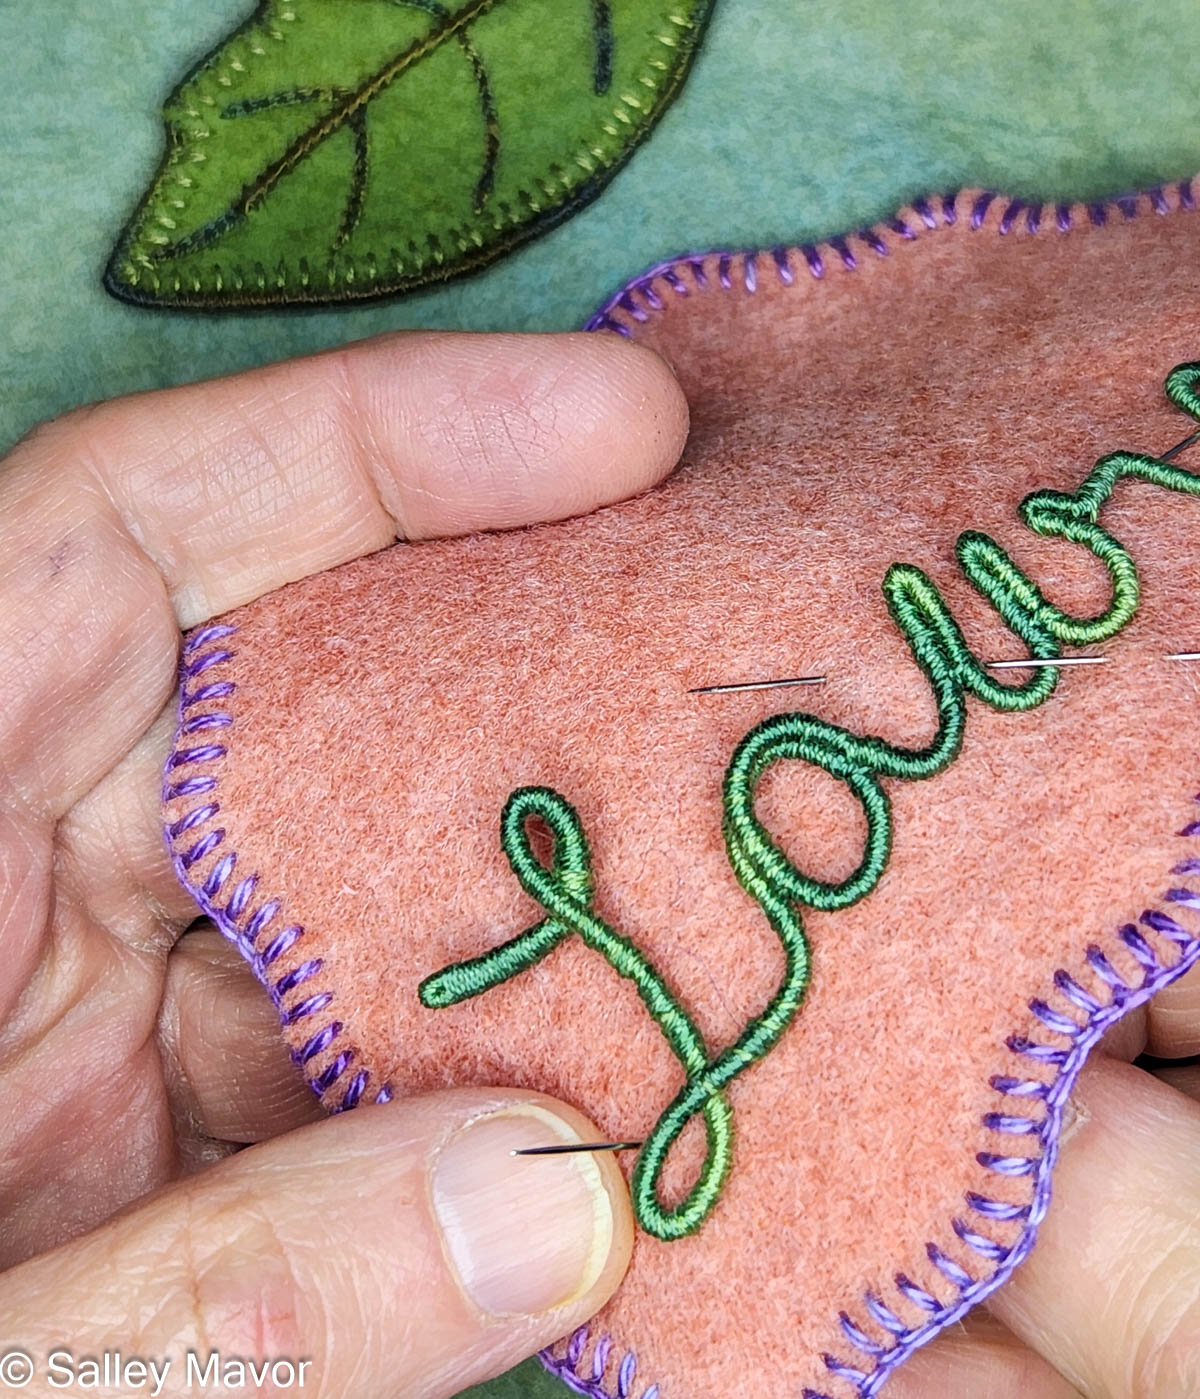
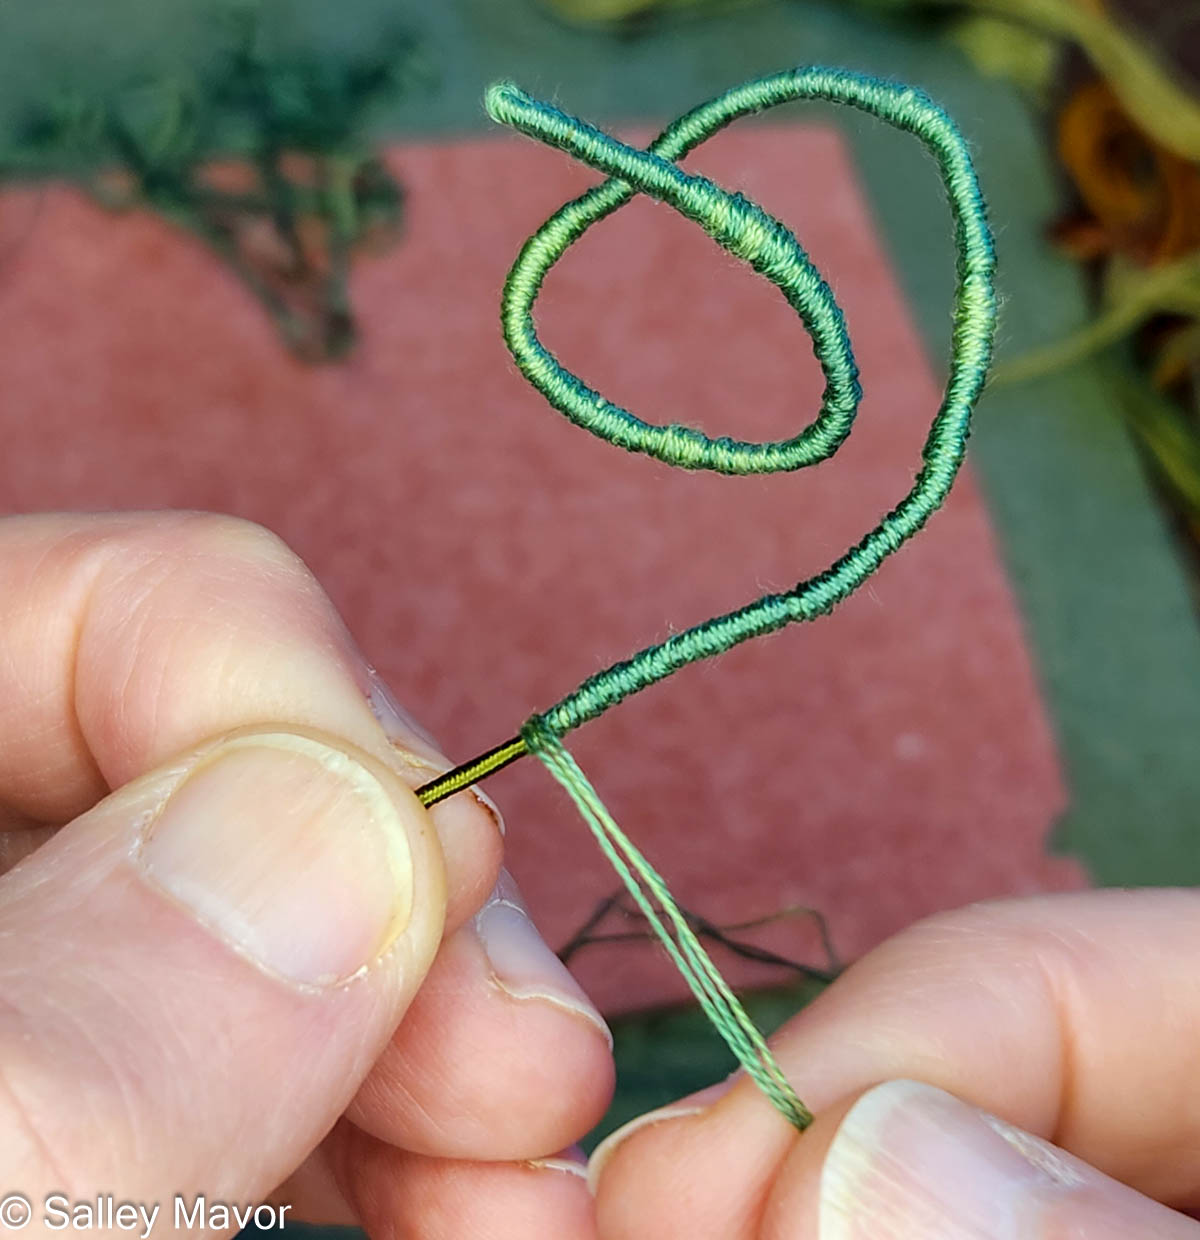
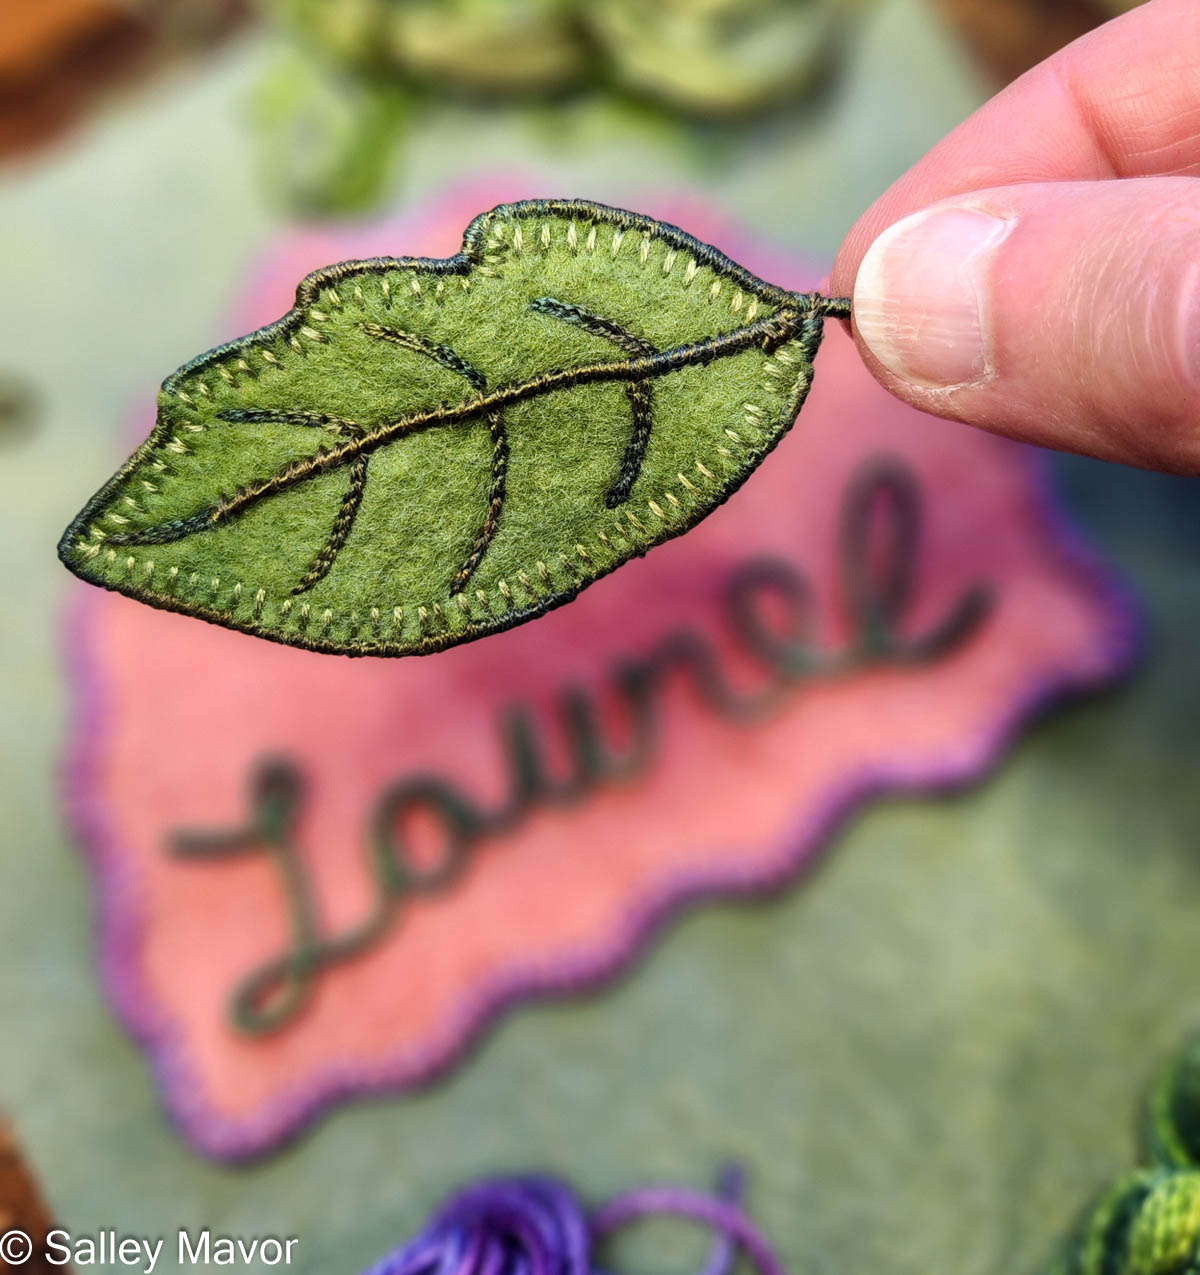
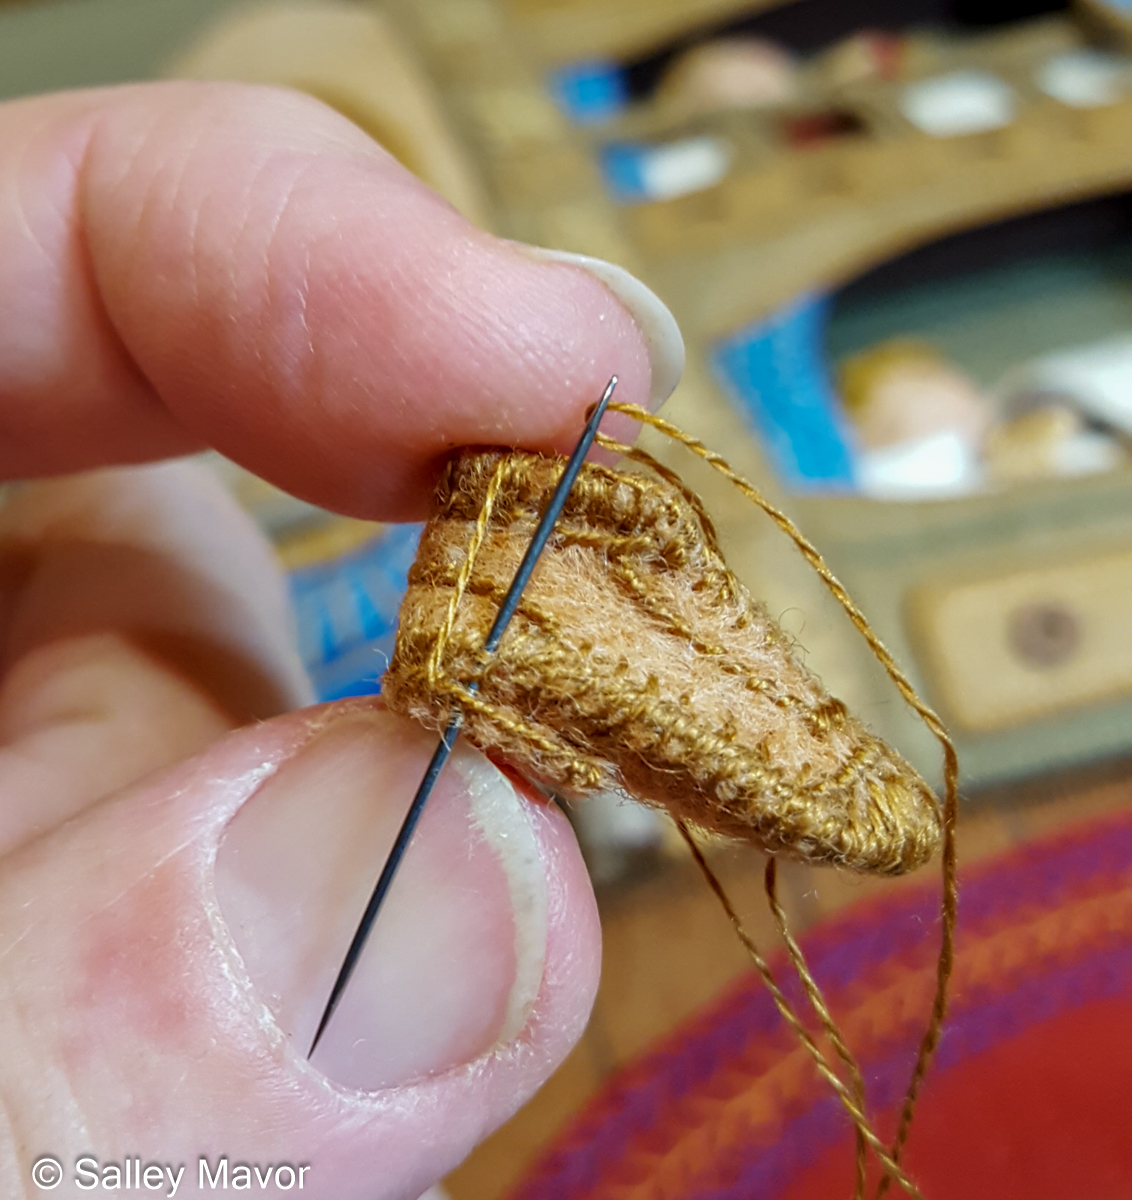
After choosing a color scheme and picking out pieces of felt and thread, I wrote out Hendrix’s name in cursive handwriting with a pencil on paper. I then wrapped the length of DMC memory thread, a flexible wire, with three strands of variegated embroidery floss. Using the sketch as a template, I bent the wire to form his name and stitched the letters together where they touched.
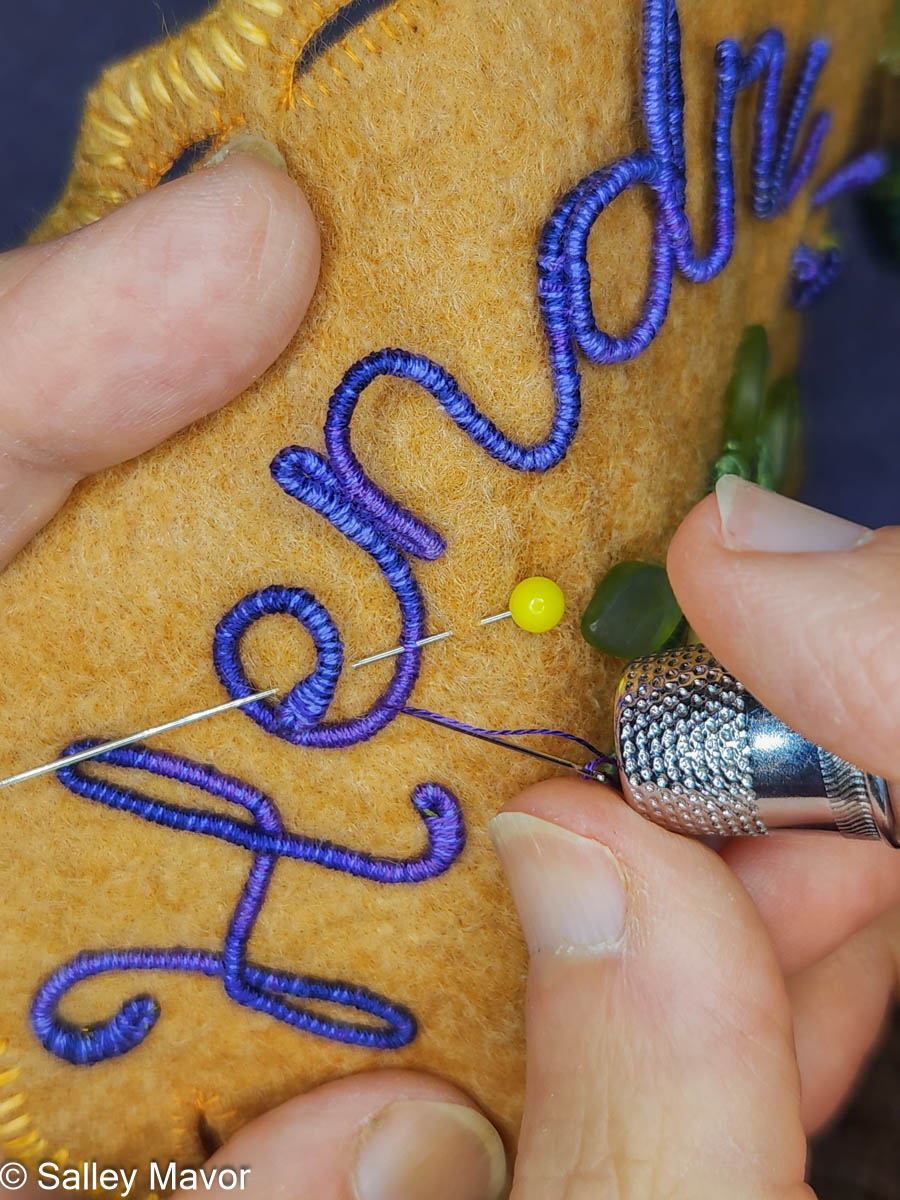
In the following video, I demonstrate how to wrap DMC memory thread with embroidery floss. For these banners, I typically use variegated floss instead of solid colors because the shifting shades give the letters a more lively, natural look. As you’ll see, the process is slow and methodical, and wrapping the wire smoothly and evenly takes practice—so be patient.

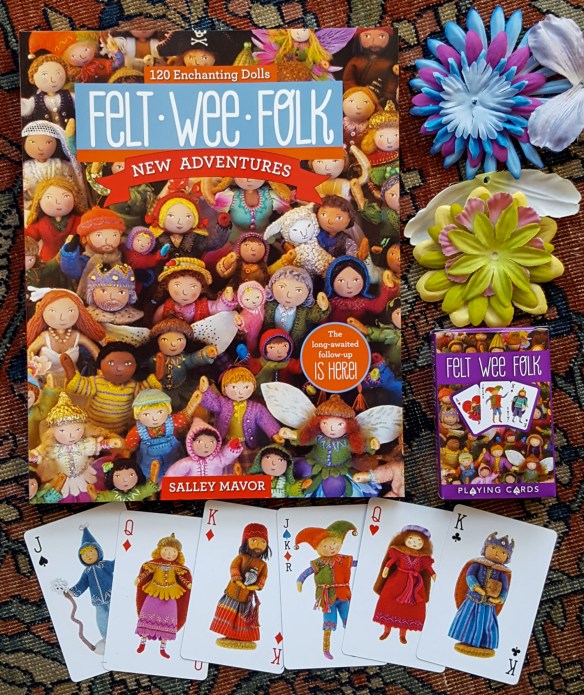
The wire ends are bent over and wrapped so that no raw thread ends are left exposed. One advantage of memory thread is that the coating of fibrous material is easier to grip than slippery metal wire. If you’ve learned to wrap pipe cleaner arms and legs for the wee folk dolls in my how-to book, Felt Wee Folk, you already have a helpful head start with this technique.
WRAPPING THE WIRE WREATH
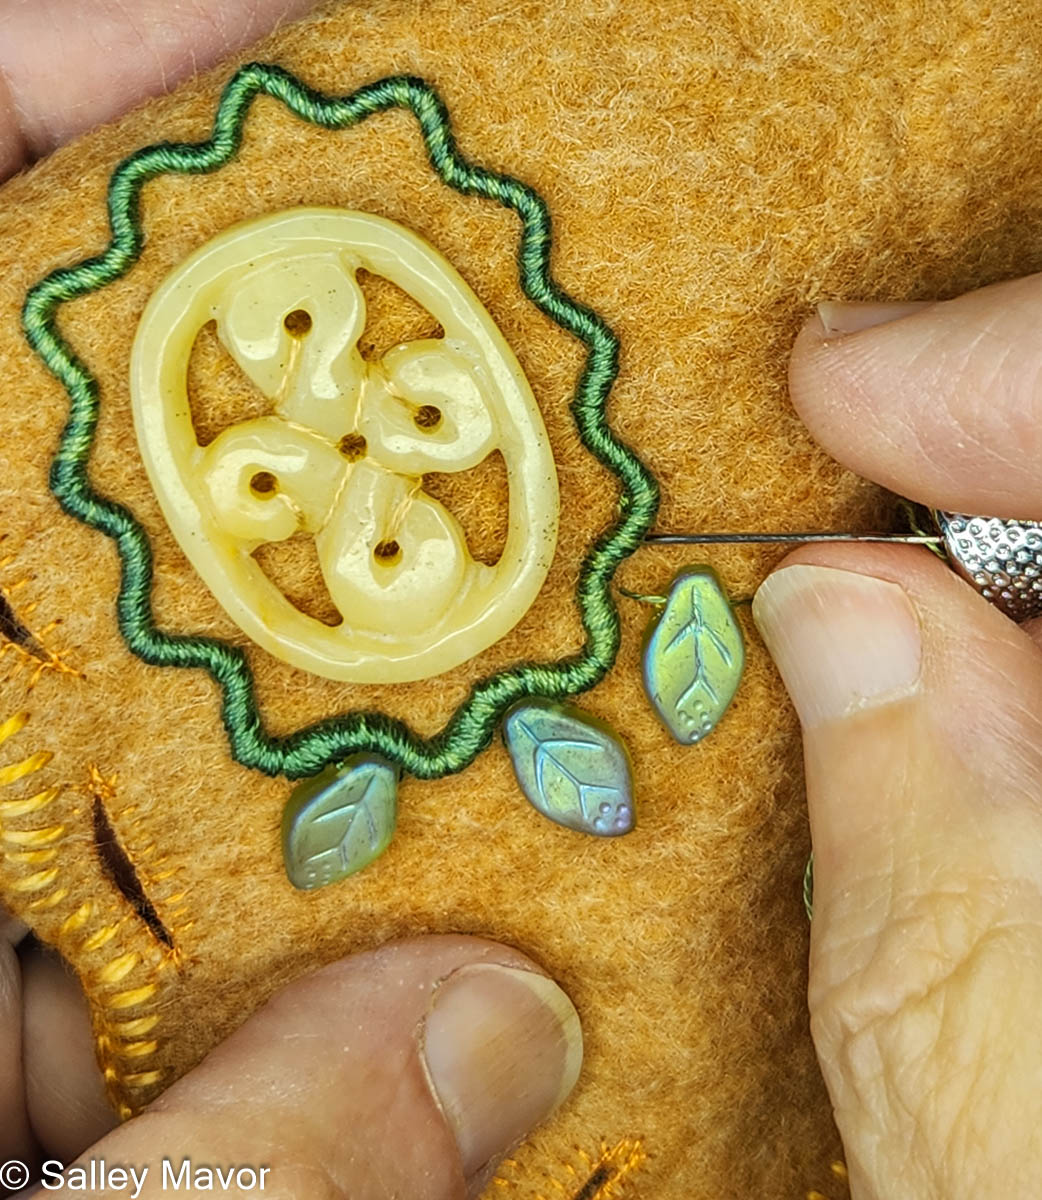
I’ve always loved wavy lines and rarely miss a chance to add curves where there might otherwise be a straight edge, so making a zigzag wreath felt like a natural choice. In the following video, I show how I form the wreath into one continuous line with no visible ends. It’s a fussy process, but the finished result is well worth the extra effort.

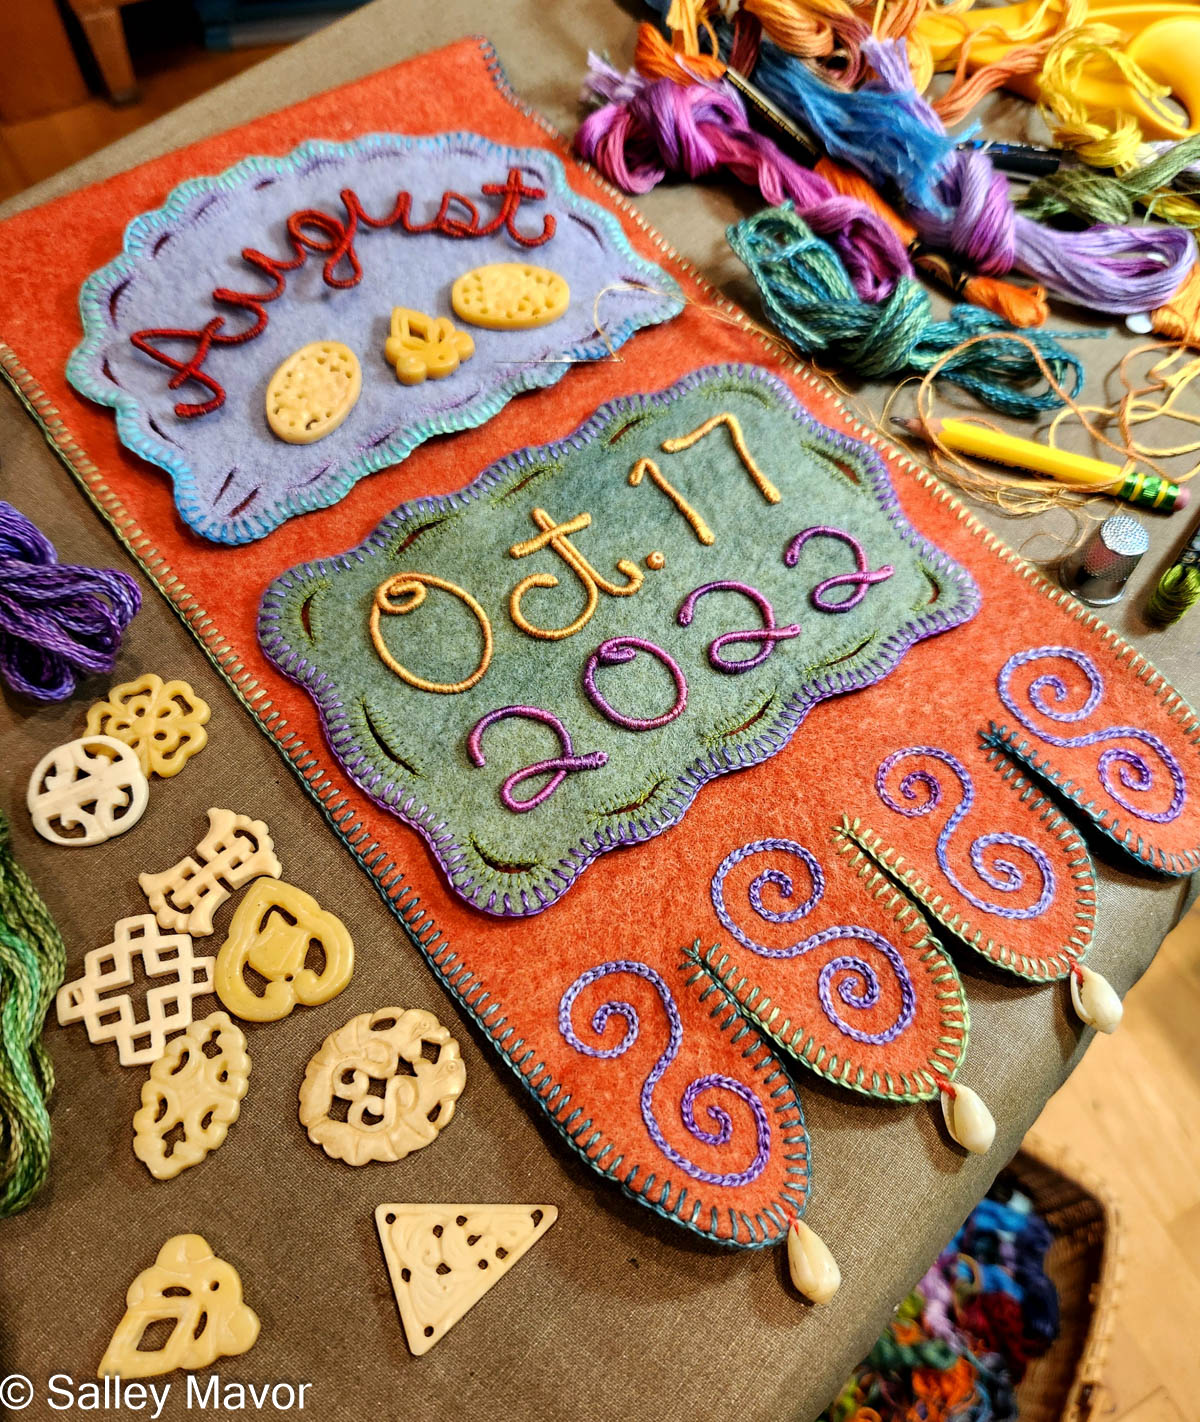
After wrapping all the letters and numbers, I pinned them in place and stitched them to the felt pieces.
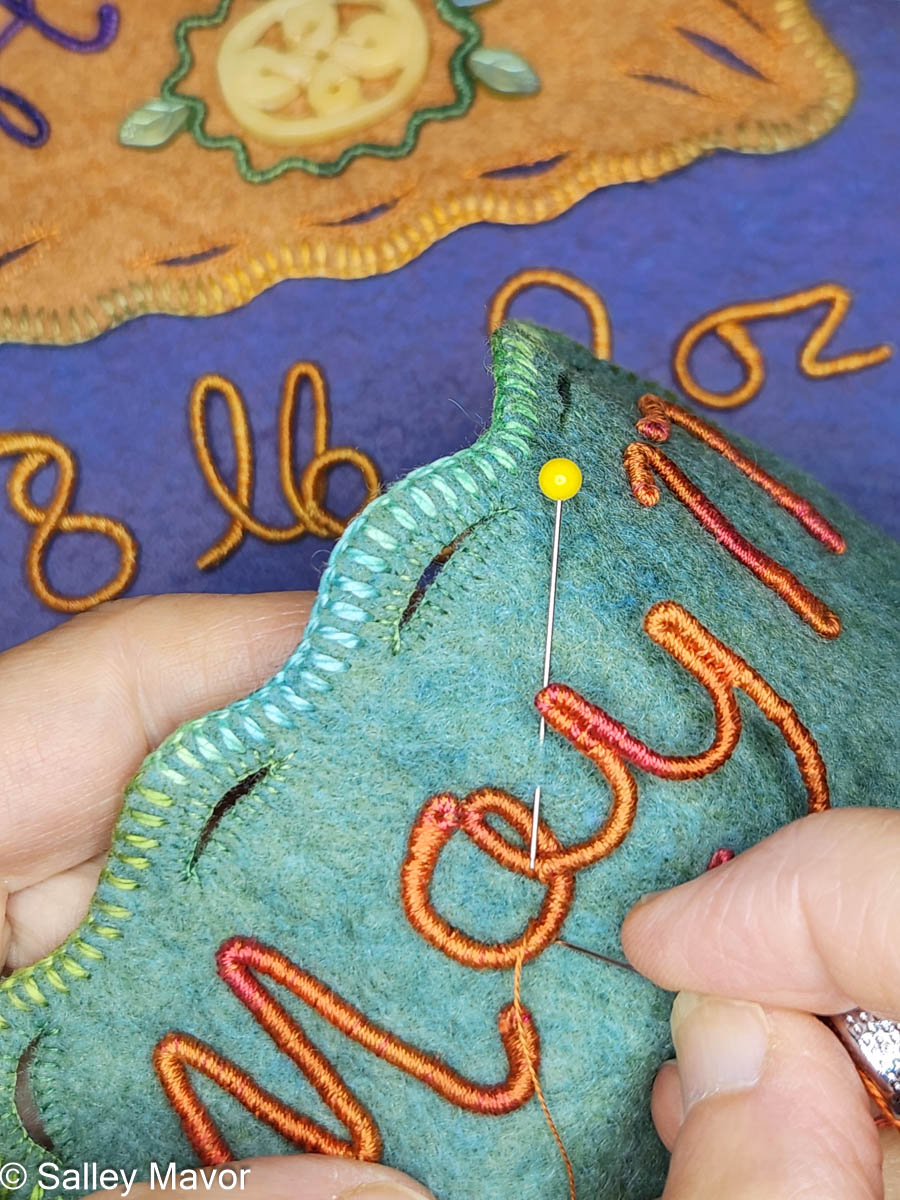
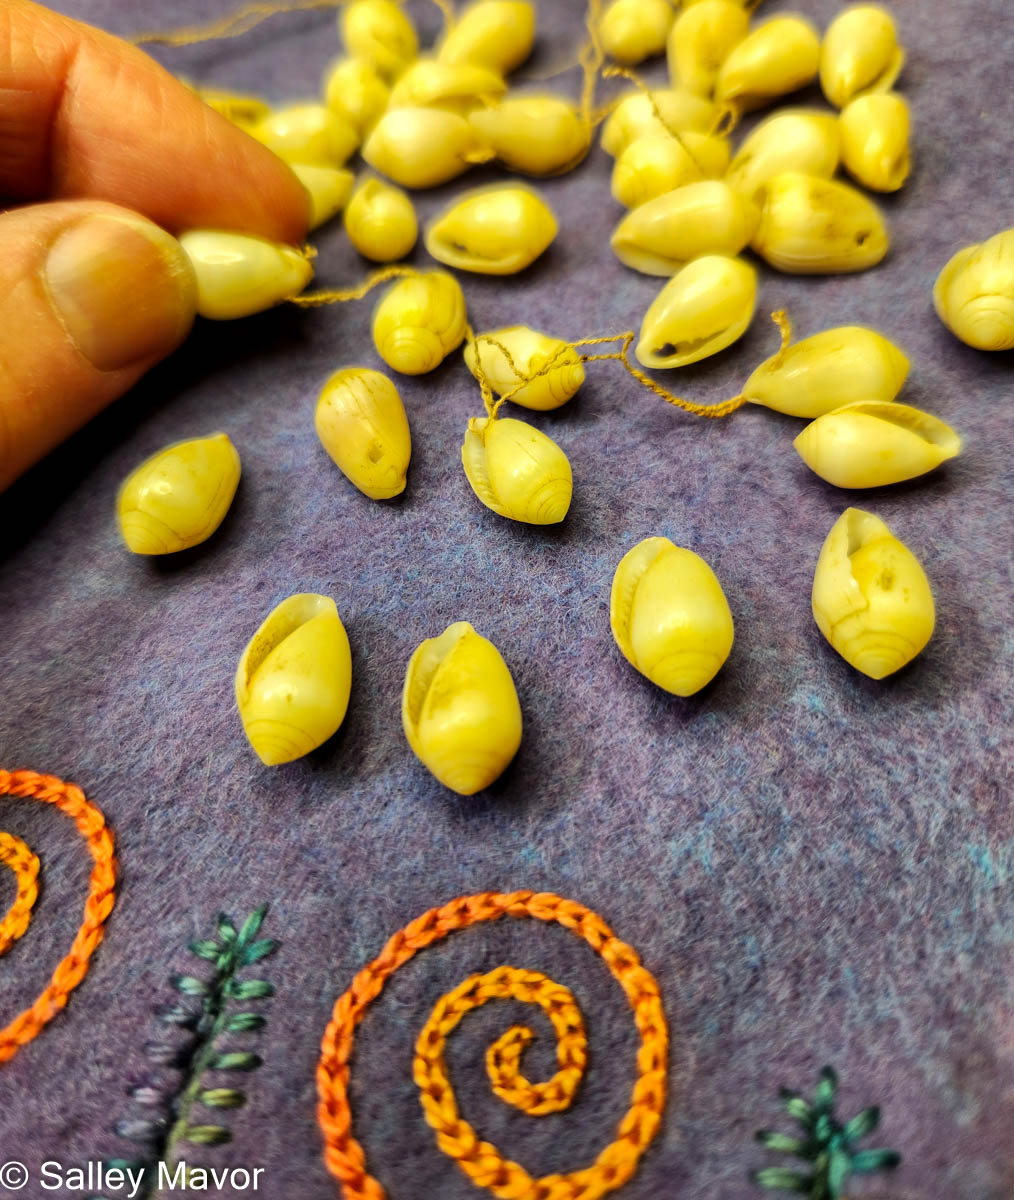
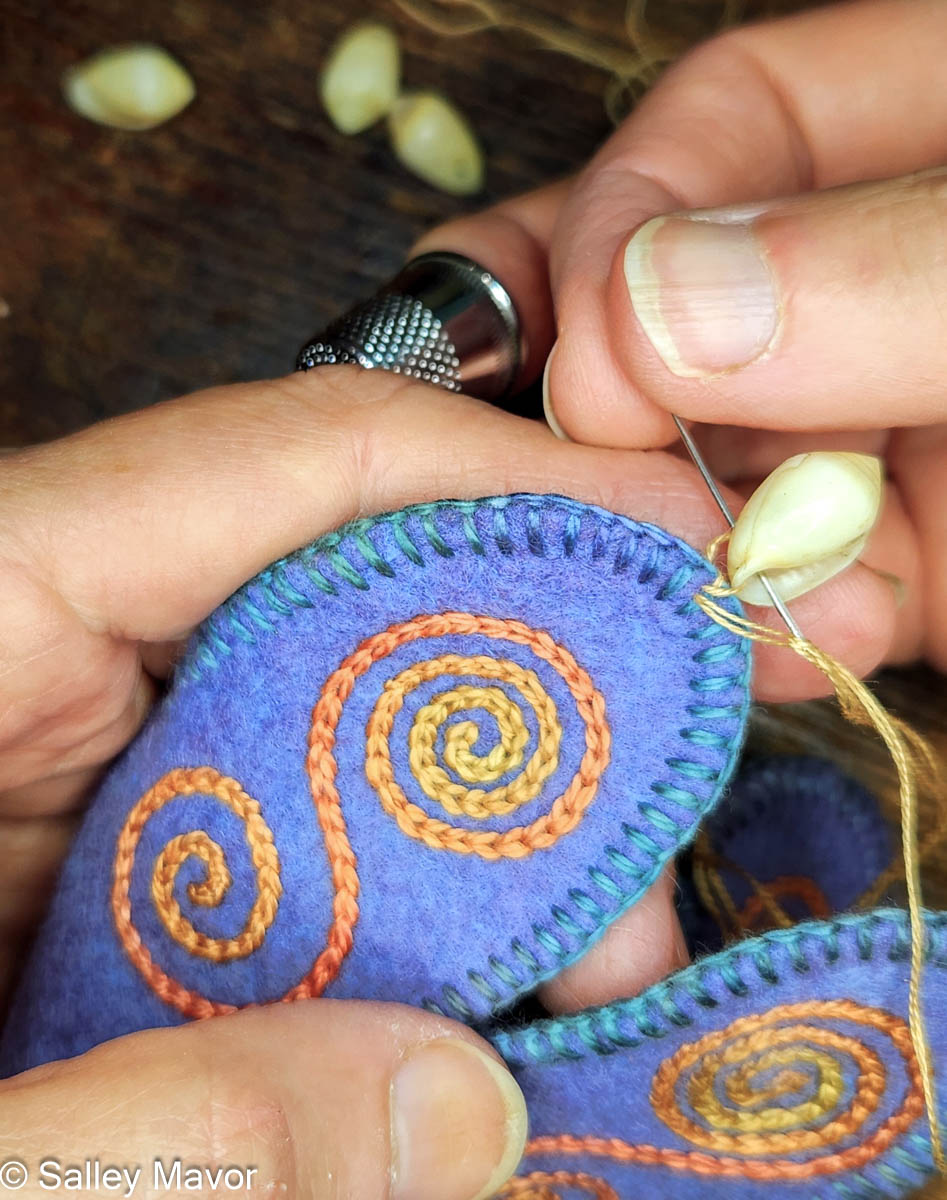
The bottom edge of the banner is finished with four scallop-edged flaps, each embroidered with chain-stitched spirals. At each point, I sewed on a shell that conveniently already had a hole for stitching. They came from a souvenir necklace my grandmother bought many years ago in her travels.
Happy Birthday, Henny!
To keep up with new posts, please subscribe to this blog. Your contact info will not be sold or shared. If you’d like to see more frequent photos tracking the projects in my studio, please follow me on Facebook, Instagram and BlueSky.
Thank you! You can now check your email to confirm your subscription.

Why I Love Wool Felt

Wool felt is one of my favorite materials to work with—right up there with embroidery thread. I love it for its versatility and stability, and most of all because the cut edges don’t fray. Wool felt is a pleasure to use. It feels better in your hands and offers a level of integrity and durability that synthetic fabrics just can’t match.

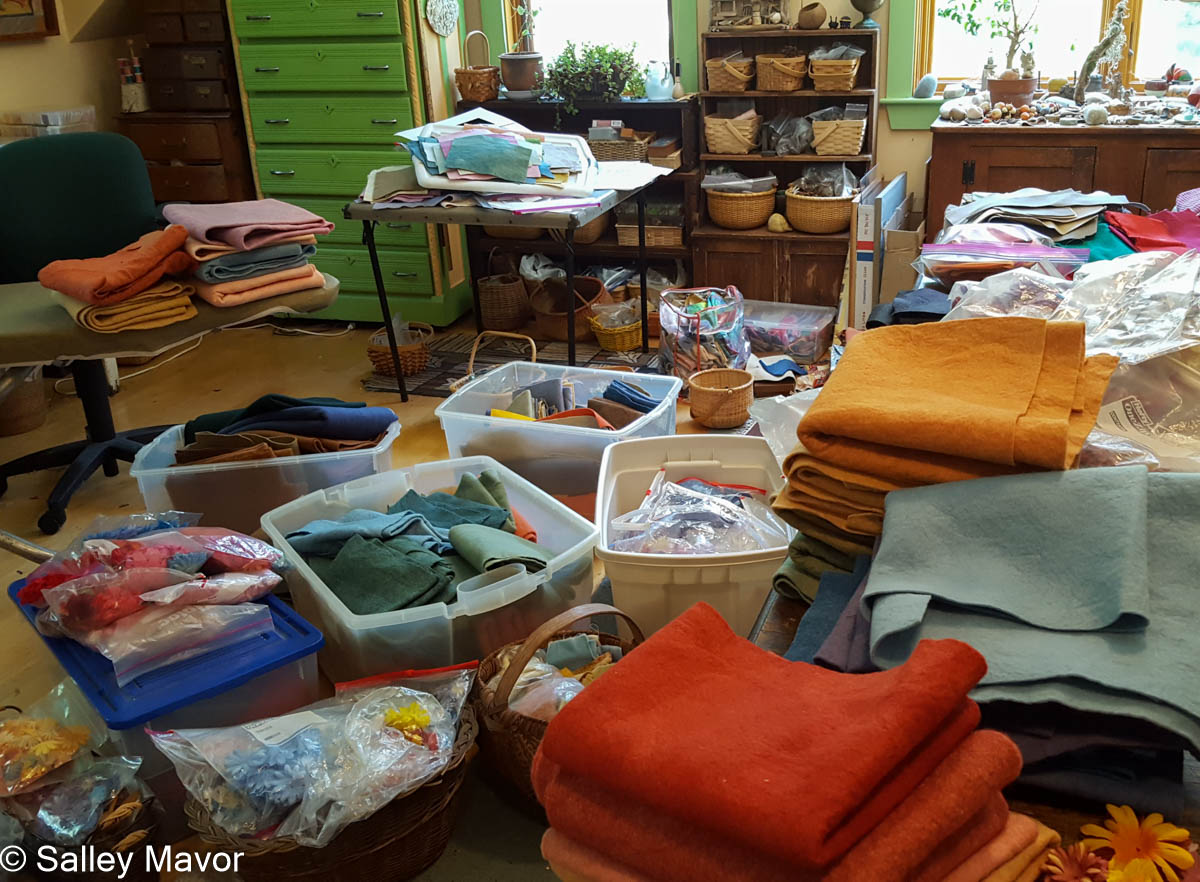
Sorting pieces of wool felt in my studio.

Once you’ve worked with wool felt, it’s hard to go back to the inexpensive acrylic sheets commonly found in craft stores—like trading a polyester pantsuit for cotton, wool, or linen. Many online businesses sell wool felt, from garish commercially dyed colors to softer, plant dyed, and “heather” shades. Sources for purchasing wool felt are at the end of this post.

“There Was an Old Woman” from Pocketful of Posies

Like many other children born in the 1950s, my first experience with wool felt was through making doll clothes. The moment I mastered sewing snaps onto felt outfits for my Troll dolls, a new world of possibilities opened up. I can still remember wondering which was the “right” way to sew on snaps: make the stitches jump from hole to hole or stitch around the outside of the snap. It’s still a conundrum.

I don’t recall coming into contact with genuine wool felt again until 1988, when my children began attending the Waldorf School of Cape Cod. Handwork was part of the daily curriculum—knitting, woodworking, and sewing with wool felt. At the time, many Waldorf schools around the country were supplied with naturally dyed wool yarn and wool felt from Textile Reproductions, a small family business here in Massachusetts.

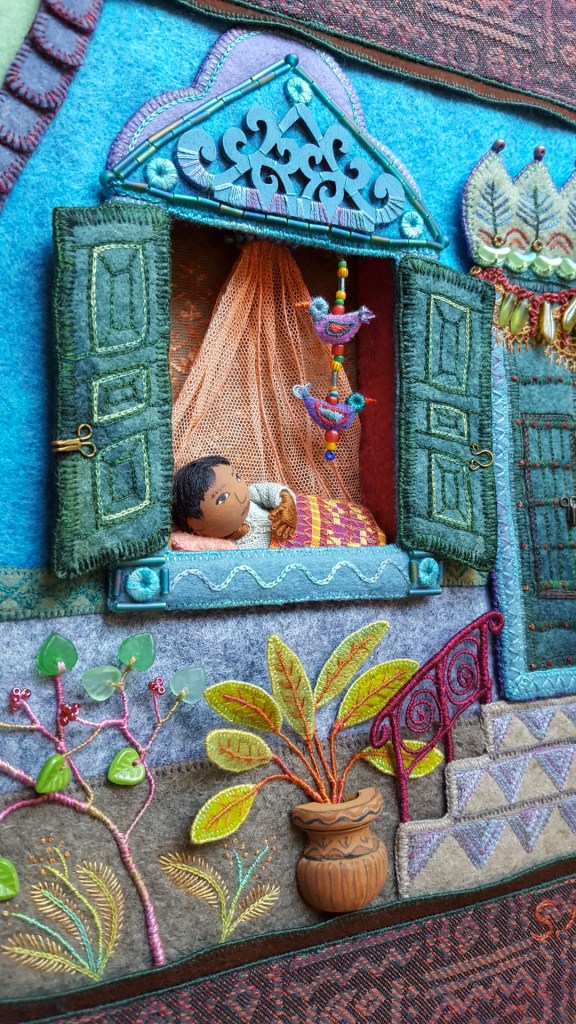
Detail from My Bed: Enchanting Ways to Fall Asleep around the World

I was thrilled to find such thick, luscious wool felt in a pleasing array of colors. For nearly ten years, I regularly ordered felt from Textile Reproductions—until they discontinued dyeing felt in 1997. Luckily, I heard about their plans in time to drive to their house and buy as much felt as I could, including their unevenly dyed “seconds”, which I considered the most desirable. Unfortunately, I still haven’t found a comparable substitute to recommend.

“Jerry Hall” from Pocketful of Posies

Why the Terms Get Mixed Up
Before continuing, I want to clarify something — I use felt (noun) in my pieces. I very rarely do felting (verb). It bothers me when my work is labeled “felting”, because the process of making felt is entirely different than using the finished product to make something else. It’s like the difference between weaving fabric and sewing a dress with fabric.

In short:
Felt (noun): a fabric you can cut and stitch.
To felt / felting (verb): manipulating and meshing wool fibers with wet or dry methods to form sheets of felt or three-dimensional felted forms.

“The Crooked Man” from Pocketful of Posies

Felting has a rich history and dates back to ancient times—even before weaving and knitting were widely adopted. Today, needle felting is especially popular, with a unlimited supply videos, kits, and how-to instructions available online. (Needle felting is done by repeatedly stabbing wool fleece with a barbed needle.) With that kind of mainstream familiarity, it’s easy to see how felt (the noun) and felting (the verb) are becoming interchangeable in some people’s minds.

Detail of Summertime

I’ve tried both wet felting and needle felting—but for the most part, I’d rather spend time embroidering with thread. For me, felt (and felting) is a starting point, not a completed piece of art; It’s a base or structure on which to build a world, using a variety of techniques and materials. Many of my picture books, including Pocketful of Posies and My Bed feature illustrations made with wool felt.

Exhibition News
I’m excited that the touring exhibition of original artwork for my book,
My Bed: Enchanting Ways to Fall Asleep around the World will be at the Mingei International Museum in San Diego, CA
Oct. 31 , 2026 – April 18, 2027. The date of my visit TBA.

Felting definitely has its appeal, but the process—poking and meshing wool fibers—creates an overall, uniform fuzzy texture that tends to blend details together. That’s not usually what I want as the finished look in my work. I’m more interested in using thread and a combination of materials to create contrast, lines, and clearly defined edges.

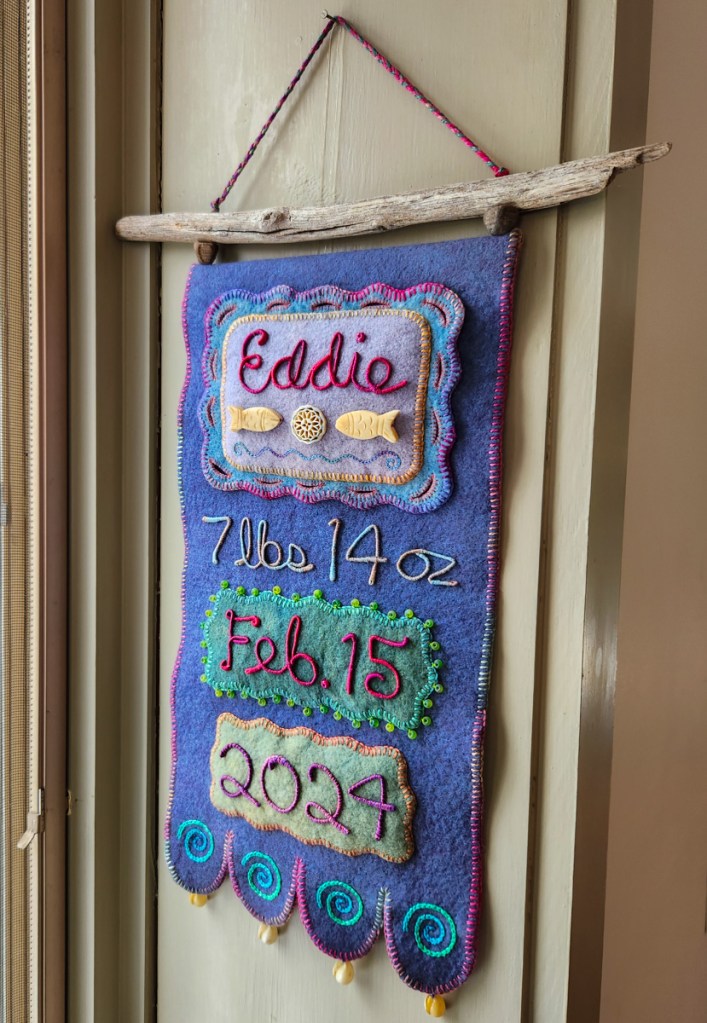
Eddie’s Baby Banner

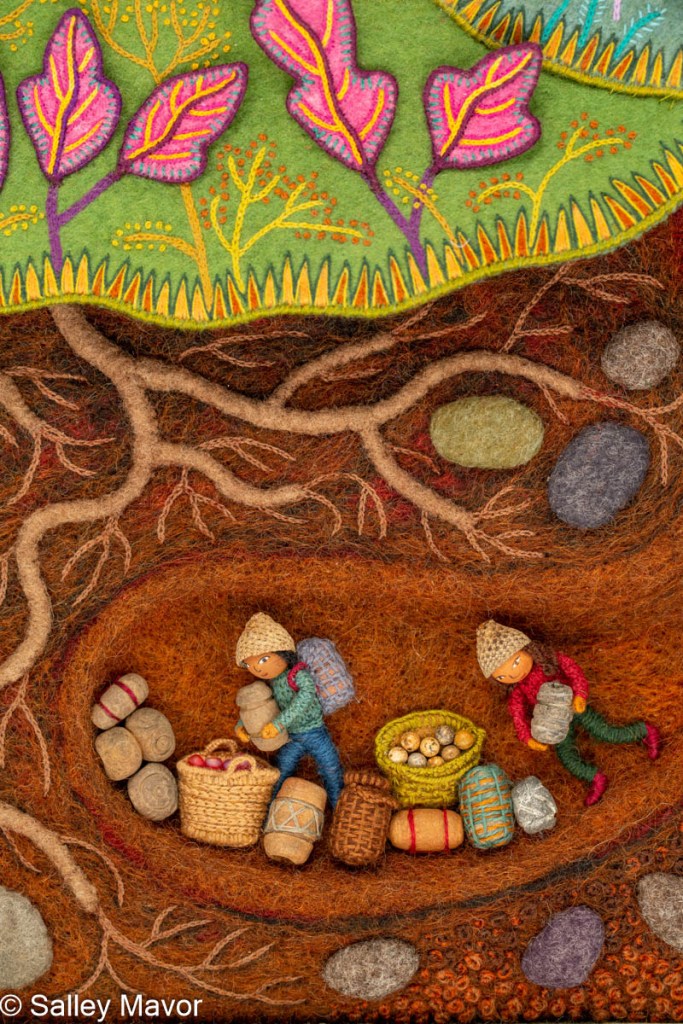
For a recent project (see image below), a soft texture was exactly what was needed to depict soil. I used both wet felting and needle felting techniques to create the tunnels and burrows in the cut-away underground section of Harvest Time, the fall scene in my series of seasonal landscapes. To learn about the process of making Harvest Time, please visit this post.

Needle felted underground burrow in Harvest Time

Where to Buy Wool Felt Online
Many online businesses sell wool felt in a wide range of colors, from bold commercially dyed shades to softer plant-dyed and “heather” tones. Here are a few sources to explore:
A Child’s Dream: Premium-quality 100% wool felt.
Sweet Emma Jean: A more affordable rayon/wool blend.
The Olive Sparrow (Toronto, Canada): A wide selection of wool felt.

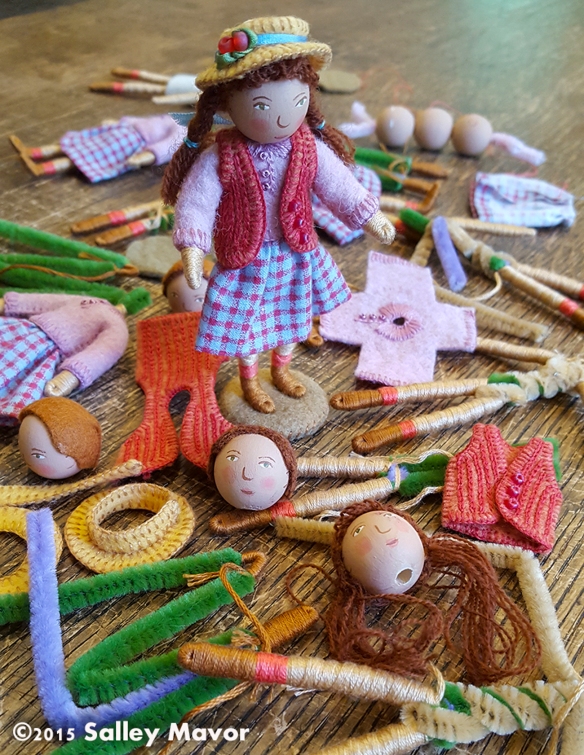
100% wool felt is pricey—but it’s often worth it. The doll-clothes pattern pieces from my how-to book Felt Wee Folk don’t require much material, so a little can go a long way. The book is available worldwide where books are sold. Autographed copies with extra goodies are for sale in my Etsy Shop.

Felt Wee Folk: New Adventures with extra goodies sold in my Etsy Shop

To keep up with new posts, subscribe to this blog. Your contact info will not be sold or shared. If you’d like to see more frequent photos tracking the projects in my studio, please follow me on Facebook and/or Instagram.

Thank you! You can now check your email to confirm your subscription.

The 3D Appeal of Stumpwork

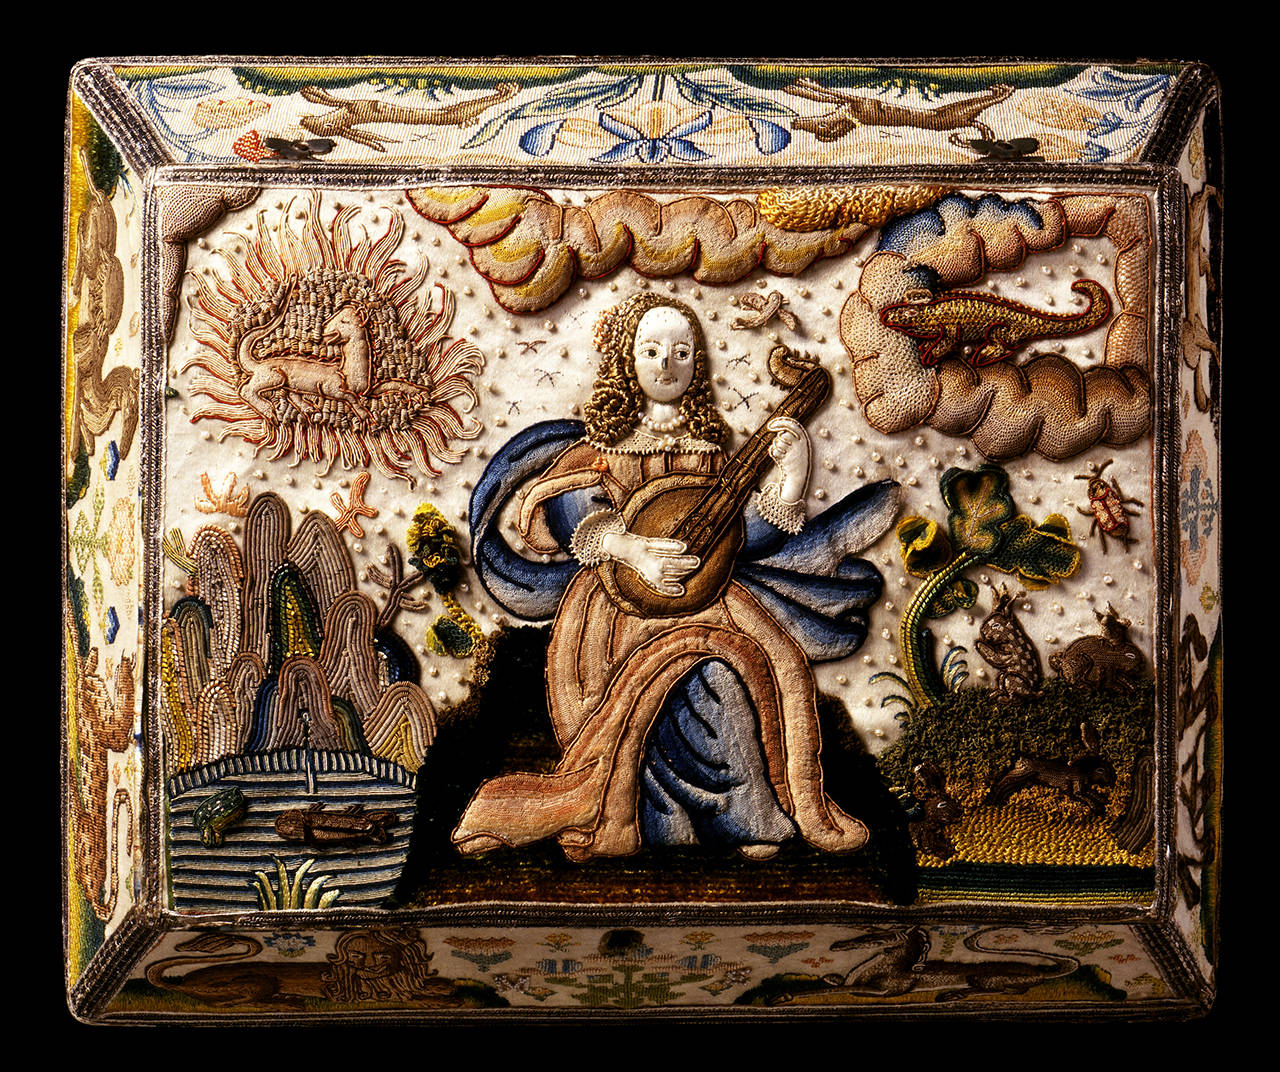
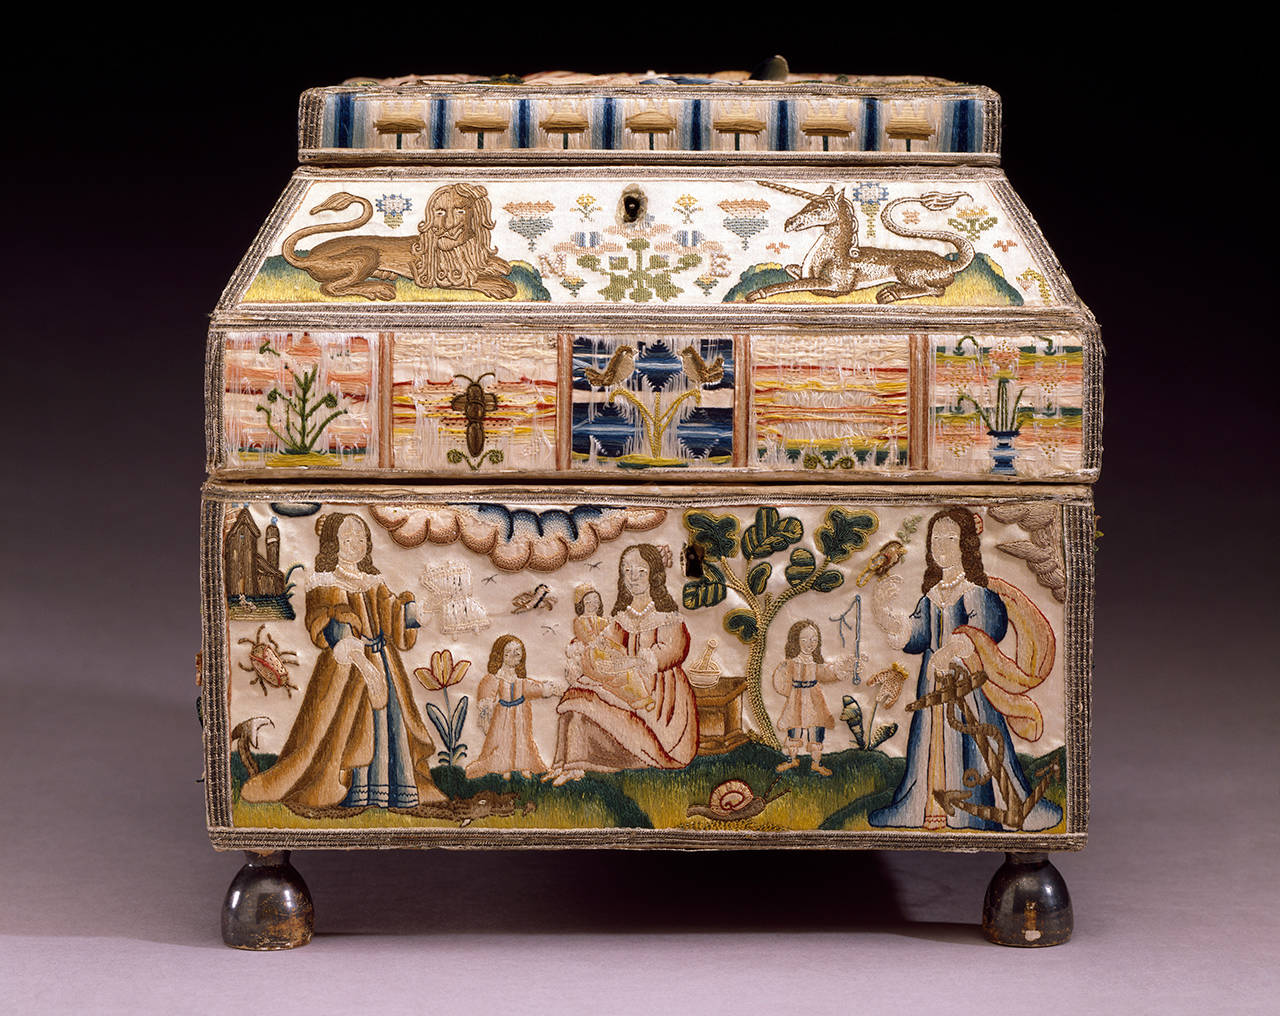
Raised work on the lid of the embroidered casket, Martha Edlin, 1671, England.
© Victoria and Albert Museum, London

Fifty years ago, an encounter with an unusual and historical style of embroidery steered the course of my artistic development, leading the way to a career in children’s books. This is the story of how it happened:

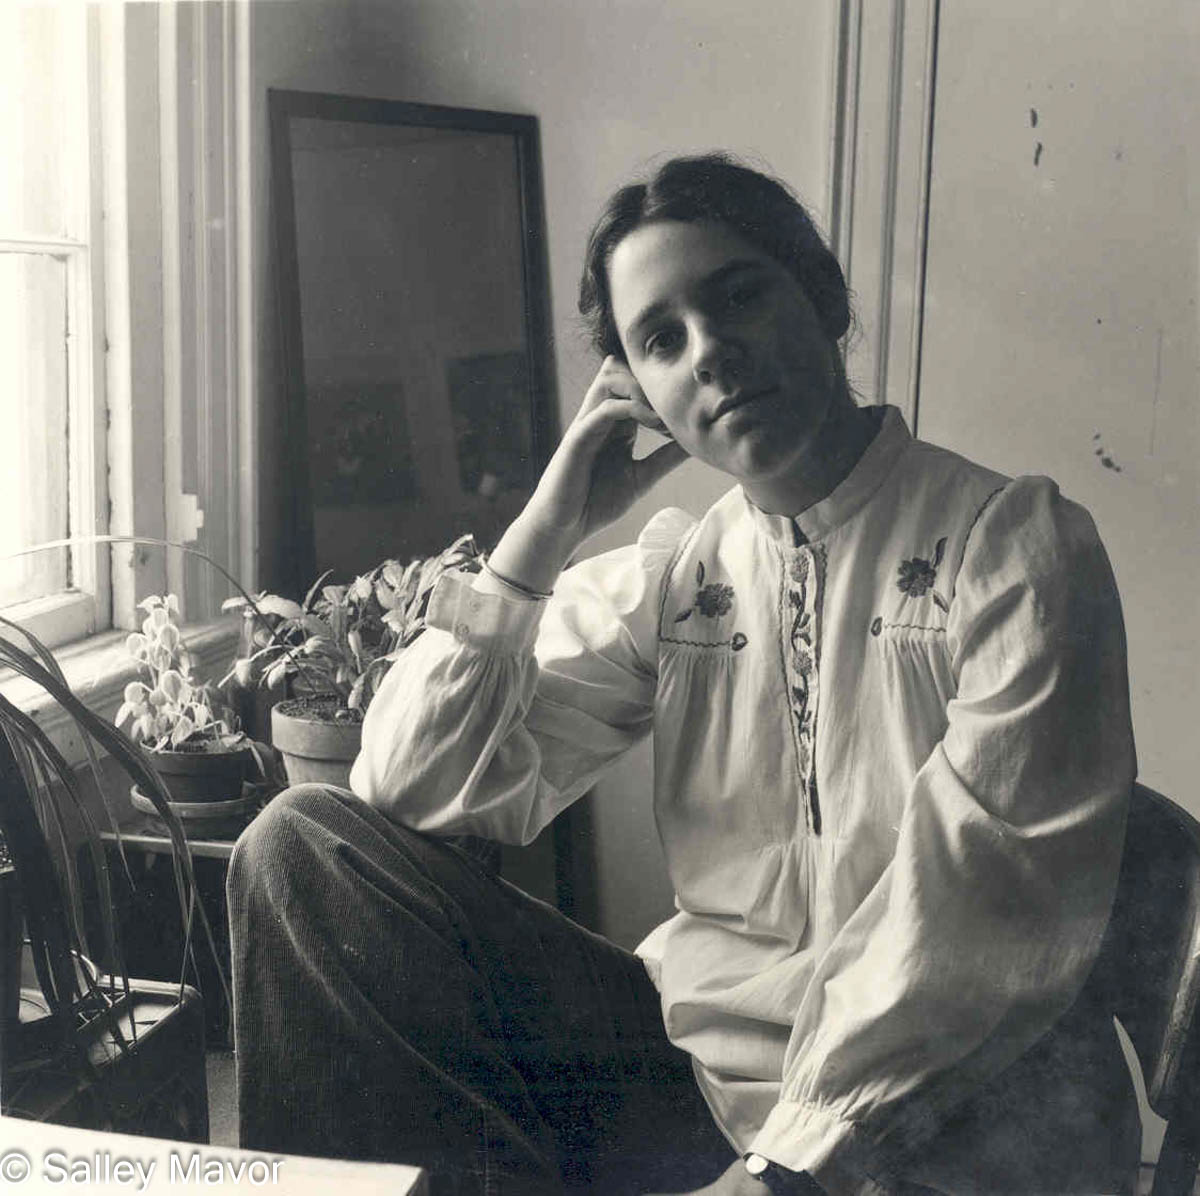
Salley Mavor at the Rhode Island School of Design in 1975

In the mid-1970s, during those early impressionable years in art school when I was searching for inspiration, I came across a distinctive 17th century English raised embroidery technique known as stumpwork. Although I cannot recall the circumstances that led me to discover a book with photographs of this oddly named type of needlework, I clearly remember the impact it had on me.


Embroidered casket, Martha Edlin, 1671, England. © Victoria and Albert Museum, London

The elaborately embroidered panels and padded keepsake boxes created over three centuries ago piqued my curiosity more than any other form of art I had encountered up to that point. It was not just their remarkable technical skill that drew me in; these pieces contained sculptural and narrative qualities that completely blew me away. This introduction to stumpwork marked a major turning point in my artistic growth, as embroidery would before long turn from a sporadic interest into the full-blown obsession it is today.


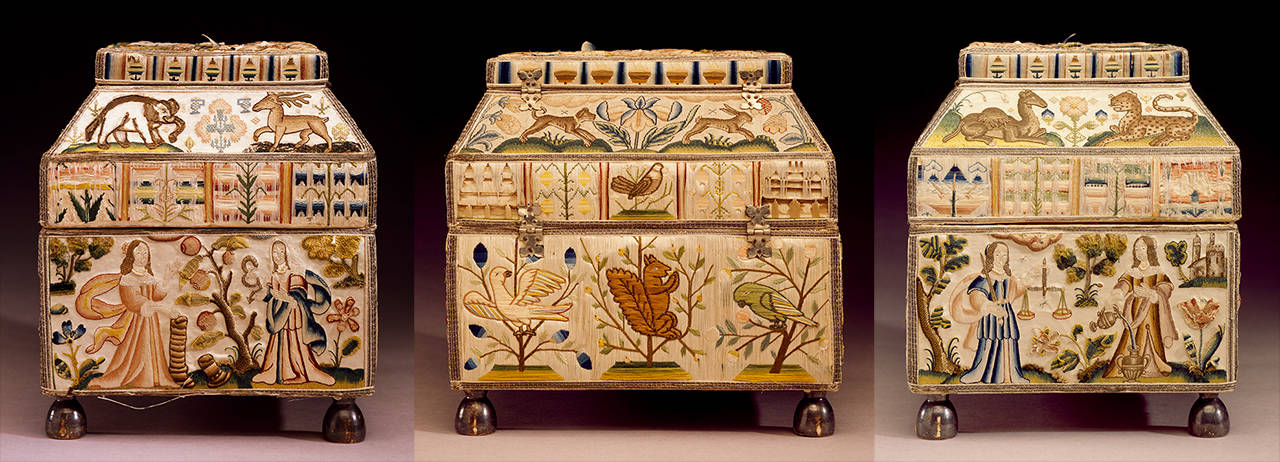
Embroidered casket, Martha Edlin, 1671, England. © Victoria and Albert Museum, London

This stumpwork casket is in a collection of embroideries at the Victoria and Albert Museum in London. It was made by Martha Eldin in 1671, when she was just 11 years old! The V & A’s website shares this bit of history about Martha’s casket: “Caskets like Martha’s were produced in England between about 1650 and 1695. The decorative needlework panels were worked by young girls as part of their needlework education.”

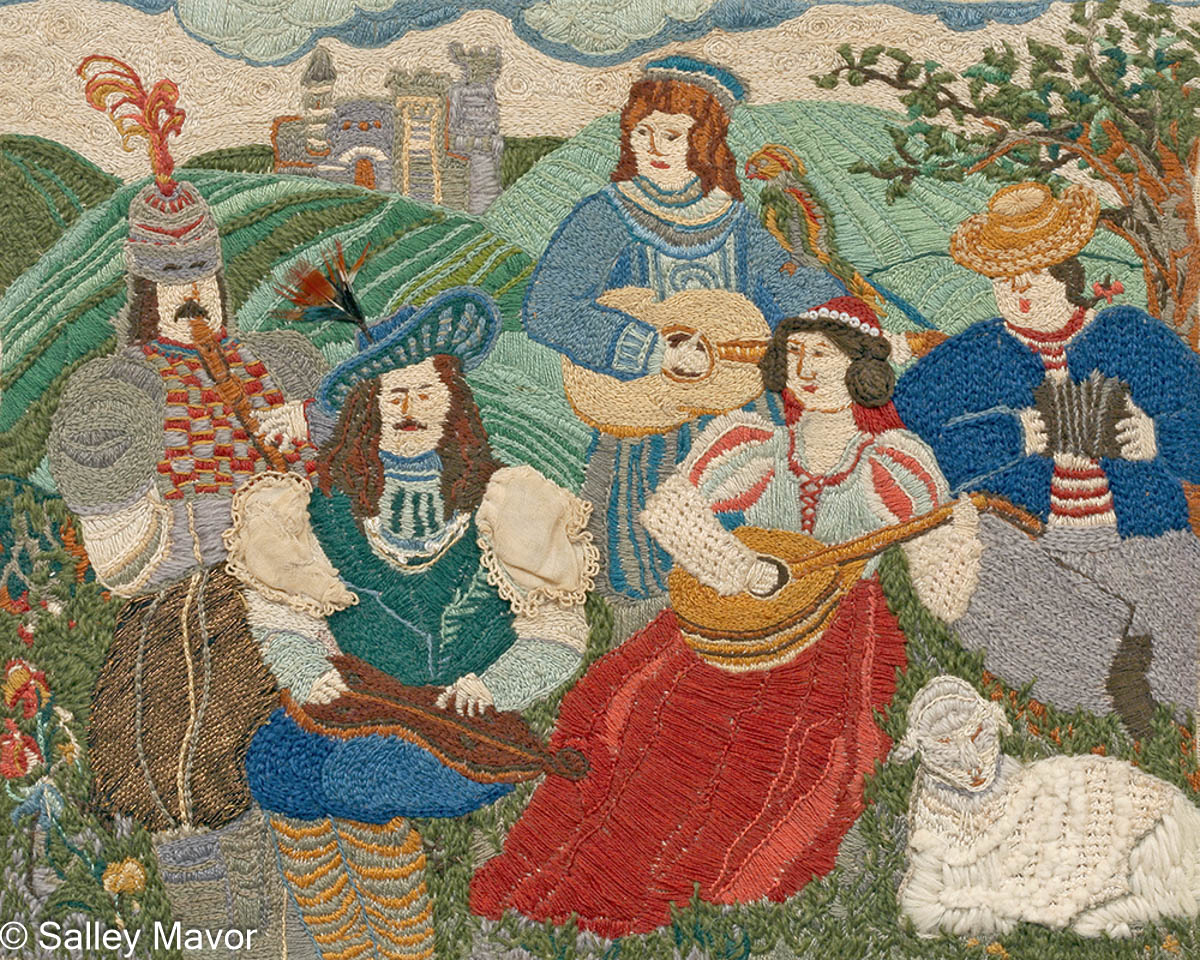
In 1975, just before discovering stumpwork, I embroidered Old World Musicians for an illustration class. At the time, I was already interested in pictorial subjects and enjoyed experimenting with various textural embellishments in my work. However, seeing examples of stumpwork opened my eyes even further to the creative opportunities within needlework.

Old World Musicians, Salley Mavor 1975

What intrigued me most about stumpwork was that it showed how embroidery could literally rise above the surface and add depth to otherwise flat, traditional textiles. By elevating certain components and creating a dramatic interplay of light and shadow, I realized that needlework could become far more engaging than mere decoration. It could be transformed into an immersive visual experience, complete with objects shaped like animals, human figures, and other familiar elements that invite the viewer to take a closer look.

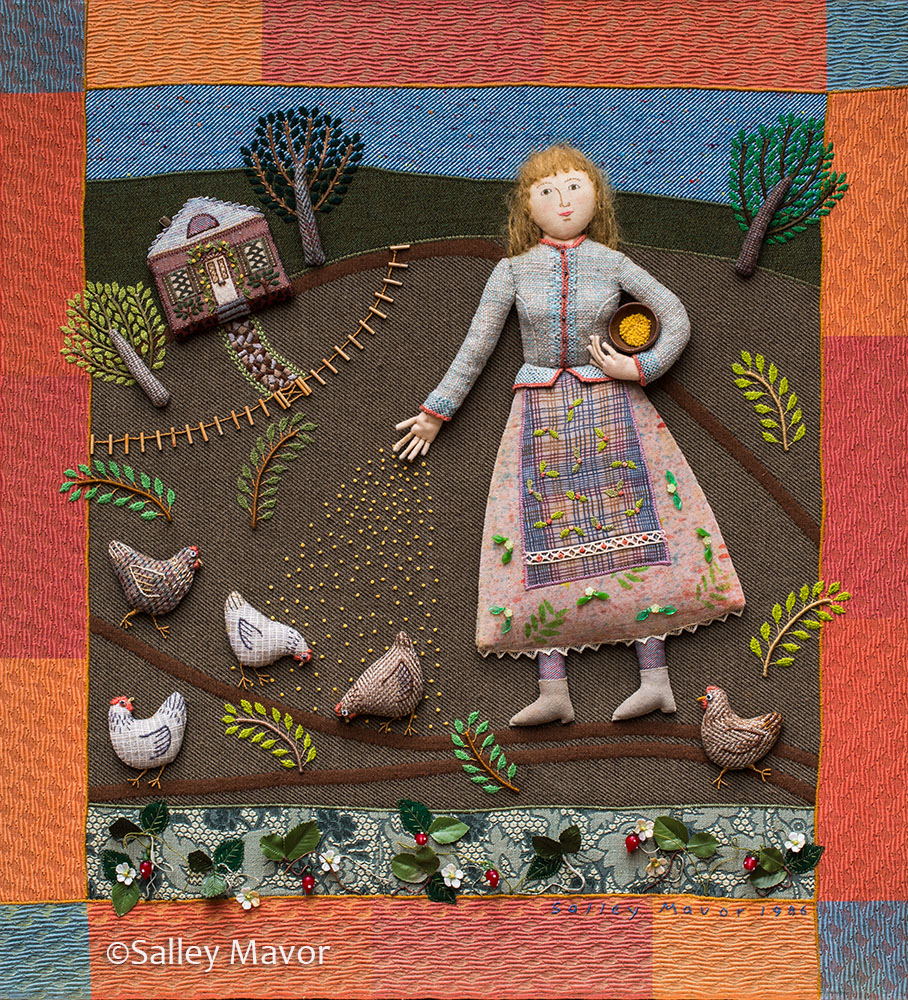
Feeding Chickens 1986, Salley Mavor

Fascinated by the three-dimensional aspect of stumpwork and its storytelling potential, I was eager to adapt the concept in a way that matched my own artistic style and abilities. Unlike other textile processes with pre-planned designs or grids—essentially functioning as color-by-number projects—stumpwork allowed ample wiggle room to make changes as I worked. This freedom to manipulate and rearrange parts midstream made this method especially appealing to me, as I typically began with a simple sketch and refined my work as I progressed.

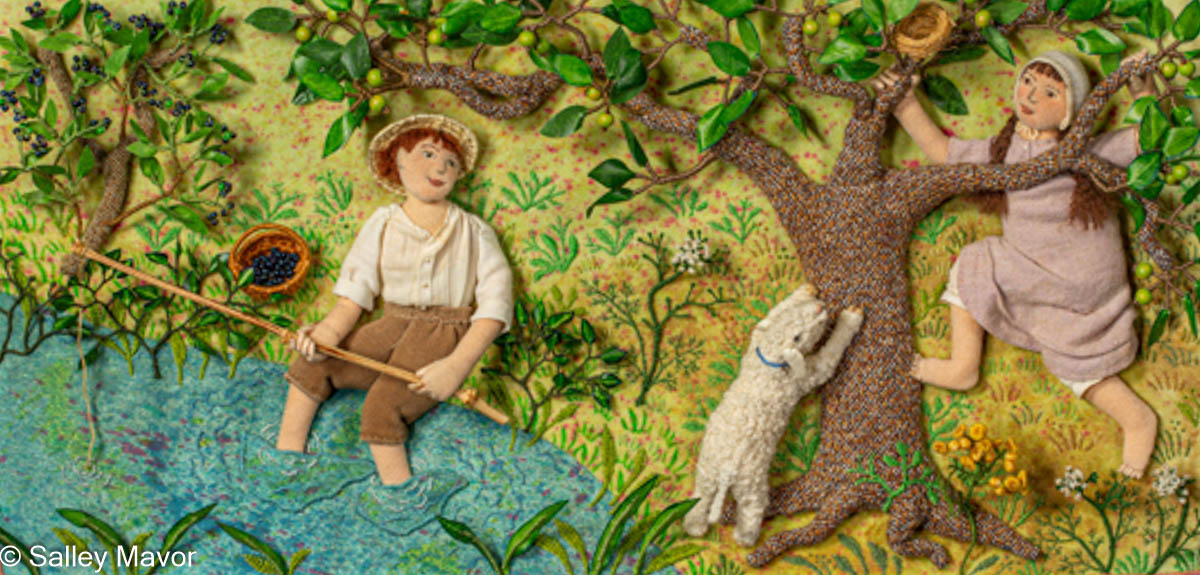
Illustration from the picture book, Mary Had a Little Lamb, 1995, Salley Mavor.

While my artwork was inspired by stumpwork, my techniques, materials, subject matter, and presentation were entirely different. Even if I could have found instructional materials for learning traditional techniques from the 17th century, I doubt I would have had the tolerance to follow the patterns and directions as prescribed. My creative process has always been more self-guided, involving a lot of experimentation until I discover something that works. When asked what my medium was called, I hesitated to use the term “stumpwork”, concerned that it sounded too homely. I soon labeled my new work ”fabric relief”, a name that I thought more accurately described my art.

In the fifty years since I first encountered stumpwork, this distinctive form of embroidery has undergone an extraordinary revival. Its renewed popularity has led to numerous books, instructional classes, and online tutorials. For those eager to explore the many facets of stumpwork, I highly recommend Mary Corbet’s Needle ‘n Thread, which offers book reviews and information on various techniques.

At this early stage of my artistic evolution, I was primarily concerned with finding ways to bring my imagination to life, oblivious to what might be required to take it to the next step professionally. I wasn’t thinking about the realities of photographing and reproducing three-dimensional illustrations. It was only years later, as I began to seriously contemplate illustrating picture books, that I recognized the practical advantages of working in bas-relief rather than sculpture in the round. From both a lighting and focusing perspective, positioning all characters, props, and scenery on a single plane with a shallow depth of field simplifies the composition and makes it much easier to photograph. To see a list of my books, please visit this page.

The summer after graduating from RISD in 1978, I went on a pilgrimage to London to see the Victoria and Albert Museum’s collection of stumpwork in person. Considering the impact that this historical artform has had on the course of my career, I will forever be grateful to the English women and girls of the 1600s who created these unique and charming pieces. Because these works were treasured and safeguarded for more than three hundred years, we are able to be inspired by their beauty and ingenuity today.

Salley Mavor in 2021, finishing Mossy Glen, the spring scene in her series of seasonal landscapes.

To keep up with new posts, please subscribe to this blog. Your contact info will not be sold or shared. If you’d like to see more frequent photos tracking the projects in my studio, please follow me on Facebook, Instagram and BlueSky.
Thank you! You can now check your email to confirm your subscription.

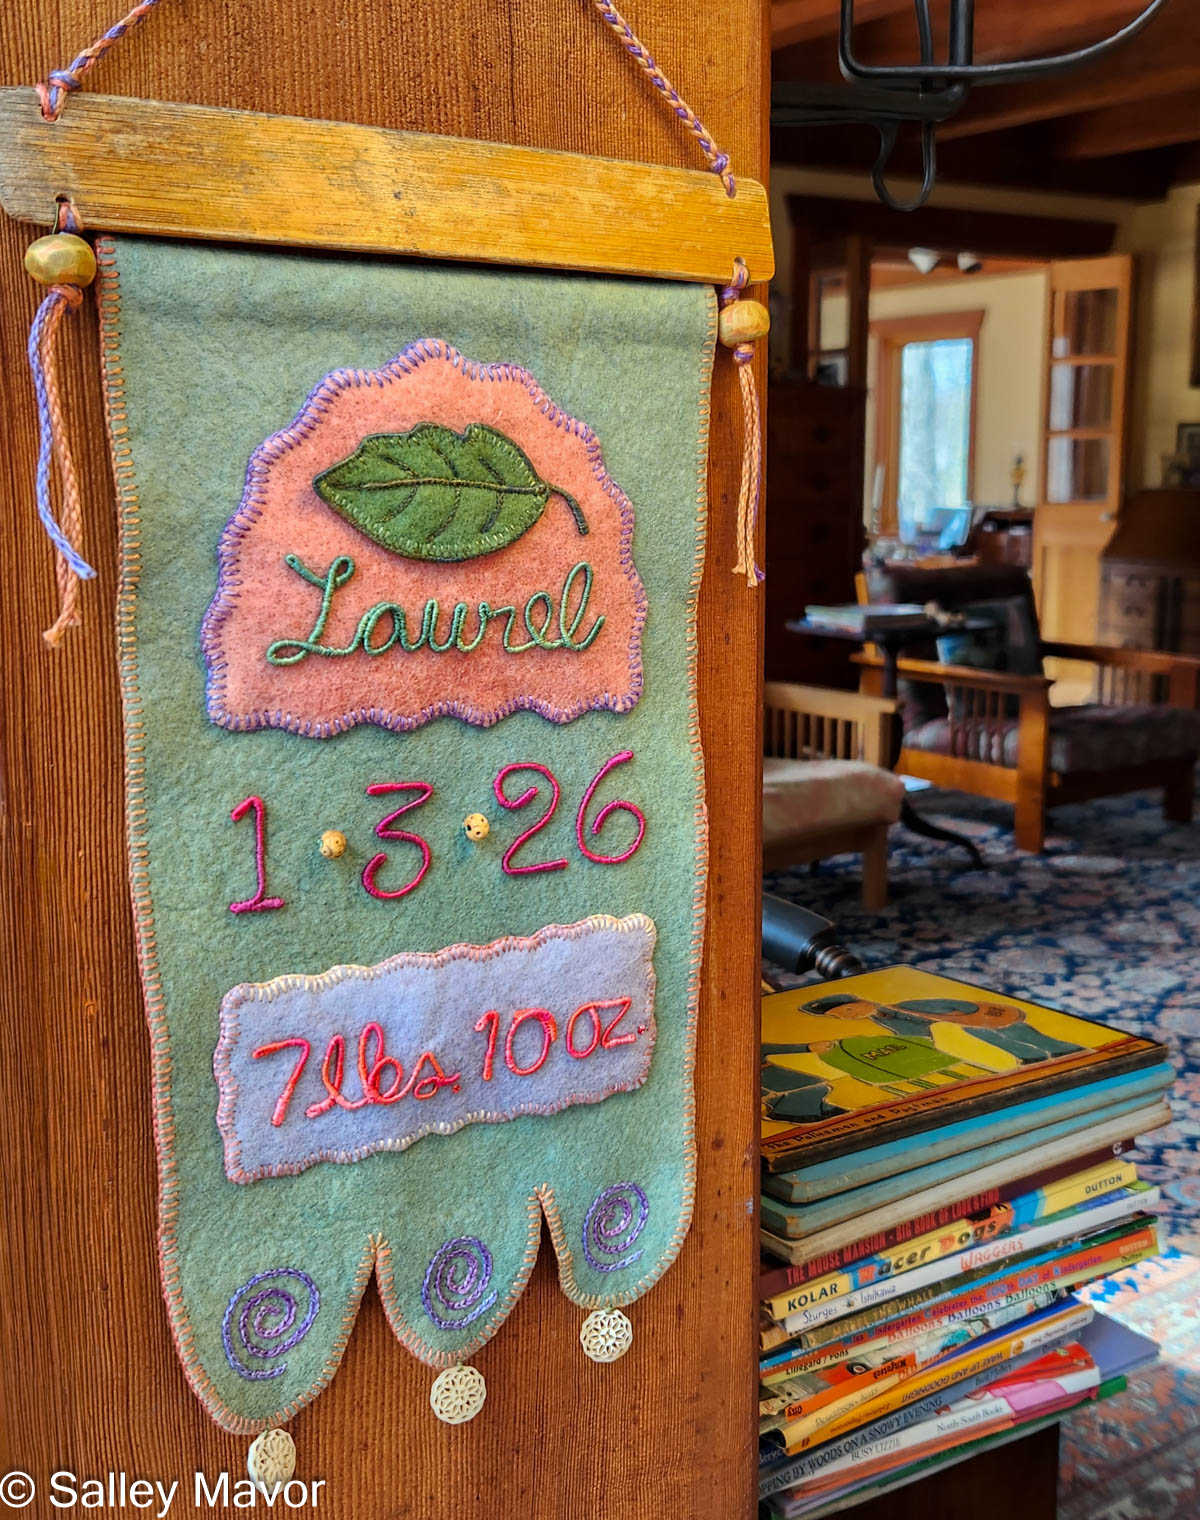
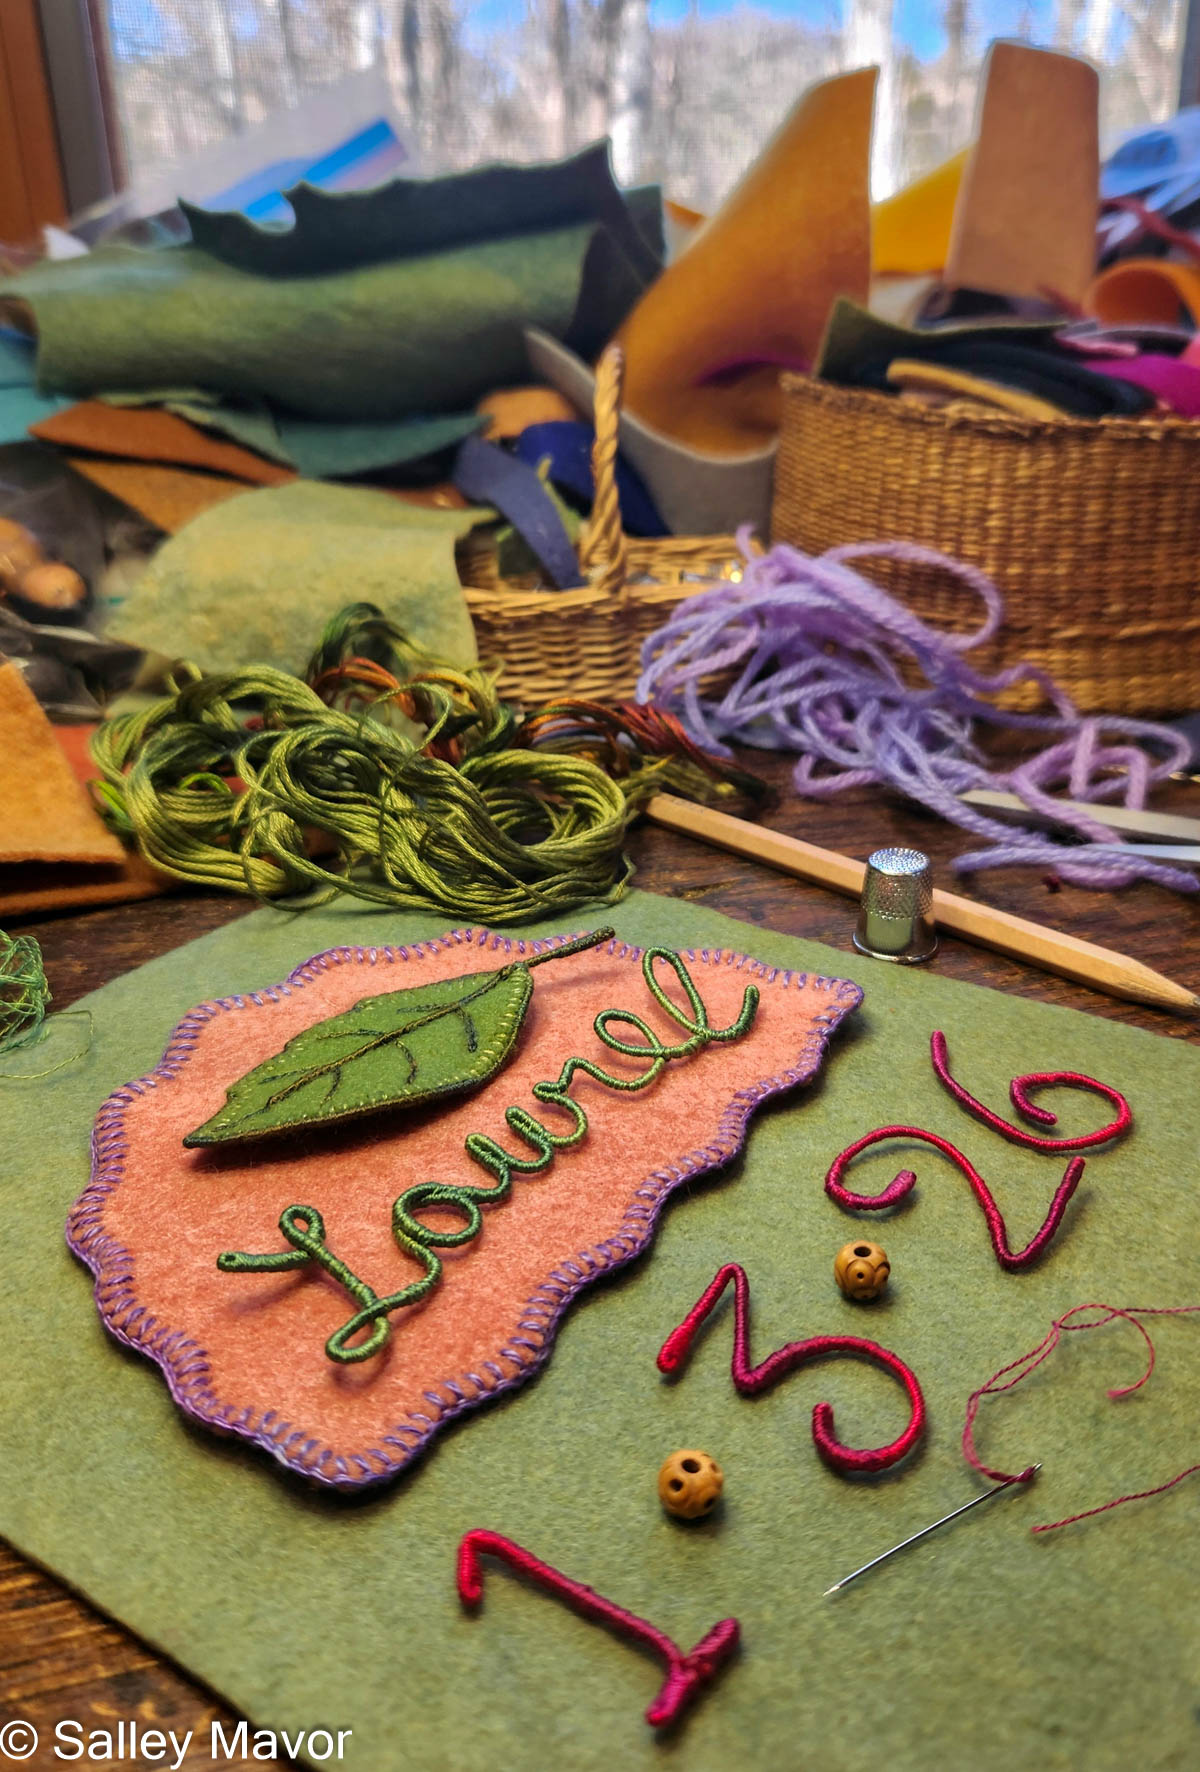
Baby Banner – Laurel

For the past 20 years or so, I’ve made personalized gifts for friends and family to commemorate special events like weddings and births. These gifts take the form of felt banners or cake toppers. The embellished felt banners combine two of my favorite things, hand embroidery and cursive handwriting. In this post, I share a behind the scenes look at the process of making a baby banner for Laurel, who was born earlier this year. You can see posts about this and other banners by scrolling through the archives here. See wedding cake toppers here.

A BANNER FOR LAUREL
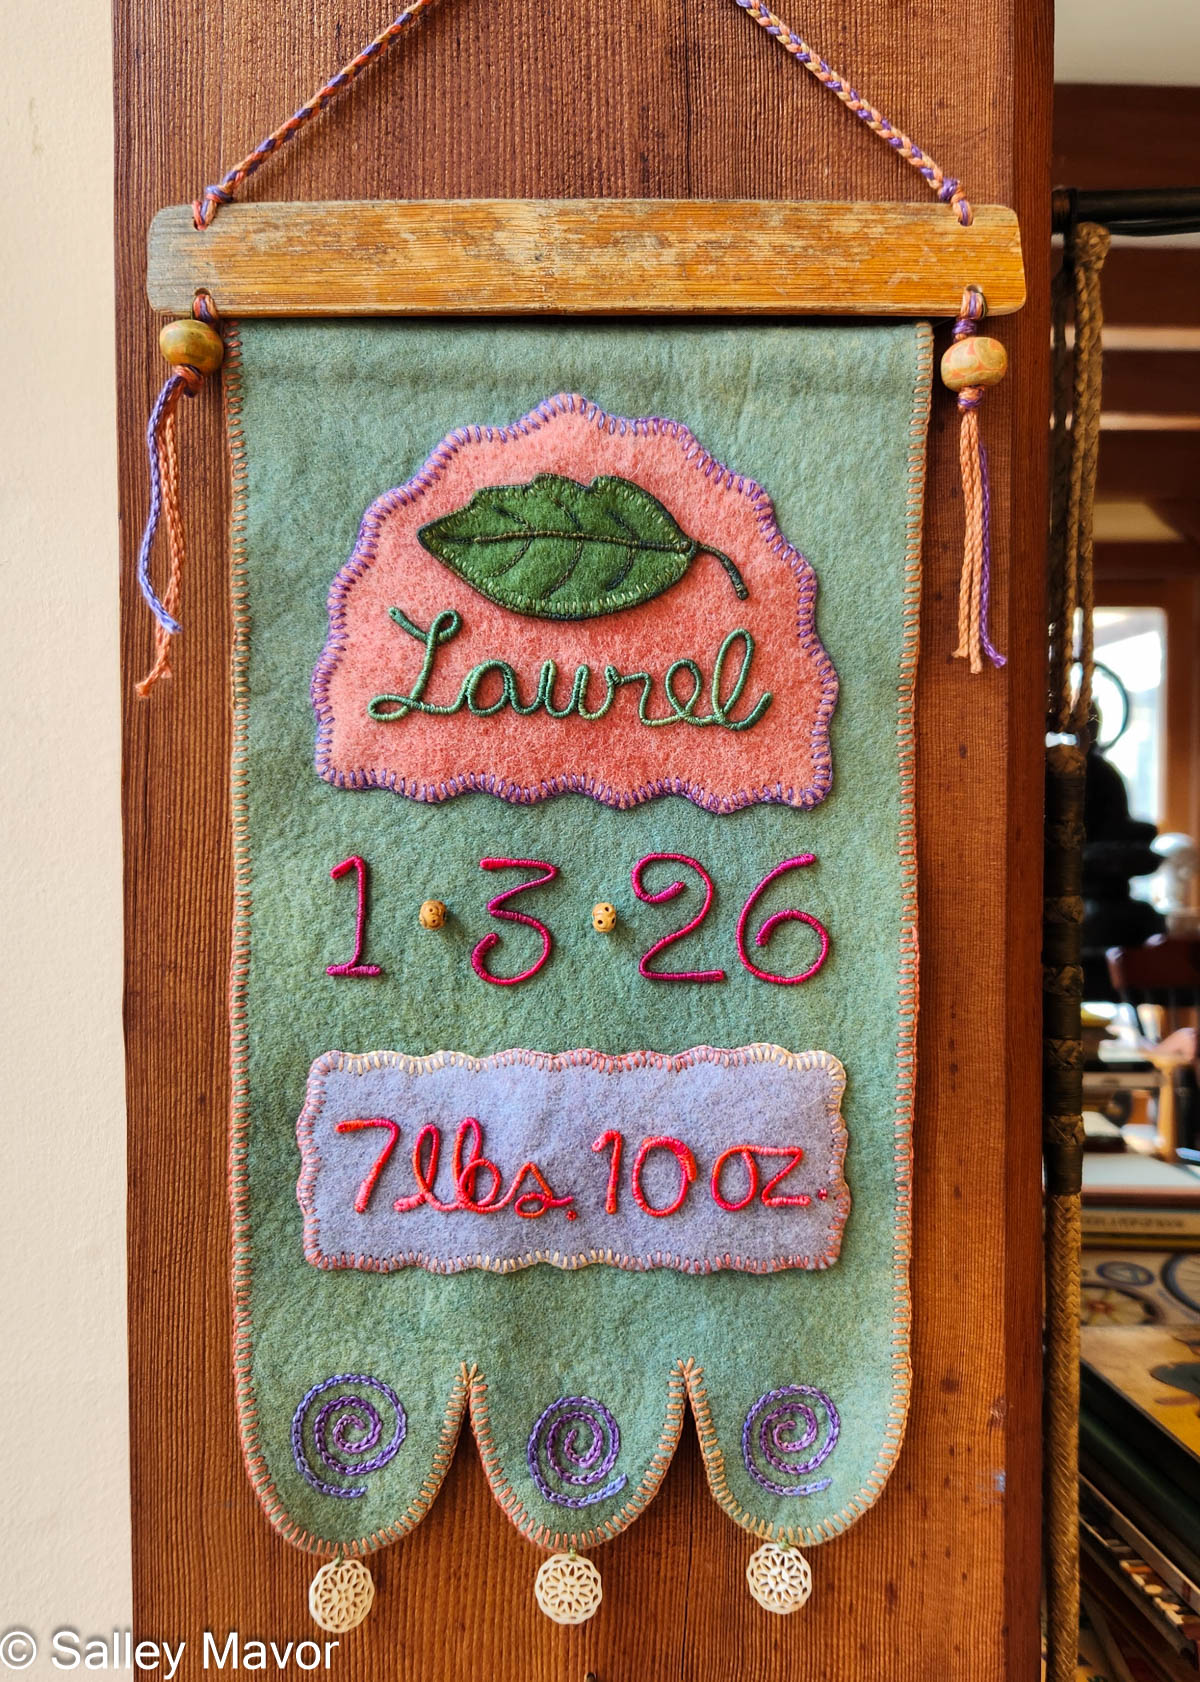
Three days into the new year, our good friends welcomed a baby girl into the world. I couldn’t wait to make a banner for little Laurel. With a nature inspired name like that, it would have to feature a laurel leaf!

WRAPPING WIRE LETTERS
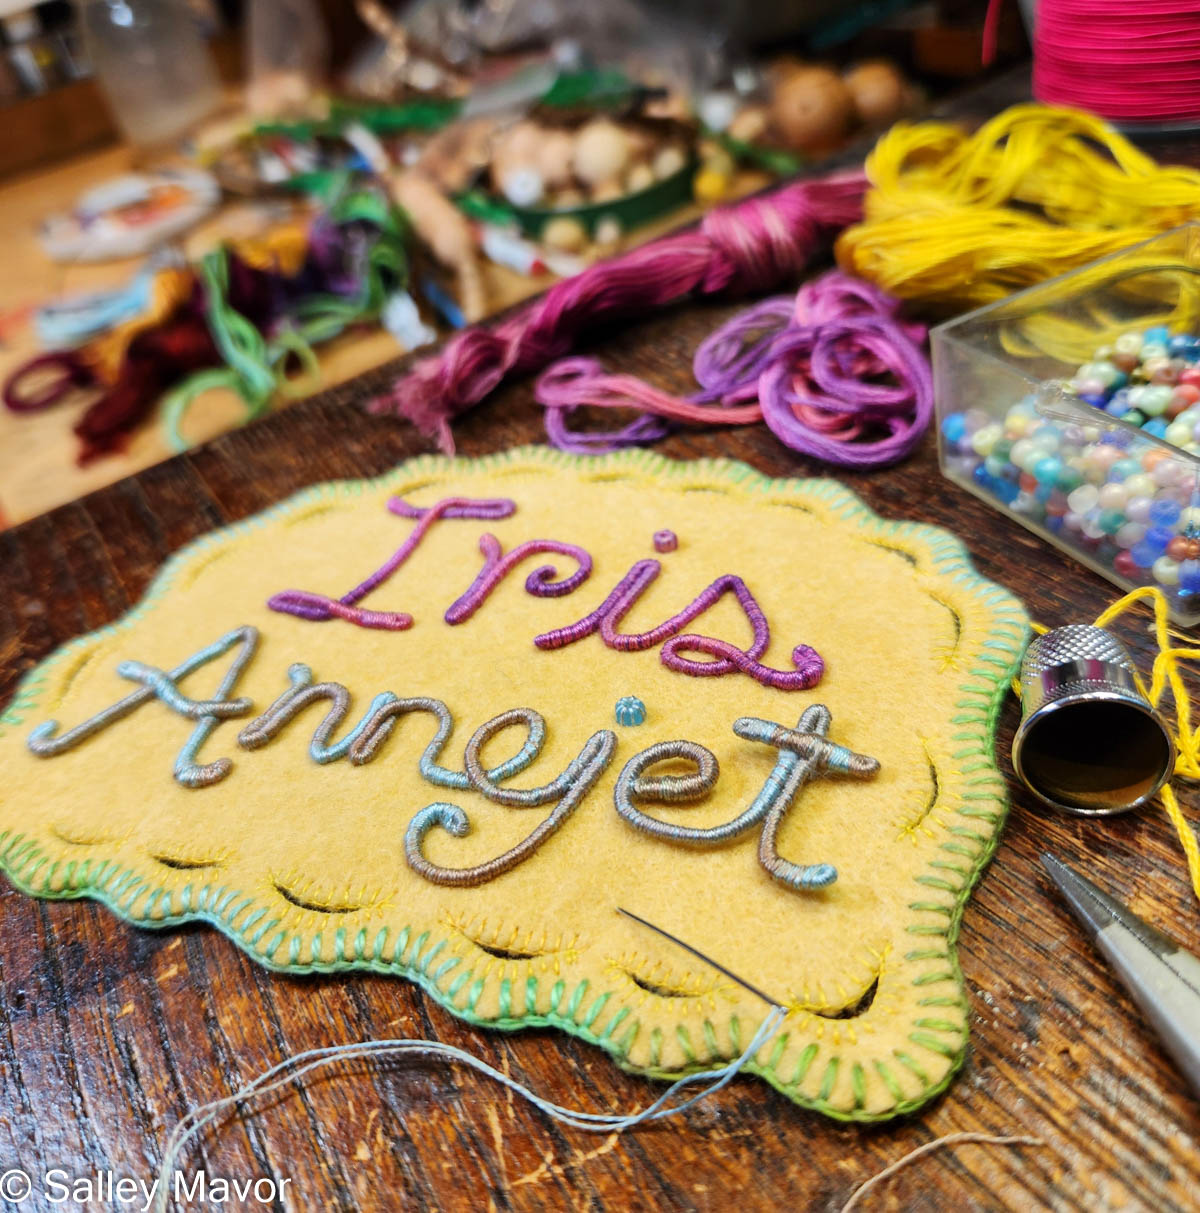
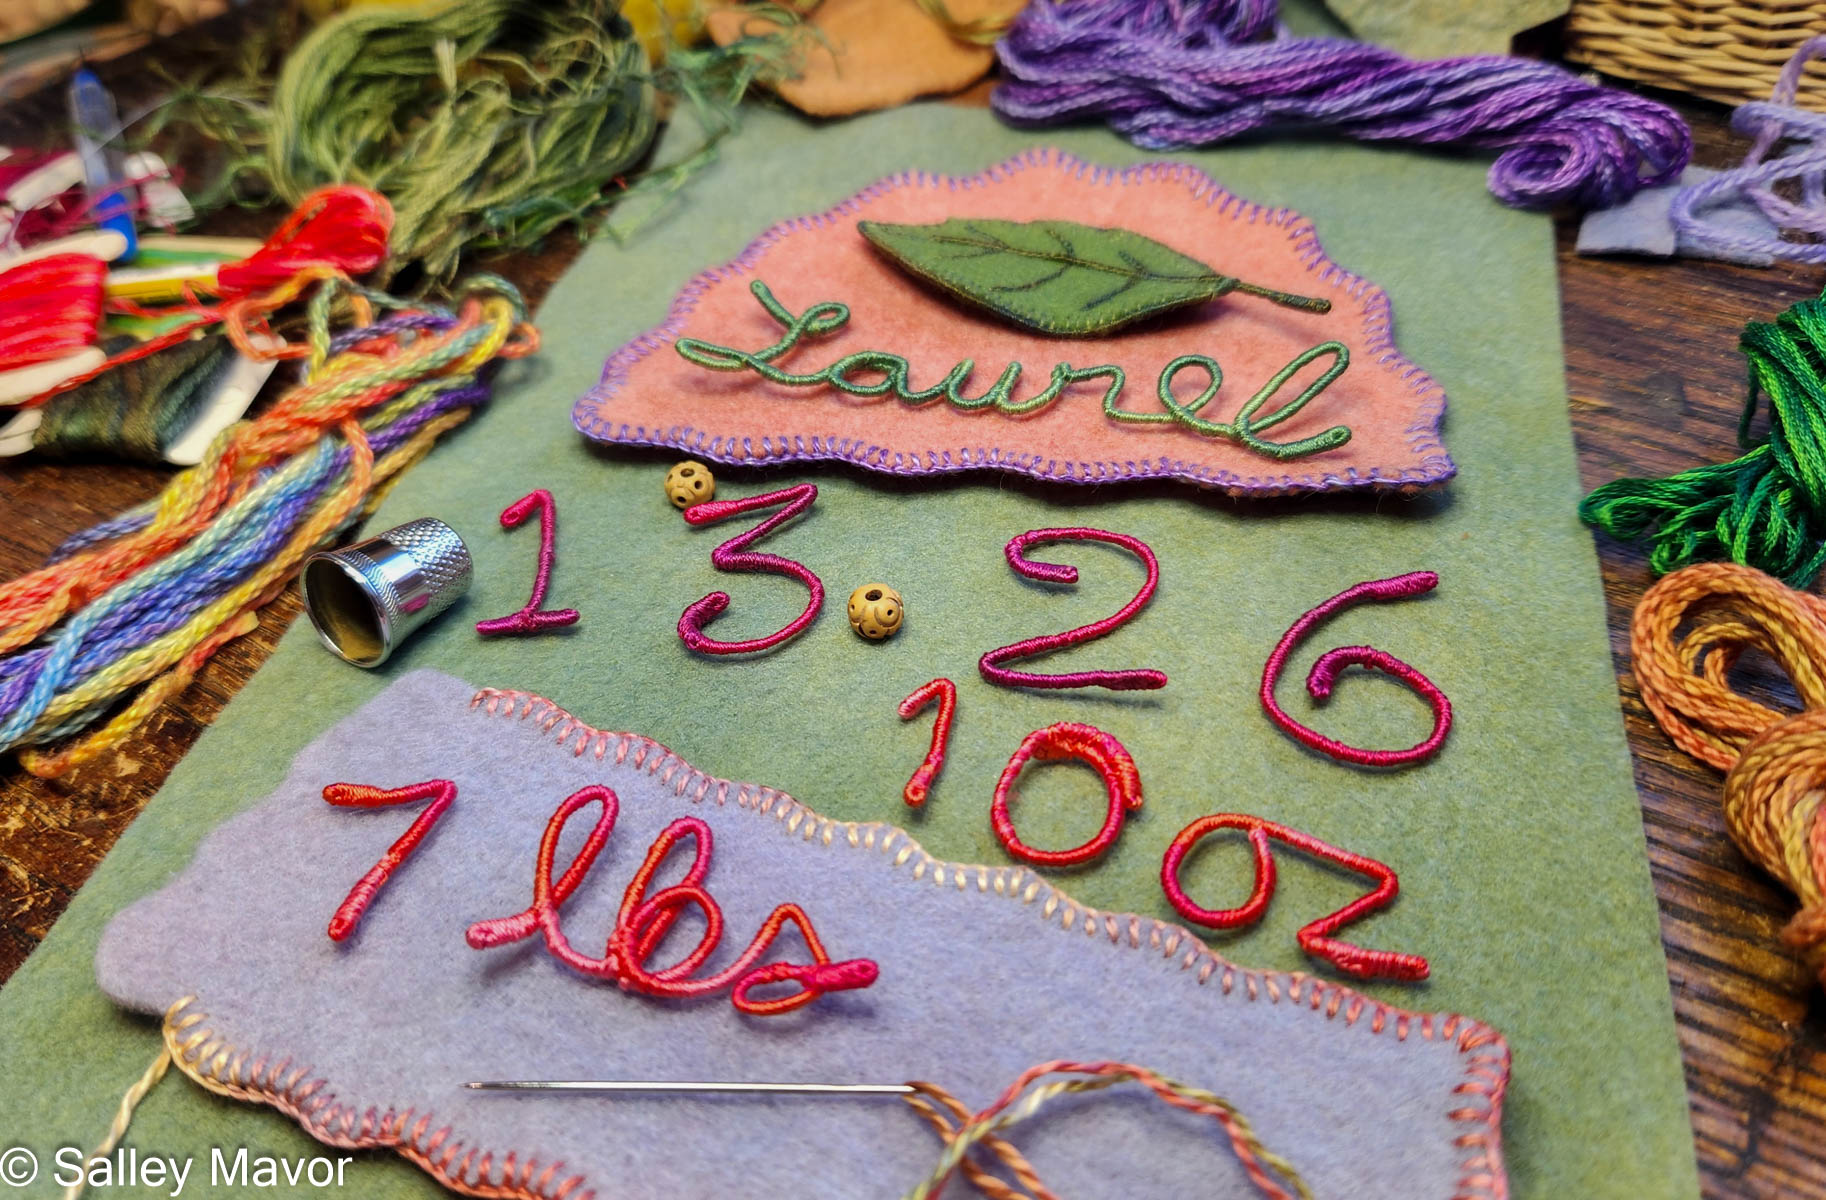
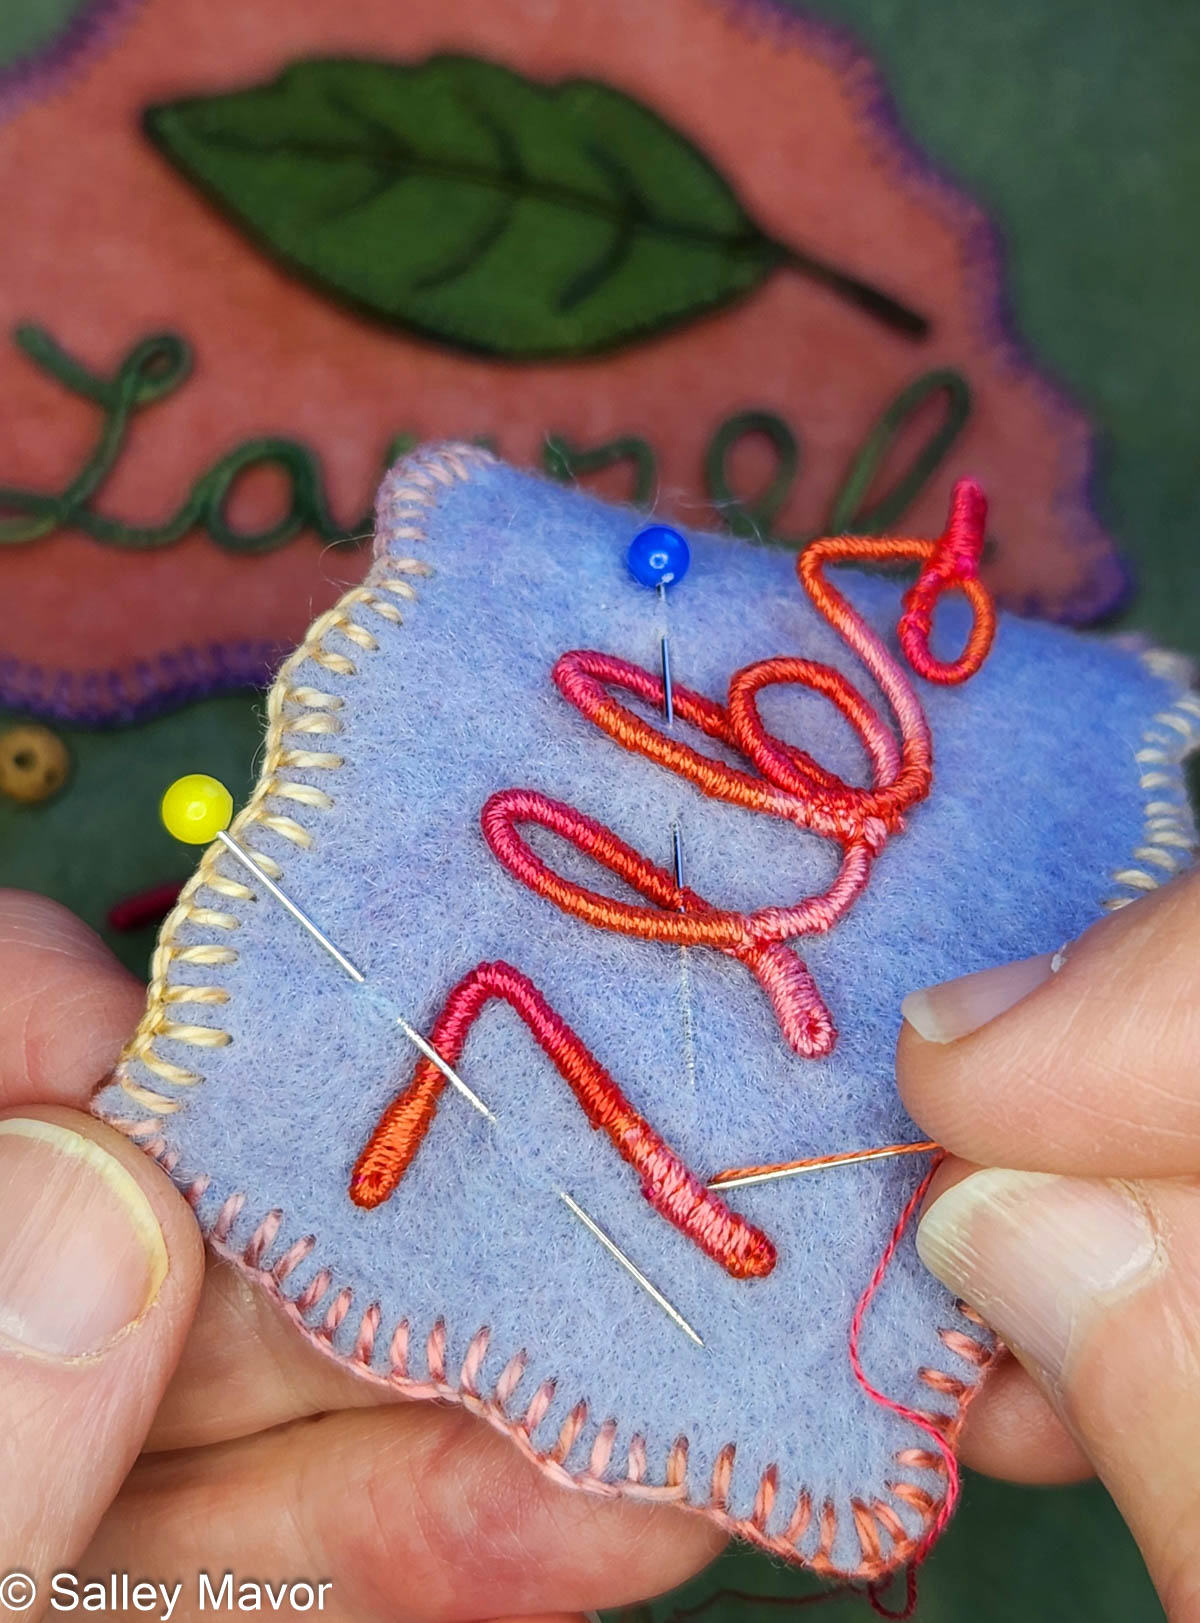
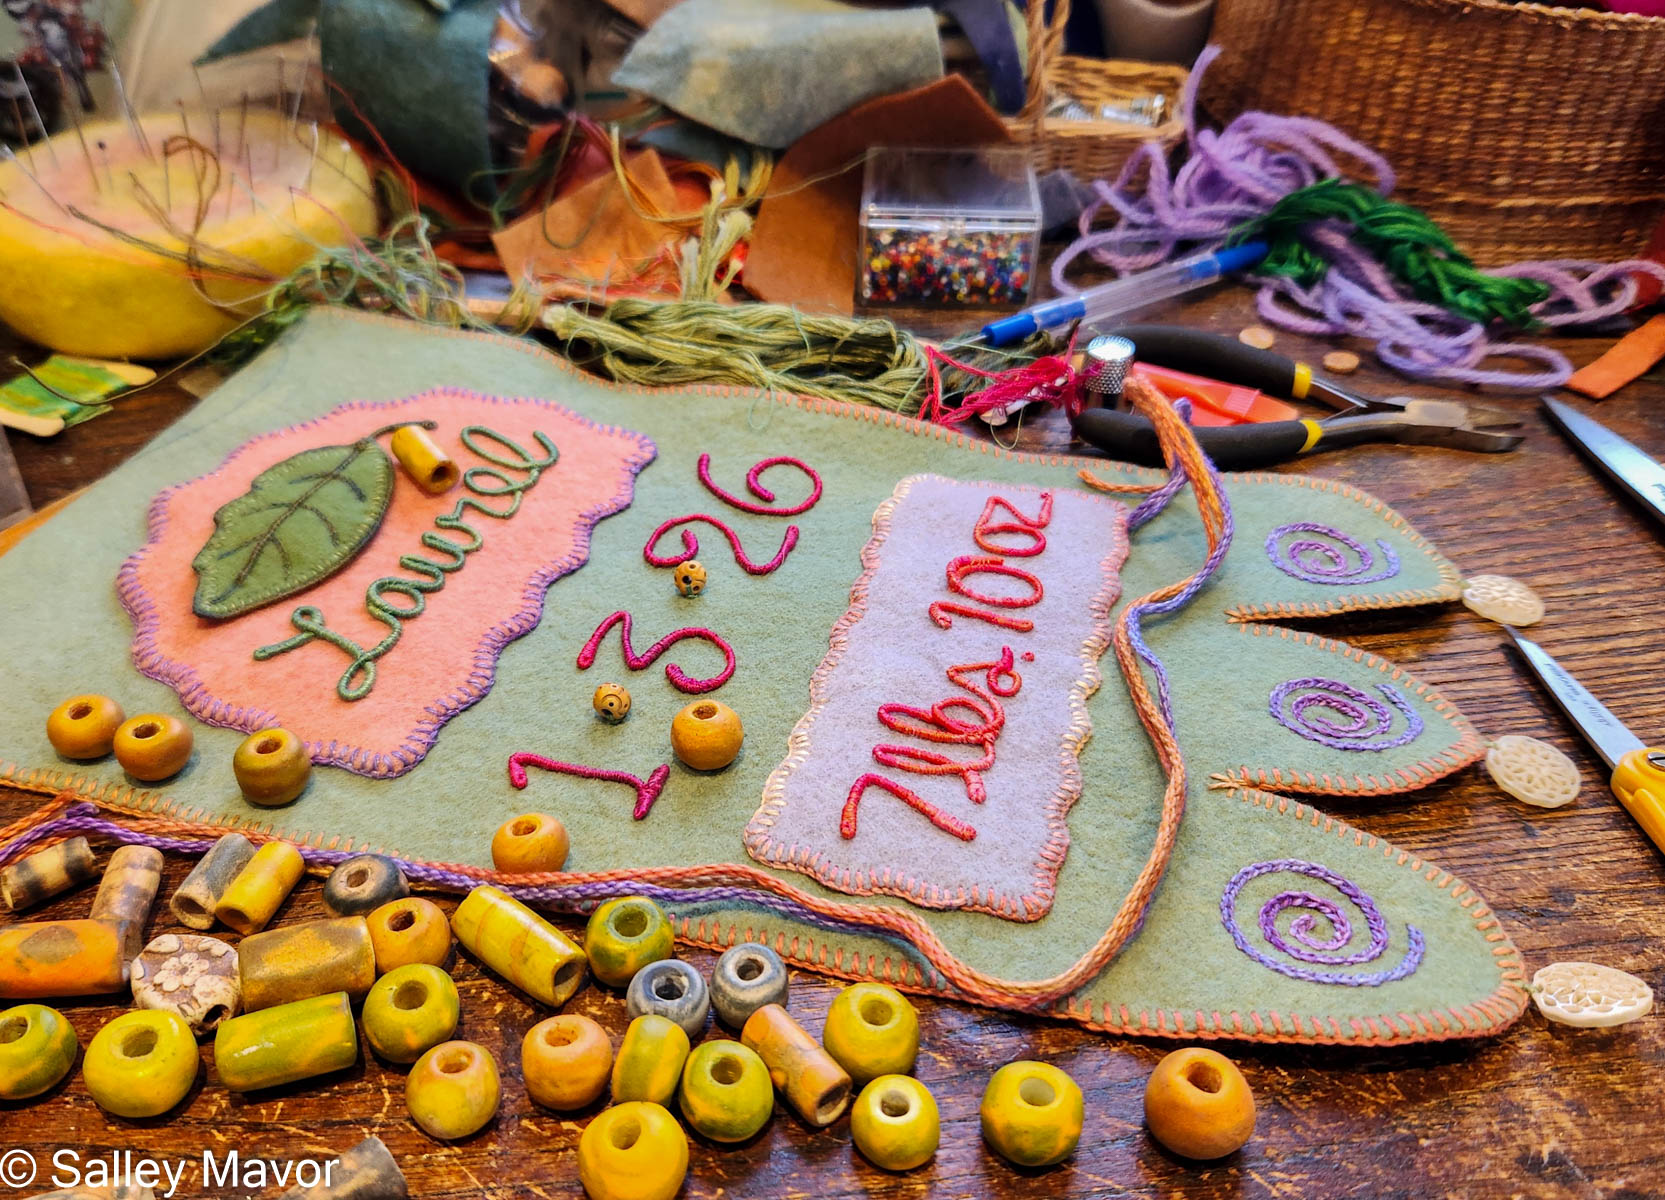
After choosing a color scheme and picking out pieces of felt and thread, I wrote out Laurel’s name in cursive handwriting with a pencil on paper. Fortunately, her name could be written in one continuous line, which doesn’t always happen. I then wrapped a length of DMC memory thread (a kind of wire) with 3 strands of variegated embroidery floss (see video below). Using the drawing as a template, I bent the wire to form her name and stitched the letters together where they touched.

In the following video, I demonstrate wrapping DMC memory thread with 3 strands of embroidery floss to create letters for Laurel’s banner. Memory thread is wire coated with a fibrous material which is easier to grab onto than slippery wire. Wrapping the wire smoothly and evenly takes a lot of practice, so be patient. The wire ends are bent over and wrapped, so that no raw thread ends are hanging out. If you’ve learned to wrap arms and legs for the wee folk dolls in my how-to book, Felt Wee Folk, you’ve got a jump start on mastering this technique.

LAUREL LEAF
Adding a horticultural element to the banner was fun! I cut a laurel leaf shape out of wool felt and edged it with blanket stitching. Then I stitched wire around the outside edge of the leaf for stability. Jewelry wire works for this purpose, but for this project, I used some memory thread that was readily available on my table.

In the following video, you can see how I stitched memory thread (or wire) around the outside edges of the leaf. Then I created veins with wire and chain stitching.

EMBELLISHING FELT BORDERS
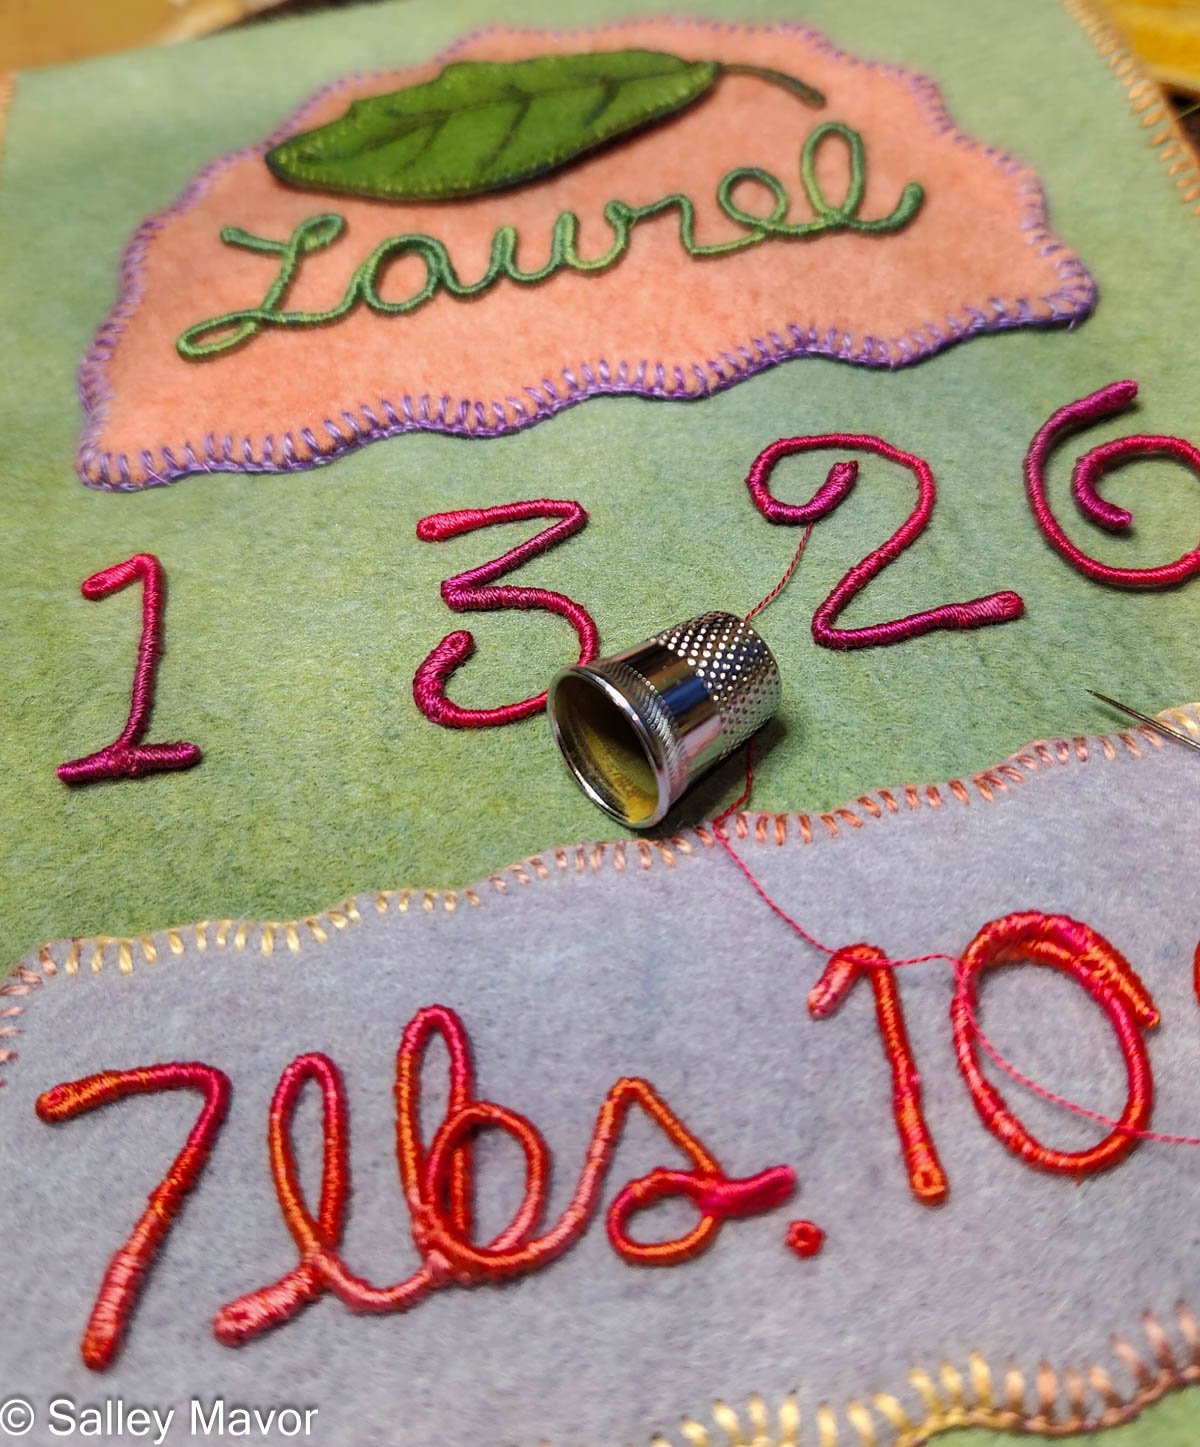
I love embellishing with blanket stitching, especially with variegated thread. It’s a simple and effective way to create an edge that’s both soft and assertive, while also displaying a handmade quality. For me, it’s important to show that a human being made it, not a machine. For this banner, I created layers of felt pieces, which I blanket stitched with pima cotton (Watercolours by Caron).

For these banners, I’ve routinely used variegated floss to wrap the wire that forms the lettering. I like how the changing shades look lively and naturalistic compared to plain solid colors.

I sewed all of the letters and numbers to the pieces of felt.

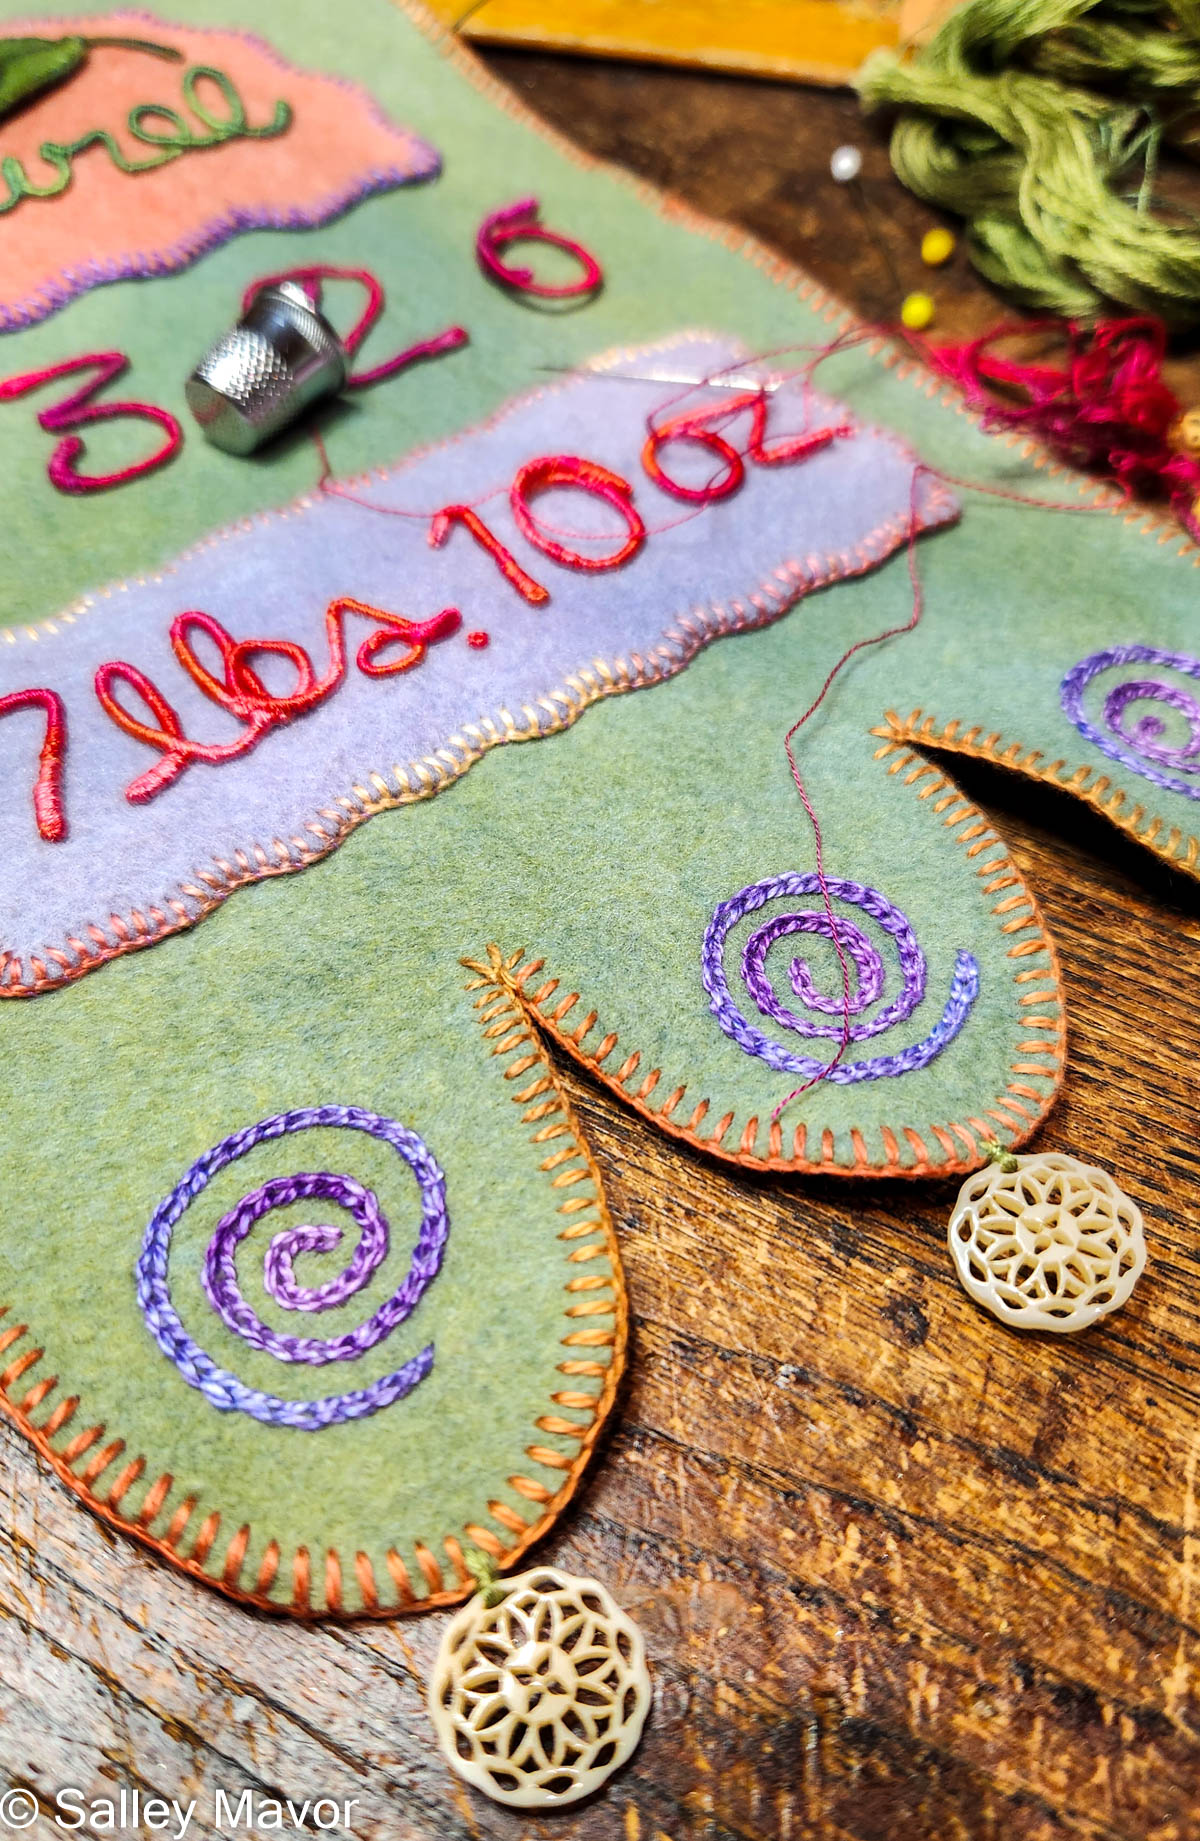
The bottom of the banner has three scalloped flaps that I embroidered with chained stitched spirals. At the bottom points, I sewed on some bone buttons that have been waiting a long time for the just the right purpose.

I searched through my stash to find 2 beads to dangle on either side of the hanging bar at the top up the banner.

The wooden hanging bar is actually an old weather-beaten sail batten that I found washed up on a local beach. I braided cord to make a strap and drilled holes in the stick big enough to thread cord through. And voila, the banner is finished and ready to display!

To keep up with new posts, please subscribe to this blog. Your contact info will not be sold or shared. If you’d like to see more frequent photos tracking the projects in my studio, please follow me on Facebook, Instagram and BlueSky.

Thank you! You can now check your email to confirm your subscription.

Summertime: Part 8 – stitching flora

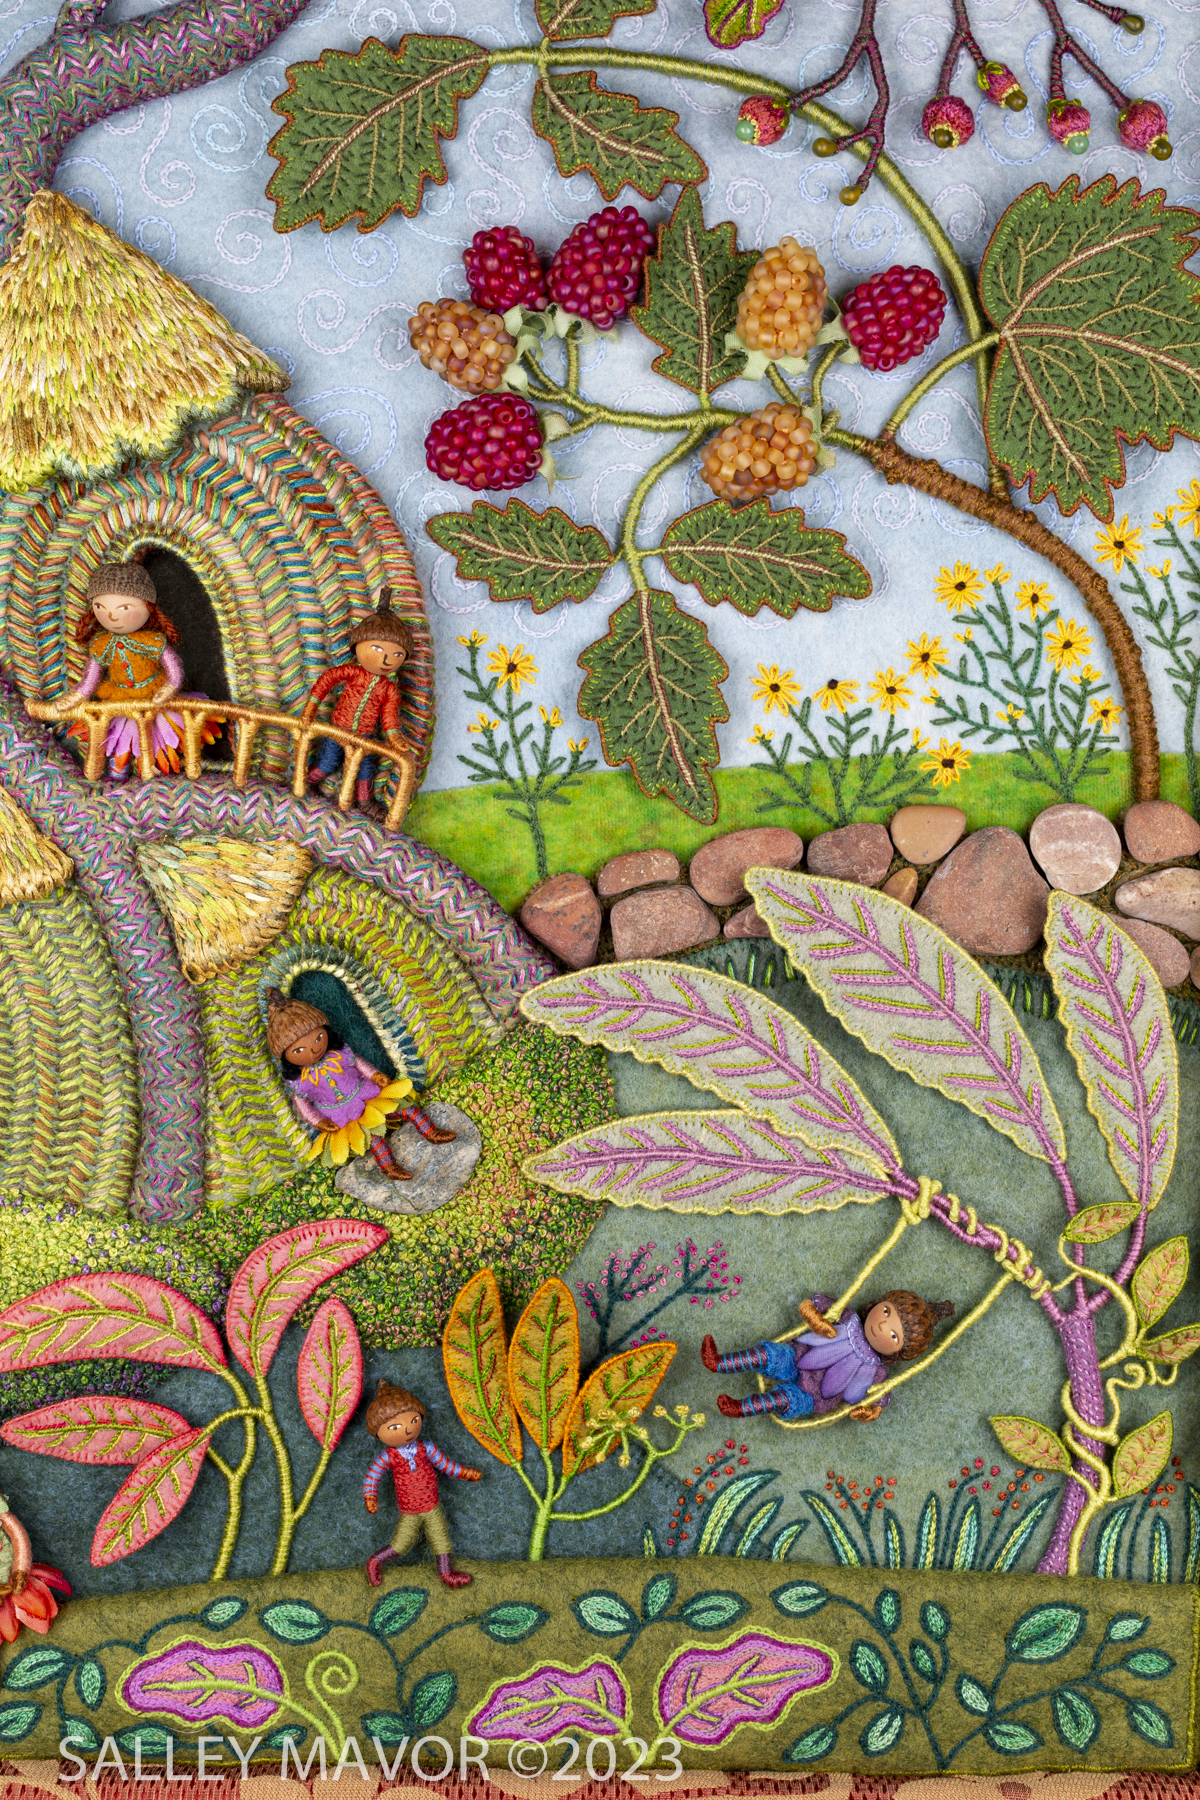
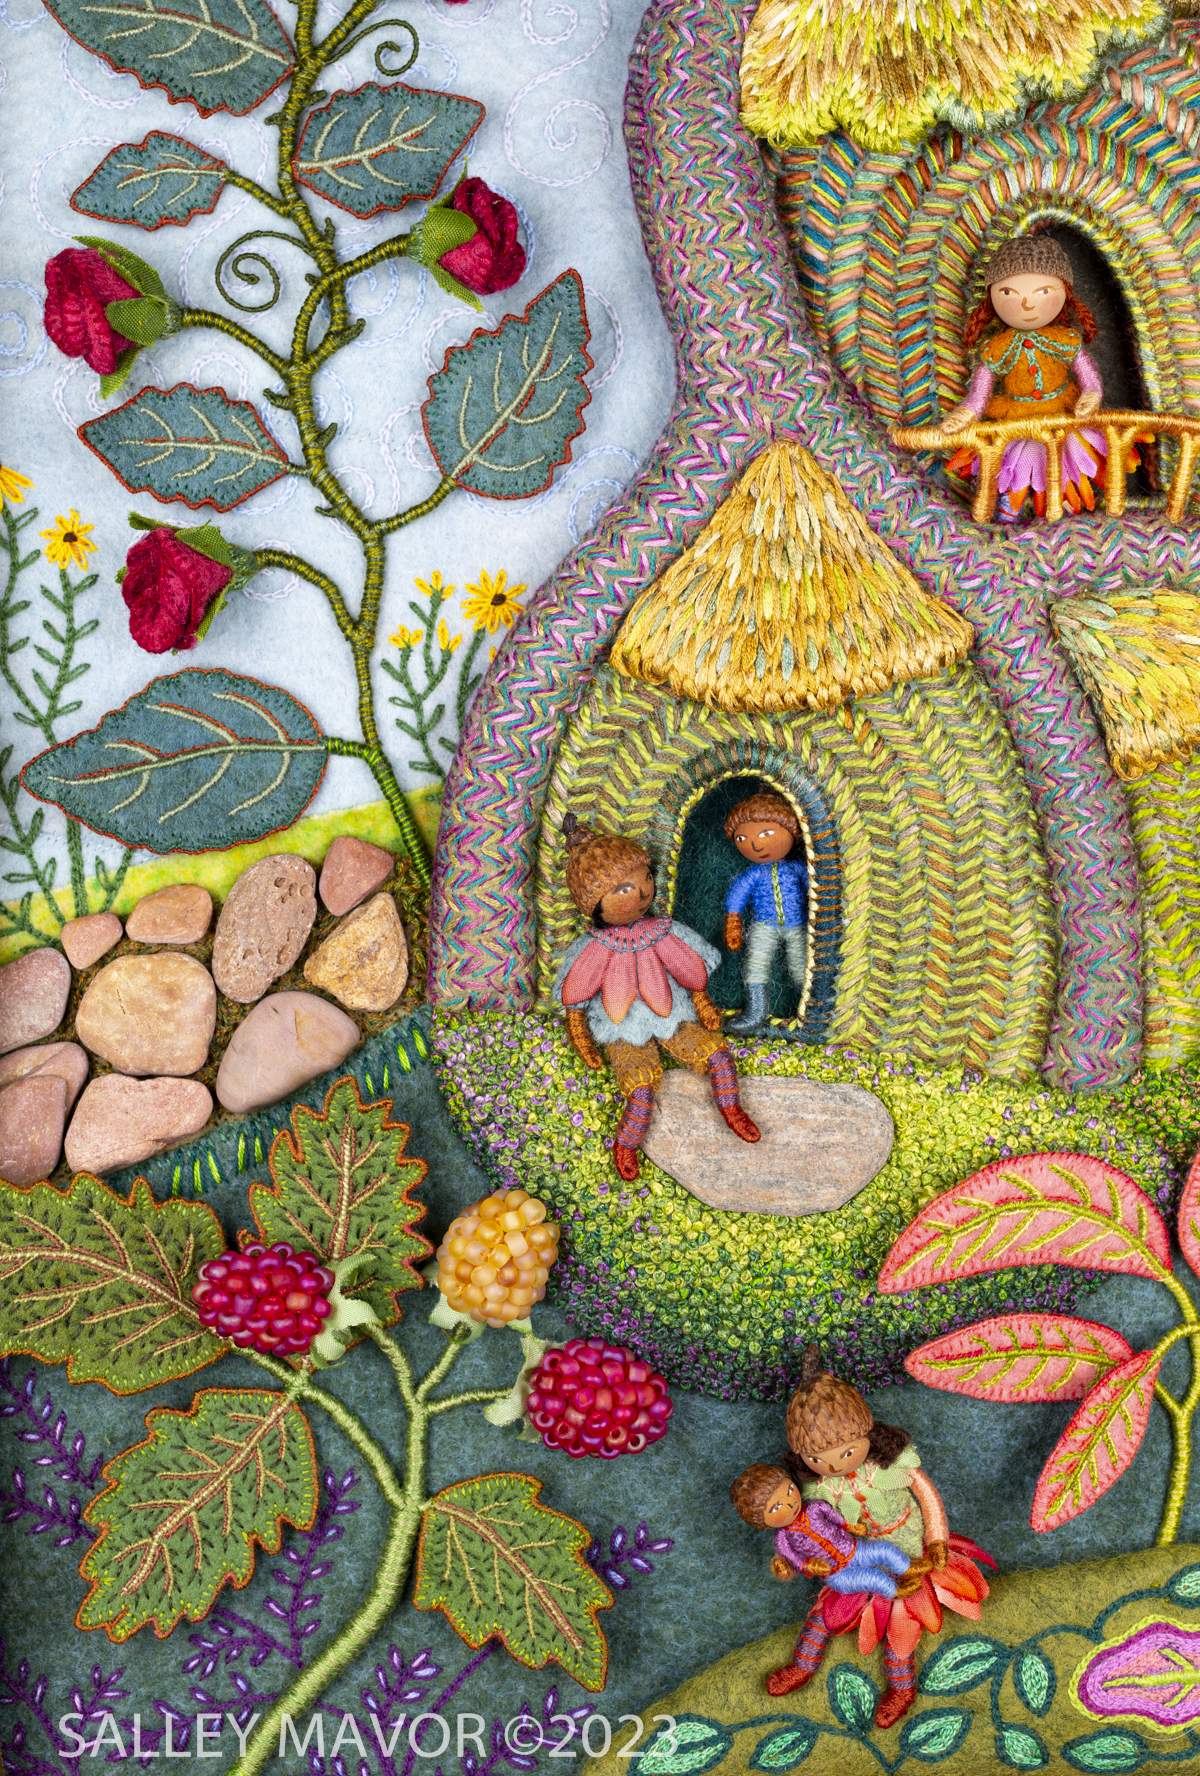
Part 8 in the series of posts about making my piece Summertime includes photos and videos documenting the process of stitching flora. For a more comprehensive understanding of my process, I encourage you to explore other posts in this series: Overview of the piece, Part 1 – Tree Trunks, Part 2 – Tree Houses, Part 3 – leaves, stems and branches, Part 4 – Baltimore Oriole (body), Part 5 – Baltimore Oriole (head and feet), Part 6 – rose vine, Part 7 – raspberry plants, Part 8 – stitching flora, Part 9 – moss, sky and stone wall, and Part 10 – wee folk.

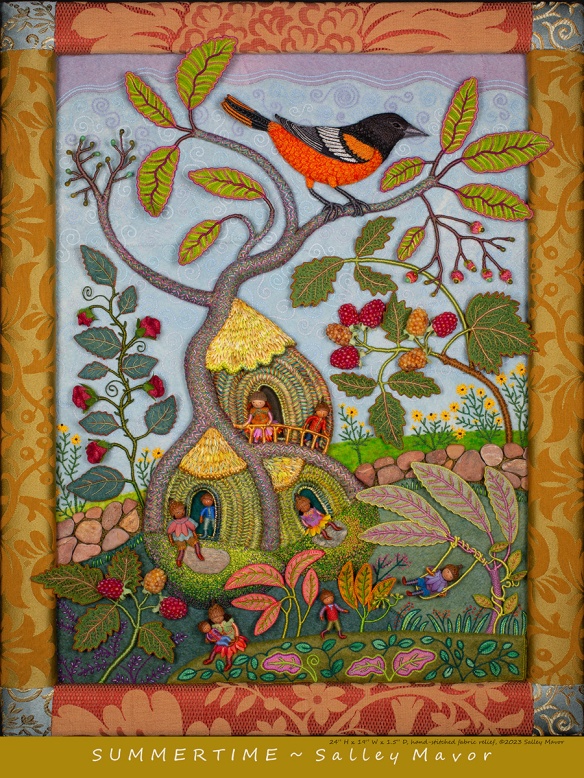
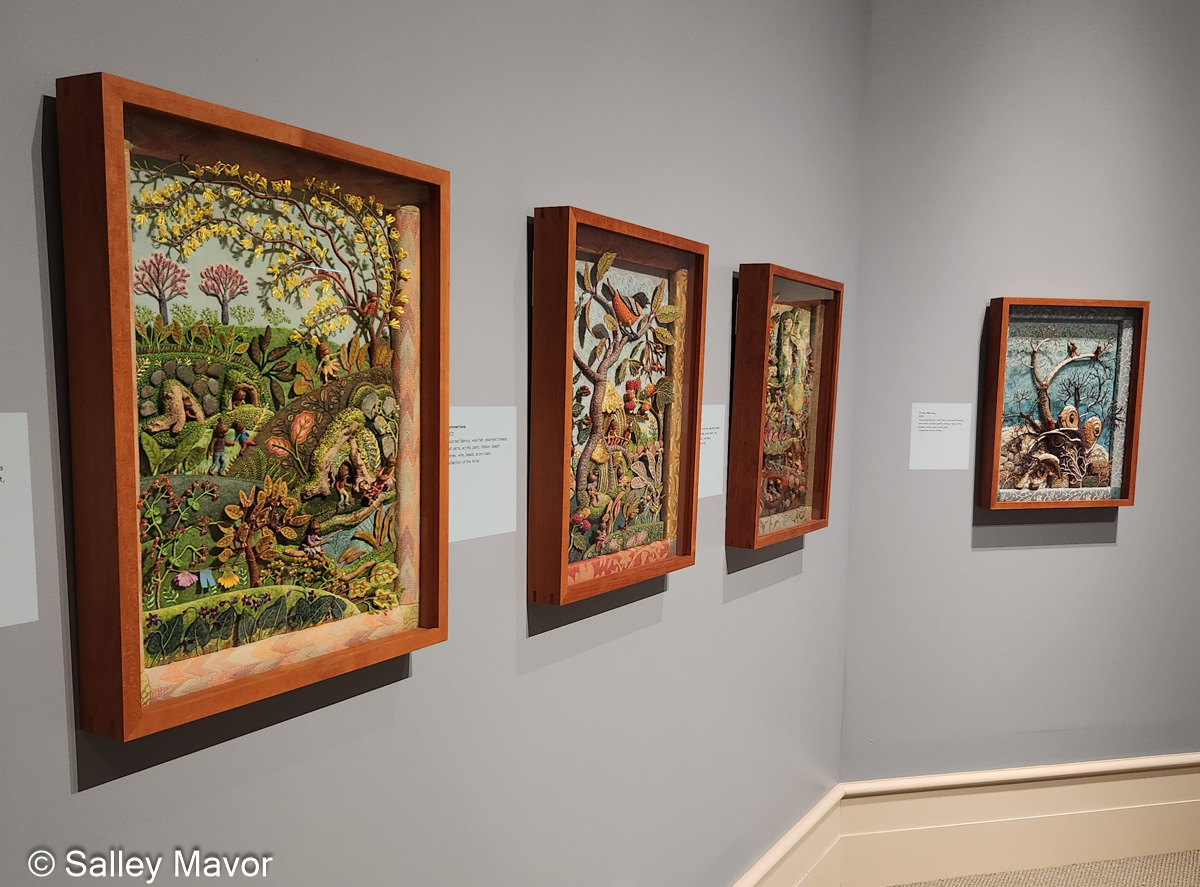
Summertime is the summer scene in a series of four seasonal landscapes that capture the wonder and magic of the natural world. Posters, note cards, prints, bookmarks, and jigsaw puzzles of Summertime and the other scenes in the series (Frosty Morning, Mossy Glen and Harvest Time) are available in my Etsy Shop.

See the Four Seasons Series and dozens of other works in my exhibition, To Every Season: Works by Salley Mavor at the New England Quilt Museum, Sept. 9 – Dec. 31, 2025.The show includes recent work, as well as rarely seen early pieces on loan from private collections.

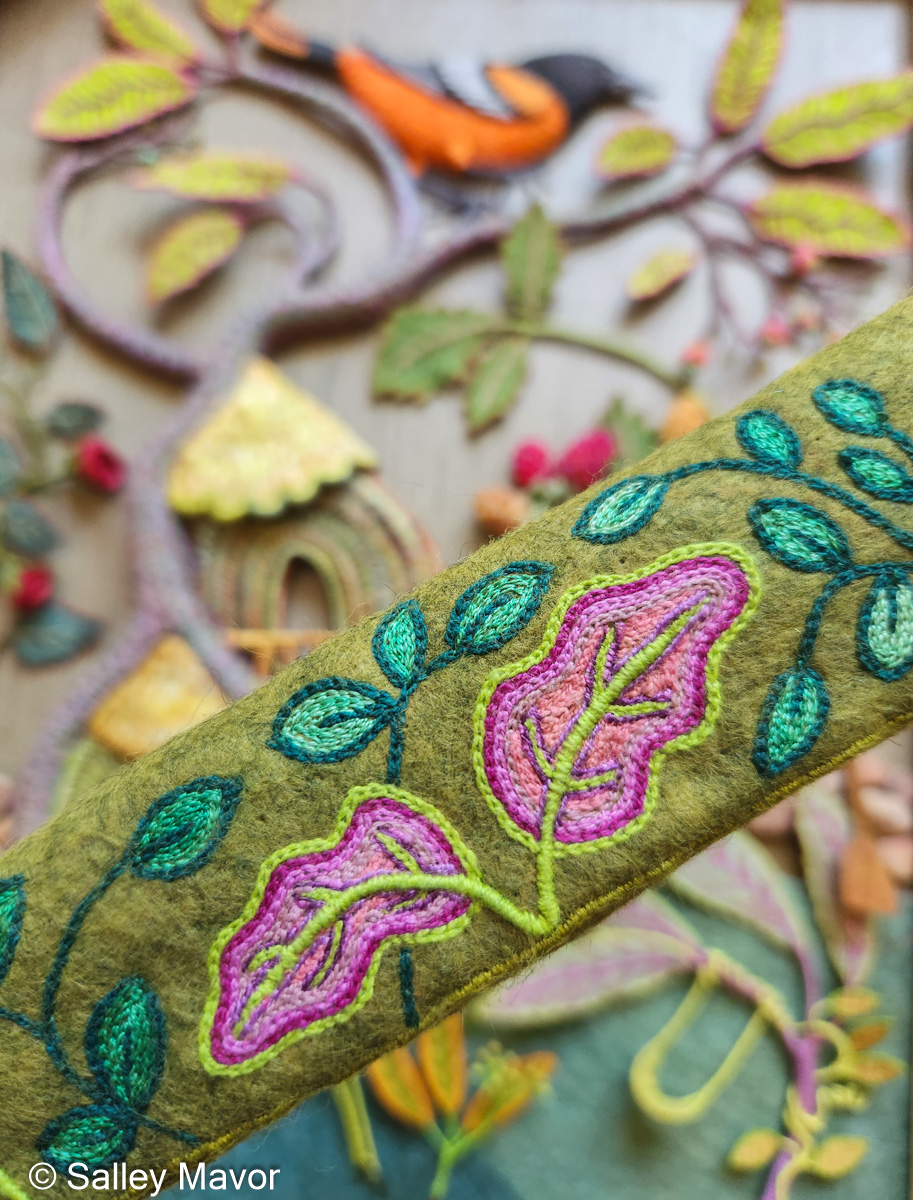
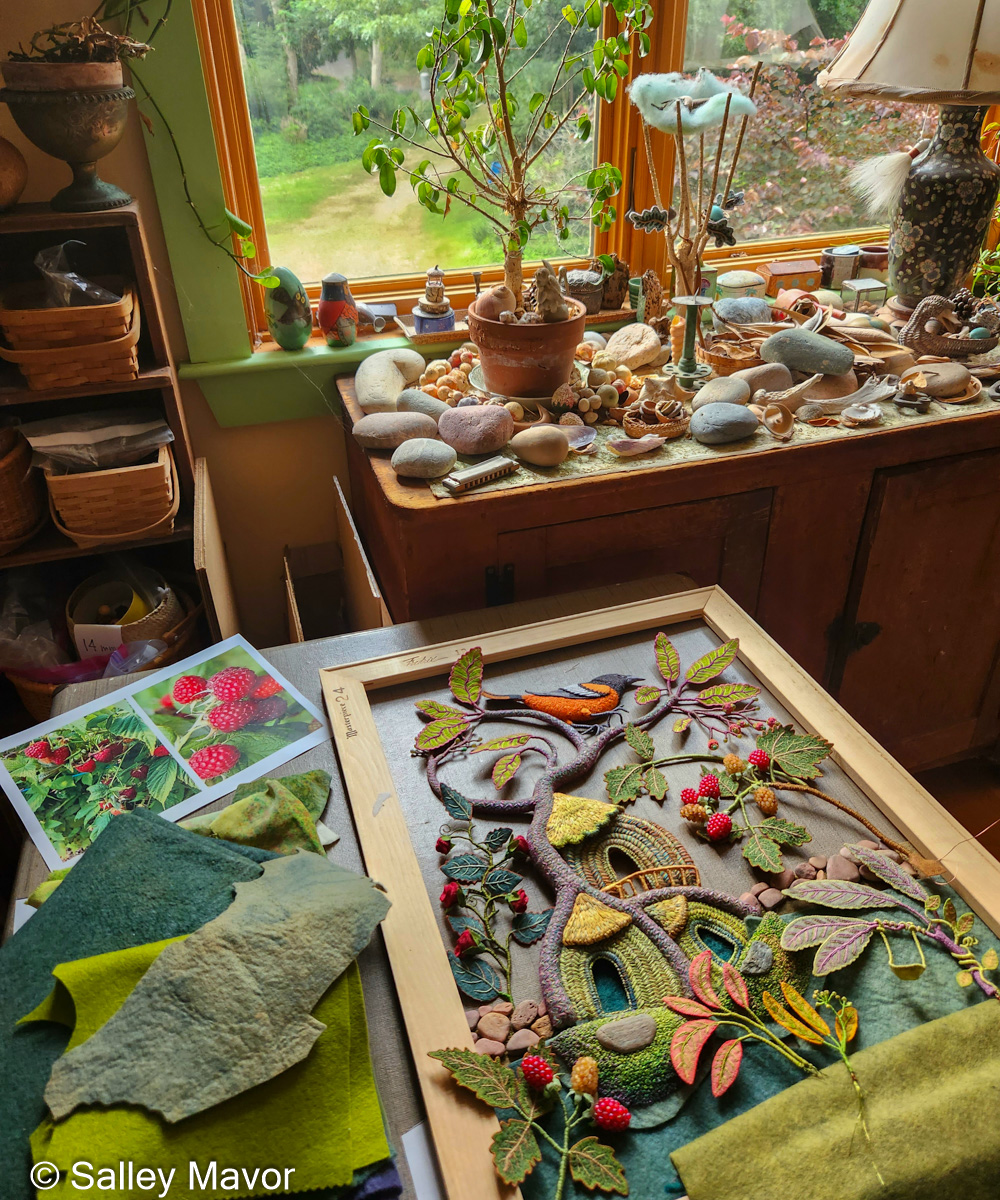
Towards the end of the project, after months of constructing most of the 3-dimensional parts of the scene, I was ready to zero in and add embroidered leaves and flowers where they were needed. In the following video, you can see how I spread out on different work tables in my studio. Every horizontal surface was full of materials and tools, as well as the bits and pieces I’d finished making.

To do the stitching, I require very few things – a piece of felt, a needle, thread, and a thimble. And good lighting, of course. And closeup glasses. No hoop, no cumbersome magnifying equipment and no fancy needles or scissors.

It was almost impossible to draw markings on this fuzzy wool felt, even with chalk. So, I mostly worked freehand and removed the stitched red guide lines later in the process. I used DMC cotton flower thread, which is thicker and bolder than embroidery floss. In this video, watch how I chain-stitched leaves and added Parawire stems on top.

Chain-stitching these leaf shapes was as soothing as filling in a coloring book.

I added patches of black-eyed susans to open areas of blue sky below the raspberries and above the stone wall (coming in part 9).

In other open areas, I chain-stitched blades of grass, dotted with little French knot flowers.

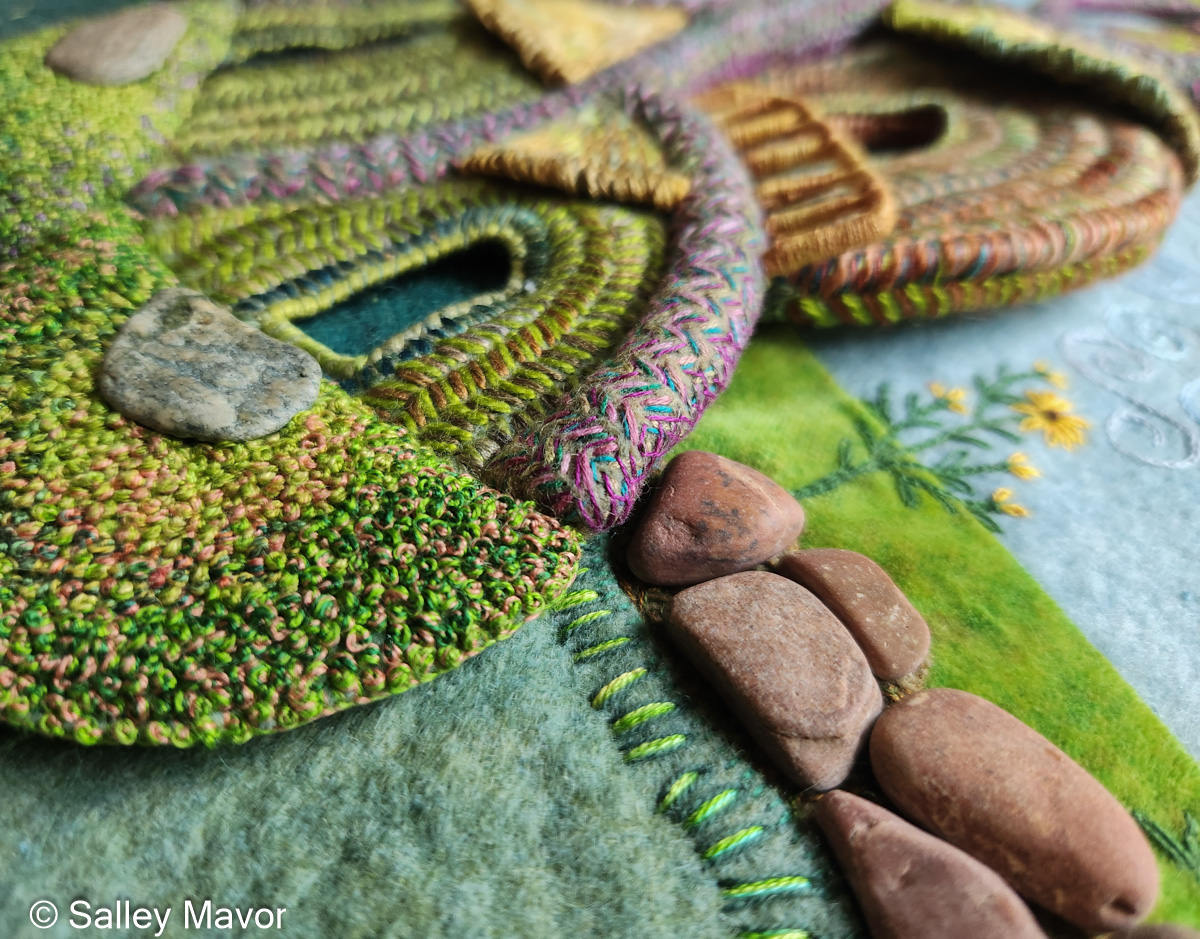
I was nearing the end of the project, which meant that it was time to tackle the border. I got out my stash of upholstery fabric and tried out different color combinations. Red and gold popped out at me; they contrasted with the blue sky and brought out the color of the raspberries. I padded the wooden stretchers with cotton quilt batting and sewed the upholstery fabric around the frame, which created a shallow box to fill with all of the parts.

Stay tuned for Part 9, where I’ll share photos and videos documenting the process of stitching moss and the sky, and building the stone wall in Summertime.

To keep up with new posts, please subscribe to this blog. Your contact info will not be sold or shared. If you’d like to see more frequent photos tracking the projects in my studio, please follow me on Facebook, Instagram and BlueSky.
Thank you! You can now check your email to confirm your subscription.

Summertime: Part 7 – raspberry plants

Part 7 in the series of posts about making my piece Summertime features photos and videos documenting the process of creating the raspberry plants. So far, I’ve written an overview of the piece, Part 1 – Tree Trunks, Part 2 – Tree Houses, Part 3 – leaves, stems & branches, Part 4 – Baltimore Oriole (body), Part 5 – Baltimore oriole (head and feet), Part 6 – rose vine, Part 8 – stitching flora, and Part 9 – moss, sky and stone wall.

Summertime is the summer scene in a series of four seasonal landscapes that capture the wonder and magic of the natural world. Posters, note cards, prints, bookmarks, and jigsaw puzzles of Summertime and the other scenes in the series (Frosty Morning, Mossy Glen and Harvest Time) are available in my Etsy Shop.

See the Four Seasons Series and dozens of other works in my exhibition, To Every Season: Works by Salley Mavor at the New England Quilt Museum, Sept. 9 – Dec. 31, 2025.The show includes recent work, as well as rarely seen early pieces on loan from private collections.

RASPBERRIES
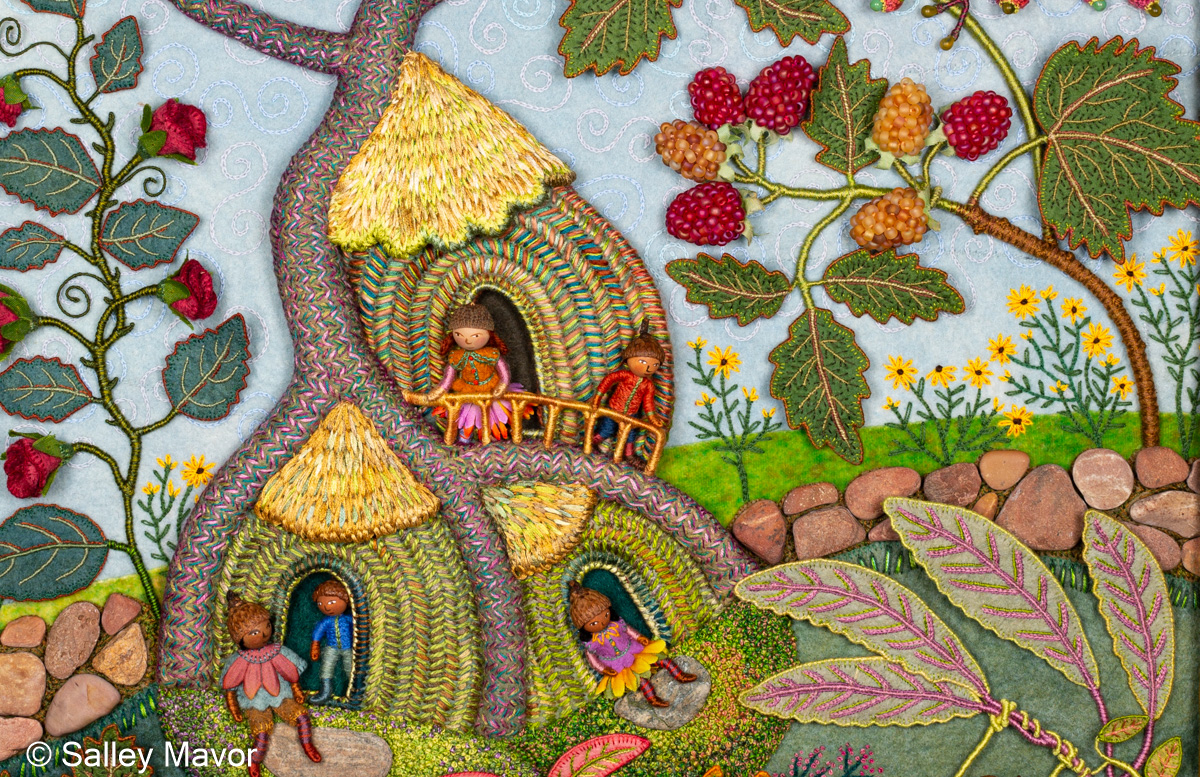
The idea to add raspberries came late in the process, months after I’d begun stitching and constructing the piece. I was inspired by our new raspberry patch, which was producing the most succulent fruit I’d ever grown. The raspberries practically begged to be featured in the summer scene! My original design included flowers, but I was much more excited about making raspberries.

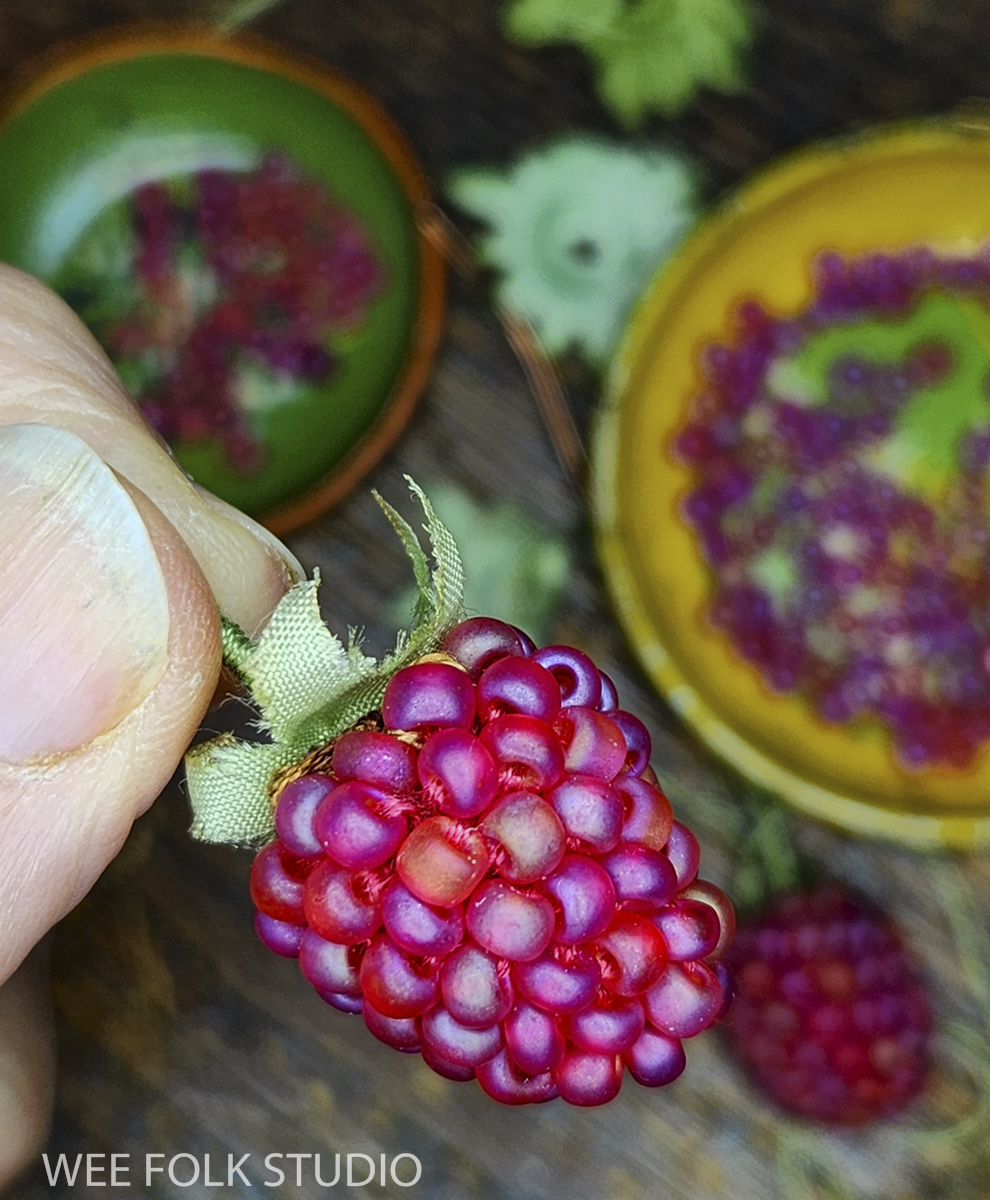
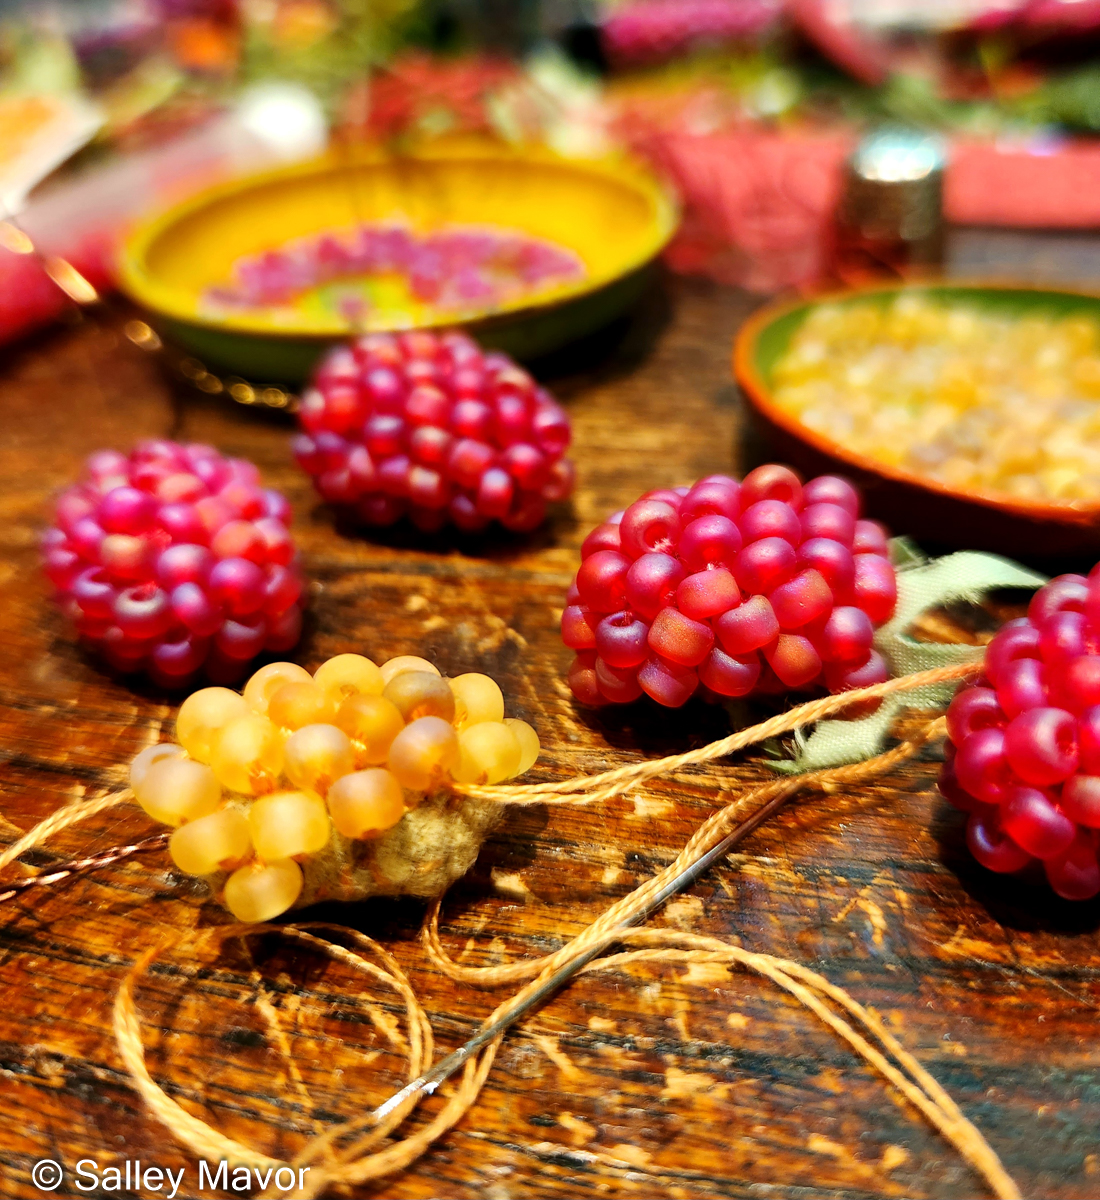
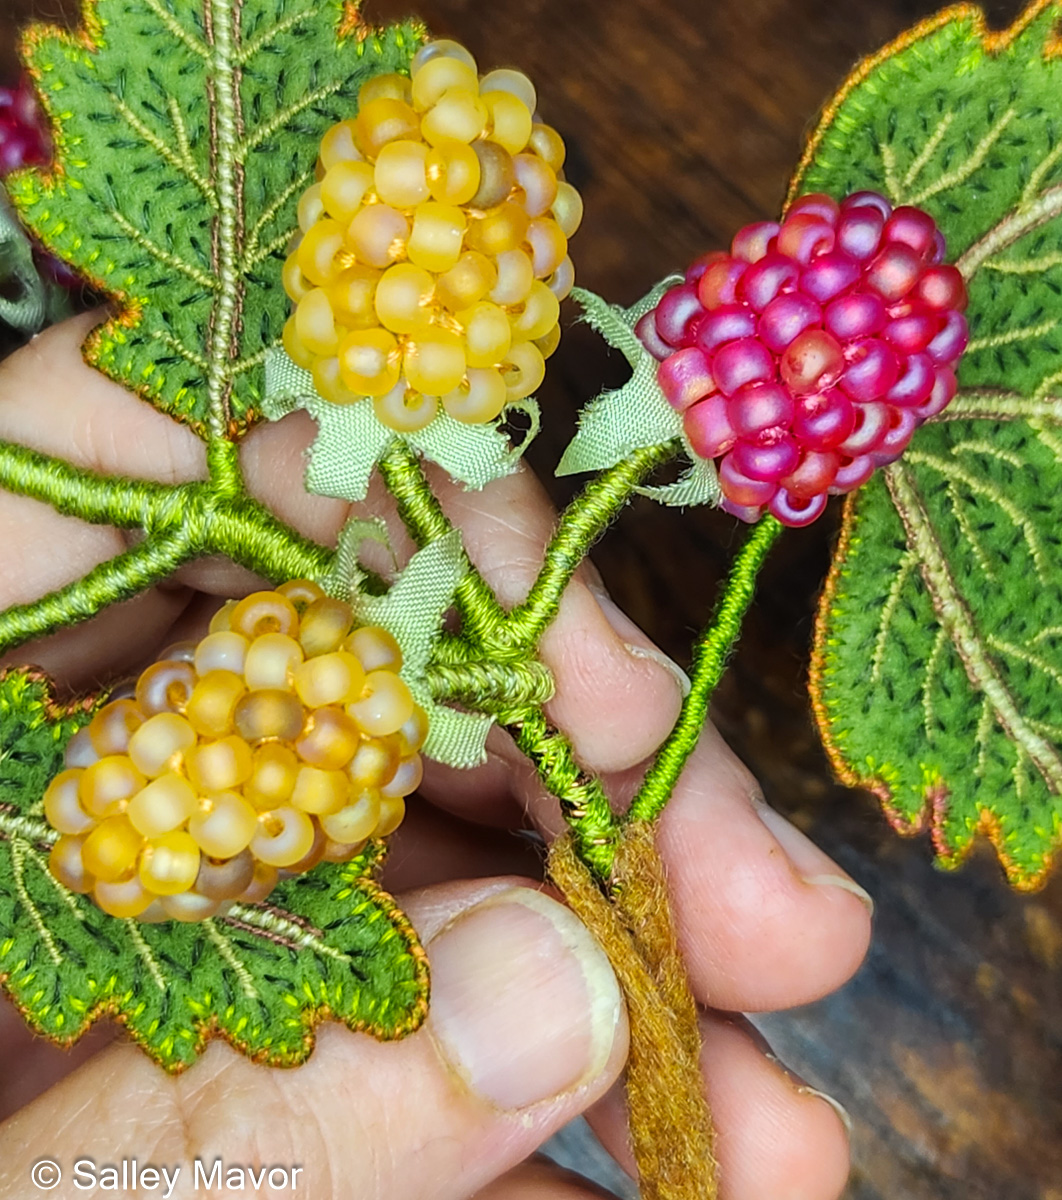
Now came the fun part, where I examined raspberries, both real and in photos, imagining how to replicate them with stitching and found objects. I searched through my stash and found some frosted glass beads that were just the right shade of reddish pink. The goal wasn’t to reproduce exact copies, but to make the imitation raspberries look even more scrumptious than real ones. The following video demonstrates how I made the felt core, sewed on the beads, and wrapped the stem with embroidery floss.

My supply of beads was limited, so I conserved them by covering just the top and sides of the felt core, leaving a bare back that could more easily be sewn to the background fabric. When I ran out of red beads, I used yellow ones to make more raspberries.

RASPBERRY LEAVES
Looking closely, I noticed that raspberry leaves were quite complex, with fine saw-like teeth that would be hard to replicate in felt. I ended up making a stylized version that was as pointy as I could get.

The following video shows how I sewed wire around the outside edge and embroidered veins on a felt raspberry leaf.

Once there were enough berries and leaves, I linked them together with wire branches. Then, I covered the wire with embroidery floss.

This video shows how I twisted Parawire to make stems and branches and then wrapped the wire with embroidery floss.

This video shows how I covered the thicker bottom branches with a strip of brown felt.

This project is a clear example of the importance of flexibility in my working process. There’s a reason that I steer away from textiles and needlework that involve grids, graphs or patterns. In the beginning, I’m not so certain about how my art is going to develop. Sure, I start with a basic design and structure, but I like to keep a door open for change. In this case, raspberries showed up.

Stay tuned for Part 8, where I’ll share photos and videos documenting the process of stitching flora in Summertime.

To keep up with new posts, please subscribe to this blog. Your contact info will not be sold or shared. If you’d like to see more frequent photos tracking the projects in my studio, please follow me on Facebook, Instagram and BlueSky.
Thank you! You can now check your email to confirm your subscription.

Summertime: Part 6 – rose vine

Part 6 in the series of posts about making my piece Summertime features photos and videos documenting the process of creating the rose vine.

For a more comprehensive understanding of my process, I encourage you to explore other posts in this series: Overview of the piece, Part 1 – Tree Trunks, Part 2 – Tree Houses, Part 3 – leaves, stems and branches, Part 4 – Baltimore Oriole (body), Part 5 – Baltimore Oriole (head and feet), Part 6 – rose vine, Part 7 – raspberry plants, Part 8 – stitching flora, Part 9 – moss, sky and stone wall, and Part 10 – wee folk.

Summertime is the summer scene in a series of four seasonal landscapes that capture the wonder and magic of the natural world. Posters, note cards, prints, bookmarks, and jigsaw puzzles of Summertime and the other scenes in the series (Frosty Morning, Mossy Glen and Harvest Time) are available in my Etsy Shop.

See the Four Seasons Series and dozens of other works in my exhibition, To Every Season: Works by Salley Mavor at the New England Quilt Museum, Sept. 9 – Dec. 31, 2025. The show includes recent work, as well as rarely seen early pieces on loan from private collections.

ROSES
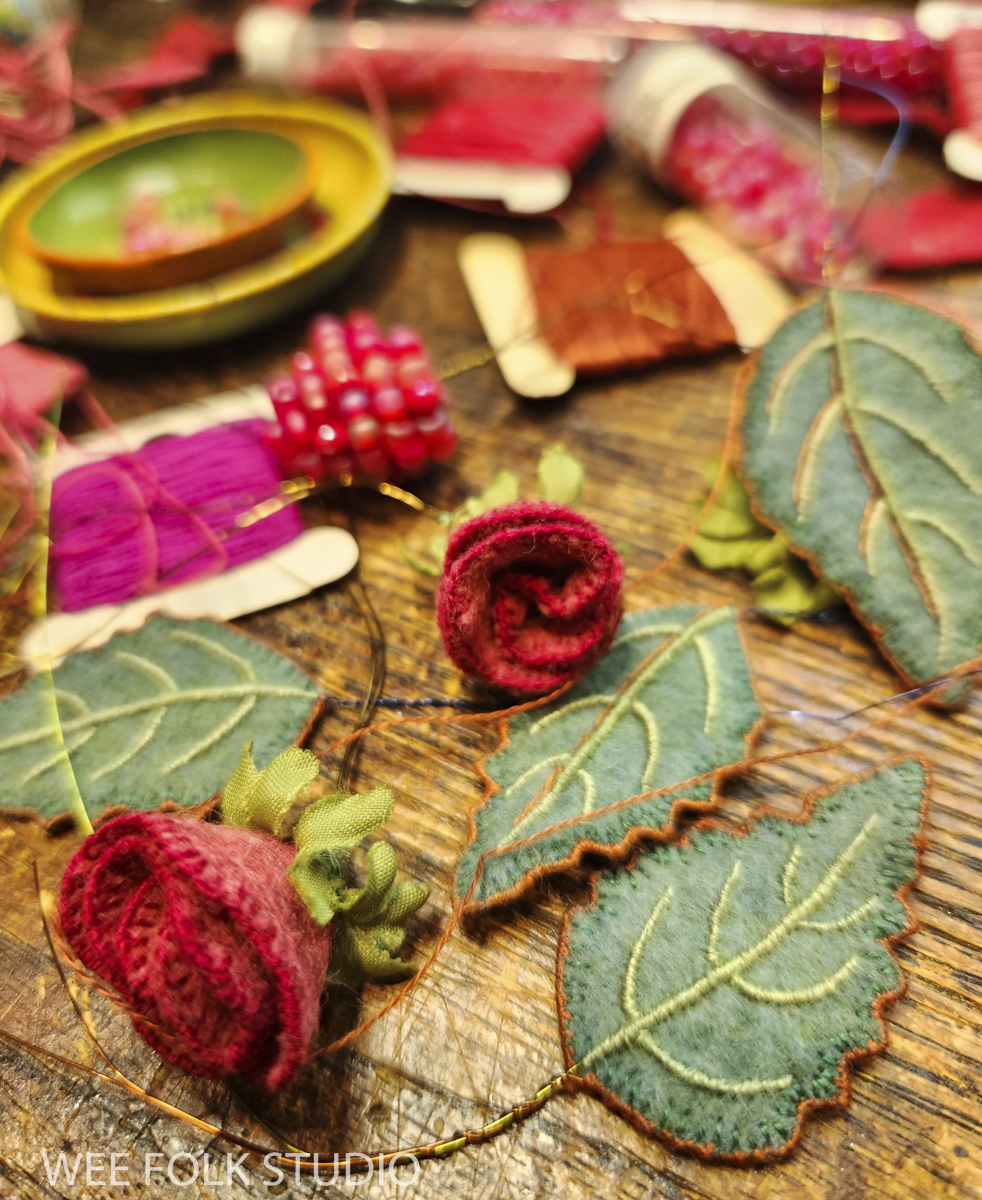
I learned how to make basic felt roses like these years ago from Mimi Kirchner’s blog. Mimi’s tutorial is available here. I love how deceptively simple the process is, starting with a circle of felt and folding it like origami to make a rose shape. Watch the following video to see how I finished off the raw felt edges with blanket stitching and folded the circle to make a rose.

Felt Rose

LEAVES
To cut out the sharp-toothed edge around the rose leaves, I used pinking shears. The following video shows how I stitched wire around the outside of a felt leaf and embroidered its stem and veins.

Felt Rose Leaf

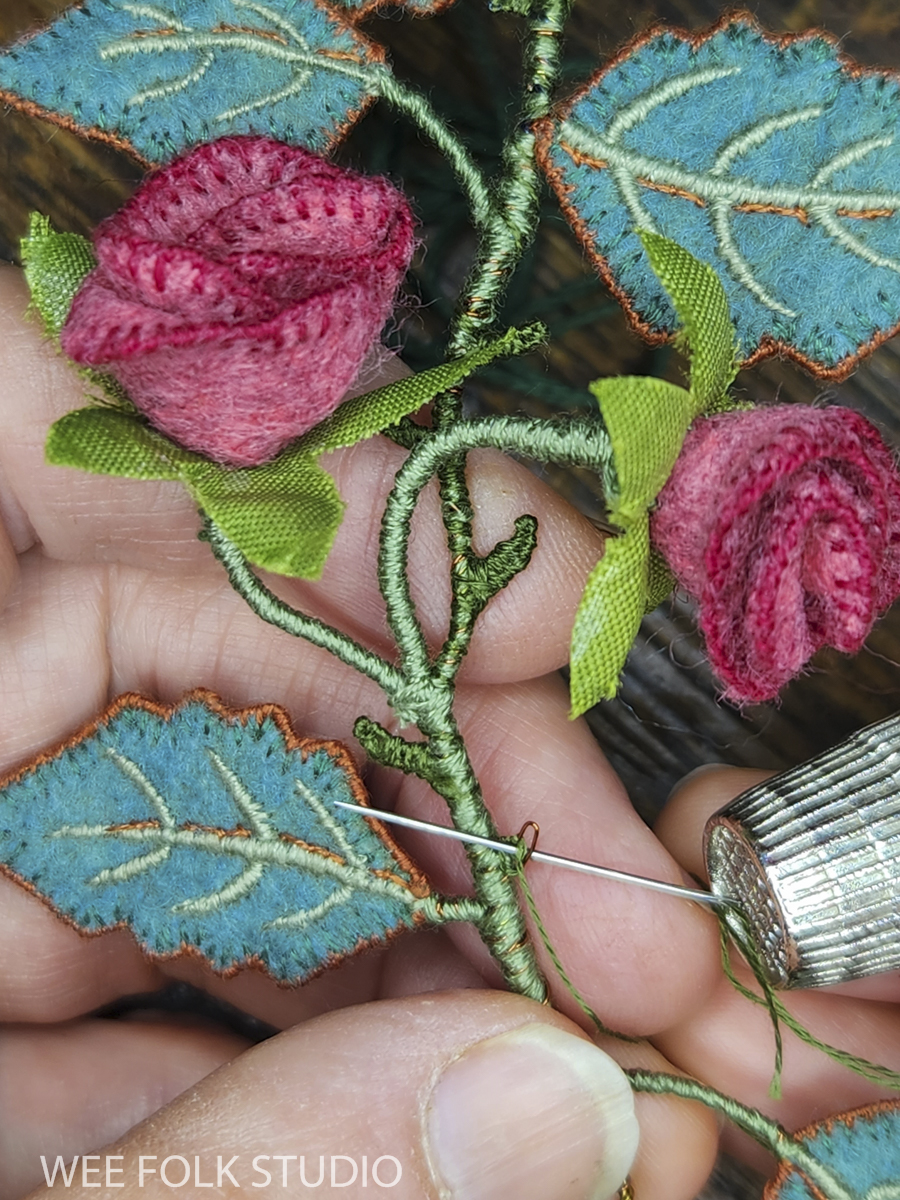
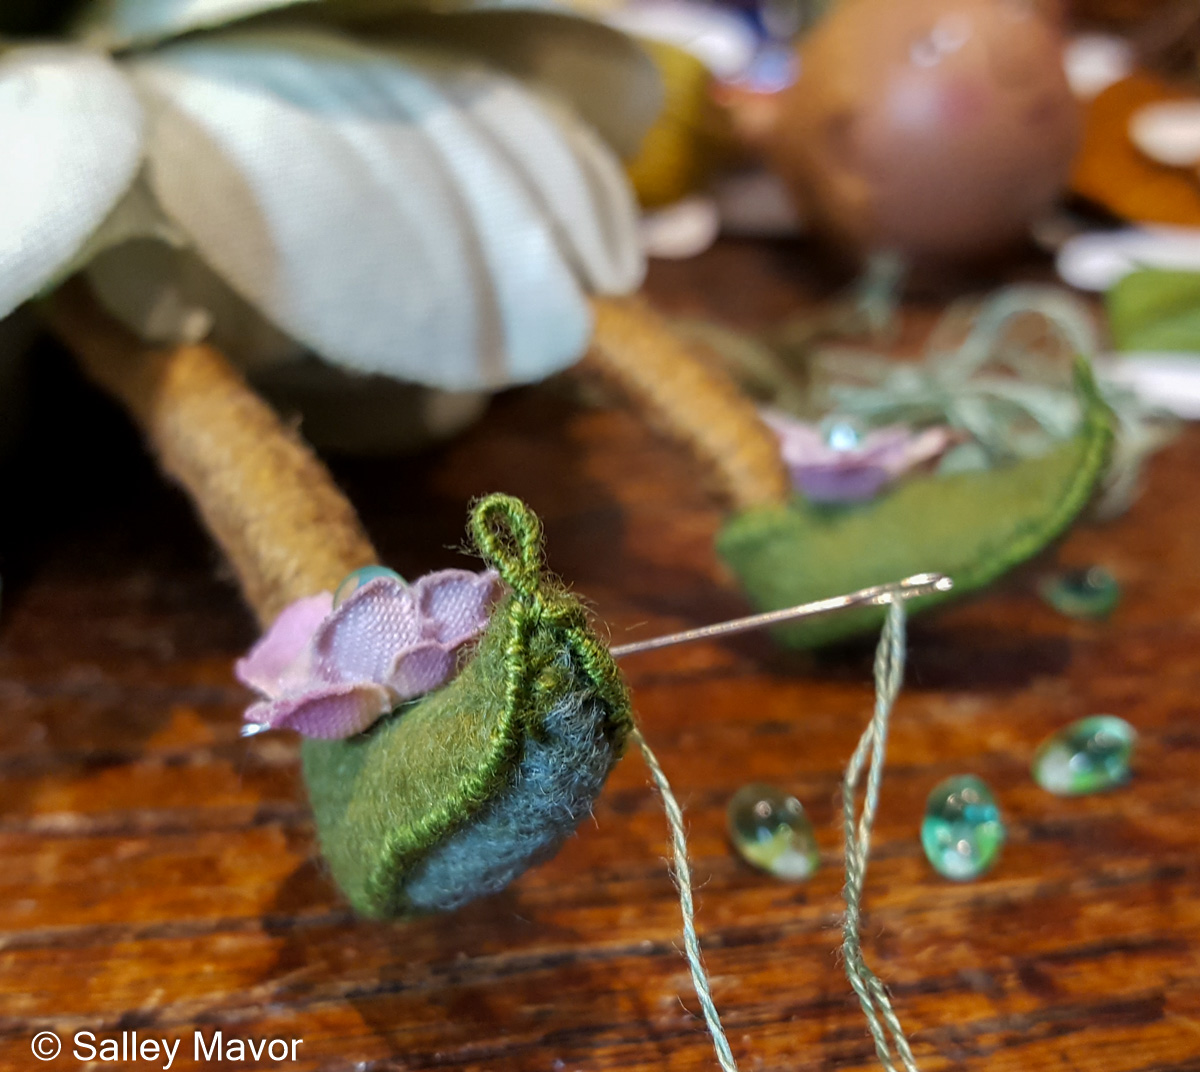
I twisted wire to make a central vine and added the roses, leaves, thorns, and curly tendrils. Besides felt and embroidery floss, the most common material in my artwork is wire. Felt alone is too floppy and needs structural supports. I used Parawire in a range of gauges, from 24 to 32, to build up the thickness and strength I wanted.

The last step was disguising the shiny metallic wire with embroidery floss. Part 3 in this series includes videos of wrapping wire stems and branches on other foliage in the Summertime piece. I wound 1 or 2 strands of floss around and around the stems until the surface was evenly covered. It was a bit tricky to make the thorns look sharp!

Stay tuned for Part 7, where I’ll share photos and videos documenting the process of making the raspberry plants in Summertime. To keep up with new posts, please subscribe to this blog. Your contact info will not be sold or shared. If you’d like to see more frequent photos tracking the projects in my studio, please follow me on Facebook, Instagram and BlueSky.
Thank you! You can now check your email to confirm your subscription.

tiny shoes are big

What is it about tiny shoes? There’s something irresistible about small scale footwear, whether it’s baby booties or doll shoes. Every time I post a photo with miniature shoes, there’s a huge response. So, I thought I’d share a selection of little slippers, boots and even high-heeled shoes I’ve made that range from precious to provocative (with a surprise guest near the end of the post).

detail from “MY BED”

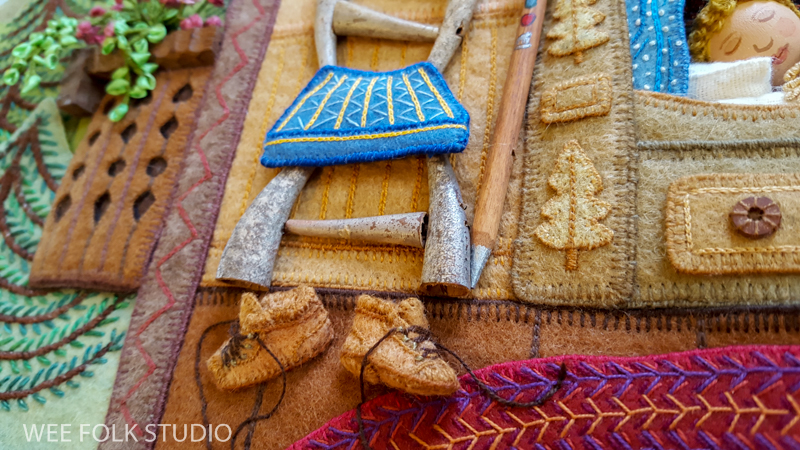
Many of the illustrations in my picture book, MY BED, show pairs of shoes that were put aside at bedtime, including the slippers above and the hiking boots below.

detail of hiking boots in “MY BED”
detail from “MY BED”

When making the Japanese interior scene for MY BED, I tried hard to convey a spare and ordered aesthetic, but couldn’t help myself from placing 2 pairs of slippers off to the side of the tatami mat. I thought that the shoes would break up the geometric blocks and give the space a lived in appearance. I’ve since learned that I don’t have a proper grasp of Japanese culture, because leaving one’s shoes out like that is a big no no! One follower pointed out that Japanese children would be spanked for being so careless. I was further corrected when the slippers were photoshopped out of the illustration in the Japanese edition of the book!

detail from “MY BED”

Early on, I made shoes out of old kid leather gloves that I painted brown, like the ones in this kitchen scene from Mary Had a Little Lamb. The kid leather was thin and pliable enough to cut with scissors and sew with a needle and thread.

from “Mary Had a Little Lamb”

For the past 25 years or so, I’ve made shoes out of wool felt, which is much more forgiving than leather. For the rhyme, “Cobbler, cobbler, mend my shoe”, in Pocketful of Posies, I made felt boots, a leather work apron, and a wooden shoe sign, which I cut out with a jig saw.

detail in “Pocketful of Posies”

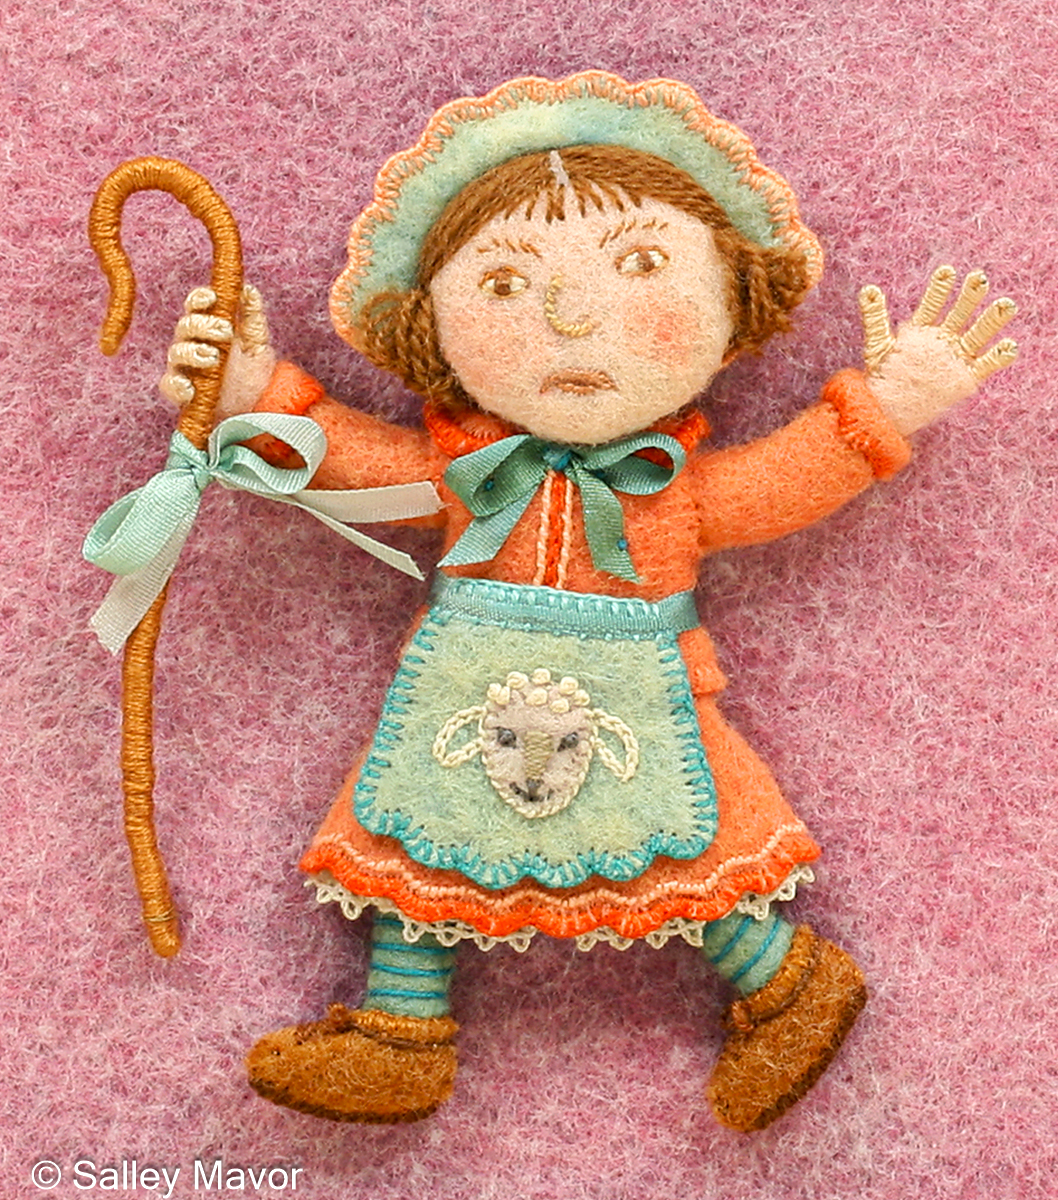
The different nursery rhyme characters in Pocketful of Posies wear over 100 shoes, in varying colors and sizes. There’s Little Bo Peep who lost her sheep…

the children playing Ring Around the Roses…

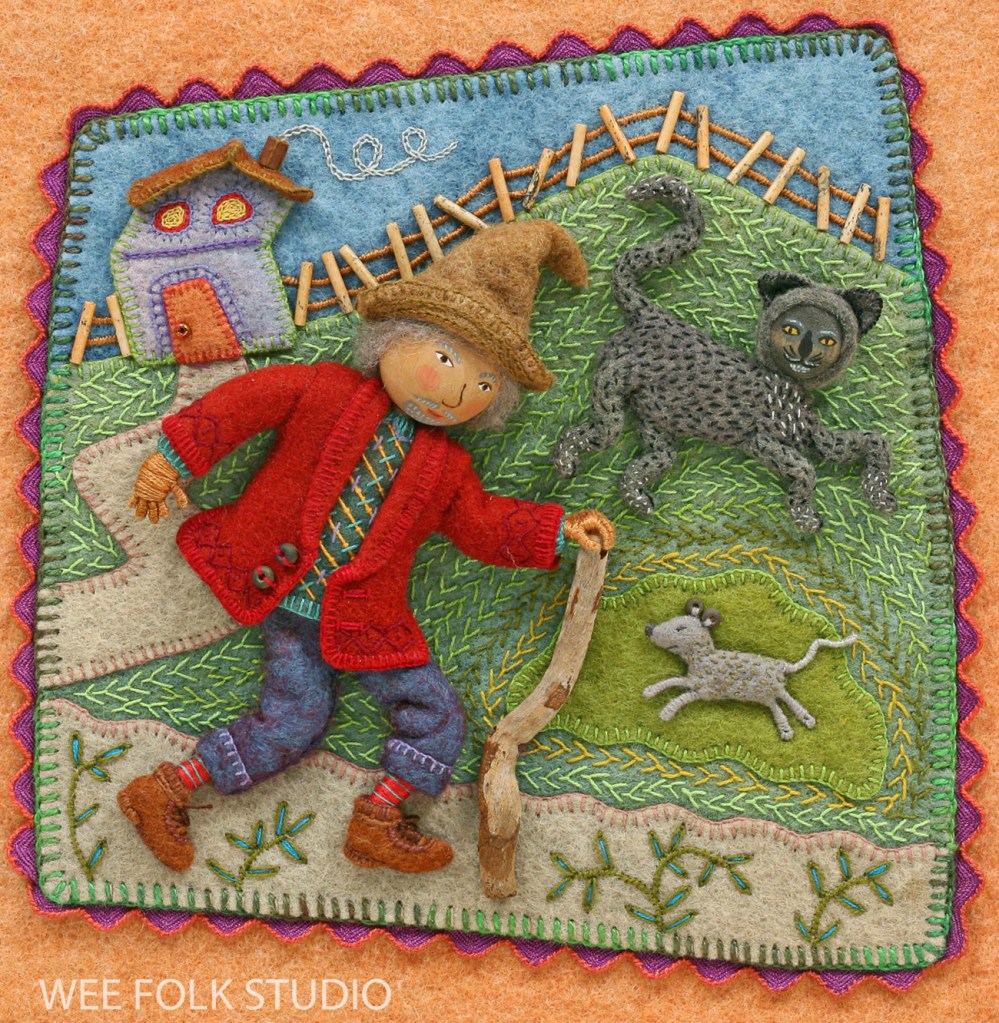
and the Crooked Man who walked a crooked mile in his hiking boots.

An old watch strap buckle came in handy for this shoe from “One, two, buckle my shoe”.

Does this shoe house look familiar? It was inspired by an LL Bean boot I found in the closet. Not only did the old woman who lived in a shoe have to feed all those children, she had to keep them all shod, too!

There was an old woman who lived in a shoe, from “Pocketful of Posies”

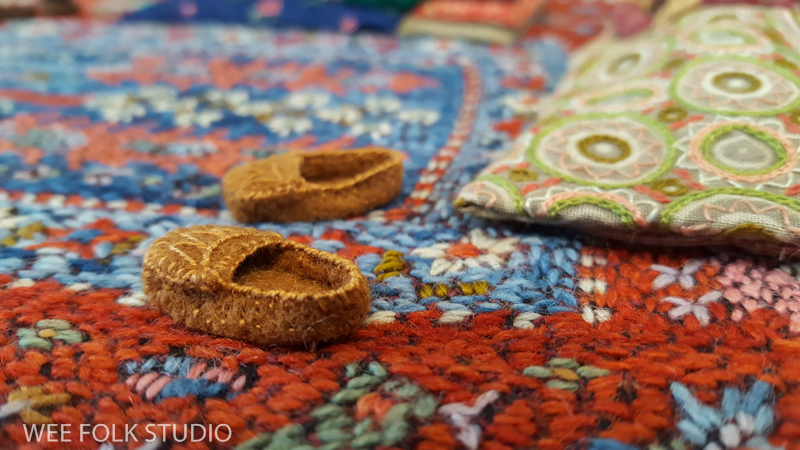
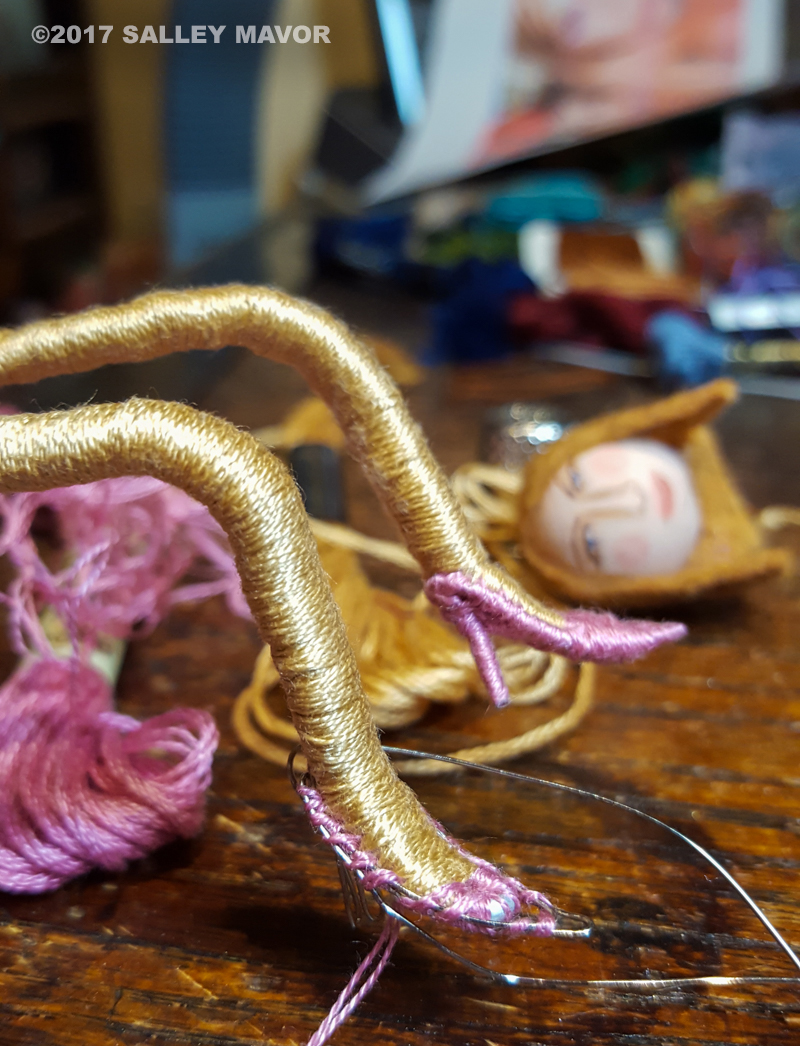
A few years ago, I made a pair of bigger than usual fairies to accommodate some large bur oak acorn caps from the Midwest. Because the Bur Oak fairies had nice big feet (1 1/4″), I could more easily cobble shoes for them. I made their slippers out of felt, with a bit of wire reinforcement to give them a pointy elfin look.

Most of the shoes I make are of the comfortable variety, but occasionally someone demands spike heels.

Like this pair of pink roach killers I made back in 2017, when Rob and I spent a year in the basement filming our stop-motion animation, Liberty and Justice: A Cautionary Tale in the Land of the Free. The film is just as relevant today as it was when it was released in 2018. In the photo below, the Melania character is getting a final fitting for her cameo appearance in the film.

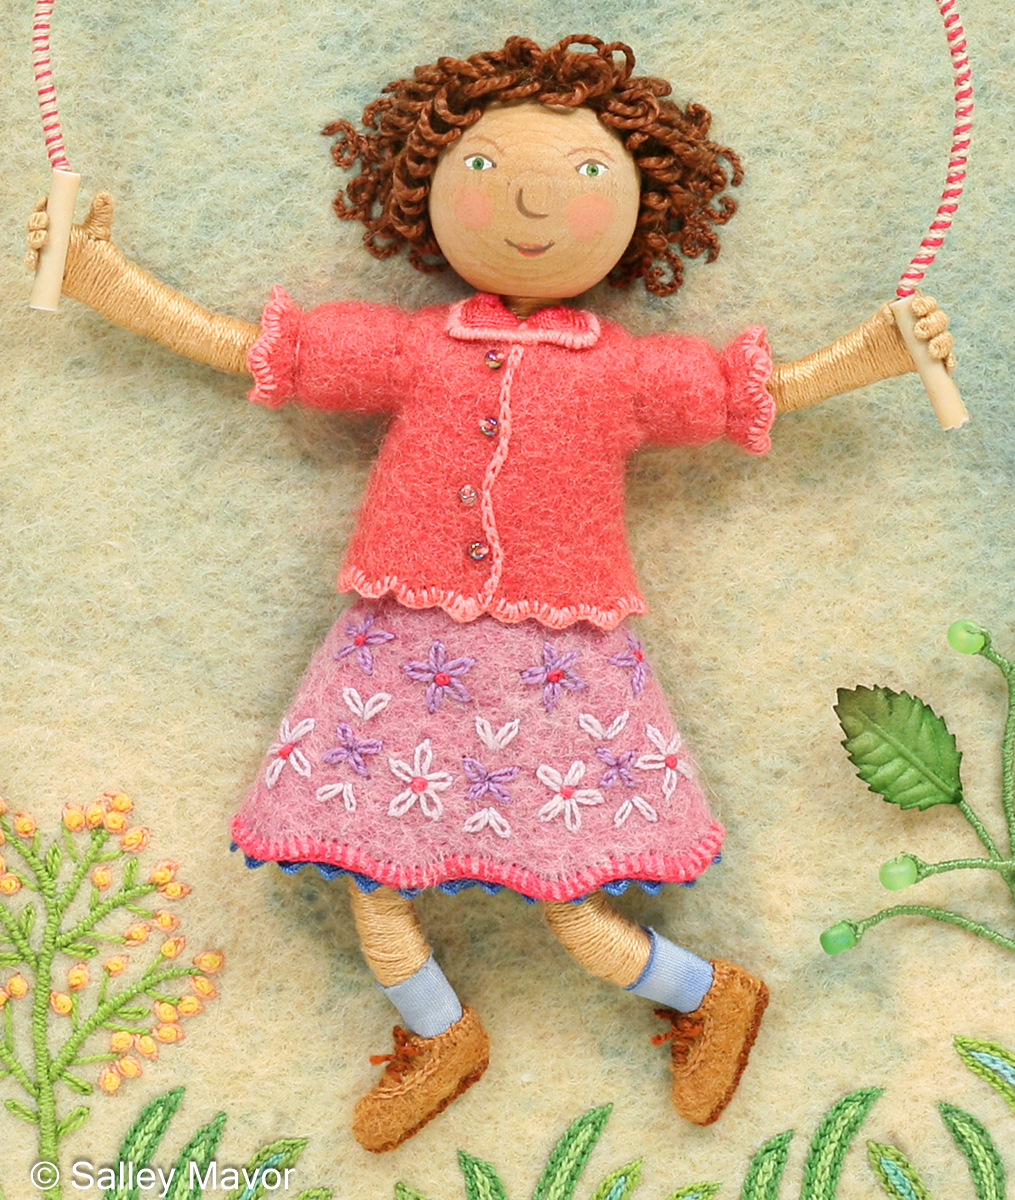
Let’s push aside all that glitz and glamor and finish up with “Jumping Joan”, who’s wearing a pair of sensible brown shoes, which everyone wore to school when I was growing up.

Jumping Joan from “Pocketful of Posies”

To keep up with new posts, please subscribe to this blog. Your contact info will not be sold or shared. If you’d like to see more frequent photos tracking the projects in my studio, please follow me on Facebook, Instagram and BlueSky.
Thank you! You can now check your email to confirm your subscription.

Summertime: Part 5 – Baltimore Oriole (head and feet)

Part 5 in the series of posts about making my piece Summertime features photos and videos documenting the process of creating the Baltimore Oriole’s head and feet.

For a more comprehensive understanding of my process, I encourage you to explore other posts in this series: Overview of the piece, Part 1 – Tree Trunks, Part 2 – Tree Houses, Part 3 – leaves, stems and branches, Part 4 – Baltimore Oriole (body), Part 5 – Baltimore Oriole (head and feet), Part 6 – rose vine, Part 7 – raspberry plants, Part 8 – stitching flora, Part 9 – moss, sky and stone wall, and Part 10 – wee folk.

Summertime is the summer scene in a series of four seasonal landscapes that capture the wonder and magic of the natural world. Posters, note cards, prints, bookmarks, and jigsaw puzzles of Summertime and the other scenes in the series (Frosty Morning, Mossy Glen and Harvest Time) are available in my Etsy Shop.

See the Four Seasons Series and dozens of other works in my exhibition, To Every Season: Works by Salley Mavor at the New England Quilt Museum, Sept. 9 – Dec. 31, 2025. The show includes recent work, as well as rarely seen early pieces on loan from private collections.

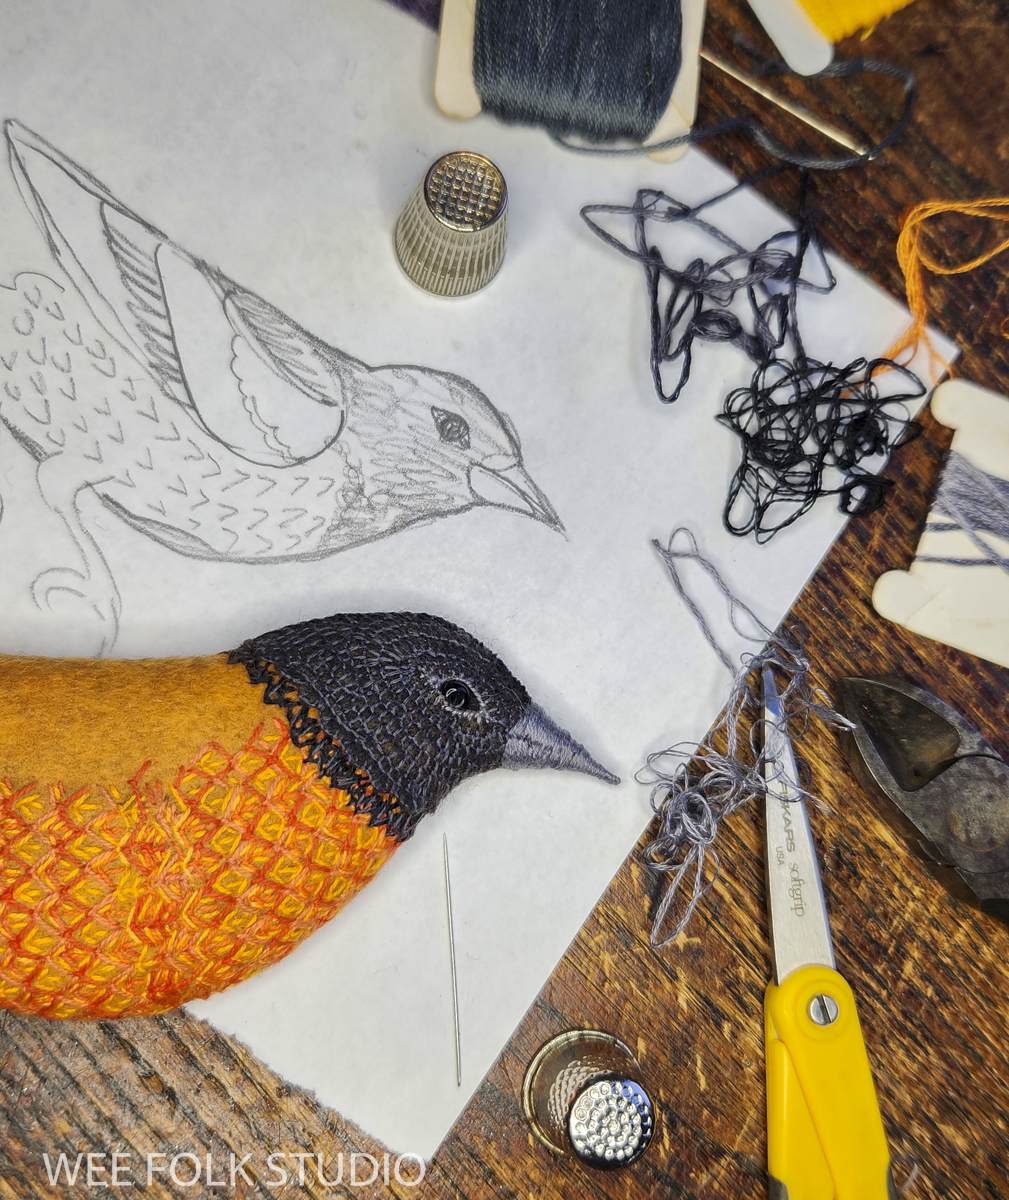
I wouldn’t call myself an avid bird watcher, but I do appreciate the subtle differences that make each species unique. For this piece, the trick was to capture the bird’s distinguishing features without being too scientific. To understand the nuances of an Oriole, I studied photos and made sketches, paying particular attention to the position, size and angle of its head, eyes and beak.

BEAK
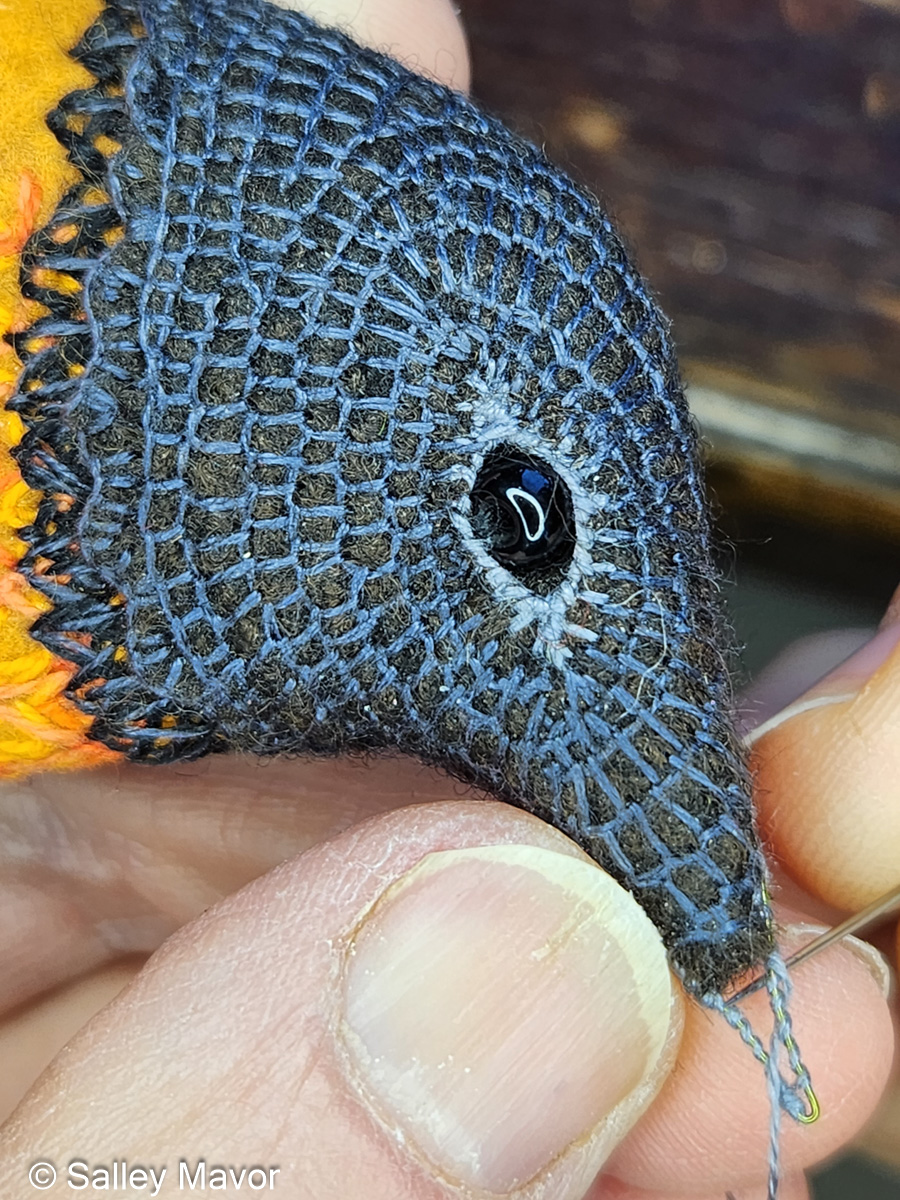
I must have been so focused on making the bird’s hood and eye (it’s a glass bead) that I forgot to take photos of that part. So, let’s skip ahead to the beak. To make it pointy, I formed a wire extension and wrapped it with embroidery floss.

I articulated the shape of the beak with floss, stitching over and around, until it had a smooth and seamless appearance.

Watch this video to see how I stitched the beak. It even shows what the back looks like!

After the beak was finished, I embroidered black feathers with fly stitches on the neck and throat area.

I sewed the wing and tail (see Part 4) in place and got to work on making the Oriole’s feet.

FEET
I shaped the bird’s feet and legs with wire, twisting it around to form 4 toes – 1 short and 3 long. Then, I wrapped the wire with embroidery floss, winding the thread up and down until no shiny wire was exposed and the feet were the right thickness.

Watch this video to see how I constructed the legs and feet and attached them to the bird’s body.

Stay tuned for Part 6, where I’ll share photos and videos documenting the process of making the rose vine. If you want to receive email notices when I publish new posts, please subscribe to this blog using the form below.

To keep up with new posts, please subscribe to this blog. Your contact info will not be sold or shared. If you’d like to see more frequent photos tracking the projects in my studio, please follow me on Facebook, Instagram and BlueSky.
Thank you! You can now check your email to confirm your subscription.

Summertime: Part 4 – Baltimore Oriole (body)

Part 4 in the series of posts about making my piece Summertime features photos and videos documenting the process of creating the Baltimore Oriole’s body, including its breast, wing and tail.

For a more comprehensive understanding of my process, I encourage you to explore other posts in this series: Overview of the piece, Part 1 – Tree Trunks, Part 2 – Tree Houses, Part 3 – leaves, stems and branches, Part 4 – Baltimore Oriole (body), Part 5 – Baltimore Oriole (head and feet), Part 6 – rose vine, Part 7 – raspberry plants, Part 8 – stitching flora, Part 9 – moss, sky and stone wall, and Part 10 – wee folk.

Summertime is the summer scene in a series of four seasonal landscapes that capture the wonder and magic of the natural world. Posters, note cards, prints, bookmarks, and jigsaw puzzles of Summertime and the other scenes in the series (Frosty Morning, Mossy Glen and Harvest Time) are available in my Etsy Shop.

See the Four Seasons Series and dozens of other works in my exhibition, To Every Season: Works by Salley Mavor at the New England Quilt Museum, Sept. 9 – Dec. 31, 2025.

Enchanting Threads: The Art of Salley Mavor at the Albany Institute of History and Art

BALTIMORE ORIOLE
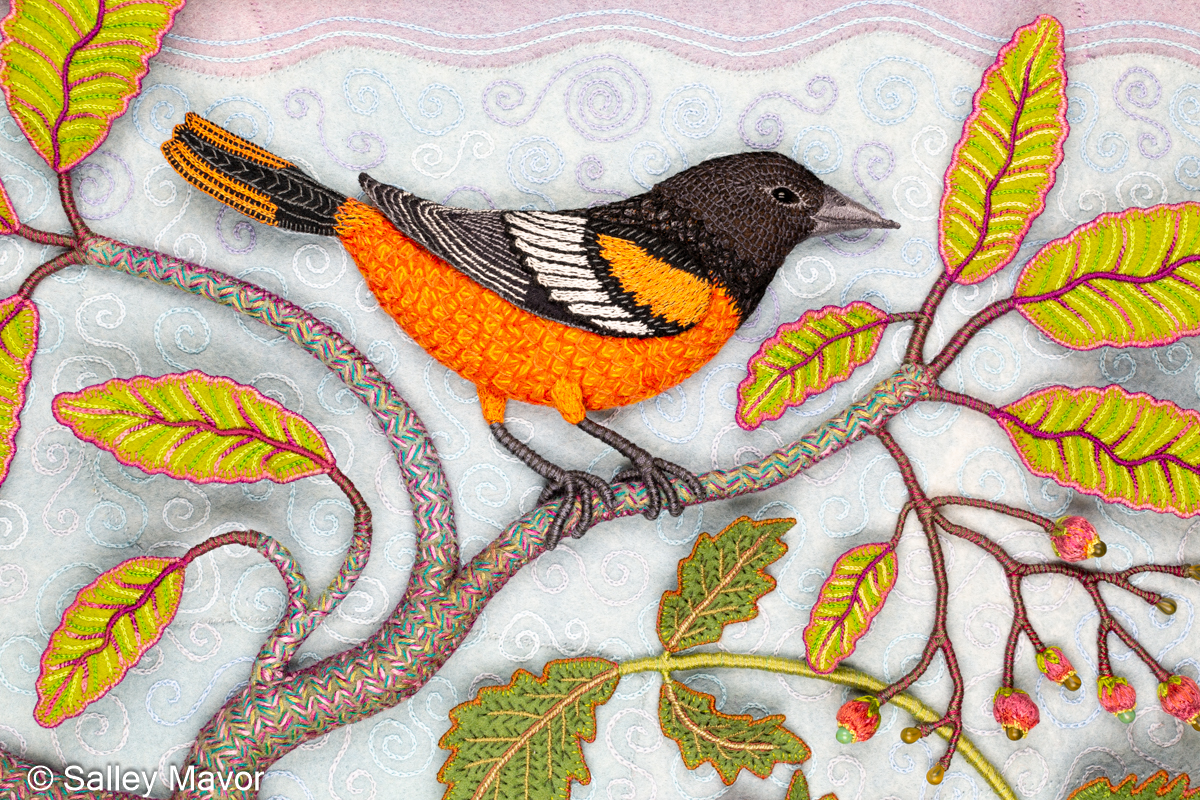
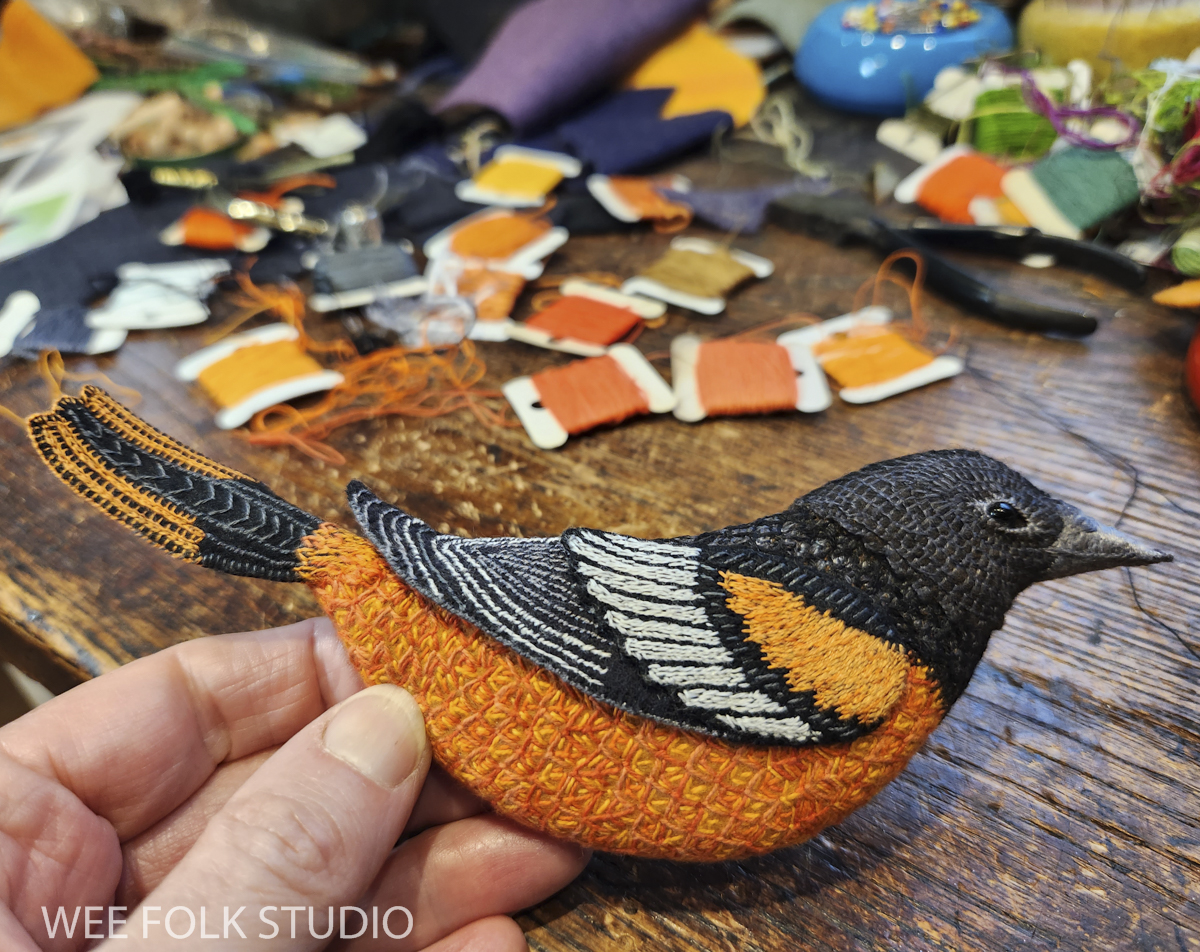
I chose a male Baltimore Oriole for the summer scene mostly because of its flashy appearance. They also epitomize the season for me. Pairs of orioles are frequent visitors to our yard in early summer, when we lure them with orange halves and grape jelly. I hadn’t made a bird this size since Birds of Beebe Woods (2012), which you can get a glimpse of on the wall in the following video. 

First, I looked at photos of orioles and made a simple drawing that showed its size and proper proportions. Then, I cut the basic shape out of acid-free matte board and padded it with thick felt (which is similar to how I made pins early in my career). Throughout the process of making the bird, I referred to photos, especially when selecting colors and stitches for the body, wing, and tail.

I wanted to make the bird realistic enough to be recognized as a species, but patterned and abstracted in a way that made it fun to stitch. It ended up being something between a stylized bird and a biological illustration.

BREAST
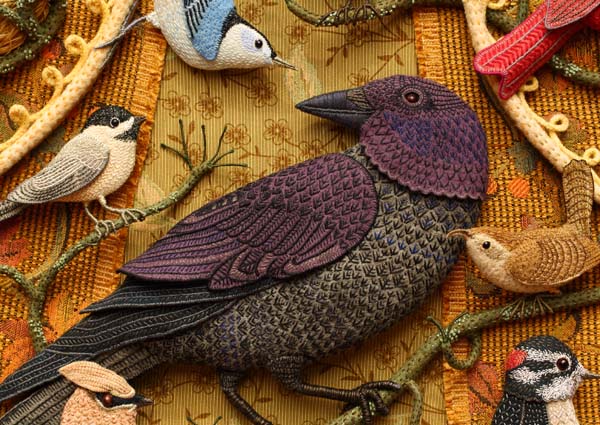
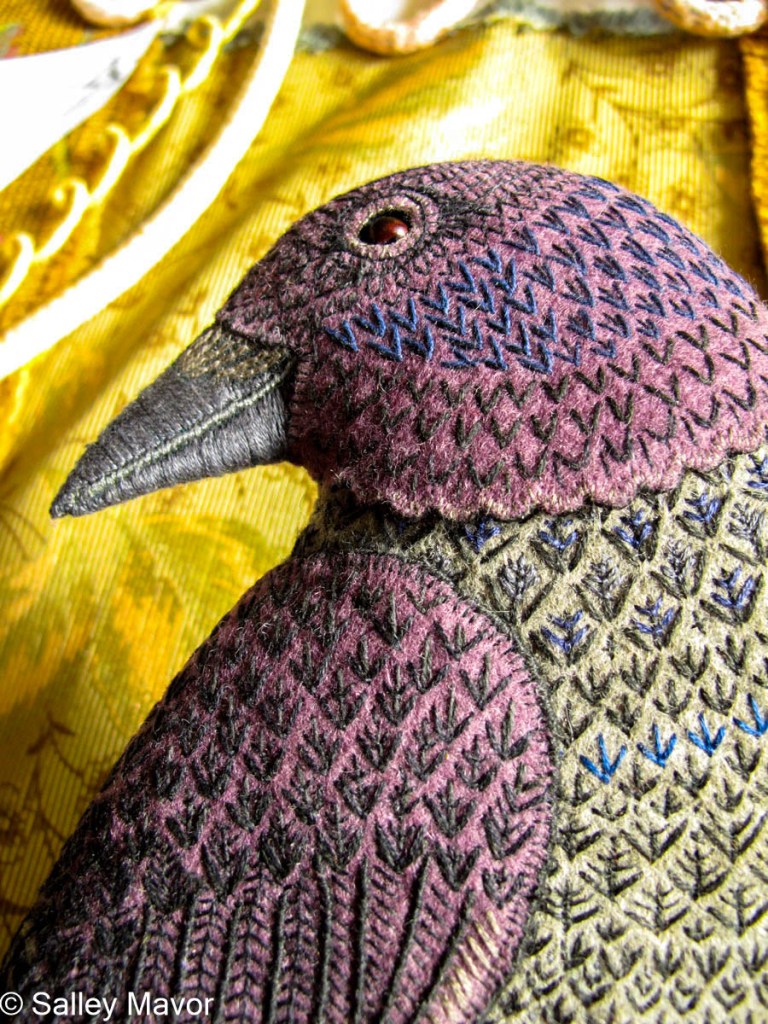
For the oriole’s distinctive orange breast, I embroidered different combinations of fly stitches that are reminiscent of Faire Isle patterns. It brought me back to a dozen years ago, when I stitched the crow’s breast in Birds of Beebe Woods.

detail from “Birds of Beebe Woods”

I used cotton flower thread, which has a matte finish that’s different from the glossy sheen of cotton embroidery floss. DMC flower thread is no longer available, so if you’re interested, Dutch Treat Designs has some of the discontinued thread in stock. 

Watch a Stitch Minute video of embroidering the oriole’s breast with fly stitches.

WING
I usually work freehand without marks, because it’s hard to draw on fuzzy wool felt. In this case, I was able to make chalk pencil lines on the black felt wing.

Watch a Stitch Minute video of embroidering the bird’s wing.

TAIL
So much of a bird’s personality comes through in the angle and pose of its tail. Doing the stitching was the easy part. Positioning the tail and attaching it to the body took more patience and perseverance.

Watch a Stitch Minute video of embroidering and attaching the bird’s tail.

Stay tuned for Part 5, where I’ll share photos and videos documenting the process of making the Baltimore Oriole’s head and feet. If you want to receive email notices when I publish new posts, please subscribe to this blog using the form below.

To keep up with new posts, please subscribe to this blog. Your contact info will not be sold or shared. If you’d like to see more frequent photos tracking the projects in my studio, please follow me on Facebook, Instagram and BlueSky.
Thank you! You can now check your email to confirm your subscription.