Bedtime Stitches on view at the New England Quilt Museum

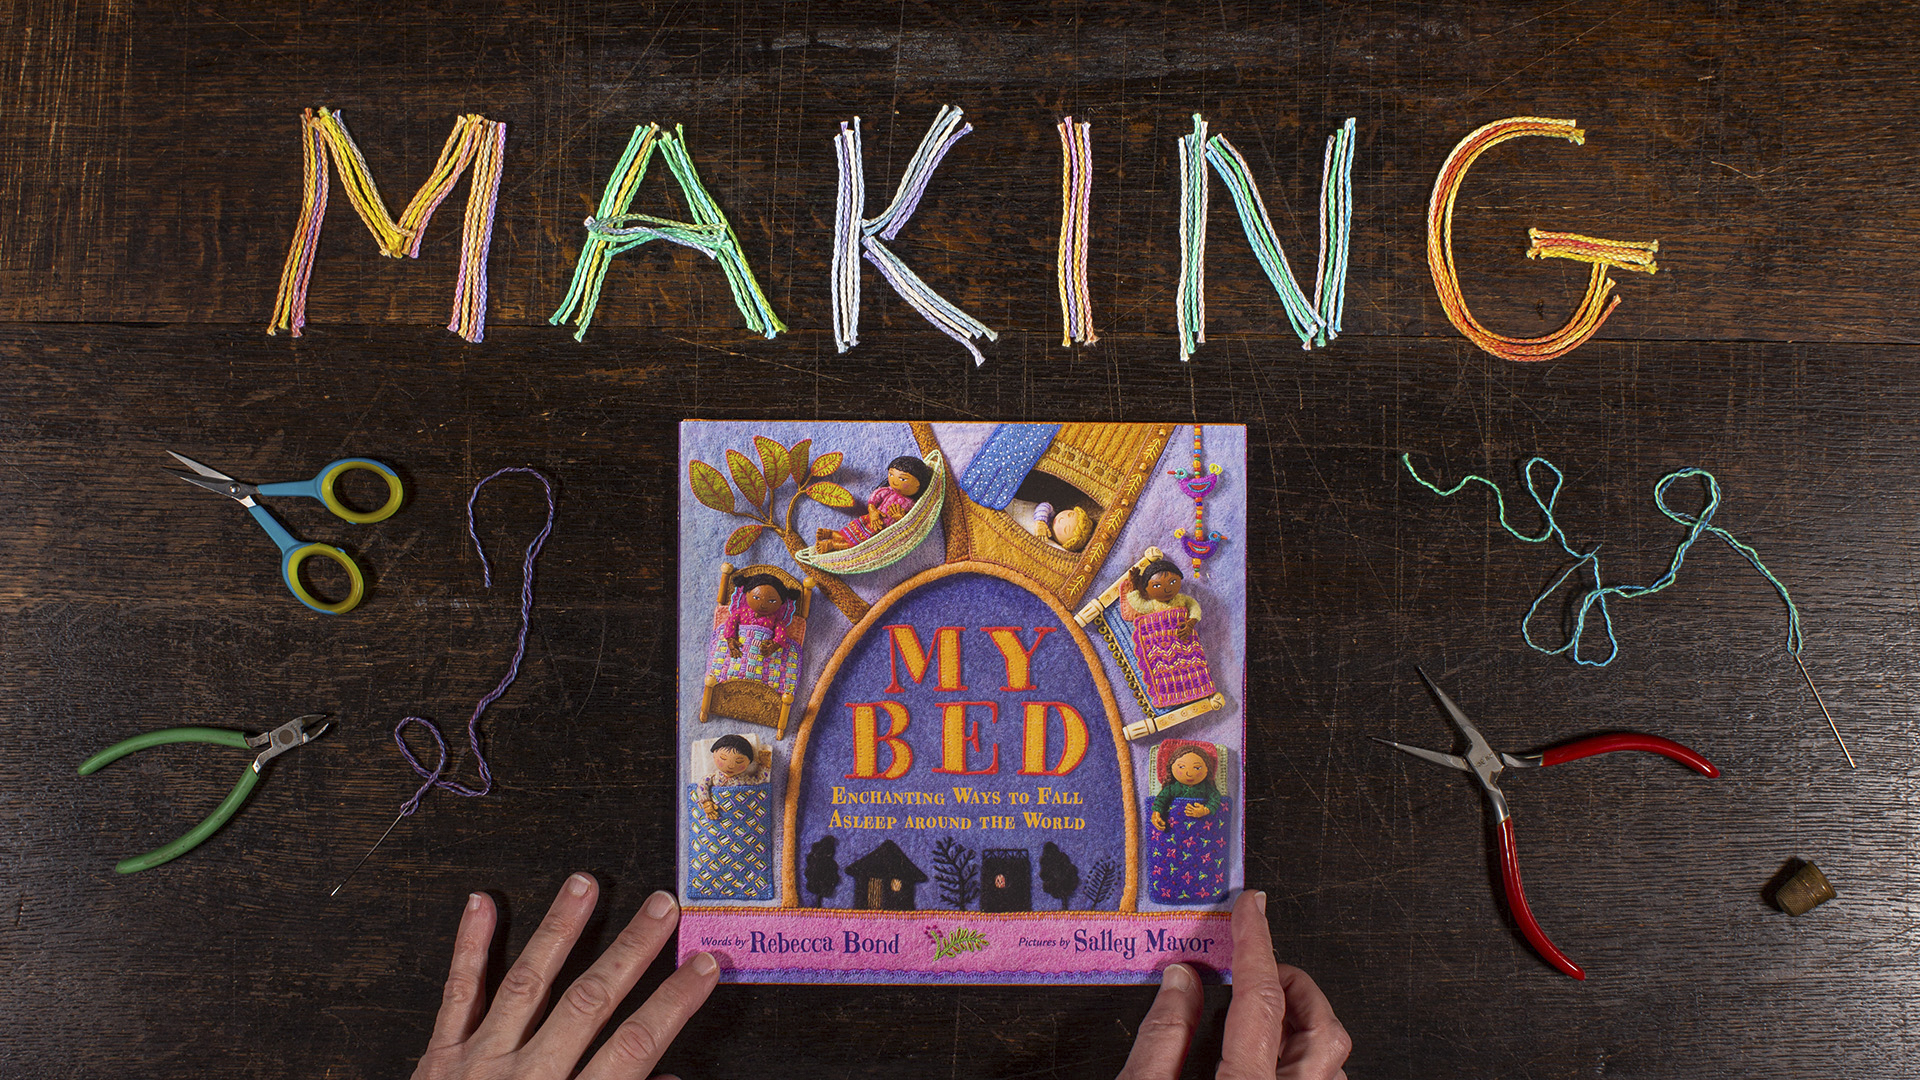
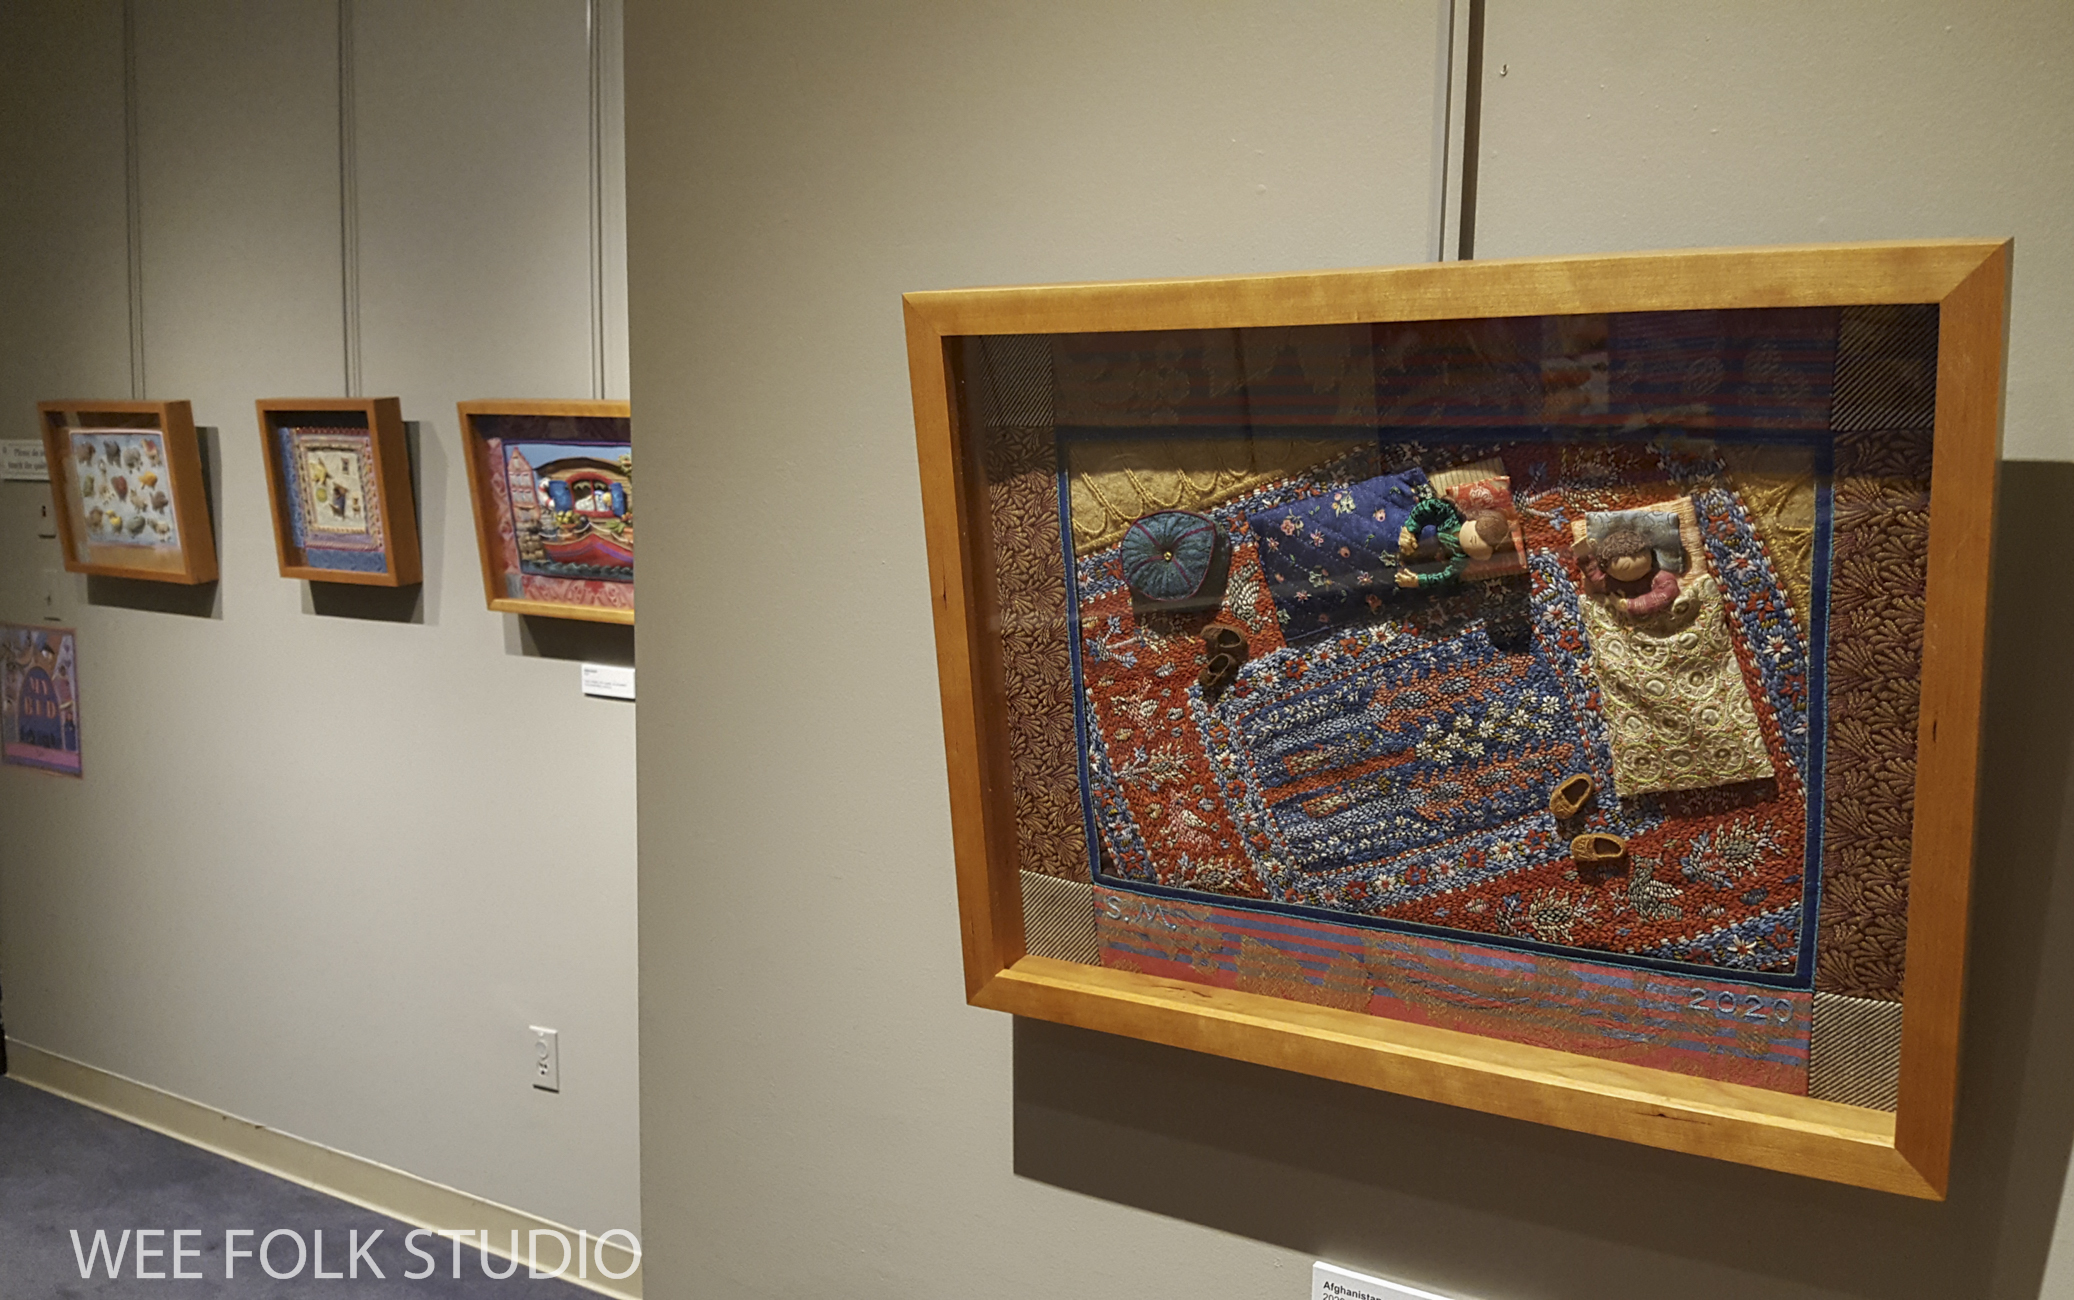
I’m happy to announce that the touring exhibition, BEDTIME STITCHES, is on view through Dec. 31, 2021 at the New England Quilt Museum in Lowell, MA. This is an opportunity for people in southern New England to experience the detail and 3-dimensional quality of the original artwork for my book, My Bed: Enchanting Ways to Fall Asleep around the World .

Rob and I recently drove up to Lowell to take photos and videos of the show to share with you. In addition to snapping still photos, Rob filmed some impromptu conversations in the gallery, which are included later in this post.

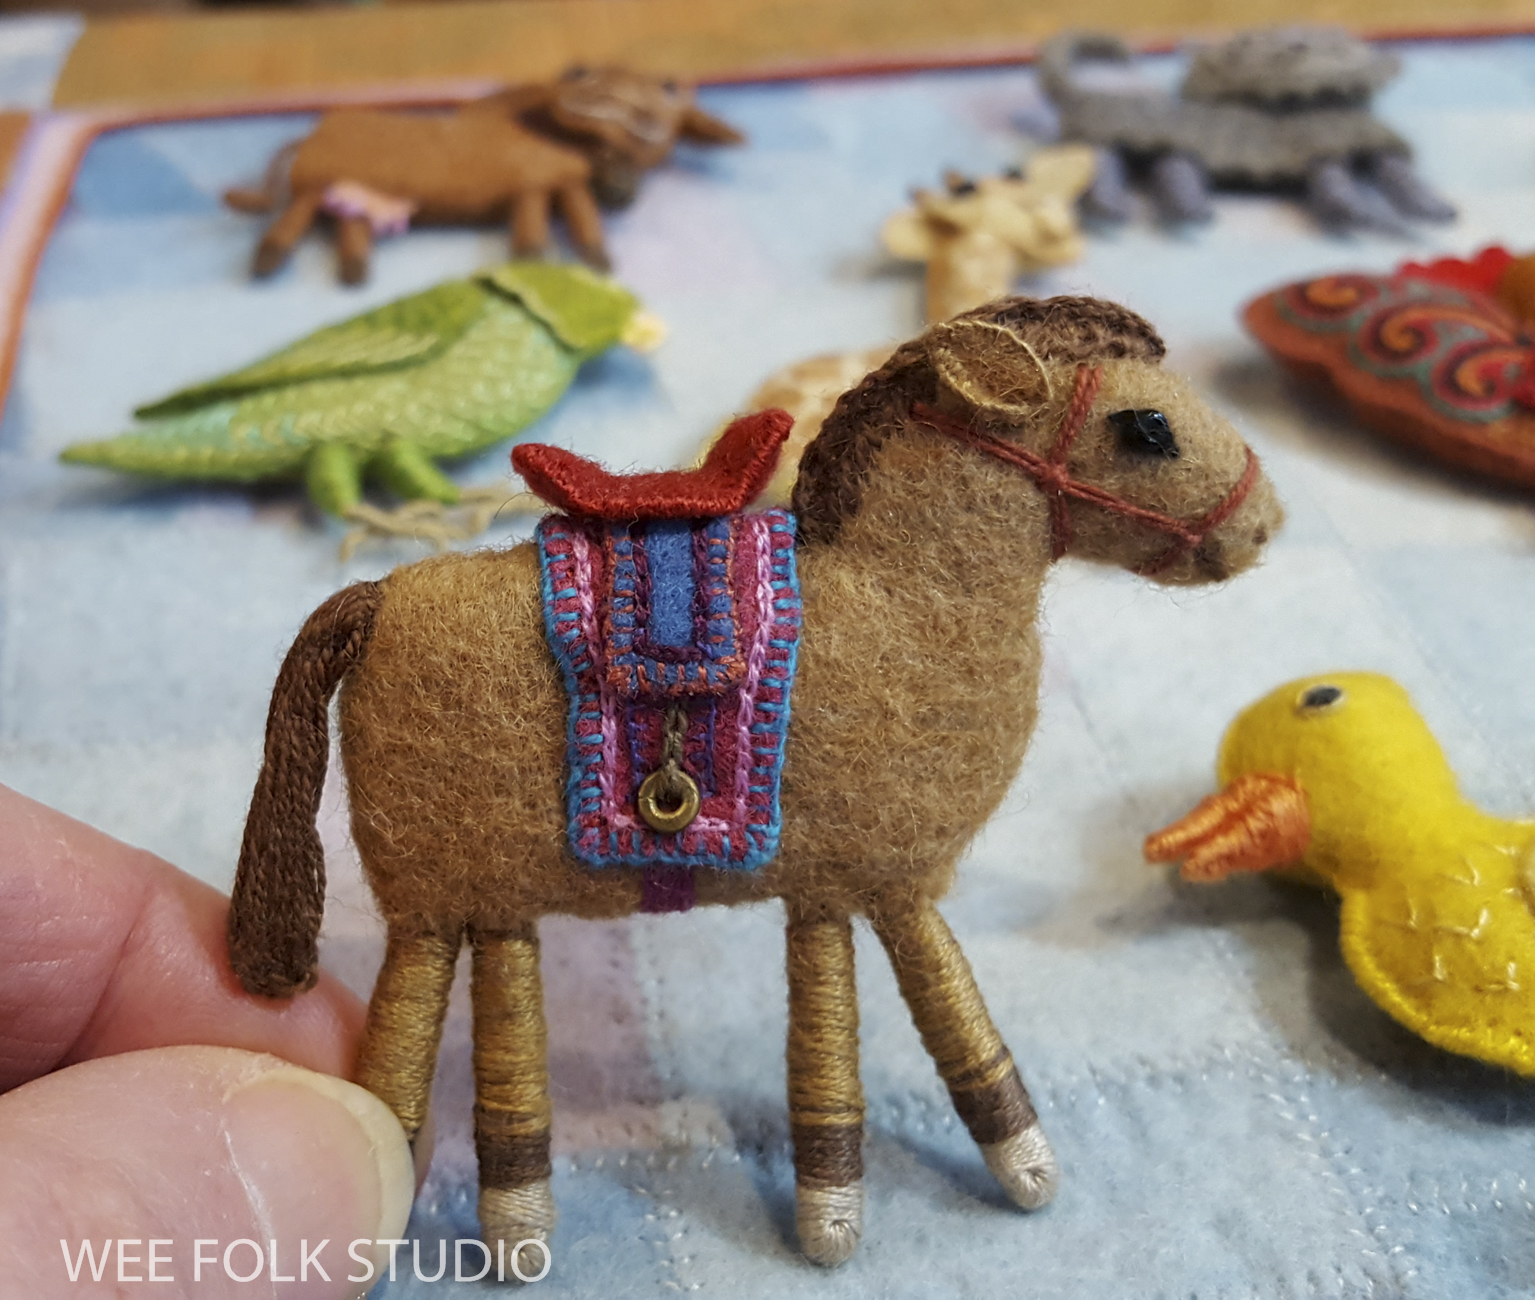
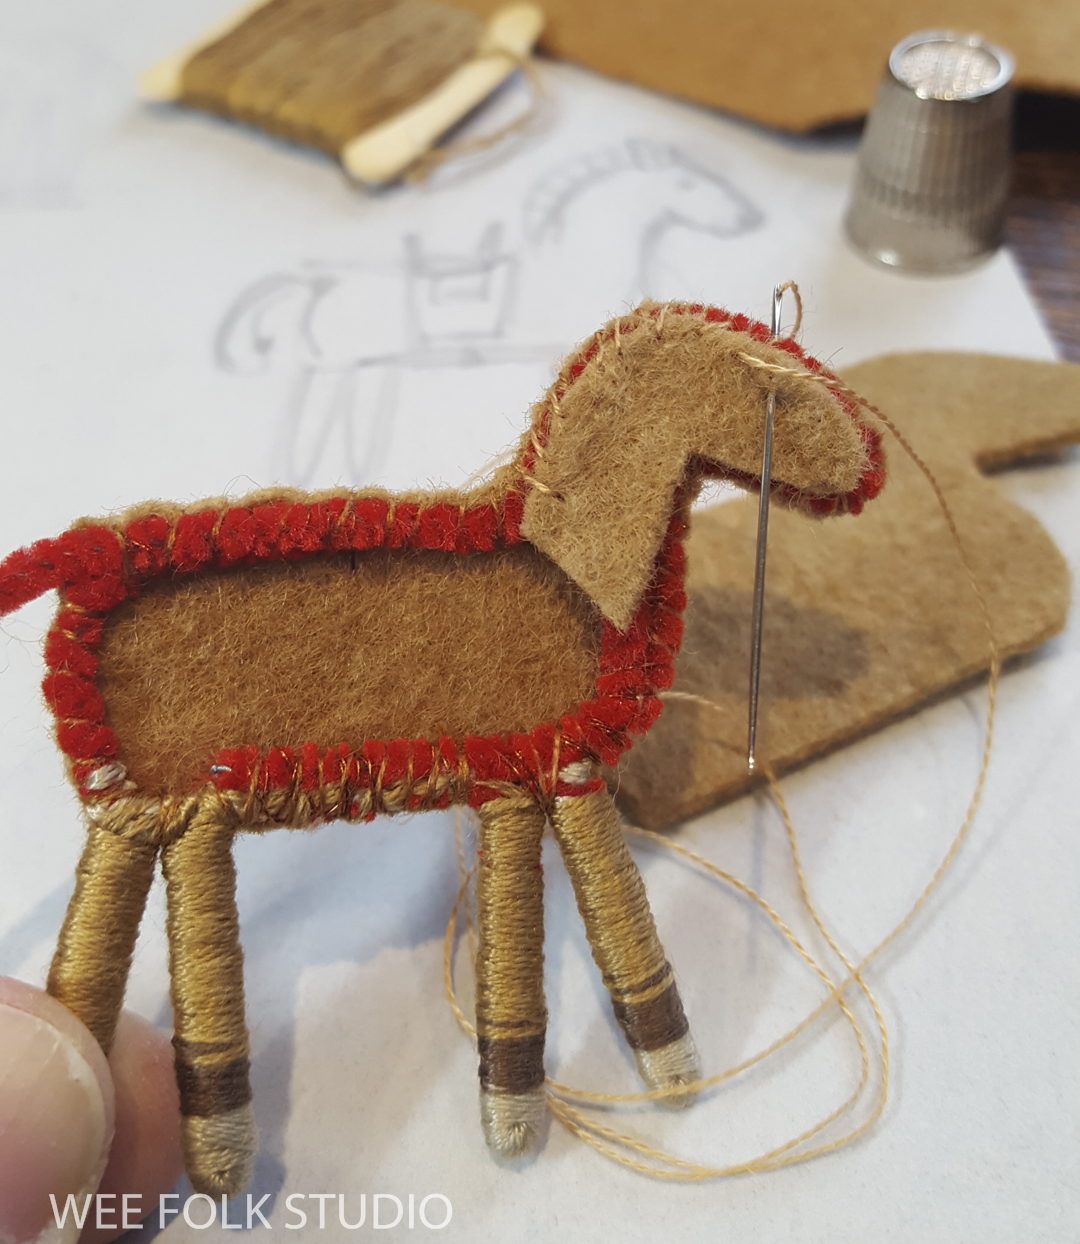
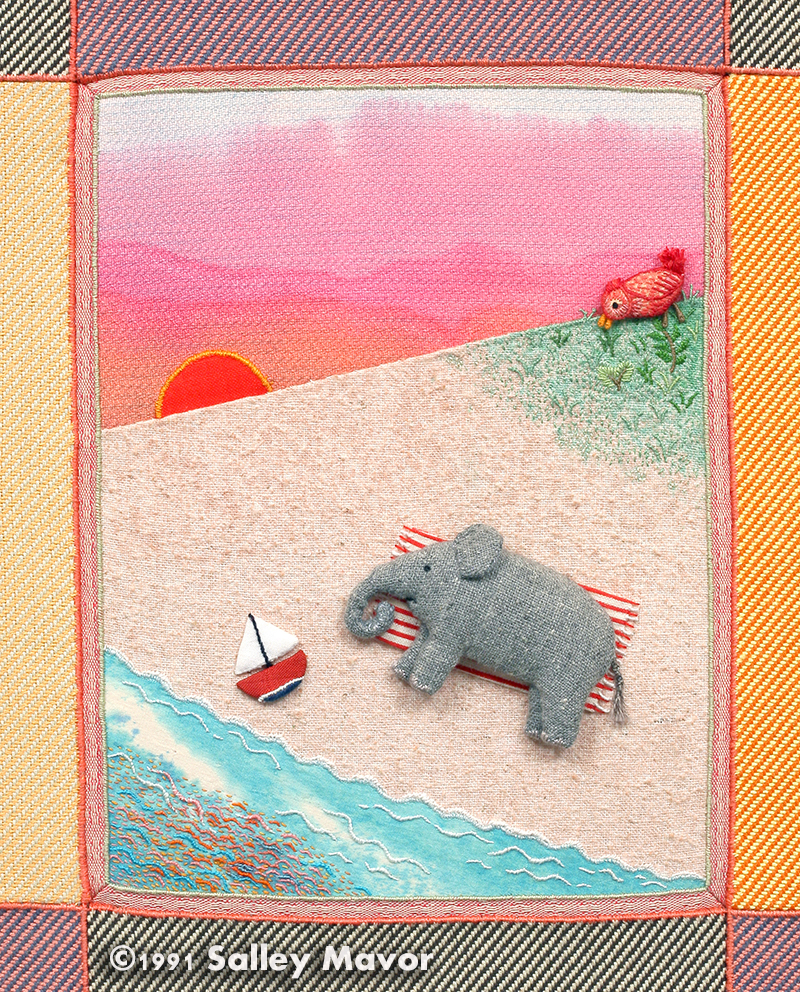
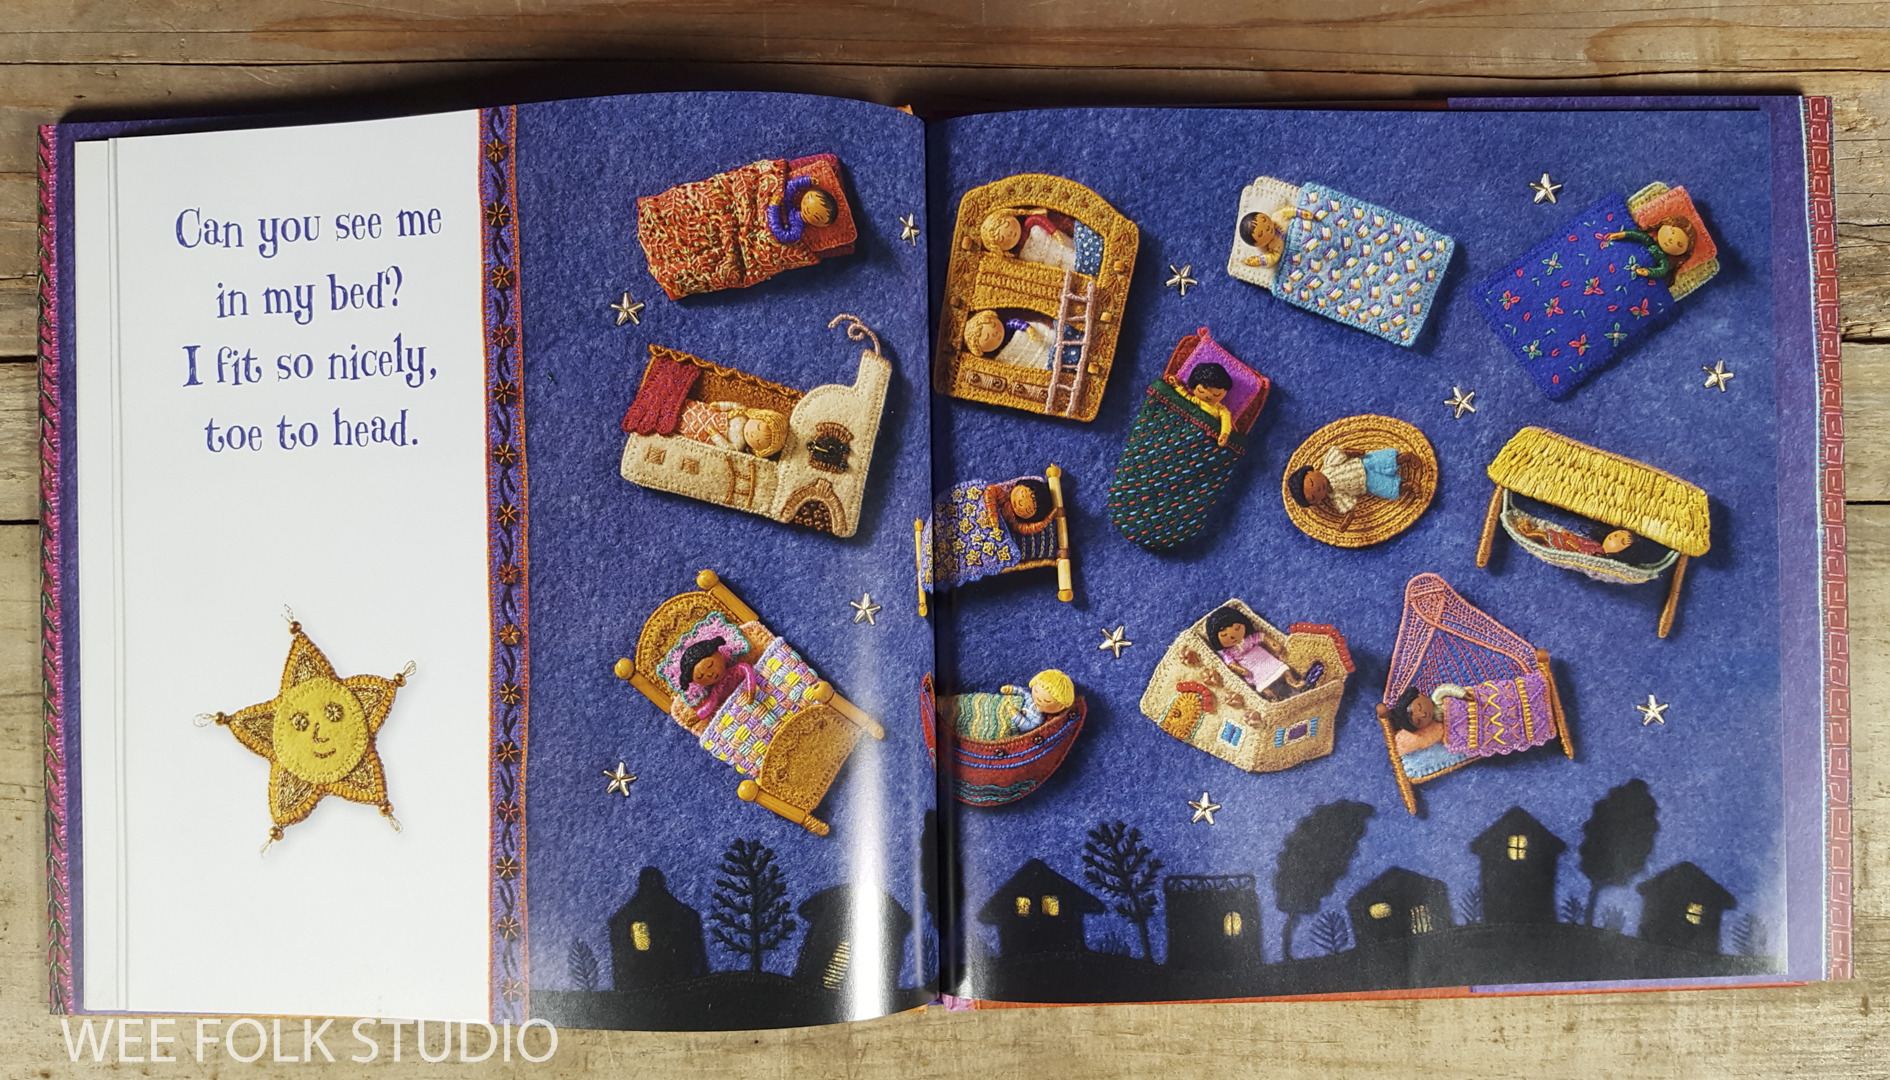
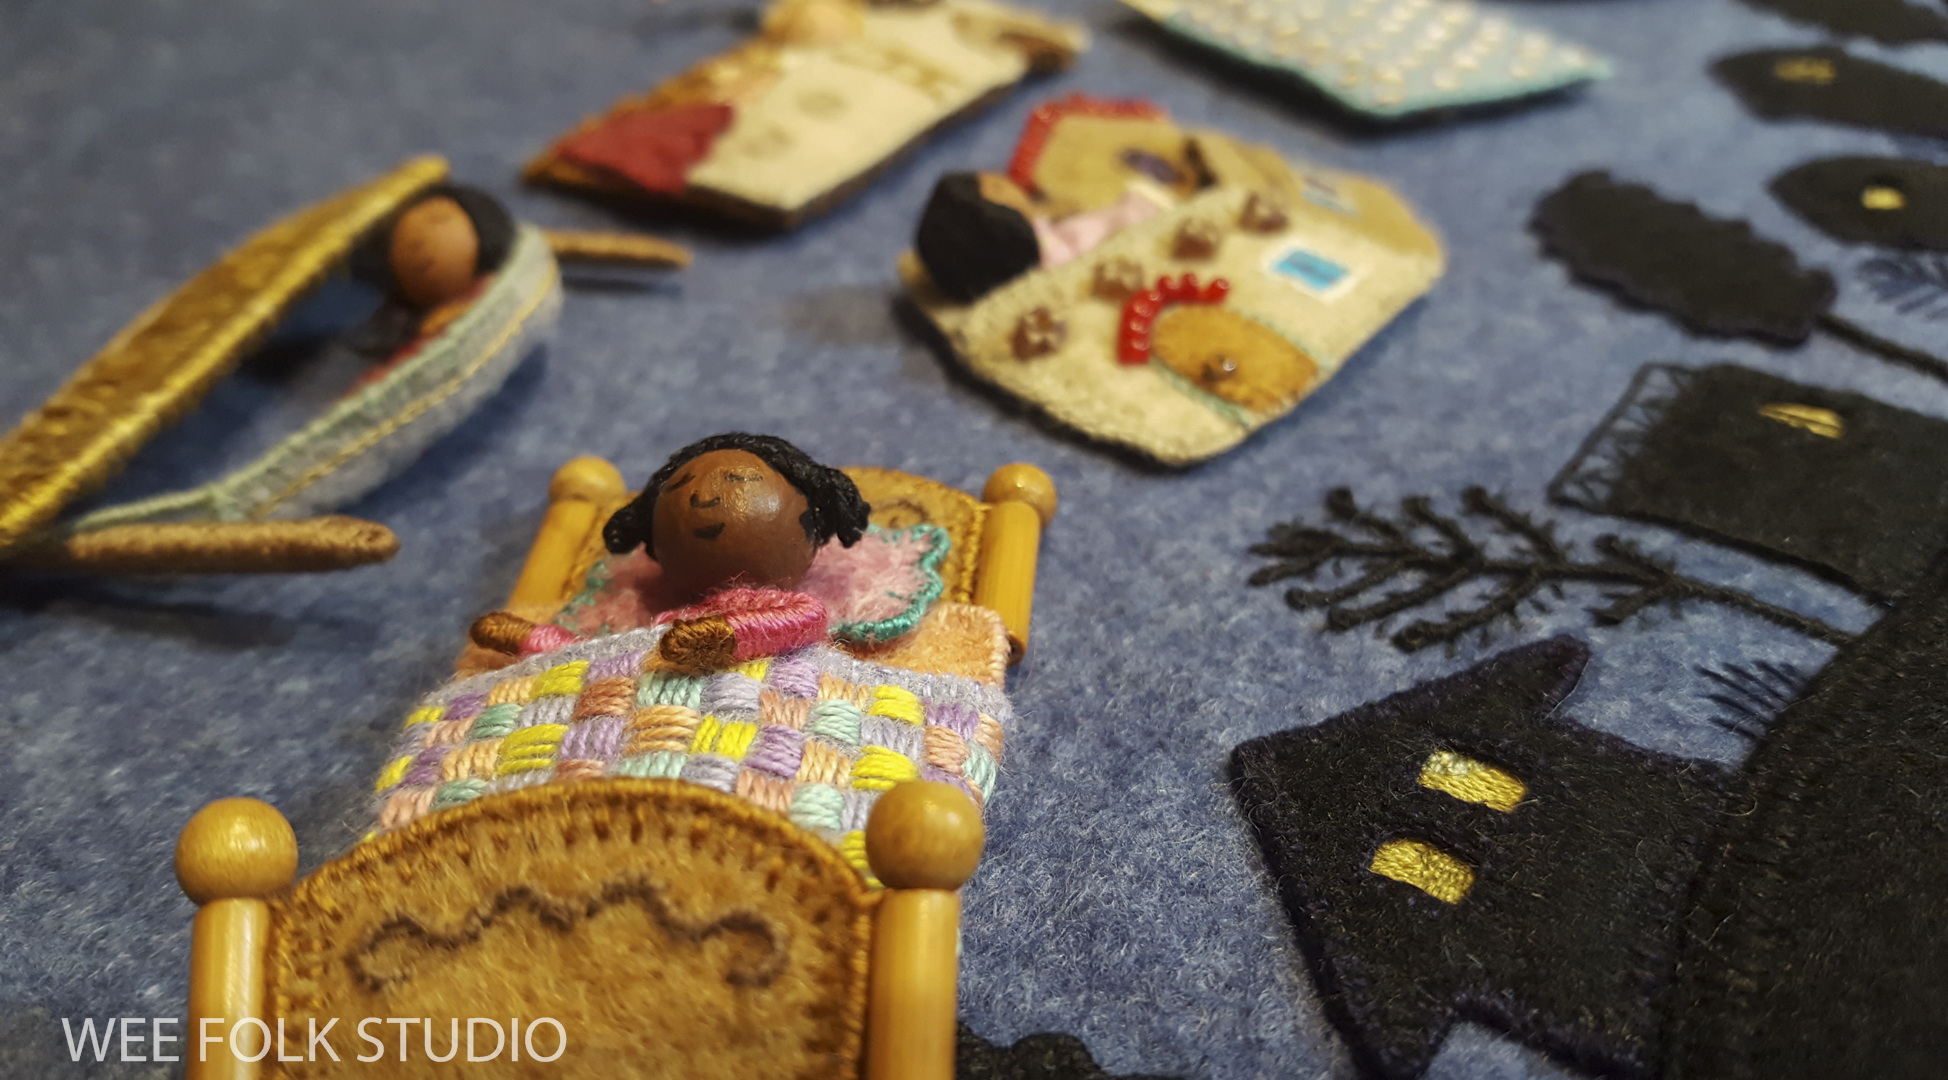
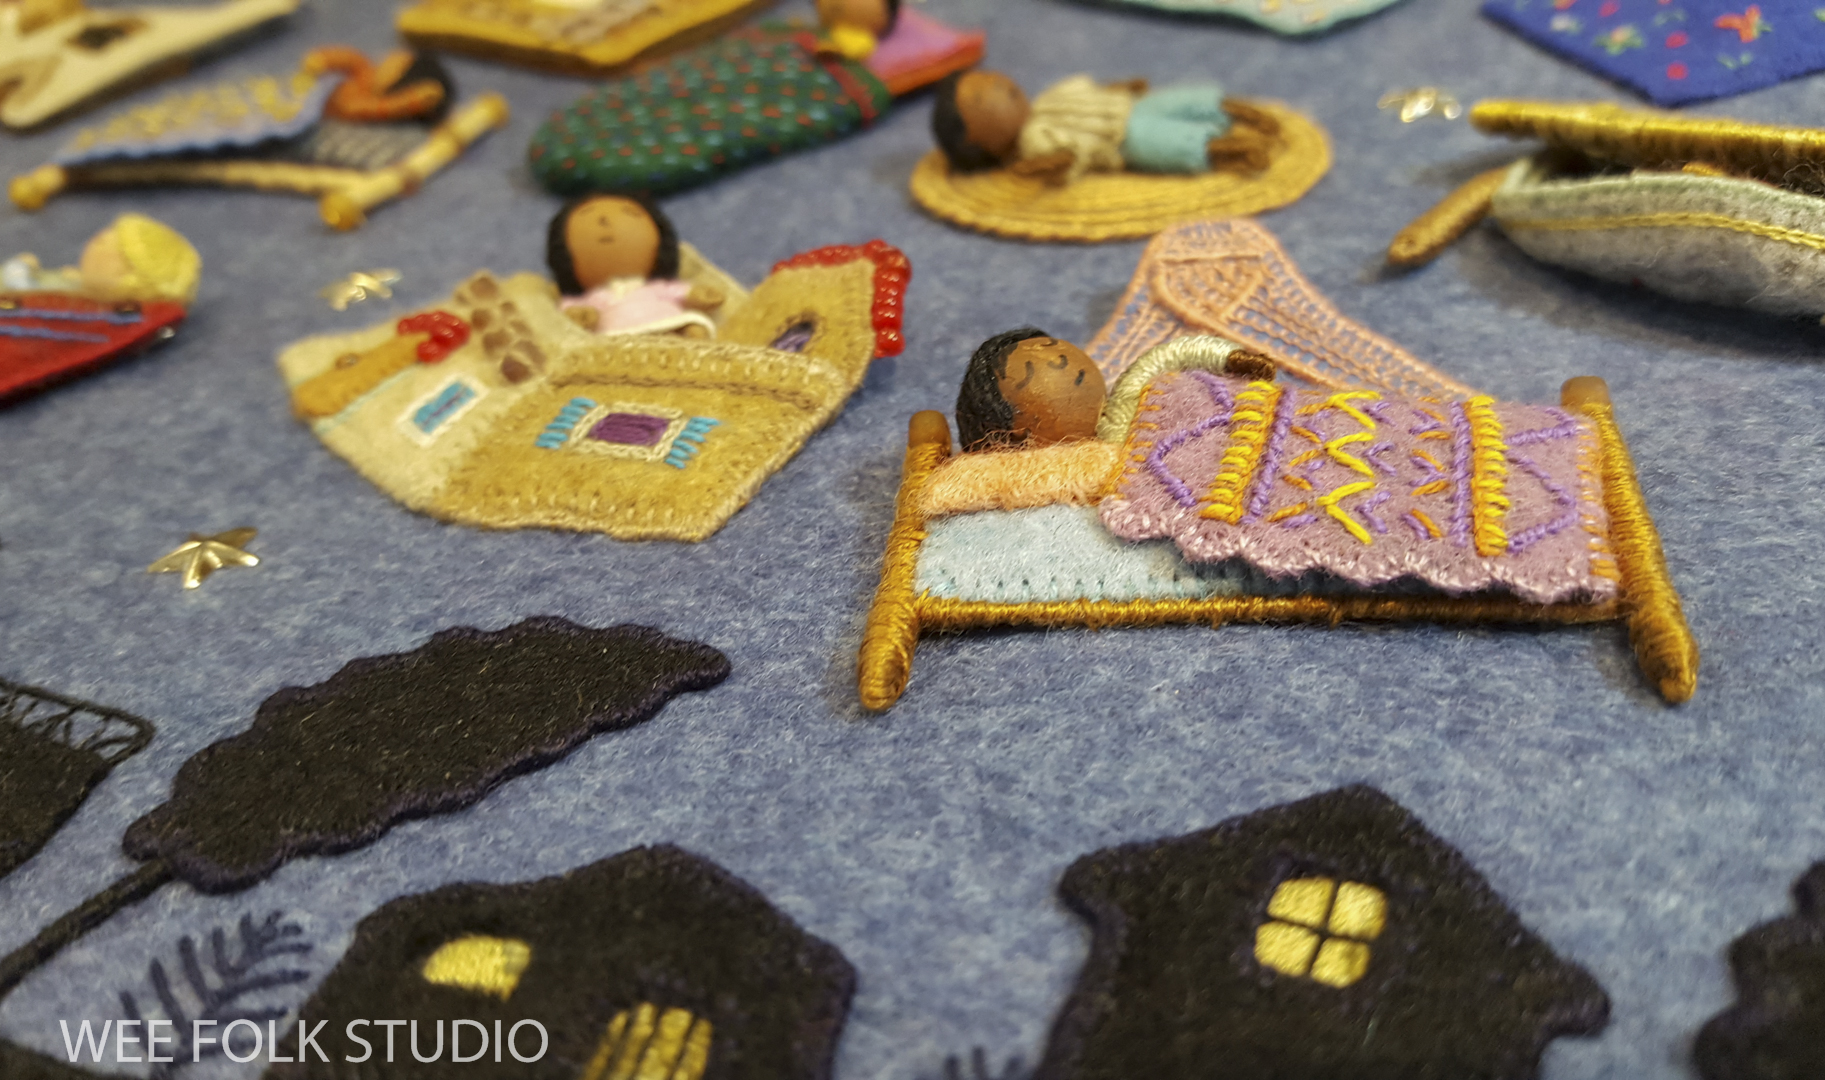
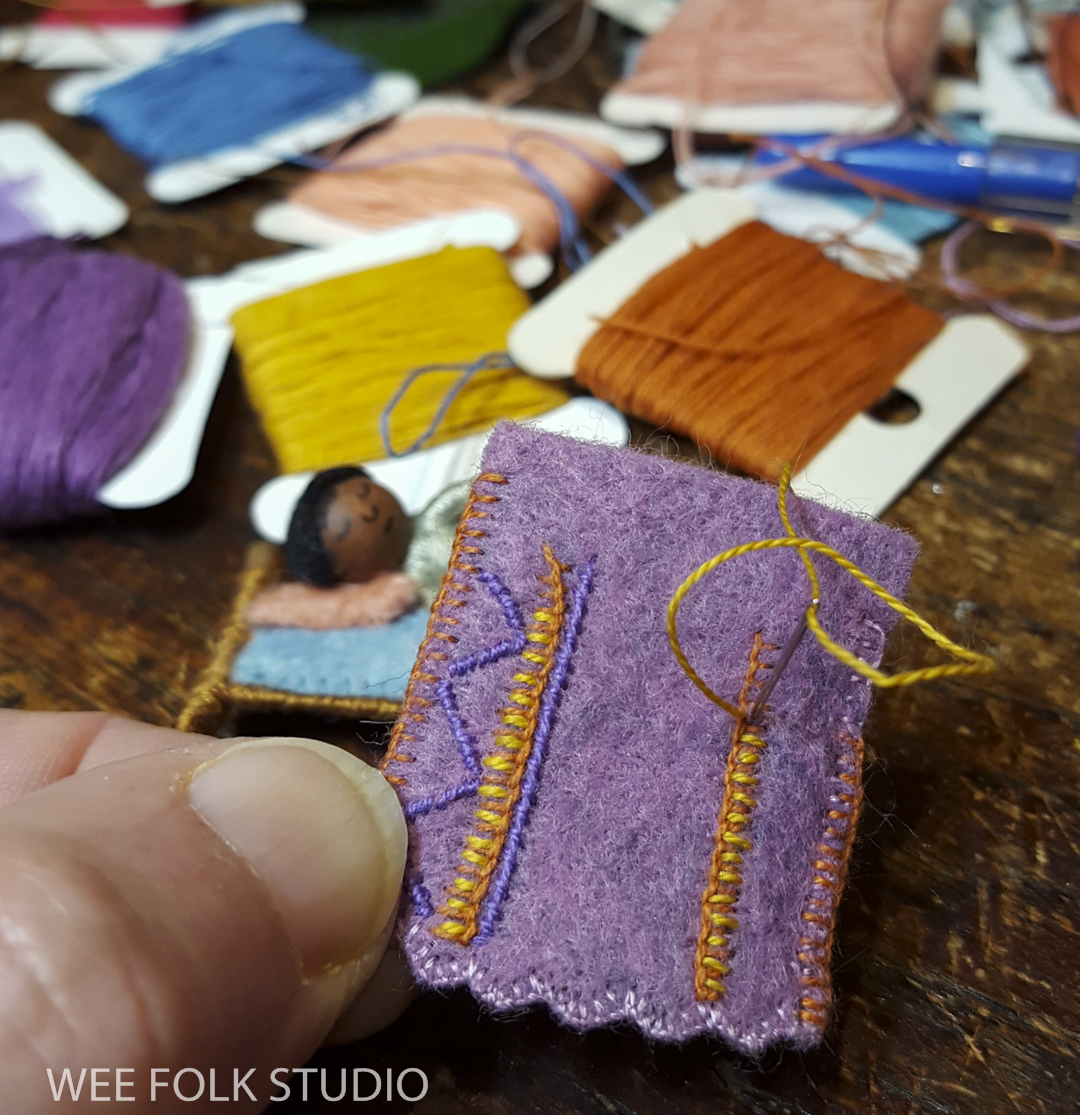
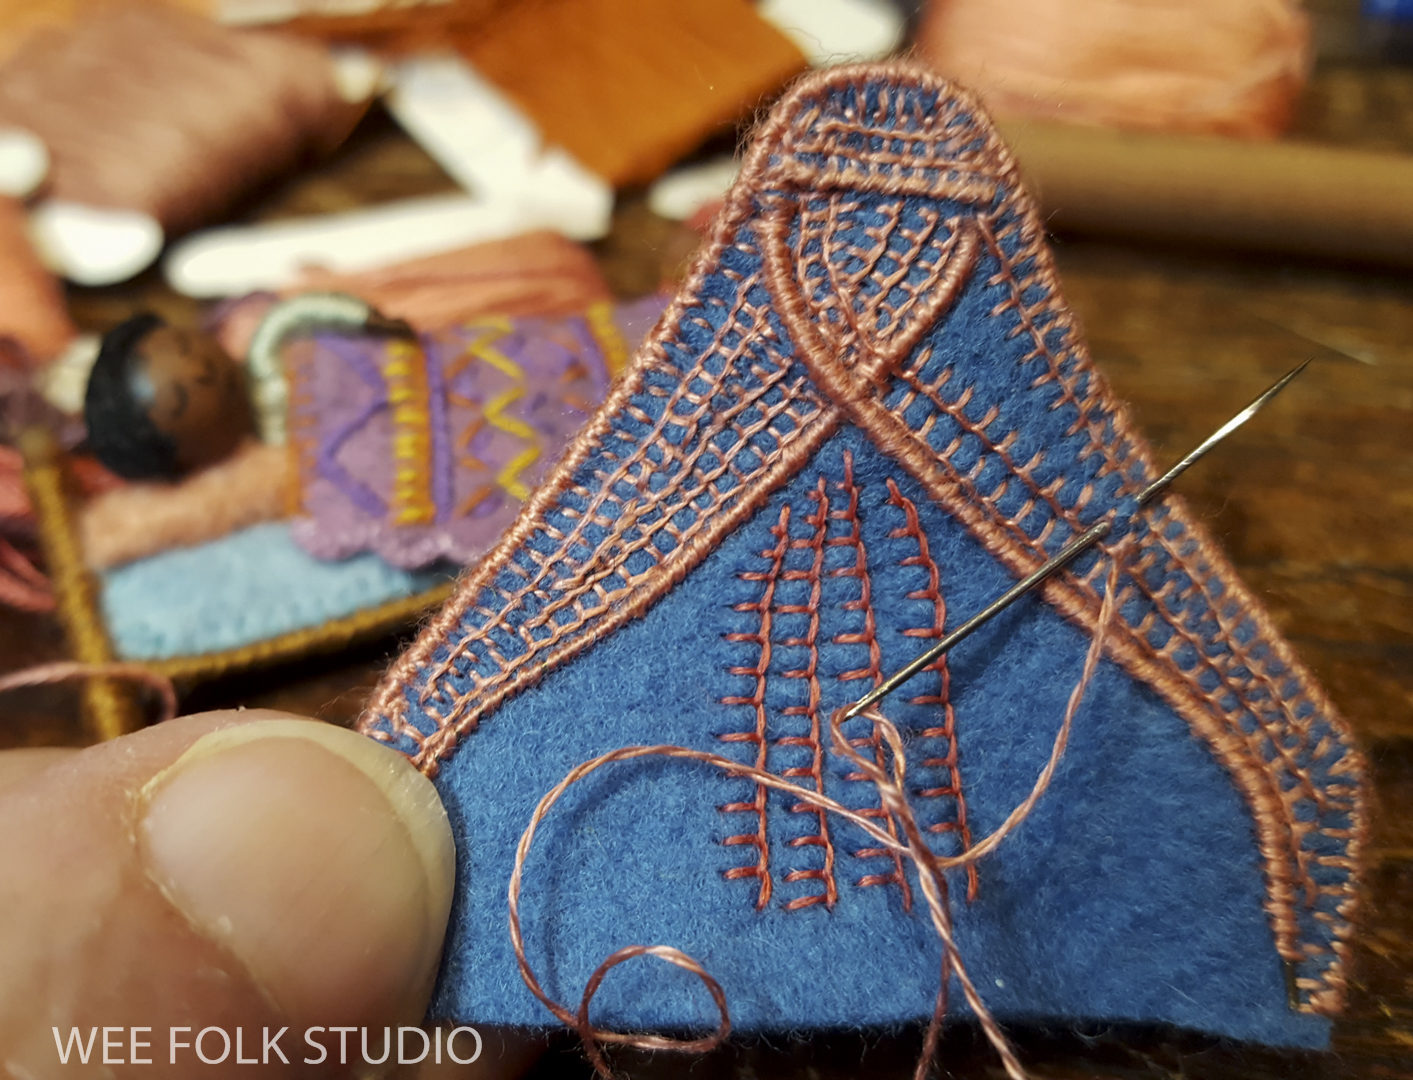
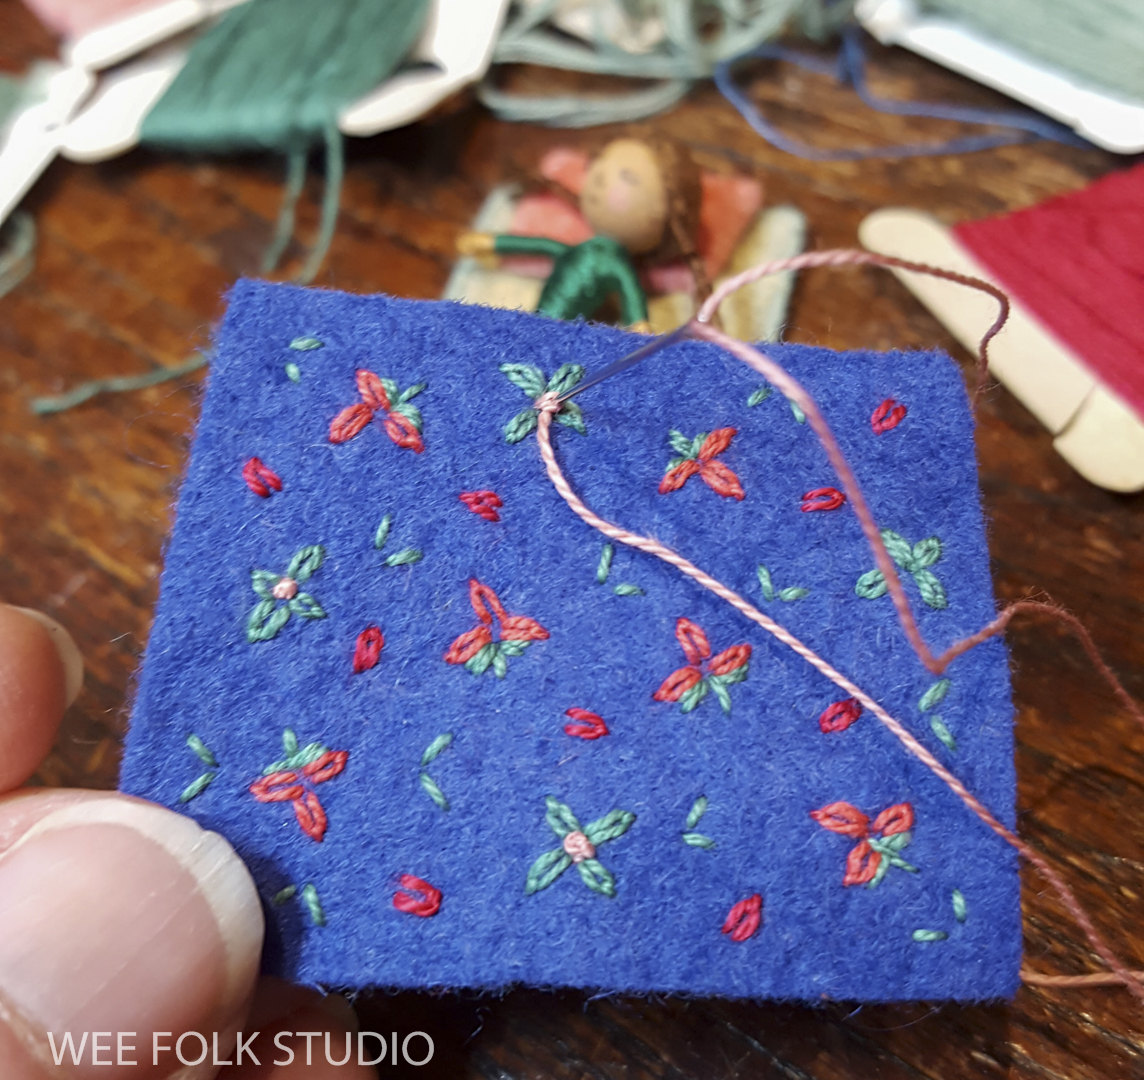
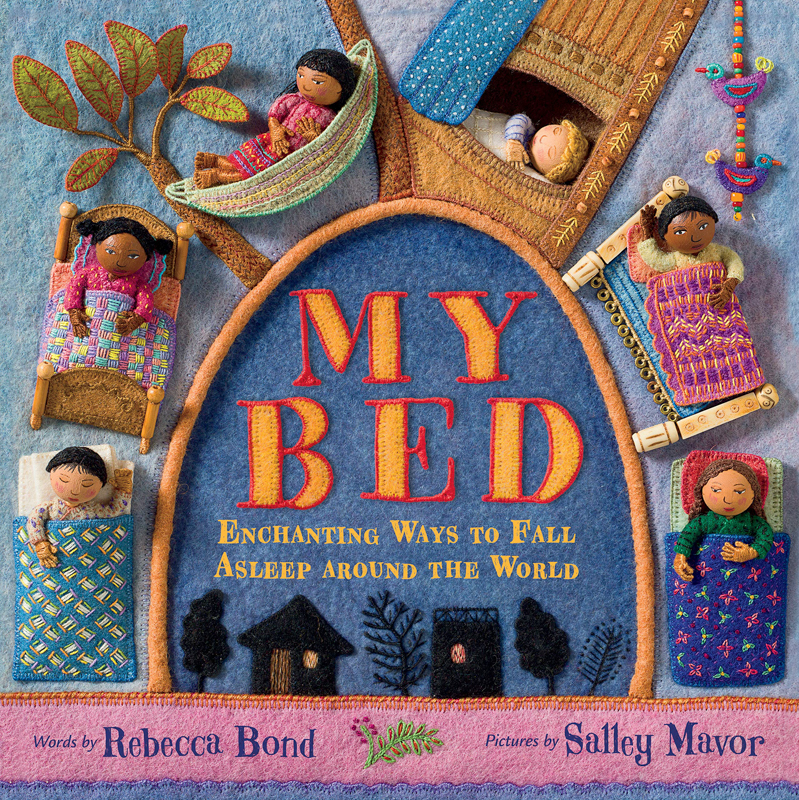
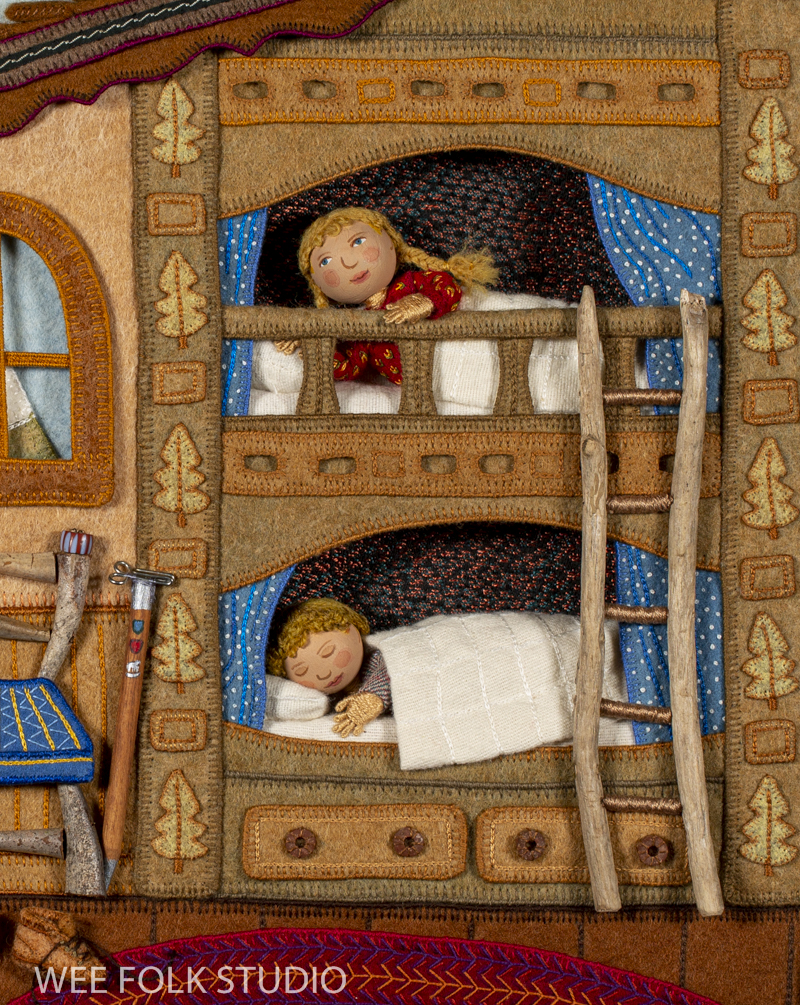
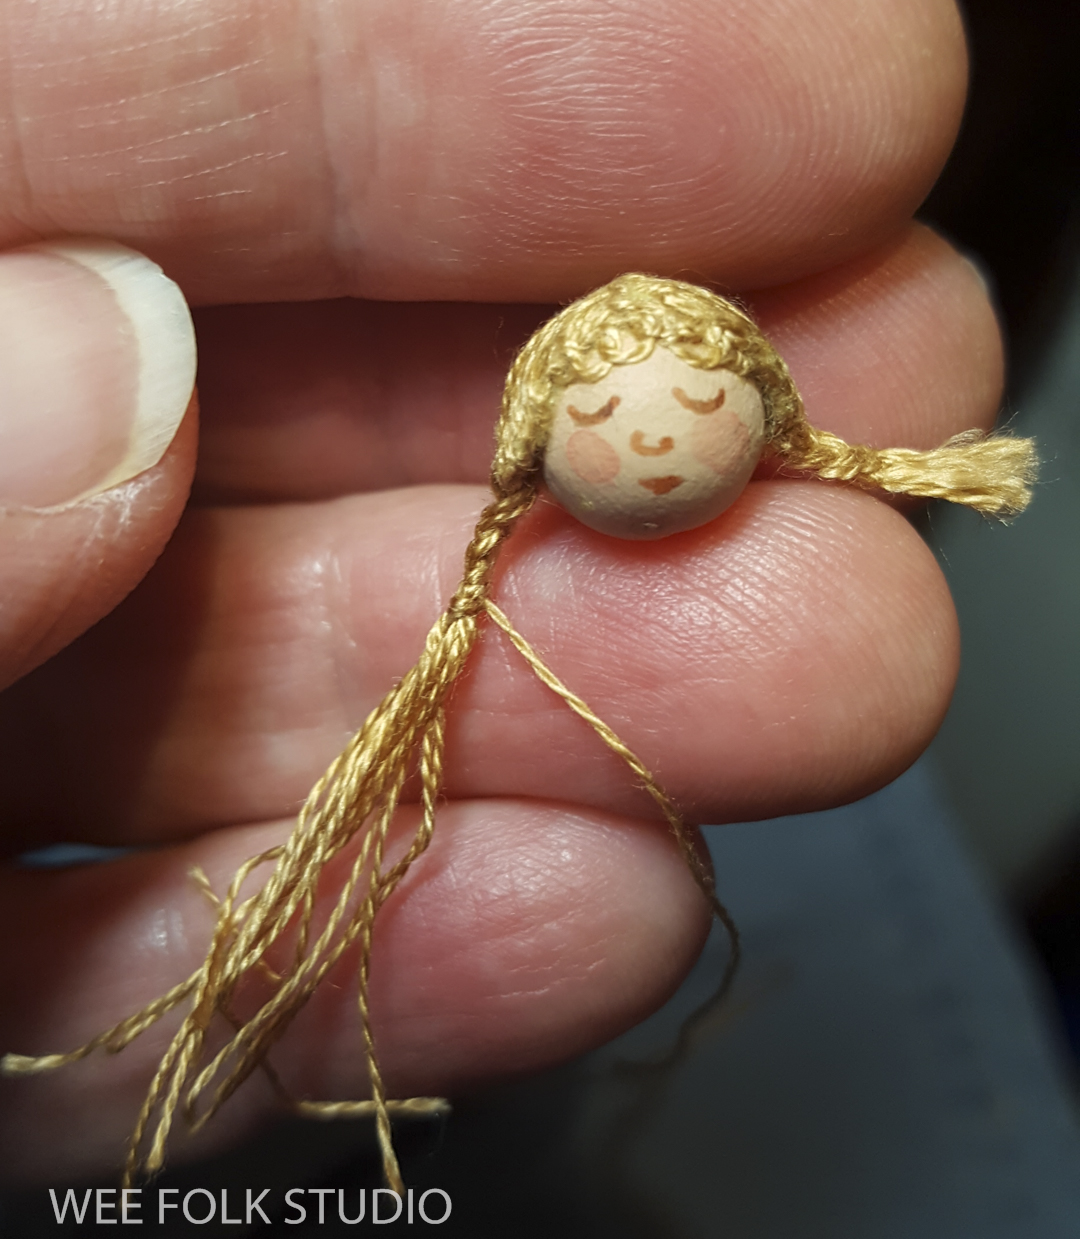
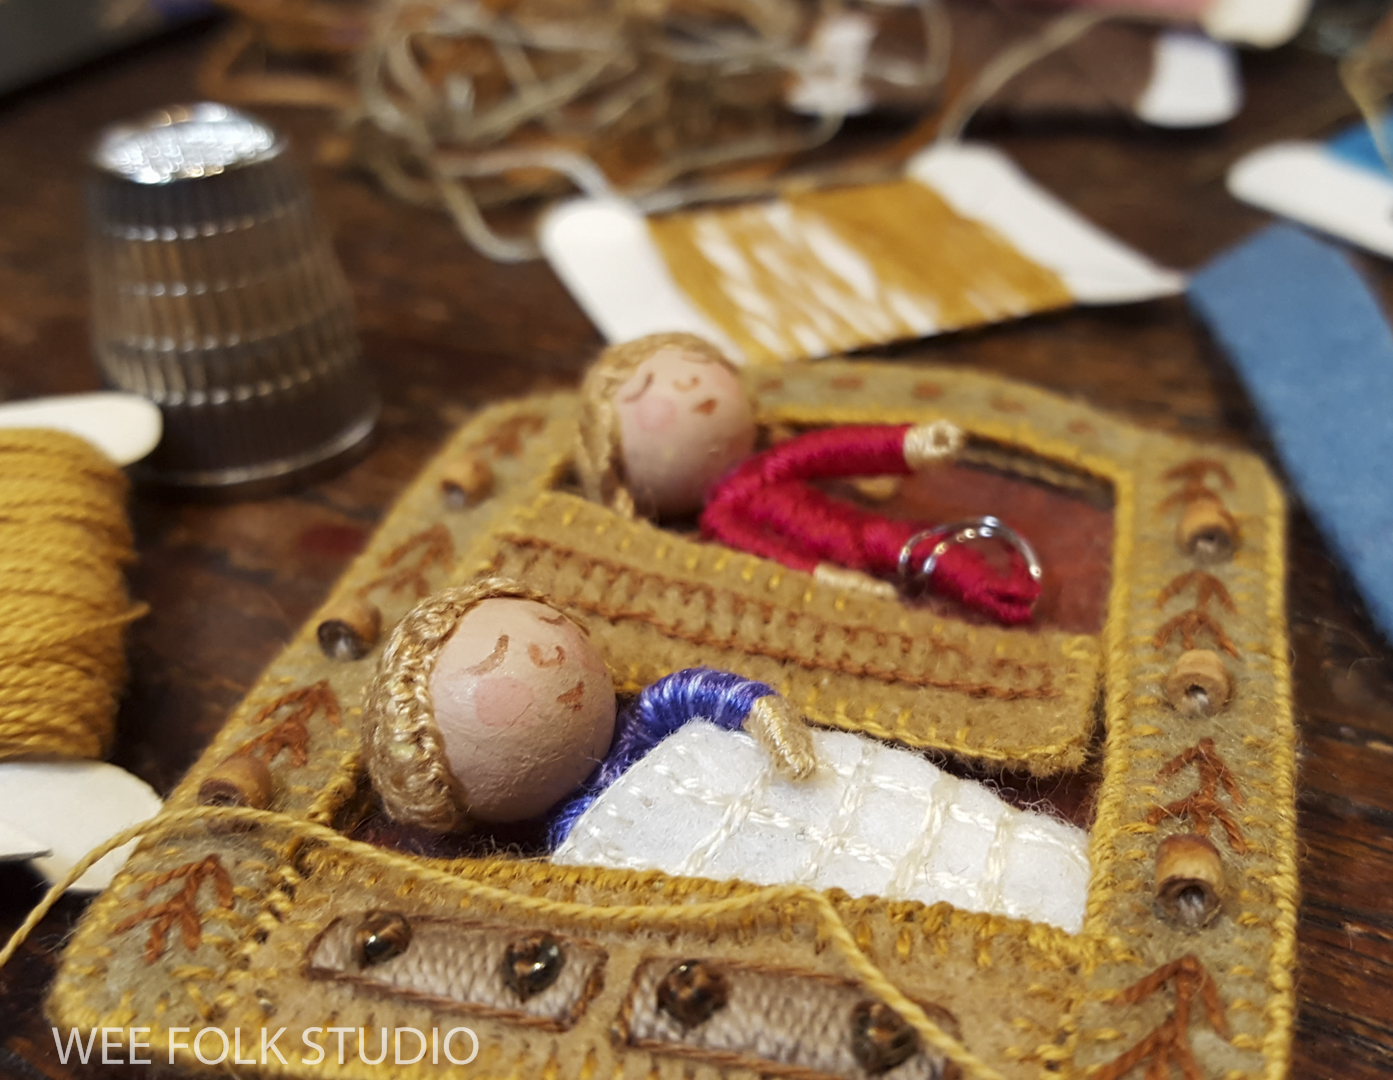
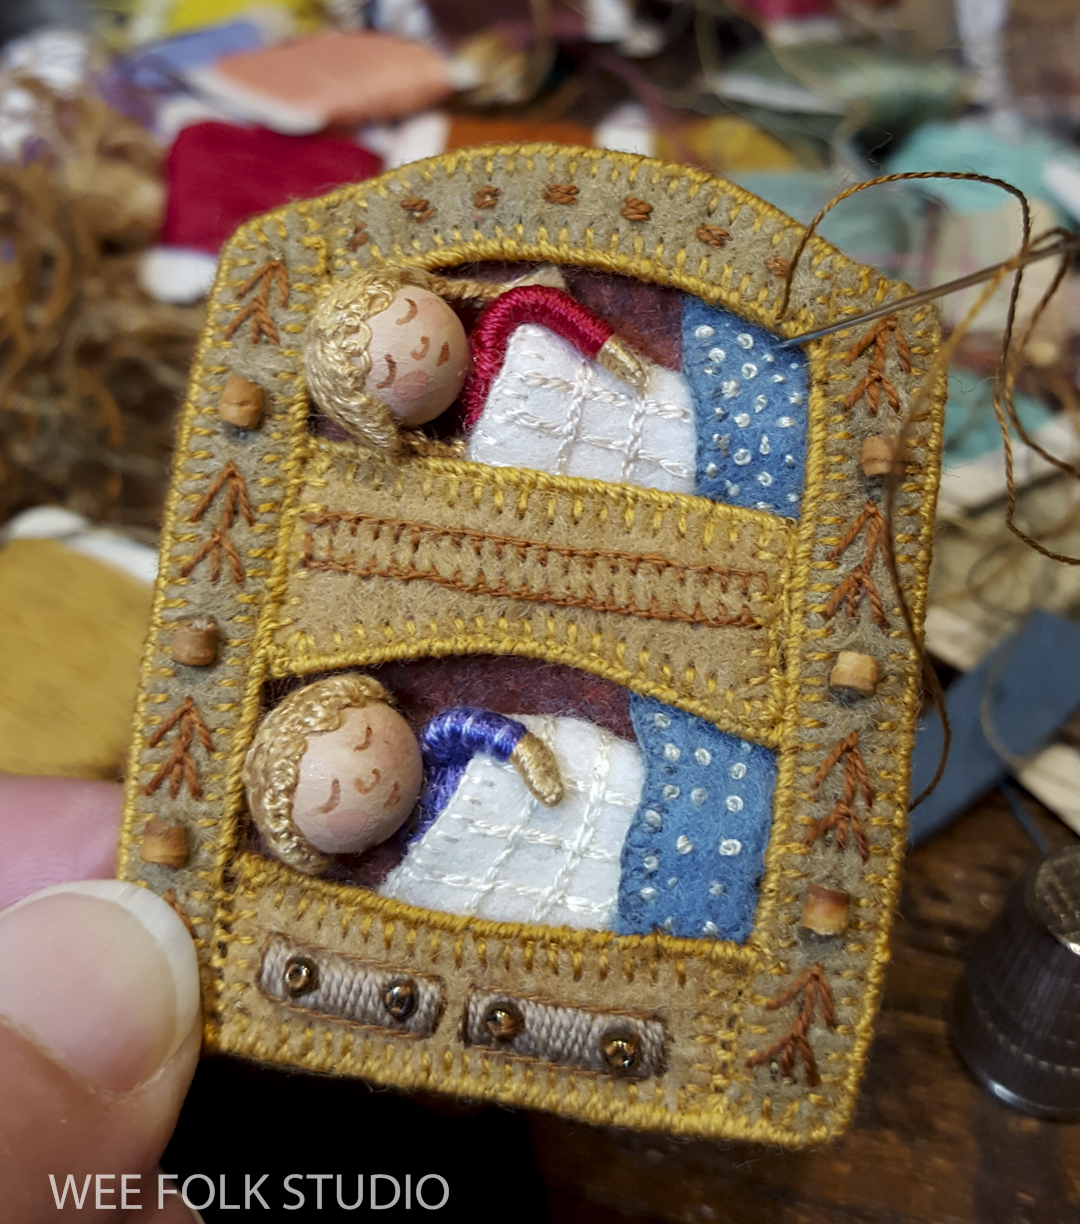
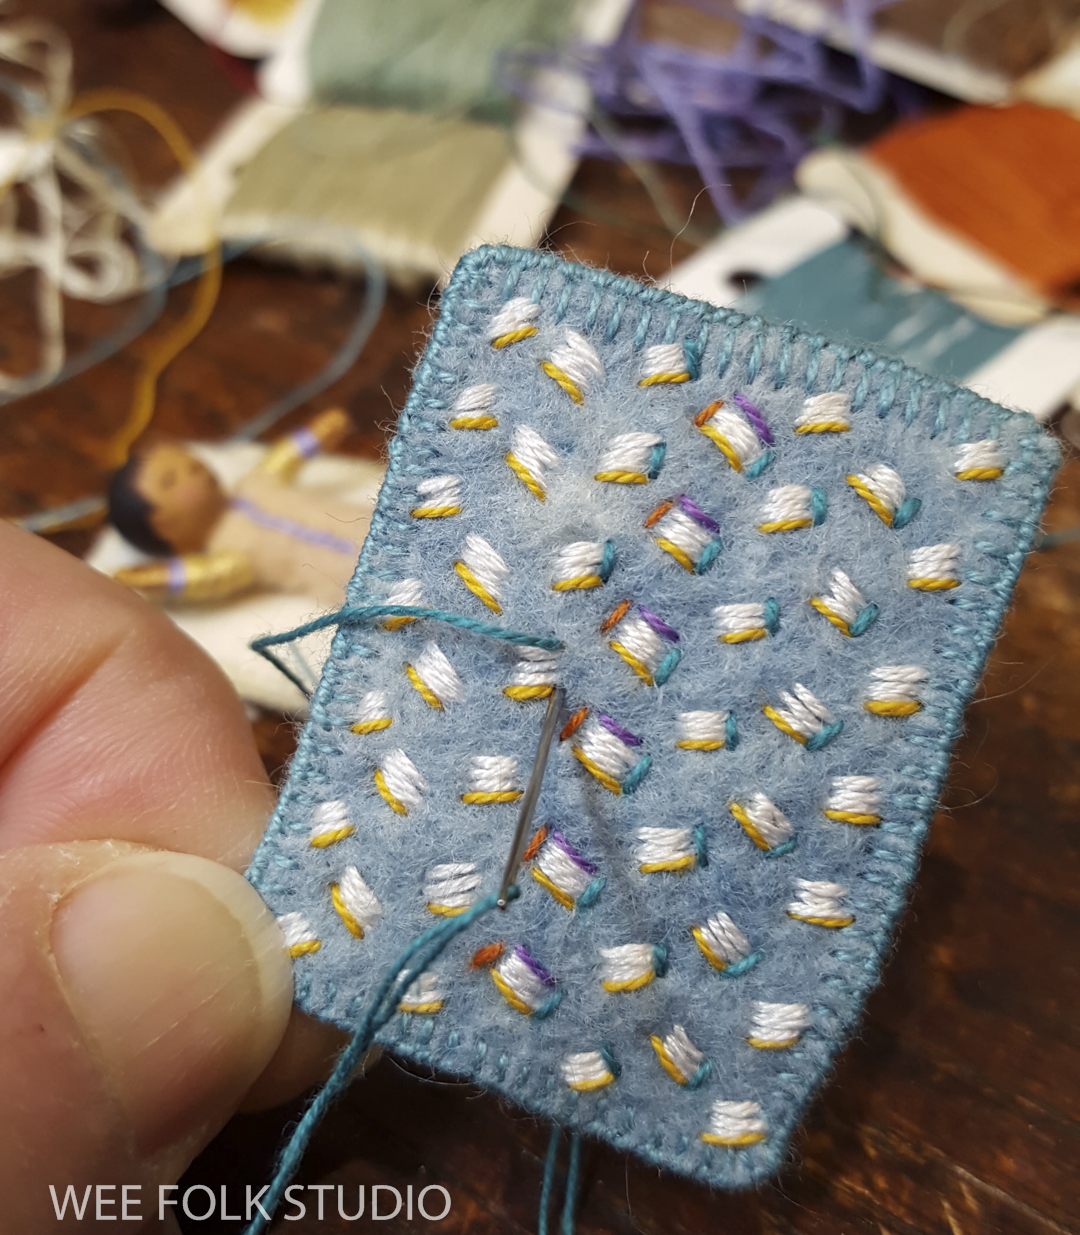
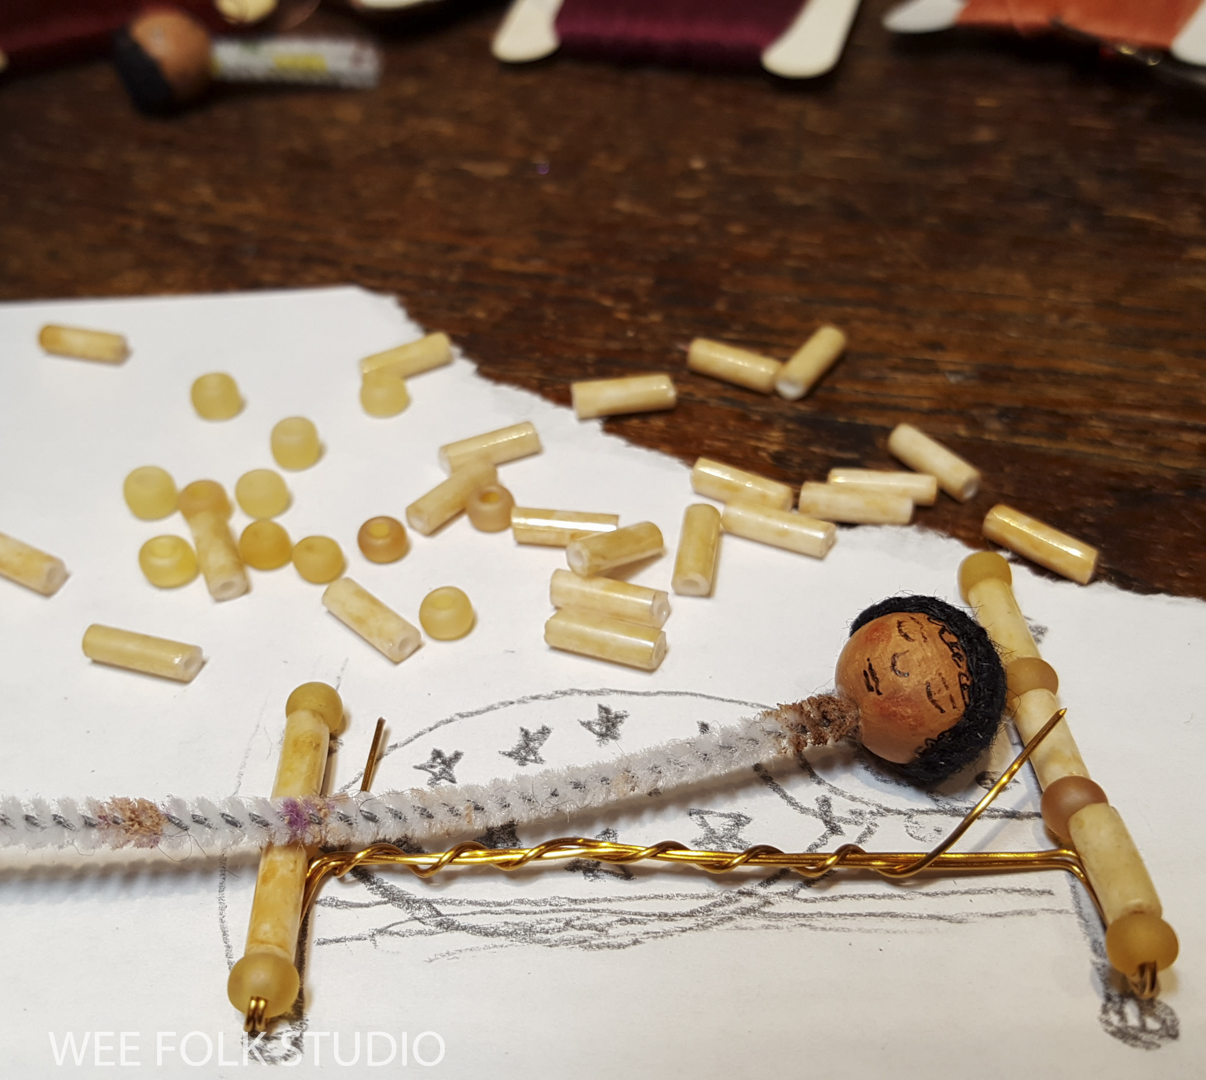
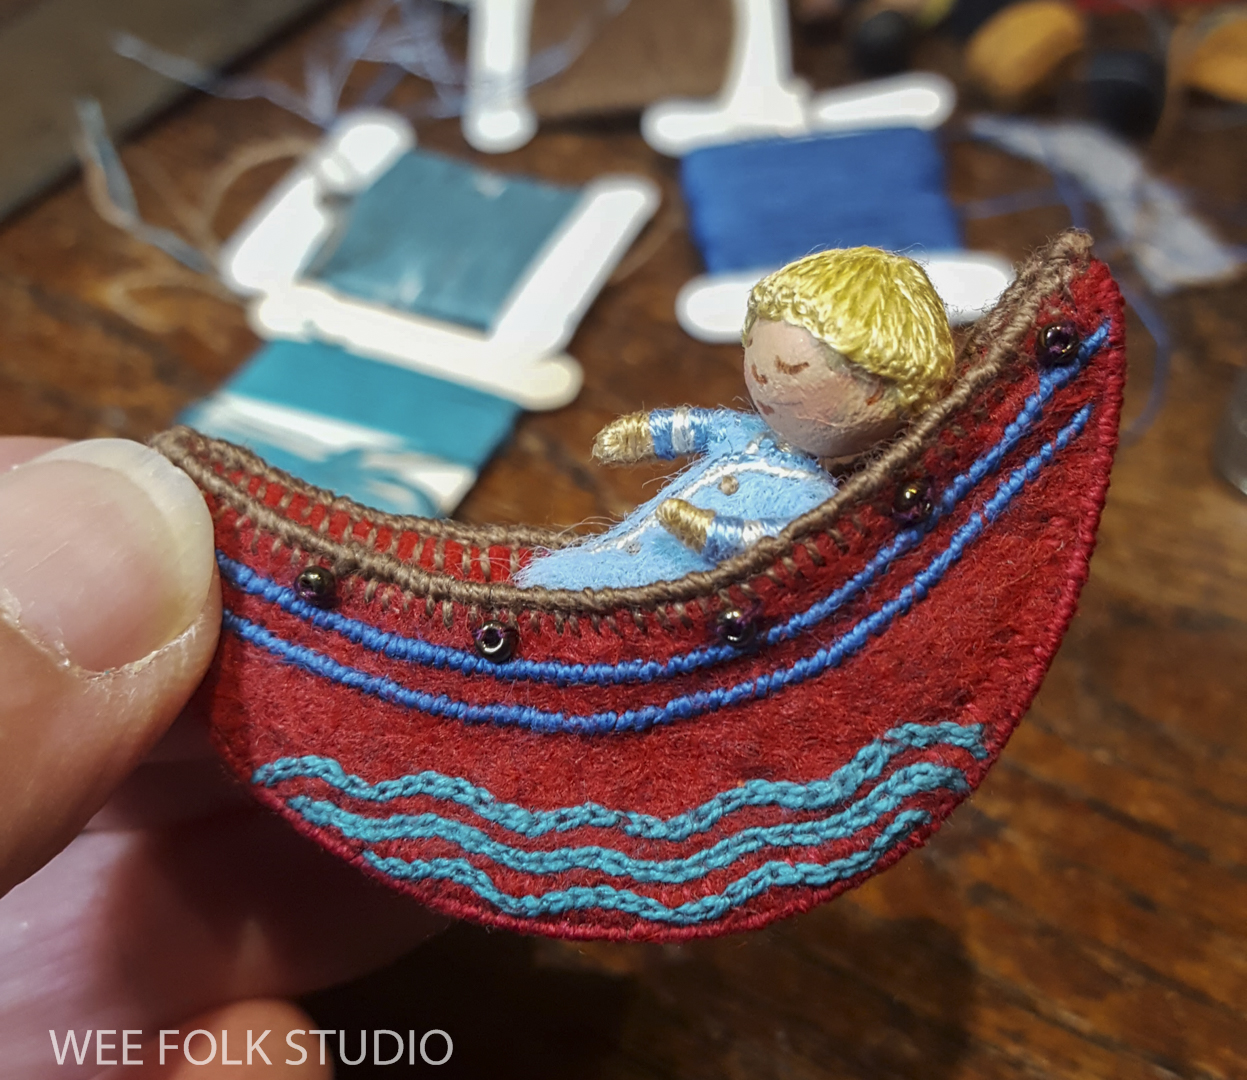
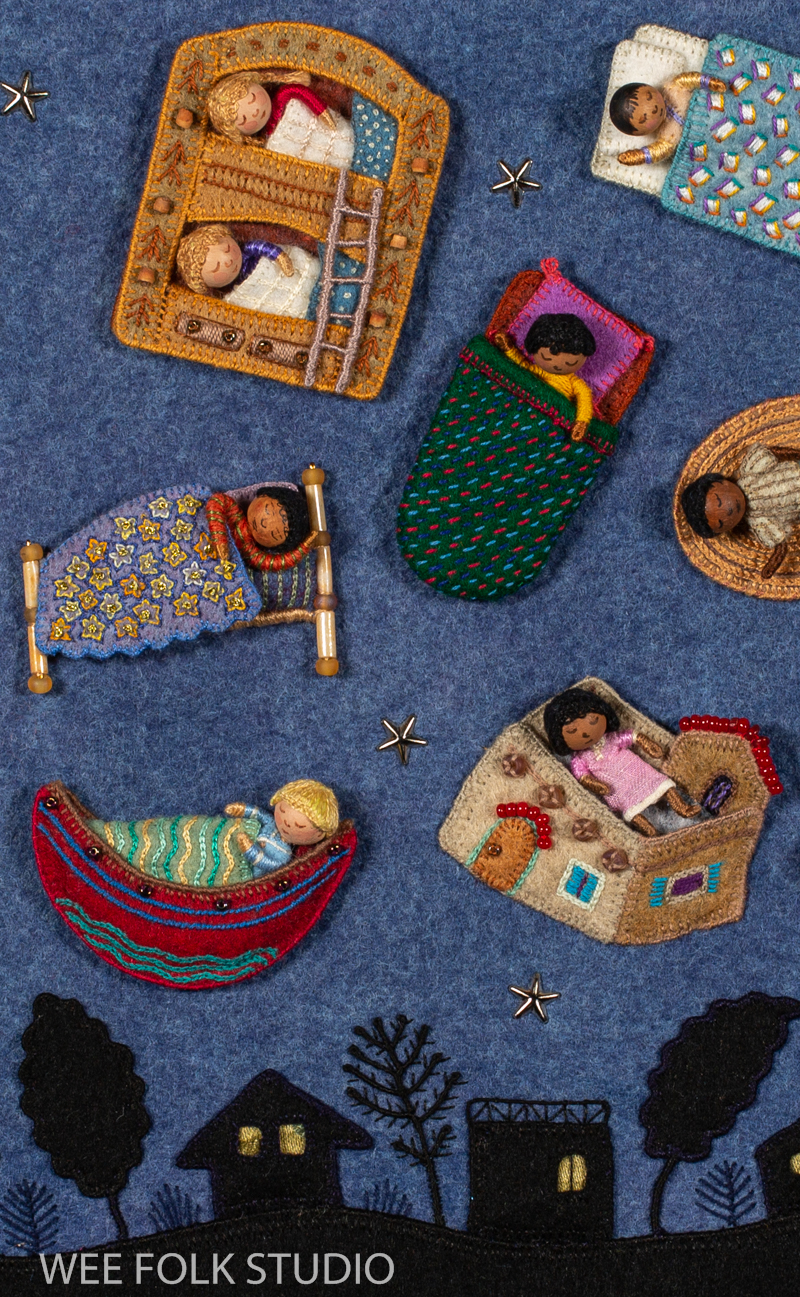
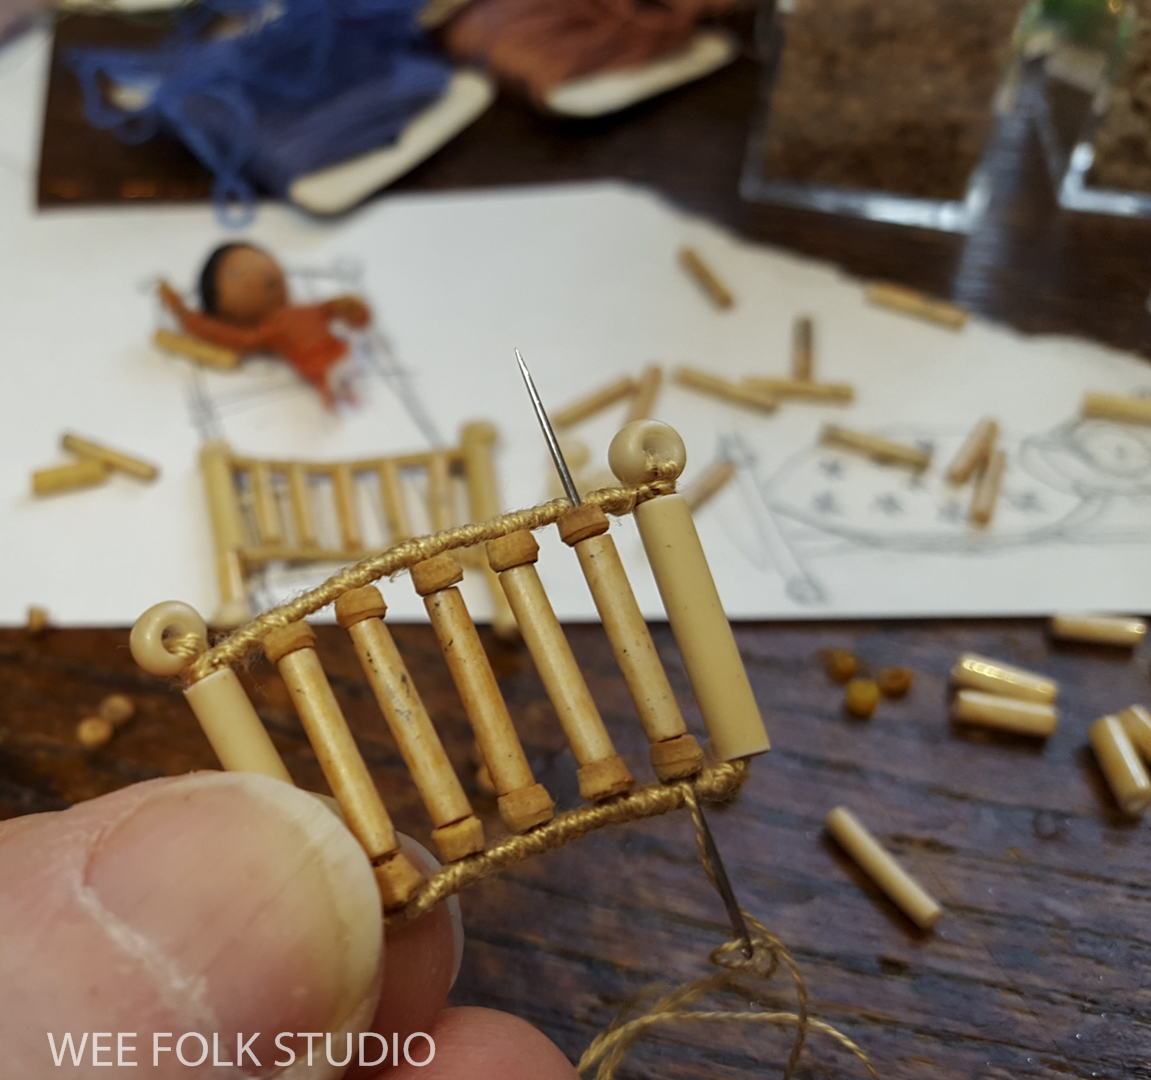
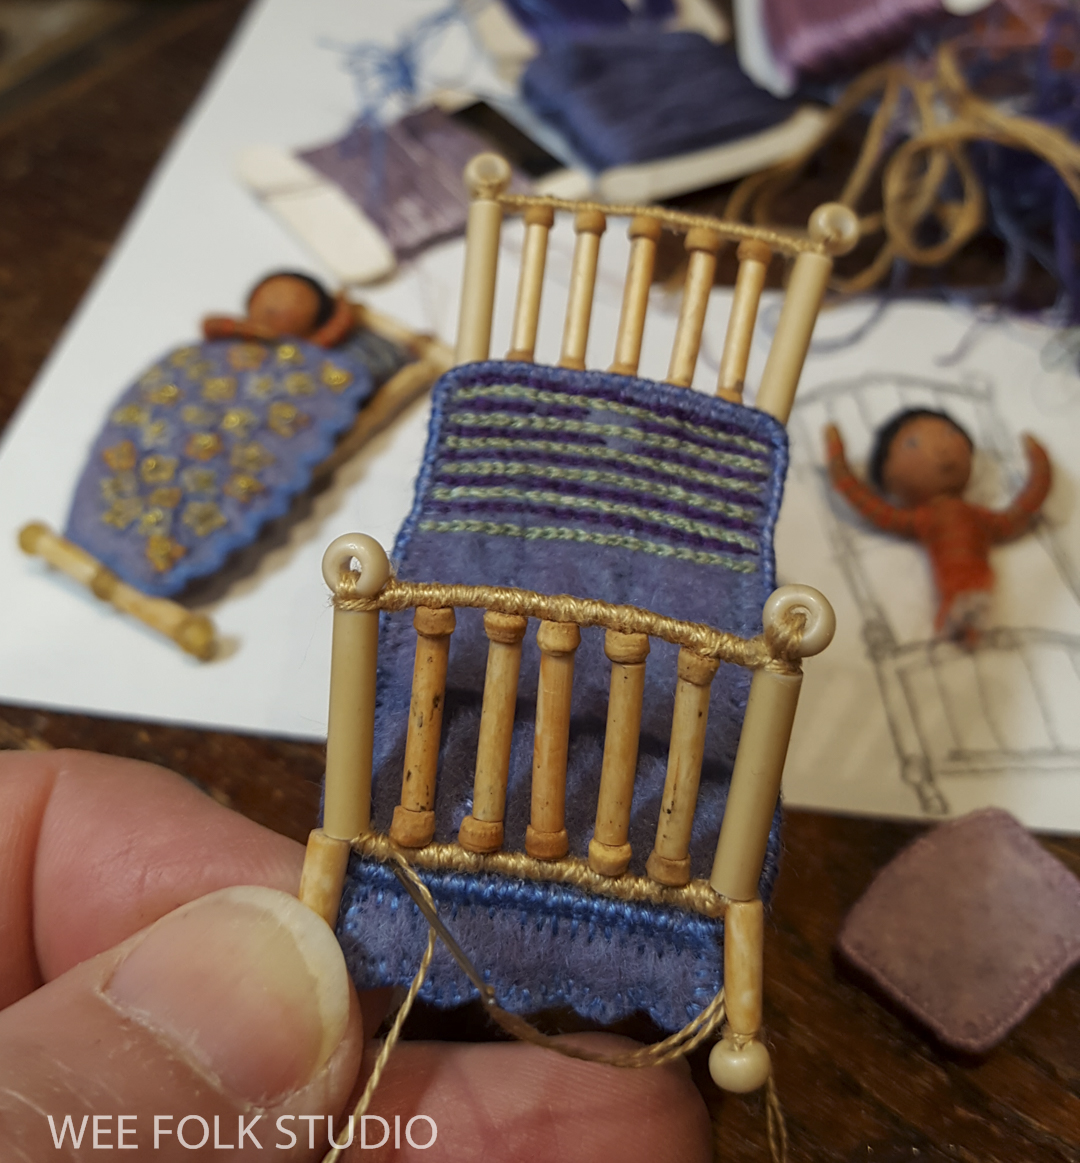
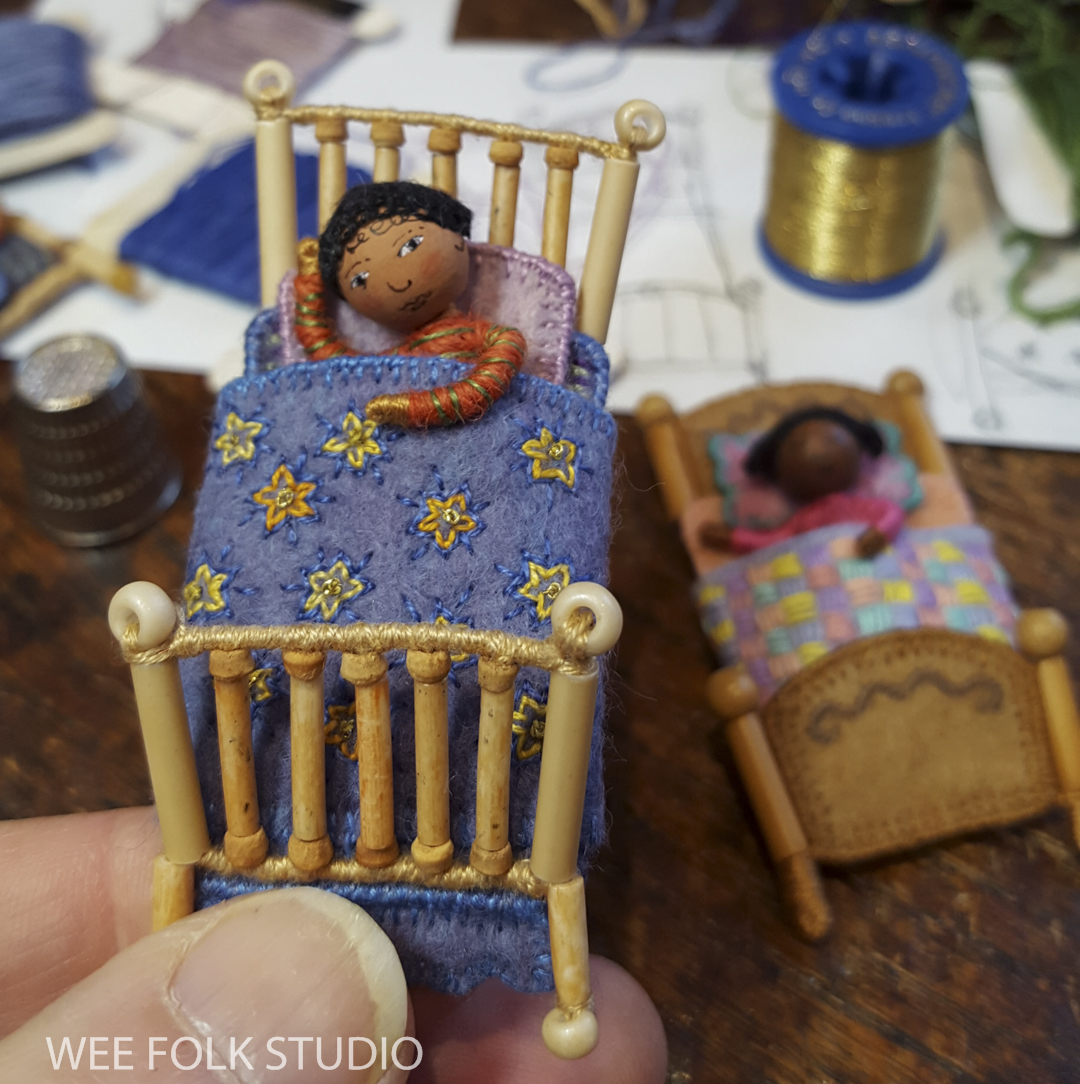
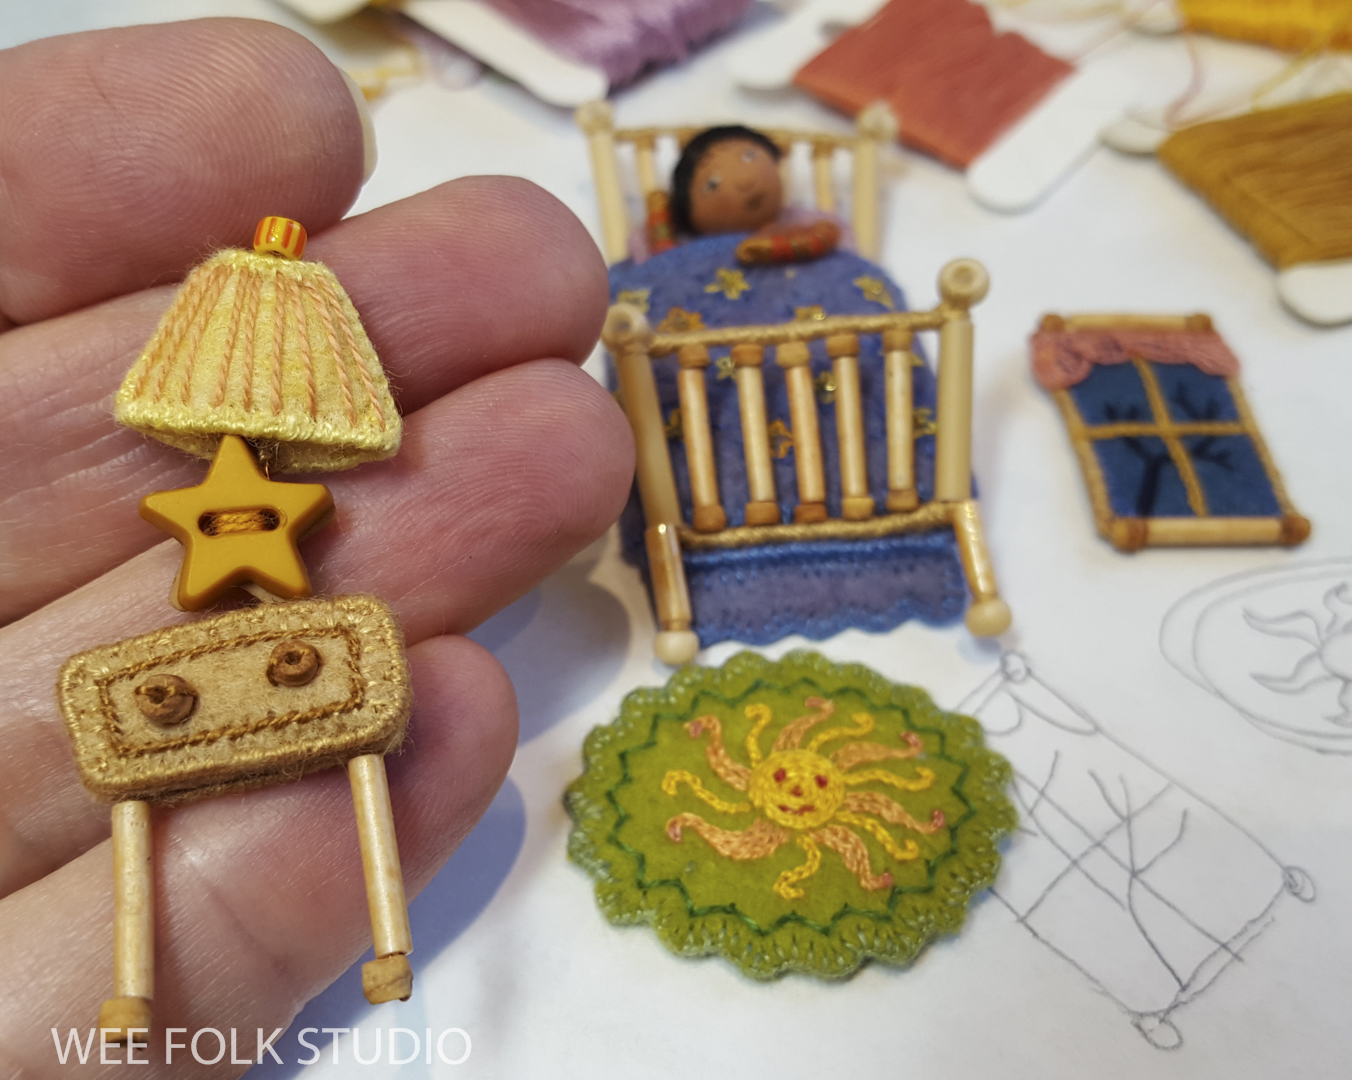
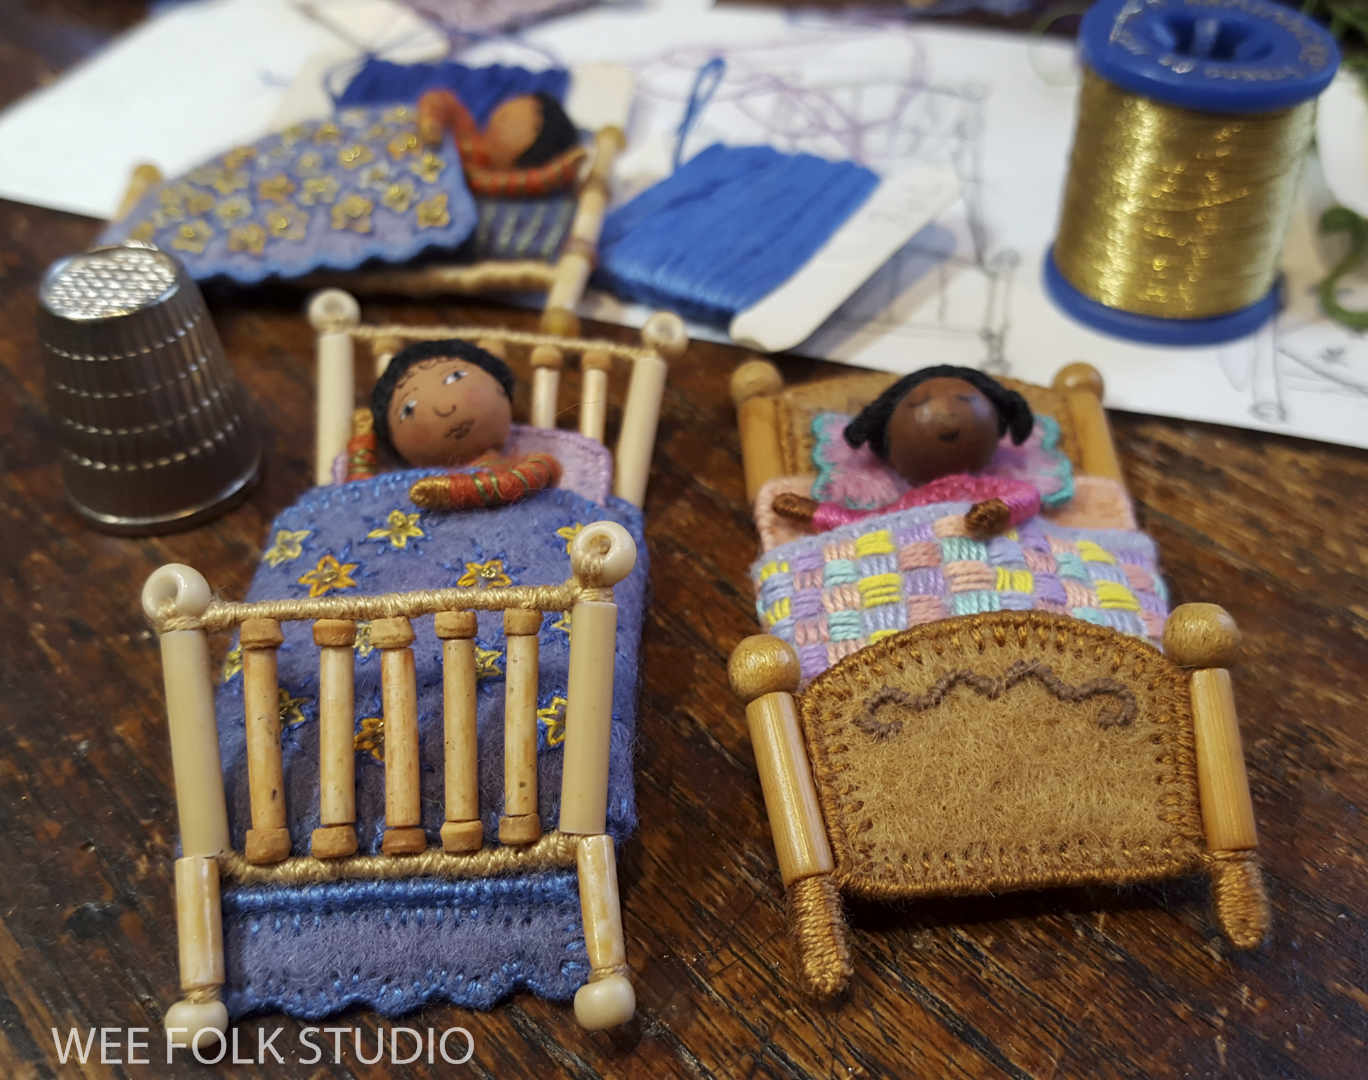
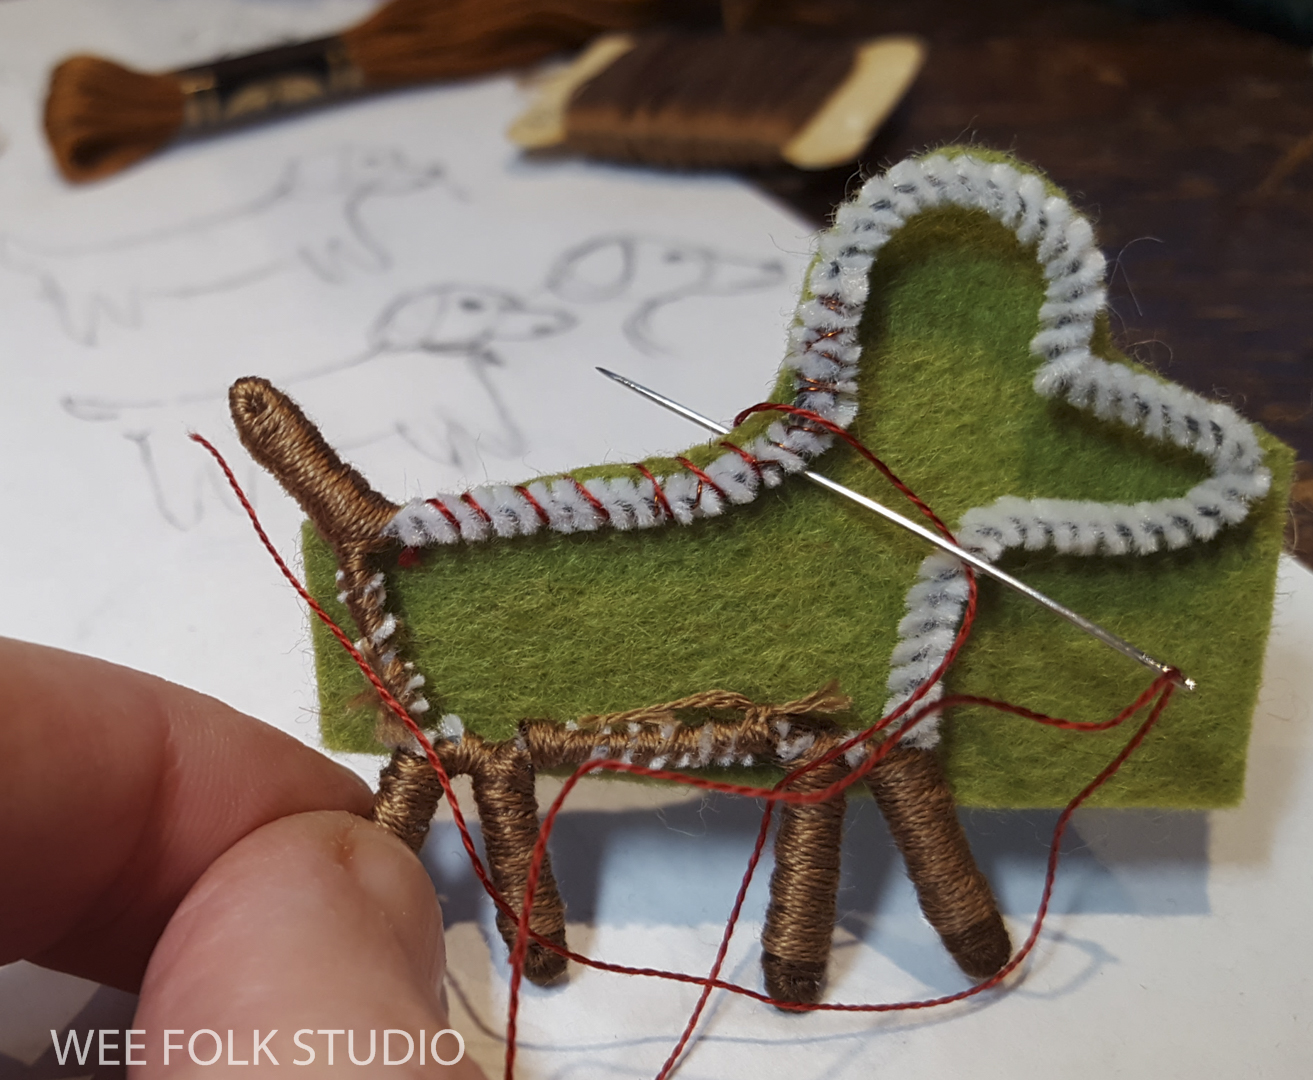
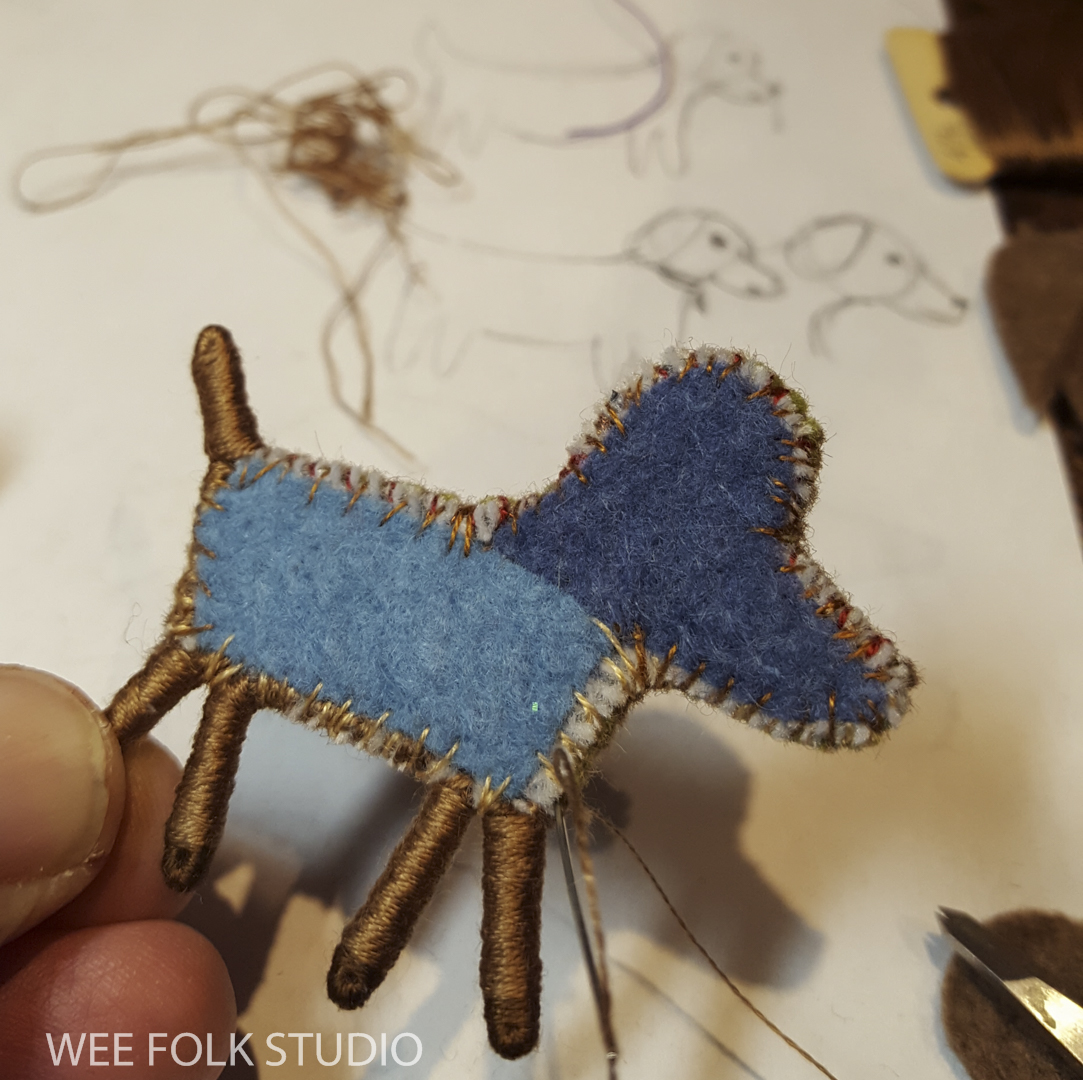
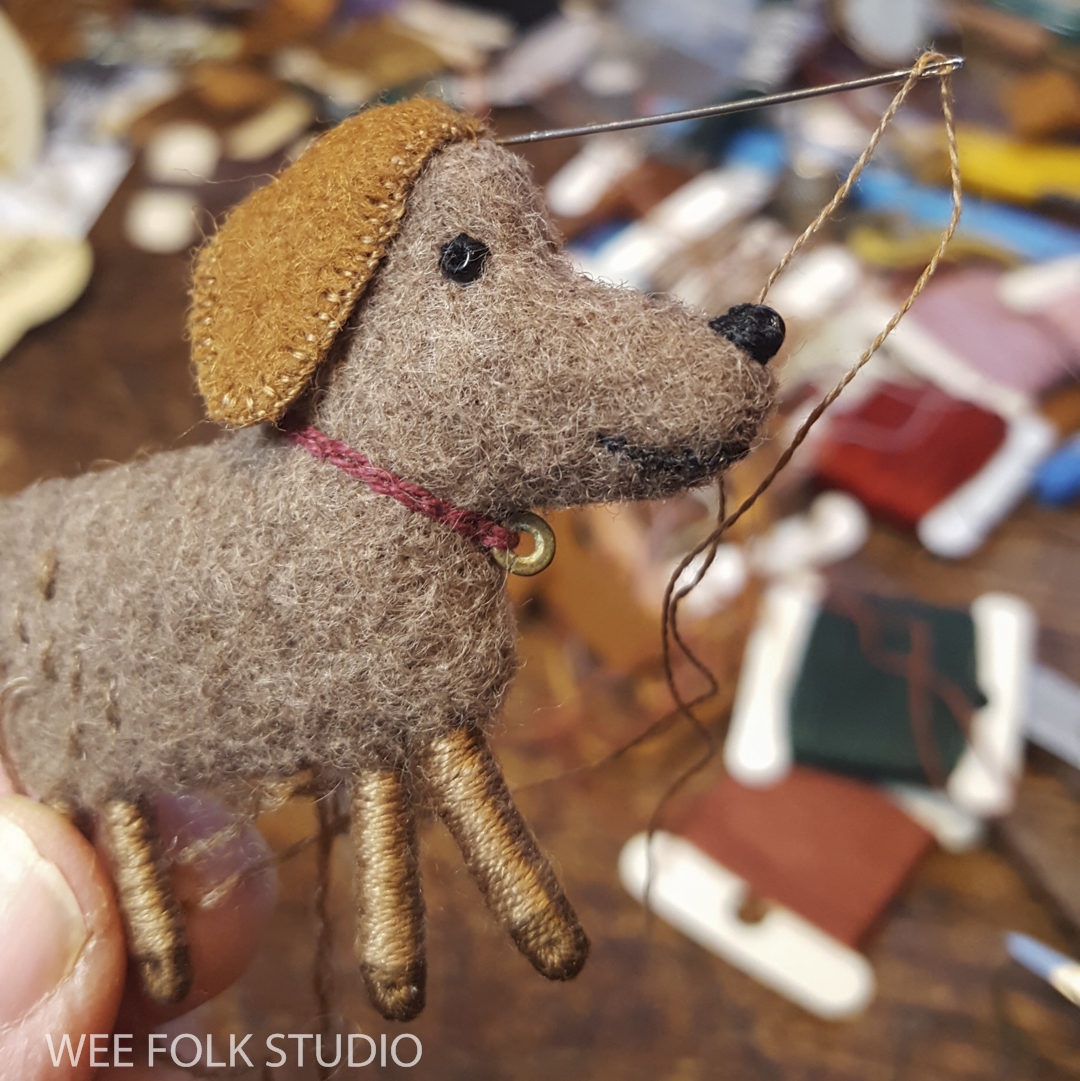
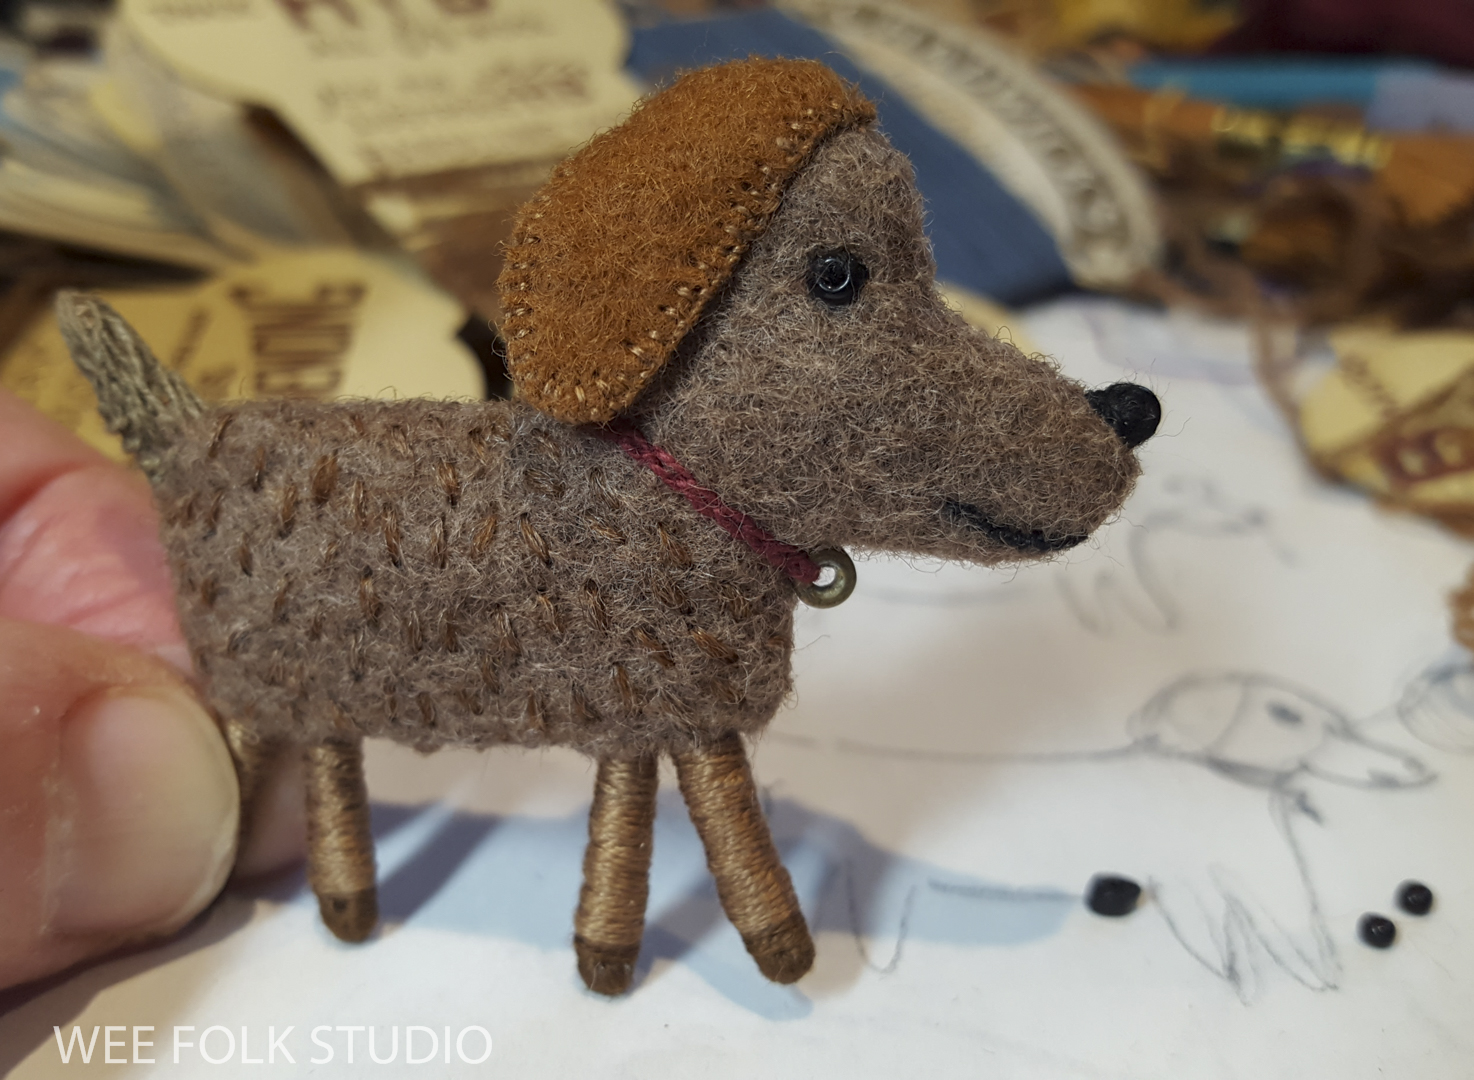
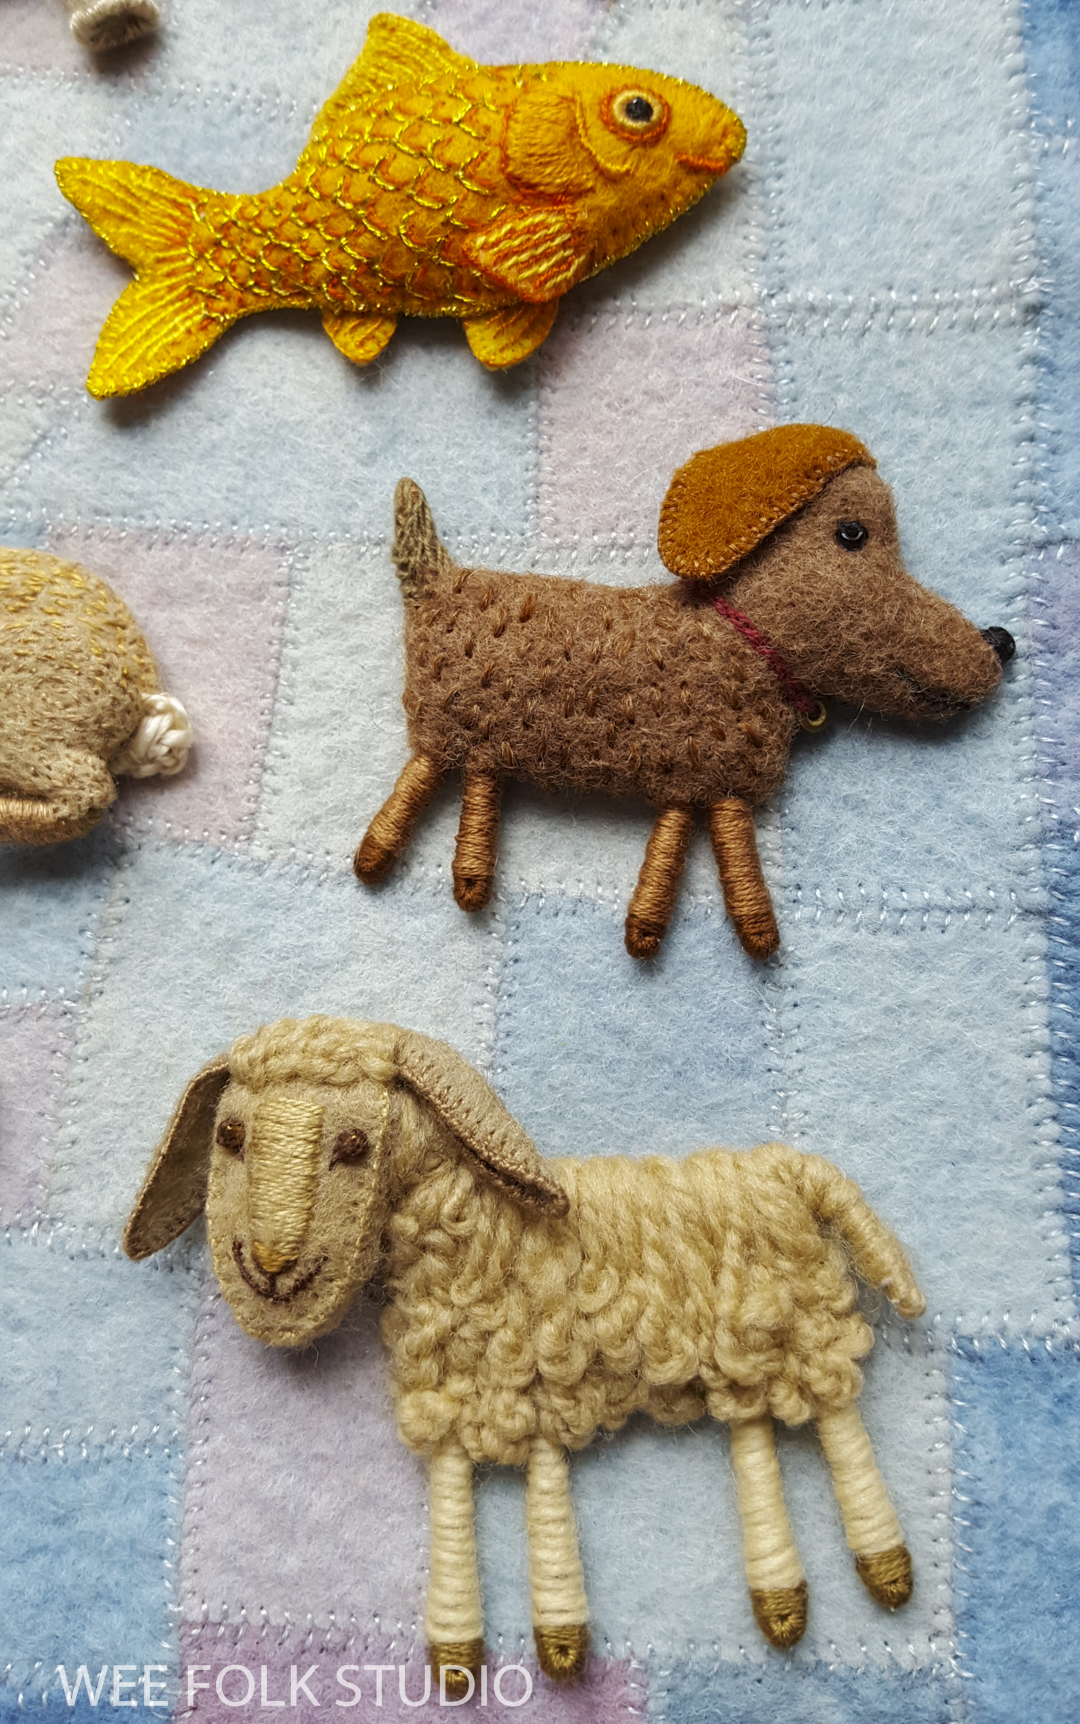
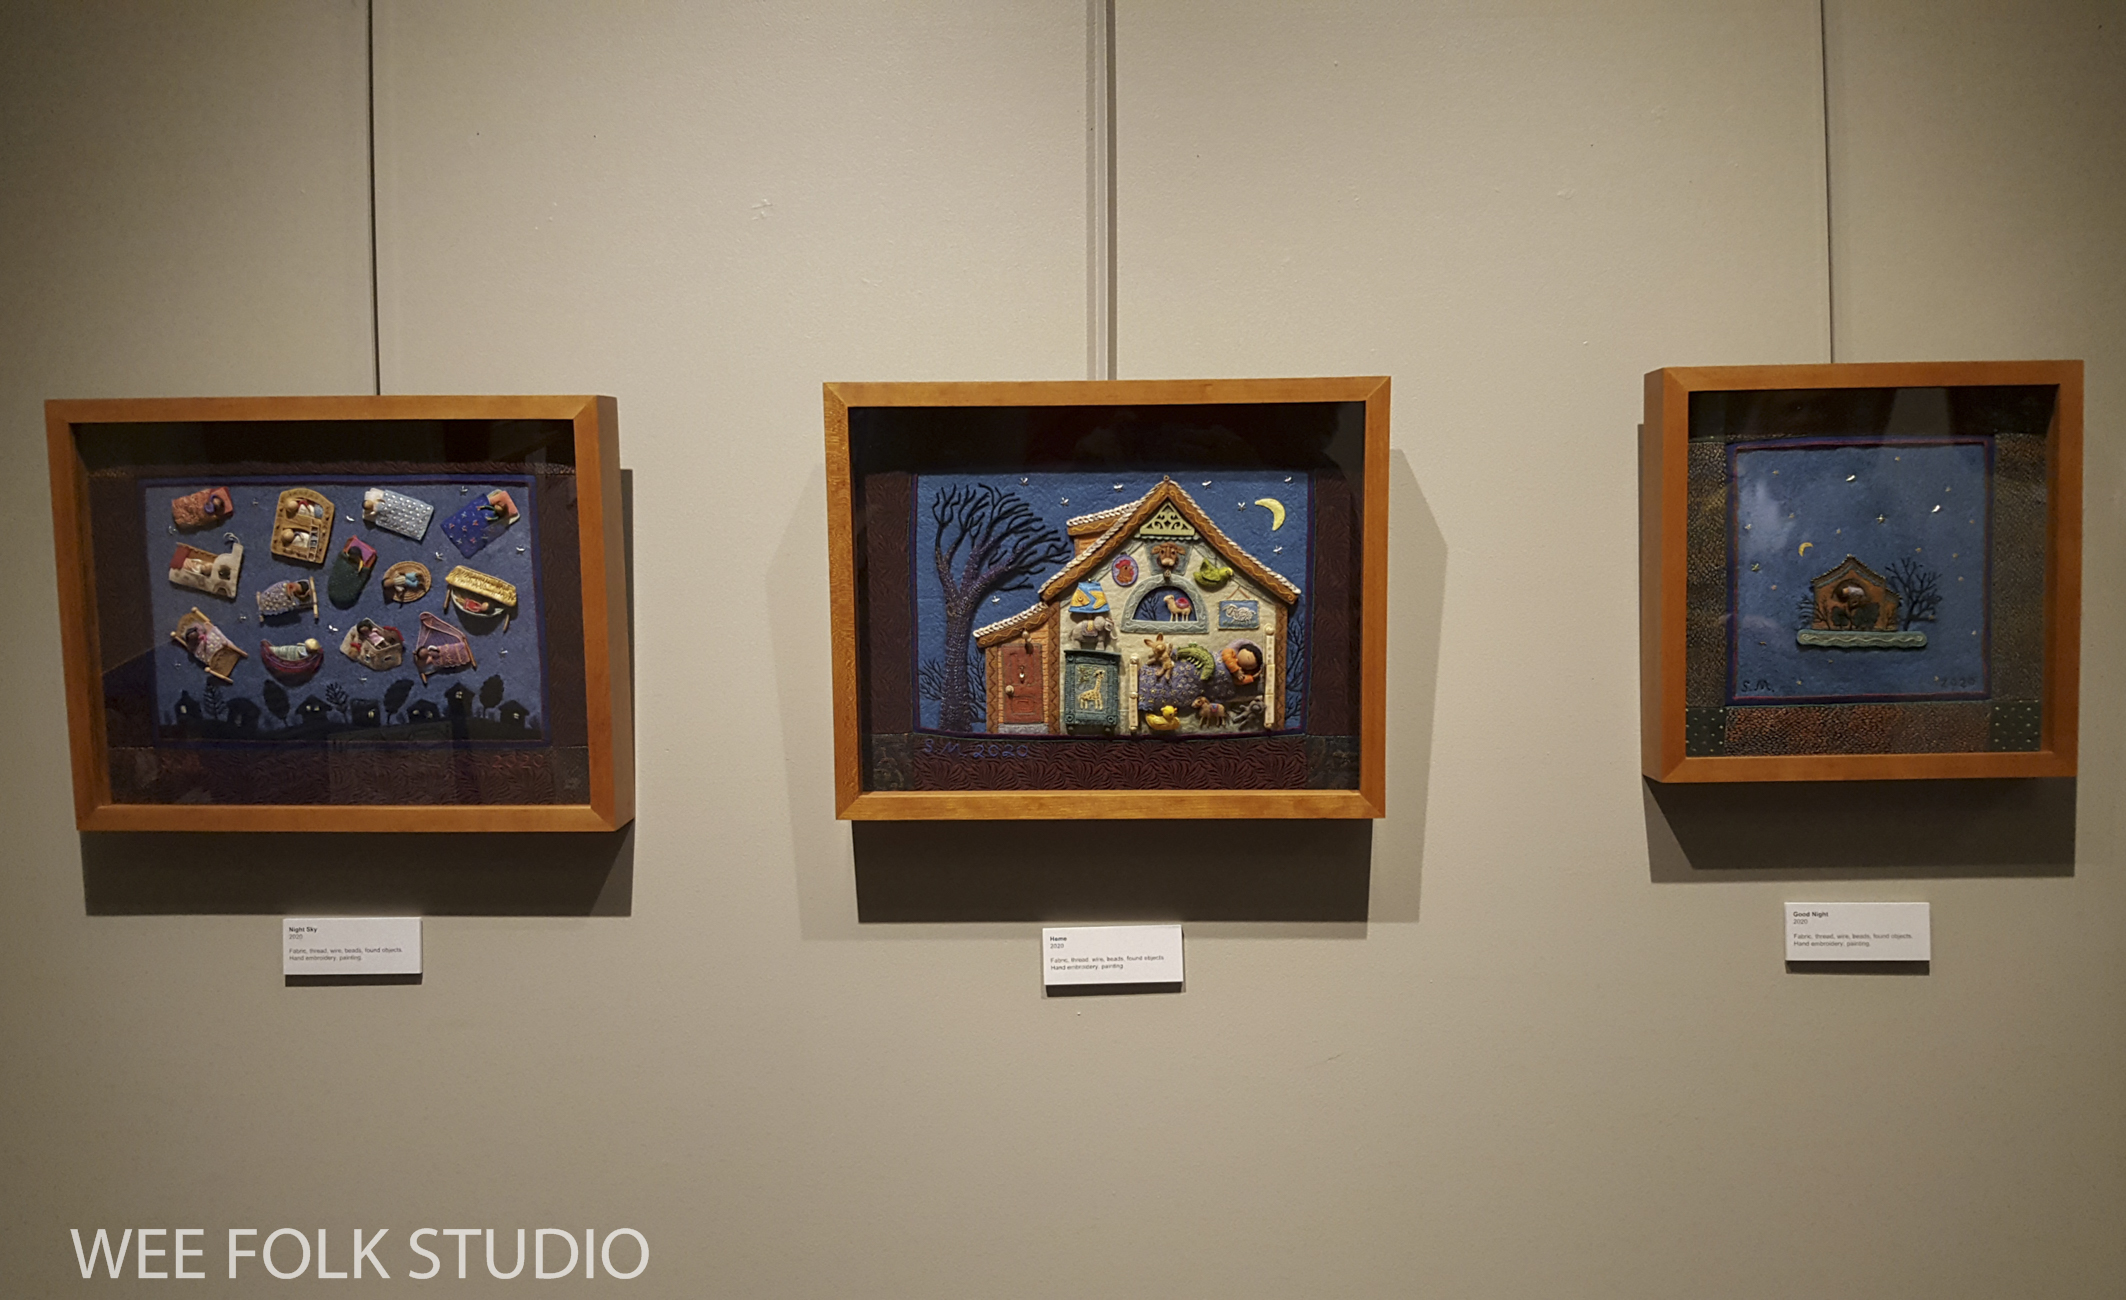
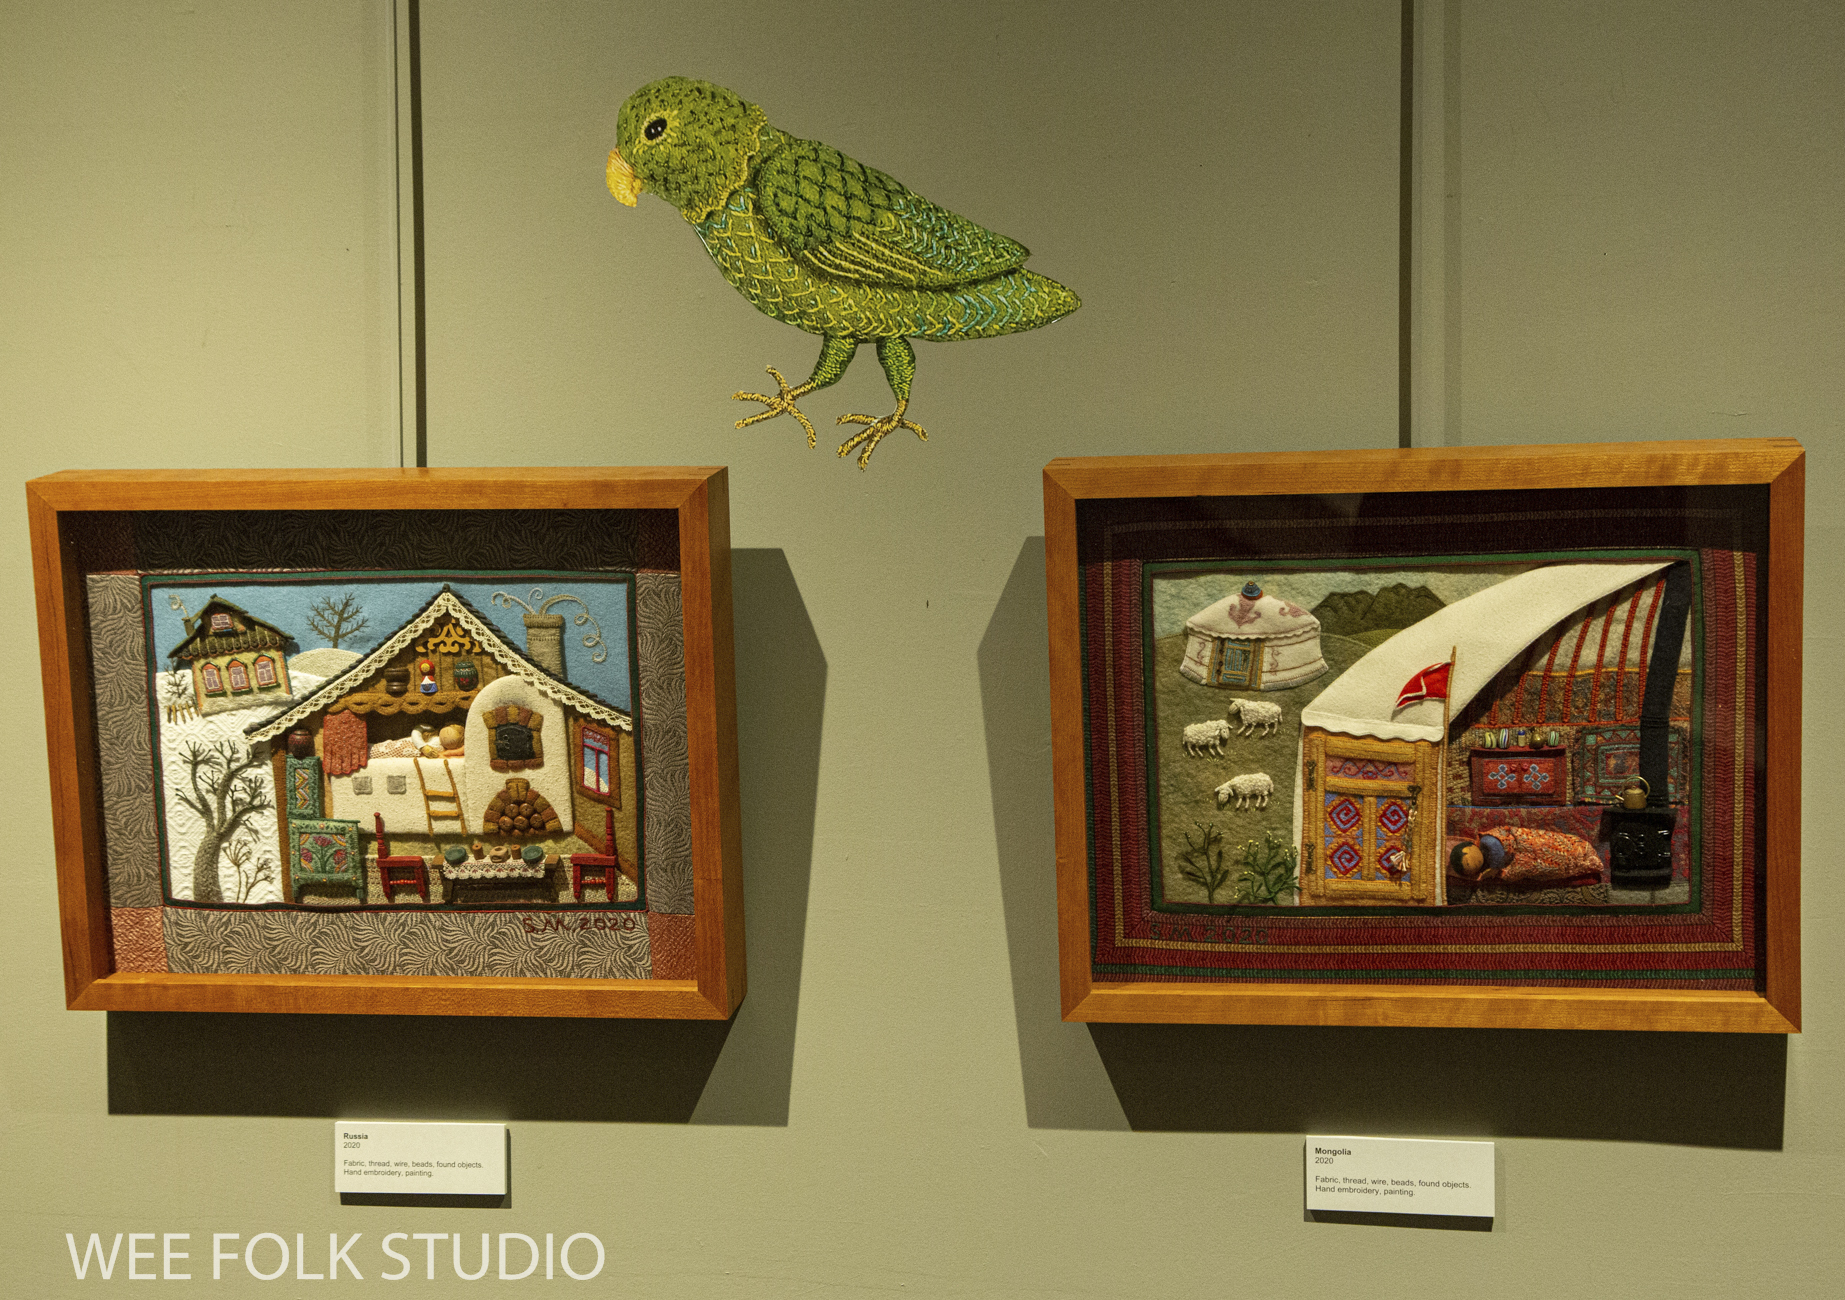
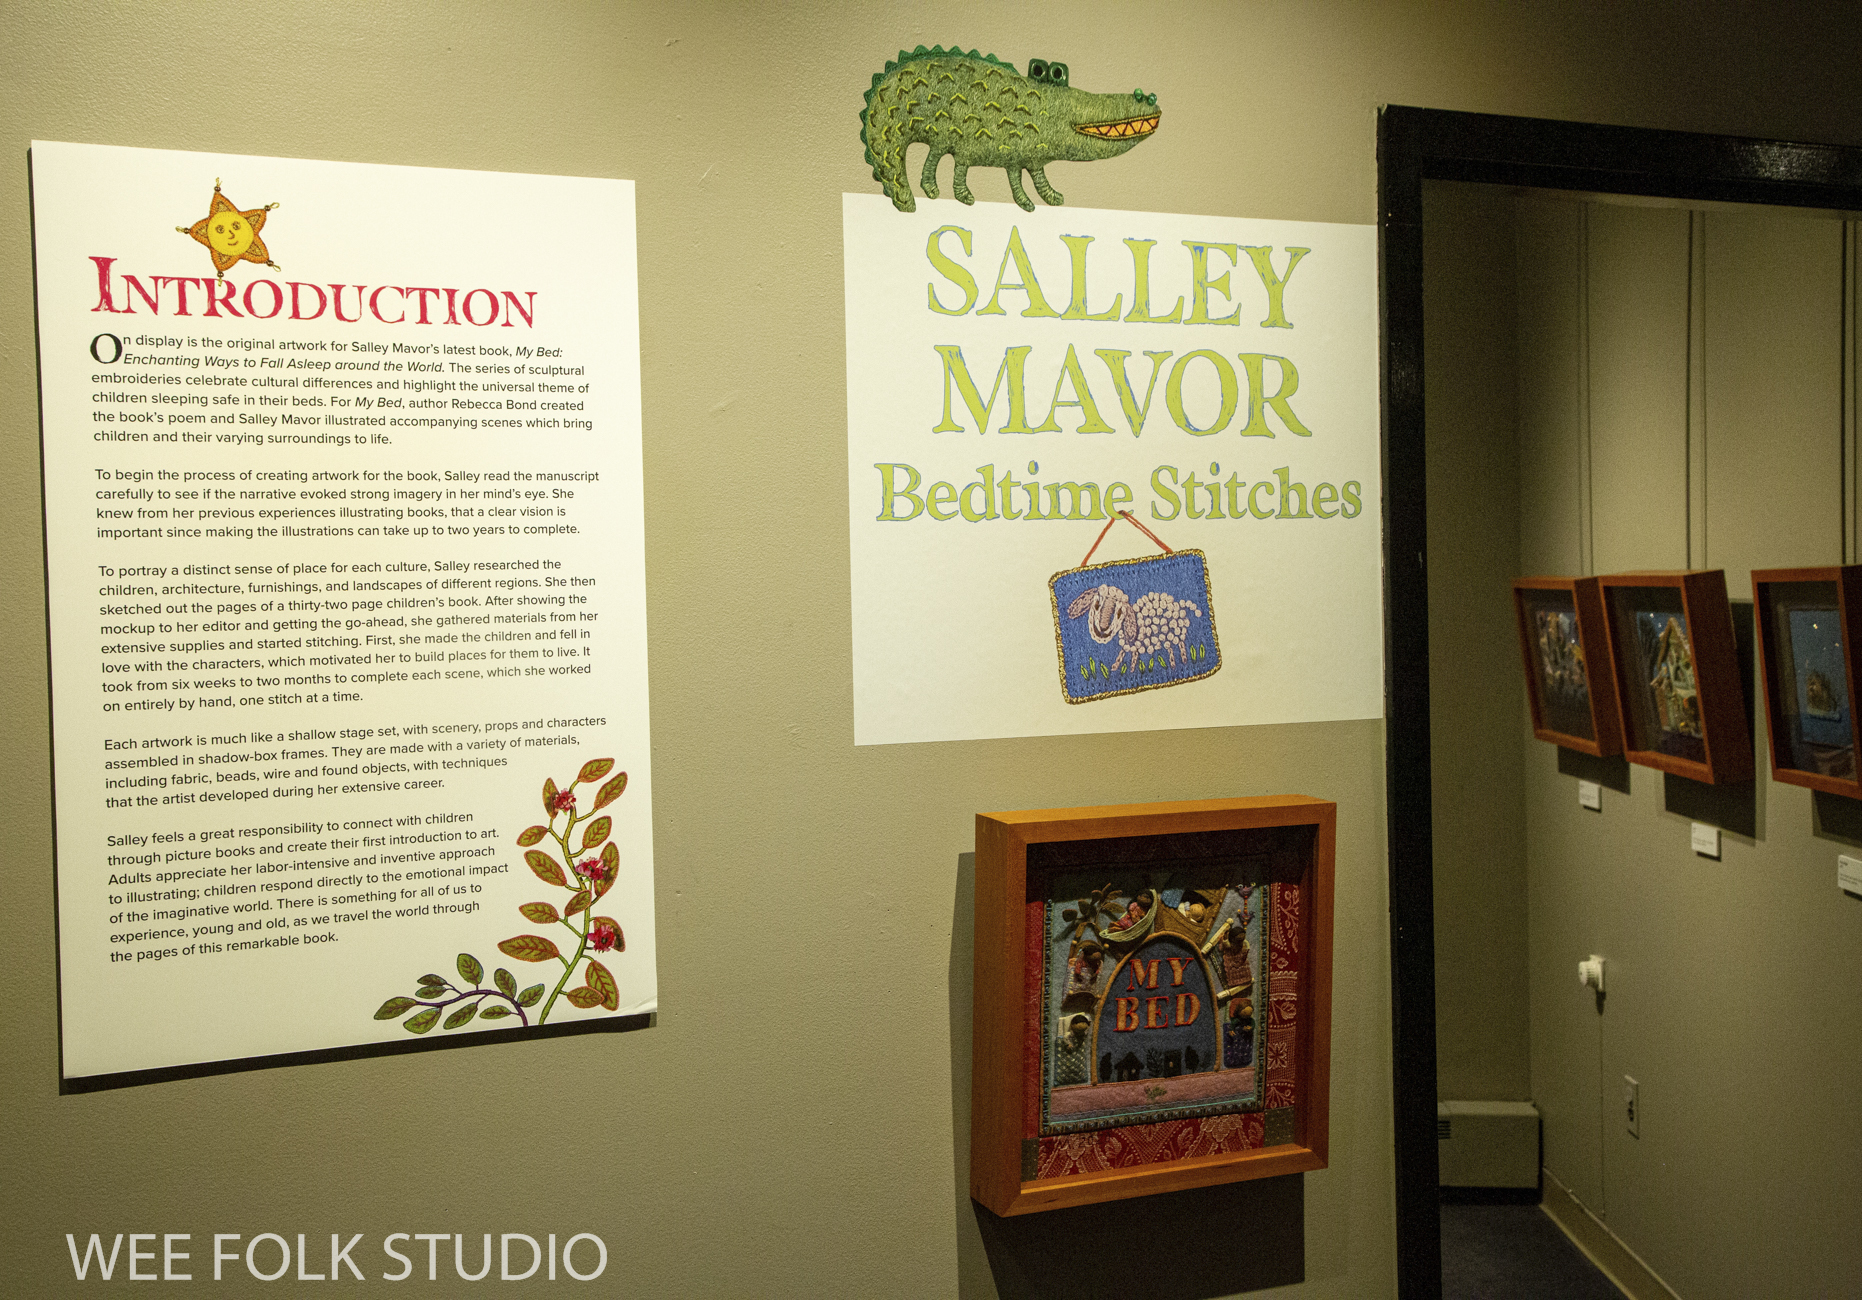
My bas-relief embroidered book illustrations have 2 lives. The easiest and most accessible way to enjoy them is by looking at the reproductions on the printed pages of the book, My Bed. Another way to experience the artwork is to go to an exhibition of the originals, where the scenes are presented behind glass in shadow-box frames hung on the wall. Either way, you can get lost in the stitched miniature worlds full of characters, props and scenery.

Personally signed copies of My Bed are available in my shop here. Watch this 8 minute documentary about how I created the illustrations for the book.

The BEDTIME STITCHES exhibition has been traveling for the past year and is booked at museums around the country through 2024 (see schedule below). I’m open to extending the tour, so if you’d like to see the exhibition come closer to where you live, please reach out to museums in your area and tell them about the opportunity to show my artwork. Interested museums are welcome to contact me (Salley at weefolkstudio.com) for information about hosting the exhibition.

BEDTIME STITCHES Tour Schedule

Sept. 14 – Dec. 31, 2021New England Quilt Museum, Lowell, MA
Jan 25 – April 10, 2022International Quilt Museum, Lincoln, NE
June 3 – Sept. 11, 2022,  Brick Store Museum, Kennebunk, ME, (Bedtime Stitches will be included in the retrospective exhibition, What a Relief: The Art of Salley Mavor)
Oct. 15 – Dec. 31, 2022Historical and Cultural Center of Clay County, Moorhead, MN
Feb. 1 – Apr. 30, 2023Pacific Northwest Quilt & Fiber Arts Museum, La Conner, WA
Fall 2023Southern Vermont Arts Center, Manchester, VT. (Bedtime Stitches and Social Fabric will be displayed together)
Feb. – May 2024Upcountry History Museum, Greenville, SC
July — Dec. 2024Albany Institute of History and Art, Albany, NY. (Bedtime Stitches and Social Fabric will be displayed together)

Pam Weeks – New England Quilt Museum’s curator

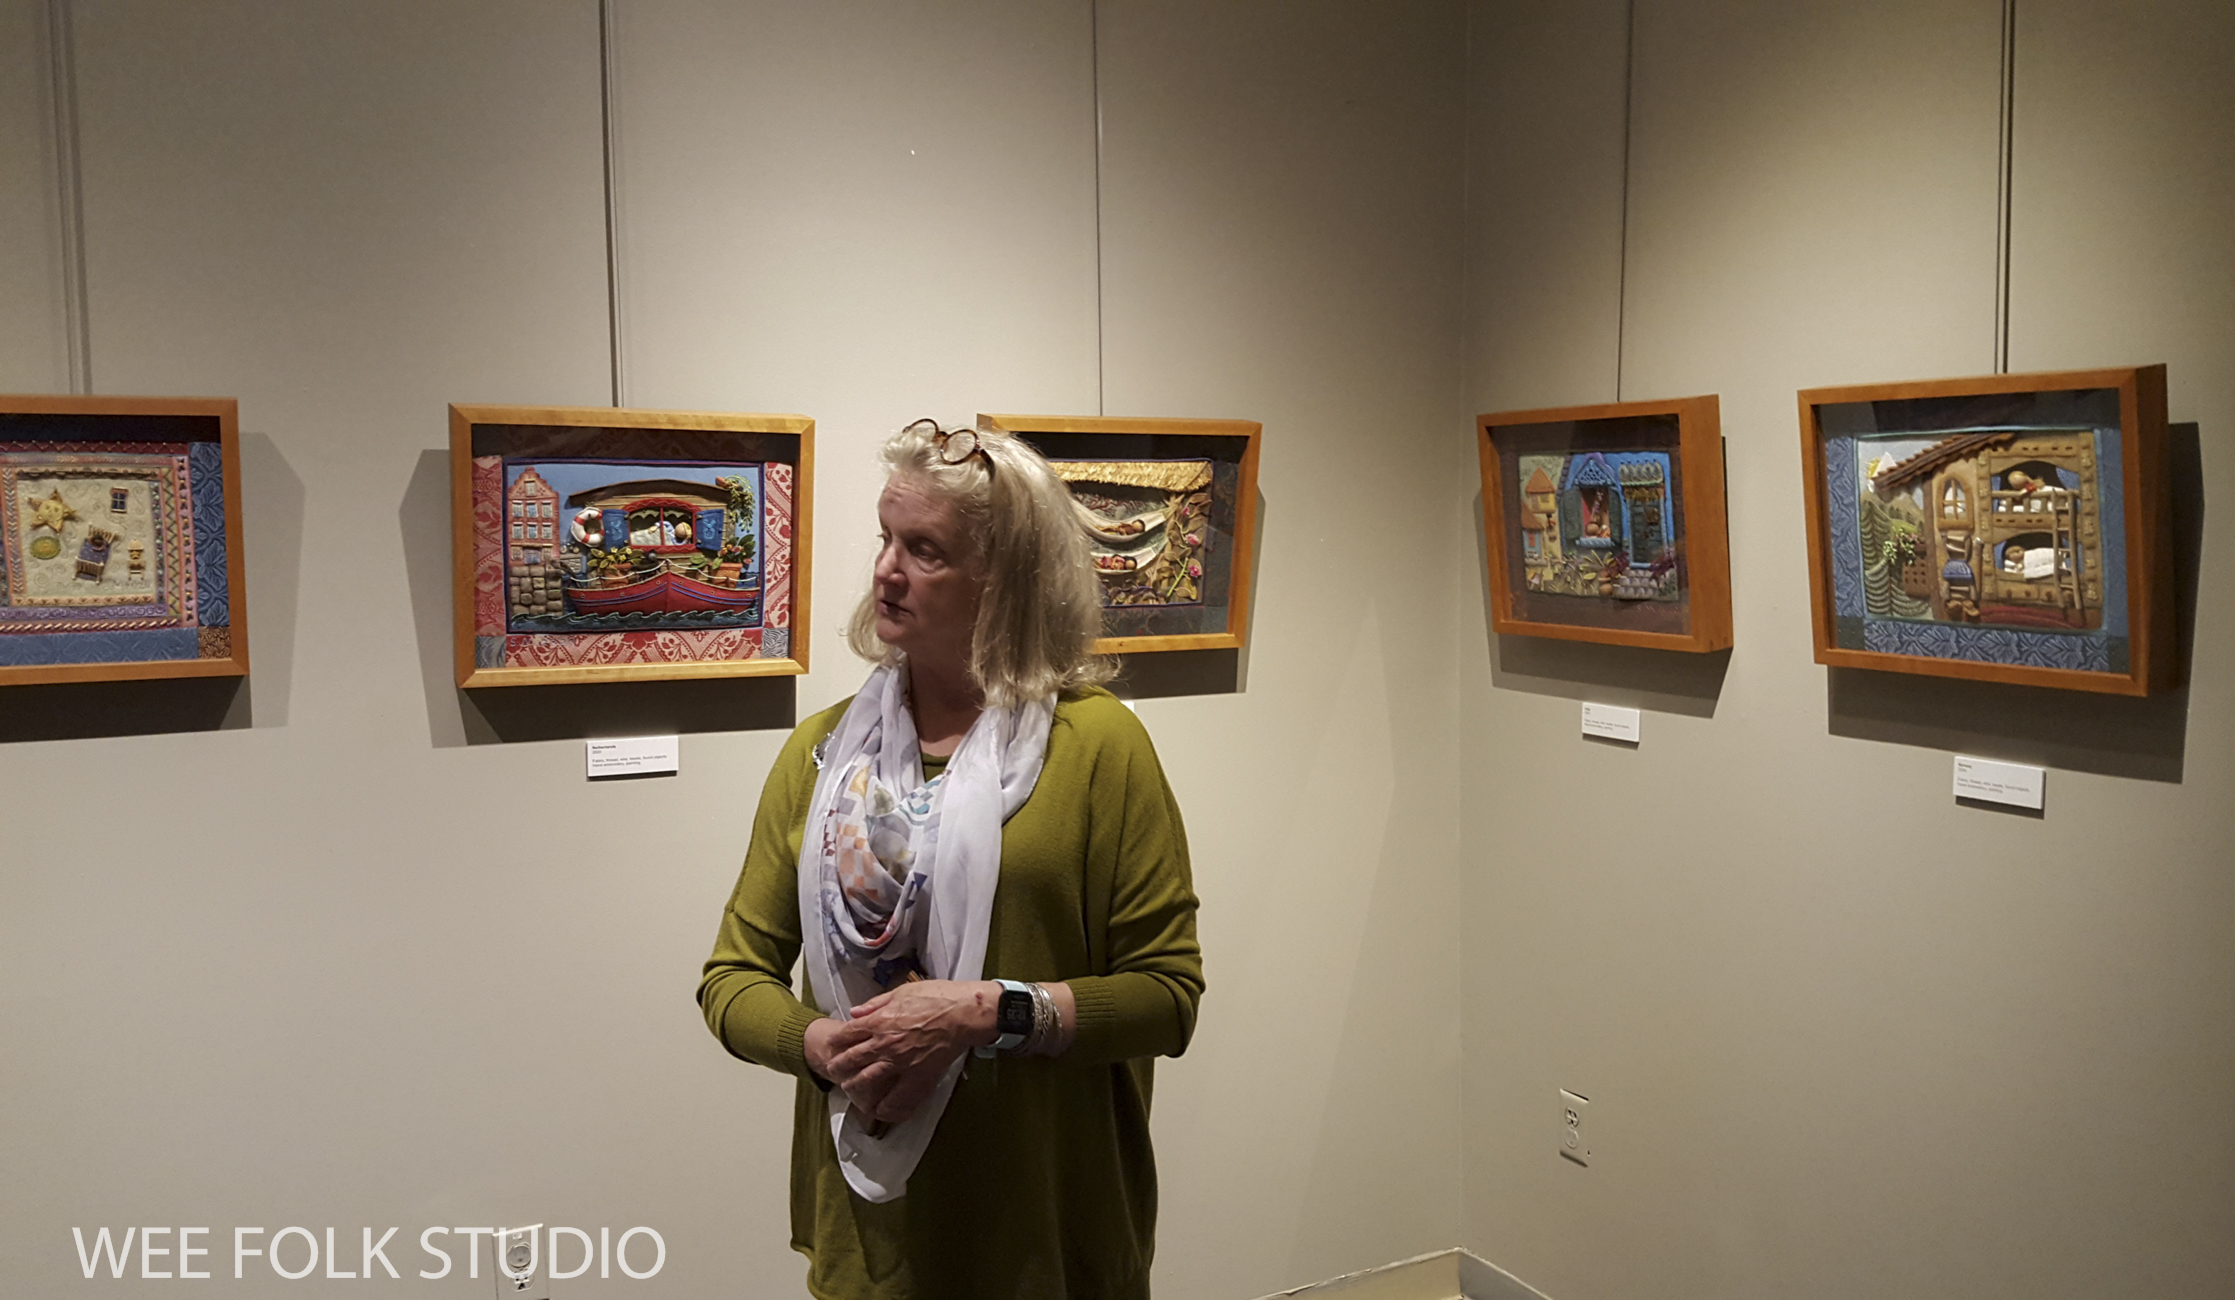
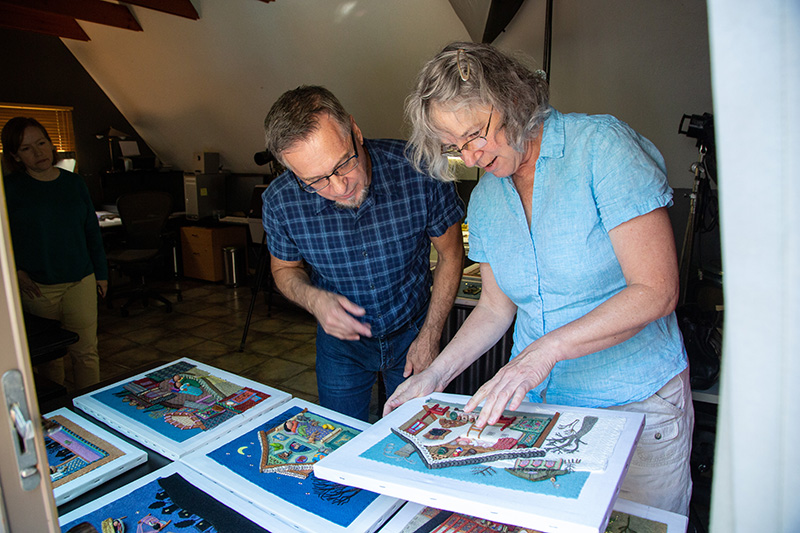
Pam Weeks, the museum’s curator greeted us when we got there. She did a beautiful job hanging my artwork in a cozy corner gallery, where visitors can spend time viewing the pieces up close.

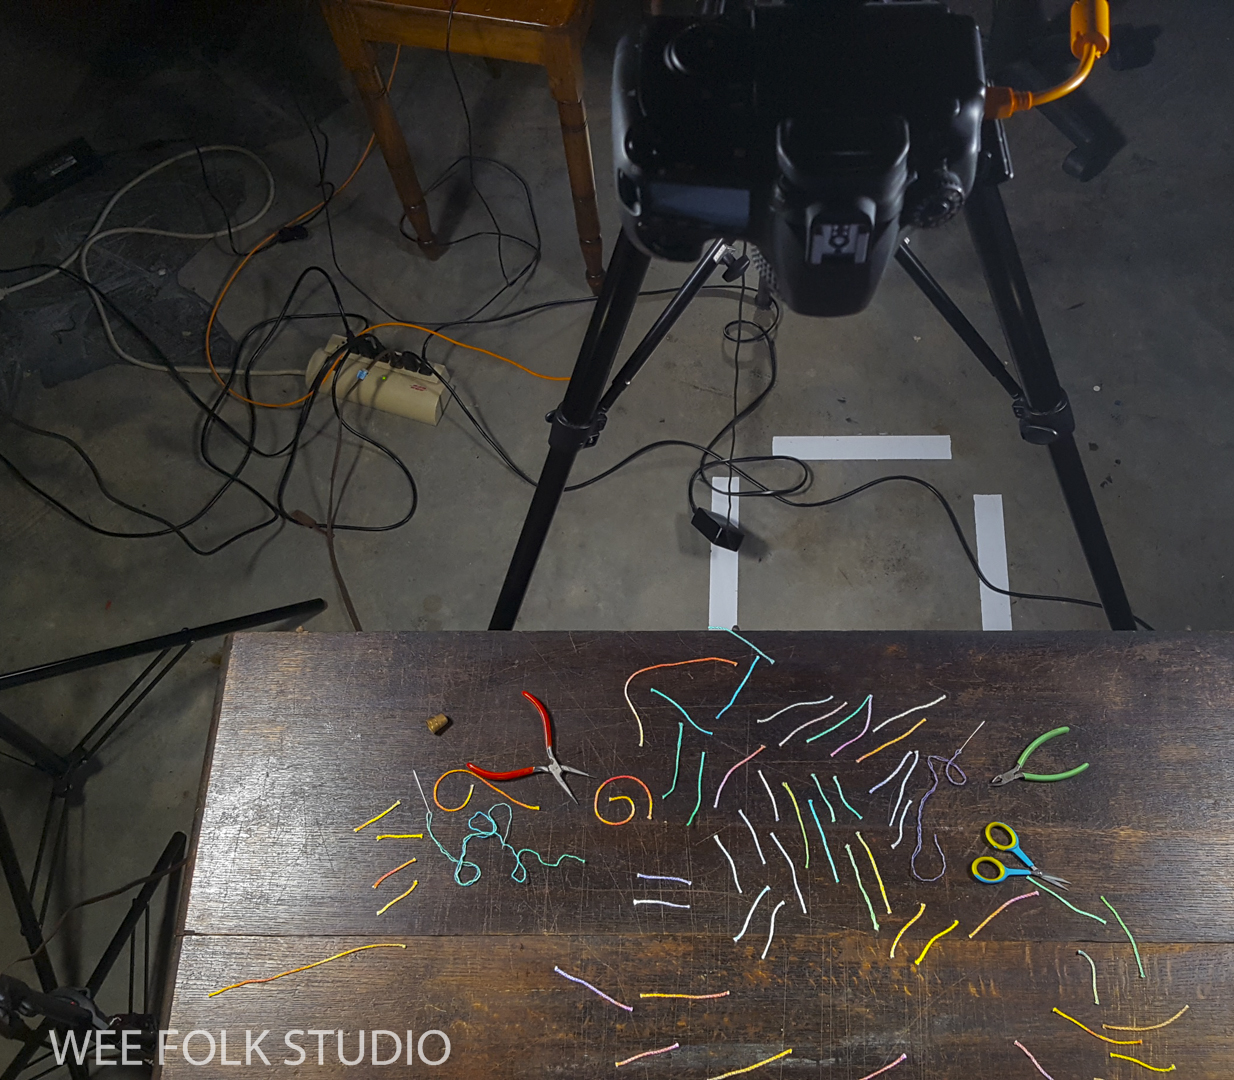
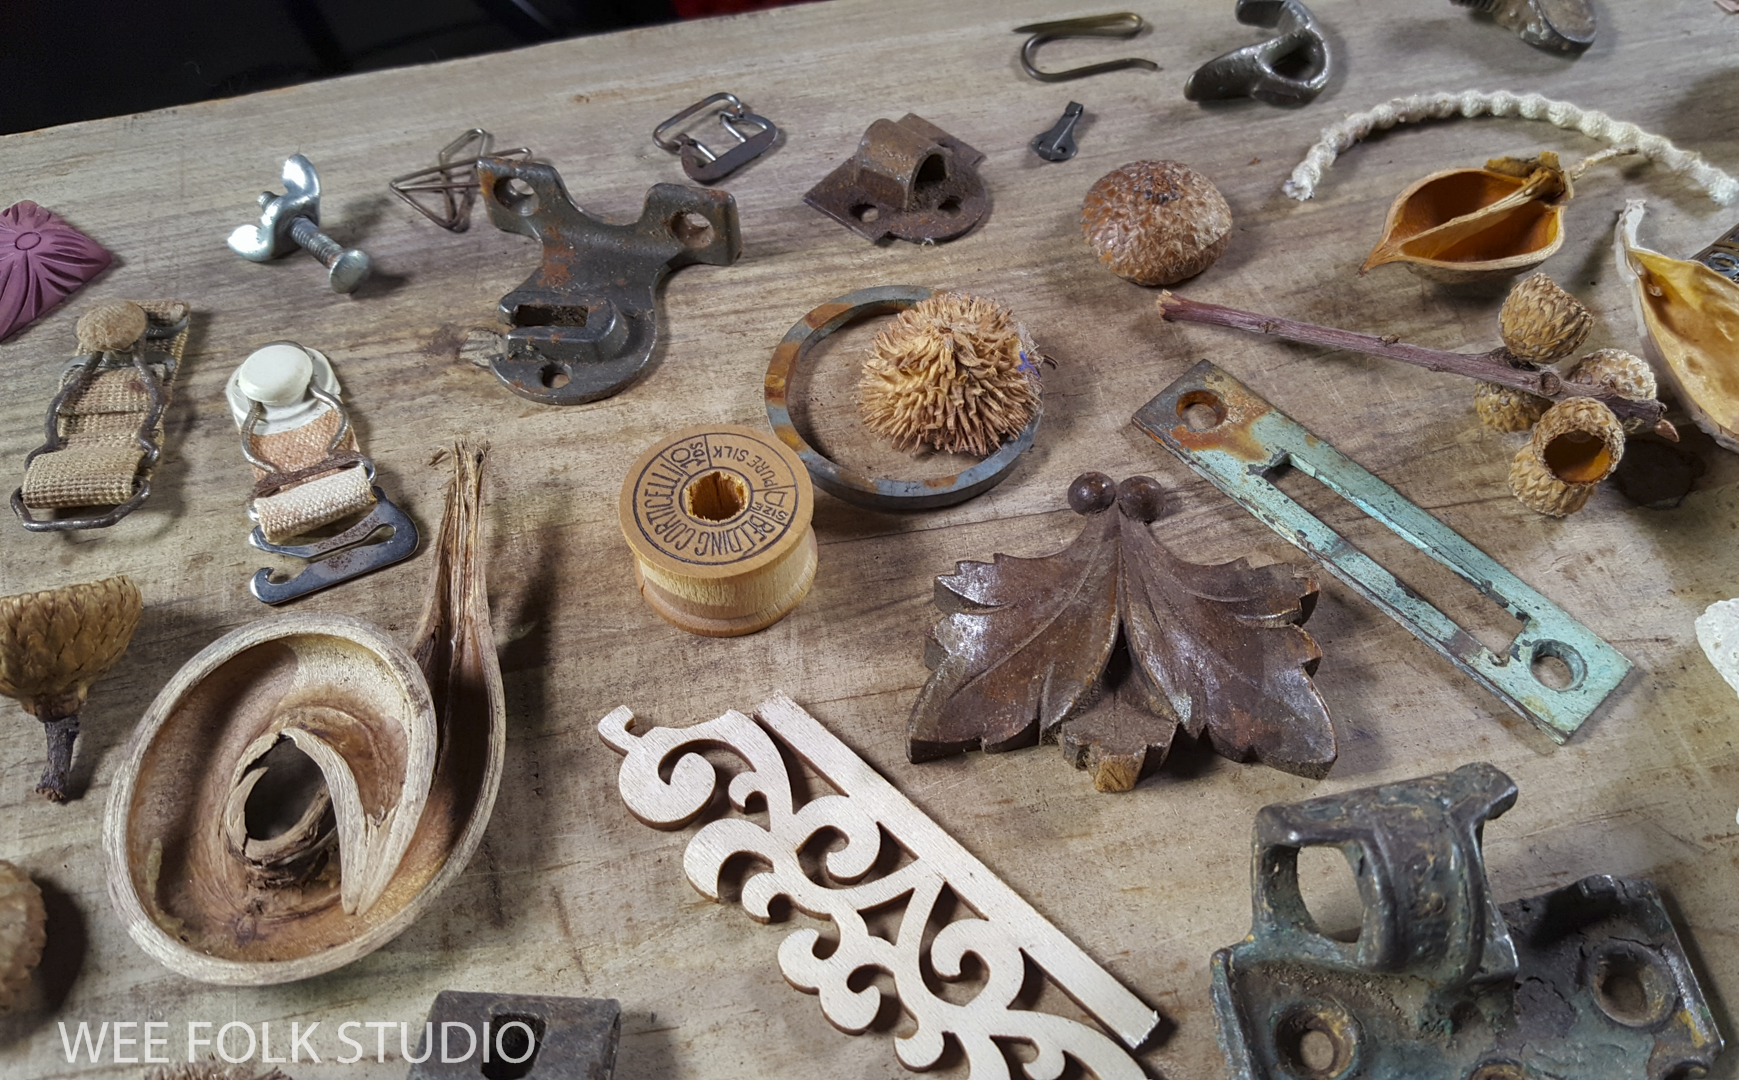
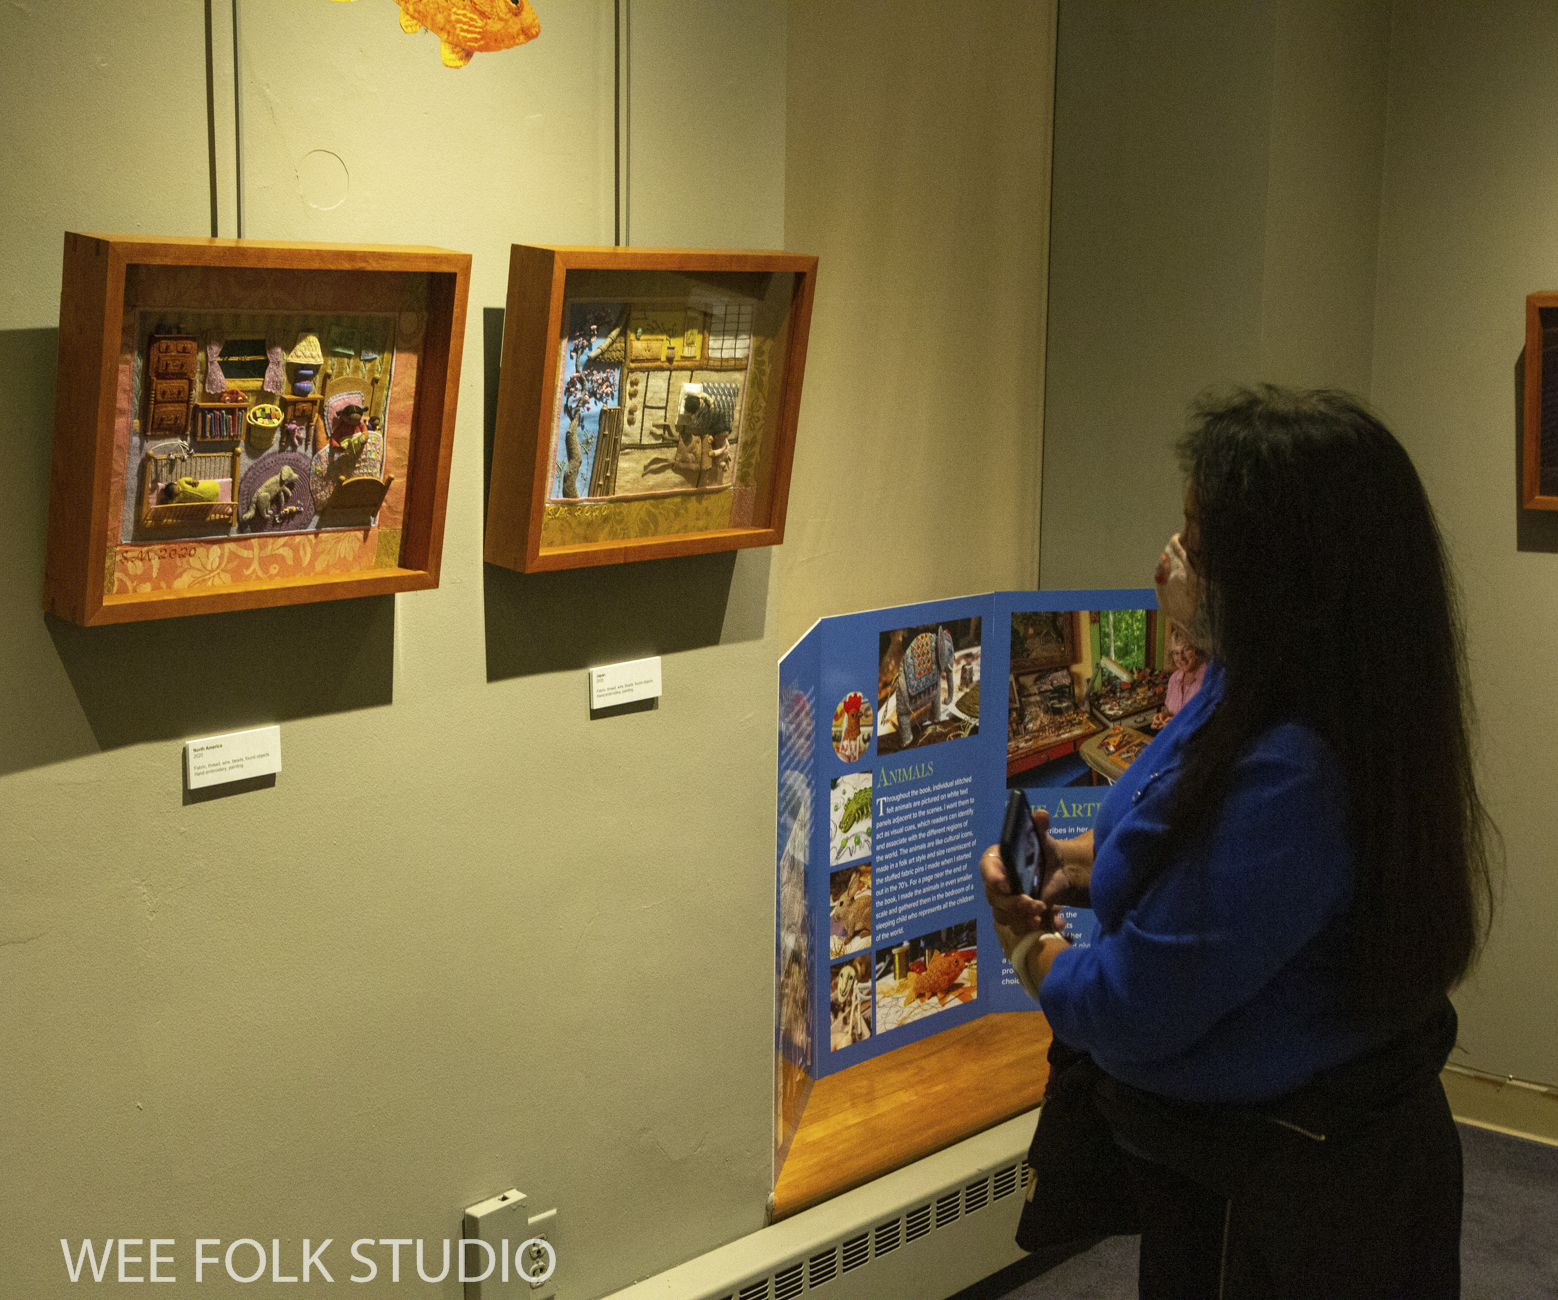
A series of information panels describe different aspects of my working process, including making sketches, stitching and using wire and found objects.

While we were there, we had the good fortune to meet 2 very interesting women – artist Laura Petrovich-Cheney, who’s remarkable Wood Quilts are also on display and Janet Elwin, who helped found the New England Quilt Museum in 1987. Here we are conversing at the museum.

Here I am signing a copy of My Bed for Laura Petrovich-Cheney.

BEDTIME STITCHES will be on view at the New England Quilt Museum in Lowell, MA through Dec. 31, 2021. The next stop on the tour is the International Quilt Museum in Lincoln, Nebraska (Jan 25 – April 10, 2022).

To keep up with new posts, subscribe to this blog. Your contact info will not be shared. If you’d like to see more frequent photos tracking the projects in my studio, please follow me on Facebook and/or Instagram.

Bed book peek: Pony

Today, I’m happy to give a behind the scenes peek at how I made this pony, which is used as a spot illustration on the Mongolian spread in my new picture book, MY BED. The story about children’s sleeping places in different cultures around the world was published in Sept. 2020.

The pony is also pictured with all the other animal icons on the book’s end-papers. If you’d like to see posts about making the other animals, please follow the links below: RoosterCamelParrotElephantGoldfishCatDuckSheepRabbitCow,
Crocodile, Giraffe, Dog.

A touring exhibition of my original embroidered artwork for the book is traveling around the United States. The schedule for Salley Mavor: Bedtime Stitches is listed here.

Signed copies of My Bed are available in my shop here. Watch this 8 minute documentary about how I created the illustrations for the book.

I’ll start off by showing this video, which brings you through the different steps of the pony making process, complete with Mongolian zither music in the background.

Making the Mongolian pony for the book, MY BED

in this series of still photographs, I’ll try to explain what I’m doing. As I’ve said before, I work intuitively, so it can be a challenge to describe the process in exact terms. For most of the animals in the book, I bent a pipe cleaner to form an outline shape. Then, I wrapped the legs, using the same technique that’s taught in my how-to book, Felt Wee Folk,

This part is all about building up the body with layers of felt. First, I sewed on a back piece and used scraps of felt to fill the cavity until it was a good thickness.

This is the point where I “upholster” the front of the animal with a piece of felt. There isn’t a supporting photograph because I consistently forget to take a picture of this part. It must be because I’m always consumed in the heat of battle. Just imagine the back as a maze of crisscrossing threads, all working to get rid of any bumps or folds.

Well, after the animal shape looked the way I wanted it to, I sewed on a seed bead eye and embroidered a mane.

I can’t remember how I made the top of the mane where it sticks up, but it could have been several rows of blanket stitching.

To make the tail, I covered the pipe cleaner with embroidery floss.

Research was an important and fun part of illustrating this book. To make an accurate representation, I looked at photographs of real Mongolian ponies, with their colorful, decorative saddles.

It took a while to make the right placement of the ear.

With its bridle in place, the pony was almost ready to go.

All it needed was a brass bead stirrup, which you can see in the last photo.

To keep up with new posts, please subscribe to this blog. Your contact info will not be sold or shared. If you’d like to see more frequent photos tracking the projects in my studio, please follow me on Facebook and/or Instagram.

The Way Home Giveaway

Book – The Way Home

30 years ago in the spring of 1991, The Way Home was published! It was the first picture book for either of us, the author Judy Richardson and me. To mark the occasion, I’m offering a Giveaway of 4 autographed paperback copies! Please find out the eligibility requirements and how to enter the contest at the end of this post.

UPDATE: Congratulations to the 4 Giveaway winners! – Melissa Hopkins, Gerry Bates, Nancy deVillers and Lisa Hunter. I thoroughly enjoyed reading everyone’s comments about your favorite books from childhood. Out of the 363 entries, there was a wide range of books mentioned from well known ones to more obscure titles. Classics like The Secret Garden, Winnie the Pooh, Wind in the Willows, The Borrowers, Pippi Longstockings, Madeline, and Black Beauty were popular. Several people shared their memories of the Little Golden Books, which were sold for 25 cents at the super market. I encourage you to read through the comments to get the true depth and breadth of the influence of children’s books. Thank you to all of you who participated!

The book has long been out of print, so this is a rare opportunity to have your own copy. I’ve previously written about our first adventure in children’s book publishing, from inception to completion, in an in-depth series of posts about The Way Home. Those of you who’ve been following my blog from the start will be familiar with the series, but I think newer subscribers will enjoy the story too! Links are here: Part 1, Part 2, Part 3, Part 4, Part 5.

in my studio with the finished illustrations from “The Way Home” 1990

This recent message from Chelsea spurred me on do something to recognize the 30 year mark. “I am still in awe of your work 30 plus years later. I grew up with the images of Savi the Elephant from The Way Home as one of the most magical children’s books I’ve ever seen. I’m actually expecting my first baby this fall. My beloved copy of The Way Home may be a bit worn but it will be a centerpiece for the theme of our little one’s room.”

Judy Richardson and I are still good friends and see each other often. Here we are in 1991 with Bella the elephant at the Barnstable County Fair and 30 years later.

Judy and Salley with Bella the elephant at the Barnstable County Fair, 1991
Judy and Salley 30 years later

Information about the book Giveaway:

Who is eligible? Residents of the United States of America. (Apologies to my international fans, but the cost of shipping is too dear.)
How do I enter? Leave a comment on this post that mentions a favorite children’s book from your childhood, by May 31, 2021. Comments on Instagram or Facebook will not be considered. Good Luck!

4 winners will be picked at random on June 1st. I will contact the winners and mail them the autographed paperback copies of The Way Home.

To keep up with new posts, subscribe to this blog. If you’d like to see more frequent photos tracking the projects in my studio, please follow me on Facebook and/or Instagram.

MY BED: night sky – part 4

This is the 4th and final part in the series about making the night sky illustration for my picture book, My Bed. In this spread, all of the children are tucked in bed, hovering among the stars in the night sky. Today, I will show how I made the miniature versions of the children and beds from Russia and North America.

But first, I have some GOOD NEWS on the exhibition front! A new museum has just confirmed that they will be hosting the Bedtime Stitches touring exhibition in 2024. The Albany Institute of History and Art in Albany, NY will show Bedtime Stitches, as well as Social Fabric, a collection of other pieces I’ve made over the past 20 years. This all came about because a longtime fan contacted the museum in her home town of Albany about showing my work. Thank you Janny! This proves that the combination of your enthusiasm, along with local connections can get results.

Bedtime Stitches is currently travelling around the country. To see the tour schedule, please visit the Exhibitions Page.

Signed copies of My Bed can be ordered in my shop here. Watch this 8 minute documentary about how I created the illustrations for the book.

For the night sky scene, I made a smaller version of the traditional “stove bed” ” like the one in the Russian scene. Besides its use for domestic heating, people slept on top of the masonry to keep warm.

To start, I cut felt in the shape of the stove and embroidered the details. The fire box door is appliqued black felt, with a metal hook for the handle and black seed beads for the hinges. I edged the stove and bed platform pieces with blanket stitches and sewed them together. To keep it from being too floppy, I stitched wire all around the outside edges. You can’t see the wire because it’s wrapped with thread.

I made a mini version of the sleeping girl, braids and all.

Then, I created a snug place for the girl to lie down. The back wall and curtain are made of felt and the scalloped edge along the top is thread wrapped wire. Then, I added a wire curl of smoke coming out of the chimney top. The last touch was a stack of seed beads “logs” inside the wood box.

I also replicated in miniature the bed and child from the North American scene. For comparison, you can see how I made the full size illustration here.

i simplified the quilt pattern into a grid of squares made with 4 or 5 horizontal or vertical stitches.

As with the other sleeping dolls, I only had to make the top portion of the child’s body.

The bed posts are tube beads topped off with round beads. I glued wire inside the beads to hold them together. The head and foot boards are made of felt.

Here she is, ready to join the other children!

I hope that you enjoyed this peek behind the scenes at how I made some of the tiniest beds in MY BED. The other posts in the night sky series are:
Part 1 – North Africa and Holland
Part 2 – Scandinavia and Japan
Part 3 – India, South America and Afghanistan

To keep up with new posts, subscribe to this blog. Your contact info will not be shared. If you’d like to see more frequent photos tracking the projects in my studio, please follow me on Facebook and/or Instagram.

MY BED: night sky – part 3

This is part 3 in the series about making the night sky illustration for my picture book, My Bed. In this spread, all of the children are tucked in bed, hovering among the stars in the night sky. Today, I will show how I made the miniature versions of the beds from India, South America and Afghanistan.

Update: Signed copies of My Bed can be ordered in my shop here. Watch this 8 minute documentary about how I created the illustrations for the book.

Rebecca Bond’s words say, “Can you see me in my bed? I fit so nicely, toe to head.” The open-ended nature of these 2 simple sentences is a picture book illustrator’s dream. They give the cozy feeling of a child in their bed, without any annoying descriptions. There’s just enough information to use as a jumping off point. Generally, with picture books, the words set up the trajectory of a story and the illustrator’s job is to provide the visual details. I can’t remember exactly how I came up with the idea of having all the beds float in space above a silhouetted night skyline. It just seemed like a good way to bring together all of the children from around the world, as well as make a fun eye spy game.

The Bedtime Stitches touring exhibition of the original artwork for the book is currently traveling around the country. To see the tour schedule, please visit the Exhibitions Page.

To make miniature versions of the beds featured throughout the book, I had to simplify the designs quite a bit. In the case of the child in India, who’s bed is partially seen through an open window in the illustration below, I reduced the scale of the bed and stylized the mosquito net.

I embroidered a geometric pattern on felt for the bed covering…

and fashioned the mosquito net canopy on felt, with wire and embroidery. What would I do without the blanket stitch?

The children sleeping in hammocks in the S. American scene are about 3 1/2 inches from head to toe.

For the mini version, I shrunk the girl down to about 1 1/4 inches tall.

I made a thatched roof for her little hammock to hang underneath. Luckily, I had some straw silk from Silk Road Fibers on hand.

It was a lot easier to replicate the child sleeping on a floor mattress from the Afghanistan scene.

The printed floral pattern was too large in scale for the mini quilt, so I reproduced the flowers and leaves with simple embroidery stitches on a piece of felt.

Here she is, already sleep.

The whole time I was making the children and their beds in miniature form, I thought back to re-imagining the full size outfits depicted in my Self Portrait: A Personal History of Fashion. By the way, a note card of this detail from the piece is available in my shop.

detail from Self Portrait : A Personal History of Fashion 2007

I hope that you enjoyed this peek behind the scenes at how I made some of the tiniest beds in MY BED. Please stay tuned for Part 4, which will feature more beds in the night sky scene. Previous posts in this series include Part 1 and Part 2.

To keep up with new posts, subscribe to this blog. Your contact info will not be shared. If you’d like to see more frequent photos tracking the projects in my studio, please follow me on Facebook and/or Instagram.

MY BED: night sky – part 2

This is part 2 in the series about making the night sky illustration for my new picture book, My Bed. It’s like a finale at the end, with all of the children and their beds hovering above the nighttime skyline. Today, I will give a behind the scenes peek at how I made the miniature versions of the Scandinavian children sleeping in their cubby style bunk bed and the Japanese child on his futon. Part 1 covered the mini children from N. Africa and Holland.

Update: Signed copies of My Bed can be ordered in my shop here. Watch this 8 minute documentary about how I created the illustrations for the book.

The tiny beds floating in the night sky represent different children, beds and regions of the world that are featured individually throughout the book. To make the mini Scandinavian bunk bed, I simplified and shrunk down the bed frame to the point where it wouldn’t look too unwieldy next to the other beds. You can read about making the full size artwork (below) for the Scandinavian scene here.

Scandinavian scene in MY BED: Enchanting Ways to Fall Asleep Around the World

I painted their faces on really tiny (3/8″) wooden beads and added embroidery floss hair. I think these are some of the smallest braids I’ve ever made. The doll wigs in my how-to book Felt Wee Folk – New Adventures are larger and more manageable than this.

Scale-wise the figures were too big for the bed, but I was determined to fit them in their cubbies nonetheless. The absence of legs helped a lot.

I cut sections of the bed frame out of wool felt and pieced them together on top of a background layer. As usual, everything was edged with blanket stitching. To create depth in the frame, I stacked layers of felt.

I stitched wire around the outside edge to smooth out the bumps and give it a crisp, architectural look.

After making eiderdown quilts and polka-dot curtains, I put the children to bed.

To finish it off, I made a mini ladder with wire and covered it with embroidery floss.

Duplicating the Japanese futon in miniature was easy compared to the bunk bed. To see how I made the full size artwork (below) for the Japanese scene, click here.

I made the the top half of the child’s body and then a futon mattress and pillow for him to sleep on.

Because the scale was all off, I couldn’t use the same blue fabric to make the quilt, so I embroidered a reduced version of the pattern on felt.

I hope that you enjoyed this peek behind the scenes at how I made some of the tiniest beds in MY BED. Please stay tuned for more posts about different beds in the night sky scene. See Part 1 here.

To keep up with new posts, subscribe to this blog. Your contact info will not be shared. If you’d like to see more frequent photos tracking the projects in my studio, please follow me on Facebook and/or Instagram.

My Bed: night sky- part 1

This is the first in a series of posts that will show how I made the night sky illustration for my new picture book, My Bed. The spread appears near the end of the story, with all of the children from around the world sleeping in their beds, floating in a starry sky above a silhouetted town. By the time I made this scene, I was about 2 years into the project and had gotten used to taking photos of almost every little step along the way. So, there’s a lot of material to share, which is divided into several parts that I’ll write about over the next few weeks. You can see a list of posts about making the other illustrations for the book on this page.

Update: Signed copies of My Bed can be ordered in my shop here. Watch this 8 minute documentary about how I created the illustrations for the book.

The Bedtime Stitches touring exhibition is an opportunity to see the original bas-relief embroidered artwork for MY BED. To see the tour schedule, please visit the Exhibitions Page.

Bedtime Stitches exhibit at Cedarhurst Center for the Arts, Mt. Vernon, IL

Thank you to those of you who’ve reached out to museums in your area to tell them about the exhibit. This strategy has resulted in several bookings! In fact, I’m in the process of working out the details with a curator who heard about my show from a fan who’s eager to see my artwork in person. As soon as the dates are confirmed, this museum will be added to the tour schedule.

Way back in the beginning, I sketched out the pages of the book. For the finished illustration, I rearranged the beds at bit, keeping in mind not to loose any children in the gutter. That’s where the pages are bound together in the center, which is marked with a vertical line on the drawing.

First, I made houses and trees out of black felt for the silhouetted landscape. I found some shiny golden fabric in my stash and sewed it behind the cutout openings for the windows and doorways. To help define the buildings and trees, I stitched wire around the outside edges.

Then, I started making miniature versions of the characters and beds pictured throughout the book. Since they are so tiny, I simplified the designs to include important and recognizable features. This one represents the child sleeping on the roof in the North African scene.

To make these reduced scale versions, I had to substitute smaller parts such as red seed beads for the roof tiles.

The girl’s pink nightie is made out of the same old handkerchief that I used to make the larger version in the North African scene. As you can see, the sleeves are not fabric, but embroidery floss wrapped around her wire arms.

I made the head and foot boards of another bed with wire and tube beads.

This is a different interpretation of the child who appears several times in the book – on the title page and in the scene that shows a house full of animal icons. The orange pajamas and star covered quilt are the giveaway.

For the boy in the scene set in Holland, I didn’t even try to duplicate the houseboat in such small scale, but instead made a boat bed for him to sleep in.

I hope that you enjoyed this peek behind the scenes at how I made some of the tiniest beds in MY BED. Please stay tuned for more posts about different beds in the night sky scene.

To keep up with new posts, subscribe to this blog. Your contact info will not be shared. If you’d like to see more frequent photos tracking the projects in my studio, please follow me on Facebook and/or Instagram.

Making My Bed video

My husband Rob and I are pleased to announce the release of our new 8 minute documentary about making the artwork for my picture book, MY BED. It’s an inside view into my process and motivations, showing in words, video, and photos how I approached the project from start to finish. I hope that you enjoy the film! Please feel free to share it with your family and friends.

8 minute documentary about how Salley Mavor made the artwork for her picture book, MY BED.

We had planned to produce the film earlier, to coincide with the publication of the book in September. But, there were so many other pressing things to do, such as prepare for the Bedtime Stitches touring exhibition, which included building frames for the artwork. Now that the exhibition has started traveling for the next few years, we could concentrate on the film.

Thank goodness for the quiet of winter! I don’t know how I would survive without the pace of the external world slowing down for a few months every year. Over the past several weeks, we focused our attention on writing and recording the script and sorting through a gazillion photos and videos. Our good friend Bonnie Simon, who produces Maestro Classics: Stories in Music kindly agreed to help edit the script and be the narrator.

We had about 3 years of material to review. I’ve documented the process in photos from the beginning and Rob took videos during the last year or so. I constantly pestered him to stop what he was doing and come take a video of me working on different stages of the process. He had to set up lights and other equipment, so it was no simple task. Even though it was a nuisance, he filmed some good shots that added a lot to the movie. The following photos appear in the movie at different parts of the storytelling.

To make the animated title sequence, we set up a camera facing down at a table top. We were a stop-motion animation team – I moved the pieces of thread little by little, while Rob snapped the camera.

We also filmed an arrangement of found objects from my collection. It was a simple slide, not stop-motion animation this time. That would be whole other movie!

Rob did a marvelous job editing the movie on his computer. He started with the speaking parts to set the timing and then added photos and videos that corresponded with the narration. After he had completed a draft of visuals and sound, we sent it to Matthias Bossi at Stellwagen Symphonette for the musical underscore. They wrote the music and sound effects for our film Liberty and Justice and we were thrilled to work with them again.

Rob and I are excited to share the fruits of our labor with you! The Making My Bed video can be watched and shared on YouTube here.
Autographed copies of the book, MY BED are available in my shop here.

To keep up with new posts, please subscribe to this blog. Your contact info will not be sold or shared. If you’d like to see more frequent photos tracking the projects in my studio, please follow me on Facebook and/or Instagram.

Bed book peek: title page

For the past 3 years, I’ve shared the process of making the illustrations for my new picture book My Bed. Even though we all stayed home, it feels as if we’ve been on an international journey together, into the homes of children around the world. To date, I’ve written 45 posts about different aspects of how I made the book, including double page spreads and animal spot illustrations. Every time I write a post in this series, I think that we must being nearing the end. Then I discover more digital images in forgotten folders. So, it looks like there’s enough material to keep the Bed Book Peeks gong for for a bit longer. To see a complete list of posts in the series, please go to this page.

Update: Signed copies of My Bed can be ordered in my shop here. Watch this 8 minute documentary about how I created the illustrations for the book.

Today’s post is about the title page. Unlike the lush scenes inside the book, which totally fill up a page and a half, this artwork was made to float on a white background. I thought of it as a minimal stage set, with a few props and a window suspended in space. That way, the book designer had the flexibility to adjust the positioning of the pieces to accommodate the type layout. I also requested an open area on the page for drawing a picture and signing the book.

BED: I built the bed’s head and foot boards out of beads and wire. To hide the shiny wire and make it blend in with the bead color, I covered it with embroidery floss. After making the basic frame, I sewed the bead rungs inside the wire.

I made a mattress out of felt, sewed the boards to the head and foot of the bed and added bead legs. The bed is foreshortened to give the illusion that the foot board is standing upright.

The foreshortened bed is easier to see in this side view.

I made a tiny child, who I tucked in bed, with a pillow and a star covered quilt.

Window: First, I constructed a window out of felt and beads. Then, I fashioned a valance style curtain out of wire wrapped with pink embroidery floss. I filled in the the curtain loops with cross hatched embroidery floss, which was like weaving a lattice topped pie.

Rug: I chain-stitched a smiling sun on a green felt rug, to contrast with the night sky in the window and the star covered quilt .

Lamp: In keeping with the celestial theme, I made a lamp out of a star button to put atop a bedside table.

After the bed, table, window and rug were photographed for reproduction, I needed to find a way to display the them in Bedtime Stitches, the exhibition of original artwork for the book. I decided to mount the bedroom set along with a larger star, which I made for a different part of the book.

I arranged the items on the green felt in the center of the back cover illustration. You can see how I made the border in another post here. I couldn’t just leave the open areas plain, so I doodled a bunch of chain-stitched curly cues.

The touring exhibition of original artwork for MY BED, SALLEY MAVOR: Bedtime Stories, is an opportunity for the public to see up close the fine detail and 3-dimensional quality of my bas-relief sculptural embroideries. The show is currently booked at several museums through June 2023 with the possibility of being extended into 2024. The current tour schedule is listed on this page. Interested museums are welcome to contact me (salley at weefolkstudio.com) for information about hosting the exhibition.

To keep up with new posts, please subscribe to this blog. Your contact info will not be sold or shared. If you’d like to see more frequent photos tracking the projects in my studio, please follow me on Facebook and/or Instagram.

Bed book peek: Dog

Today, I’m happy to give a behind the scenes peek at how I made this dog, which is used as a spot illustration in my new picture book, MY BED. The story about children’s sleeping places in different cultures around the world was published in Sept. 2020. A touring exhibition of my original embroidered artwork for the book is traveling around the United States. Salley Mavor: Bedtime Stitches will next be shown at the Cedarhurst Center for the Arts, in Mt. Vernon, IL from Feb. 28 to May 5, 2021. The tour schedule is listed here.

Update: Signed copies of My Bed can be ordered in my shop here. Watch this 8 minute documentary about how I created the illustrations for the book.

The dog joins all of the other animal icons on the book’s endpapers. If you’d like to see posts about making the other animal icons for the book, please follow the links below: RoosterCamelParrotElephantGoldfishCatDuckSheepRabbitCowCrocodile, Giraffe.

Forming the dog: After drawing a simple dog shape, I bent a pipe cleaner to match the outline. Then I wrapped the legs and tail with embroidery floss, using the same technique that I teach in my how-to book of doll projects, Felt Wee Folk.

Backing: I sewed a felt scrap to the back of the pipe cleaner, cutting the felt to fit as I stitched around the whole body.

Padding: I padded the inside of the body by layering and sewing small scraps of felt inside the pipe cleaner edge. It didn’t matter what color the backing and padding was since it’ll be hidden inside.

Body front: At this point, I must have been so engrossed in adding the top layer of felt that I forgot to take photos until the whole body was covered. So, I’ll try to explain what I did. I cut out a piece of felt that was about 3/8″ bigger than the dog shape. Then, I folded the felt over the pipe cleaner edge and stitched it to the backing. To make it nice and tight, I went around several times, until the head and body where clearly defined. I cut and stitched the felt closely around the legs and tail to make them fit.

Ears, nose, eyes: I stitched a mouth with embroidery floss and sewed on seed beads for an eye and nose. For the ear, I cut out a separate piece of felt, edged it with blanket stitches and sewed it to the head. I chain-stitched a collar and sewed on a bead for a dog tag.

Fur: The dog’s body looked rather plain, so gave it a furry texture using mending wool. I’m glad I kept a collection of vintage cards that were found in a relative’s dresser drawers. They’re from the days when people actually darned moth holes.

Tail: To make the tail look more tail-like, I covered the wrapped pipe cleaner with other stitches.

The dog appears on the back cover of the book. You can see a previous post about making the border here. Stay tuned for more peeks behind the scenes!

To keep up with new posts, please subscribe to this blog. Your contact info will not be sold or shared. If you’d like to see more frequent photos tracking the projects in my studio, please follow me on Facebook and/or Instagram.