fairy house tour (part 1)

Last week,  I drove with my husband and a friend to Old Lyme, Connecticut, to see the eagerly anticipated Wee Faerie Village on the grounds of the Florence Griswold Museum.  It was the last opportunity to see the display, because this year’s exhibit closed yesterday. I’m told that they coordinate the building of a new village every other year, so the next event should be in the fall of 2014.

fairyfamilyraffleOther Fairy House News
(added May 30, 2015)
The Fairy Houses of Highfield Hall outdoor exhibit will be held from June 28th to August 31, 2015 at Highfield Hall in Falmouth, MA. In addition to curating the exhibit, Salley Mavor has made a fairy family of 5, which is being raffled (3 tickets for $5.00). Tickets may be purchased online or at Highfield Hall, where the fairy family is on display. The raffle drawing will be August 30, 2015. The prize will be sent to the winner anywhere in the world! Good luck!

Even with cloudy skies and cool temperatures, we enjoyed strolling around the property, following the numbered mushroom signs. Over thirty fairy dwellings were created by artists from the area, including my favorite, Nevergreen Caverns, made by the museum’s education director, David D.J. Rau.

Three hollow logs are stacked on a larger stump, with each space furnished with fairy comforts.

I found the burned wood markings charming…

as well as the mushroom roofed balconies.

It was well worth the visit! I will show more pictures of other houses in my next post.

a banner day

Last Saturday, a group of lovely women gathered at Highfield Hall in Falmouth for my felt banner workshop. Lynn and Christy treated the workshop as a destination event. They drove down from Vermont a day ahead and spent the afternoon riding their bicycles on our prized Shining Sea bike path. The next morning, they were eager and ready to go before we officially started at 9:30.

I brought wool felt and other supplies like thread, wire and an alphabet guide. The class was made up of stitchers and quilters who felt very comfortable with a needle and thread. Everyone came with an idea of what kind of banner they wanted to make, so they got right to work. There were holiday signs, a baby banner, a Chinese proverb, a sewing room sign, and one woman made personalized tooth pillows for her nieces. The first challenge was selecting felt and thread colors. Then, I showed them how to form and wrap the wire letters. This is a technique I’ve been developing for some time, but I’ve never explained or demonstrated how to do it.

The wrapping technique can be quite tedious and fussy, but this group picked it up quickly. They didn’t seem frustrated and became engrossed in the process, asking questions along the way.

Lynn wanted to make a wire plant instead of words, so I showed her how to form and wrap branches.

Christy started a cheerful purple Christmas banner, which will include felt holly and other embellishments. The hours passed quickly and by closing time at 4:30, everyone’s project was progressing well, but nothing was completed. I know that Christy is working on hers at home, because she wrote to ask some questions yesterday.

Will I teach any more classes? I’m striving for the right balance between time out in the world and time creating in my studio. With so many projects planned, I hesitate to commit to teaching workshops, especially if it involves travel.  I find it difficult to do my artwork if I’m constantly coming and going, preparing and recovering. Teaching at a venue close to home makes the idea sound more manageable, but I still guard my studio time like a mother bear!

Stormy Stitching

We’re back on the grid! Going without power for the past two days didn’t stop me from stitching, though. The only electricity I usually need is for a lamp, so I adapted to the circumstances. I felt like a Jane Austen character, sitting and stitching near the light of the window during the day and sewing by lamp light in the evening. Sandy’s high winds blew down a lot of trees in town and some roads along Vineyard Sound were flooded, but we weren’t hit as bad as some places to our south and west. Our neighbor with a generator offered to put our frozen food in their freezer, so we saved some sentimental items from thawing, like soup from our garden veggies and striped bass that our son caught.

Birds of Beebe Woods: robin

Back in the spring, when I started working on Birds of Beebe Woods, robins were in abundance,  hopping around the yard. After making the larger, dominant crow, I added a robin to the piece, placing it in the center, down on the ground. Compared to the smaller, realistic looking birds that were made later, the crow and robin’s bodies are more abstract, with stylized patterns on their wings and breast. My approach to rendering the birds seems to have changed during the 4 months that I worked on the piece. Toward the end, when I sewed the nuthatch, chickadee and warbler, I referred to photographs more closely and was caught up in making them identifiable and naturalistic. I like to combine realism and abstraction.

In keeping with the robin’s perky nature, I curved the bird like a sideways apostrophe, with its tail flaring upwards.  The red breast presented a opportunity to play around with warm tones and metallic thread.

To see more posts about the making of Birds of Beebe Woods, see the archives here. A 18″ x 24″ poster (pictured at the beginning of this post) is available through my Etsy Shop. Note cards of details from the piece, including the robin, are also sold as mixed sets and separately.

Note Card – Robin
Note Cards – Birds of Beebe Woods

To keep up with new posts, please subscribe to this blog (top right column on the home page). Your contact info will not be sold or shared. If you’d like to see more frequent photos tracking the projects in my studio, please follow me on Facebook and/or Instagram.

Mimi visits!

My friend and maker of wonderful things, Mimi Kirchner drove down from Arlington on Monday and we spent the day together. For those of you who haven’t discovered Mimi, visit her blog, Doll, as soon as you read this post. She  inspired me to write my own blog and just recently, to open an Etsy shop. We met 30 years ago, when we were members of the Christmas Store, a seasonal craft coop in Cambridge, MA. We always have a lot to talk about because we’re interested in the same kind of things and our lives have taken us in similar directions, both personally and professionally. Mimi brought a Tattoo magazine that features her tattooed dolls in their Christmas gift guide. She also showed me the new Land of Nod catalog that includes several of her doll designs. It was a glorious fall day and we talked about art and our lives as  we walked from my house, through Beebe Woods and into Falmouth center to have lunch. It was great to see you, Mimi!

Halloween Giveaway!

Even though Halloween is just around the corner, I figure that there’s still time to fit in a seasonal giveaway. Three people (from the US and Canada) will be picked at random to win 2 autographed 18″ x 24″ posters, one of “On Halloween”, which is a double page spread from my picture book, You and Me: Poems of Friendship, and one Blossom Fairies poster, which features 16 fairy dolls from my how-to book, Felt Wee Folk: Enchanting Projects. To enter the Giveaway, please leave a comment on this blog by midnight, October 25th, EST.

“On Halloween” posters are also being given away for free during the month of October, with a purchase of any poster in my Etsy Shop. Other posters for sale include Birds of Beebe Woods, Rabbitat, Blossom Fairies, and Self Portrait: A Personal History of Fashion.

going to MECA

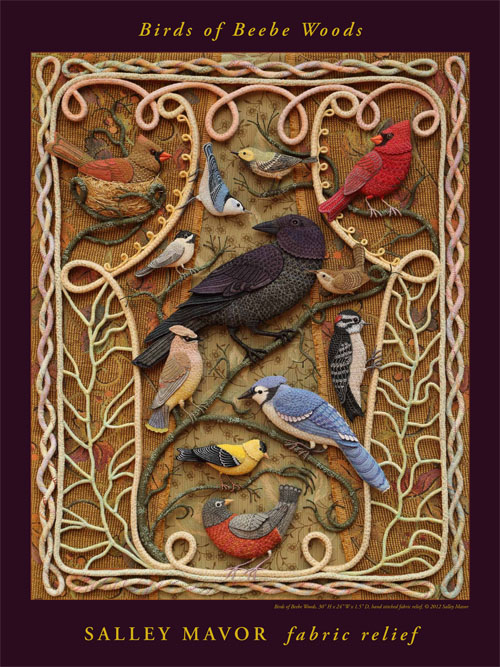
Last week, I had a wonderful visit to the Maine College of Art in Portland. Illustration faculty member, Jamie Hogan and I met at a conference last spring and she invited me to come and talk to a group of illustration majors. Our time at RISD in the 70’s overlapped a bit, but since we weren’t in the same classes, we never knew each other. My husband and I also fit in a short visit with our son Ian, who is a painting major at MECA. In preparation, I tried to remember what kind of things I would have appreciated hearing about at their age and changed my usual slide presentation, gearing it to a younger art student audience.

I started by showing the students my first book, made at age 8, and then progressed to projects I’m working on today. Sharing stories of failures as well as successes, I described my journey to find and express my own personal artistic vision.  I encouraged them to discover their own unique way as well.  I emphasized the value of an art education, no matter where it leads, and predicted that their time at school will benefit them in ways that they may not see until much later. The skills they are learning are basic to our human experience, because they are being challenged to look carefully at what they see, solve problems imaginatively, and to learn how to create something new. This is a special time, when students are surrounded by a supportive community that believes in the power of art.  We’ve all heard the opinion that art is unnecessary and impractical in today’s harsh world, so I think spending time with other motivated artists is essential.

I told them about people I meet who are skilled technically, but lack the confidence to create original designs. Many are mature women who copy patterns and faithfully follow directions, always coloring inside the lines, so to speak. In a lot of ways, needlework traditions have been kept alive through this culture of imitation. For many, this is a comfortable and peaceful way to spend time. Others want to break out and do original work, but are struggling to find a way. Technique can be perfected through hours and hours of practice, but creating something new takes a sophisticated understanding of design, color and composition–the principles of which one can learn in art school. But, folk artists create strong, well designed artwork, so art training  isn’t always necessary. Being original could have more to do with self-confidence and a willingness to experiment than education. Of course, it’s never too late to grow artistically, it’s just easier to learn the vocabulary when you’re young.

It was a pleasure to meet so many students who are serious about what they are working on. I love how funky and fragile they are at the same time. Their teacher, Jamie Hogan followed up with an e-mail, saying that “the Salley effect is rippling through the department!” She told about one senior who had an epiphany after my talk. She remembered that she really liked to do sculpture, but had gotten wrapped up in trying to paint realistically. Now she’s going to return to making 3D things, and somehow combining them with painting and air brushing, and she’s filled with a new enthusiasm. Thank you, Jamie, for passing this on. Hearing the students’ reactions makes it all worthwhile!

By the way, a spot has opened up in my Felt Banner Workshop on Oct. 27th. Intermediate to experienced stitchers are welcome to sign up. Check it out here.

Birds of Beebe Woods: warbler

I wanted to include a warbler in the Birds of Beebe Woods piece and found that a handful of varieties live in our area, each with their own distinct markings. I liked the look of the black throated green warbler best and thought its color patterns and striped wings would show up against the brownish gold background fabric.

To start, I found many photographs of warblers in books and on the internet and sketched until I found a pose that fit into the  scene of birds. After making paper patterns, I cut out the bird’s shape from acid free matt board and cut pieces of white, green, black and yellow from wool felt. Thinking ahead, I glued cheap acrylic felt to the back of the matt board body, so there would be something to grab the stitches while the front felt piece was later being sewn in place. I also basted thick wool felt padding to the top of the matt board piece.

warbler4WM

I embroidered the texture and markings on the warbler’s green head. The bead eye is sewn inside a cut out hole in the yellow felt. Periodically, I would hold the bird up against the background fabric, to make sure there was enough contrast.

I used a combination of blanket stitch, fly stitch and lots of little single stitches.

warbler3WM

The wing’s stripes were defined by chain stitched lines.

warbler2WM

To finish, I made a little felt tail and added thread wrapped wire legs. Then, the black throated green warbler was ready to join the flock.

To see more posts about the making of Birds of Beebe Woods, see the archives here. An 18″ x 24″ poster (pictured at the beginning of this post) and note cards are available through my Etsy Shop.

warbler1WM