
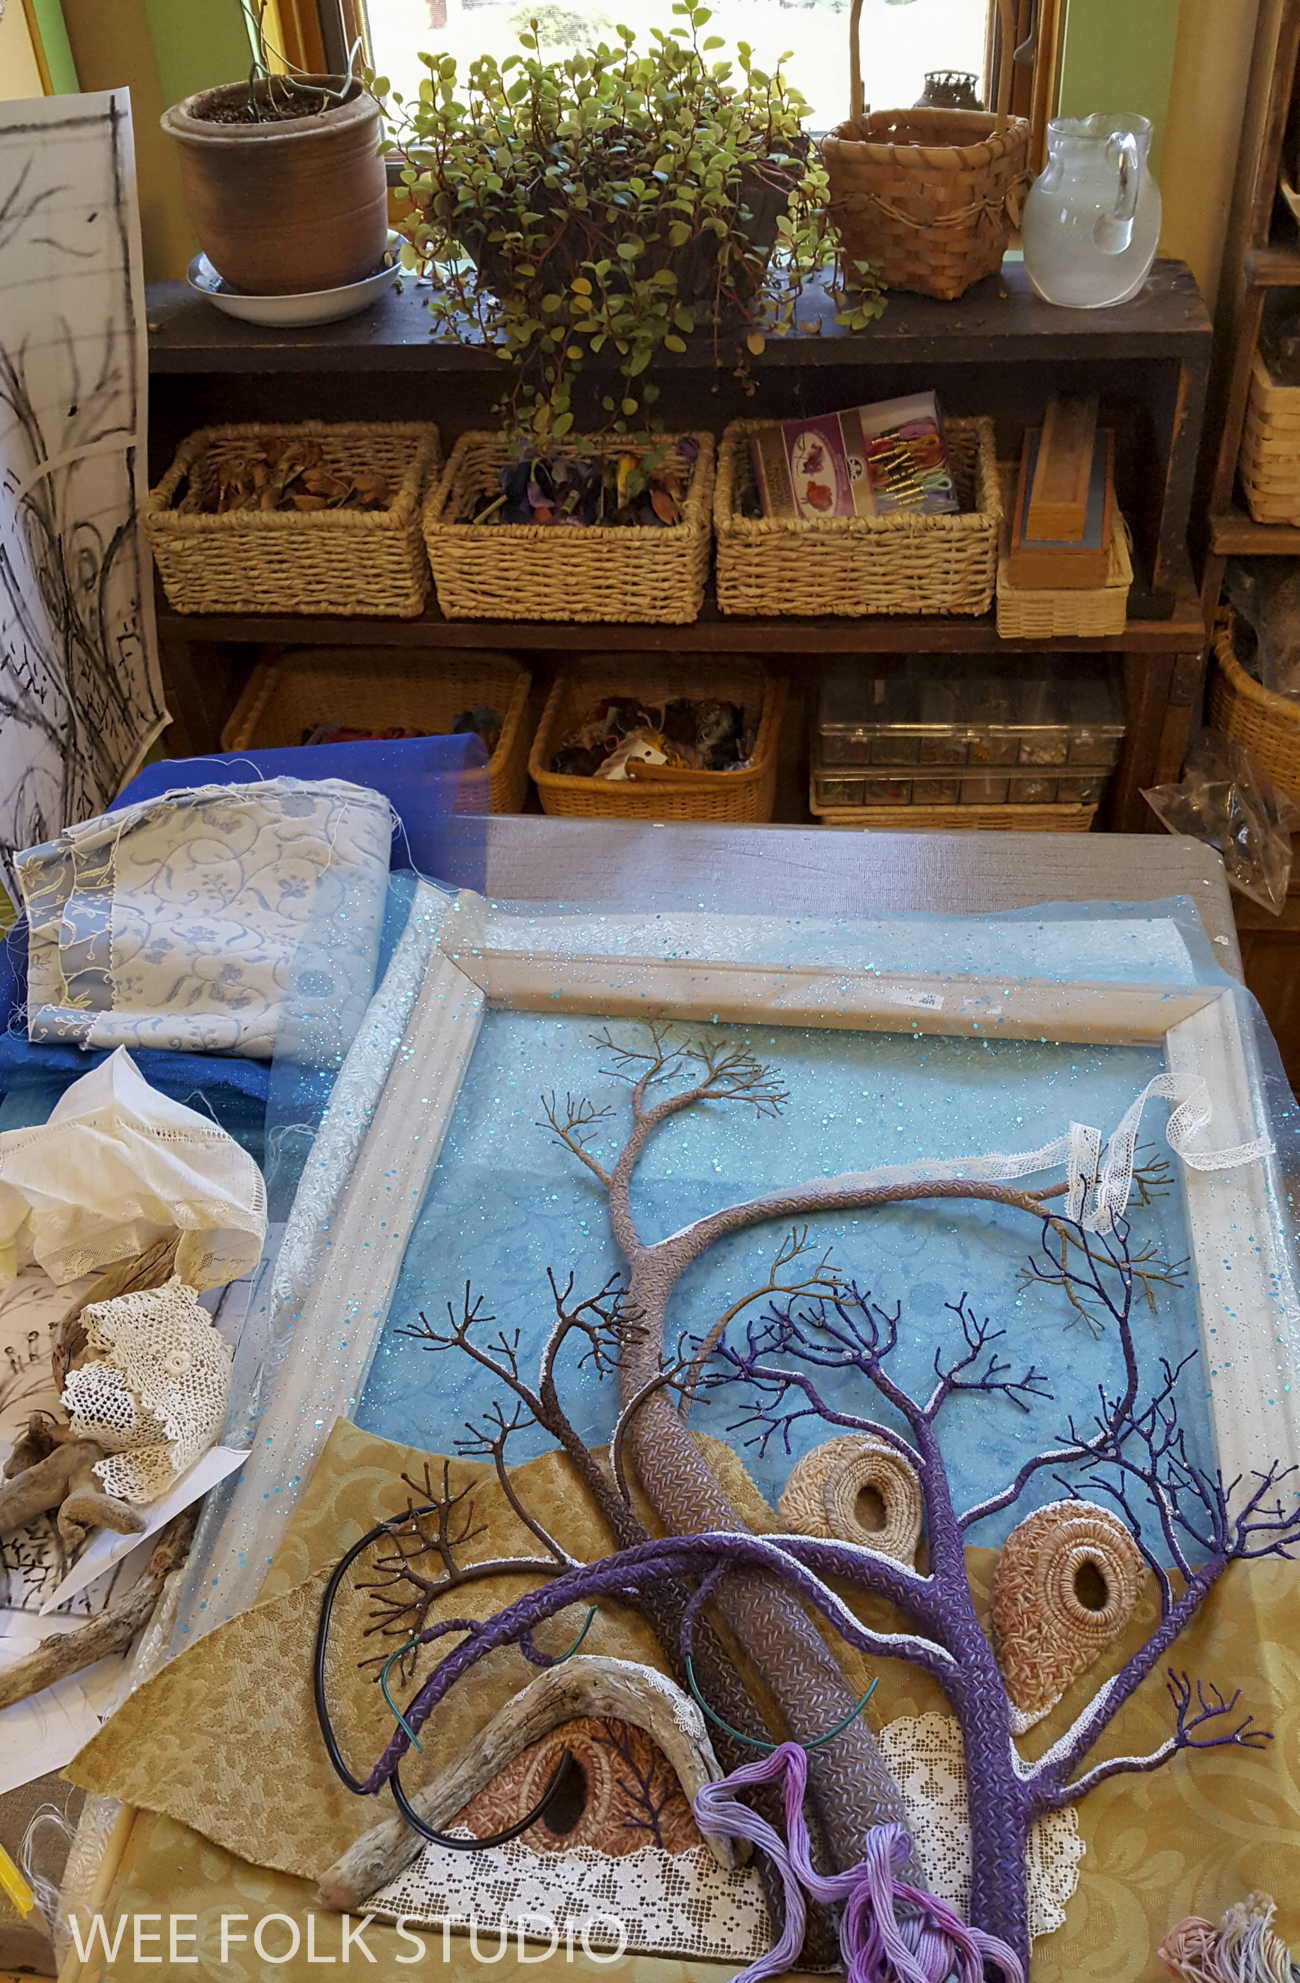
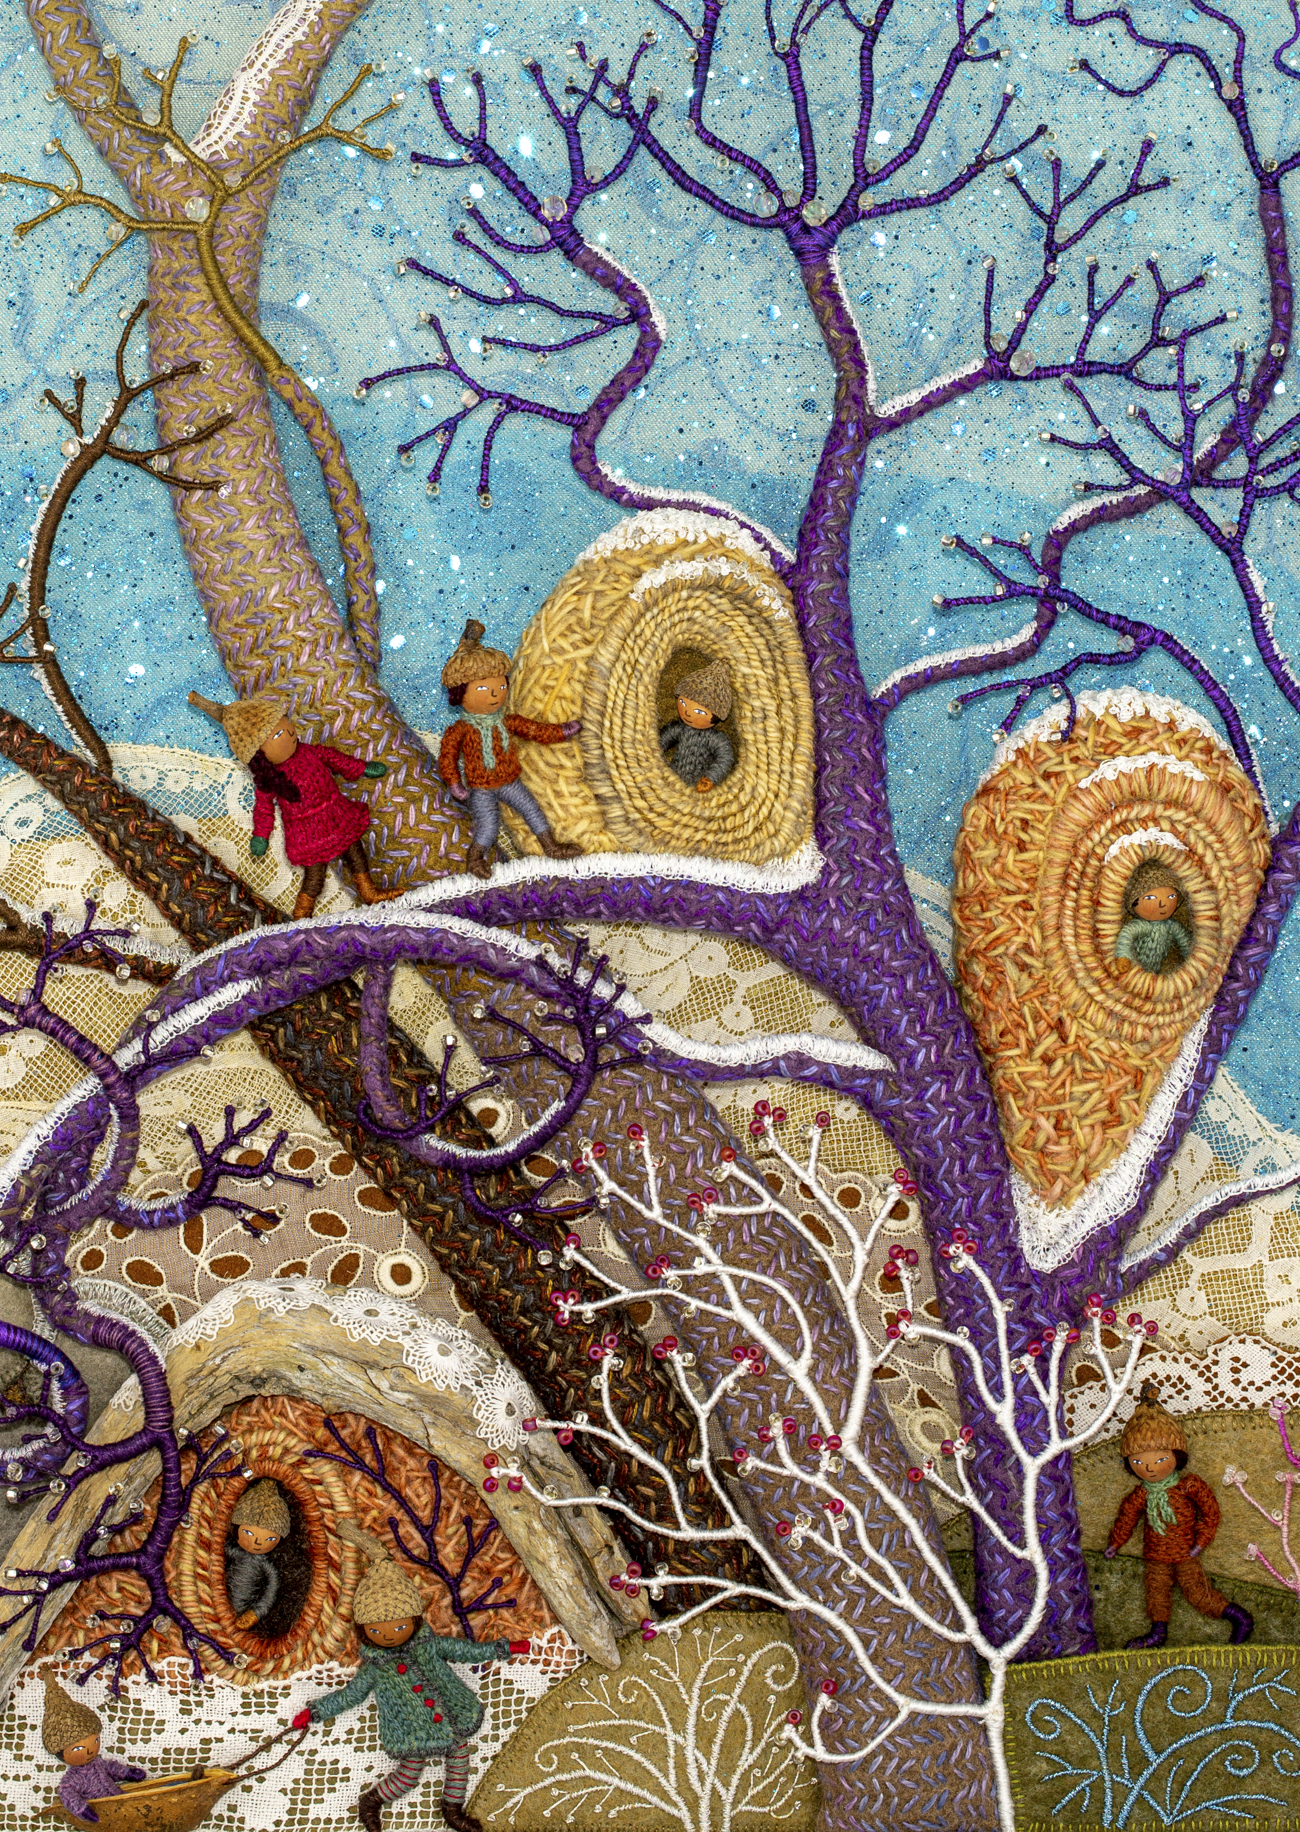
Are you ready for a blast of cold air in the heat of summer? I hope so, because today, I am giving a behind the scenes peek at how I made the tree trunks for Frosty Morning. Part 2 in the series will concentrate on how I formed and wrapped the wire branches. As the summer progresses, I will share other features of the winter scene, including snow and ice, cozy little shelters, a stone wall and the ubiquitous wee folk characters dressed in warm winter outfits.

This year, I’m working on a group of seasonal pieces that capture the wonder and magic of the natural world, both real and imagined. Frosty Morning, Summertime, Mossy Glen and Harvest Time are available as jigsaw puzzles and note cards in my shop here.
I’m currently deep in making mode, working on a completely different piece – the spring scene, which you can follow on Instagram and Facebook . So, writing this post requires switching my brain into explaining mode. You see, when I’m engrossed in making something, I don’t think about the actual process. I’m focused on bringing my vision to life.
So how did this vision develop? I started by picturing a winter scene in my mind, with expressive branches and sparkling ice crystals. When I sketched out some ideas, rounded shelters showed up, all nestled in the thicket of trees. The original drawing also included a line of little figures climbing high along a branch. The details changed along the way, but the basic thrust and curve of the center tree remained. Over the 4 months that I worked on Frosty Morning, I used the drawing as a guide, but never a template.

Because the center tree is the main focal point of the piece, I constructed it first. The photo below shows how I used matte board and wire to form the structure of the tree trunk.

The concept of using matte board as a base actually began over 40 years ago, when I designed a line of stuffed pins. You can follow the story of my pins here.

i still have the patterns for the various shapes, including the cat. The board inside gave a nice flat backing to stitch the pin fastener onto.


For the tree, I glued a piece of felt (the cheap stuff) to the back of the matte board. That way there is something for the needle to catch onto. Then, I wrapped a piece of felt (the good stuff) around the trunk, covering the front side and stitching it in place on the back.
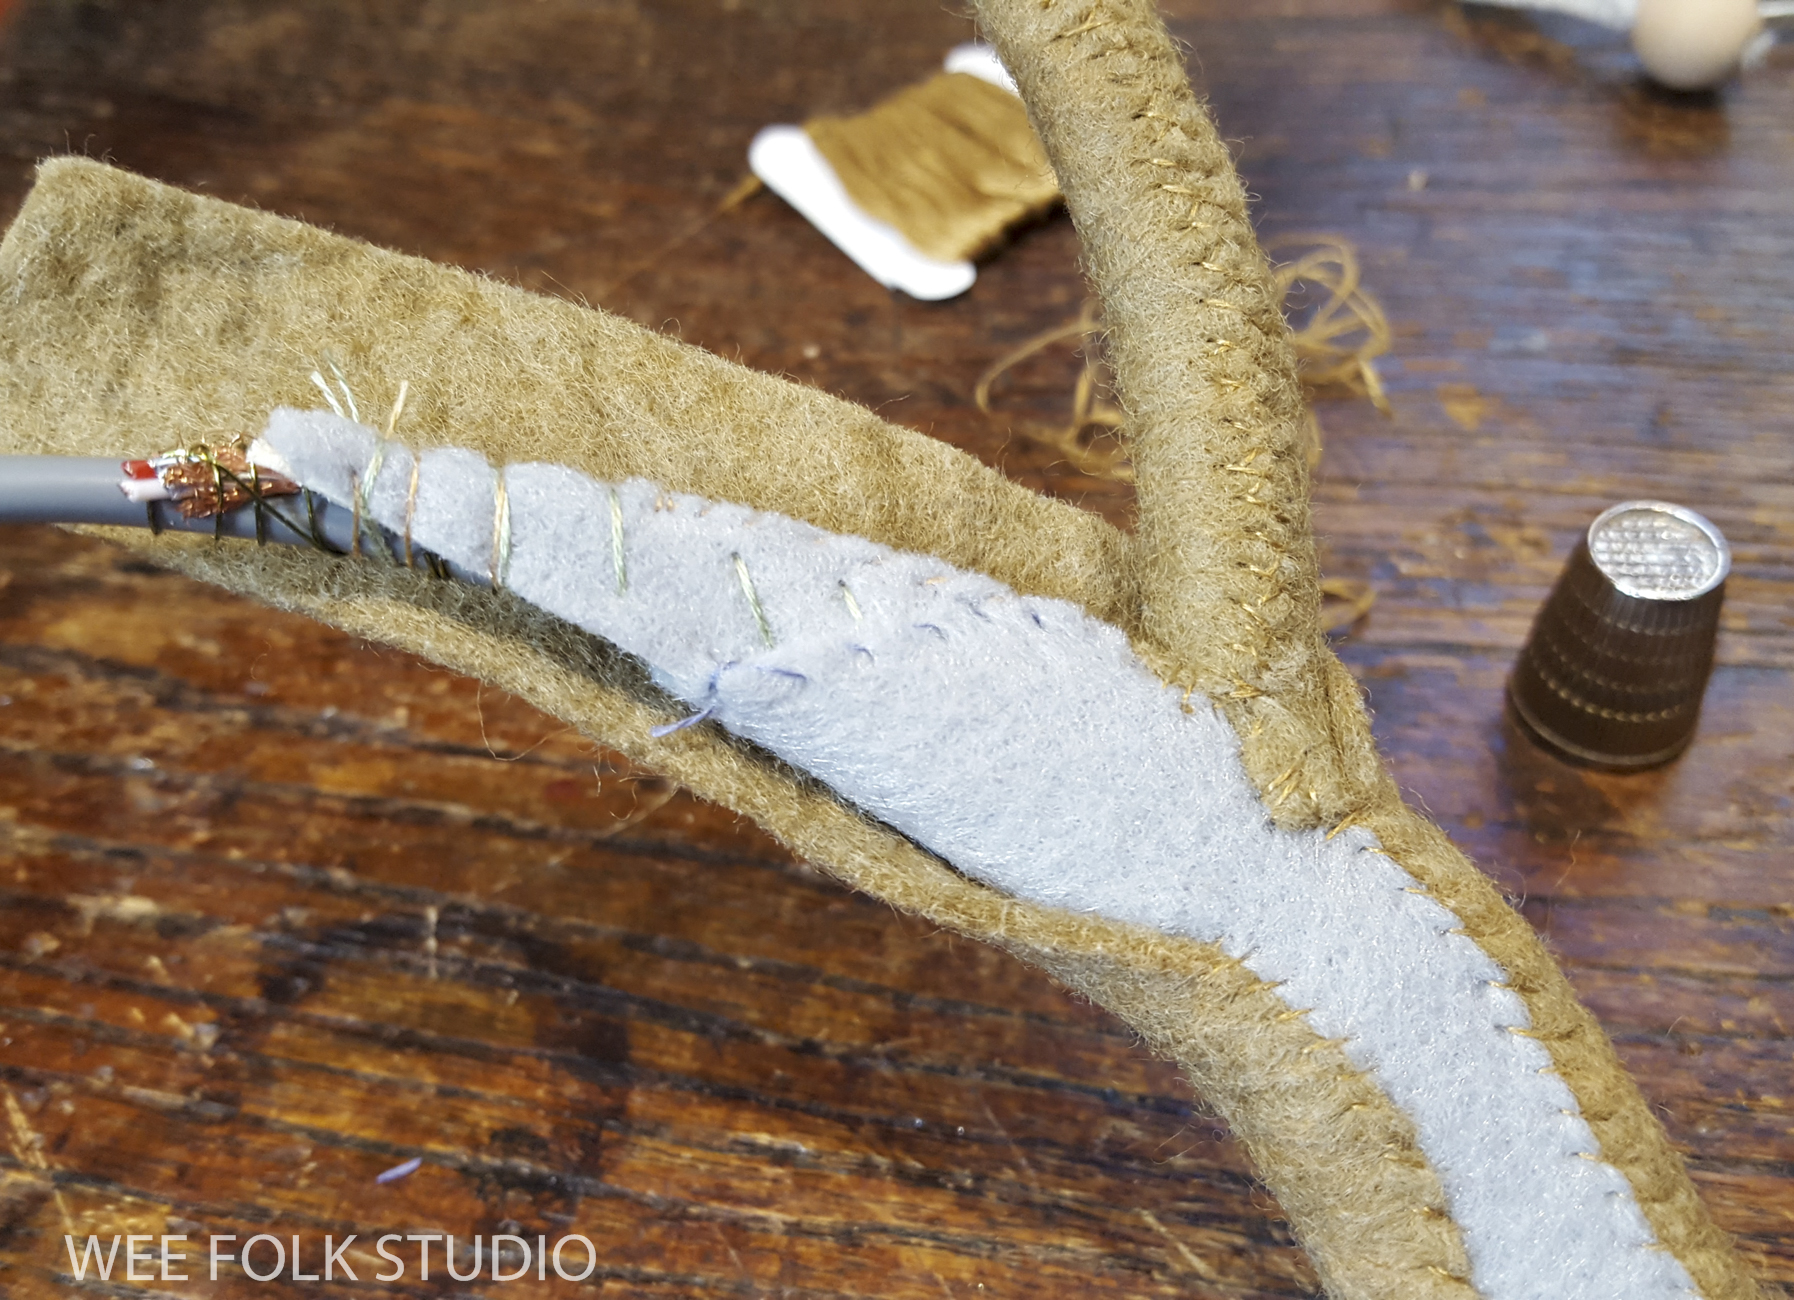
Then, I stitched a zigzag pattern on the font side with variegated pima cotton made by the Caron Collection.


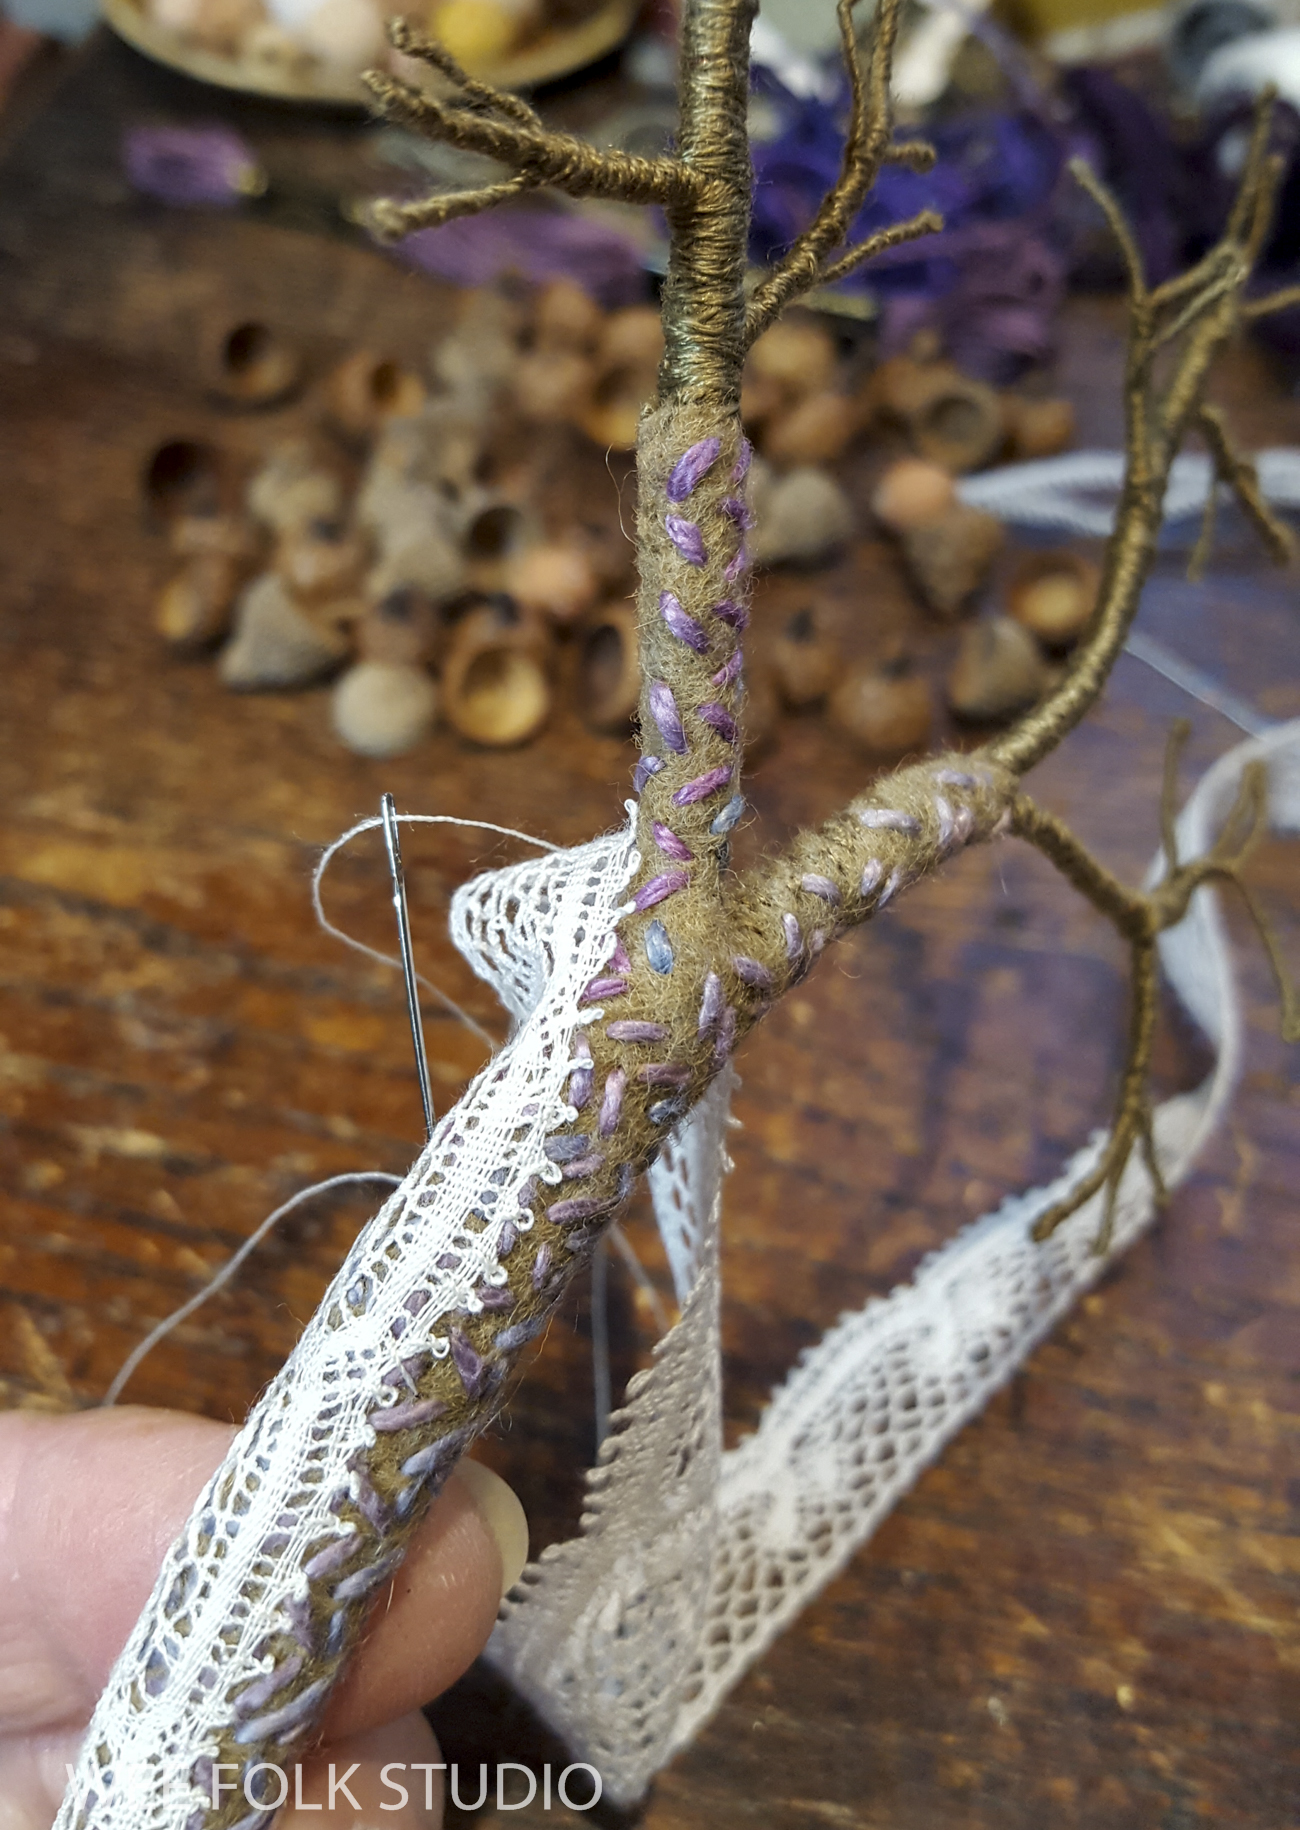
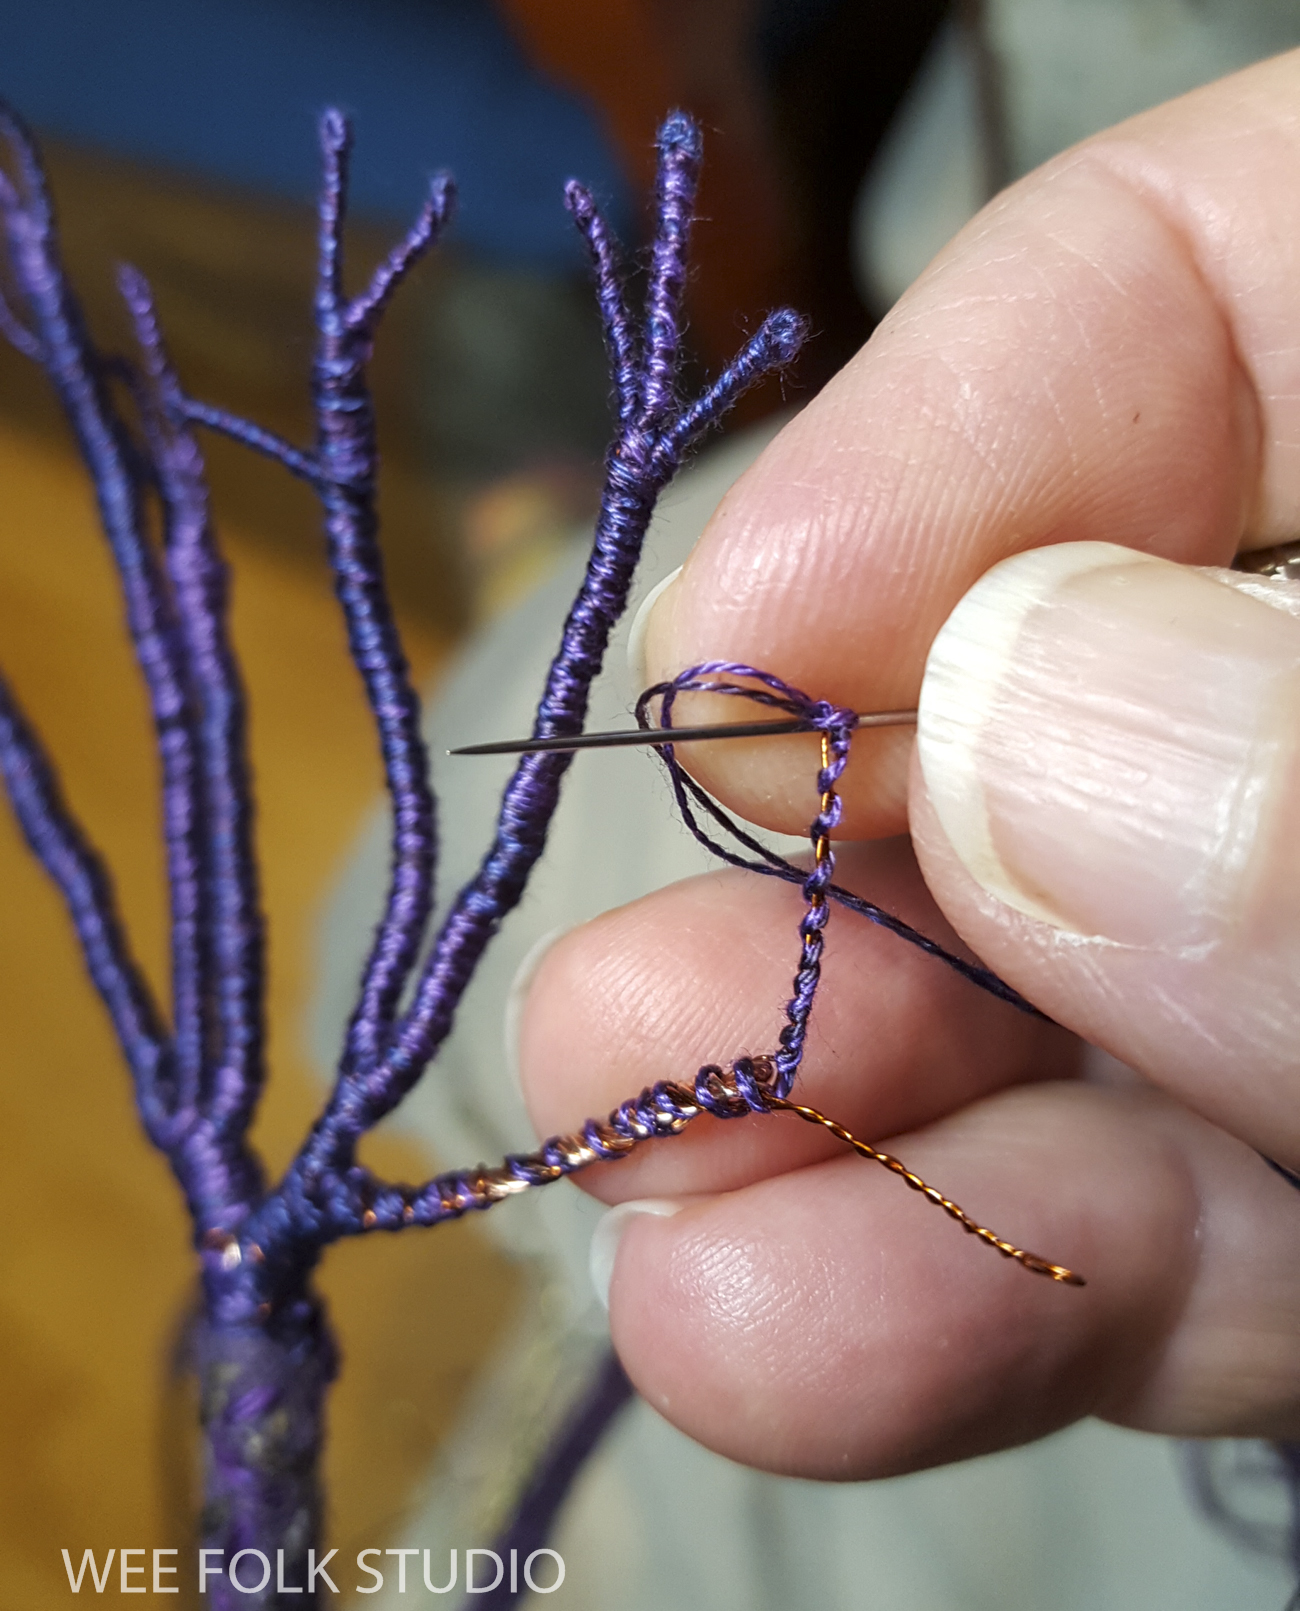
I used insulated wire of different gauges, sometimes stripping off the rubber/plastic coating to reveal multiple wires inside. It’s the kind of supply that can be found at hardware stores The skinnier wire inside became the finer limbs as the tree branched out.

I searched through my old lace collection until I found something that would evoke snow cover on the center tree’s outstretched branch.


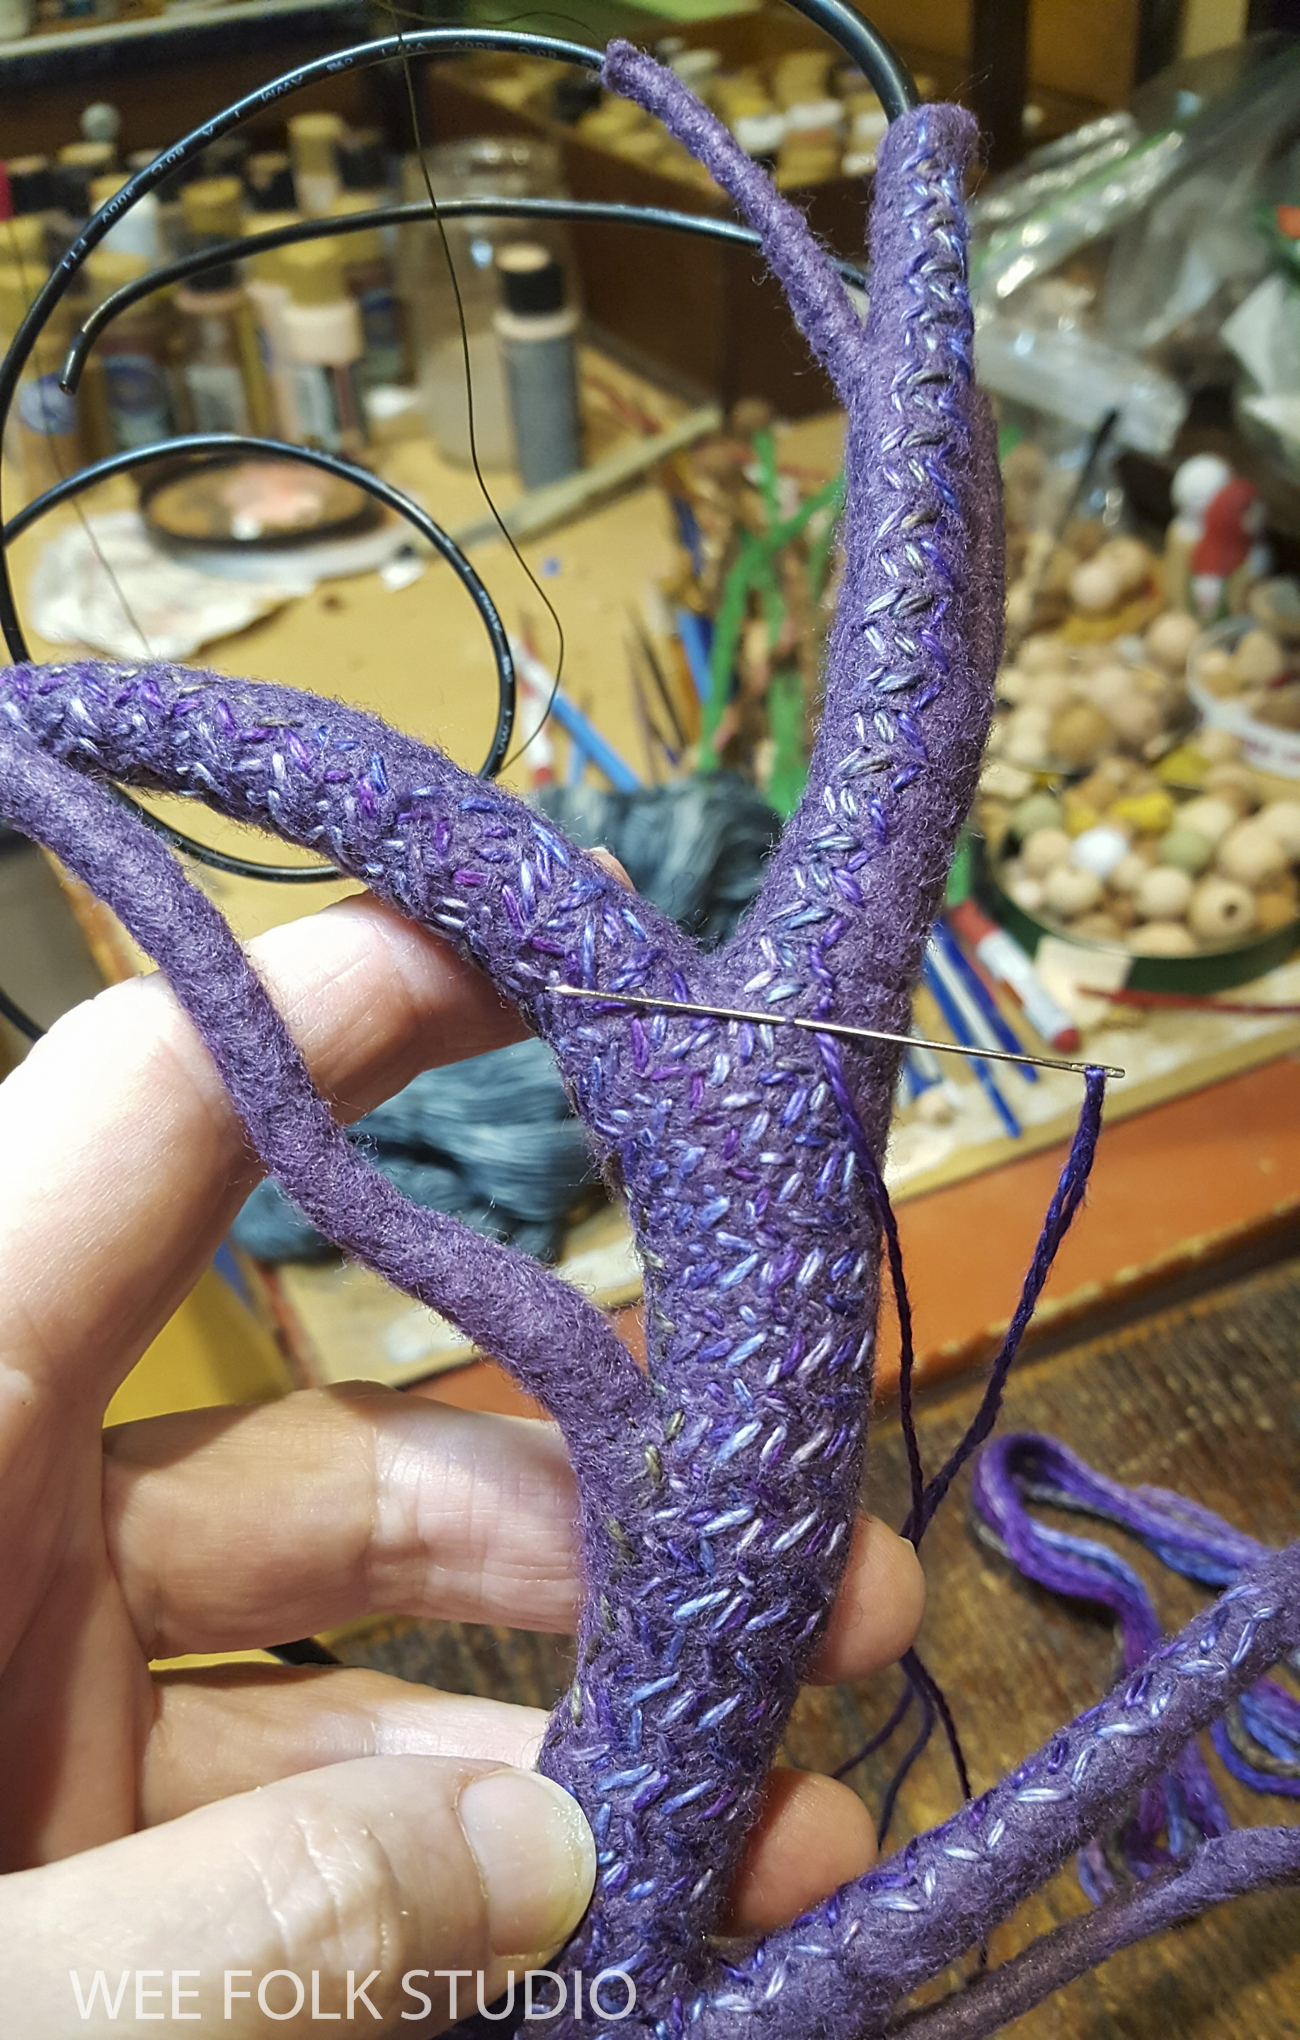
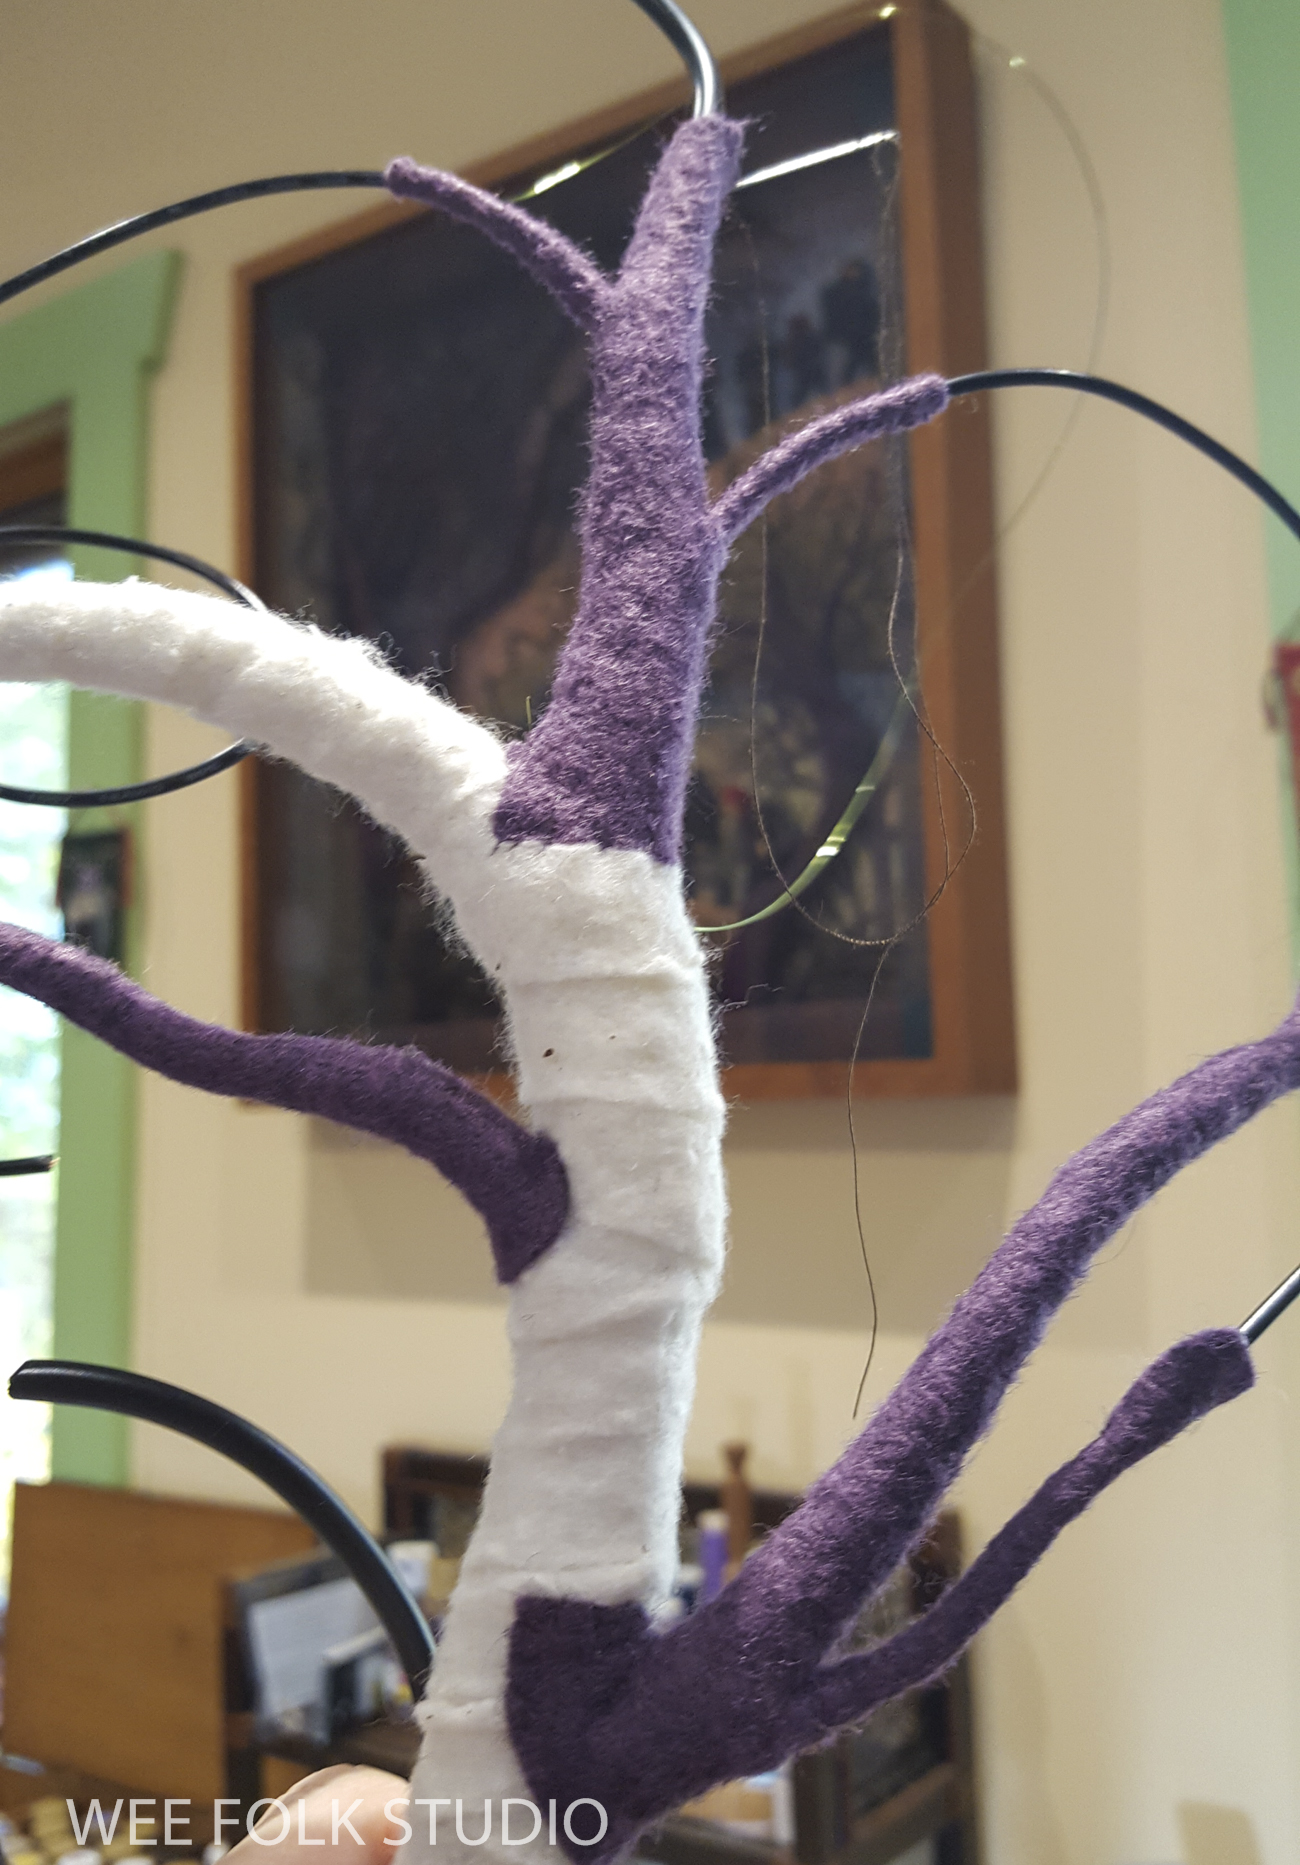
I made the purple tree a little differently.
Being smaller in diameter, the purple tree didn’t need a board backing, so i just wrapped the wire armature with strips of cotton batting until they were the right thickness. I have no logical explanation as to why this tree is purple. I just wanted to cheer up the scene with something besides drab browns and grays.
Part 2 in this series, will be devoted to forming and wrapping the branches.
Frosty Morning note cards are available in my Etsy shop here.
To keep up with new posts, subscribe to this blog. Your contact info will not be shared. If you’d like to see more frequent photos tracking the projects in my studio, please follow me on Facebook and/or Instagram.

Sally, I love reading about how you construct your elements in a scene. The tree explanation is wonderful and makes me want to go get materials to start making a tree but there are too many projects that I already want to make. You have such a creative mind and a bit of whimsy to spice up your work. Looking forward to seeing your next exhibit in the area! Thanks for sharing!
You are one in a million Sally. Thanks for sharing your step by step instructions over the years. Years ago I taught 3 of my great grandchildren (1boy and 2 girls how to make a Wee person from your book. They each were excited about their results, and today (they are all graduated college now) it is a sweet memory for us all.
Amazing!
Thank you thank you thank you, a million thanks more too.
I’ve been trying to make an Australian eucalyptus for one of my projects inspired by your wee folk and well failing badly. I’ll now try another method inspired by this one blog.
Just want to tell you how much joy looking at your creations gives me!! I bought your “bed” book for my granddaughter and she loves it! Sally, they should make you a “National Treasure”!!! ❤️❤️❤️
You’re a marvel! I love your work. I love seeing how you create your images. Thank You so much for sharing.
Salley, I am a new follower of your works of Art. I feel like a sponge, trying to soak it all up and retain as much as I can. I have always loved peoples hand work and having done some myself, I can value the time invested. Not only that but the gifted ness which is so unique to each work. Thank you for your generosity in putting together these step by step creative jewels of information. You’ve definitely inspired me. My own main creative expressions have mainly been as a painter, where I let my imagination guide me to create whimsical folk art. My work can be found on Etsy if you would like to see it, and if you wanted to take a look at it I would be honored to hear what you thought. You have now inspired me to perhaps re- create some of my paintings by adding a fiber touch with needle and thread! Thanks again Salley and God Bless you , for the joy your creations bring along with them!