

In part 1, we were introduced to this little girl in her cozy bed and quilt. In this part 2, I will describe how I made her baby sibling sleeping in a crib and her pet dog lying on a rug. Part 3 will come next, with photos of all the miscellaneous elements in the bedroom.
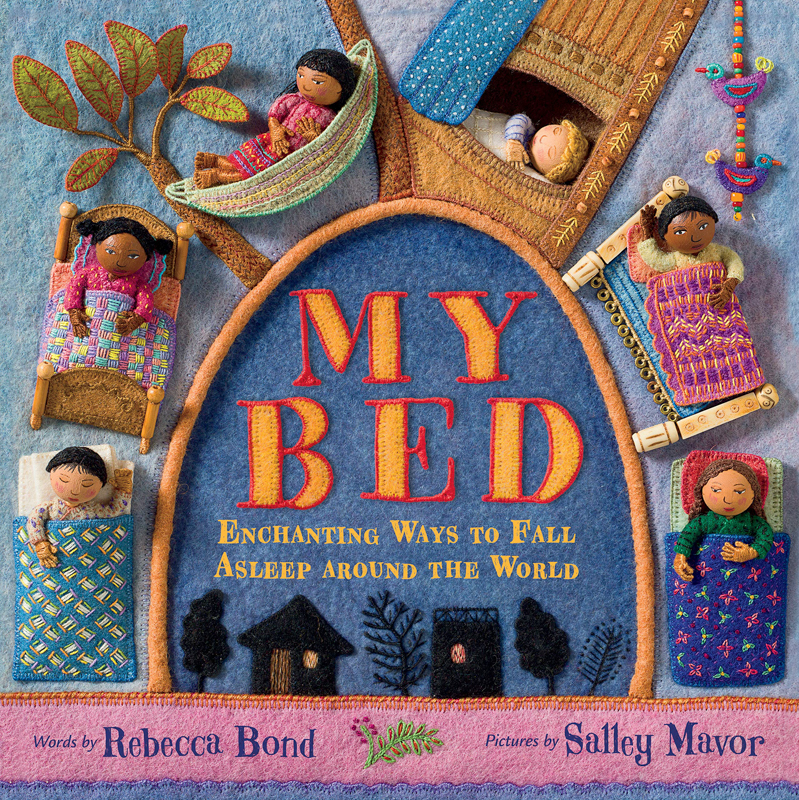
The scene will be included in My Bed, a book about where children sleep around the world, with each spread depicting a different culture and living environment. Here are links to posts showing other finished illustrations for the book:
Holland, South America, Japan, India, Afghanistan, Russia, North Africa and Iran. To see a list of all my books, click here.

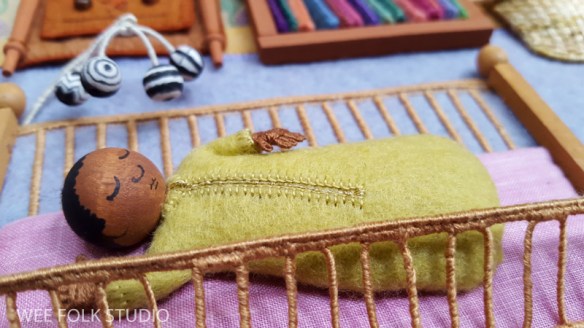
When making the baby’s head, I was faced with the dilemma of how to deal with the bead hole on top. Normally, when making a doll from my how-to book, Felt Wee Folk, the hole is covered with hair or a hat. But in this case I wanted to paint on the hair. So, I glued a small scrap of black felt inside the whole, which blended in with the painted bead surface.
I must say that it felt strange to lay the baby face up, instead of on their stomach, which is what I did in the 80’s with my kids. But, that’s what you’re supposed to do now for their safety. This is just one example of the kind of things that come up when you illustrate a children’s book.

The head, foot and bottom of the crib are made of wood, but the sides are formed with wire, wrapped in embroidery floss. I love using wire for detailed touches because it’s cooperative and strong at the same time. I’d say, when you can’t figure out how to get something to hold its shape, use wire. I use non tarnish beading wire in a variety of gauges and Soft Flex wire for straight lines or wide curves.

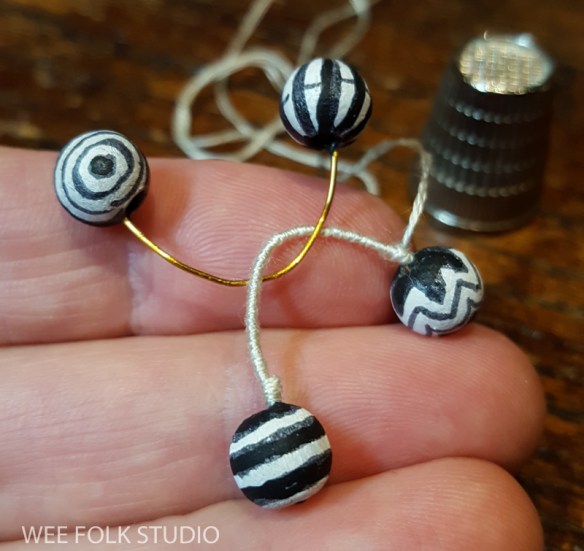
I made a black and white mobile-like contraption from beads and wire to hang over the crib. Have you noticed the black and white products for newborns? The reason is that that the sharp contrast of black and white is easier for them to see when their vision is still blurry. So much for pastels.

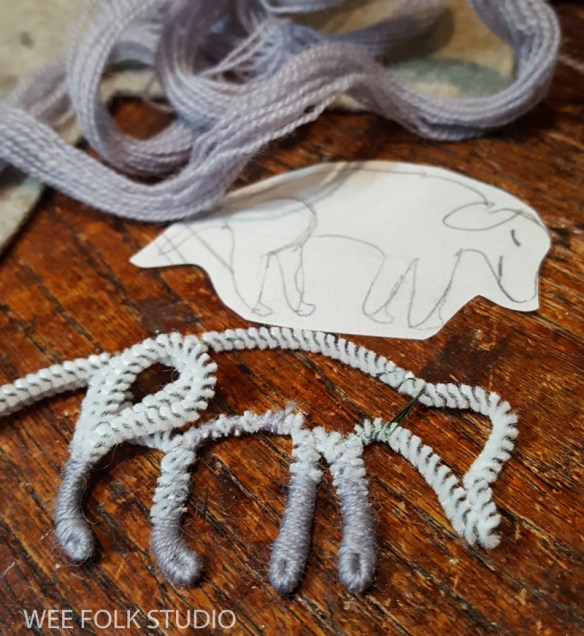
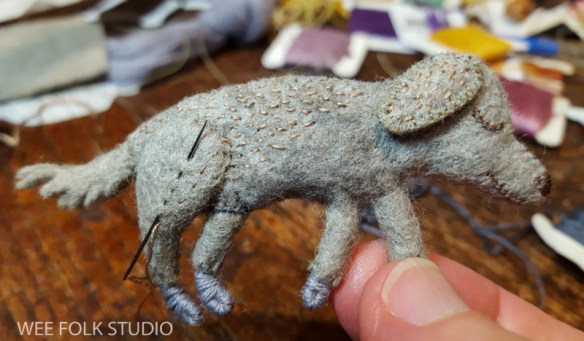
Now, let’s look at the dog making process. If you follow the other posts about animals for the book, you’ll see that I use pipe cleaners to form their basic shapes. I wrapped the dog’s legs with wool tapestry yarn, so the color and texture would blend with its wool felt body.
For my illustrations, I make all of the parts in shallow relief – characters, animals, furniture, architecture, foliage and everything. After the parts are made separately, they are arranged and sewn to a background fabric. For photographic and framing purposes, nothing should stick up more than an inch from the surface. With that in mind, this dog was made to lay flat on a rug. It didn’t have to be able to stand up or have its back viewed.

I then covered the legs and formed the body and tail with felt.

Looking at this photo, it’s hard to see how the dog’s head was attached to the rest of the body. There is a seam at the neck, but I smoothed the felt fibers a bit with a needle, to cover the stitching. The finishing touch was a stitched fur texture on its body and ears.
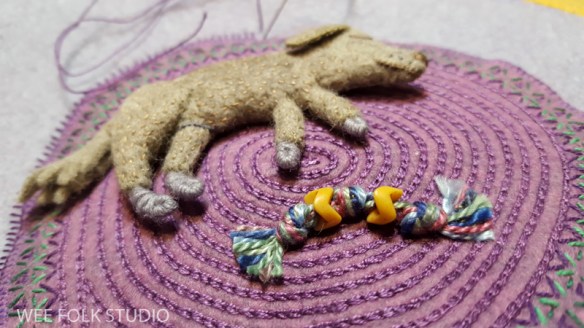
Then I stitched a circular felt rug for the dog to sleep on.

After the dog was sewn in place, I added a knotted rope chewy toy, made with beads and perle cotton. Please stay tuned for part 3, which will conclude the series and show all of the miscellaneous elements in the bedroom.
To keep up with new posts, please subscribe to this blog. Your contact info will not be sold or shared. If you’d like to see more frequent photos tracking the projects in my studio, please follow me on Facebook and/or Instagram.

I really hope the exhibit reaches California!
Yes, that would be great. It all depends on finding venues with funds for shipping the artwork across the country.
Thank you for sharing your stories and creativity. I really enjoy
Seeing the progression of your work. It’s like having a window into your studio!
Thank you for coming along, Tina.
So much to see in these posts💚🧡I love it all!
I love seeing all the little details. I wish I ws a child again to receive such a gorgeous book!
Hi Salley,
I can’t wait to see the originals of these!
Susan
>
I’m learning so much! Thank you! Would love to host this exhibition here in Switzerland, but that might be asking too much!!!
I’m glad you are enjoying tbe posts, Claire. You’ll be interested to know that a Swiss scene will be in the book. As for exhibit, if there’s a trusted venue that’s willing to finance overseas shipping, I’ll consider it!