
Part 8 in the series of posts about making my piece Summertime includes photos and videos documenting the process of stitching flora. For a more comprehensive understanding of my process, I encourage you to explore other posts in this series: Overview of the piece, Part 1 – Tree Trunks, Part 2 – Tree Houses, Part 3 – leaves, stems and branches, Part 4 – Baltimore Oriole (body), Part 5 – Baltimore Oriole (head and feet), Part 6 – rose vine, Part 7 – raspberry plants, Part 8 – stitching flora, Part 9 – moss, sky and stone wall, and Part 10 – wee folk.

Summertime is the summer scene in a series of four seasonal landscapes that capture the wonder and magic of the natural world. Posters, note cards, prints, bookmarks, and jigsaw puzzles of Summertime and the other scenes in the series (Frosty Morning, Mossy Glen and Harvest Time) are available in my Etsy Shop.
See the Four Seasons Series and dozens of other works in my exhibition, To Every Season: Works by Salley Mavor at the New England Quilt Museum, Sept. 9 – Dec. 31, 2025.The show includes recent work, as well as rarely seen early pieces on loan from private collections.
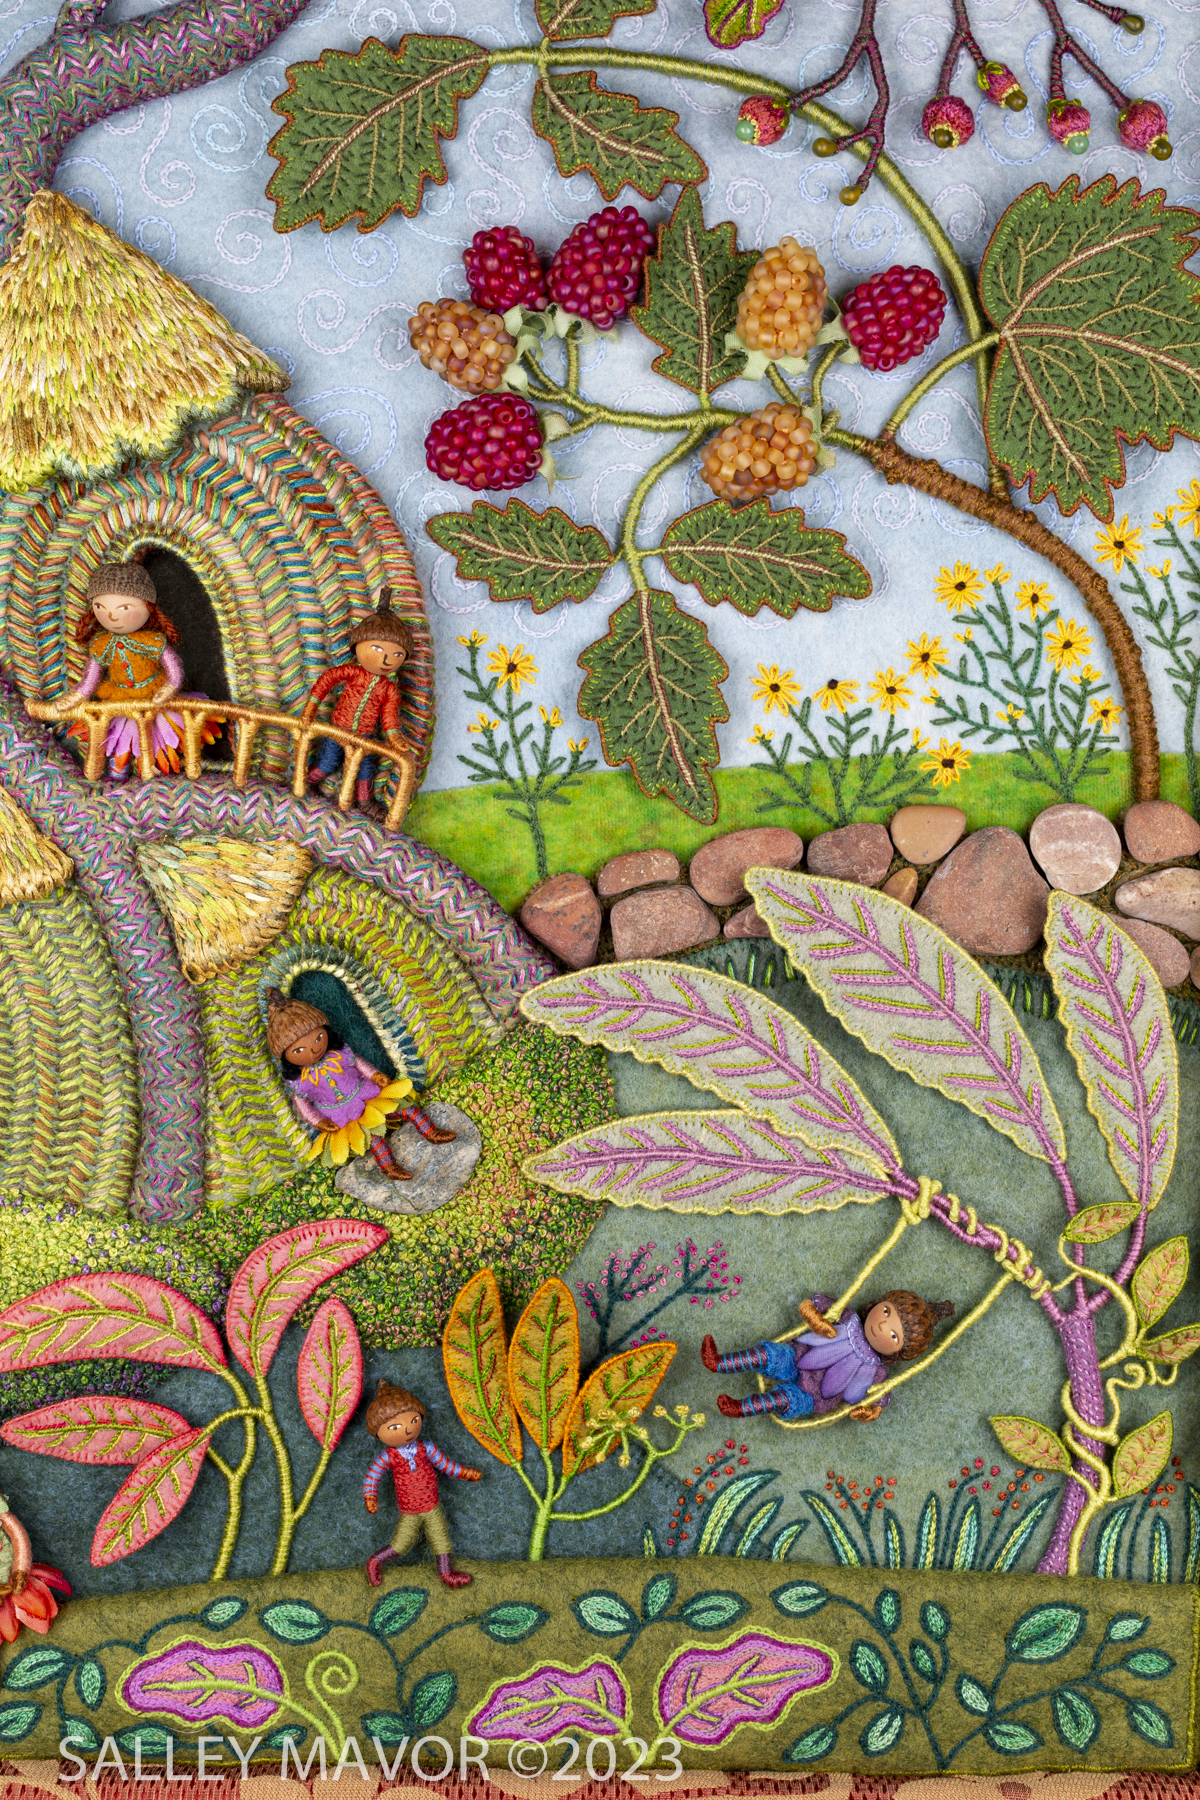
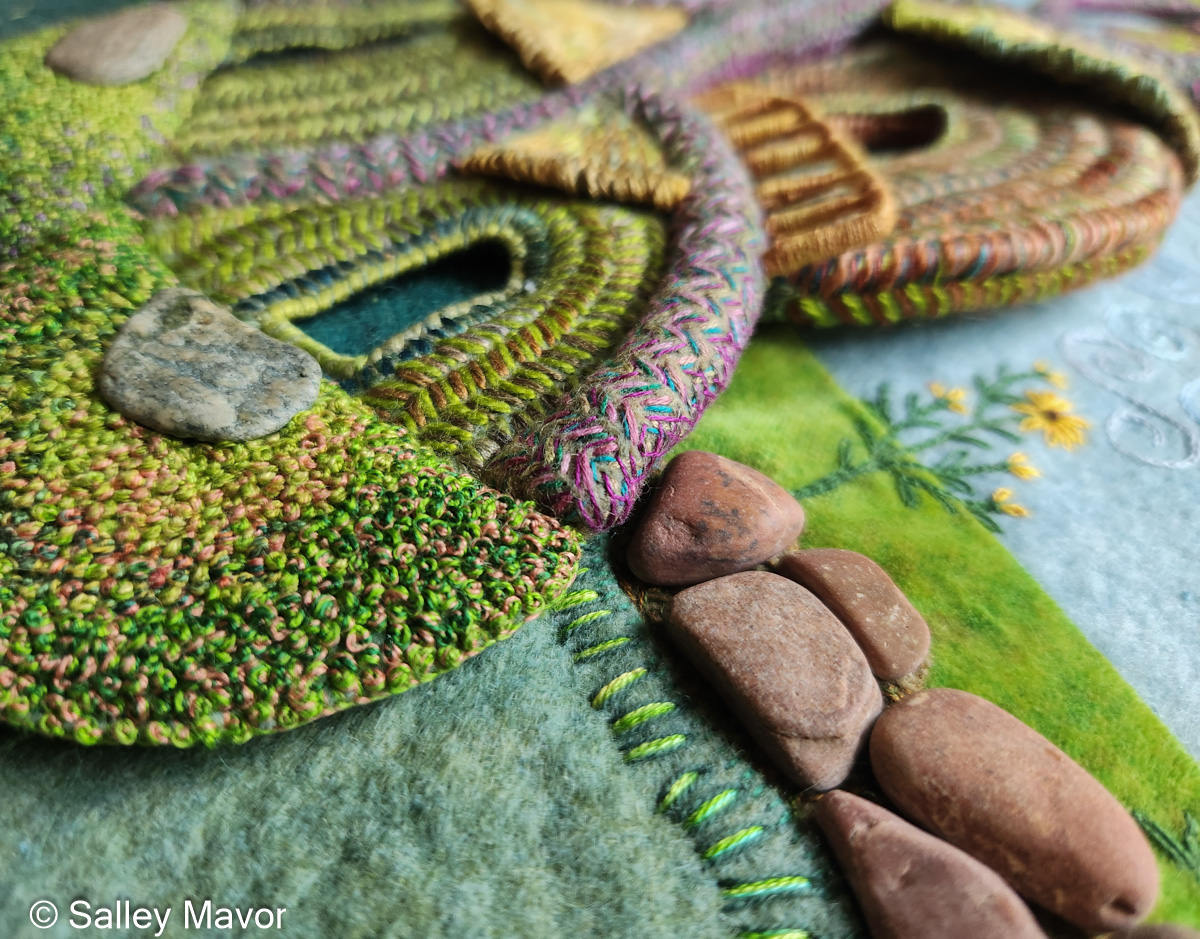
Towards the end of the project, after months of constructing most of the 3-dimensional parts of the scene, I was ready to zero in and add embroidered leaves and flowers where they were needed. In the following video, you can see how I spread out on different work tables in my studio. Every horizontal surface was full of materials and tools, as well as the bits and pieces I’d finished making.
To do the stitching, I require very few things – a piece of felt, a needle, thread, and a thimble. And good lighting, of course. And closeup glasses. No hoop, no cumbersome magnifying equipment and no fancy needles or scissors.

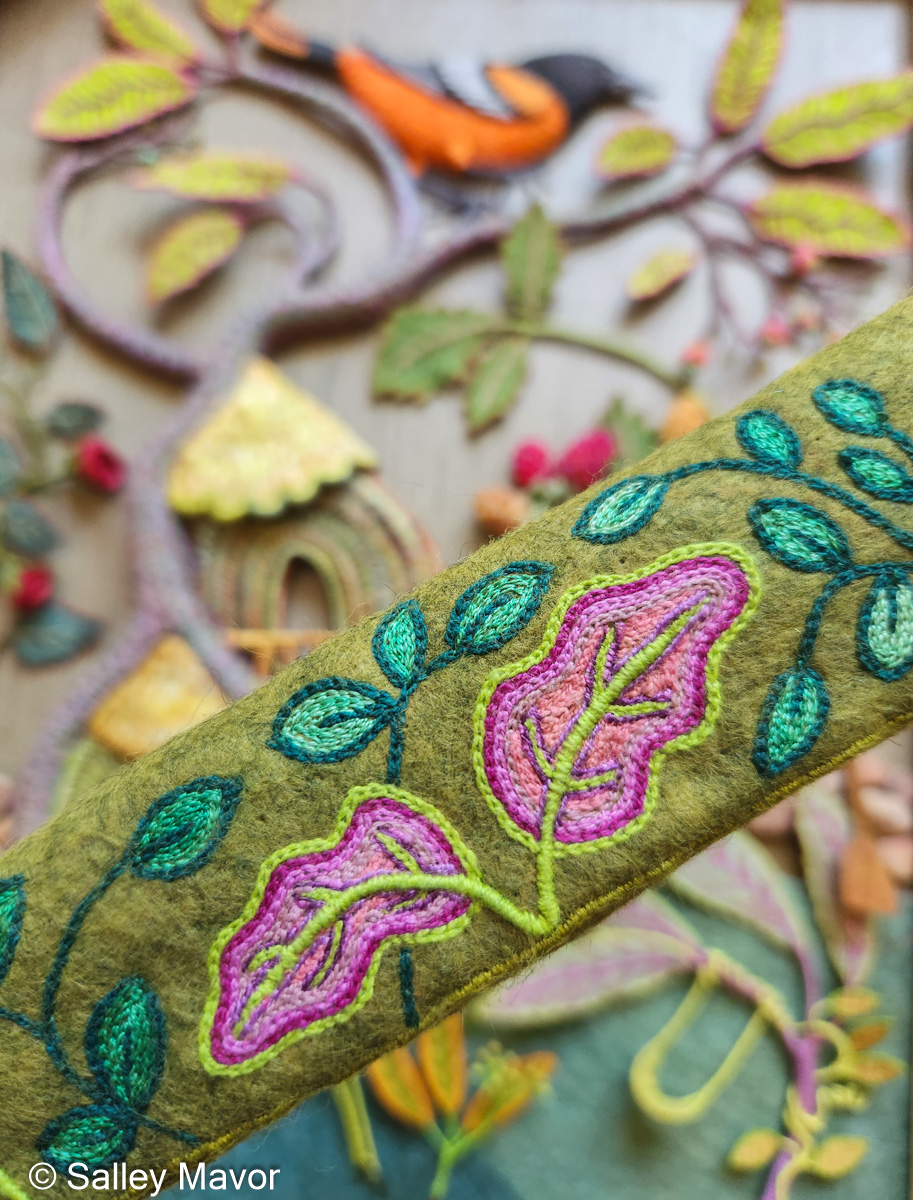
It was almost impossible to draw markings on this fuzzy wool felt, even with chalk. So, I mostly worked freehand and removed the stitched red guide lines later in the process. I used DMC cotton flower thread, which is thicker and bolder than embroidery floss. In this video, watch how I chain-stitched leaves and added Parawire stems on top.
Chain-stitching these leaf shapes was as soothing as filling in a coloring book.

I added patches of black-eyed susans to open areas of blue sky below the raspberries and above the stone wall (coming in part 9).

In other open areas, I chain-stitched blades of grass, dotted with little French knot flowers.


I was nearing the end of the project, which meant that it was time to tackle the border. I got out my stash of upholstery fabric and tried out different color combinations. Red and gold popped out at me; they contrasted with the blue sky and brought out the color of the raspberries. I padded the wooden stretchers with cotton quilt batting and sewed the upholstery fabric around the frame, which created a shallow box to fill with all of the parts.

Stay tuned for Part 9, where I’ll share photos and videos documenting the process of stitching moss and the sky, and building the stone wall in Summertime.
To keep up with new posts, please subscribe to this blog. Your contact info will not be sold or shared. If you’d like to see more frequent photos tracking the projects in my studio, please follow me on Facebook, Instagram and BlueSky.

Dear Salley: I love watching your videos that show you stitching a leaf or a flower. I’m not good at sewing, so I think you are awesome! I love the little doll people, and the worlds you create! Have a good Summer, and God bless you! Sincerely, Janet MacDonald (from Canada)
I am enjoying your wee folks embroidery pictures on how stitches are made, tree bark, etc. So impressed with your work-it’s wizardry!!😉 How much time each day do you preserve for working on your plans? It’s quite monumental and a love for the art. You are very ingenious!!! Judy Atwood
Thank you for your kind words, Judy. As for how much time I spend stitching – it varies, depending on what’s going on in my life, but I don’t feel right unless I work with a needle and thread some time each day.
You are soooooooo amazing🤗🤗🤗🤗🤗S
Everything is very carefully thought out and embroidered. You are great!
Great job!