
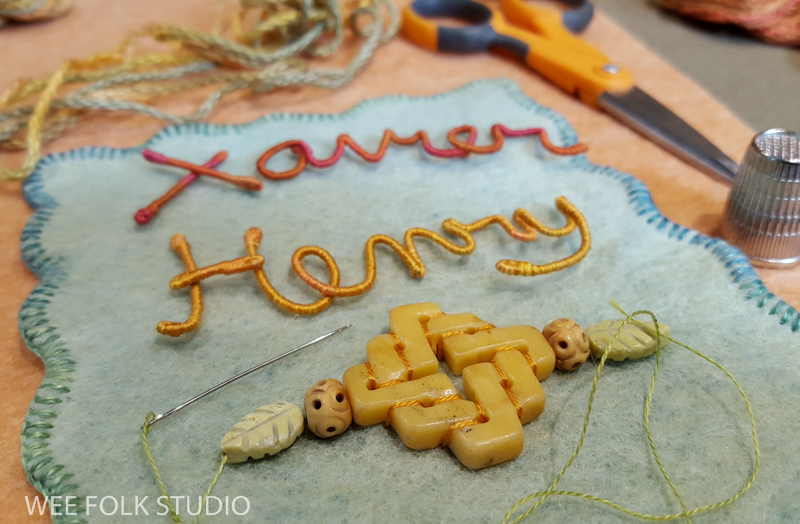
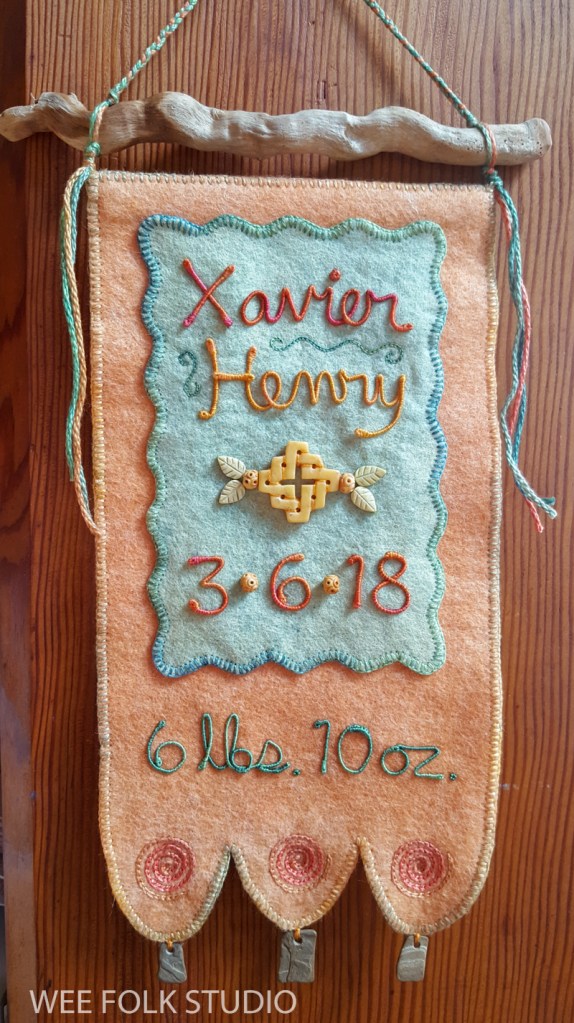
Since delivering the artwork for my upcoming book, My Bed to the publisher, I’ve had time to catch up on overdue gifts. Like this baby banner for Xavier, the newest member of a family of dear friends. He is now a toddler, and I hope the banner is something he won’t ever outgrow.
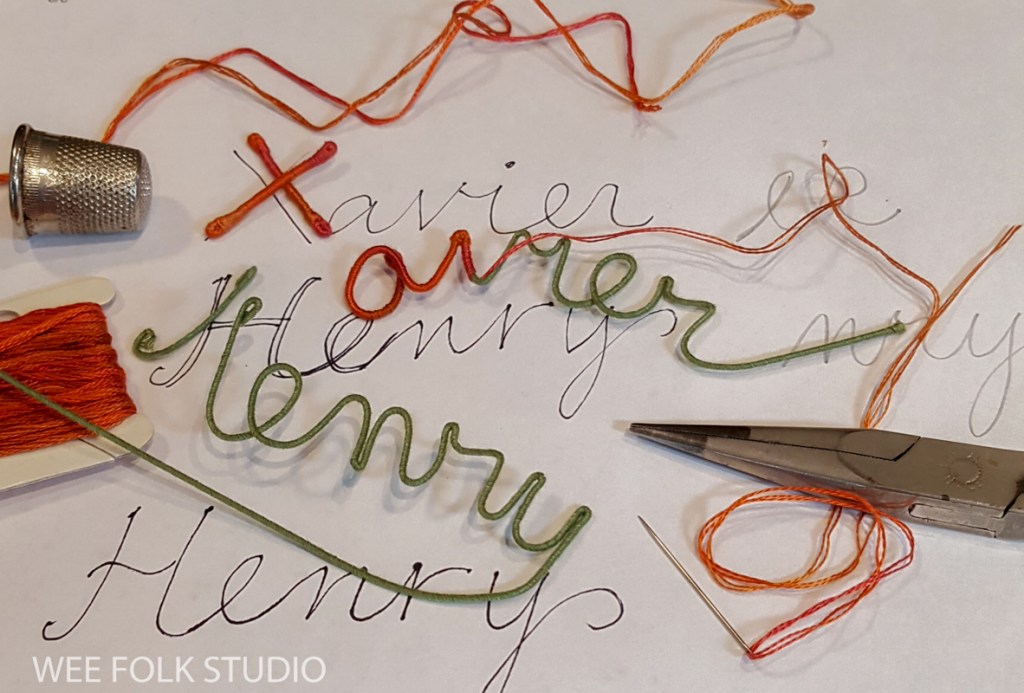
I make banners for friends and family that commemorate special events like weddings and births. You can see others I’ve made by scrolling through the archives here. They all feature 2 of my favorite things; embroidery and handwriting. When I form letters in wire, I think back to that day in 3rd grade in the Woods Hole School, when Mrs. Cleveland called each student up to her desk, one at a time, to show us how to write out our names in cursive handwriting. I was transfixed, watching her make a line of loops and bumps that magically spelled my name, without lifting her pencil off the paper.

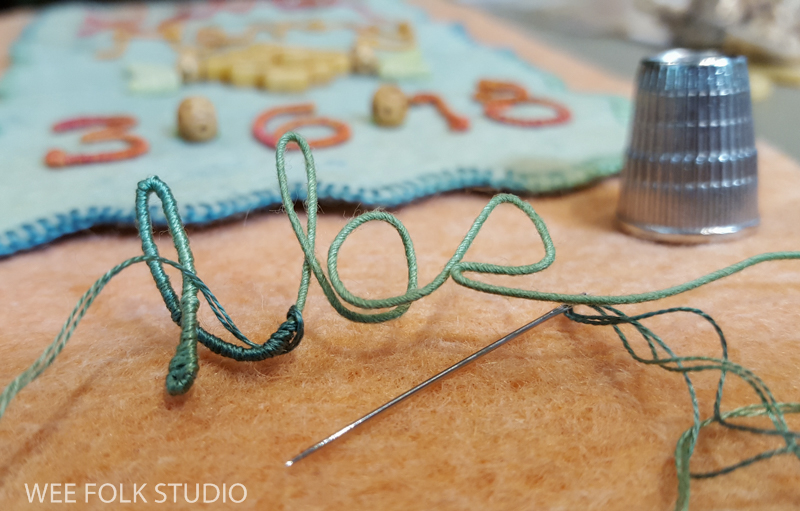
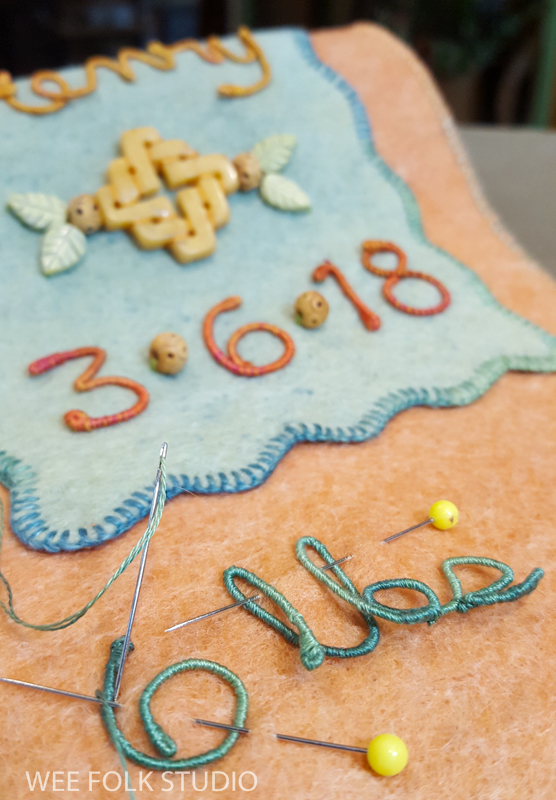
I use floral wire to make the letters, because it’s covered with green thread that provides a non-slippery surface to wrap embroidery floss on top of.
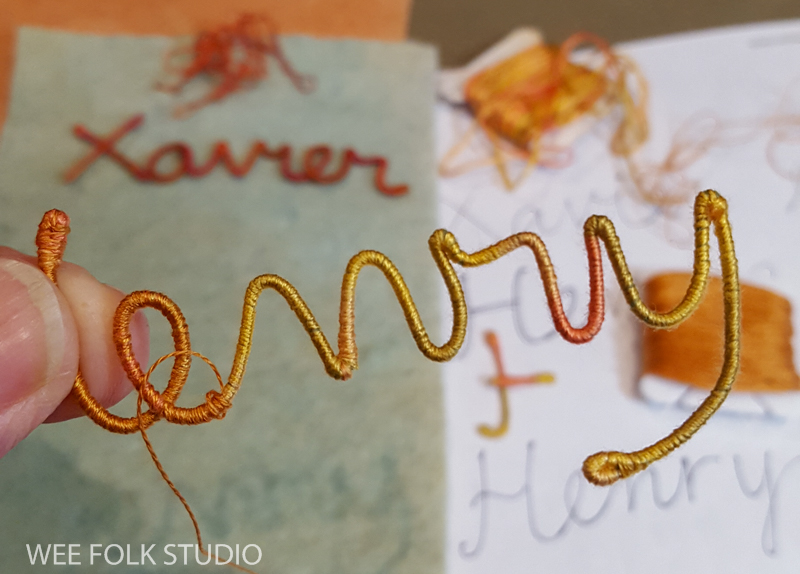
I usually use variegated floss to wrap the wire, which can look like stripes on the 2nd pass. The wire ends are bent over and wrapped, so that no raw ends are hanging out. It’s similar to the technique I use to make doll limbs in my how-to book Felt Wee Folk.

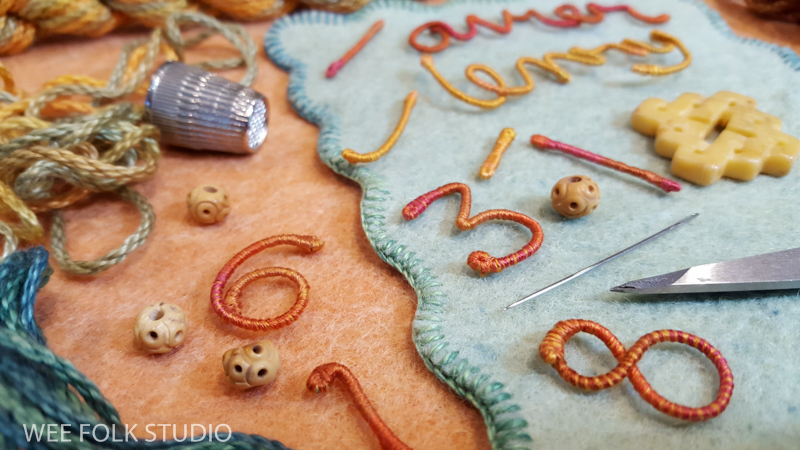
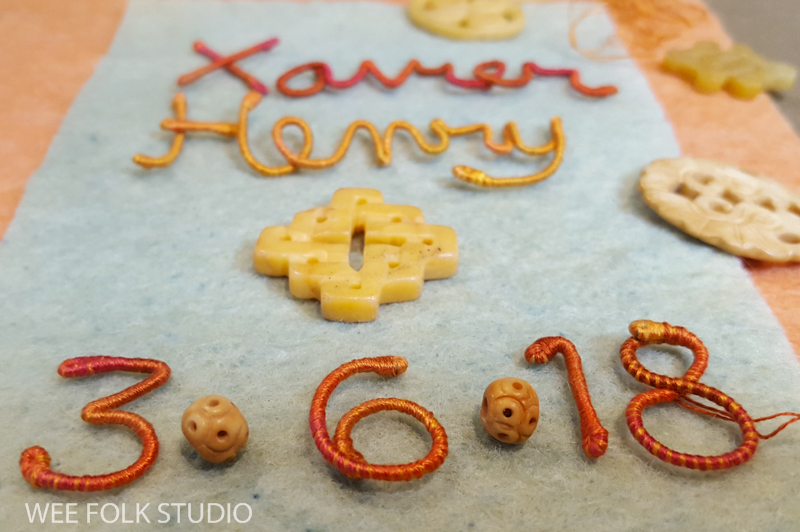
Out of my stash, I selected bone beads to make a decorative separator between the names and birth date.


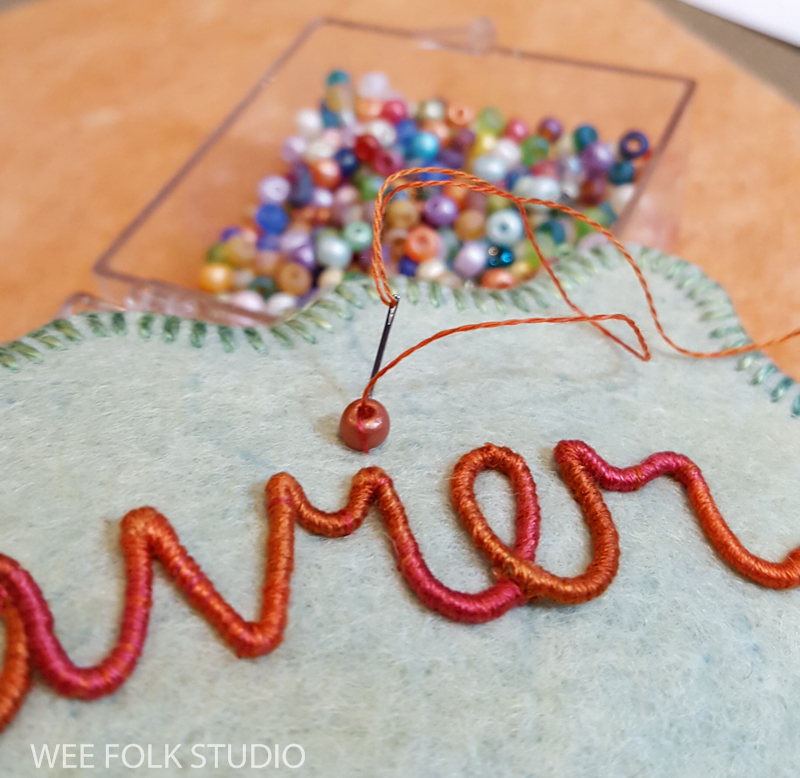
And what better than a bead to dot the i.
A little chain stitch never hurt, either.
Writing out the letters in wire sometimes follows a different path than actual handwriting, especially for b’s.
Over the years, I’ve adapted my handwriting on paper as well as wire to a personal style that’s part cursive and part block letters.

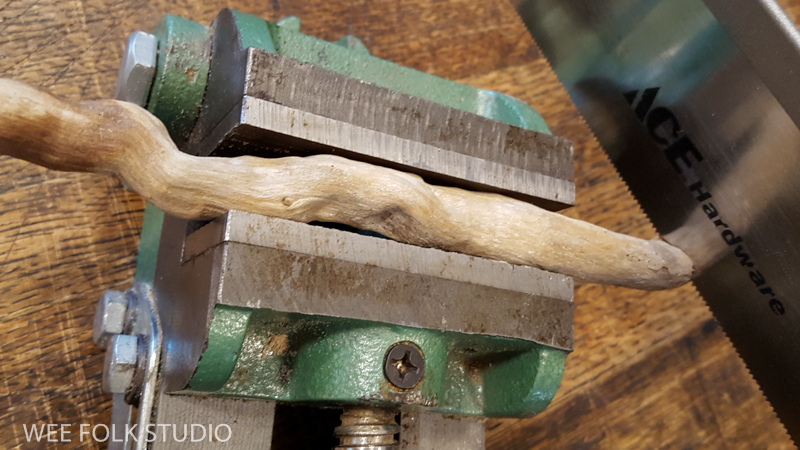
I went through my collection of driftwood, picked out a bumpy piece, and cut it to the right length with a saw.

Many years ago, I bought these beach stones with drilled holes. I use them sparingly on special projects.

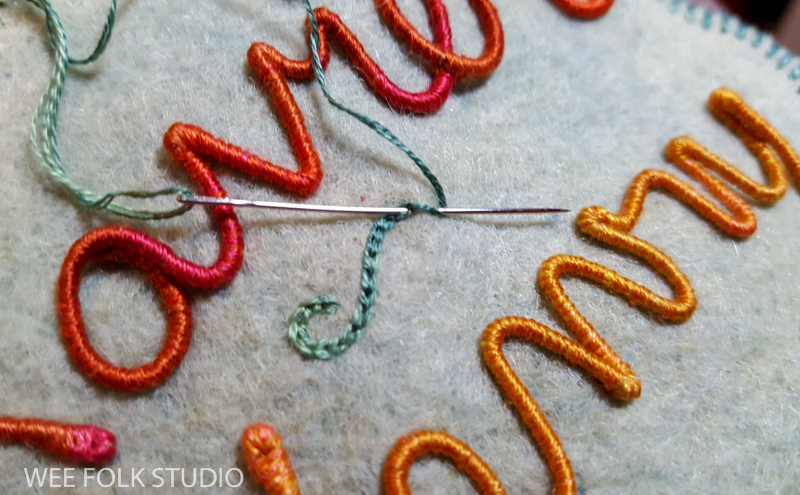
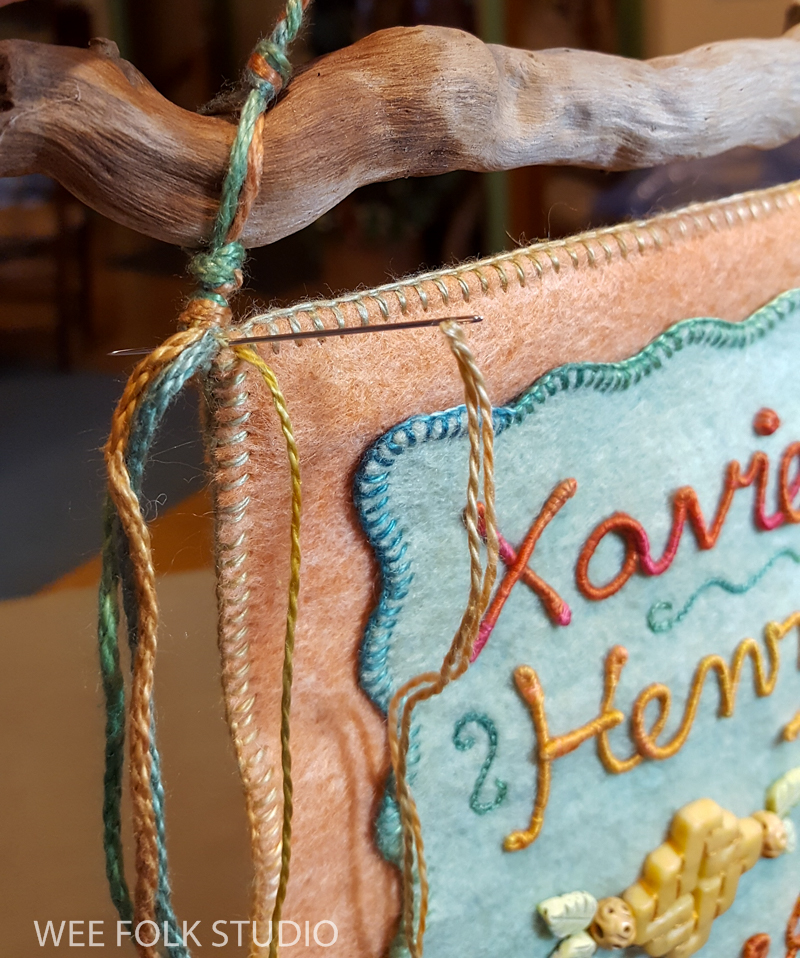
This shows how I sew the wrapped lettering to the felt banner piece.
For a hanging cord, I braided pima cotton made by Caron.

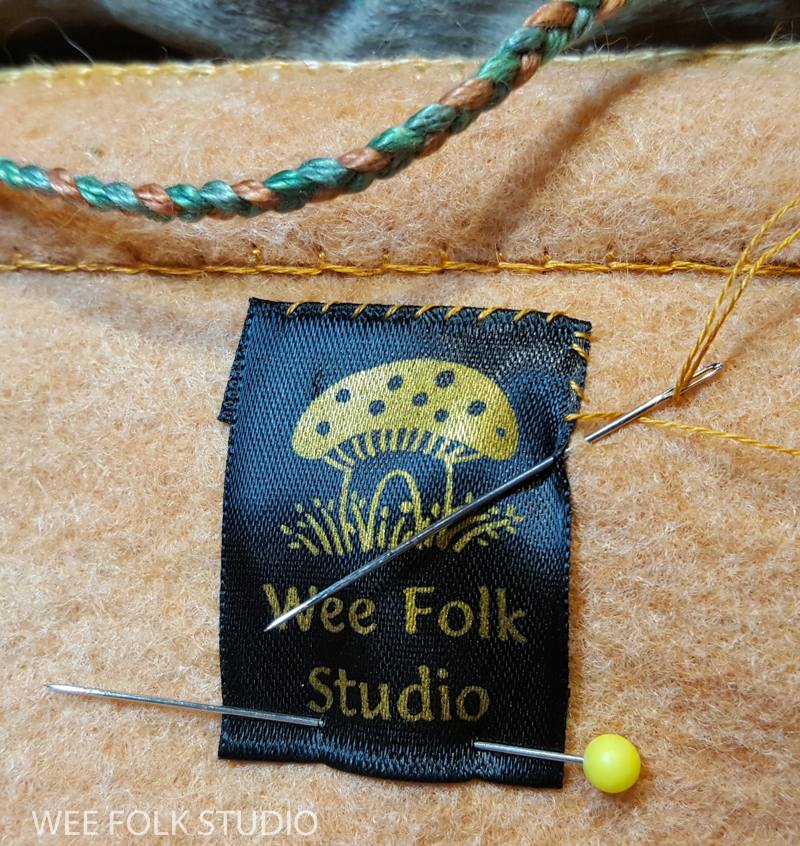
I have lots of Wee Folk Studio labels left over from when I made felt purse kits, so I sewed one to the back of the banner.
I attached the cord to the wood bar with knots and stitched it to the banner at the top corners.
This banner will soon hang on Xavier’s bedroom door. Welcome to the world little Xavy and congratulations to his parents, Mark and Cal!
To keep up with new posts, subscribe to this blog (top right column on the home page). Your contact info will not be shared. If you’d like to see more frequent photos tracking the projects in my studio, please follow me on Facebook and/or Instagram.

Just wonderful! They will have a treasure!
Thank you, Sally! How generous of you – just like having a private class! Lenora Kirby, Albany NY
So beautiful. Such attention to detail. I wish I had the patience for that . Made a garden fairy( inspired by your lovely book) . She has a bucket of lavander and a watering can. Thank you for the inspiration. Jennifer
Hi Salley,
This looks like such a beautiful act of love.
Wonderful!
Susan
>
I love that it’s earthy, natural and artistic. They are lucky to have such a wonderful gift!
Thanks Salley, for this wonderful post. Cal had asked me how you do the lettering and I wasn’t totally sure. Now she got the answer first hand! I actually forwarded this post to many more dear ones (in Holland too!). Good luck with all the catching up! Love, Maria
Ps. Just looked at all the other banners you have made! Fabulous and wonderful!!!
Sweet! A lovely tradition. Jill
What a treasure!
Thank you Salley, for sharing this. I hope the family treasure this unique piece of art. Best wishes from a rainy, cloudy North Yorkshire in the UK. Sandra
Exquisite, thank you for your generosity in showing us how it was created, I haven’t considered the wonderful use of wire before, it has set my mind whirring to many wonderful possibilities. You are an amazing artist, thank you
A very special gift indeed. You do such beautiful work. A gift that is sure to be cherished.
________________________________
Thank you again for sharing your techniques.