

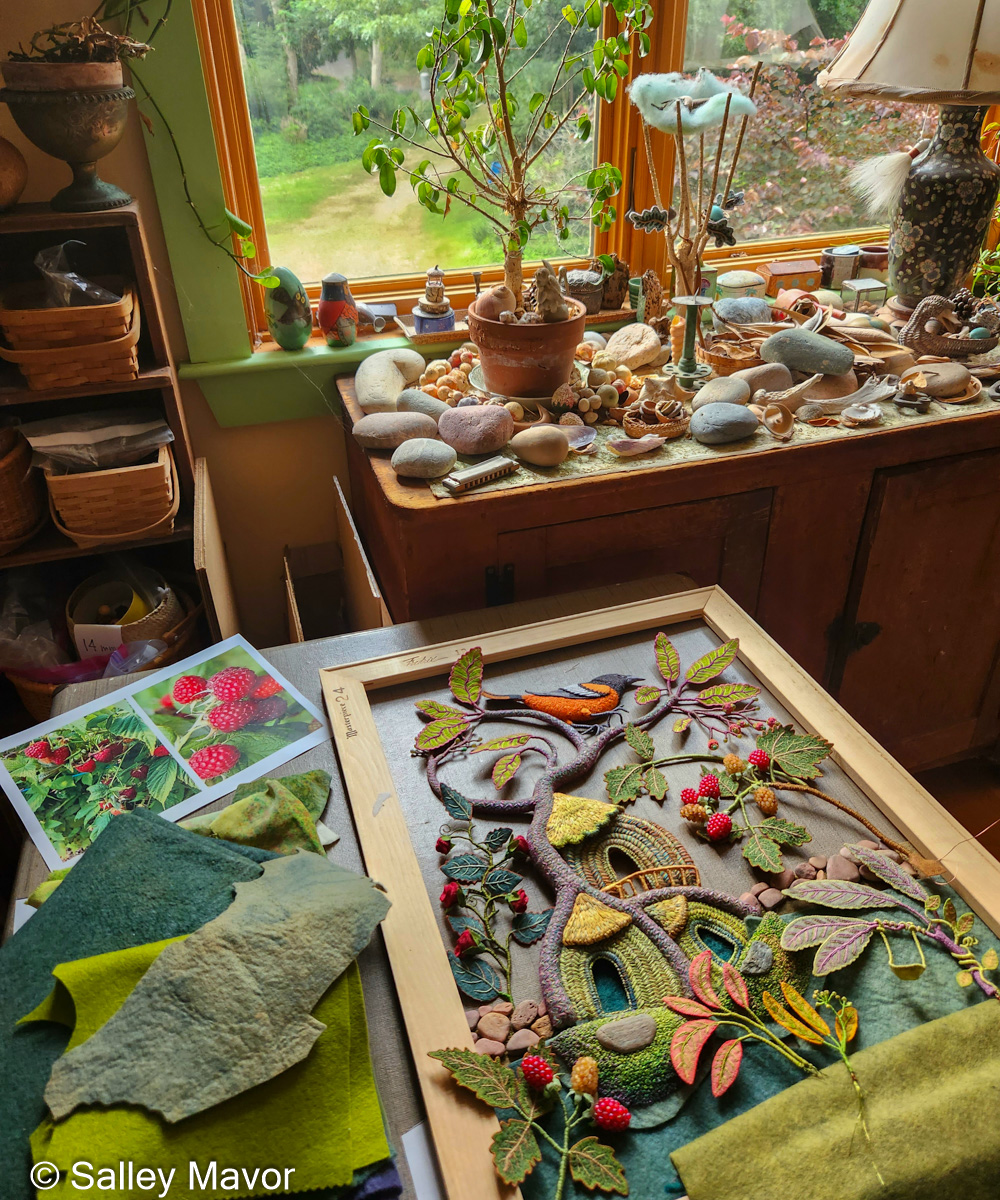
Part 7 in the series of posts about making my piece Summertime features photos and videos documenting the process of creating the raspberry plants. So far, I’ve written an overview of the piece, Part 1 – Tree Trunks, Part 2 – Tree Houses, Part 3 – leaves, stems & branches, Part 4 – Baltimore Oriole (body), Part 5 – Baltimore oriole (head and feet), Part 6 – rose vine, Part 8 – stitching flora, and Part 9 – moss, sky and stone wall.
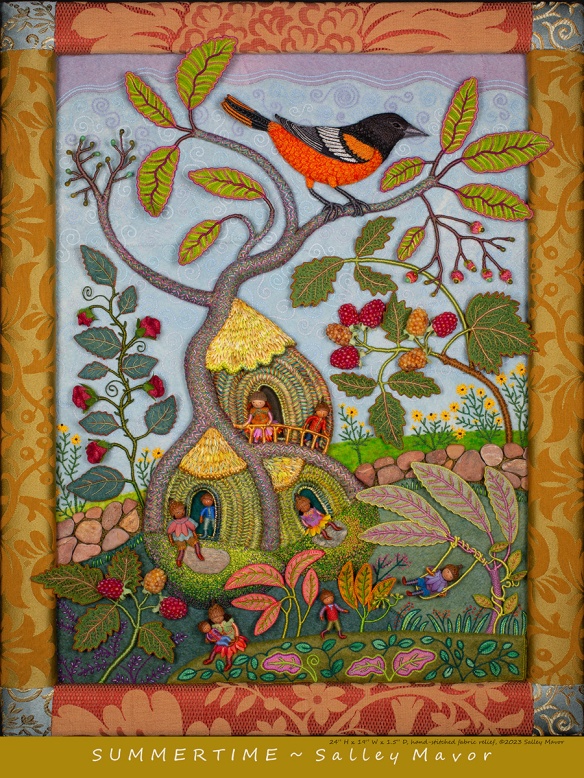
Summertime is the summer scene in a series of four seasonal landscapes that capture the wonder and magic of the natural world. Posters, note cards, prints, bookmarks, and jigsaw puzzles of Summertime and the other scenes in the series (Frosty Morning, Mossy Glen and Harvest Time) are available in my Etsy Shop.
See the Four Seasons Series and dozens of other works in my exhibition, To Every Season: Works by Salley Mavor at the New England Quilt Museum, Sept. 9 – Dec. 31, 2025.The show includes recent work, as well as rarely seen early pieces on loan from private collections.
RASPBERRIES
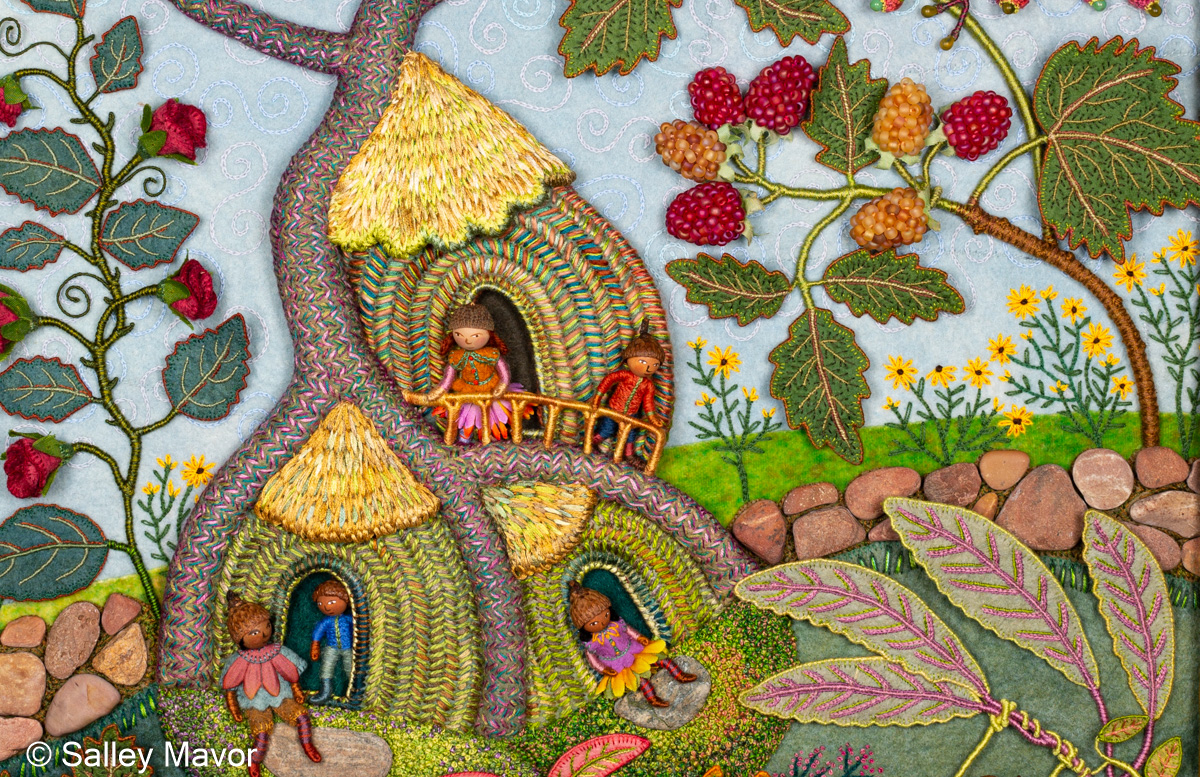
The idea to add raspberries came late in the process, months after I’d begun stitching and constructing the piece. I was inspired by our new raspberry patch, which was producing the most succulent fruit I’d ever grown. The raspberries practically begged to be featured in the summer scene! My original design included flowers, but I was much more excited about making raspberries.

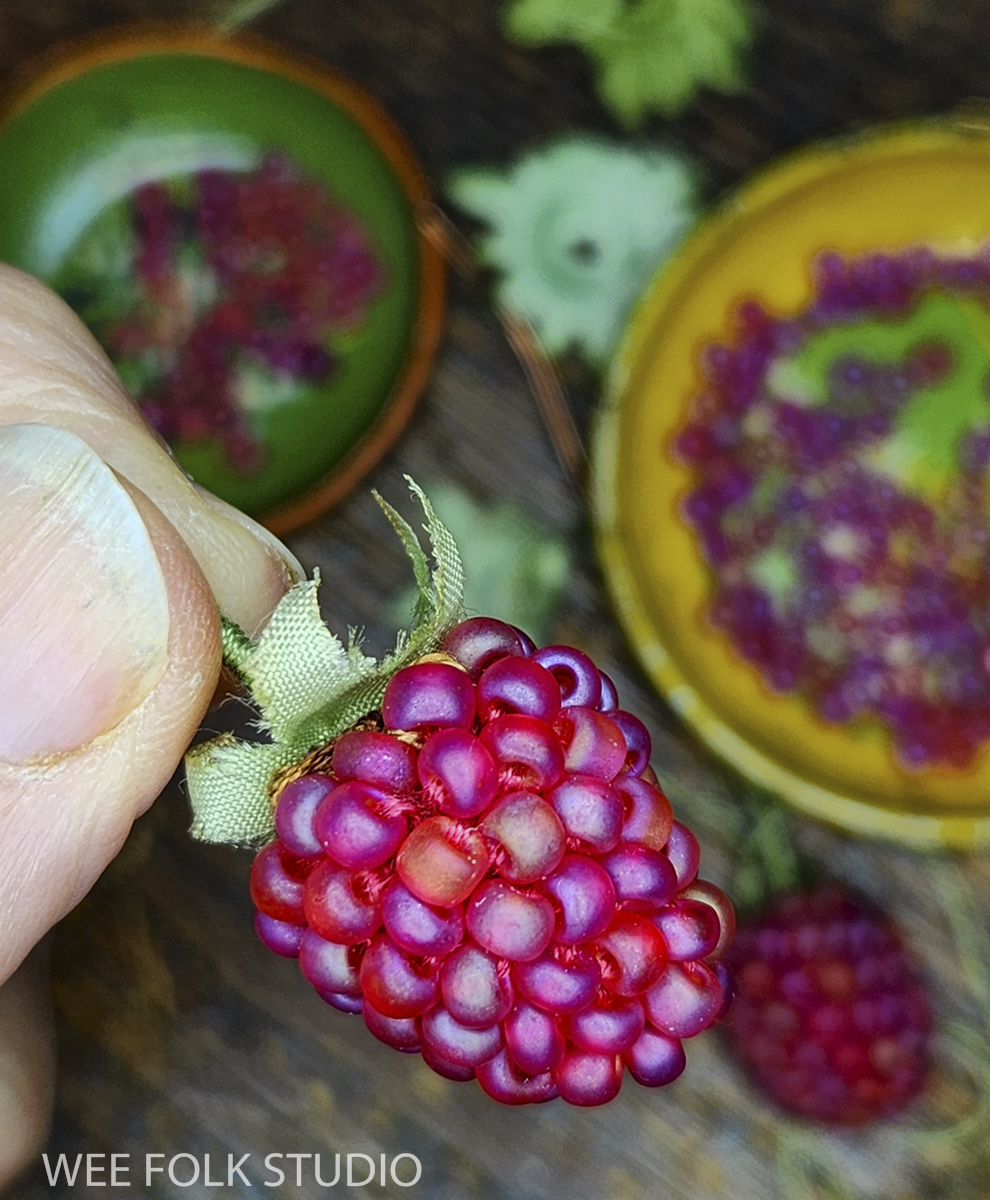
Now came the fun part, where I examined raspberries, both real and in photos, imagining how to replicate them with stitching and found objects. I searched through my stash and found some frosted glass beads that were just the right shade of reddish pink. The goal wasn’t to reproduce exact copies, but to make the imitation raspberries look even more scrumptious than real ones. The following video demonstrates how I made the felt core, sewed on the beads, and wrapped the stem with embroidery floss.
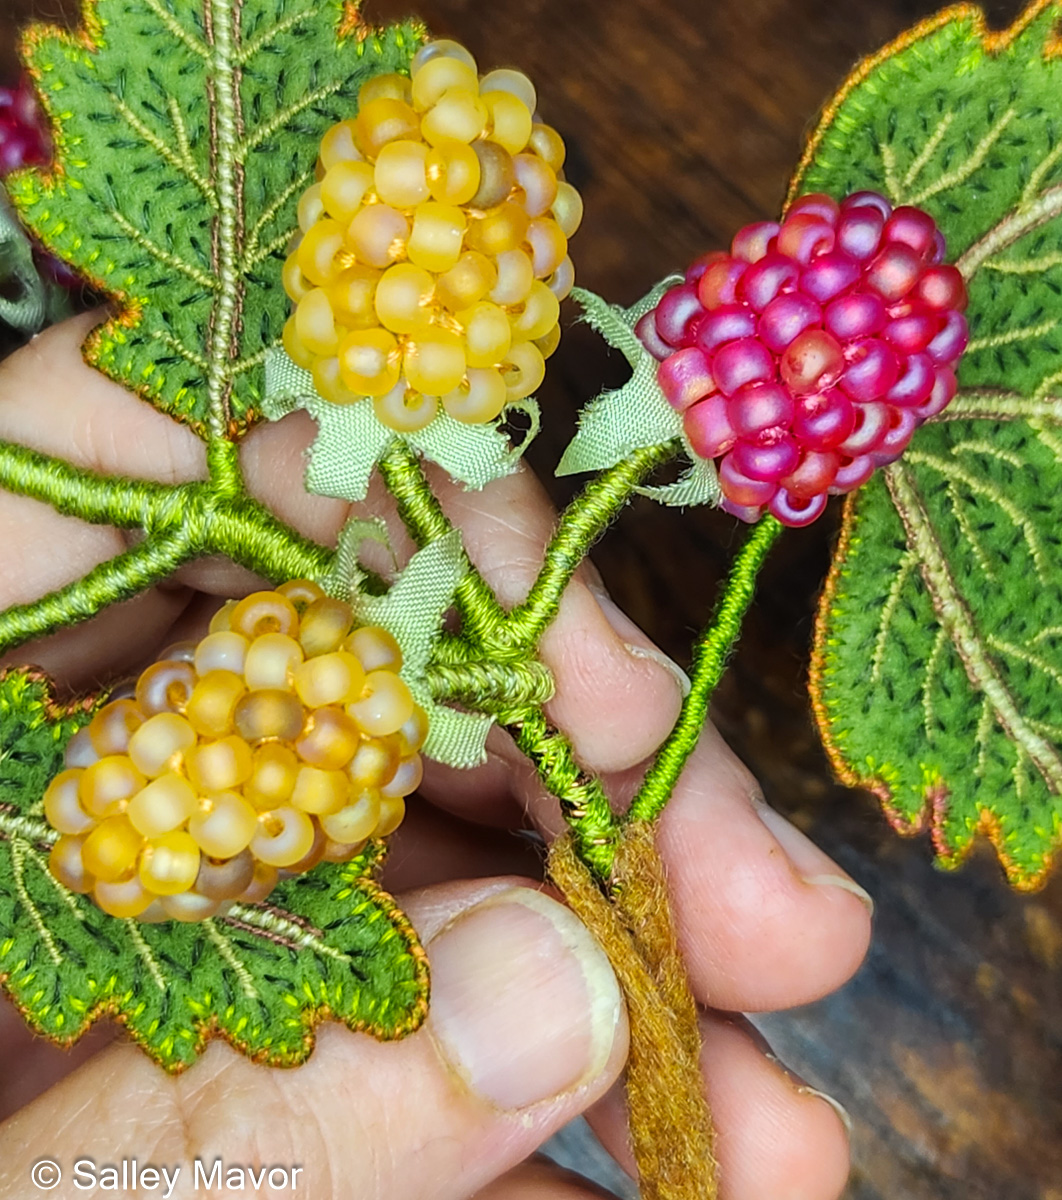
My supply of beads was limited, so I conserved them by covering just the top and sides of the felt core, leaving a bare back that could more easily be sewn to the background fabric. When I ran out of red beads, I used yellow ones to make more raspberries.

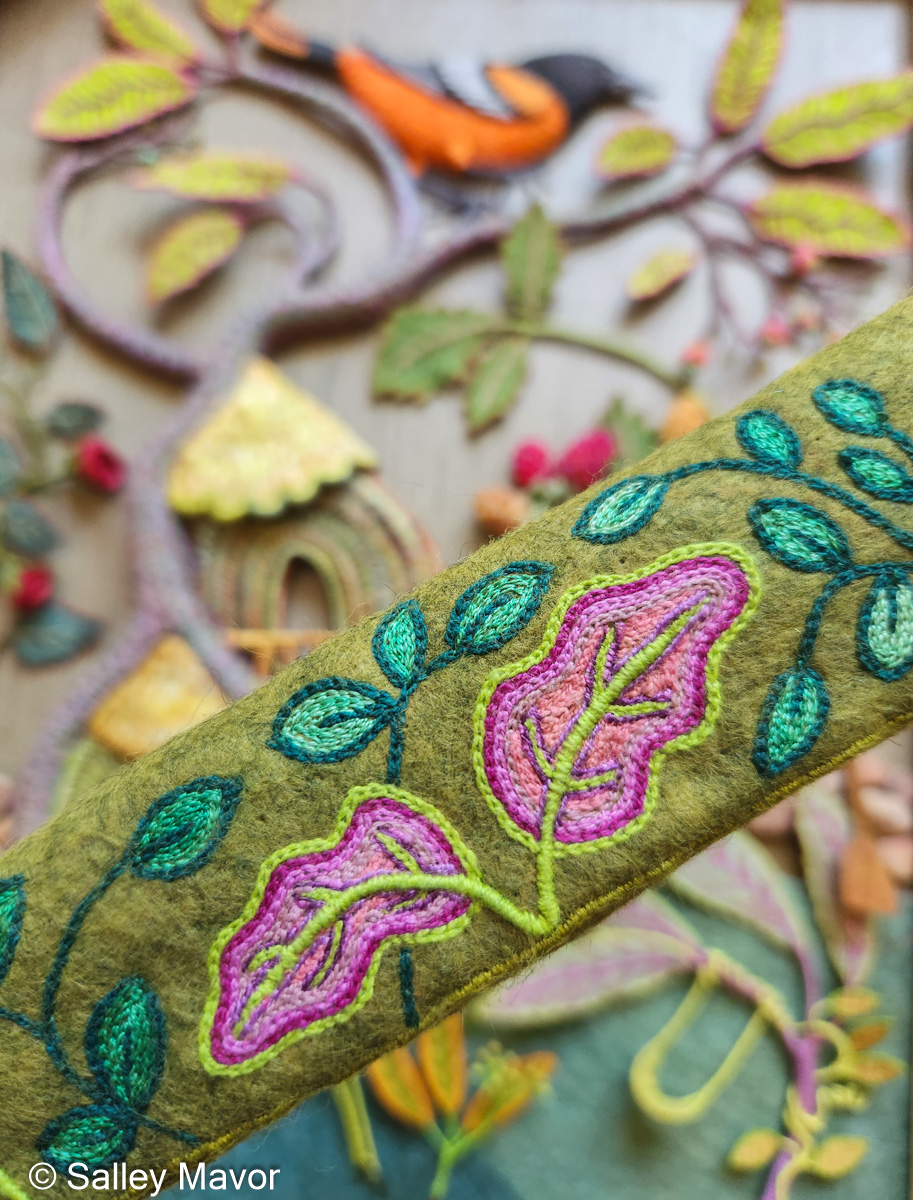
RASPBERRY LEAVES
Looking closely, I noticed that raspberry leaves were quite complex, with fine saw-like teeth that would be hard to replicate in felt. I ended up making a stylized version that was as pointy as I could get.

The following video shows how I sewed wire around the outside edge and embroidered veins on a felt raspberry leaf.
Once there were enough berries and leaves, I linked them together with wire branches. Then, I covered the wire with embroidery floss.

This video shows how I twisted Parawire to make stems and branches and then wrapped the wire with embroidery floss.
This video shows how I covered the thicker bottom branches with a strip of brown felt.
This project is a clear example of the importance of flexibility in my working process. There’s a reason that I steer away from textiles and needlework that involve grids, graphs or patterns. In the beginning, I’m not so certain about how my art is going to develop. Sure, I start with a basic design and structure, but I like to keep a door open for change. In this case, raspberries showed up.
Stay tuned for Part 8, where I’ll share photos and videos documenting the process of stitching flora in Summertime.
To keep up with new posts, please subscribe to this blog. Your contact info will not be sold or shared. If you’d like to see more frequent photos tracking the projects in my studio, please follow me on Facebook, Instagram and BlueSky.

Sally, You are amazing. Thank you so much for sharing your process. Your explanations and videos are so clear.
Those raspberries look so real. I love your work. It is so wonderful.
Very painstaking work! And beautiful!
You are so generous with your talents. Thank you!
Those berries look good enough to eat!
Exquisite!
Love your raspberries! As I love all your other work❣️❣️❣️
wow! The raspberries look better than real! Thank you for sharing your technique!
Sally,
Your work is exquisite! Your talent is amazing and your love for art shows through each of your projects.
I sew, quilt, crochet and have very basic knitting and embroidery skills, but seeing your work has given me inspiration for adding embroidery to more of my sewing/quilting projects.
Thank you for sharing your skills.