

In the series about making Summertime (the fourth of my seasonal landscapes), I share photos of different stages of the project and explain what went through my head while I was working on it. In this post (Part 2), I show how I made the thatched roof treehouses nestled in the tree trunks.
For a more comprehensive understanding of my process, I encourage you to explore other posts in this series: Overview of the piece, Part 1 – Tree Trunks, Part 2 – Tree Houses, Part 3 – leaves, stems and branches, Part 4 – Baltimore Oriole (body), Part 5 – Baltimore Oriole (head and feet), Part 6 – rose vine, Part 7 – raspberry plants, Part 8 – stitching flora, Part 9 – moss, sky and stone wall, and Part 10 – wee folk.
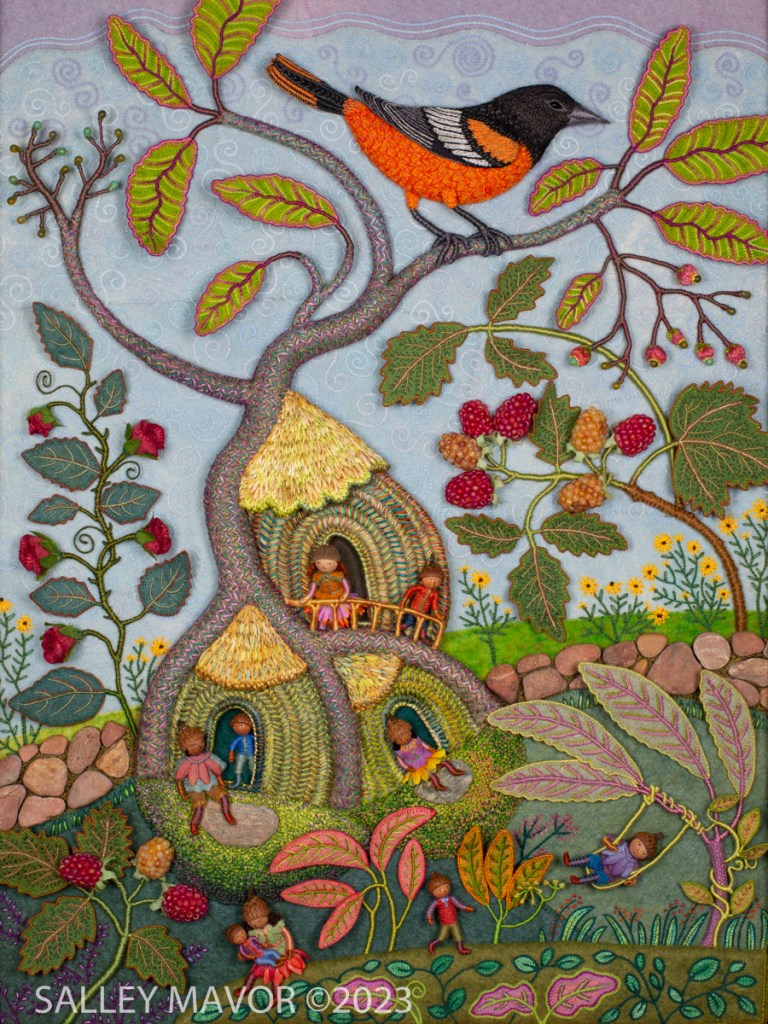
Summertime is the summer scene in a series of four seasonal landscapes that capture the wonder and magic of the natural world. Note cards, prints, bookmarks, and jigsaw puzzles of Summertime and the other scenes in the series (Frosty Morning, Mossy Glen and Harvest Time) are available in my Etsy Shop.
Thatched Roofs
I hardly ever buy new materials because I have enough fabric, wire, beads, and thread to last a lifetime. However, sometimes I feel pushed to look beyond the containers full of miscellaneous supplies in my studio for something unique. That’s how I found straw silk made by Silk Road Fibers. I first came across it when searching for thatching materials for the roof in the South American scene in my picture book, MY BED: Enchanting Ways to Fall Asleep around the World.

So, when it came time to make the tree house complex for Summertime, I knew exactly what to use to thatch the roofs.

Straw silk is different from other silk embroidery ribbon, which can be too slick for my taste. Straw silk’s rough texture and variegated colors give it the kind of natural appearance I’m looking for.
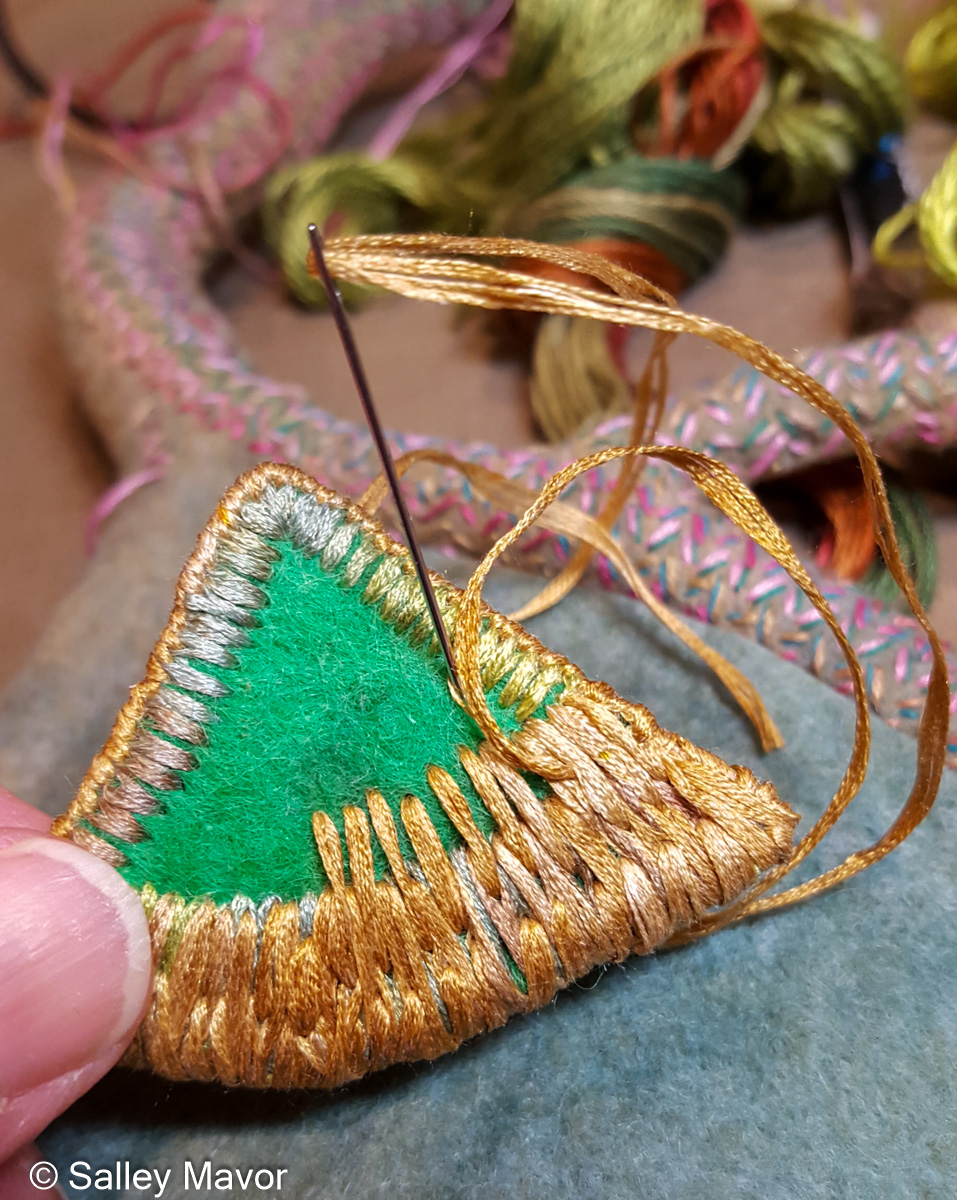
Doorways and Huts
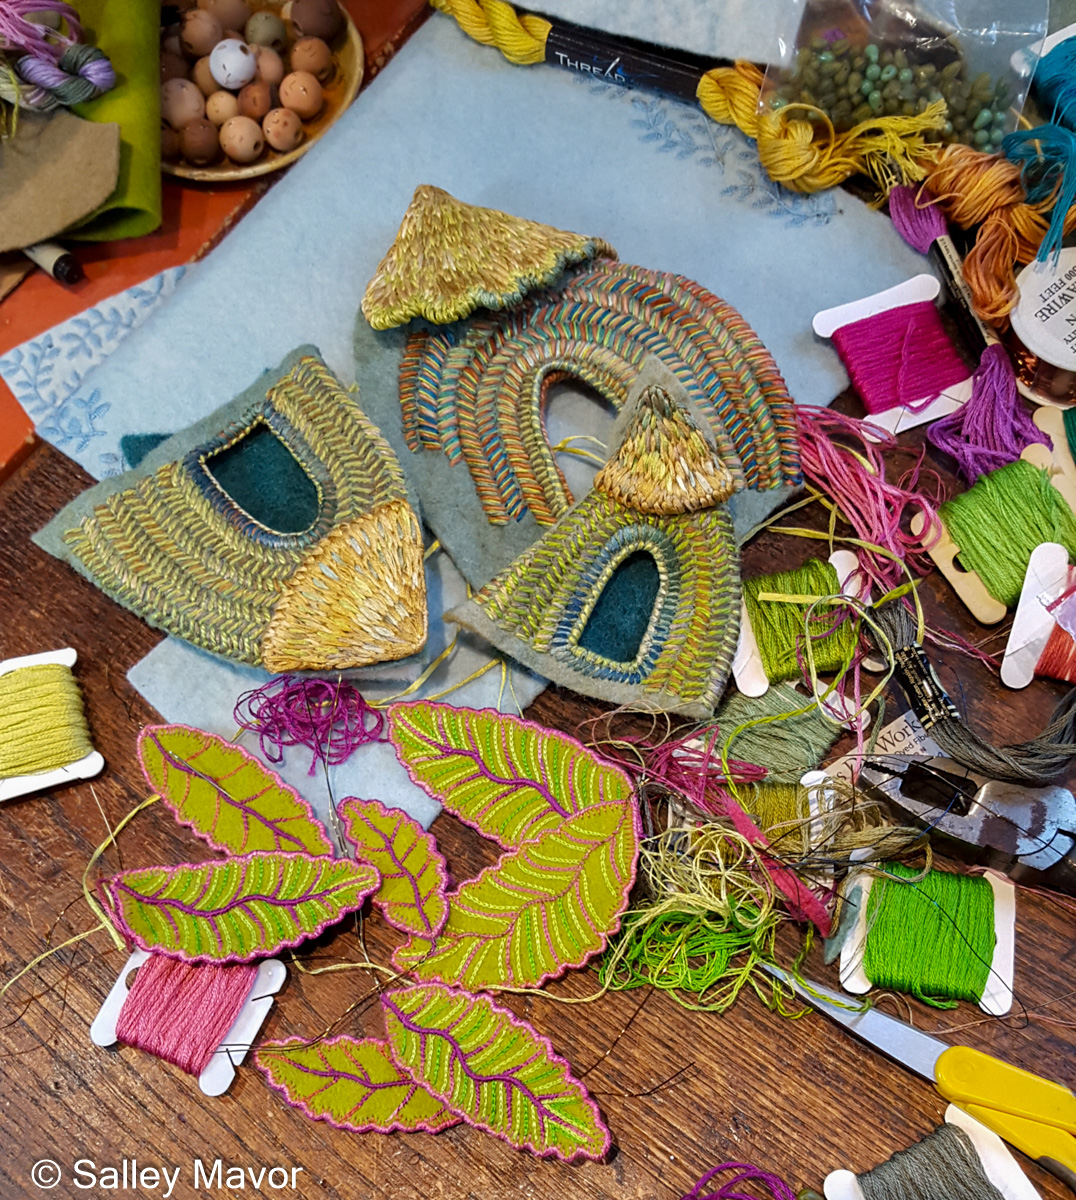
To make the doorways, I cut out holes in pieces of wool felt and edged the openings with a combination of straw silk and pima cotton.
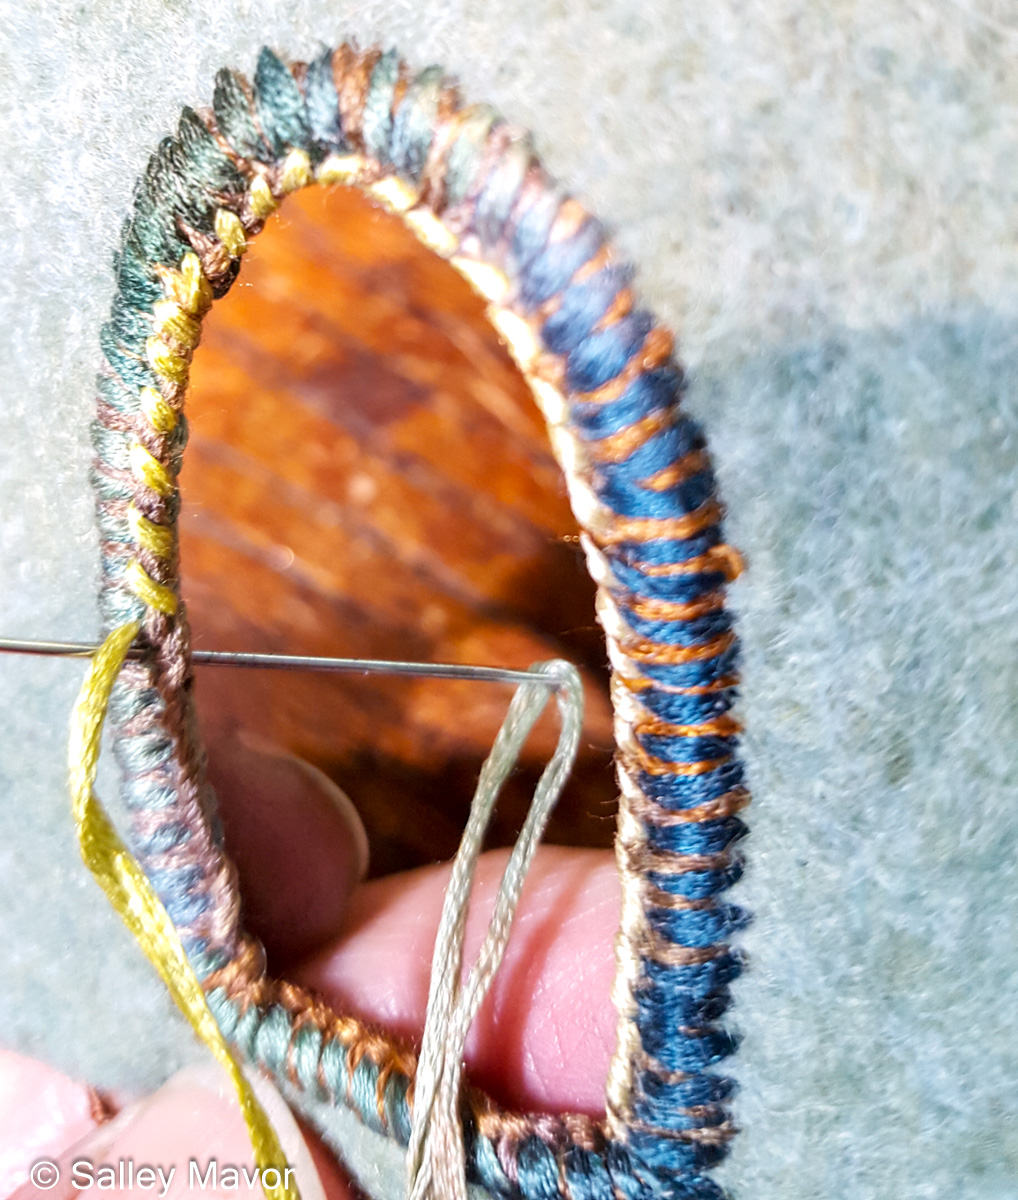
I liked how the herring bone pattern around the doorway created a three dimensional effect, so I continued covering the entire hut that way.

At some point, I realized that the doorway openings were too flimsy and needed reinforcement, so I stitched wire (Memory Thread) around the open edges.

After stitching the roofs to the top of the huts, I decided to add loops around the bottom edge, like a pixie haircut with bangs.

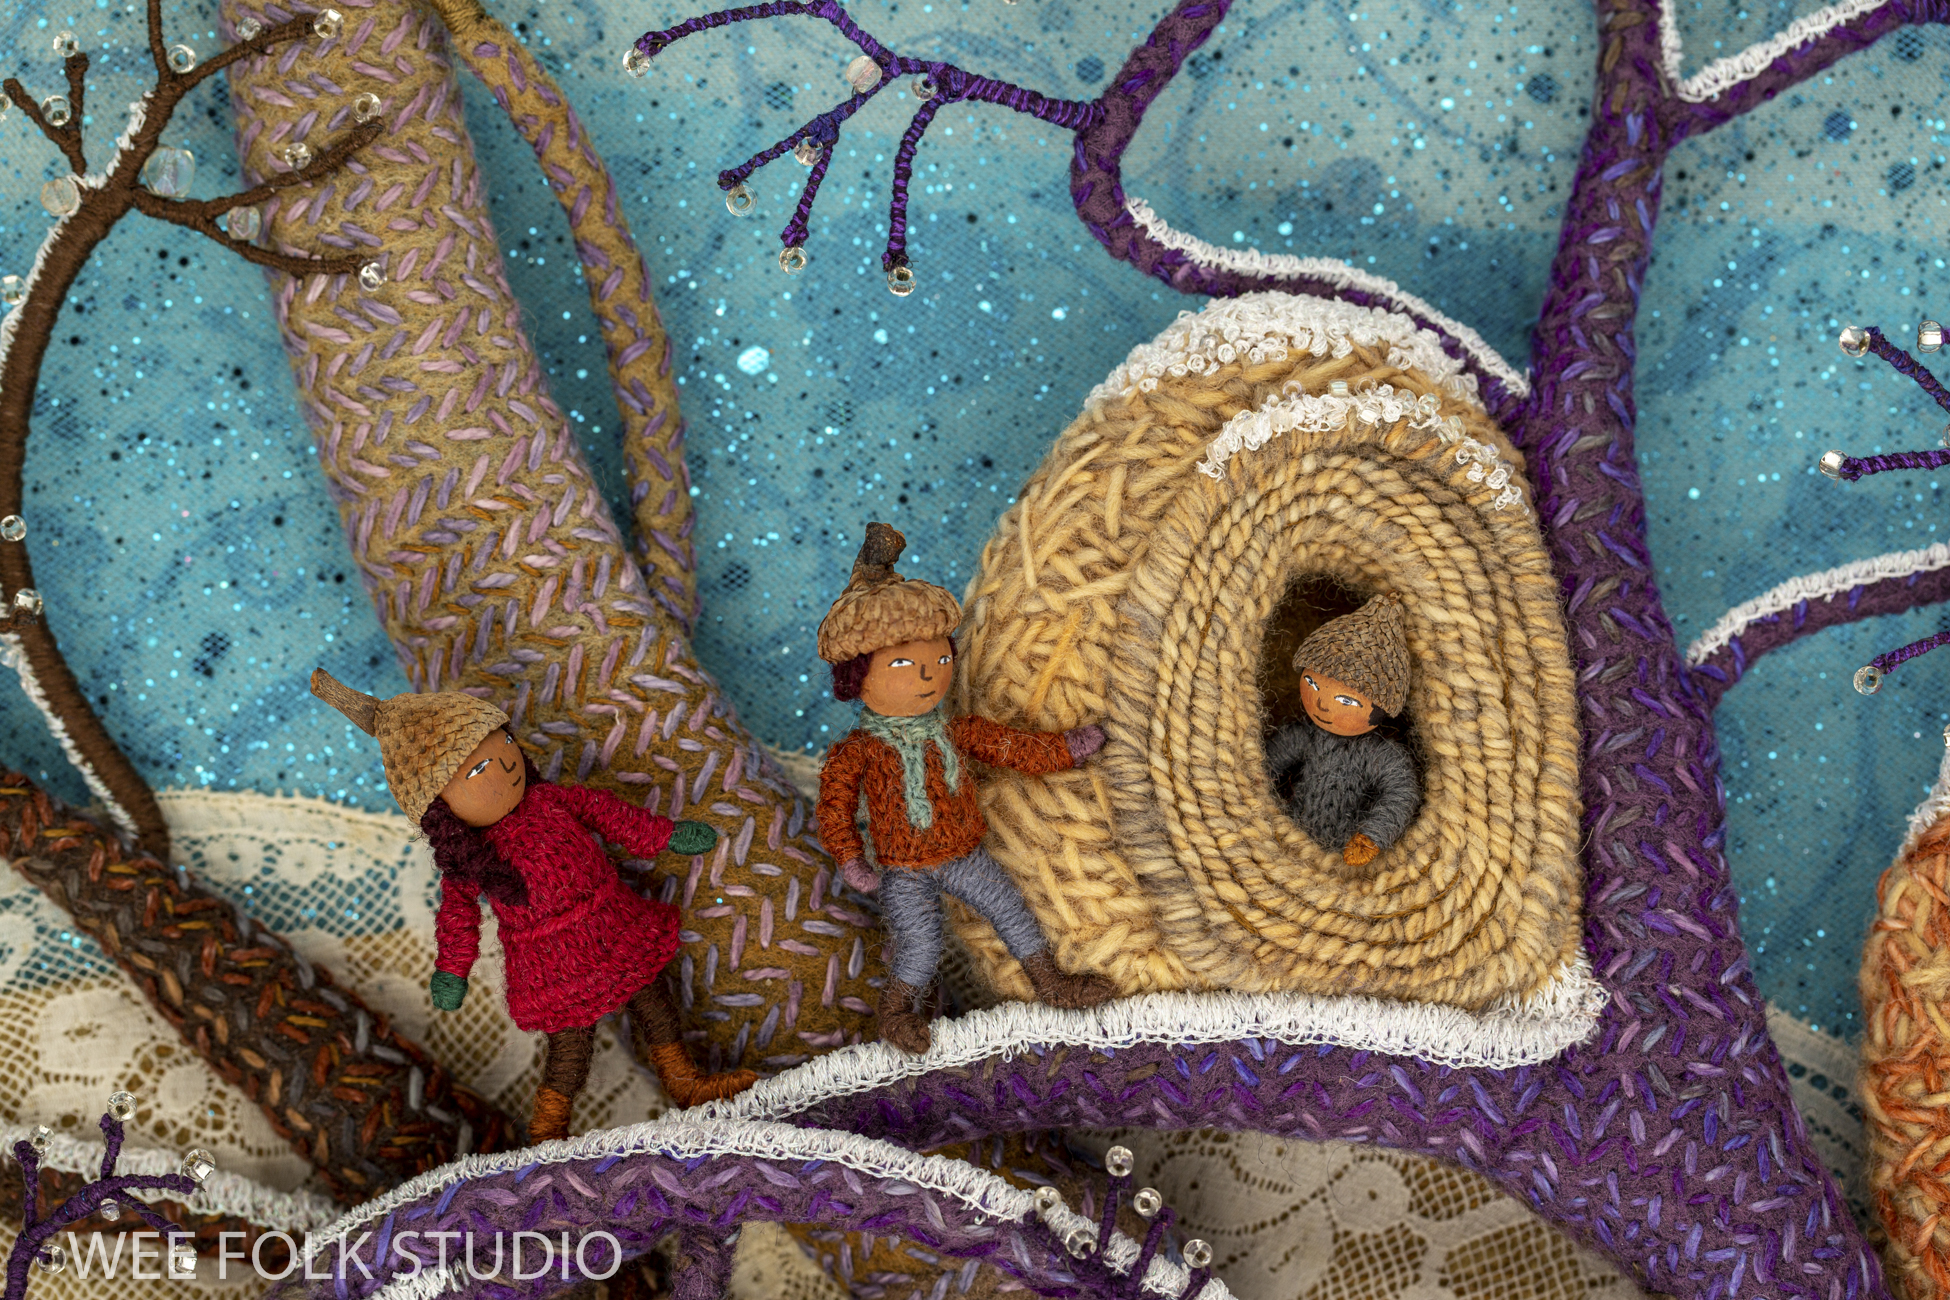
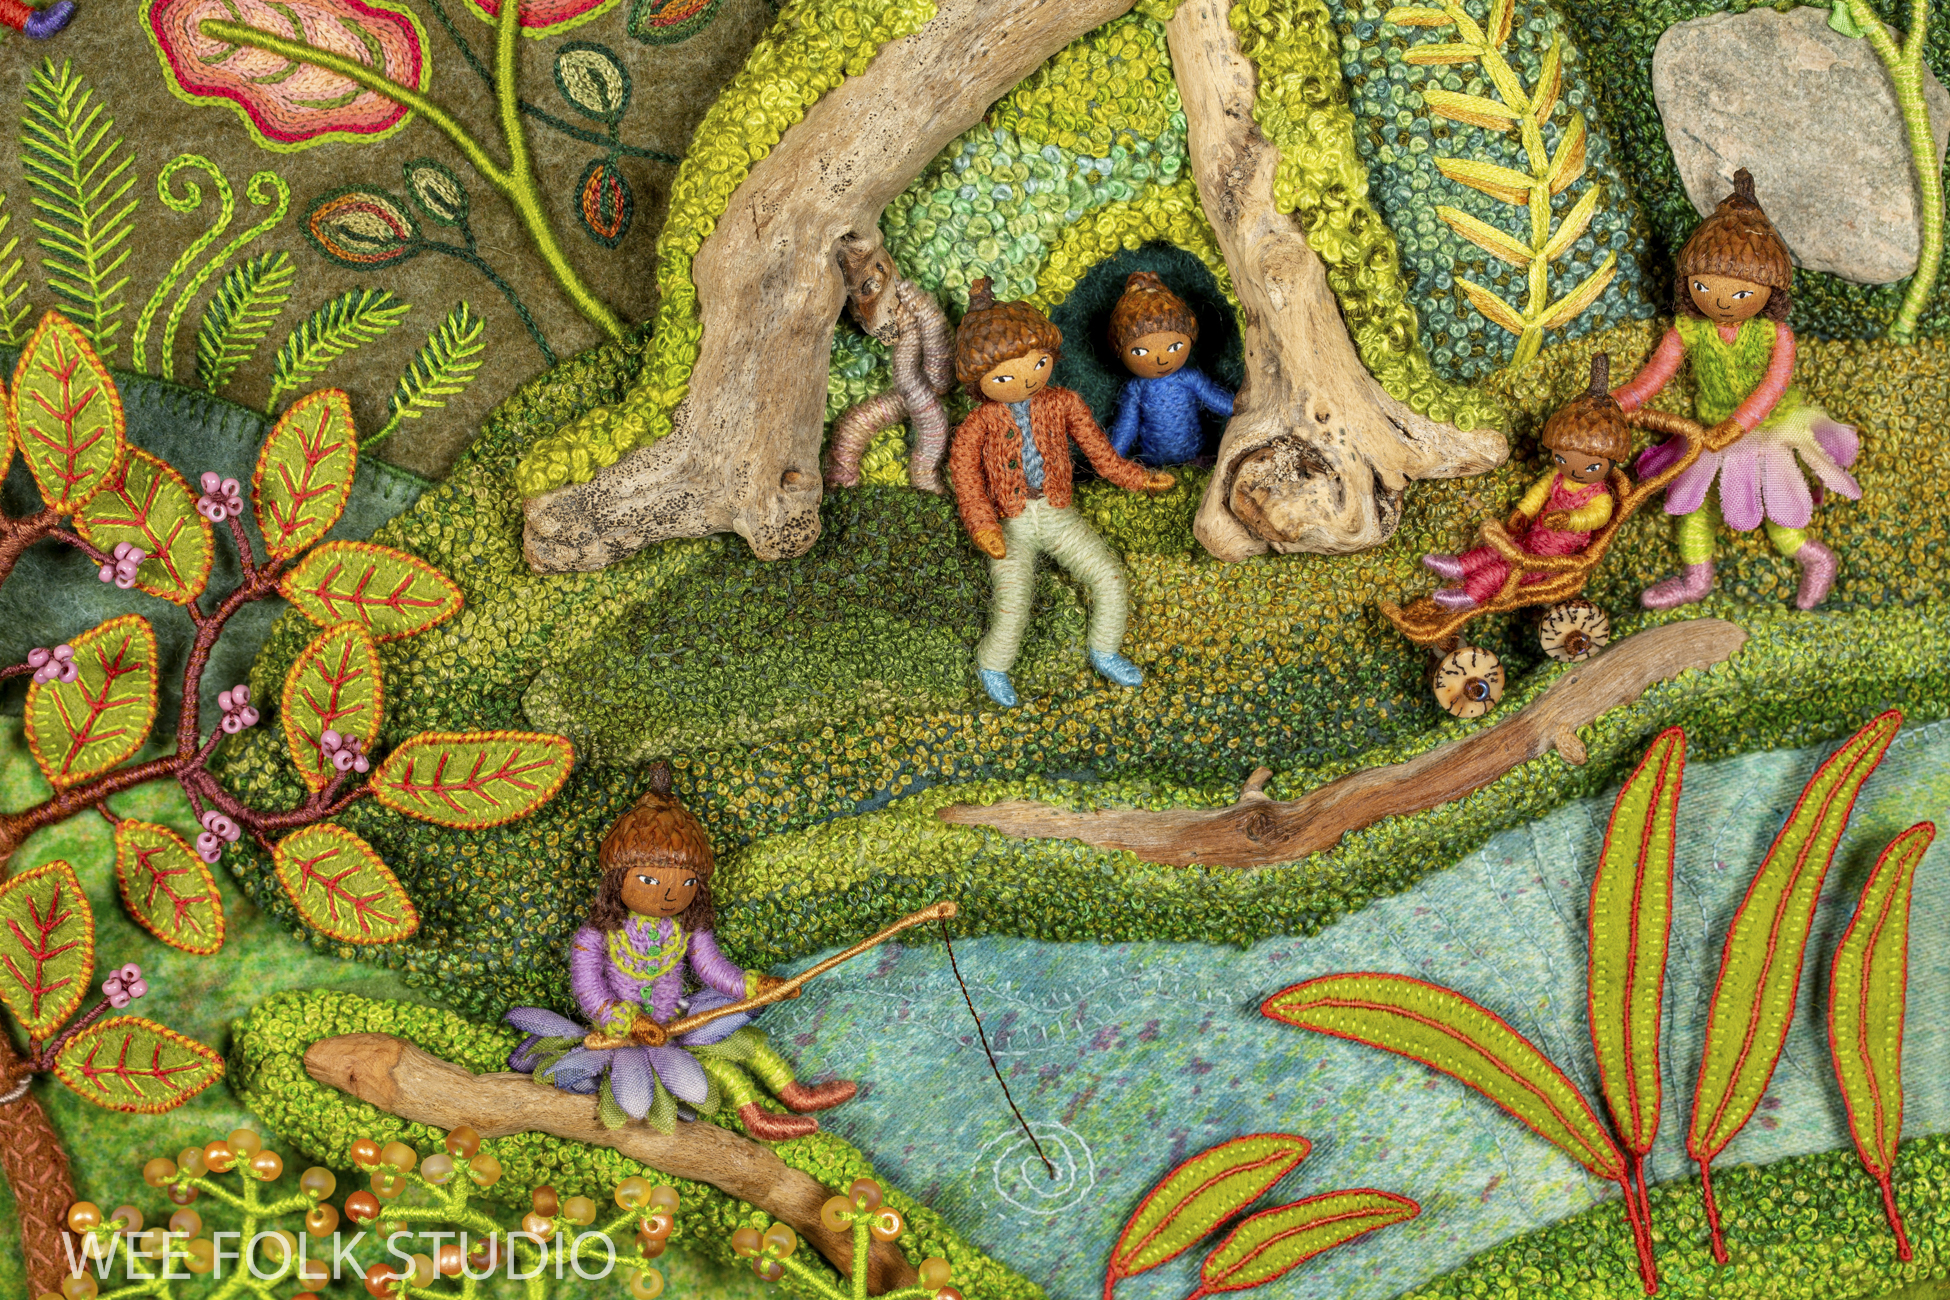
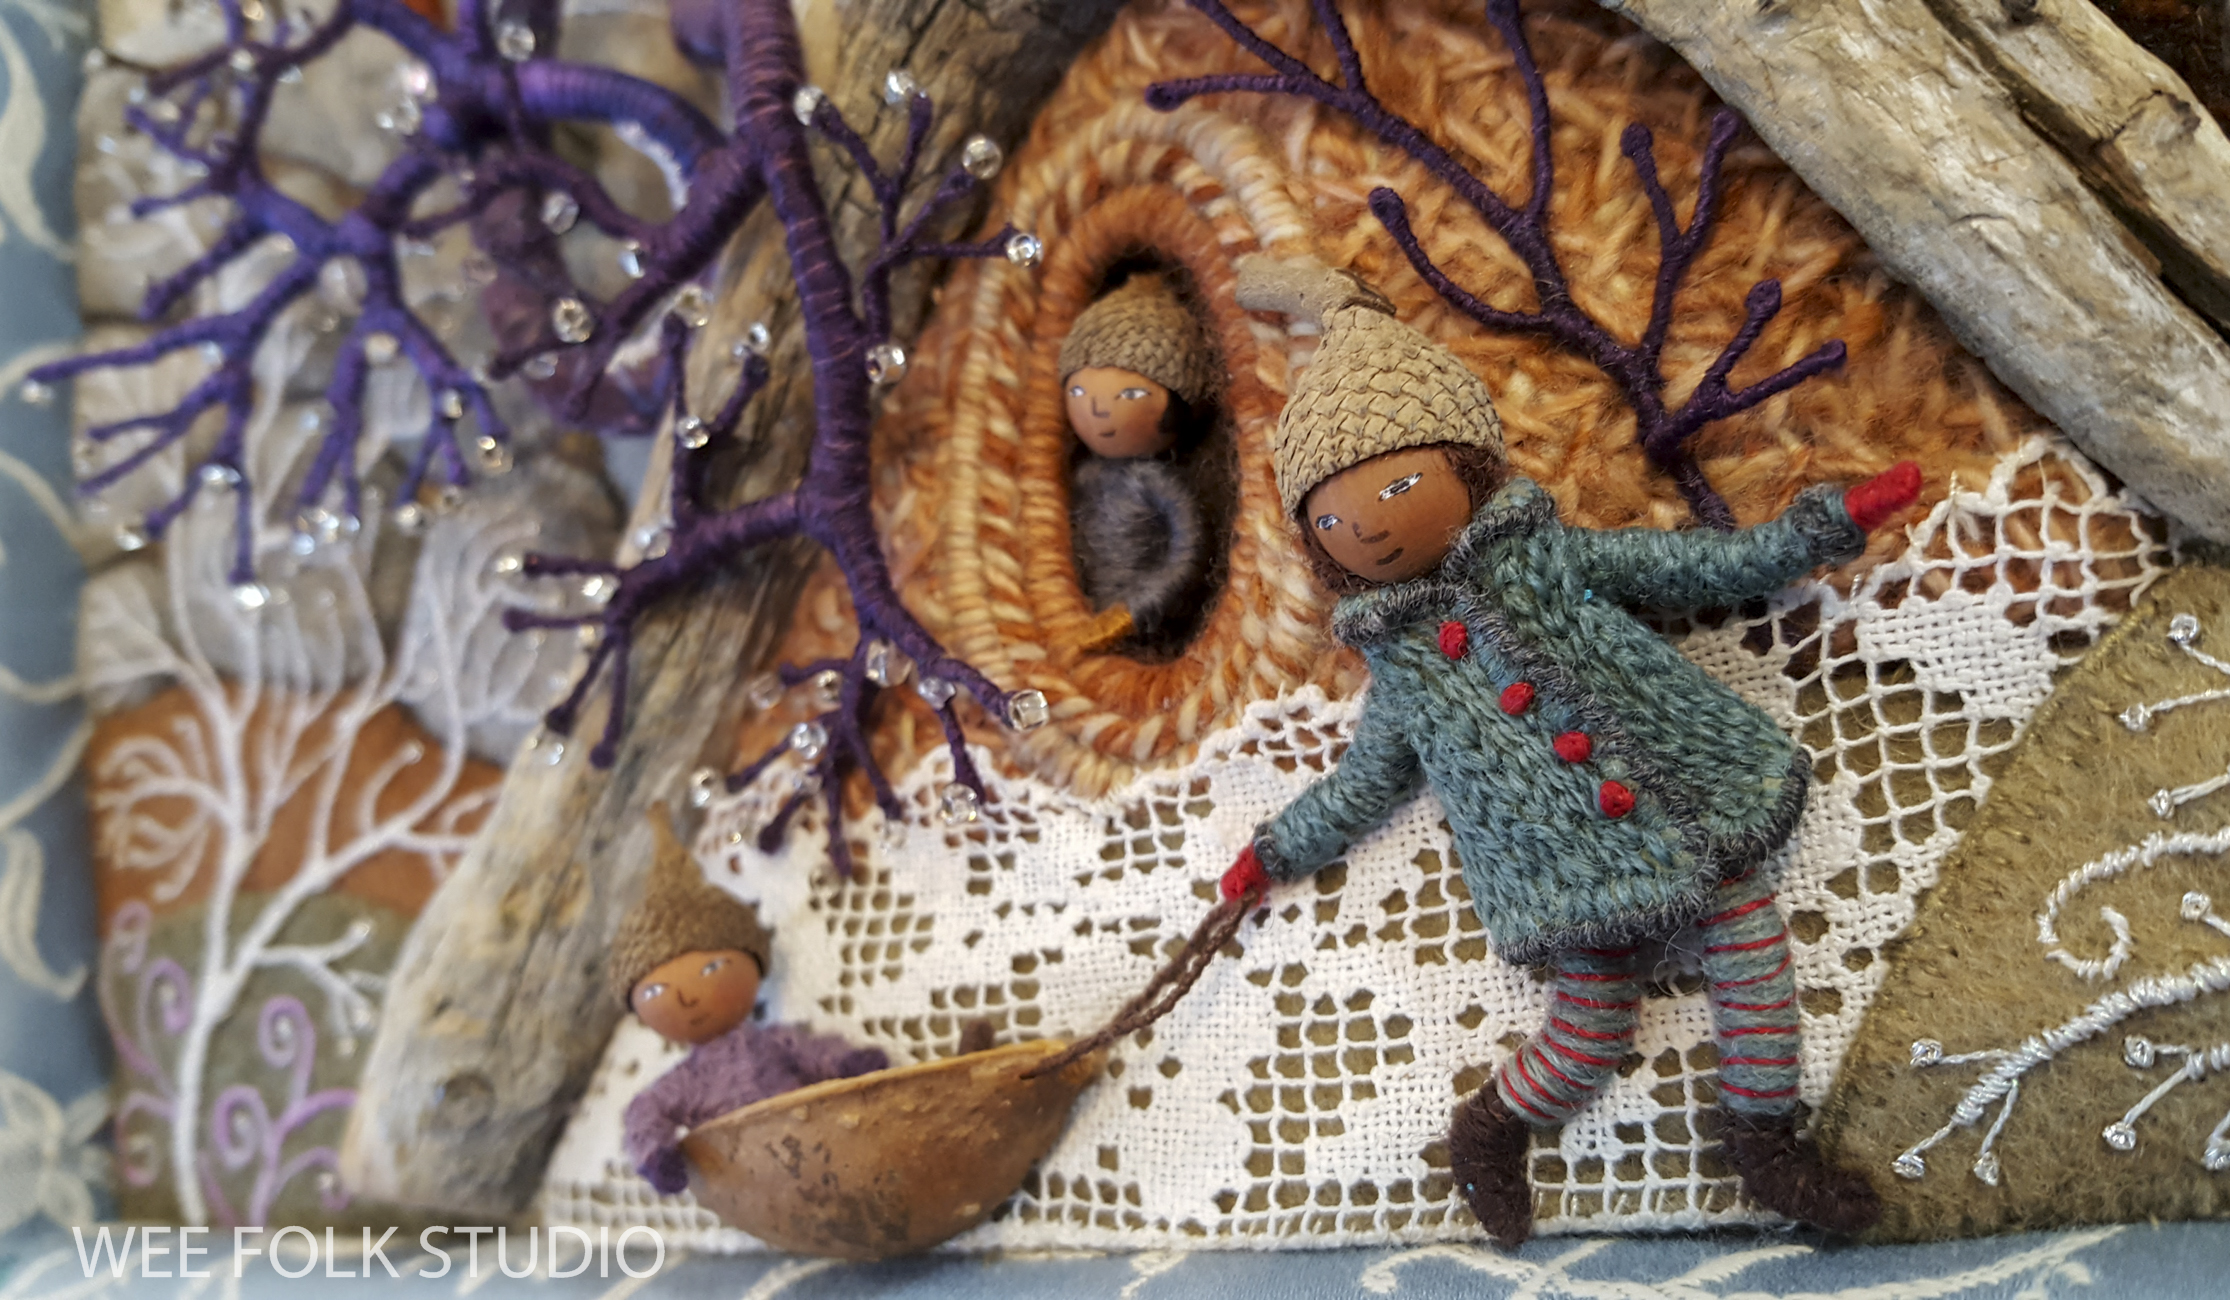
Each landscape in the Four Seasons Series includes housing for the wee folk, either perched in trees, dug into hillsides, or in underground tunnels. The slideshow below features examples of a variety of cozy shelters found in Frosty Morning, Mossy Glen, Harvest Time and Summertime.


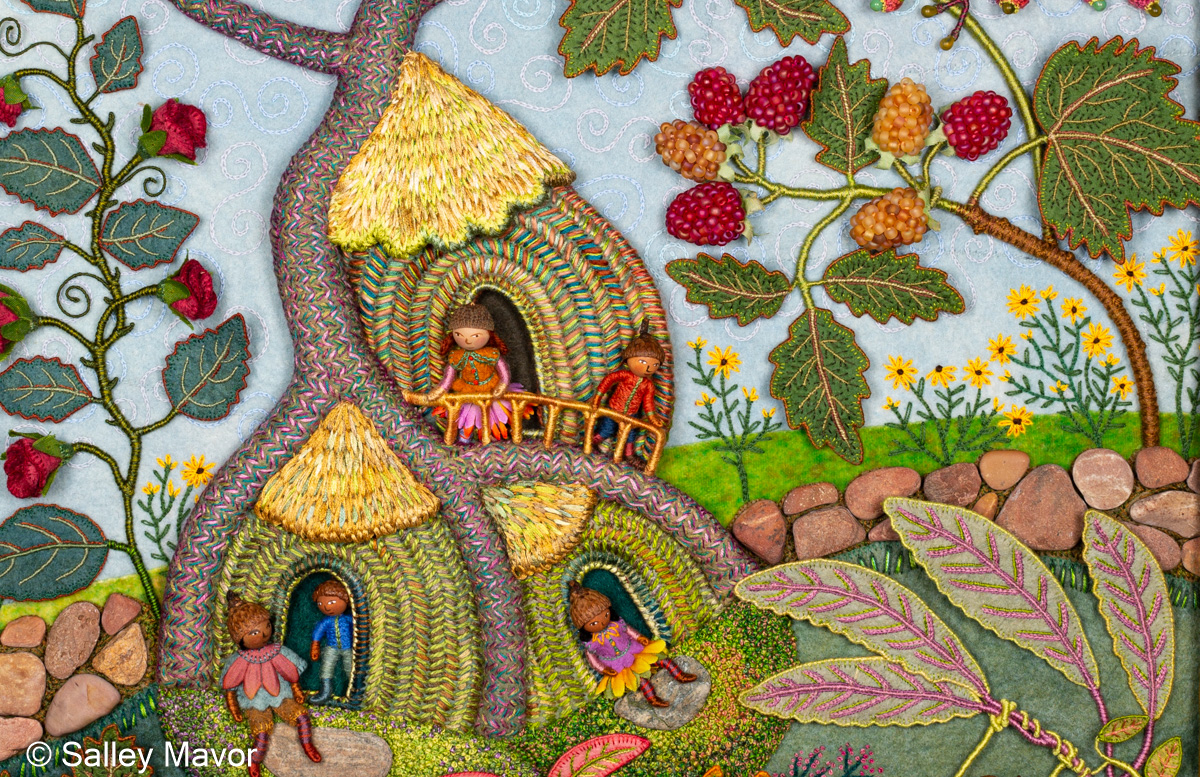
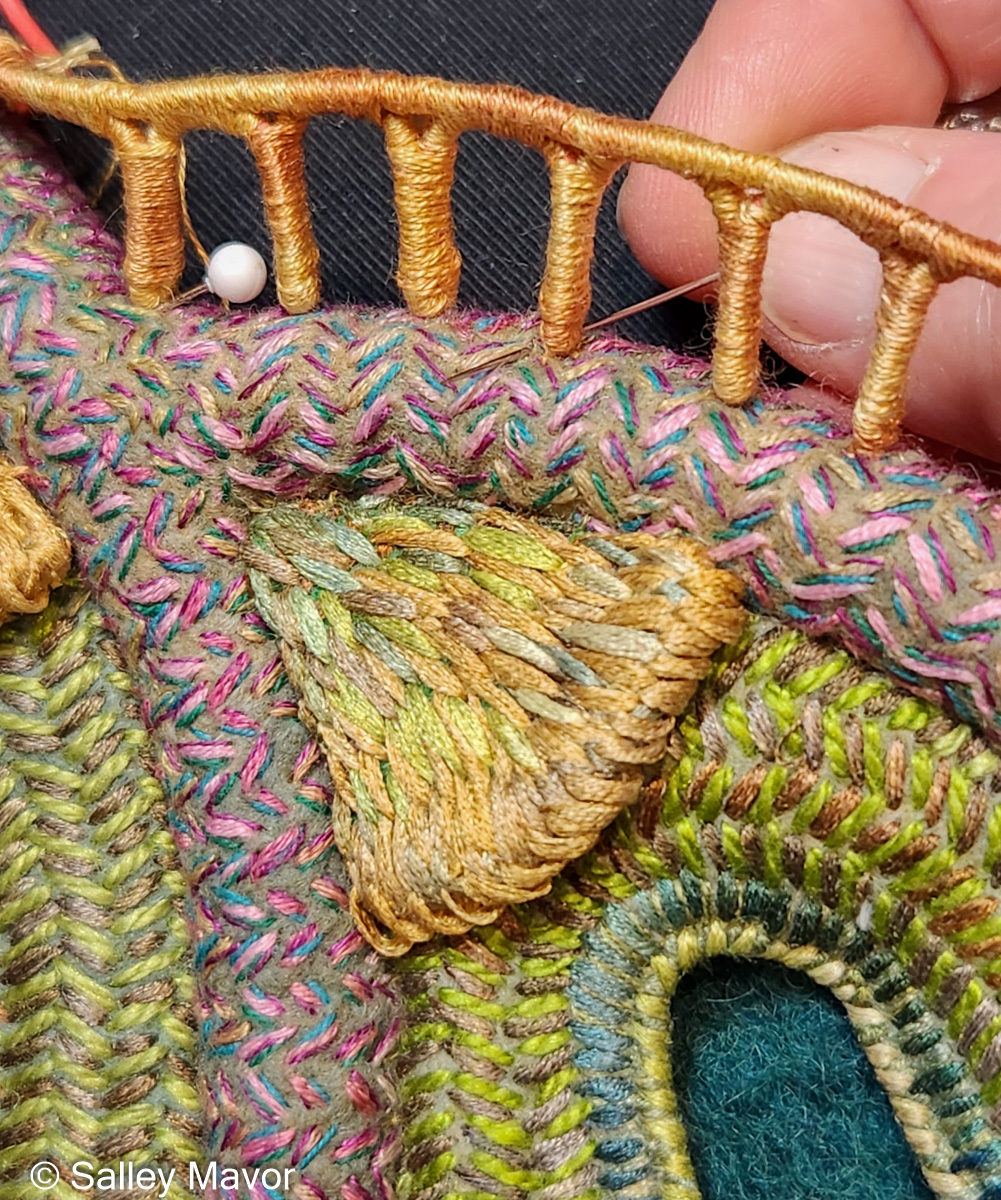
When I first imagined Summertime, I pictured thatch roofed huts clustered at the base of the center tree, with at least one elevated high enough to warrant a balcony.
I formed the balcony out of rubber coated electrical wire and wrapped it with embroidery floss.

Then, I sewed the balcony columns to the tree trunk.
It felt good to create homes for the wee folk and move on to others parts of the project!

Stay tuned for future posts in this series about Summertime. In Part 3, I will share photos, videos and commentary about how I made leaves and branches. If you want to receive email notices when I publish new posts, please subscribe to this blog using the form below.

To keep up with new posts, please subscribe to this blog. Your contact info will not be sold or shared. If you’d like to see more frequent photos tracking the projects in my studio, please follow me on Facebook, Instagram and BlueSky.

Thanks, Salley! This was all so interesting. I have never heard of straw silk before.
So Beautiful!!!!!
Phenomenal attention to detail. Love your work!
Such pretty art:) I’m a poet.. but had to drop by to say.. how beautiful:)