Pins (part 3)

I enjoyed the challenge of coming up with ways to make the animals’ extremities and found beads for their legs, ears, noses and eyes. The business grew to a point where most of my sales were to shops, on a wholesale basis. To keep the process interesting, I came up with new designs like this bread and cheese and scallop shell.

 In an effort to meet people and to make more for my labor, I became a member of the Christmas Store, a seasonal cooperative in Cambridge and commuted from the Cape to do my work shifts. For a display, I built a fruit and vegetable stand with crates made out of popsicle sticks.  Later, I made patterns and wrote directions on how to make the pins for the 1982 Holiday Crafts issue of Better Homes and Gardens magazine.     

 After about 5 years of mass producing the pins, I moved on to other things, including motherhood.  Since then, I’ve had several business ventures, which inevitably reach a point when I’ve had to make a decision to grow or stop all together. I’ve always chosen freedom, never wanting to spend all of my time running a business, even though I see the promotional part as an important element of a creative project. And it’s not as if I walked away from a gold mine. At the wholesale price, I was making so little for my time. Being an artist means coming up with new ideas and making the same thing over and over has therapeutic, although limited appeal. Even the idea of hiring others to do the work made me nervous. I knew that I would be a miserable boss, having to hold others to a high standard of workmanship at low pay. And, I realized that I am happiest while making things myself! I have no exact record of how many pins I made, but it must have been well over a thousand. Throughout, the peapod was a best-seller, which was ironic because it was the simplest and fastest to make of all.   

 To keep up with new posts, please subscribe to this blog (top right column on the home page). Your contact info will not be sold or shared. If you’d like to see more frequent photos tracking the projects in my studio, please follow me on Facebook and/or Instagram  

Pins (part 2)

Continued from Pins (part 1).

I started adding new designs and soon had 20 different pins.  It was time to be more serious about marketing and I decided that a catalog was needed to reach more people. A former classmate from RISD, Niki Bonnett, volunteered to develop some promotional materials for my business.

Pin catalog designed by Niki Bonnett, 1980

Niki devised a poster that could be cut up in strips and glued together in such a way as to make an accordion-fold catalog. She made drawings, with descriptive hand written notes identifying materials and features of each pin.  For the sake of economy, the poster was printed in black and white, and I hand colored the pin illustrations with markers. I constructed a cover for each catalog out of cloth-covered cardboard. Then I glued the beginning and end of the accordion folded pages to the inside of the front and back covers, along with ribbon ties. The finished catalog size was 4″ x 3″.

pin poster designed by Niki Bonnett,1980

In a recent conversation from her home in Ashville, NC, Niki remembers this about the project:

“When I did your job, I was working at Hill, Holliday, Connors, Cosmopulos (HHCC), a well-known ad agency in Boston. I was doing freelance work at night to build my portfolio and I loved your pins.

For your project, I designed a poster with all the art and type as white on a black background. Once printed, it could be cut up into horizontal strips that were then hand colored, accordion folded, taped together and hand-bound into a fabric wrapped cover (also handmade) that tied shut with a bit of ribbon. Obviously, back then I didn’t think about my time as part of the cost of doing the project, and I had plenty of it back then too! All it cost was the printing of some black and white posters! Those posters looked great on their own, and it was lots of fun making those books; they were little gems.

In addition to the design and production of the piece, I also did all the illustrations of the pins, the calligraphy naming each pin style, and I created that typeface that your name and other copy were set in. I got one of the typesetter reps who visited HHCC every day to give me an entire alphabet of uppercase, metal letters (“slugs”? I forget the terminology for those bits of lead type). The letters were tiny, maybe 12 point. I used a brayer to roll black acrylic paint out on a piece of glass and then hand printed each tiny letter on rough newsprint until I got the “perfect” letter. Once I chose the letters for the entire alphabet, I blew them up to four times the original size on the Photostat machine (Good thing I had a key to that ad agency! Can you imagine being able to sneak back into a large office now to work on your own stuff from 8 to midnight?). That became my typeface from which I made all the “typeset” words. Needless to say, there was A WHOLE LOT of cutting and pasting goin’ on!

House Pin 1977

I was very proud of that project and I know I still have at least one of those books and some pins tucked away somewhere all these years later. I sure do miss the hands-on way design was done before computers; that’s what eventually caused me to quit my graphic design business in favor of making art quilts. I never made the kind of money I made in commercial art with my textile artwork, but it was so enjoyable… the creativity and the “making” of things!”

Salley arranging pins on top of poster, designed by Niki Bonnett, 1980

Mummy pin

Eggplant Pin 1977

My pins were included in Yankee’s Feb. 1981 issue, along with articles about a man who played music on a saw and someone who repaired oriental rugs. Laura Gross wrote, “Sparkling beads and soft velvet compliment her intricate hand-sewn and embroidered Egyptian mummies, palm trees, hearts, carrots, etc. Prices range from $4.00 to $12.00, and her custom work starts at $15.00. In the past, Salley has specially made banjos, cats, mermaids, New York town houses, corn-on-the-cob and a doctor’s bag, complete with gold initials.” I don’t recall making the doctor’s bag, but I do remember sewing on individual yellow seed beads for kernels of corn.

pin catalogs, 1980

People wrote in response to the article and I sent out free catalogs in manila envelopes. I can’t remember how many orders came in, but it was enough to keep me busy for a while.

Pin catalog

The story will be continued in PINS (part 3).

To keep up with new posts, please subscribe to this blog (top right column on the home page). Your contact info will not be sold or shared. If you’d like to see more frequent photos tracking the projects in my studio, please follow me on Facebook and/or Instagram

Pins (part 1)

The peapods were the gateway to my life of stitching. I started making peapods and other pins in art school, as a totally separate project from my class assignments.  Some of my friends knew about them, but my teachers hadn’t any idea.

peapodpin2WM

One day during class, I was listening to a critique, sewing some peapods, when my teacher, Judy-Sue Goodwin-Sturges, noticed what I was doing. She looked more closely, asked me a few questions and said, “Why don’t you do this kind of thing for your illustrations? Try sewing them.”

Watermelon pin 1977
Bunch of Grapes Pin 1977

With that simple encouragement, I stopped trying so hard to communicate the pictures in my head through a brush or pen. Given permission to work outside of the usual illustration mediums, I found that I was much happier and energized. I was no longer struggling to keep in step, but, with a needle and thread, I could dance.  For some reason, I’d been under the impression that in art school, one does “serious” fine art and I’d kept my interest in sewing and handcrafts underground. I rediscovered the joy of creating and learned to trust my hands and gut feelings to help work out challenges.

catpinWM

After graduation, I added more designs and started mass producing pins and selling them on a wholesale basis to shops. I had to really push myself to call shops and arrange business calls with my basket of pins in hand. I was more content sitting at home, covering little red beads with sheer lavender fabric to make bunches of grapes or sewing strings of green wooden beads inside a velvet ribbon peapod.  Despite my shyness about pedaling my wares, I found the marketing part of the business to be a creative excercise. I’d spent my teenaged years working in my mother’s import shop in Woods Hole, From Far Corners, and the experience dealing with customers and learning the difference between wholesale and retail sales was helpful.

carrot2WM

I started making custom pins of people’s cats, based on photographs they sent. I remember that Siamese cat owners were particularly fussy about their breed and one time had to redo a blue point. The cat ears are made from a coiled wire bead, which is cut in half.

back of Cat pin

Some of the pins like the cat and the watermelon have a cardboard shape inside to give them stability. I’d sew a little pocket, turn it right side out and slip the cardboard in, put in some stuffing and sew up the pocket.

cardboard patterns for pins

I used my Singer Featherweight, the same machine on which I learned to sew, to do the machine part. There was always a lot of hand sewing to finish and attach the pin back.  I had some labels printed with my name and sewed them under the pinback. They were the same kind of labels you get at fabric stores for sewing on your children’s camp clothes.

In the studio 1979

This is the first of 3 parts.  The story will be continued in PINS (part 2).  

To keep up with new posts, please subscribe to this blog (top right column on the home page). Your contact info will not be sold or shared. If you’d like to see more frequent photos tracking the projects in my studio, please follow me on Facebook and/or Instagram


Close-ups (Cats)

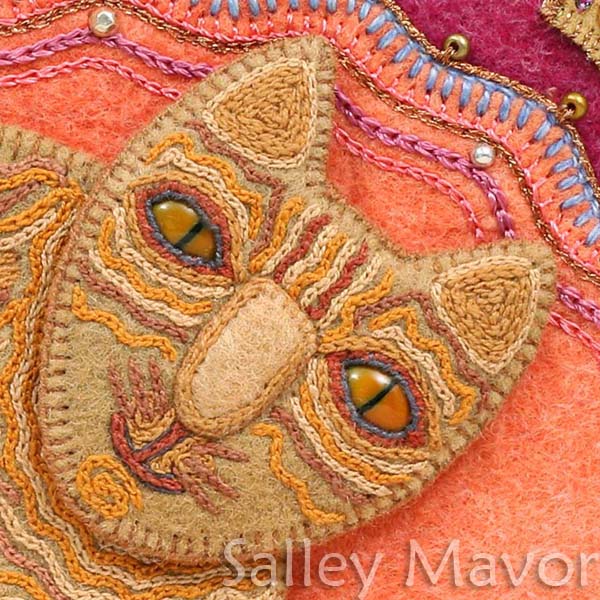
Today, I’m starting a regular series called Close-ups, which will feature detailed images taken from my artwork. I’m having fun grouping different subjects for future posts. There will be close-ups from my childhood drawings, student work, sculpture, illustrations and fabric relief pieces, all presented in somewhat chronological order. The following cats are from my books, The Hollyhock Wall, Felt Wee Folk, Wee Willie Winkie and the upcoming book Pocketful of Posies.

HHWcraftcatWM

feltpinscatWM For a tutorial on how to make this cat pin, see another post here.

from

from “Wee Willie Winkie”

detail from Pocketful of Posies

from

from “Pocketful of Posies”

Note: See other posts in the Close-ups series archive here.